Showing posts with label coolant. Show all posts

Tuesday, February 17, 2026

Hapy Runs Again

Picking up where I left off last time, we had Hapy mostly in one piece, needing coolant. His exhaust was still in pieces, rear bumper on the ground and he had not started since June of 2024.
 
Coolant
full moon down the street
There is really no adventure here, but in the interest of being thorough, I topped off Hapy's coolant with some G40. I worked air bubbles out of his system by squeezing hoses, but they won't really fully work themselves free until the engine is running. So, after a couple more top-offs, I called it good and capped the overflow and coolant bottles.
 
Exhaust
The not-my-favorite, too-small-diameter, cheap exhaust installed on this engine all those years ago went back on. This was not my first choice, but I want Hapy running, so I'll circle-back on a new exhaust later. The old one came apart where the piping enters the muffler. I think the cheap muffler failed allowing the section of pipe to which the exhaust "downpipe" (we'll call it that: it's the pipe that leads from the turbo, but it does make it sound awfully grand) was welded to fall out of the muffler body. The weld is a good 4 inches from the end of the pipe which clearly fits inside the muffler body and sets inside an inner pipe within. I regret not taking a picture here; apologies.
 
ShadeTree mechanic'ing
So, I hung the muffler body by the support hook and then set to attaching the downpipe. There is one stud attached to the turbo that the 3-holed flange hangs on. Then, you swing the rest of it into place, square the gasket and send the other bolts (with washers) through. A 13mm spanner is needed for the lower bolt, but the other 2 can be approached with a socket. With the muffler swinging on its mount and the downpipe firmly a-fixed, I set the pipe into the muffler and literally hammered the muffler into the pipe with a rubber mallet. These parts will easily work themselves apart again, if I didn't do something. So, I went full shade-tree, and added a 1" angle bracket, screwed into the muffler and the pipe to hold it together. The picture on the right, here, tells the tale. Not a proud moment but that will all go to the landfill / recycler eventually.
 
Bumper
Feeling confident that Hapy would be a runner again very soon, I installed the rear bumper / tow hitch component. I detailed the original install of the tow hitch in Bus Tow Hitch. Re-install is not nearly as involved. 15mm socket needed. I set the hitch onto the TravisJack and lifted it close to where it would eventually sit and then balanced on the TravisJack while I set bolts. I fingered-on the left (driver) side and then the right (passenger) side, taking care not to drop the unit off the jack and onto me. I discovered that the exhaust pipe leaving the muffler hung in the way, but a solid kick with my boot resolved it without causing any damage to anything. Just needed some sudden blunt force. Once all 6 bolts were finger tight, I set the bumper where I wanted it depth and parallel-to-the rear-wise and torqued them down.
 
Injection Pump Prime
electrical connection cleaner
Any time I let Hapy sit undriven for a while, the injection pump loses prime. I believe this is because of a failing seal, but it's the one that's much harder to get to (and I don't have on-hand). So, I have let that sit to be solved another day. Enter the mighty MityVac. Since I disconnected the large fuel filter for the flywheel replacement, I was unsure if that filter was completely full, so I started with the line which enters the injection pump, moving to the return side of the pump next. This is relatively straightforward: disconnect the fuel line, apply vacuum with the MityVac (using the collection bottle between the pump and the fuel line, of course) until the collection bottle consistently gets fuel. Then, remove the vacuum contraption and reconnect the line. For the return line, I also clamped the return line from the injectors to the pump so I did not lose vacuum through them. Once the pump was full, I cracked the hard lines at the injectors with a 17mm spanner. This last bit of priming needs to be done by turning the ignition and counting to 5. Well, that's how I did it. When I returned to the engine compartment, each of the 4 injectors had some fuel sitting on top where the hard line connected. I snugged them back tight.
 
DeOx-it D5
Before I ran to the cab to give the engine a try, I wanted to make sure all of the plug-in bits were set. So, I went around the top of the engine, disconnecting, shooting-DeOxit D5 into the connectors and clicking them back together. This served 2 functions. First, a simple survey of the top of the engine allowed me to see if I had missed anything. Second, every electrical connection was confirmed a good-click connection and it was cleaned/deoxidized for a better connection. Having done this, and it only taking literally a minute, I intend to include a similar final survey when doing top-side maintenance going forward. Its so easy, and removes many possible variables to failures.
 
And Then It Happened
At this point, I felt that I had done everything I could to set up for a successful first start since June of 2024. I put the trans-axle into neutral turned the key to run and saw the familiar lights. With an inhale, I turned the key to start and after about 3 seconds he fired up. I didn't expect immediate, since fuel still needed to get pushed down into the injectors, but he started well and ran strong, arriving at a comfortable idle almost immediately. I left him run for a while, sitting in my shop in neutral while I checked for leaks and drips. There were none, which was little short of a miracle.
 
I thought about giving him a little test drive, but I have not solved for the electrical cord for the FrostHeater yet. Curious, though, I tried to ease him into gear, but he wouldn't. Knowing that he easily moved in and out of gear when the engine was not running, I concluded that the clutch cable needs adjusting.

Clutch Adjustment
This adjustment took a little bit of effort, but with a thicker spacer where the Bowden tube meets the mount on the transaxle, and another spacer on the adjuster, I was able to get the clutch to engage and disengage properly. The Bowden tube needs a curve in it to reduce clutch chatter, so this was needed regardless. The fact that I needed a spacer on the adjuster tells me that the cable that I replaced.. jeez.. almost 20 years ago... may be stretching. This is often a warning that the cable will fail soon. So, time to order a replacement.

I used a Velcro ties to hold the FrostHeater cable up and out of the way. But, before I wrapped it up, I tried the FrostHeater, and I think it might be broken. I'll have to do some research, but I expected the unit or at least the top hose to warm up to the touch a little bit. I did not notice any warming, so that effort may have been for nothing after all. Again, I will look into it and I may get a replacement unit, but I'll be pretty bummed if it was really only used a couple of times before it got damaged.

Here's a video of him running, probably 3 minutes after his first start in like 18 months.


I noticed that the rear lights were acting all weird, but a different kind of weird than usual after messing with the battery. So, I did not want to risk a drive-about. It seems like every time I touch the battery, the tail lights short-out such that stepping on the brakes completes an unexpected circuit. That's the usual. This time, the reverse lights were lit up and the blinkers were acting all strange, but only the rear. I think I may have done something with the reverse lights, like reversing the plugs when I wired up the switch, but I ran out of daylight before I could get after it. I'll diagnose and attempt to fix it next time. 

Thanks, as always for following along, and I'll post with any test-drive observations, and other improvements as they happen. At this point, I am thrilled that Hapy self-starts and can move around again--

Tuesday, February 3, 2026

Hapy Gets a FrostHeater

Today, I nearly complete the re-assembly from the flywheel (well, ring gear, really) replacement that has been an open effort since US Independence Day. I had to order a clip to hold the coolant temperature sensor in the coolant outlet flange, so this post picks up where I left off after placing that order. Before I begin, hapy belated GroundHogs Day or Imbolc, if you're a little less western in your seasonal outlook. Either way, there's 6 more weeks of winter because Spring Equinox is still 6 weeks away no matter what a Pennsylvania rodent sees. Anyway...
 
Some History 
installed
For background, Hapy was having increasing trouble starting over the past 2 years. I thought I was getting poorly manufactured starters because every time I replaced one, he would be okay to start for a few times. That was until the last couple, including a new highly-recommended starter from IDParts and a fresh local rebuild of the original TDI starter by a very reputable rebuilder. I concluded the teeth on the "ring gear" or in my case the teeth on the flywheel since this flywheel was one formed unit, had broken off enough that the starter teeth could not engage. This started a path that started with removing the engine-transaxle on my falling-into-pieces driveway, having the transaxle fall off a jack and popping off a flange, hauling Hapy in a sketchy way back to the shop, and finally, now, almost completely reassembled. When this saga completes, he would have been not running since July of 2024 (when we drove home from the final 4Peaks Music Festival).
 
FrostHeater
Frostheater is a vendor who uses a widely available Zerostart 3309040 coolant heater with hoses and brackets for a custom fit for various makes and models. If you have not tried one and are tired of cycling your glow-plugs multiple times before you can start your diesel in the winter, I suggest giving them a look. The unit Frostheater uses looks to be the top of the line from Zerostart in terms of build, capacity and cost. There are plastic other brands, and block heaters that are effectively a glue-on heating pad, but I have found these FrostHeaters to be really effective. From what I can tell, there are no moving parts. By placing the unit near the lowest point of the oil cooler loop the unit draws colder coolant from the oil cooler and the warmed coolant flows up through the upper bib into the head. That rising heated coolant then puts pressure on the coolant in the block to move into that vacuum, through the oil cooler and the loop completes. A few years ago, I installed a Frostheater into a 2004 VW Jetta Wagon (K'Lack). It worked great. We sold K'Lack to our niece a few months later, and she never used the heater. So, when we had to do a major timing belt and cam shaft maintenance, OldPoopie removed the FrostHeater, and restored the original coolant line which I left in place when I installed the Frostheater. The Frostheater and related hoses went into a box for future Hapy consideration.
 
Coolant Temperature Sensor
#6 in diagram
Before I get too far ahead of the story, I installed the coolant temperature sensor and retaining clip first. That sentence is easy to type, but the actual install is very unpleasant. In Hapy, the coolant outlet flange sits behind the fuel tank and barely above the top of the body cross-support that also contains the center-mount for the transaxle. So, there is no way to insert the clip from below, it must go in from above. Directly above the insertion point for the temperature sensor, however, is the to-the-heater side of the coolant outlet flange, leaving a 1/4" or so to fit the clip. Since the orientation of the clip is straight  up and down, there is not enough room to simply slide it in. Of course, let's not forget that you can't actually see anything because it is all on the front side of the engine. For the ALH-TDI engine install into the bay-window bus, I believe this is the single issue that challenges the install. It is minor, in the grand scheme, but it is still highly unpleasant when you need to replace this sensor.
 
So, how do we do this? With a fingernail, I find the slot on the far side (front) of the flange where the one side of the clip will go, and send one "leg" of the clip into that slot while holding the sensor firmly in place. The clip will flex hard, and the inner "leg" of the clip needs to bend somewhere while the first notch of the clip is slid in, I found that having it flex away from the flange (towards the sensor) gave me something to work with. Once the clip is most of the way down and it seems like the clip can't possibly flex any more, push the flexed inner "leg" towards the flange until it clicks into the hidden slot. I spent a couple of hours wrestling with this, and broke a clip along the way, but this method does work. These clips are inexpensive, so buy several when you need to install one. Also, I found it much easier to access the coolant flange from the driver side (the sensor side) if the charged air hose is removed.
 
FrostHeater Install
where fits FrostHeater
I could have stayed on target at this point, filled the system with coolant and started test firing the engine. In fact, I try to follow that pattern more recently: finish what you started, then do the next thing. In this case, I had already lost the coolant from just below the outlet flange and above. I figured swapping out one hose for 2 with the coolant heater was not a significant scope increase when compared to the effort to open the system to add the heater later. I figured adding it later could be years away.
 
All of the install drawings and instructions I was able to find gave very model-specific directions. I was able to determine through loosely related searches that the life of the heater is significantly extended if it does not suffer the constant vibration of being attached to the engine block. So, I looked for a place along the right side of the engine bay where it would be low enough to be nearly the lowest point relative to the engine block while still being reachable by the hoses I had on-hand. That area has a small wire bundle, the main 12V line and the diesel fuel lines, so my placement will need to be careful, but there is a section a few inches front-to-back where it could go. With that general placement decided, I shifted to hoses.
 
The BEW TDI hoses that were part of the FrostHeater kit are not an exact fit for my early ALH TDI. The top hose (red line in the drawing on the right), which runs from the top of the heater into the head hose bib which protrudes on the oil cooler side of the engine just below the coolant outlet flange (#11 in drawing), had an extra bend at the far end that I trimmed off. I felt that the extra bend made the hose want to have a large arc which would have created a hard-to-manage air pocket -or- it was a kinking risk, reducing the coolant flow. The lower hose that runs from the lower bib on the oil cooler to the lower bib on the heater simply would not work for where I could install the heater and still use the upper hose. So, I decided to reuse the hose I had originally running from the oil cooler to the head for the lower hose from oil cooler to heater (blue line in drawing).
 
viewed thru top hatch
Now, we get to hard-mounting the heater to the engine bay. The BEW install bracket on top of the heater unit was oriented to mount to the left side of something. I don't remember what. But the bracket could be easily removed with a 7/16" socket and flipped over, aligning the bracket for a right-side install. Flipping the bracket also placed the heater about an inch lower and set the angle of the bracket against the lip of the engine bay, offering some additional support. With the hoses attached, the heater unit had a smaller range of motion for deciding where to mount it without putting stress on the hoses. Still, I was able to find a spot where the bundle of wires and everything else would not get bound beneath the bracket, and marked it with a sharpie. I planned for and then drilled for a M6 rivnut. The M6 was considerably smaller than the original, but the heater is super light and I was fairly sure that bolt was designed to go into a pre-existing hole. I say "planned for" because once I got the hole drilled, there was no way I was going to be able to fit the hand-riveter into the engine bay and set the rivnut. So, instead, I simply sent the bolt through and nutted from behind like most things. It is still a M6 bolt, using washers, of course, just no fancy riv-nut. So, to remove, I will need 2 wrenches rather than one. Not a big deal.
 
Fill 'er Up
from behind approx level
With the cooling system seemingly buttoned up, it was time to add coolant and burp out the air bubbles. This is where my effort ran out of supplies: no G40 coolant on hand. I added some water to confirm there were no leaks, and after shifting the upper hose clamp on the FrostHeater, there were not any. In the picture on the right, here, you can see how well tucked up and out of the way it is, even though it is below the oil cooler. Note the dry, albeit stained, concrete floor underneath. No leaks.
 
I still need to solve for the routing of the electrical cord so it can be reached relatively easily on a cold day, but far enough out of the way that it is not subjected to flying gravel and road debris. At this point, I am looking at tucking it up behind the right rear wheel, under the battery tray and holding it in place with a strip of cable-management Velcro.It might be time to consider mud flaps back there to help protect the cable from tire kick up.
 
Last, when I removed the exhaust at the start of this project, it came apart where the pipe meets the muffler. To be honest, I was never terribly pleased with the exhaust that was put on there. But, it did last 15 years, so I can't complain too much. Still, I have a 2" exhaust kit that is a bunch of straights and turns that I intend to eventually cobble together into a better exhaust. I think, to get Hapy on the road, I will put the existing, falling apart system back in. Then, I can plan for the 2" exhaust as a near-future improvement.
 
Thanks, as always, for following along, and I intend to get coolant this week and get Hapy running next weekend.  
 

Wednesday, November 22, 2023

Hapy Update

Today I could continue the dissertation on the effort to move the furnace in our 1948 farmhouse. Instead, I actually have something car related... the check-in on Hapy that I said I was going to do in a prior post and then flat-forgot. Remember Hapy? He's the 1972 VW camperbus that launched this blog. I meant to post this yesterday, time got away from me.

Hapy No Start Returns
A few weeks ago, as the weather turned cold, Hapy became increasingly difficult to start. Again. I figured it was the same issue as last time (See Hapy No Start Again), and started checking things with my multi-meter. I started where the old problem was: the main fuse for the glow plugs. Nope, there's a clean over-12V signal there. Then, I checked the voltage at the relay, and it was fine there too. Same for the resistance in the wire and the fuse.. no issues. So, I started thinking about the glow plugs themselves. I swapped this set in when I put in the chipped CPU and bigger nozzles, but not because there was anything wrong with the ones that were in there. I had this set of plugs that I had lying around for a few years, and I was selling Flash. Flash had failing glow plugs (resistance tests between the plugs were not within a few ohms of each other). So, rather than put the new set into Flash, I got selfish and put Hapy's nothing-wrong-with-them plugs into Flash and installed the new-never-opened plugs into Hapy. Looking back, I don't think these plugs were nearly as good. I think we have had starting-while-cool problems from the beginning, but it was Summer when I did the swap and never thought about it. Until now.

I pulled the rear-most plug (#4?) and tested it by resting the glow plug threads against a grounded bit of steel on the engine and triggering the ignition to "run". After a 3 count, the tip of the plug started to glow orange. After another 3 count, I could hear the relay click off, and the tip returned to black. I did this a few times and each time it took a few seconds for the plug to respond and even then it was only the very tip. Based on some internet imagery, I concluded that those plugs were insufficient and bought a fresh set.

A few days prior to installing the new set, I started hitting the in-engine plugs with some Kroil penetrating oil at dinnertime. I did not want a plug to break off or damage the head during removal. Whether it was necessary or not, the plugs removed relatively easily. All of them had soot on them when they were removed. Into the trash they went. For each of the new ones, I applied some anti-seize onto the threads prior to installing and then only snugged them down (did not torque the snot out of them).

Unfortunately, my efforts to start Hapy when the glow plugs were not working did a number on the starter. Again. So, my attempt to start him after replacing the glow plugs was not fruitful. Since I did the glow plug swap around the furnace work, and the furnace still is not operational, I self-limited my time to just swapping the plugs and then getting back under the house. I returned the following weekend (bumming rides and car-sharing with Boo the week between) to remove and inspect the starter.

should be 1 part, not 2
I admit, I expected the starter to just need a remove / re-install cycle. I was wrong. This rebuilt starter was installed in June 2023. After a summer of being my "daily driver", the starter was cycled well less than 500 times. I guess rebuilt Bosch starters are not all the same. Maybe the starter was a Bosch but the rebuild was done with cheap-o parts, leaving just the case as a Bosch unit. Regardless, it did not take very long to notice that the seal on the end (which is supposed to go around the shaft which juts out when 12V is applied) wasn't there anymore. It had potato-chipped inside the little pocket where the nose of the starter goes. Neat! So, off to the internets I went looking for a suitable replacement. I decided to get a new one from MetalManParts. Run by MetalNerd, his site only sells things that he personally fabricated or installed into his own vehicle. I have purchased both types of things from him before and have no regrets. Since Bosch was sold off to Seg Automotive, he now supplies new starters from them. I trust that if he is selling them, he is using them.

Sadly, the install of a starter has become fairly rote, since I've done it so many times. I simply put a 19mm socket, 13mm socket, a ratchet and a couple extensions into my pocket, slide under the bus with the starter and it's installed in less than 15 minutes now. If the rear sway bar were not there, I could probably have it done half that time. Of course, I ran the battery down with all my glow plug testing, so it got a spell on the battery charger before I could test my handiwork. Once that was resolved, I turned the key to "run", counted to 6 (for the glow plugs, it's 45*F here) and returned the key to "off". I repeated and then tried to start. Fired right up! I let him run a few minutes to top off the battery and now he is back to being my daily driver.

Hapy Heat Not Heat
Remember all that effort I went through to install the Vanagon rear heater under the bus for some heat? While that was fun, the result is not much heat. I described the lack of warm on the drive to and from the Cascade Equinox festival. Beyond the lack of detectable warmth, opening the valve to try to get heat has resulted in a coolant leak. I can attribute no other source for why Hapy's coolant level is suddenly not holding. So, I turned the valve back off and will be replacing the Vanagon rear seat heater with something else: a Maradyne Fans Stoker heater.

Maradyne, but could be any
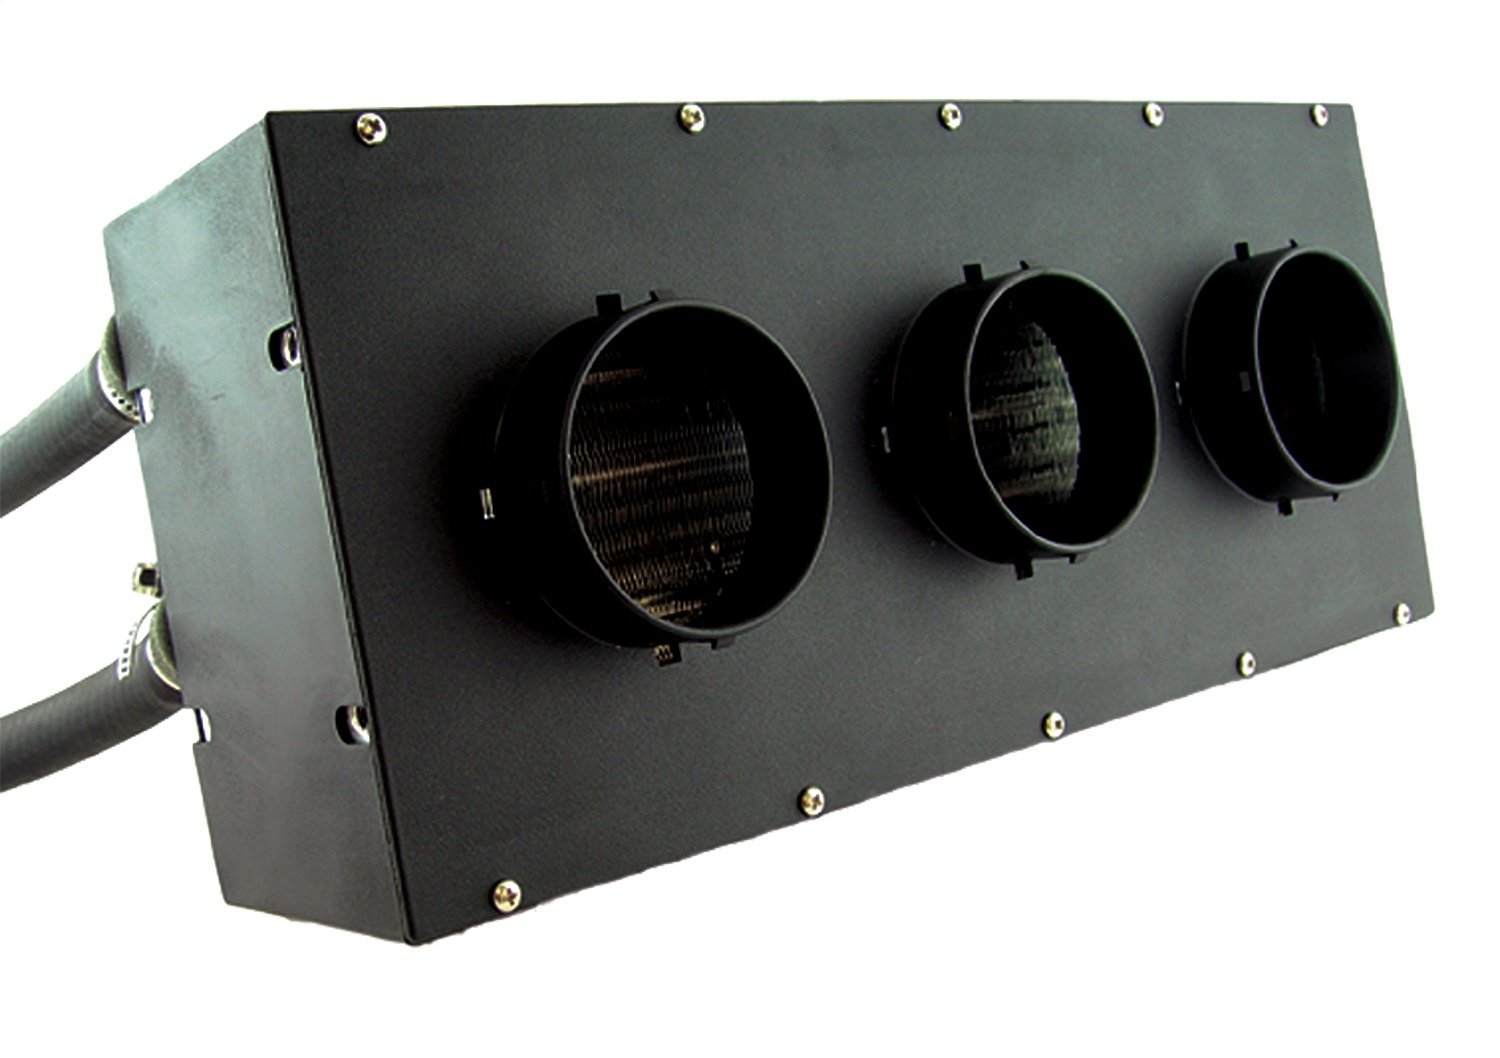
There are lots of auxiliary fans which all look the same and have the same spec's (300cfm, 40k BTU - airflow and heating capacity, respectively). JEGS has their own, for example, that looks identical. Since I am unsure who is the originator, I went with a manufacturer with a known, solid reputation. There is little documentation and hardly any photos of this particular unit on the interwebs, making this choice perhaps a little more risky. I find the 40k BTU number everyone is using to be gross hyperbole, but I don't know how to test that nor the 300cfm number. I will bench test to get some amp-draw numbers before I install it. The amp-draw might be useful information for the next person since even Maradyne doesn't list this detail on their product page. And, it could be one more thing that is exactly the same on all of these units. For future reference, the JEGS unit draws 5.5, 7.1 and 11.6 amps (for low, medium and high settings respectively). I had relays in-place for the medium and high draw switch positions for the Vanagon unit. I don't know if I  will re-use them. Perhaps the amp-draw numbers will help me decide.

One other thing to point out: none of these heaters ship with a coolant control valve. Since I was leveraging the valve in the Vanagon, I have to add one of these or the heat will be on maximum all the time. I included this "vintage" control valve in my order. I thought about going with an electric one, but decided that I would really like to re-use one of the big original heat-sliders on the dash to control the amount of coolant flowing into the heater core. That feels more authentic than another knob attached to the bottom of the dash. Of course, I haven't ever had that control cable, so I will be running this either full-on or full-off until I do.

For now, this means that trips in Hapy will be just like all the other trips I've ever made with him in the not-Summer. They will be cold. It will be like driving around in an ice-fishing shed, unless I can either install that heater soon-ish -OR- get the little Chinese diesel heater/furnace working.... or both. Since I do not have a garage and I barely have a 4-meter square piece of concrete to work on... and I have a house furnace to fix, I do not think Hapy's heat will get addressed terribly soon. At least I have the parts for when I do. Of course, now that he is my daily-driver again, I may decide another week without a furnace might be a fair trade for some heat, any heat, in Hapy.

That's it for today. Thanks, as always, for following along-

Tuesday, January 7, 2020

TDI install retrospective: Cooling

Continuing the process of back-documenting what I did to put a TDI engine into an old (1972) air-cooled VW bus. Today I cover the cooling system. Somehow, I managed to not plan for this post when I started this retrospective. Ha. To keep concepts separate, I won't go into the electrical, but I'll cover everything else cooling / coolant related.

Radiator
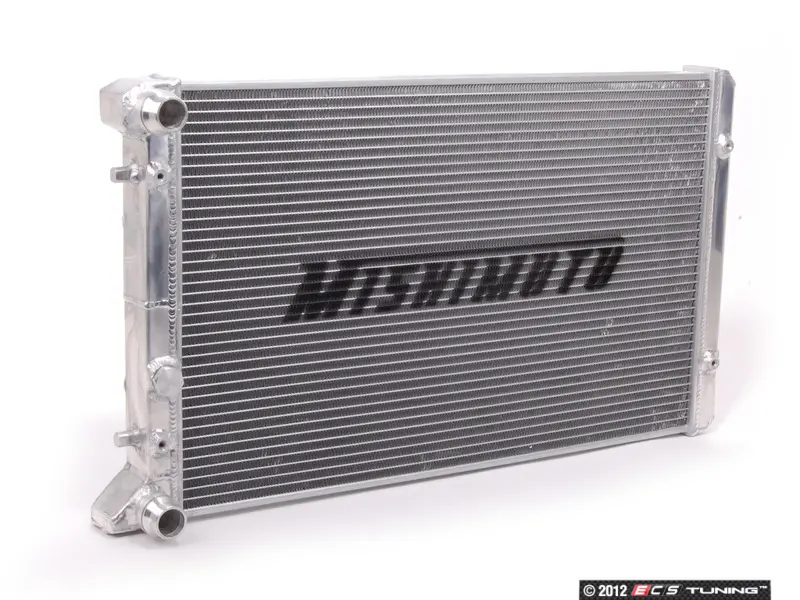
I started with a Jetta3 radiator I got off craigslist for $20. This met the need, but eventually was swapped out for a Mishimoto radiator designed for a Jetta3. This allowed all of the bracketing work I did for the original radiator to be re-used. Sort of. The bracket design was relatively simple: Add a straight square-tube bar across the leading edge of the radiator, and form brackets which are affixed to the bar, but thread into the radiator mounts. The crossbar then had eye-hooks added so the radiator could suspend from the underside of the bus. To the front of the bar, steel security screening was added to prevent refuse from entering the radiator. See bracketing the radiator and Radiator mounting planned for more details.

On the rear, simple individual brackets were formed for each of the 2 mount holes on the radiator. Each bracket had an eyehook added, similar to the front bar. From the 4 eyehooks, the radiator would hang from the underside of the bus. I used 400# test chain to hold the radiator, and placed it at an angle (front about 4" lower than the rear) so the exhaust heat would be encouraged to vent down-and-rearwards and so that the leading edge of the radiator might scoop some air as it passed beneath. Corresponding eyehooks were added to the frame under the center of the bus, and the chains have threaded carabiners on the ends for ease of connecting / servicing. See rad brackets continued and Radiator test-fitted for more details.

To discourage hot air from recycling into the intake side of the radiator, I cut and attached some sides to the radiator unit with some thin zinc-coated sheet metal used as cold-air return material in houses (See Radiator Shrouded). Underneath, I attached an aftermarket fan:cowling to maximize the suction of the fans drawing air through the radiator (See Cowling the Hapy Radiator). For more details, See Radiator InstalledBack to the Bus Rad Swap 1 and 2.

I have not experimented with lowering the radiator beyond it's current height of about 9" above the ground. I had ideas of adding a scoop to the leading edge bar, or adding a means of lowering the radiator with a lever or something, but the bus now runs cool enough without added complexity. If that changes, those options remain.

I know there are some who will read this and not accept that an under-belly radiator is sufficient. Consider that the Aussies are doing it, and were doing it well before I started my project. They have super-hot, dusty conditions and they drive their under-belly conversions in the outback. So, some gravel from the road or a mid-western summer are not really the factors we may fear them to be. After 10 years, these have not influenced the cooling at all. The keys to keeping the temperature controlled are getting the exhaust air away and getting air to draw through the radiator through cowling and fan suction.

Overflow Bottle
The overflow bottle for the NewBeetle is shaped like a ball with a mounting tab on one side, like in the picture here. That tab has the 2 mount holes. I built a simple angled bracket that aligned with those 2 holes, and attached it to the front-to-back floor support at the front right corner of the hatch I added. The bottle needs to be located height-wise in the same relative position as it appears in a stock TDI install. This places the full line at the top of the head. This height requirement may force you to put in an access hatch just so you can add coolant. I suppose a port-hole could work. Your bus, your choice.

Hoses
Unlike the inter-cooler and vacuum, the cooling system left only a few pieces I could re-use. The runs to/from the radiator were solved with multiple 2' long Goodyear flexible hoses fitted together with metal connectors. These flexible hoses satisfied the run from the engine bay to the radiator, but within the engine compartment, there were other considerations. For example, the outlet from the thermostat housing exits the engine pointing at the passenger-side rear wheel. This needs a 90* downward bend, so I used a short piece of original hose, and mated the bend to the flexible hose with a metal joiner that included a small (1/2") "T" which I routed to a bleeder. I have used this bleeder to get air out of the system while filling with coolant many times. The run from the outlet flange also points to the passenger side, and it needs to include a temperature sensor. So, again, there is a mix/match of TDI hose, a piece of TDI plastic holding a sensor and the flexible hose.

I omitted the EGR, so the plumbing around the EGR needed to be eliminated as well. This actually simplified some of the paths. Last, there was the coolant line run to the overflow bottle.

Extras
nicked from TDI-club
I haven't introduced any changes to the oil cooler nor the oil-to-coolant exchanger, but this feels like the right spot to mention it. I have thought about swapping out the original stock TDI exchanger for the V6 4motion Passat oil cooler or the late model NewBeetle / Jetta / Passat / Toureg (also Audi) oil cooler. Both are larger, and with the amount of concern I've had over temperature control over the years, this is an upgrade I will probably do as part of a Malone tune. The V6 4motion looks a lot like the TDI one, just a little bigger while the later model cooler has the coolant inlet/outlets oriented differently (middle unit in the picture). I got these part numbers from this thread on the TDIClub and only re-post here for my own future reference benefit. The TDIClub thread author (Kennedy) deserves all the thanks and praise for assembling this detail.

V6 4motion Passat
028117021E OIL COOLER (should come with upper gasket)
038117061 LOWER COVER TO OIL COOLER WITH SEAL
*I believe the original lower cover will fit, but I'm not 100% sure

late model
038117021B OIL COOLER
038117061 LOWER COVER TO OIL COOLER WITH SEAL
038117070B SEAL

Heater
image nicked from theSamba
For some, having a heater isn't an extra. Its mandatory. I wanted to remain stock-VW parts as much as possible, so I looked into a real defroster-type heater unit. I couldn't fit anything that big into the space I had, so I bought a used Vanagon rear-seat heater. I plumbed that into the heater/defroster hose loop, placing the heater unit on the extra battery tray, under the spare tire well in the engine compartment. This actually worked fairly well. The coolant lines were very short, and I was able to route an insulated flexible air hose to the front, connecting it to the original bus air system. I removed it all when my original ignition went up in smoke, and now don't have a heater. More importantly, I don't have a defroster. In retrospect, I probably could have retained the heater, and just sourced the 12V elsewhere.

I have considered adding an aftermarket heater closer to the front of the bus, and running longer coolant lines to support it. The long air hose system was slow to respond because the air in the hose needs to warm up or cool down before you can feel the change. That's the beauty of the modern systems: no air hoses. The coolant, however, could cool off before it gets to the front of the bus, and there are would be a need for a bleeder, etc. so this isn't exactly perfect either. So, as much as this is a retrospective, some things clearly aren't really done.

De-Scale
Regardless of what you do, if your engine isn't new, and you don't really know how well it was maintained by the prior owner, it might be wise to de-scale it before you consider your system complete. I ran a Thoroflush procedure and that made a massive difference in the bus' ability to ditch heat. Check out the Now Water-COOLED post for some more detail.

Prior related posts:
Preparation
Fuel System
Physical Mounting
Vacuum System
Air, Inter-cooler and Exhaust
Primary Electrical

Next related posts:
Secondary Electrical
ECU, dashpod and Sensors

Tuesday, December 17, 2019

Nemo Rides Again

Returning to the Nemo work, today we button everything back up and test things. In the first of these 3 posts (See Sadist Engineering), we diagnosed and removed the head. In the second (See Nemo Head Install), we took the head to a shop, had it tested and decked and then installed it back onto the engine. So, we start with the head and engine back together again, and torqued down.

Intake and Turbo
With the head on, next came connecting the turbo: slip a new gasket between, then slide the other 2 bolts through. I held the turbo from below and got those 2 bolts to thread in by hand. Once I was able to get them tightening down with a spanner, I could get the bolt closest to the head through to the turbo and finger-thread in. Tighten to spec. The intake was a bear to remove, but it was actually kind of easy to install (with a new gasket). I did not need to replace that one bolt, either. In fact, upon inspection, I couldn't easily distinguish it from the others. I was able to get them all snugged down tight. Torque spec was lower than I expected (like 20 pounds or something), so these were on too tight when I removed them.

Timing Belt
The last big/hard piece was the timing belt. Luke had really cleaned the head, so there weren't any paint-markings on the gear on the cam sprocket when I got it back. So, getting the belt in the exact same spot threatened to not be the simple case I had expected. I did know, though, that the engine hadn't moved and the head was at TDC, so I just needed to get the belt perfect-tight on the left side (front-is-front) and make sure I did not shift the engine timing when the belt was tightened. It turned out that I was smarter than I thought, and had put the head cam mark on the belt where the timing dimple appears on the gear. So, the alignment was actually a snap. That's one to grow on: mark the belt based on the timing mark and the shop can't erase them on you. I was able to re-use the belt tensioner (belt was replaced less than 20K ago) by slowly re-compressing it in a vice and sliding a paperclip into the hole to hold it compressed during install. Put on the tensioner roller, put on the tensioner verify everything is right and pull the pin. There are much better instructions with the belt kit than I could provide in this space. Regardless, once the belt is on, it is recommended to rotate the engine one full rotation by the crank and then verify that the timing marks are still spot-on. I apologize for not taking any pictures along the way, here. I got going and kinda forgot to.

Accessory Belts
After the timing belt is on, the lower timing belt cover is added and then the lower crank pulley. At this point, I put on the accessory belts, and the belt tensioner for the longer serpentine belt.

Hoses
With the timing belt and corresponding covers on, the hoses were next. Since I did not swap any hoses, and I removed as few ends as I possibly could, the hoses flopped back to where they were, and it was rather simple to plug hoses onto nipples. Getting the evil outlet flange on, though, was it's typical challenge. I used 10mm bolts instead of the Allen-keyed bolts and found them much easier to start and torque. I consider this an upgrade. Before I switched from cooling stuff, I mounted the overflow bottle.

Vacuum
Once everything else was in place, the vacuum lines just flopped into place. I didn't expect that, but I had only disconnected a few of them. I needed to find one that simply disappeared: the line from the intake manifold to the fuel pressure release. This is only about 4 inches long, and I had thought that maybe it wasn't on there when I started tearing things down. Turned out, I simply dropped it and found it on the tarmac after we moved the car. By then, I had put on a fresh hose.

Electrical
Re-installing the spark plugs was next for me. I could have done this earlier, but I got to it now, when I needed something that didn't require me to be bent over because my back was starting to flare up. So, I gap'd the plugs (.028) and installed them. Then, I plugged in the coil packs, bolted down the related grounds and verified everything I could reach was plugged in. I noted a few that could only be solved once the front end was re-attached, but that was becoming a very short list.

Front End Assembly
test ready
And just like that, I was ready to put the front cowl / radiator support back on. This would have been much easier with a helper, but I started with the passenger side, getting one of the upper bolts by the fender loosely threaded in. Then, I repeated the driver side. Now, I could arrange the large steel bar which runs behind / below the radiator and the lower mounting points of the cowl. Held in place with my knee, I set first the passenger side, then the driver side bumper supports with a single bolt. Bouncing from one side to the other, I threaded in the other bolts, and then tightened them down.

With the front end mounted, I could complete the hose connections to the radiator and confirm the route of the charged air. I swung the A/C condenser around and mounted it to the radiator and then added the large front inter-cooler. I plumbed the large pipes for the inter-cooler, and then checked for missing connections and not-plugged-in things. I plugged in the horns. I mounted the headlights and plugged them in. I found and plugged in a small green plug below the radiator and the sensor just above the lower radiator outlet. Or is it an inlet?

Test
I had run out of time and daylight to do anything else, but I knew the next step was to fill the system with water and test fire it. I wanted full daylight for that, and a night to sleep on it so I could come back and inspect with fresh eyes. The next morning, it passed visual tests and T dropped by for the test start. I filled the system with plain water.. yes, I know that's not a good thing to do long-term. This was simply to see if it started. I figured if it didn't I would be draining the system to fix it and didn't want to waste good coolant for that. We hooked up the battery and turned the key. Vroom-vroom.

We let the car sit and idle while the temperature came up. There were no drips so I ran my gloved fingers around the various coolant components. The gloves came back without moisture, so we took it for a spin. We drove for 15 or 20 minutes and watched the engine temperature rise and fall as we pushed it and let off. When we returned, we backed Nemo back into the service parking spot and let it idle again. No drips, no coolant loss. And, the temperature sat still.

Road Ready
We turned off the engine and did our little happy dance. The next day, I drained the coolant system and filled it 50/50 with G40 coolant and water. Once the system was burped of air bubbles, it was ready for T to take back home.

So, that's pretty much it for Nemo. I replaced a couple of fuses for the tail-lights, and the registration has expired, but otherwise, the car is ready. T collected the car, drove home to Eugene without incident and has driven it on errands and fun-runs multiple times since. We'll call that a win. Thanks, as always, for following along-

Tuesday, December 3, 2019

TDI Fighting Frost

Another departure from the TDI retrospective posts, today's post covers my efforts to install a FrostHeater into the new-to-us 2004 TDI JettaWagon. I discovered that this is a later-year model, so it does not have the ALH engine, rather the BEW. Neat. But, that's a different story.

Why a FrostHeater?
Our weather turned especially cold in September and never really recovered, here in the Pacific Northwest. While the rest of the country appeared to enjoy nice warmer weather (as evidenced by the short sleeves at the Major League Baseball playoff games), we were breaking out our hats and gloves. After scraping ice multiple days, I decided something that got the engine warmer faster would be a good idea, both for the car's engine as well as it's inhabitants.
http://www.frostheater.com/

I looked for and found the FrostHeater, courtesy of the TDIClub. Everyone loves these things, and while they are more expensive than many others, they are 100% USA made and they do exactly what you would expect: the coolant is heated so the engine is warm when you try to start it. So simple. No weird hot-patch glued to the oil pan, creating a small area of intense heat, and not really helping the engine warm up. There were tales of those things falling off, too, so mid-winter you are suddenly without it. Not good. It's hard enough to work on the car outside when the weather is kinda crummy; full-on winter is beyond-the-pale unpleasant.

More Sadism
I brushed up against the sadistic nature of the German auto-engineers when I did the head removal on T's Audi A4, Nemo (See Sadist Engineering). That was nothing compared to what they set up when they did the hoses behind the radiator in the TDI. On the driver side, we have the oil:coolant exchanger where the oil is cooled or warmed by the coolant. This is actually a really great idea, but the way it was implemented puts your hands behind the fan housing, if you want to mess with those hoses. At some point, you will need to replace them. In my case, I was removing the hose that runs from the bottom of the exchanger to the upper radiator hose. The rear of the fan housing, at least in my case, is hard and sharp-edged. By the time I was finished, my hands looked like I had spent the day baling hay: covered with little cuts (20 or more of varying lengths and depths on each arm/hand) and pink from knuckles to elbows. Note to the reader: get a set of hose spring clamp pliers like those shown in the picture here. The skin on your arms, and potentially many hours of suffering, will be saved.

Lower Hose
Again, I encourage you to get a set of hose spring clamp pliers. I have a set now, and will actually enjoy clowning with these clamps next time. Start by removing the under-engine pan. Then, put a catch-pan below the oil:coolant exchanger and remove the lower hose from it. Allow the coolant to drain. Once you're fairly sure you are not going to get coolant dripping on you, start positioning the heater unit. On this engine block (BEW, remember?), there are 2 holes which could hold the heater. You want the one that is closer to the passenger side, but not yet. First, route the hoses. The lower hose runs parallel to the bottom of the engine block and loops up and around to the lower fitting on the oil:coolant exchanger. I suggest attaching it entirely, with a hose clamp. It is easier to thread the bolt from the heater bracket into the hole in the block if the hose is partly helping you hold it in place. Even then, this is not easy unless you have abnormally long, thin fingers.

Heater Unit
Frostheater unit
Before you start with the bolt, shoot the hole with some brake cleaner and mop it out with a rag or paper towel. If the threads aren't clean, this only gets harder. Anyway, you are on your back, holding the unit up with one hand while slipping your fingers between the bracket and the block. With your finger tips, you will need to wiggle on the bolt, lightly turning it until the threads set. I found the bolt would just bite into the threads before it was too hard to turn with my fingertips. The tight space makes it impossible to gain purchase with more of your fingers. With a 17mm wrench (socket won't fit), tighten it down being careful not to cross-thread the hole.

Upper Hose
In the instructions, the FrostHeater folks indicate that you should route the upper hose before you attach the heater unit. Yes, it could be helpful to do it first. I routed and re-routed this hose many times (both before and after the heater was bolted on), mostly because the directions and pictures were not very useful for this part. The hose runs around the oil filter housing from below. The directions indicate that the hose runs between the AC hose and the housing. While that's correct, they omit the part where it runs around the front to the oil filter housing to the upper radiator hose. The picture in the instructions doesn't show it. Anyway, once you have the hose routed, remove the old hose, and slap that new one on.

Retrospective
The instructions and the web site indicate this is a 45 minute job. It took me 5 hours, which further proves my shop-time math. We test drove it to work the next day to make sure any air bubbles worked their way out, and plugged it in overnight that night. The swift-start and instant-heat from the heater was very welcome. Everything behaved as expected: at start-up, the coolant temperature was at normal operating temp (NOT), and once we started moving, the temp dropped a little bit while the warmed coolant met the cold that was in the radiator. After the coolant blended, the temperature rose back up to NOT quickly, like, by the time we were on the main roads. While this install was a super PITA, we will enjoy this heat for years. Already this autumn we have greatly appreciated how little we have had to scrape ice even though all the other cars in the driveway had icy windows in the mornings. Having heat coming out the vents before we're out of the driveway is really really nice too.

The main take-aways from this are: get a set of those hose clamp pliers, give yourself lots of time, and recognize that the hoses are probably original, so they will be super stubborn to come off. If I ever get to driving Hapy in the winter, I would definitely install one of these. In fact, this install gives me a thought for how I could install the coolant filter I got over the Summer.

That's it for today. Thanks, as always, for following along.

Tuesday, October 15, 2019

Adventures with Nemo

No, this isn't a post about a clown fish. Today, I'm going to cover the adventure of trying to get Nemo, T's A4, to operate correctly again.

Break Down
This story actually starts very soon after the last post about A4 ended (See A4 Puzzles). It was late Summer, and T had been living with us for a while. His car had been behaving well, but he wanted to make sure everything was tip-top before leaving for Eugene. Well, we got it running, but he broke down with a coolant leak on the way to Eugene. We knew the radiator had a small leak, and we concluded that the leak was the cause. I drop-shipped him a replacement which he installed in his garage. Unfortunately, this was not the cause of his coolant loss.
T replaced the coolant outlet flange. Twice.
He replaced a few hoses.
He swapped the coolant overflow bottle with a used one from the junk yard.
By the end, he was no longer seeing coolant puddles appear under the car, but when he would return from a drive the coolant bottle would register below "MIN". Frustrated, he had the car towed home, to Beavo. He rode with the tow truck driver and borrowed Flash while K2 and I assured him that we would find the cause and fix it.
That was in June.

Rad Patch
K2 was out of school and missing his daily shop time, so we thought he would get into fixing the A4. Well, that didn't last very long as Summer brings its own distractions and rewards. So, while he took some air, I re-assembled what K2 had started (he was preparing for a head-gasket job) and got Nemo to start again. I had forgotten that I had drop-shipped a radiator down to Eugene, so I started to disassemble the front to remove it. I discovered that one of the fasteners holding the air conditioning condenser to the radiator was a screw instead of a bolt. AND, the tip of the screw had pierced the plastic side-tank on the radiator, causing a leak. So, I started with that.
I used an old Shade Tree trick for small (read: pin) holes. Do NOT do this for a hole of any significant size because the superglue could get inside the radiator rendering it less effective or even completely ineffective. Anyway, the quick fix for tiny holes:
drain the coolant down below the small hole and make sure the area is dry.
rough it up a little bit with sandpaper or a file
apply superglue, covering the hole
dust baking soda on top of the superglue, completely covering it
once dry, blow off excess baking soda
fill system with coolant/distilled water mixture and pressure test
Yes, it actually works. Again, this is only recommended for very small holes. There are epoxy-based kits that are designed for larger holes. At some point, though, even those become ineffective and you need to replace the whole thing.

Puddles
This worked great. No more leak from the radiator. But other puddles still appeared after a spirited test drive and the coolant in the bottle read below "MIN". Well, that's familiar. In fact, it is the exact experience that T was having. At least we're back to what he was seeing, and the pin hole in the radiator was not the cause. I found the coolant dripping from the lower radiator hose, which appeared to have been replaced with one from NAPA. I replaced it again with a Continental hose, and cinched the hose clamps down nice and tight. Another spirited drive and another drip-drip-drip, landing in the same spot. I could hear a "pssss" sound, and traced it to a hose near the intake where I could see water bubbling around it. I tightened it up and then started tightening every hose I could reach. I tightened the thermostat cover as well.

Temperature Sensor
During my early test drive, I noticed that the coolant temperature gauge wasn't working. This is often diagnosed as the sensor being bad. I knew we had recently replaced it, but I replaced it anyway. That didn't fix it. While installing, I noticed that the 4-plug socket that plugged into the sensor had a frayed the brown wire. When I tested continuity between that wire and the other end of the gauge-sending side of the socket, I got continuity at the wire (which had a bare spot), but not at the socket. So, I knew the socket was bad. But, where do you find a 4-pin socket with the correct alignment grooves? On eBarf. I cut off the old plug, leaving a short length at the socket for reference and as much wire in the loom as I could. One at a time, I checked and re-checked as I connected the wires with crimp-on butt-connectors and then heat-shrink'd the connections. It plugged in easily and with the hoses tightened, it was ready to test drive. If you replace a plug like this, take care to wire it correctly or you could fry your ECU. No, I didn't, but I was full-on scared about it until I turned the ignition to run and saw the coolant temp appear on my OBD-II reader.

Leak Free
I took a familiar drive up the connector streets onto the main road, thundered down that main road, right at the major intersection, around the next main road to the connector streets on the other side of the neighborhood before returning home. This route has stop and starts, speeds up to 45mph as well as lots of turns and speed bumps. All while remaining within 1/2 mile of the house. By the time I got home, the temperature had gotten up high enough for the thermostat to open. I backed into the drive, pulled the hood latch and hopped out. I couldn't hear any "psss" noise and there was a single drip from the lower radiator hose. I figured that drip could have been residual from prior leaks, and a longer test drive was needed before I called it fixed.

Coolant Bottle Swap
I decided to replace the coolant bottle since I knew the one that was in was not exactly right. The bottle fit the mounting points, but the low-coolant-level sensor was rectangular instead of round, so the sensor wasn't plugged in. When you know you have a coolant leak, that's not a good set up. I drained enough coolant out of the old bottle so I could swap them out, but I did not fully bleed the air. Once re-filled, I got distracted, and left it filled, but un-bled.

Another Drive
The opportunity for a longer drive appeared the following weekend when T stopped by after helping his mom with some chores. He was eager to see how Nemo was progressing, so we pulled him out and took a drive, T behind the wheel. T was thrilled to feel the big turbo spin up (PO upgraded it) and hug the turns (PO upgraded suspension too). By the time we got home, we had been running at normal temperatures for probably 10 minutes. When we got home, we both realized that we couldn't smell coolant, and I mean not at all. Not a whiff. All prior drives had at least a small smell, so this was a really good sign. We popped the hood and saw that the coolant bottle was down to just above MIN. Recognizing this could have been because I failed to bleed the air, we figured we would wait until it was cool again before checking. We also discovered that the tail lights were not illuminating with the headlights. I'll need to fix that before T takes the car back to Eugene.

Bad News
So, I seized upon an opportunity to drive Nemo when I had to take a run to Tualatin. That's a 20+ minute drive with a mix of highways and surface streets, so it would be a good test. When I arrived at my destination, the coolant bottle was pretty much empty. I let the car cool down and then added some water, and drove back home. When I got home, the bottle, again, was nearly empty. I wanted to prove that the system wasn't leaking. So, I grabbed my MityVac. When I removed the overflow bottle cap to refill the water, I could distinctly smell exhaust as the pressure released. I was starting to conclude that the head gasket or head were allowing water into the exhaust. To confirm there were no other leaks, I removed one of the hoses from the bottle, plugged where the hose came from and applied 14psi of pressure to the cooling system. Over the course of several minutes, the pressure would drop by 1/2 psi, and no coolant was appearing anywhere. More reason to believe the coolant is traveling into the combustion chamber. So, my next task, which I will document separately, will be to remove the head, have it tested and then replace the head gasket.

This is a big job. Just for context, I got a quote from a mobile mechanic I've never used, and he came back with $1250US. Seeing that the quote is more than we could get if we sold the car if it didn't have this problem, we're doing it ourselves. Well, myself. I really would rather not spend my autumn working on the A4. I would rather combine efforts with C and dedicate ourselves to the Zed (1979 280ZX), completing the sand-down and possibly spraying primer before the temperatures get too cold to paint. Oh well.

It has been unseasonably cold for more than 3 weeks (10F* / 6*C or more below average), so the window for spraying primer may have closed and it may make the Nemo work a little less fun. Regardless, I probably will not have much time to get back to Hapy until dead-of-winter. I may delay the electrical re-do I had in mind and focus instead on recovering the front seats, since I can do that indoors where its warm and dry. We'll see how I feel and how the weather behaves when the time presents itself.

Thanks, as always, for following along.

Tuesday, October 8, 2019

The Dog Days 333 (Part 2)

Continuing the story of the 333-mile loop we did in mid-August. In part 1, I explained the plan, and the longest leg of the trip, from home to just south of Florence. Today, I'll cover the journey from Florence to Newport, happenings at Newport and then the journey through Lincoln City and home again.

Florence
googleImage
I left off the last post with our departure from Honeyman State Park. We had a great time there, but it was approaching lunch time for most, and we had one rider who had skipped breakfast, so food was at the front of our minds. When we entered Florence on our way in a few nights earlier, we spotted a Dairy Queen, so we had a fail-safe. I wanted to see if there were better offerings before suffering the Brazier. Our patience was rewarded with an A and W car hop on the north end of Florence. We were fortunate to arrive just after someone else had left, so we could pull into a car-hop spot. I didn't think these things were still around, but not only is the place still standing, they still bring food out to you at your car on big platters that you can hang on your window. I wasn't sure that was a good idea with a nearly 50 year old bus, so we used the tray as a table inside it instead. They served the classic A/W root beer in heavy freezer-cold glass mugs, and the food arrived slightly wrapped in paper. Maybe it was because we hadn't eaten planned food in a week (no grocery store stops means you make up meals based on what you have, not from a plan) or maybe it was because we had worked a bit to get there, but those burgers and fries tasted fantastic. As we sat, we could better see just how busy they were. Inside the restaurant, there were no open tables and the line ran back to the door. Around the parking lot, there were no open spots, and there were motorists queued for the next open car-hop spot.

From Florence to Newport
looking South
Northward is just as amazing
Now fed, we could embark on the US-101 north to Newport. I hadn't driven this stretch of the US-101 in many years, but as much as other areas of Oregon have radically changed, this area is relatively static. The coastline is peppered with public beaches, but for the most part, the waterline is unreachable. The cliffs are too steep, or the terrain too rough for a road. Or, a path could be put in, but there's no place on the 101 to put a parking lot. As a result, there are long stretches of untouched coastline to enjoy out the window.

With all of the recreational vehicles on the road with us, there was little pressure to drive too terribly fast, making the drive all the more pleasant. The road is curvy, so even if the road had been empty, Hapy tips a little bit on corners anyway, so I wouldn't have been driving much faster than the current speed of traffic allowed. Hapy was running great. His temperatures would pop above 185*F for a quick second and then drop back down to 185*F as we climbed inclines or had to slow way down. Overall, though, his temperature issues of the past were quickly moving further into the back of my mind, as the scenery increasingly took over the front.

park, as it appears in googleImages
As I mentioned in the last post, we rented a house in Newport. Well, my sister Em did. We had her text the address to C, my navigator, so he could get us there. He had us take a left off of US-101 after we crossed the bay bridge into Newport and then he became confused. He asked me to pull over real quick and he asked a pedestrian "is there a skate park around here?". Hilarious. But, there was, and he had almost gotten us there. We were a block and a half away from it. We parked in front, nose pointing at the concrete bowls, and C jumped out, board in hand. K2 opened the slider, but remained on the lot couch while I wandered over to check it out.

Newport
725 NW High Street, Newport
This skate park looked like a combination of planned park and random construction. A few words from the older cat hanging out brought clarity: the city built it, and then the skaters added to it. For materials, they used whatever they could find plus concrete. Patio blocks? Check. Concrete slabs? Check. So.. that begs the followup question: how were the transitions? Well... you needed to plan for them. C worked the park, and while he did a car-load of locals arrived. Apparently, this was a super-hot day for Newport, so the locals would do a run and then pant in the limited shade. They all had an interesting style where they would look uncomfortable on their board, but then pop an amazing trick or fly out of the bowl and land it.. just to look unstable again after they had landed the trick and rolled a few feet. Maybe it was all of the home-made transitions. Regardless, I pulled up the address for the house, and it was about a half-mile away. We were early anyway, so C got his skate on. Once he was pouring sweat and ready to roll, we pointed south and within 10 minutes we were sitting across the street from the rental.

The rental was an odd, albeit large, 4 story house. The first floor was a separate apartment, but it was part of our rental. The upper 3 floors were, in order from bottom-to-top: more bedrooms with a bathroom, the main living space and a full-floor master bedroom. There was no yard, but there was a grassy park across the street with a big playground in it. It was perfect for the cousins, but no yard meant no tent for C and K2. Arrangements were resolved, and shifted each night as who was able to stay the night changed each day. Boo and I got a bed for one night, but honestly, we prefer Hapy so we stayed in the bus the other nights, and were grateful for it.

The family reunion was great. Boo and I had seen everyone within the last few years, but many family members hadn't seen each other in a very long time. For example, K2 had never met Chris, Rebecca's husband, and C hadn't seen him for close to 10 years. Lives get busy, and travel isn't the highest priority when there are colleges to pay for. Regardless, it was great to have that time, all in one place, for a few days so we could really re-connect.

Newport to Lincoln City
near Yachats
When it came time to leave, the plan was for the smaller, or more distant traveling families to pack and split, leaving the final walk-through for those who simply couldn't move fast. Boo and I were that last group, transporting the grandparents and teens. The plan didn't really work out that way, though, and we had all of the families all packing and leaving at about the same time. This made for a little extra chaos, but it also provided a little extra time to see each other. Ultimately, we were out by the appointed time, and the families went their separate ways... with Boo, K2 and the grandparents in K'Lack and me in Hapy with C, we headed north towards Lincoln City with hopes that this time Moe's wouldn't have a long line.

The drive to Lincoln City was as eventful as the drive from Florence to Newport. Hapy's temperatures stayed very level, he had plenty of power and the traffic didn't push faster than around 55mph anyway. We took the left to get to Moe's and could tell from the parking lot that things weren't looking very good. It was past noon, but still close enough to lunch time, even on a Wednesday, to create a crowd at Moe's. I found a spot near the door and C jumped out to find out how long the wait was... 40 minutes for a seating. Boo quick-conferred with the grandparents and we all decided to go to the McMenamin's Lighthouse Pub instead. Of course, McMenamin's isn't exactly known for fast service, but I figured that with the time to seat and then get food, we were still ahead versus Moe's.

Lincoln City no-start
After lunch, Hapy's now-typical 'starts the first time' didn't happen. I turned the key and nothing. I wiggled some wires behind the ignition switch and I could get the system to flip to "run", but "start" was still a no-go. Neat. With Boo, the grandparents, C and K2 watching, I simply pushed in the clutch, let off the brake, and roll-started by popping into reverse. Within a few seconds, I dropped into that 1200 rpm limp mode. Fun. I just puttered to an incline and roll-started him again. With concern about Hapy's limp mode issues and inability to start, we headed back to the US-101. He didn't drop into limp mode again, nor did we stop the engine again until we got home.

Homing
4!
We made one stop after Lincoln City. There was a pressing need for road-bev's and a restroom so at the north end of Dundee, we stopped at the Chevron. I stayed with Hapy as he idled and C dashed into the store for a couple drinks for us. Other than the no-start in Lincoln City, Hapy continued to run like a champ. It was a hot day, and he was staying nice and cool. He continued to have plenty of power as well, and he demonstrated both on the long uphill between Newburg and Sherwood. I described this climb, and it's significance in my recent post (See Now Water COOLed), but I'll stress it again. This is the ultimate test ground for the success of the cooling system. Hapy has struggled up this hill on the way home every time we've driven it. Part of that is because of the length and height of the incline, but part too is because by this point, he has run for multiple hours and is already plenty hot before we start. This time, though, his temperature peaked at 194*F as we took the hill in 4th gear. Boo and I parted ways in Sherwood. I took Roy Rogers into Beaverton and she continued on 99W into Portland to drop off the folks. Roy Rogers has gotten very built up now, making this less and less of a quality cut-through. I may need to work the maps for something more interesting for next festival season.

Anyway.... 4 successful round trips, To celebrate, here's a clip from Sesame Street back when the painter was still part of the show. Yeah, showing my age here a little bit, but I liked this guy, back when the Count was spooky, the parents didn't know about Mr. Snuffalupagus, etc. Once they started PC-ifying all that stuff, they took some of the special with it. Anyway, 4 successful 300+ mile trips, totaling over 1200 miles without the support of a towing company nor AAA. Hazah!

By the way, the starter no-op was solved once I emptied the back of the bus and disconnected / reconnected the wires going into the TDI ignition switch. Something shook loose on the drive. Another argument to spend time this winter getting after the electrical: solving the 1200rpm issue with the accelerator pedal, the occasional issues with the engine not starting and maybe even organizing some of that wiring in the tire well. Nah... that's crazy talk :)

That's it for today. Thanks, as always, for following along-