Showing posts with label overflow bottle. Show all posts

Tuesday, July 20, 2021

Shade Tree with Gramps

Today's post is about some efforts on cars that are not mine, around the cycles of applying Bondo, sanding it down, applying a guide coat of sand-able primer and repeating. This is all so I can get the panels as smooth and flat as I can before I get into the paint. Recall, I am still waiting for the body kit, so I am in a holding pattern anyway.

Shade Tree
I have mentioned in passing a few times that one of more of the kids we know will drop by to work on their cars in our driveway. They are new to car ownership, have few tools and a little experience. Boo and I call it our "Shade Tree" where they or their friends can come to get after some work on a car in a safe place with the tools they need, WiFi and an extra pair of hands. We bought a couple of car port canopies last year, and those serve as the base for this Shade Tree concept. Nearby, we have parked Hapy, and set up like DriveWay Fest: lot couch pulled out, seats strewn about, camping table set up. So, when you need to take a break, there's shade, a comfy seat and a cold beverage.

For me, this is an opportunity to hang out, wrench on some cars and help a friend or two out. If I could, I would do this every day. Fortunately, as the kids get more into their respective cars, this is happening more often.  I have not posted about these moments, but with my time dedicated to the Bondo cycles, I am not generating material... just lots of dust. So, today's post is about a weekend afternoon spent with a couple of kids and their cars.

K2 - Gramps
stock image, not Gramps
K2 got my parent's old Jetta3 when they decided that they should not drive anymore. That was a great decision, and for a base grocery-getter Jetta, Gramps was a pretty good little car. It does not have air conditioning, and it suffers the 2-dot-slow engine (non-turbo), but that should make it easier to work on, since there are fewer parts. Still, those parts which remain can be a PITA. Case-in-point, K2 wanted to do a simple tune-up, replacing the spark plugs. Well, to do that, you need to remove the intake plenum because the sadist engineers at VW located the sparkplugs on the fire-wall side of the engine, underneath the big air intake. To remove the plenum requires considerable flexibility, so this basic maintenance has not been done.

With that backdrop, we learned a couple of weeks ago that Gramps was not running. It turned out that Gramps was running, but he would go from everything-is-fine to suddenly overheating within a few minutes after achieving normal operating temperature (NOT). So, K2 drove Gramps over and pulled him into the front spot in the driveway nearest Hapy. He explained that he was sitting in a drive-thru and steam started billowing out from under the hood. After popping the hood and noticing a new hose clamp near the outlet flange, we learned that shortly before the overheating, he had removed and replaced that clamp. Why that was done was not explained, however, we concluded that maybe it was related.

The symptoms were interesting. Like I said above, the engine would run fine for a while and then water would start bubbling out of the overflow bottle as the engine temp climbed above normal. I felt the hoses. The top hose heading into the radiator was hot. The radiator was not, nor was the lower hose. That indicated water not moving, so I figured that there's either a blockage or the pump isn't working. Once the engine cooled down a little bit, we added water, but the issue repeated. I thought maybe there was an air pocket stemming from the prior hose clamp removal, so we remove the upper hose from the radiator. No water came out. I was able to run 1/2 a gallon of water into the top of the radiator before it was full, so I felt like we were approaching the solution. With the upper hose removed, and the open end held below the top of the radiator, we continued to put water into the over flow bottle, squeezing the hoses by hand to force water through. Eventually, water started to drip out of the upper hose, so we re-connected it. Then, we performed a repeating process of adding water, running the engine to get the bubbles out, turning off the engine, adding water, etc. We discovered very early that the radiator was now getting warm, so the circulation had solved. The fans, however, were still not firing. Still, the car was able to not overheat enough for him to drive it home and on short trips until he had time for another visit and diagnose of why the fans were not coming on.

G - unnamed
sort of what G wants
it to look like
K2's best friend, G, recently bought a late-model Jetta. I don't know the exact year, but it's possibly the newest car among those we have clowned on. A few months ago, I helped him remove his old stock muffler to install a fart-can. He knew then that he would need a cat-back exhaust system to get the sound he wanted. Since that time in the driveway, he got and installed a cat-back system. It has a sporty rumble to it now. On this visit, G wanted to replace his coolant, and do a little customization of the front grille. G had found a step-by-step online where you could cut and fab lower grilles from wire mesh as a replacement for the little slotted-looking vent things. He had built and installed them, but they looked kind of weak. To improve the look, he first removed the front bumper cover. G taped around the little grilles and then shot the grilles and the bumper covers inside the grilles with black spraypaint. We talked about cutting the fog-light supports out, but decided that just shooting black was enough to hide the body color and now he had the option of installing fog lights later. The coolant was fairly straightforward. He loosened the lower hose from the radiator, and drained into a pan. He re-connected the hose and filled the overflow bottle. So simple. These take about 1.5US gallons of 50/50 G12 (or G40) when completely emptied. Since he had not opened up his heater, that coolant did not get drained. So, his refill only used about a gallon. After driving it around, the level didn't drop, so we're confident that he filled it.

Zed
Of course, I continue to perfect Zed's body. I had a mishap with the Bondo where I believe I mis-mixed the hardener in. The symptom: it never fully hardened, and when I sanded on it, the Bondo came off in rubbery strings. I ultimately had to remove all of that layer of Bondo, and start over. Fortunately, I have been mixing smaller and smaller batches, since the areas which need attention are also shrinking. So, much of the areas I fixed that day were quite good. I mentioned at the start that I used a guide-coat. It was after this cycle of Bondo that I did that. I shot a light coat of sand-able automotive primer on top of the areas I had just sanded and then scuffed with 220 grit paper. I found 4 spot that I had not sanded sufficiently and about a dozen small imperfections (dips or gaps) that needed another round of filler. Around helping K2 and G, I sanded down the handful of high spots, vacuumed and re-shot with primer. I will scuff that guide-coat and fill the tiny spots next.

I am starting to wonder if that body kit will arrive after I am past ready for it. I expect I will focus on the hinges and other stuff, as well as shooting primer on the parts that will not be impacted by the kit (like the hood, doors, tailgate).

If you're in the area and need a place to tweak your car, come on by. We'll help as best we can. All we ask is that you lead on your work, the car leaves (but my tools don't) when you do and you check your politics at the curb. So, that's it for this week. Thanks, as always, for following along. 

Tuesday, January 7, 2020

TDI install retrospective: Cooling

Continuing the process of back-documenting what I did to put a TDI engine into an old (1972) air-cooled VW bus. Today I cover the cooling system. Somehow, I managed to not plan for this post when I started this retrospective. Ha. To keep concepts separate, I won't go into the electrical, but I'll cover everything else cooling / coolant related.

Radiator
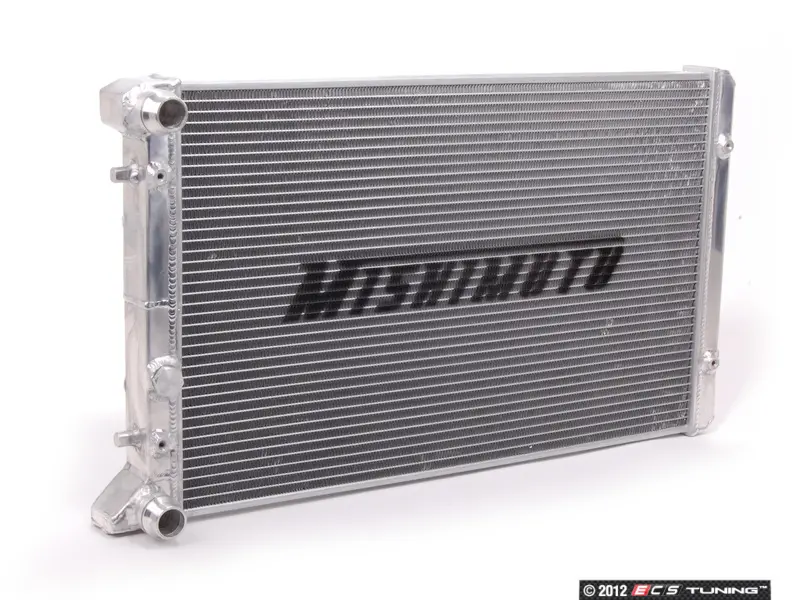
I started with a Jetta3 radiator I got off craigslist for $20. This met the need, but eventually was swapped out for a Mishimoto radiator designed for a Jetta3. This allowed all of the bracketing work I did for the original radiator to be re-used. Sort of. The bracket design was relatively simple: Add a straight square-tube bar across the leading edge of the radiator, and form brackets which are affixed to the bar, but thread into the radiator mounts. The crossbar then had eye-hooks added so the radiator could suspend from the underside of the bus. To the front of the bar, steel security screening was added to prevent refuse from entering the radiator. See bracketing the radiator and Radiator mounting planned for more details.

On the rear, simple individual brackets were formed for each of the 2 mount holes on the radiator. Each bracket had an eyehook added, similar to the front bar. From the 4 eyehooks, the radiator would hang from the underside of the bus. I used 400# test chain to hold the radiator, and placed it at an angle (front about 4" lower than the rear) so the exhaust heat would be encouraged to vent down-and-rearwards and so that the leading edge of the radiator might scoop some air as it passed beneath. Corresponding eyehooks were added to the frame under the center of the bus, and the chains have threaded carabiners on the ends for ease of connecting / servicing. See rad brackets continued and Radiator test-fitted for more details.

To discourage hot air from recycling into the intake side of the radiator, I cut and attached some sides to the radiator unit with some thin zinc-coated sheet metal used as cold-air return material in houses (See Radiator Shrouded). Underneath, I attached an aftermarket fan:cowling to maximize the suction of the fans drawing air through the radiator (See Cowling the Hapy Radiator). For more details, See Radiator Installed, Back to the Bus Rad Swap 1 and 2.

I have not experimented with lowering the radiator beyond it's current height of about 9" above the ground. I had ideas of adding a scoop to the leading edge bar, or adding a means of lowering the radiator with a lever or something, but the bus now runs cool enough without added complexity. If that changes, those options remain.

I know there are some who will read this and not accept that an under-belly radiator is sufficient. Consider that the Aussies are doing it, and were doing it well before I started my project. They have super-hot, dusty conditions and they drive their under-belly conversions in the outback. So, some gravel from the road or a mid-western summer are not really the factors we may fear them to be. After 10 years, these have not influenced the cooling at all. The keys to keeping the temperature controlled are getting the exhaust air away and getting air to draw through the radiator through cowling and fan suction.

Overflow Bottle
The overflow bottle for the NewBeetle is shaped like a ball with a mounting tab on one side, like in the picture here. That tab has the 2 mount holes. I built a simple angled bracket that aligned with those 2 holes, and attached it to the front-to-back floor support at the front right corner of the hatch I added. The bottle needs to be located height-wise in the same relative position as it appears in a stock TDI install. This places the full line at the top of the head. This height requirement may force you to put in an access hatch just so you can add coolant. I suppose a port-hole could work. Your bus, your choice.

Hoses
Unlike the inter-cooler and vacuum, the cooling system left only a few pieces I could re-use. The runs to/from the radiator were solved with multiple 2' long Goodyear flexible hoses fitted together with metal connectors. These flexible hoses satisfied the run from the engine bay to the radiator, but within the engine compartment, there were other considerations. For example, the outlet from the thermostat housing exits the engine pointing at the passenger-side rear wheel. This needs a 90* downward bend, so I used a short piece of original hose, and mated the bend to the flexible hose with a metal joiner that included a small (1/2") "T" which I routed to a bleeder. I have used this bleeder to get air out of the system while filling with coolant many times. The run from the outlet flange also points to the passenger side, and it needs to include a temperature sensor. So, again, there is a mix/match of TDI hose, a piece of TDI plastic holding a sensor and the flexible hose.

I omitted the EGR, so the plumbing around the EGR needed to be eliminated as well. This actually simplified some of the paths. Last, there was the coolant line run to the overflow bottle.

Extras
nicked from TDI-club
I haven't introduced any changes to the oil cooler nor the oil-to-coolant exchanger, but this feels like the right spot to mention it. I have thought about swapping out the original stock TDI exchanger for the V6 4motion Passat oil cooler or the late model NewBeetle / Jetta / Passat / Toureg (also Audi) oil cooler. Both are larger, and with the amount of concern I've had over temperature control over the years, this is an upgrade I will probably do as part of a Malone tune. The V6 4motion looks a lot like the TDI one, just a little bigger while the later model cooler has the coolant inlet/outlets oriented differently (middle unit in the picture). I got these part numbers from this thread on the TDIClub and only re-post here for my own future reference benefit. The TDIClub thread author (Kennedy) deserves all the thanks and praise for assembling this detail.

V6 4motion Passat
028117021E OIL COOLER (should come with upper gasket)
038117061 LOWER COVER TO OIL COOLER WITH SEAL
*I believe the original lower cover will fit, but I'm not 100% sure

late model
038117021B OIL COOLER
038117061 LOWER COVER TO OIL COOLER WITH SEAL
038117070B SEAL

Heater
image nicked from theSamba
For some, having a heater isn't an extra. Its mandatory. I wanted to remain stock-VW parts as much as possible, so I looked into a real defroster-type heater unit. I couldn't fit anything that big into the space I had, so I bought a used Vanagon rear-seat heater. I plumbed that into the heater/defroster hose loop, placing the heater unit on the extra battery tray, under the spare tire well in the engine compartment. This actually worked fairly well. The coolant lines were very short, and I was able to route an insulated flexible air hose to the front, connecting it to the original bus air system. I removed it all when my original ignition went up in smoke, and now don't have a heater. More importantly, I don't have a defroster. In retrospect, I probably could have retained the heater, and just sourced the 12V elsewhere.

I have considered adding an aftermarket heater closer to the front of the bus, and running longer coolant lines to support it. The long air hose system was slow to respond because the air in the hose needs to warm up or cool down before you can feel the change. That's the beauty of the modern systems: no air hoses. The coolant, however, could cool off before it gets to the front of the bus, and there are would be a need for a bleeder, etc. so this isn't exactly perfect either. So, as much as this is a retrospective, some things clearly aren't really done.

De-Scale
Regardless of what you do, if your engine isn't new, and you don't really know how well it was maintained by the prior owner, it might be wise to de-scale it before you consider your system complete. I ran a Thoroflush procedure and that made a massive difference in the bus' ability to ditch heat. Check out the Now Water-COOLED post for some more detail.

Prior related posts:
Preparation
Fuel System
Physical Mounting
Vacuum System
Air, Inter-cooler and Exhaust
Primary Electrical

Next related posts:
Secondary Electrical
ECU, dashpod and Sensors

Tuesday, October 31, 2017

MGB - coolant pump replacement (Part 2)

Today's post continues the efforts around replacing all of the smaller pieces of the cooling system. It started with just swapping out the coolant pump, but the hoses were old, the hose clamps rusted on, some parts desperately needing paint, etc. So, today's post covers the second phase. In the last post, we identified parts and tore everything down. Today we clean it up and start putting it back together. But first: Hapy Halloween.

Clean Up
There were a few original pieces that needed to be cleaned up and painted before they were re-installed. I reused the pulley cap, the accessory pulley, the pipe that connects the heater to the system and the overflow bottle mounting strap. Using 80-grit sandpaper, I took down the rust and then followed with steel wool to prep for paint. I then shot them with high-gloss black Rustoleum. When I sanded on the overflow bottle, I discovered it was brass, so I spent a bunch of extra time cleaning and polishing it instead. It will probably be the shiniest thing under the hood.

bottle while cleaning
bottle as removed
While the parts dried and cured, I decided I would de-scale / de-rust the inside of the radiator. I knew this was my opportunity to get after it, especially if I didn't want to open the cooling system again. The radiator is held on with 4 bolts, accepting a 1/2" socket. Once removed, the radiator lifts straight up. If you don't lift straight up, some otherwise not drained coolant will come out. I drained the rest into a disposal bottle and then ran water through it using a garden hose. I kept sending water through until the water coming out was clear. the discharge went mostly into a disposal bottle with some spilling on my driveway. Between the rain and a post-cleaning hose-off, I think the local animals are safe. I then poured 2 quarts of vinegar into the radiator and topped it off with distilled water.

harness pull-back
Something very similar to the radiator treatment I did to the heater unit. I attached old hoses to either end and flushed with tap water until it ran clear. Then, I added vinegar to the heater by filling from the lower bib until it started to bubble out the top. Through raising and lowering the hoses, I was able to get the heater core completely filled with vinegar.

I left the radiator and the heater with their de-rusting solutions in place for a week. Then, I drained them into a disposal bottle. Vinegar is an acid that will leave the remaining metal prone to rusting if left alone. To neutralize, mix one cup of baking soda with a gallon of water. I poured this mixture into the radiator and heater units and left them alone overnight. The internet says it only needs 10 minutes, but I was out of time that day anyway. Once the neutralizer is drained, flush again with water. Once they were both running clear, scent-free water, I taped off the radiator fins and shot the rest with very high temperature (VHT) flat-black paint. The same paint I used on the brake calipers. While the radiator shouldn't get anywhere near the heat that brakes or exhaust get, I figured better use that than Rustoleum which may not be able to handle 200*.
heater flush

While everything was broken down, I had an unexpected garage visit from my now-19 year old son T. He wanted to jump in and help. So, we pulled the main harness off the passenger inner wheel arch and taped it off for paint. After he left, I pulled back the engine seal, and masked off the outer wheel arch (fender / wing). I tossed a moving blanket over the engine, cleaned the inner wheel arch and shot it with the same orange I used on the driver inner wheel arch. Similar to that paint job, orange paint dust settled on lots of parts, but I'll hit that with the shop vac after the rest of the bits are assembled.

Re-Assembly
I started with setting the gasket on the coolant pump and threading the bolts through. The bolts will help hold the gasket still. The internet doesn't agree on whether a layer of goop on the gasket is necessary or not. I did not put any on, believing that if it leaks, I can always tear things apart and add it. It leaked after all, so I tore it down and re-did this part using Permatex blue gasket maker. This stuff is designed for something like this. Simply peanut-butter both sides of the gasket with a thin (about as thick as a sheet of notebook paper) layer of the Permatex. Carefully set the gasket onto the pump and then the pump onto the head taking care not to get goop into the head. I did this by pushing the bolts through and using them to line things up. The 4 bolts which hold the coolant pump to the engine are different lengths. Since they are threading into the engine, make sure you use the right bolts in the right spots. Too long, and too much torque could create a crack.
rad flush

Once in place, the manufacturer and the interweb says that the coolant pump gasket needs to be heat-set. One way is to assemble everything and then run the engine (without coolant!) for 30 seconds or so to generate the heat necessary to make the seal happen. I found that alarming, and chose to go with option 2: using a drill. This was really kinda weird. Either way you need to put the pulley on the pump. With option 2, you put the accessory belt around the underside of the pulley, and the other end around the chuck on my drill which I held near the thermostat housing. I created tension by pulling upwards on my drill and then fired the trigger. Once I got it running consistently, without running off either end of the chuck, I let it spin for 2-3 minutes... or the length of one old Black Sabbath song on the radio. War Pigs, I think. When I did all that, it leaked. So, I re-did it with the Permatex like I described above, and didn't heat-set the gasket, and it's holding fine. Use the goop.

With the pump ready, I re-installed the radiator. 4 1/2" bolt/nut combinations later, the radiator was in. This was super-easy and with the new paint it looks much better too. Then, I put in the thermostat housing.. without the thermostat. There's a reason for this: the thermostat sits closed so coolant can't pass, but the coolant filler is above the thermostat, so you need to wait while coolant trickles in. Who has that kind of time? Instead, once the hoses are on, you fill without the thermostat in until you're full just below the lip of the head. Then, drop the thermostat in.

Next, hook-up the hoses, starting with the lowest radiator hose to the coolant pump followed by the upper radiator hose to the thermostat housing. In each case, I considered where the screwdriver would need to be in order to loosen/tighten the hose clamp before putting on the hose. Taking a few seconds to consider that, and even popping the clamp on there loosely, but in the right position, saved me a headache later.

Connect the lower radiator hose to the narrow pipe that leads back to the heater, and then the heater hoses. If you have or used to have a coolant-based choke, you have the small hoses that lead from the rear of the head to the narrow pipe, though the carb. My carb had been swapped out, so there was a hose connecting these two. I will form a more formal blank for both ends, but knitted things together for now. And then there's the hose from the radiator to the overflow bottle. And installing that overflow bottle. That's easy. The bottle is held by a steel strap which is held in place with 2 1/2" nuts addressed through the passenger front wheel well.

Fill as much as you can with the thermostat out, and then remove the thermostat housing, and install the thermostat. The new cork gasket held very well, not requiring any Permatex. Add more coolant, burping the system by squeezing the lower radiator hose until you can't reasonably get coolant into the filler hole. But then what do you do? The MGB cooling system is simple, but the routing of the hoses and location of various components creates many opportunities for air bubbles. For example, the heater core is at the system high-point, but there is no facility to bleed air. I used the little hose bib sticking out of the back of the head to fill once the coolant filler at the front of the engine was full. I continued to burp the system until I heard coolant start to appear in the overflow bottle. The interweb advice is to have the bottle at 1/2 full, so I continued filling from the back of the head, holding the hose above the heater until the overflow bottle was 1/2 full.

Sigh..
That's it for today. All that remains is a test start and then a test drive. At some point, the seemingly endless rain will pause long enough for me to take this roadster out to verify the clutch hydraulics...  brake hydraulics... coolant re-do... steering... front suspension.... fuel system revitalization and, of course, the floors. It has been a year since the little British car drove around, so I'll be dedicating a post to that... once it happens.

Thanks, as always, for following along.

Sunday, August 4, 2013

Holding water... holding my breath

Hey folks.  I may have solved the coolant leak problem, so I'll focus on that.  We've had some family events over the Summer (as have you, I hope), and I'll touch on some of that too.  Rockin' on...

Planning the Cut
cooling diagram for reference
In my last post, I concluded that the hard line that runs across the top of the bell housing was the cause of all of my leaking problems.  I was convinced that it much be the cause.  So, I removed some parts of the intake and the vacuum ball to gain access to the pipe.  As I did, I found that there appeared to be a leak at the coolant flange.  "Ay carumba," I cried, believing that yet again it was the coolant temperature sensor leaking.  With careful inspection using my dry fingers, I was able to prove that it wasn't the sensor, but it was the flange itself.  Curious.  I removed the flange, covered the o-ring with high-temp sealant (red Lock-tite product) and re-connected everything.  It failed to hold, but the water leak pattern was the same, leading me to believe that I'd found the actual problem.  Next stop: new o-ring.

By the time I'd realized it was the flange-to-head connection, it was the middle of last week.  On Friday morning, I hopped on the phone wit the fine folks at the FLAPS (Friendly Local Auto Parts Store): Discount Import Parts (DIP).  Gotta love those acronyms.  The guy on the phone mis-heard me, and pulled an entire outlet flange.  So, wen I arrived to get my o-ring, there was a little confusion.  He pointed out that the flange will warp sometimes, and they had a 100% return policy for un-installed parts.  Figuring it was a worthwhile $10 risk abatement to just take the flange, I took it.  And a couple o-rings.  And another temperature sensor o-ring.  And some high-temp gasket sealant.  And a couple bottle of coolant.  Simply put, it was a project in a bag.

Add a Flange, drop the Reverb
Old flange. rocked left to right. 
With the old flange in hand, I was able to compare what a new one was like.  Posted on the right are hard-to-discern pictures of the old and new flanges.  When the new flange is pressed against something flat (in this case a piece of finished furniture), it is perfectly flat.  The old flange rocks from corner to corner: the corners which don't have bolt-holes.  This told me that once tightened down all the way, coolant could escape through a neighboring corner.... just like it did.

Now, for the easy part.  I made the same modification to the new flange as I did to the old one: cut off the outlet which lead to the oil-cooler and sent a short bolt through the hole, sealing it off.  This is necessary because of the proximity of the flange to the frame in the bus.  I took the high-temp gasket stuff and put a thin bead on top of the o-ring, and let it sit (per instructions) for 15 minutes.  A few minutes of re-assembly later (new coolant temp o-ring, fully seat the temp sensor, new C-clip) and the flange was ready.  It bolts on easily, once the holes line up :)  The hoses slid back on, the clamps seated well, and all things appeared right.  Finally, you have to be patient for 24 hours while the gasket stuff completely dries.  It doesn't specify it on the tube, so in an emergency situation, it may not be necessary.  Still, I didn't want to go this far and have that be a problem.

New flange. no movement.
Anyway, this morning, I poured a bottle of water into the overflow bottle and listened.  Glug glug glug went the air bubbles through the top of the overflow bottle.  They got quieter to a tick-tick-tick sound, to silence.  Straining to hear the "sss" sound of a leak, or the "bloop" of a water droplet landing in the catch-pan, I still heard nothing.  The water appeared to ave leveled off just under the fill line.  I squeezed the rubber hose leading from the flange down to the oil cooler and radiator... no leak, just a little more air released.  Hmm... I seem to have fixed it!

Graduation Congratulation
After attaching the flange yesterday, I spent the afternoon with my family (including Boo, T & C) celebrating my sister-in-law's graduation from a Master's program.  For 5-1/2 years she worked through first completing her bachelor's degree and then a master's so she could have her dream job: teaching nursing.  She started working that dream job a few months ago, so now, with paper in hand, she's reached her goal.  Emotional speeches and a slab of chocolate cake later, we all recognize just how much effort it took.  Congratulations, J.  Your impact on the health and well-being of thousands of patients will be monumental through your demonstration of providing care from a place of respect and love.

That's it for now.  I have about an hour of buttoning-up left on the bus and then we'll be ready to test drive.  If he holds, then we can start looking at what's next.  Maybe, we'll just enjoy him as-is for a while and try to wedge some camping in before school starts up again.  Regardless, thanks for following along...

Sunday, March 28, 2010

Plugging Holes, Plugging Wires

I indicated that boss-man was going to activate everyone to work yesterday, and he did. Since my wife was out of town, and I had C with me, I couldn't really go in. Besides, I had a pre-existing commitment to be at the neighborhood association Easter Egg Hunt. I haven't really gone into the details of the HOA, and the fact that I'm on the board, but lets just say that it takes up considerably more time than I anticipated. Yesterday morning was no exception. Today's post touches on my homeowners association (HOA) responsibilities, and the progress I made yesterday.

Hay Ho HOA
In November of 2008, there was all that election energy I got to thinking that I could do a little something to make the world a better place. Let's call it a case of the "civic's". Anyway, by the following February, I found myself on the board of our neighborhood home owner's association (HOA). By the end of 2009, I had taken on the position of "Maintenance Chair", meaning I had the responsibility for all of the common-owned areas excluding the neighborhood pool. Since the start of the school year, I have hosted 6 ivy pulls, coordinated the removal of 15 dangerous trees, oversaw the bidding process and selection of the maintenance company and a surveying company. We have had another tree fall, so there was a clean up (and now insurance company involvement) of that. There have also been a few small projects, including the clearing out and bark-chipping an area where the Easter Egg Hunt took place yesterday. Because of the project, I had to attend the Egg Hunt just to make sure it all was up to snuff... and my 8 year old ("C") was a hunter. The hunt went well, and the space looked great. After meeting with a number of the homeowners, I took "C" home and logged in to work. Fortunately, it was very well under control by my co-worker, so I spent the rest of the day around the bus.

Clean up on Aisle 6
Last Tuesday afternoon when we arrived home from Bend we moved the firewood from just in front of the bus to a spot much closer to the back door. This served 3 purposes - wood no longer touches the house, closer to the door we go through in winter for wood and away from the nose of my bus so I can work around the front. We only moved the wood though, we didn't clean up all the refuse that was underneath that pile. I did that Saturday. With last night's rain completing the job, it is nice clean concrete now. After the area was nice and clean, I set to work on the bus.

Genie Finally Bottled
With some fresh stainless steel bolts, nuts and fender washers, I installed the coolant bottle bracket that I had fab'd and painted before we left for Bend. With it tightened down, I put in the bottle - also with 1/4" stainless steel bolts, nuts and fender washers. With some short stretches of steel brake line, I connected the last bits if the cooling system "bubble system". I cut up pieces of donor rubber from the stock system for the 90* elbows. The leftovers were then sliced length-wise and wrapped around the steel lines. My thinking was that the steel lines could touch ground, and cause an electrical charge through the coolant. The net result looks like the bubble system is pure rubber, but its not. The steel will hold in-place, allowing access to the oil filter and guarantee that the high point of the bubble system is the overflow bottle. The lower nipple on the bottle was tied into the engine block with a section of leftover hose from the donor engine. After much celebration, and a small snack, I switched gears over to the electrical side.

Marinara on the Side
For the first time since last October, I pulled out the wiring harnesses that I got with the donor engine. Since I spent all that time labeling 60% of the sockets, it didn't take very long to get the spaghetti laid out and the important 2 sections identified. There is a primary engine harness that was left on the engine. This has the smaller ECU plug on it as well as a couple connectors for the vehicle lighting. I don't know what I'll do with those. For now, they're just hanging out. The second important harness connects to the other side of the ECU. This has the other engine connectors as well as the multi-plugs to go into the main harness. Both of these harnesses originally passed through the fire wall into the dashboard area (out of the elements).

Considering the length of the cables, I had few choices for a dry location. The most obvious location is the spare tire well on the left side. In the later Westvalia layouts, there is a closet cabinet on top of this well, which makes it a great candidate. An alternate solution could have been putting the "dry" stuff under the rock-n-roll bed. I am not sure the cables would have reached, though. Anyway, I cut a 4" long 1-1.2" wide rectangle in the very bottom of the well. This took some doing without removing anything. Once cut (and sharpness filed), it was pretty straightforward identifying which parts of the cables needed to be in the cabinet and which needed to be in the engine compartment.

I connected the bits that were well marked, and will have to investigate some of the circuits to be sure of others. I intend to physically mount the ECU and other bits into the wheel well, though some of the circuitry needs to find a different home. For example, I don't know what I will be doing with the donor dashboard. I could imagine it taking the place of the stock bus dashpod, but I don't know if I'll have that kind of time before camping season begins. Besides that, there are lots of other parts that would consume too much of the cabinet, and look awful if jammed in there. Instead, I am thinking of removing the parts of the fridge that do the cooling, and leaving the cabinet. We don't use if as a fridge anyway, so why keep all the heavy gets-in-the-way junk? Once that is pulled out, and a pass-through drilled between the 2 cabinets (closet and former fridge), I'll be able to pass the cables into the fridge cabinet. I intend to put in a false-floor under which these circuits would live, leaving the topside for dry food storage.

Next up, is more with the electrical, of course. Since most of the work is now contained within the bus, I should be able to do things even on nasty weather days. I have to put in the accelerator, brake and clutch pedal switches, but those installs are not blocking, so they can wait until a dry day. It really feels good to be on this part, and thinking about placement of electrical bits. It really is starting to feel like I'm almost there.

pictures:
top - coolant bottle installed with rubber lines.
upper middle - engine bay view of harness pass-through into cabinet. Note that big black thing. It contains the relays for the coolant heaters - which I'm not sure how I'm gonna use.
lower middle - the pasta from inside the cabinet. Eeek.
bottom - inside of the fridge cabinet that seem primed for holding some spaghetti.

Sunday, March 14, 2010

Good Day, Sunshine

Today was the first day of daylight savings... or yesterday was the last day of it. Either way, we set our clocks forward an hour last night. Here in the North Woods, that means that it doesn't really get dark until after 7. This opens up all kinds of after work opportunities.... or does it? This week, both of my kids start lacrosse season, so time will quickly get consumed by Spring. I did get the coolant overflow bottle bracket fabricated, though, and I think I have something going to the bleeder.

Bottle Bracket
Since my welding skill is crude and low, it took most of the day on Saturday to fabricate a relatively simple bracket. Near the beginning of the project, I got a '01 Jetta/Golf TDI bottle. I thought about locating it in a few different spots, but I settled on near the firewall on the passenger side. This places it nearest to the air-bubble lines and close enough to the coolant pump. The bottle needs to be high enough to completely flood the engine, yet below the engine lid. Building the bracket took that into account as well as the form of the bottle. I shot it with some rust proofing paint, and I need some longer bolts, and it will be ready for 'final' install.

Lower Rad Hose Bleeder
There's a reasonable concern about air bubbles passing from the radiator circuit into the coolant pump. This could cause the engine to overheat. Anyway, I used some of the old hose as donor material, and put in another "T" just in front of the block inlet. I'll have to figure out a reasonable way to block that off. I could use a PEX valve, I suppose. It would allow yet another way of feeding coolant into the circuit when the day comes to fill it, though. Hmm...

That's all I really got done this weekend. Next weekend, is the beginning of Spring Break, so I have low expectations for getting much done. I'll try to wrap up the bracket and the bleeder so I can check the coolant system off the list. Then, its on to the air filter, and then the electrical. Fun!

pictures:
top - rough fit of overflow bottle
bottom - looking south-west off the Broadway Bridge at night