Showing posts with label KLack. Show all posts

Thursday, September 3, 2026

A Tale of Two Astras

In my last post, I said I had a relatively long story about a pair of Astras. Today, I'll tell that, and provide an update on K'Lack. I don't have pictures, because, honestly, most of this story isn't mine, and Ang didn't take pictures. She really does not "live thru her phone" like most people. Meaning, she doesn't take and share pictures as she trips through life. She experiences the moment at that moment and then moves on to the next one, living in the now. On to the tale-
 
Astras
I have mentioned Astra a few times. I provided some backstory to how we found her and why the Astra is so important to Ang here (See Moving into Shop). Basically, a Saturn Astra is an Opel Kadett with a new name and Ang's first car was an Opel Kadett. When we were having to use the jump box often, she started to get down on it. Then K'Lack broke and Krista needed a car, so Ang lent her Astra while Ang drove the truck (and I drove Hapy). Krista didn't like Astra very much, and Ang got to thinking about buying a new car that didn't have all of these problems. So, I dipped into craiglist and found... another Astra. This time, it was the top-of-the-line model which had been driven / cared for by someone who really loved this car. Everything worked on it. It had less than 60k miles on it, and then it was ours. I think Ang drove it for about a week before she let Krista borrow it. We had it just long enough to name it Frankie.
 
Astra Heads North
It was around this time that a friend of Angela's (they have known each other since 3rd grade) found herself in a bit of a bind. Her housing of over 25 years was being sold out from under her and she needed to solve for housing in rural western Canada without a car. And so started an odyssey. Ang resolved to getting Astra as functional as possible. That meant getting the alignment done, the tires rotated, the oil changed, filters etc. with a plan to drive to Canada to help her friend. She got a full read-out of everything that was done and every minor thing the tech's found and added that to the file she took to Canada. Soon, her plan to drive there became a plan to drive there and give Astra to her friend. So, in her limited spare time in the evenings she learned how to export a car from the US and did all that paperwork.
 
Ang finished her usual workweek on a Tuesday evening and left from there northward on I-5. Astra drove great and she landed just outside Olympia at a Super8/Motel6 for the night. The following morning, she drove up the Olympic Peninsula and hopped the ferry from Port Angeles to Victoria BC. Prior to leaving, Ang had done all of the vehicle export steps and had her paperwork in order. Unfortunately, her friend had not completed the import paperwork and was not at the border to meet her with that paperwork. So, the importing would need to take place in Nanaimo. Apparently because her paperwork was not in order, Ang was waved into the deep customs inspection area where they disassembled parts of the car and re-installed things. This included, for some reason, removing the wheels and putting them back on. Undeterred, Ang drove north on the Canada1, finding a motel just outside Victoria. The next day, she completed the drive north past Nanaimo to Courtenay where her friend lives.
 
Oh Canada
Importing a vehicle into Canada requires the vehicle passes an inspection. That seems totally reasonable as it prevents Americans (and others) from using Canada as a vehicle dumping ground. During inspection, they identified 2 lugs which were striped. Since the wheels had just been rotated and the tech's found nothing interesting, we have concluded that the customs folks jacked up the lugs during re-install of the wheels. For this reason, and the horn not working (it had been temperamental) caused the car to fail inspection. Angela's friend had 30 days to get the car fixed and re-inspected in Nanaimo or the car could not be imported. Since the car was officially exported from the US, she also couldn't come home. It was get fixed or get crushed time.
 
To Vancouver
Ang helped her friend look at some places to live and then Ang needed to get home. The original plan included her friend driving Ang at least as far as Nanaimo to catch the ferry over to Vancouver where Ang would catch the Amtrak to Portland. Instead, Ang bought a flight home, flying out of Comox (neighboring town to Courtaney. At this point, we learned that the passport id card is only valid for land travel across a border. If you want to fly, you must use the booklet, which Angela left here. While they let her board the flight from Comox, her flight from Vancouver to Portland was canceled. Instead, she would have to take a bus from Vancouver to Seattle where they rebooked her to fly home to Portland.
 
This travel all happened on the Sunday that one of the larger regional Canadian airlines went on strike. So, while her flight from Comox to Vancouver was relatively calm, the scene in the Vancouver airport was bordering on chaos. And, land travel options were disappearing fast as those with canceled flights because of the strike were vying for whatever they could find. This included bus and trains into the US.
 
Angela grabbed a Lyft to the train/bus station, ticket in hand, and talked to the ticket person at the counter. The computers were down because of course but the ticket counter person said that while her in-hand ticket was for tomorrow, the driver would let her ride today. That proved incorrect as the unpleasant driver had no interest in talking to anyone about anything other than accepting a ticket for that specific bus ride. So, now Ang found herself in a not-too-safe part of Vancouver, the afternoon turning to evening, no ride across the border, no personal transportation, a dead cell phone and no housing plan. As her phone charged at the nearest bar, we talked about options. That weekend there were multiple events taking place in Vancouver (the annual Pride parade and ComiCon, eg) so options were slim and expensive. Most options were far away from where she was and where she needed to be to board the morning bus to Seattle. The place we thought we found had no front desk and everything was done virtually. As she tried to book, the price kept going up. While wrestling with their booking site, she befriended someone who walked her to a place with an actual front desk and an available room. It wasn't big. It didnt have it's own bathroom, but it was expensive and had a lock on the door. It's funny how far down the bar goes as evening turns dark.
 
Thru Seattle 
Early the next morning, Ang caught another Lyft to the train/bus station and was through customs before 7AM. She hopped the bus, driven by the same unpleasant guy who wouldn't talk to her the night before. The bus was delayed passing through northern Washington to the point where she missed her original flight. I swear, you can't make this stuff up. Ang got a hold of the folks at United before the gate closed and got moved to another flight, freeing up her seat for a stand-by person. Her later flight was 4 hours later, but that provided time to unwind, and decompress a little bit before the final legs of her journey home. Still, spending 4 hours in the busy SEA/TAC airport is not remotely 'unwindy'. It is not comfortable, nor quiet, nor without lurkers so those 4 hours felt longer than the 8 hours we were stuck at Portland International Airport (PDX) last June.
 
And Home 
Fortunately, the flight was uneventful, boarding, leaving and arriving on time. Since she was now arriving at rush hour, she insisted I not drive the 60+ minute drive to PDX and instead meet her at a Tri-Met light-rail stop. The light rail from PDX is actually very easy. The train line ends there, so there is usually a train sitting there waiting for you to get onto. She had about 15 minutes of sitting before the train pulled out and then about an hour on the train. Then, at the stop one before the one I was meeting her at, all the westbound trains were held for 20 minutes because of an issue on the line well west of where she was getting off. Seriously, you just can't make this stuff up. I literally teared up when I saw her get off the train, so grateful her perilous adventure had come to and end. We hit one of our favorite local Japanese restaurants on the way home.
 
We learned last week that Astra has passed inspection, and she is wearing new Canadian license plates.
 
K'Lack Update
Ian found the issue that was causing us continued issues. He has lots of diagnostic tools and he found that the voltage range being sent from the crank position sensor was below the minimum for the computer to have a reliable reading. The part was new, and I installed it.... lying on the ground on top of wood chips. Apparently I did not seat the sensor exactly square in the hole. So, the sensor was pointing at a slight angle. When he removed the sensor to see what was going on, he saw the o-ring was pinched more on one side than the other, adding credence to the theory. He replaced the o-ring, cleaned out the hole and the edge before re-installing the same sensor. He was able to gain a better angle on the part and was able to seat it squarely. After multiple tests runs, he handed it over to me. Ang and I drove K'Lack exclusively for a few days, putting nearly 150 miles on it. K'Lack drove great, no codes were thrown, so Ang took it through DEQ (Department of Environmental Quality) / smog testing. It passed, and with new stickers applied, we traded cars with Krista, putting Frankie back in our driveway.
 
I admit that at least part of the problem with getting K'Lack running was my long-lived dislike for the car. It has been the problem-child since it first arrived from Kai. Did I rush the sensor install? I don't think so, but I was lying in wood chips in the sun on a hot day. Perhaps, if I had had room in the shop to to the work, or made the room to do the work, we could have avoided some unpleasantness this summer.

Thursday, August 20, 2026

Catching Up on Cars

It has been a busy Summer of car stuff. Some wrenching, some otherwise. In today's post, I will not try to cover everything, but there has been a lot. 
 
Oliver freshly cleaned
Before I begin, you may have noticed a new sticker on the right-hand side called "Electoral-Vote". If you aren't familiar, that is a site run by 2 history professors who started a site initially, I think, to analyze polls. I have been reading their page for well over a decade; maybe 2 decades at this point. From humble beginnings that aimed to provide insights into political polls, they are a daily site that examines the (mostly) US political theater. As the national political disposition has shifted right-ward, their political position has remained around or just left of where the political middle was during the Bush years. Now, that position is left-of-center (because, again, of the national shift) in the continuum of US national politics. As the primary season has ended, they are returning to their roots, looking at polls and providing the kinds of insights only 2 life-time history and statistic's nerds could provide. If you find that stuff interesting, check them out. Neither they nor I get anything money-wise out of my putting that sticker on my blog. They get clicks, I literally get nothing. Back to cars.
 
K'Lack
P0726 re-appearing
We will start with my nemesis car: K'Lack, the 2004 Jetta TDI Wagon that previously belonged to our son K. After driving it for years and logging thousands of miles, he needed to sell it off and get something that was newer? broke down less often? I'm not really sure, but at the end he was having transmission issues. Regardless, the trade-in amount he was offered was pennies-to-dollar value. So, we bought it for Kelley Blue Book value at the time (around $4500US) and took it directly to a transmission shop who was qualified to do transmission work on these 2000's-era automatic transmissions appearing in VW's and Audi's. Through the benefits of successful aging and poor record-keeping, I don't remember how much we paid them to rebuild the transmission, but it took literally months. If I remember correctly, it went into the shop in December and we got it back in March. It was around this time that our niece (another K, so I think maybe since all these "kids" are adults now, maybe I'll just start using their names), Krista needed a car. Her former car failed in some way I don't remember. We intended to sell her Flash. Remember Flash? He was a great 2001 VW Jetta TDI sedan, but he had a manual transmission. Loved that car, but a different niece needed a car, so when Krista was unable to drive a stick, Flash went to the other niece and K'Lack went to Krista.
 
replacing K'Lack rear caliper
Now, years later, and many repairs ranging from replacing the oil pan to a timing belt and camshaft replacement, K'Lack is currently having issues I cannot track down. It is throwing a P0726 code and after tracing wires and replacing the crankshaft position sensor, the issue persists. The code means a check-engine-light is lit which means the car will not pass emissions. It is also virtually un-driveable. It barely starts and at any point during a drive the car may suddenly shift into a too-low gear, causing it to buck. It is quite alarming and dangerous. I have date with a mobile mechanic, Ian, who has helped on some of Cedar's (that's "C" in all prior posts) cars. I hope very much that we can resolve this and get Krista back on the road with K'Lack. In the meantime, it is parked under a plum tree in the back near the shop and Krista is driving Boo's (okay, her name is Angela and I'll refer to her as Ang from now on) Ang's Astra.
 
Oliver
In the interest of getting Oliver, the 1978 MGB, out of the shop so I could move things onto shelves, I got Oliver running well enough to back out and idle-drive under a tree. I say idle-drive because the throttle cable had seized. Fortunately, parts for an old MG are not nearly as expensive as parts for new cars, so a after few bucks and about 15 minutes, the throttle cable was replaced, and Oliver could start and move around. Thrilled, I drove him out to the front and gave him a long overdue bath. His brakes were still a little squishy, so I moved him to the other side of that plum tree in the back and put his cover back on. I have to do a system-wide look at the brakes. They have been acting like they needed a bleed for a long time, no matter how much I bleed them. I think I must have a loose fitting somewhere that lets air in. I still intend to get him out and around, even with squishy brakes, before the Summer is over.
  
Hapy
cursed outlet flange
Earlier this year, I got Hapy put back together. I drove him out to Sheridan where Justin could do the injection pump re-seal. On the drive home, I popped the boosted air pipe and sorta limped home. But, after that, I took him on around-town outings and he ran great. He would start right up, have lots of pep, moved through the gears well. For almost all of the month of July, he was set up festival-style in the back, providing music, a hang-out spot and a groovy vibe. This past weekend, Ang and I had 2 different events. First, we had tickets to Joe Russo's Almost Dead (JRAD) in Eugene. JRAD brings the energy of the early 1970's versions of the Grateful Dead while performing everything and anything across their song catalog. I highly recommend to my DeadHead friends. The next day, I had an early-afternoon show in Rockway Beach, playing the NCAM benefit festival. I'll post on the festival later, but our adventure started and ended Thursday night, heading south to Eugene.
 
As I've mentioned before, Ang and I like to leave for events the night before, getting as far as we can in the cool dark and then vagabonding (boon-docking to some) in a random parking lot or on the side of the road to catch a sleep before completing the journey in the morning. Hapy likes the cool air and we really like awakening that morning most, or all, of the way there. The drive was relatively uneventful until after we got south of Wilsonville. I noticed that the rear window was getting blurry, and I had just washed it when we filled up. Growing concerned, I pulled off into the Charbonneau rest area near Aurora and glided into a parking spot. I went around back, opened the rear engine hatch and could see that the coolant bottle was empty, and I could hear steam. After moving the bedding out of the way, I could get the top hatch open and could see that the coolant was escaping from the cursed coolant outlet flange. I would later discover that the c-clip or "U" clip that holds the coolant sensor in place had a broken leg (so, really a "J-clip). If you look at the picture on the right, there ought to be a little plastic tab thing sticking downward from the bottom of that dark channel on the right side of the outlet flange. That would be the end of the "U" that's not there. Our trip to Eugene was over and I called for a tow.
 
trench filled
We waited for about an hour, and the truck operator seemed fine enough. He was nice, albeit quiet. In retrospect, he seemed less comfortable with Hapy not having a parking brake but Hapy has been on a flatbed lots of times without an issue. Until this time. I believe he did not strap the wheels down as tightly as prior truck operators had. I say that because Hapy seemed to move front-to back a little bit as he backed the truck into the driveway. I had not noticed that when he was loaded onto the flat bed in the parking lot. We rolled Hapy into place, and Ang and I called it a day, returning to Hapy the next day... when we discovered that putting Hapy in gear was not enough to hold him in place. Since it was enough to hold him in place on the flatbed, at least while he was getting strapped in, and this was over an hour after we had overheated, I conclude that the tow somehow messed up the transmission-to-engine connection (read: clutch). I wanted to see if the engine was locked up, so I put a 19mm socket on the crank end-bolt and gave the engine a short turn (like 15*). The timing belt moved, the camshaft moved with it, so I concluded no major engine damage was done. Or, at least, it's not frozen in place. That's huge, but I think I will need to pull the engine and transmission apart to fix whatever went wrong in between. With this knowledge, we called it a day on Friday and spent a lovely day at the beach on Saturday.
 
trench filled
Since I still had a trench running the length of the lane-way, I spent Sunday morning filling the trench. By the end of the day, Ang and I had flat-towed Hapy back to the shop with the X-Runner and 20' of trucker's chain, parking him out front. I need to clear some space inside the shop to put him, and get him in there. Then, I have the equivalent of a clutch job ahead. The last time I had to remove, separate, re-acquaint and re-install the engine and transmission, I vowed that I would cut a rear apron into the back so I could just remove the engine. Looks like that time is now. Regardless, Hapy will probably not make it back out on the streets this summer. Could I get it done before Summer ends? Maybe, but we have lots of things going on and I don't know if I have a weekend to dedicate to that right now. Besides, if I am going to cut, I want it well planned with a means of fastening what I have removed before I pick up an angle grinder.
 
EDIT: I was trolling through some of my old posts yesterday when I came upon Front is Front which clearly describes this same coolant sensor leak recurring, until I put the clip in from below. Over 15 years later, and I'm repeating myself. Had I remembered, or read, we would not have lost coolant, broken down, etc. There's a lesson in there somewhere.
 
Wrap
With Hapy's catastrophic failure, we are down to one operable car: The Toyota X-Runner, which Ang drives to work. She has a lingering bad shoulder from a skiing crash a dozen years ago, so driving a 6-speed in rush-hour traffic is really taking a toll. If Ian and I can't get K'Lack fixed, we are going to need to re-po the Astra and have Krista solve her car need another way. Generosity reaches a limit when another's convenience is literally causing you pain.
 
Well, that's where those 3 cars are at. I have a long tale of 2 Astra's to share another time. We have lots of active construction Ang and I are doing with our friend Ray, so I'll update on that, the Astra's and whatever else happens around here as things roll. I hope the reference to the electoral vote guys doesn't cross some no-politics line for you. I generally don't bring that noise in here, but elections are coming, and we all need to be as well informed as we can be.
 
Thanks as always, for following along. Until next time-

Tuesday, March 1, 2022

Enter ToyoTruck

Super long post today, and I still didn't get the project all the way done in one post. I did get most of the way, though, and I'll wrap it up next time. For today, I'll hit some background first, and then get into the adventure with this new-to-us truck. Since this started on Christmas 2021 and today is the first of March 2022, clearly this has been quite a saga. At the rate this is progressing, it will be competed mid-Summer.

Background - the setup
example image
When C returned for winter break from University, he left his car ('09 Subie) on campus. He needed a car while he was home so he could get to work, but we have a significantly reduced the operable fleet (sold Flash, sold K'Lack). So, we borrowed-as-a-prelude-to-buy Boo's sister Rose's Toyota Tacoma X-Runner. I am referring it ToyoTruck for now, though the interweb folks often call these "taco's". I suspect it will get a better name when it presents iteself. Rose has an older Ford truck that is getting a new engine swapped in, so this Toyota was kind of extra anyway. Clearly, having extra cars around is a family thing for us, and with the rehab we plan on doing on this house, having a pickup readily available for supply runs will be valuable. Anyway, C arrived home a few days before Christmas, just in time for some radical winter weather. We got snow, and ice, and more snow, some sleet, and melting followed by freezing. It was a full-blown winter stew. We let C use Boo's '09 Audi A4 (all wheel drive, newer M&S tires, etc) while Boo drove ToyoTruck. ToyoTruck is rear-wheel drive with mostly-worn-down summer highway tires. That would have been fine if it weren't for the winter weather. With Boo's new schedule, she has to report by 7:AM, which means leaving well before dawn, and right about at the overnight low temperature. This lead to a Christmas morning (yes, she worked Christmas morning) sliding-on-the-ice scenario which ended with the truck smacking a pole. The passenger fender, the bumper cover, passenger headlight, passenger fog light, the leading corner of the hood and some assorted little bits all were affected by the very low speed impact. The damage seemed minimal enough that Boo continued on to work. It wasn't until the next day that we got to access the damage in the daylight.

How Does that Insurance Commercial Go Again?
after post-smack
In the daylight, it looked pretty twisted, but it is mostly surface damage. I took a bunch of pictures and we tried to get a claim going with our insurance company. Turns out that insurance goes with the car, not the driver, so we needed to use Rose's insurance. We learned this while we were getting bids (~$5k) on the work. This is where insurance got interesting: even though Rose told Allstate she wanted "full coverage" the agent pulled a massive boner and failed to include collision (pays for damage to your car). How that meets the definition of "full coverage", I don't know, but I swear this feels like one of their ads... where they say the competitor will leave you hanging with a tagline like "if you don't have Allstate...". It appears that the Allstate ad is actually self-describing. Maybe their ad should be more like "if you let our agents do it, you're gonna get screwed". So, to sum this up: we borrowed a truck, slid into a pole causing ~$5k worth of damage and there's no insurance to fix it. Happy Christmas.

Paulie: Bodyman
Fast Times Camaro
To resolve, I tried my best Spicoli imitation: "Relax, all right? My old man is a television repairman, he's got this ultimate set of tools. I can fix it." Of course, the next scene in that movie (Fast Times at Ridgemont High) has that car, unrepaired, but tagged with Ridgemont sucks / Lincoln rules spray-paint. Instead of that, I'm actually going to repair it. I took the itemized bid and ordered all of the parts the body shop said needed to be replaced from CarParts.com. This cost about $1300US delivered. The bid had the parts for around $2k, so we are already ahead in the game. I will simply remove and install the parts I received, and hope I discover nothing else is wrong. The labor for the body panel removal/replacement was $900US. So, if I can get the truck back into one piece, I will have saved over half the bid. At $900US, using my usual price for my labor ($50/hr for simple math), I break even at 18 hours. On its surface, I think I can get way under that. I had a great experience with CarParts.com, by the way. The bumper cover was wrapped in thick plastic wrap inside a huge box and the fender was made-in-Taiwan steel double-wrapped in custom cardboard protecting it plus packing material between the wrapped fender and the box sides. The packaging of the headlights was equally protective. Some of the shipping, however, was spotty. We can credit GLS for losing and then claiming delivery of almost half the order. Ultimately, they got the parts to me, 2 weeks after they said they were delivered. That final delivery was curious in that the box appeared without a text nor email update, though I had been set up for both. Sneakily done, GLS.
 
Finally, with all the parts I had ordered in my garage, I was ready to get started. I had finally gotten the 2016 Sprinter seats installed into Hapy (See Hapy Seating Part 2), so I could shuffle vehicles around. Hapy went back into the driveway and ToyoTruck moved under the canopy so I can work out of the rain.

Body Panel Removals
2 replacement bits in
I started by removing the front grill, fog lights and bumper cover. Then, I pulled the headlights and removed the fender, leaving the hood for last. The grill is held to the top of the radiator support with 3 Phillips screws across the top. Down below, the electrical plugs for the fog lights are simple tab-lock plugs. Since I am replacing the fog-lights with the bumper, I left the old lights in the old bumper. For reference, just press the tabs and they wiggle out. With the plugs out, the fog lights can push through the bumper (after pressing inwards on the plastic retaining tabs). The bumper cover is held on with plastic push-on tabs across the top as well as a few from underneath. These pop free with a slotted screwdriver. Since they are 15+ years old, they will often fail on removal. There are also a few 10mm screws as well, all from below. The ends of the bumper cover tie into the inner wheel well plastic, but eventually, once the last fastener is free, the bumper just wiggles free.

I next removed the under-headlight trim bits. There is a small plastic push-on thing, like the ones that held the bumper cover, on the inside that attaches the trim bit to the headlight, but the rest of it just clicks into place... or out of place. The headlights are held in place with long Phillips-head bolts from the top, and 2 more on the sides (one connects to the lower radiator support, the other through the side of the fender). The lights unplug, but if they are stubborn, the bulbs which are not the main beam twist out with a 90* twist. Then, the plug can be wrestled free. The last big thing to remove is the fender itself. There are obvious bolts from above, but there is one hidden in the door jam near the top and one from the outside just rear of the wheel well. Of course, before final removal, the inner wheel well needs to be removed, and the antenna needs to be dealt with.
 
super-glued tabs on the flare 


The Inevitable Annoying Bits
The antenna and the inner wheel well skin are the worst part of this parts exchange. The antenna had become heavily oxidized and corroded, completely freezing the top nut. I ultimately broke-off the lower antenna mast so I could continue and ordered a top-to-bottom replacement, adding another $140US to the parts costs. Even on my garage floor, I was unable to separate the antenna bit from the bent fender.

The plastic inner wheel well is held in place by ribbed plastic clips along the inner edge and in a couple spots in the middle. Along the outer edge of the fender, the fender, the inner wheel well and the outer faring (flare) are held together with Phillips/10mm screws. When the truck hit the pole, the 3 top mount points along the outer faring / flare all broke. I did not realize that until I was removing things. Rather than order a replacement ($130US plus delivery), I collected the mounting ears and super-glued them back onto the flare as shown in the picture. Once the superglue had set up, the tabs did not wiggle. Since they broke off so cleanly, I could see their original pitch. So, I simply matched that and held the tabs for a 15 count as the glue set.

With the big parts out of the way, we can see where the little bits that Beaverton Auto Body suggested replacing. There is a small plastic bit that looks like a tiny fist with the hole in it that is Phillips-screwed to the fender. This holds the edge of the bumper in the right spot relative to the fender. There are 2 long thin brackets which support the top and bottom of the bumper cover (and lower leading edge of the fender) which were definitely tweaked. The small triangular bit that attaches to the passenger-side front (front is front) of the radiator support, extends forward to the other end of the long thin bracket, had a subtle twist to it. All of these attach with 10mm bolts, and you can see them installed in the picture above captioned "2 replacement bits in". They are the ones with big white labels.

Start Re-Assembly
windshield washer lines pre-removal
I started with the small bits: the triangular bracket first, and then the support bracket on the passenger side. I decided that the driver side bracket was untouched by the accident, so replacement was unnecessary. I swapped out the driver-side headlight next, re-using the original under-headlight trim bit since it was undamaged. Then, I tackled the fender. It is surprising how much faster install can be when you know where the fasteners go. I started with the 2 most difficult: the one on the bottom, heading straight in from the outside, and the one from inside the door. The bottom bolt is really only difficult because of all the extra lower body trim that appears on the XRunner needs to be loosened and held out of the way. I fear that I will need to completely remove all of the panels on that side because of all the dirt and sand I found in there when I took it apart. That dirt/sand may prevent a clean, tight install. Anyway, with the hard bolts in, I ran the bolts in along the top edge and then the front pair into the new bracket. I am not thrilled with the gap along the hood, but I will concern myself with that once the new hood goes on. It is possible that the hood got tweaked beyond just the small dent in the front corner.

After the fender, I installed the passenger-side headlight and the replacement under-trim. Other than cannibalize plastic fasteners from the bent and broken old body panels, this was as far as I could get at this point. I ordered a set of plastic snap-fasteners, but they had not arrived yet. Also, I had not planned for the antenna, so I could not completely button-up the fender and wheel well anyway. Yes, I could have stopped the post here...

The Hood
only disconnect needed
I was able to source everything, except the hood, from CarParts.com. For the hood, I turned to eBay, and got burned with a hood that arrived with a dent. My cursory inspection upon delivery did not detect that the passenger side had a couple of bashes in it under the cardboard wrap. I had checked the other 3 sides, so lesson learned here: completely unwrap the entire thing before you sign. I didn't know the pair of dents were there until I went to install it after installing the inner wheel skin down below, sadly. So, if I want a clean hood, I will order, pay, wait for and move-bits onto a second hood. FFS. Of course, with the supply chain issues around the world, there is a very small set of these hoods in the western US. In fact, according to the local Toyota dealer, there aren't any.
 
Obviously, the hood is held to the truck by 2 large hinges. Additionally, the windshield washer nozzles are in the hood. There are a few other things to transfer to the new hood, so I simply disconnected the washer hose and removed the bolts to free the hood. Then, I set the old hood next to the new hood in my garage. Piece by piece, with the puppy (Tuukka) watching, I moved the washer nozzles, bits of hose, the sealing rubber bits and the front rubber feet. Those feet are pretty interesting: they are solid rubber and thread in. You set the height of the closed hood by turning them clock or anti-clock wise. Very clever design.
 
There is a sealing strip that runs along the rear edge of the hood, held on by little plastic fasteners. I was able to free them without damaging them by using a door panel removal tool. I expected the washer nozzles and hose to the the hard part, with the scoop insert to be a breeze. It was the opposite, with the hose retainer plastic bits and the washer nozzles popping off with only a little difficulty, but remaining intact for reuse. These bits are held in place by little plastic barbs that need to be pinched in for removal. I used a slotted screwdriver, working one side and then the other until each one was free.

Hood Scoop Insert
The hood scoop insert, however, has seen better days. The mounting studs all backed out of the scoop, rather than allow the nuts to back off the stud. The 2 front studs would not separate from the old hood at all, and last, during install into the new hood, it cracked. This plastic is over 15 years old, and based on the damaged paint on the top of the vehicle and the sand I found in the wheel liner, I think we can conclude that this truck lived at the beach for a while, getting salt water on it while driving on the wet sand. I suspect it was parked outside mostly, as well, further accelerating the aging of the exterior. I will accordingly reset expectations for any other exterior bits I touch going forward.

I ordered a replacement hood scoop insert (another $140US for parts), and started considering doing a complete respray of this thing once the damage has been resolved. Of course, with the way I have to keep buying parts, that respray may need to wait a while. Meanwhile, I was in a holding pattern waiting for parts... and I was looking for a hood, again. Yes, I could have stopped the post here as well.

The Bumper
dry-fitting the bumper
The bumper cover / assembly is actually 6 distinct plastic bits: the main bumper cover, of course, a decorative center piece below the grill, 2 end pieces and 2 lower valences (split in the middle). Of these parts, we damaged 3: the main cover, the passenger-side valence and passenger-side end. All of these parts are held together with these blue wedge-like plastic clips. I was able to salvage all but one (which disappeared), which tells us just how slow moving the crash was. While I waited for parts, I re-assembled the bumper bits, excluding the decorative center. I had thought that I could paint the bumper as an assembly, but, I realized that I would need to take it all apart to install the decorative bit anyway, so I will be taking this all apart to shoot it. Of course, I put all this together mentally after I had put the bumper together physically. LOLs.

Still, by having the bumper bits together, I could dry-fit the front end together. Also, this reduced a big pile of parts in my small garage, and it helped me understand what bits I could sell-off, and which I still needed. For example, I discovered that there are little rubber strips between the main bumper cover and both the lower valences and the end bits. In the upper dry-fit picture, you can see the old valences on the ground below. A keen eye could see the rubber seals on top. I will be re-claiming those rubber bits before I dispose of the broken plastic parts. As you can also see. I have not removed the protective film from the lights yet; no need to tempt fate.

More Parts Arrive...
dry-fitting with the grille
After another week of waiting, things I ordered during the tear-down / re-assembly started to appear on my doorstep. So, I got back to it, starting with the antenna.
 
The antenna arrives with a stretch of cable that's about 1/2 a meter long with a pair of mounting clips already attached. This cable passes through the side wall and the fire wall up behind the glove box, and then runs up into the A pillar where it plugs into another cable. This seems like a strange design, but it's how it is. To access everything, the glove box needs to come out and the passenger grab handle needs to come out. There are a couple of plastic retaining clips that need to be popped (the OEM replacement antenna arrives with new clips) and then it is ready for removal. I attached a string to the end of the antenna cable and pulled it out through the side wall. I moved the string from the old cable to the new and pulled the string, bringing the cable along the original path.
 
The plastic tabs were in the right spots, and they popped in. The one in the rear of the picture below was a little difficult, but only because it is in a hard-to-get-to spot. I found by getting the front edge of the clip (front is front) first, allowed me to put pressure on the rear edge with a slotted screwdriver, snapping it home. Once the cable was in, the panels were installed in the order I removed them. The leading edge of the A-pillar trim inserts into a slot on the edge of the dash (seen in picture below) while the upper end has a tab that also fits into a slot: idiot-proof. The grab handle only fits into the A-pillar trim one way, and, because of the tabs, the mounting bolts align without effort. Inside the fender, the cable has a rubber grommet to seal the pass-thru hole. The top of the lower mast is then passed up into the hole in the fender and the lower end is bolted to a mounting tab with a 10mm bolt. After all the wrestling with German over-engineering, I really like this Japanese design. I feel like the Tacoma was built with owner maintenance in mind. I finished up the antenna on top of the fender with the outer rubber bit and nut and then threaded on the upper mast.

The Inner Wheel Well
installing antenna
All I had left was the inner wheel well, but I didn't explain the assembly of the rest of the bumper. As I mentioned earlier, I assembled the bumper, but I needed the bits to mount it. This was a straight-forward matter of using the plastic snap-clips where they belonged, and using the 10mm screws where they belonged. Since I failed to take quality pictures during tear-down, this was not as smooth as it could have been. Still, it all went together, leaving the passenger side wheel well. I purchased a replacement inner skin because I saw that the original had been damaged in the accident. The new liner was an exact match, and fitting it was not as terrible as installing on the old Jettas, but it was pretty close. These plastic liner things are the absolute worst. I did the outer edge last, simply because this edge also held the flare in place and I felt trying to juggle 3 things which were not in any way attached was at least one too many. The inner edge was straightforward: set the plastic skin where it is supposed to be and slam the plastic bit through the holes. The challenge for me was getting the square holes in the skin to consistently align with the square holes in the under-body.

With the skin now held in place by a handful of plastic bits, the outer edge was easier. I started at rear bottom and worked my way up. Again, having pictures would have been helpful so I could confidently set the skin / fender / flare stack correctly. Absent that, I just considered where water would go. So, I put the inner skin "outside" the fender along the rear edge for the first 3 fasteners (block water kick-up from the tires from getting inside fender) and at a cut-out transitioned it "inside" (so water drips from above don't run under the inner skin). At this point, I attempted to mount the fender flare. The super glue repair I described above failed almost immediately, so I shifted to the hood.... at which point I discovered the dents and my progress halted again.
 
I am going to halt this post here, and pick it up in another one. This has gotten very long, matching the saga, and the truck is still not in one piece. And, again, I'm waiting for parts.

Thanks for following along and more next time-

Tuesday, November 3, 2020

Bondo Sand Repeat

Back months ago, I said something like "you're never really ready for paint", and that's because we generally get in our own way. Today's meandering post is about how I am refusing to accept the prep and start shooting primer. Of course, the temperatures running below the recommended by the paint manufacturer isn't helping.

For those of you in the US, today is Election Day. While so many are focused on the Presidential race, there are many races and measures on the ballot that could impact your life more directly. I hope you took the time to vote, and are here reading this as an escape from election coverage. I know I look at my cars as an opportunity for respite, away from the challenges of every day life (or political bs). This blog is absolutely a part of that, and I'll leave it at that.

Bondo Zed
I had a whole post not too long ago about how I thought I was done with the body work on Zed only to do some more. Well, since then, I just can't let it go. I keep finding little things, and I can't let them go. So, I whip up another batch, apply, sand and recheck. I have lost track of how many cycles I have done, but I would like to think that I'm learning along the way. Since I don't know how well the hi-build primer is going to fix things, I may be overdoing things. Regardless, one of my motivators is my color choice for the finished product.

Color Thinking
silver Datsun 280ZX from wikipedia
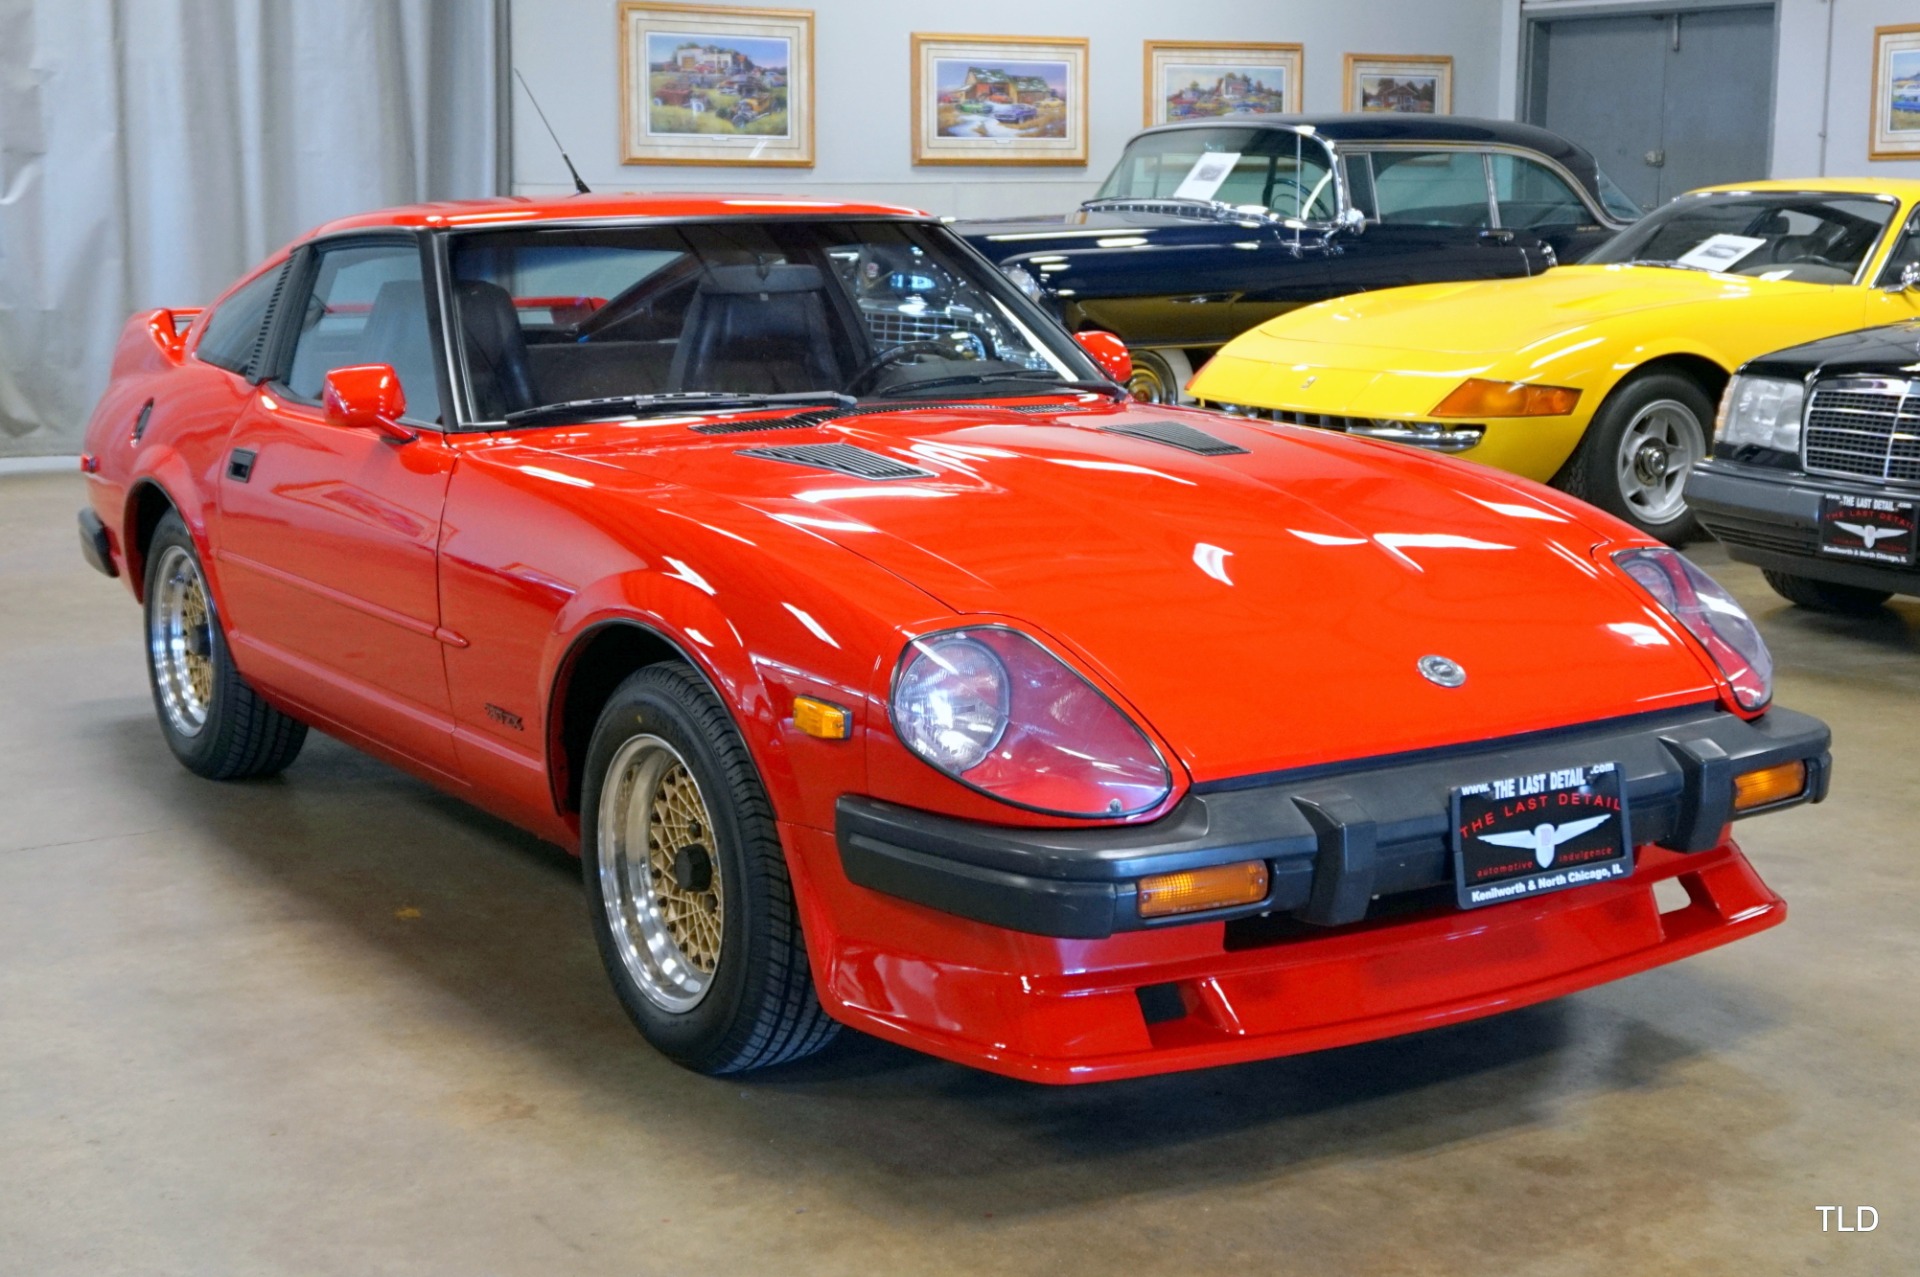
I spent a few hours looking at pictures of 280ZX's, trying to land on a color. I entered the search with something in mind, but I wanted to see what these cars looked like in a finished state. I also recognized that the darker the paint color, and the higher the gloss, the more imperfections in the paint prep are visible. So, if you go with a dark dark black with a super high gloss so you could, potentially, see a clear reflection from feet away. The prep work needs to be perfect for a color and finish like that. At the other end of that spectrum, if you paint a low-sheen white or off-white, the little misses are not as obvious. I have found a dirty white car looks cleaner than a dirty black car too, but I digress. So, if your vehicle looks good in white or cream or light yellow and it's your first paint job (or you don't have a lot of time), the minor things may not be nearly as visible if you go with one of those colors. So, what do I mean by "minor things"?

Minor Misses
red Datsun 280ZX
all cars look good in red
The kinds of things I am finding during these last rounds with the Zed are varied. One example is larger, but very shallow indentations in an otherwise straight panel. For example, on the hood, there are multiple little sags in the metal that look almost like they appeared because a child sat on the hood and it depressed a little bit. If the hood was painted flat black, would it show? Probably not too much, but I have done my best to minimize those shallow sags. I have also found very small, but deep chips in the steel. They almost look like someone took a jeweler's screwdriver and stabbed the panel. Multiple times. These could have been filled by the hi-build 2k primer, but I fixed them with bondo instead just to be sure.

Ultimately, panel by panel, I would feel like the panel was done, so I would wipe it down with a towel. Then, I would go over it lightly with 400 grit to get the metal and the patches all the same degree of smooth, at the level pre-described by the paint manufacturer. Last, I would hold it up to the light at various angles, slide my bare hands over the entire panel, both quickly and super slow.. seeking something that felt wrong. Piece by piece I would accept a panel and set it aside. First, it was the 2 doors, then a fender, then the hood and finally that last fender. Ironically, the first area that I accepted was the main shell (rear quarters and tin top).

Zed Color
dark gray color sample
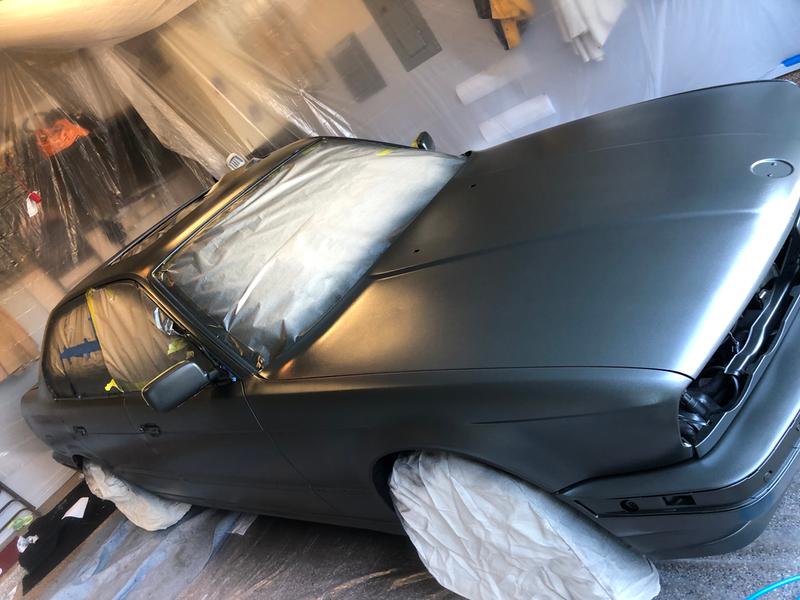
Eastwood intermix gray
All this time, I'm thinking about what color I want to shoot Zed. When C was doing the work, he was thinking flat-black. While I agree that some cars, possibly even a 280ZX, look great in flat black. I'm not sure I want to go that way for the entire car. Like I indicated above, I looked at lots of pictures, and, while there are lots of colors of 280ZX's out there, only a small handful of colors really look good. Of course, this is totally my opinion, and the shortlist is basically the color list that pretty much every car looks good in: Red, Dark Blue, Silver, Dark Gray and Black. Zed was silver when we got him, Flash is silver and KLack is silver, so pretty much silver is out. I intend to paint the lower 2/3 of Hapy a dark blue so that's out. High gloss black would show too many imperfections and it is well documented (though I can't find a link) that red cars are pulled over most often, so that leaves Dark Gray. This is sort of a compromise between Black and Silver, both of which look really good on a 280ZX. 

metallic gray color sample
Eastwood 9mm Gray
So, I take this idea to my resident style expert (Boo) who suggested that maybe a metallic flake would look better. We are looking at Eastwood's 9mm Gunmetal Gray Metallic -or- their GearHead Gray Intermix. We are going to need 2 gallons anyway, since I will be shooting inside the hood, some interior spots that don't get covered with plastic, etc. So, the cost ends up being about the same. Based on the photos, I tend to agree with her. The metallic flake looks like it creates more depth, and may be a little darker. What is hard to tell is which one will be more forgiving of my prep work. The picture on the right here is of a BMW 5-series shot with the Eastwood 9mm Gray. The owner had not yet color sanded nor clear-coated it, so it is a very honest image of what it looks like fresh from the gun. It looks a lot like the graphite metallic gray color I have seen on a 2019 or 2020 Mercedes.

I guess that's it for today. The primer shipping fiasco has finally come to a conclusion, with it's arrival during the cold snap. We are not expecting weather to be accommodating to spraying paint for much longer. So, while I may be ready for shooting primer, I may not actually have an opportunity to shoot it unless I figure out how to put sides and a non-flame heat source inside the car ports. Before then, I still have to metal etch the bare steel, wipe the whole thing down with degreaser and mineral sprits and, of course, complete the masking. So, there is still plenty to do before I'm ready to actually put primer in a gun and start shooting. Honestly, it could be Spring before priming actually happens.

Thanks, as always, for following along-

Tuesday, August 18, 2020

If You Love... Set It Free

Weird post today, but it IS car-related. Before I begin, today is the birthday of my lovely wife of 7.75 years. Boo, you are amazing, an inspiration and the love of my life. So glad we found each other, and we can enjoy this life together, laughing through the good times and leaning into each other through the hard times.

If You Love Someone (or something)
So, In my last post, I mentioned how T is leaving Eugene for music school in LA (well, Burbank, actually). Similar to my barely-escaped-disaster departure from southern Nevada when I was his age, he had to sell his car for money for that new life. So, he had to sell Nemo. But, in another twist for how to make money for music school, he got hired by a forest fire fighting crew.... and got sent into the bush. So, how does someone sell a car when they are nowhere near it? Consider too, that he is effectively homeless, having vacated the house, and crashing on a friend's couch when he's not fighting fires. The answer? Your dad buys it from you. Yeah, I'm a big frickin' softy, and I bought that A4.

Set It Free
The decision to buy it was actually the easy part. Then, we had to figure out how to get it from Eugene back to the corral. I say corral, because now I have an absolute embarrassment of riches in terms of cars. I mean, this is ridiculous. It's a good thing I have a long and somewhat hidden driveway or my neighbors would be rightfully wondering WTF is going on over here. It was almost like Nemo didn't want to be set free. He did everything he could to stymie our efforts. First, he got his passenger window smashed in... twice, and had the stereo and T's new forest-fire fighting boots stolen. Then, he popped the charged air hose off the intercooler, stranding T. Last, he started leaking oil, leaving spots everywhere, but also forcing regular pull-overs on the drive from Eugene to Beaverton to top off the oil. After an Odyssey worthy of epic poetry, T arrived with Nemo, packed with stuff we'll be holding for him until fire season ends. Oh, did I mention that part? Yeah... my once-viable-as-a-shop garage is now full of not-my-stuff.

If They Come Back
At this point, the expectation is that fire season will end or the start of school will arrive and T will come back to Beaverton for his stuff. That won't include Nemo. As for Nemo, I will be fixing the smashed window, and fixing the oil leak. I may have to do other things, but eventually I'll be selling him... I think. I don't know. Now that he's in the driveway, Boo thinks he looks pretty darn good. With the upgraded suspension, turbo and intercooler, it is a super-fun sled. T did the timing belt and the clutch as well as the master/slave clutch hydraulics and replaced the sunroof while he had it. I did the head gasket, and a few random things over the years, so we have gone through a lot of the expensive stuff already. So.... maybe we will jettison a different member of the fleet.

He/She/It is Yours
Which brings us to what am I going to do with all of these cars. While I may not be at "Rust Valley" level, for a suburban cul-de-sac, I kind of am. For posterity, this is what is currently in the corral:
Hapy - 1972 VW camperbus (TDI transplant from '98 Beetle, Riviera top, '79 westy bits)
Oliver - 1978 MGB (Mikoni side-draft carb, stainless header-back exhaust, new interior)
Zed - 1979 Datsun 280ZX (still in pieces, still not ready for paint)
K'Lack - 2004 VW Jetta Wagon TDI (Boo daily-driver car)
Flash - 2001 VW Jetta TDI (my car, tho with CoViD it hasn't seen tarmac since June)
unnamed - 2006 Subaru (C's car)
Nemo - 1997 A4 1.8T Quattro (up-rated suspension, turbo, intercooler)

Yeah, that's 7 cars. All in one suburban driveway. Again, like my complaints about having that house in Eugene, this is just too far into first-world problem for most folks, and I apologize for any who are offended. I'm a little offended. Like smelling myself after a particularly good hot sweat. Yuck. So, what's the shower in this metaphor? I think it is selling off or long-term lending out cars that we don't use, starting with Flash. Then, finish the Zed and sell it. Last, make a decision on Nemo.

If They Don't,
Years ago, I set out to get a $1000 car for each of my boys when they were entering high school. I figured that they could learn about cars and we would have something to work on together. In many ways, that was true. Psychologists believe that one great way to connect with your kids is to do something with them. While their hands are busy with whatever that something is, you talk about stuff. Before you know it. you're maintaining a relationship through the awful puberty high school years and maybe they learned something about cars. In all of those ways, this worked. I was wrong in one significant way, though: I thought that by putting this time into a car, they would love it more, and want to keep it, drive it carefully, etc. Nope. Instead, I just put my $1000 in a 0 percent-interest account for a few years, so I could spend that same $1000 later, to buy the car from them to finish.

They Never Were
Ultimately, they learned that ...having an unreliable car is a major pain in the butt. ...not having a car at all is preferable to breaking down on the side of the road and then having your window smashed in because you didn't get it towed soon enough. ...having a car in pieces in the garage for years at a time is not really the same as actually having a car. ...choosing between food and car parts is not a choice they want to make. So, C saved all his money for a reliable car that will require no more than routine maintenance. And T? He sold me Nemo and has decided that he won't have a car in Burbank.

That's it for today. As to the house in Eugene, Boo and I have finished the work down there. Our road trip got cancelled, so I will be shifting focus back onto cars. It is hard to imagine the rainy season approaching when it is 37*C (100*F) and clear skies, but I know my time is limited. So, even though I could probably thin the herd faster by getting Flash and Nemo ready first, I will probably focus on Zed so he can possibly have paint before the cold wet arrives in mid-October.

Thanks, as always for following along. I guess the break wasn't as long as I thought it would be. That's what happens when your life-partner works harder than you do, and you both are 100% focused on the same goals. More when there's more-

Tuesday, March 17, 2020

Side-Marker Lights

This is my first post since CoVid-19 completely took over the international conversation with cancelled professional leagues, concert tours and pretty much every other social outing. Boo hit the grocery for our usual restock and what she saw was out of a zombie apocalypse movie: partially filled carts strewn all over the place, shelves stripped to nothing in some areas (toilet paper?) and virtually untouched in others (fresh produce). And, of course, tons of people, having lost all sense of public-face calm, filling their carts with strange things like cases of Gatorade. People are weird when they're scared, or maybe they don't usually cook at home. Either way, the world is very odd today.

My employer has directed all of us to stay home and work remotely thru 3-April, so I expect I will be getting cabin fever stir-crazy quite soon. Since today is St. Patrick's Day, may we all have a little touch of the Irish luck and see this pandemic pass quickly. Anyway, where was I? Oh yeah. Side Marker Lights.

Side Markers - Original
When I first got Hapy, the side lights didn't work. I didn't think much of it since they were cracked and had nasty looking moss growing inside them anyway. Later, I removed them when I thought I was going to paint him. I got as far as priming him. I figure when I finally do get to painting him, I don't want to wrestle with the side markers. I figured I could do that now.

On the early bay-window bus, there is a single side marker light, located rear-ward of the rear tire, fairly low on the body. Each one is wired into the respective tail light for juice courtesy of the wiring loom. Or at least that's how they're supposed to be set up. Once I got into it, I discovered why my side markers didn't work: the wiring was gone. Just cut away. Oh well. No judging. I have done some things on this bus that will scratch some heads, but this left me with a puzzle.

Side Marker - Passenger Side
Without wiring, I decided that I would tap into the tail light, so I spliced off of both the housing ground and the running-light signal. This was fairly straight-forward with some female dis-connectors and some 16ga wire. Mounting the light was far more interesting. The old set up was falling apart when I took it off, and it was so long ago, I don't have a clear picture of how it was on there. If memory serves, the outer lens was held on with long screws run through the bulb-holder and into the side of the bus. When I tried to align the new holder, with the correct snap-in plastic buttons, there were no holes in the bus to pop them through. They had been filled with bondo prior to my getting Hapy. Sweet. I chose to drill holes where the holes should have been and then attach the holder with a pair of short screws through those holes. That mostly worked, and once the bulb was set I was able to successfully test that the wiring was good (see picture),

Side Marker - Driver Side
While pushing and shoving on the wiring harness near the driver side (looking for the side marker wires), I managed to cause a failure in the driver-side running light. I looked at the wiring diagram, and it looks like that bulb has it's own fuse and circuit from the fuse box. Since the fuse box only has, like, 12 fuses, I thought this was super weird. I was not going to run a new wire from the fuse box and this was not going to be the watershed moment where I decide to replace the whole harness (which, if you remember, I got when the ignition fried, and cannot return). Instead, I did a classic DPO move. I changed the wiring for the passenger-side side marker into a 2-wire splice, running a long wire along the original harness over the engine hatch to the driver-side tail light. At this point, I made a second 2-wire splice, sending one into the running light in the tail light housing and one to the side-marker.

Unlike the passenger side, the driver side had all of the correct holes. Unfortunately, this install showed that the replacement parts do not have a "pop-in" plastic nub that is long enough to actually snap the housing into place. Since the nubs are easily removed, I simply pushed a bolt through the housing and the side of the bus and threaded on a washer and nut from inside the engine compartment. I popped in a bulb, tested and then shifted to the lens. The lens set on easily enough, though they do not ship with screws/bolts so you're on your own for those. Once all assembled, I re-confirmed the running lights work all-around (again, see picture).

K'Lack Came Back
I intend to continue doing these low-risk things until I am ready to tackle 2 big projects on Hapy: (1) re-wiring the front-to-rear using a cable and (2) implementing a defroster. Both of those will be big, and I'd like some dry weather before I start them. But first, we finally got K'Lack (our TDI wagon) back from the transmission shop. Recall that K'Lack was suffering a form of morning sickness, being unwilling to shift out of first on cold mornings. I thought it was from old activators inside the transmission, so we took it back to the rebuilder to swap them out. That wasn't it. After 2 months of trying to figure out the mystery, they discovered that the rebuild kit they were sent for the rebuild a year ago was for a 01P not a 01M transmission. After trying everything else, they pulled the transmission, rebuilt it again and compared the servos to the ones they removed and learned that they are different sizes, but barely noticeably. Anyway, with K'Lack back in service, I can pull Oliver (the MGB) off the road and fit him with a catalytic converter before he is due for Oregon DEQ in May.

Remember how at the end of the TDI retrospectives (here) I said that there would be a gap in postings for a while as my projects got spun back up? Well, I think that's finally going to happen now that K'Lack is back. With 2 operational cars, K'Lack and Flash, I can comfortably take Oliver and Hapy out of service. So, the project fun is about to begin, but that means that the blog silence is as well.

Thanks, as always, for following along. There will be more when something I haven't started yet is close to completion. Wash your hands, for 20 seconds, many times a day, my friends --