Tuesday, November 29, 2022

Fare Well, Nemo

Brief post today.

Nemo Departs
This past Spring/Summer, I thought I had sold Nemo (1997 Audi A4 Quattro) to our friend Garry. After repairing the driver rear bearing and replacing the axle with it, the power steering blew a hose and he lost interest. So, it came back. Truth be told, Nemo never left the driveway; Garry did the repair here. I figured I would do what was needed to get Nemo through smog and then figure out what to do. So, I repaired his exhaust, replaced the catalytic converter, downpipe and O2 sensor. I was ready to take him to Oregon DEQ when  the NewOldHouse purchase happened and so Nemo just kind of sat. Fast forward a few weeks and I get a text from Garry, now living in Idaho. His friend expressed interest. So, I shot some pictures and video with my phone and sent them on. 2 days later, he is here, with a friend, a truck and a tow-dolly. They crawled around on Nemo for a while, took him for a drive.... paid me cash and drove away with him. Just like that, the herd is thinned my one.

Mom Moves
With my Dad's rather sudden decline and then final departure early this month, my Mom lost the person who had eyes on her 24/7. Her health has been an issue for some time, so having her living alone in a somewhat basic assisted-living facility was no longer safe for her or the facility. So, she is moving to a stepped-care facility 4 blocks from here. That move is today (29-Nov). Since her space is significantly reducing, we will move her and her most treasured belongings to the new place. Everything else is moving here, so it can be gone through with heat and beverages and comfortable seating.

NewOldHouse Update
Since my CoViD battle ended, I have returned in earnest to the restoration of the NewOldHouse. When the flooring guys were here last Summer, they removed all of the 1/4-round. As they removed it, they clumped it by room and taped the clumps together. Unfortunately, some of that careful work was undone, and some of the 1/4-round went to the dump. What remains is semi-documented. I have been puzzling-out which pieces go where, re-marking them and then shooting them with BIN primer. Once dry, I set the pieces where they will be re-attached to the baseboard. Prior to priming, they get the nails removed and then a good cleaning. I have a small pile of un-matched pieces and a larger pile of not-yet-attempted pieces. I will be continuing this game next weekend.

Other than playing with 1/4-round, I resolved the canopy catastrophe, consolidating 2 damaged canopies into one viable one. You can see things are back to "normal" in the picture on the right, with the "Jerry" canopy restored. If you look closely, you can see stacks of 1/4-round under the canopy on the left (Phil). I have also cleaned, rust-converted and painted the heat vents. We decided that the original vents could be salvaged, and if they were painted a color that roughly matched the floor, they would sort of disappear into the wood floor. For the most part, this turned out to be correct, though I don't have a good picture to share.

The bathroom progress was temporarily halted by the discovery of the sub-floor damage. Boo crawled back under the house to see how extensive it was.. and it is really quite contained. There are 3 1x4 (sub-floor) boards that rest between the top of the beams and the wood floor which need to be replaced. But even then, the section that needs replacing is only between 2 beams, and the beams themselves are in great condition, showing no damage from the leak.

As part of the preparation for a bunch of mom's stuff appearing here, I tore down the living room stereo equipment and moved it out of the way. While this isn't terribly interesting stuff, it does further prove that life is either Tetris or Monopoly, and today it's Tetris.

With each passing day spent at NewOldHouse, it feels more and more ready for occupancy. Sure, we don't have a functioning bathroom yet, nor will we have a functioning kitchen for some time. Still, we believe that we will be moving into NewOldHouse by the end of January. I guess that's it for today. I know there isn't much car content these days; that is also true of my life, and I feel it. The sooner the house is ready, the sooner I will be back wrenching on Hapy. Thanks, as always, for following along-

Tuesday, November 22, 2022

Hello Windstorm, My Old Friend

I mentioned in my last post that I caught myself a CoViD. It's been a heck of a head-cold, and I can't remember ever sleeping this much, but I am steadily improving. Today's post is a random collection of updates, starting with NewOldHouse. Before I begin, for my US readers, have a Happy Thanksgiving. As I have years prior, I hope this year you are able to find yourself somewhere other than a retailer's line on Friday.

Canopy Calamity Catastrophe
#$%@!
This Fall, our typical 4 to 6 weeks of steady rainfall has been replaced with a couple of weeks of rain, followed by cold and dry conditions. With the cold and dry came strong blustering winds which have felled some tree branches around here, but I have heard of friends across town (closer to the Columbia Gorge) where trees went down.

In anticipation of our seasonal wet, I had assembled 4 canopies to protect cars at NewOldHouse. This was a stop-gap until I can afford to get something more substantial like a shop structure thing in the back lot so we can tinker on cars all year round. The canopies are not really designed for winds above, say, 25 mph, and definitely not rated for gusting winds pretty much at any speed. So, my plan was pitch-perfect for the kind of weather we usually get, but flat-wrong for the kind of weather we ended up with. To offset the lift presented by the wind, I used a few tactics. Tying rope from the canopy to fixed objects on the ground seemed most effective, but I also tied rope to bags of tire chains, adding a few pounds of ballast to the canopy. For the most part, this worked at current house, and I didn't lose a canopy terribly often to wind toppling it over.

At NewOldHouse, I took another step: tying a rope between the canopy and a 5-gallon bucket full of water. This worked great, until the regular seasonal breezes were replaced with a full-on multi-day wind storm. The canopy closest to the house, Jerry, got caught in the wind and it lifted up and over the eaves, slamming upside-down onto the new roof (picture on the right). Fortunately, the roof is fine, but the canopy got bent badly in multiple places, rendering irreparable. Worse, this was the canopy over Zed (recently painted 1978 280ZX), and one or more of the legs of the canopy caught the car as it was lifted and destroyed. I have removed the canopy, and if I am unable to buff-out the scratches, I may very well be painting that car a 3rd time. Sweet.

The canopy at the far other end, Bob, also flipped over, and a couple of its steel poles were fractured when it happened. Fortunately, nothing was underneath that canopy, but I had planned to put Oliver, the 1978 MGB convertible there. It's a good thing I didn't or that convertible might need a replacement top right now. Between the 2 flipped canopies, I will lose one of the 4 covered spots (Bob) as I will consolidate the not-broken pieces into a reconstructed Jerry. I don't know how/where I will put Oliver between now and when a more permanent roof is constructed. We may need to part ways to keep him in good health.

Bathroom Refresh
The bathroom in NewOldHouse was one of the areas which needed to be redone before Boo and I could really move in. Now that all the other areas have been sorted (except for the kitchen and the 1/4-round), Boo shifted focus to the bathroom. She remodeled a bathroom by herself when she owned a condo years ago, so she knows exactly how to get after this. In fact, in that effort, she needed to get down to the wall studs and floor supports. After removing the old flooring, it was discovered that some of the sub-floor was water damaged, and there had been some bug damage to the sub-floor wood after it was water damaged. The bug activity appears to have been dormant for quite some time, though. So, after pulling the sink, cabinet and toilet, she has gotten elbows-deep into repairing the sub-floor. If things go according to plan, the bathroom should be back to a usable state in a couple of weeks.

Helping Mom
My mom and my dad had been married since 1965, so his departure from this world early this month has left her in an unusual position: alone. She needs much more consistent oversight than her current lightly-assisted living (and now alone) situation provides, so my brothers, sisters and I are rapidly moving her to a facility that will provide more support and much more social engagement. One upside of her move is that she will be 4 blocks away from Boo and me, so we can visit her much more easily (she was 40 minutes one-way by car without traffic or weather issues). As part this move, however, she will be moving into a much smaller personal space, so most of her and Dad's belongings will be routing through our house before they are distributed to their eventual new owners. The old facility needs to be emptied quickly, and since we kind of have one empty house, it makes sense for the sorting to happen here where there is room and means for making tea. The other alternative was a storage facility, but those don't have heat nor tea-making and cost monthly. Her health and strength has been increasing in the days since my father passed away. We are all very interested to see just how far down this path she can go from once bed-ridden to now taking a few steps with assistance, it is entirely possible that she could return to the mobility she had 2 or 3 years ago, which wasn't tap-dancing, but she was able to move independently with a walker. As they say, we will see.

Moving Starts
move begins
While the section above about not having a bathroom might lead you to think we are not ready to move things, we started anyway. We considered waiting, but also realized that this cold, but more importantly, DRY weather will not last very long. At some point, it will either shift to freezing rain / ice or just plain rain. Either way, it is precipitation, which makes moving with an open-bed pickup truck all the more unpleasant. Also, with the sudden need to empty mom and dad's old place somewhere, we needed some clear space to deposit those things. Our current house seemed like a better option. So, we started with 2 adjacent rooms we really don't use much (front living room and the dining room-turned music room), hauling items over to the NewOldHouse. I truly believe moving is only interesting to the people who are moving, so I'll leave this update at that. As you can see in the picture, here, we started with some music gear, though the 1/4-round install has barely started. When the calendar is not your own, compromise is necessary. 

I am feeling much better, CoViD-wise. For example, Boo and I took yesterday off from our own 2-house 2-step to help Boo's sister Rose load and move a cord of firewood. The exercise in the crisp fresh autumn air was very therapeutic. That's it for today. Thanks, as always, for following along-

Tuesday, November 15, 2022

If It Doesn't Move, Paint It (Final)

After weeks of spackle, caulk and masking, we were finally ready to shoot the interior of NewOldHouse. We would have arrived here earlier had we not digressed outdoors, but when the rains come, you need to have already gotten your wet/dry solved, or you will be doing it in the rain while everything gets wet. Anyway, today's post covers the final adventure in paint, and a few other things that happened along the way because.. of course.

Just as I completed the work described in this post, I tested positive for CoViD. I am living proof that living a hermit lifestyle is not a guarantee that you won't get CoViD. I have been going to a pizza place in Hillsboro for an open jam on Wednesdays as my only outing, so at least I know where it happened. I've been down nearly 10 days with it now, so progress on cars, the house, even my job is, obviously, halted. Good times.

The Walls Came Down
thar's a furnace in thar
For some reason, when the prior owners installed the gas furnace, they put it into the main living space. I thought it was because of the proximity to the chimney, but from the garage, there is a straight path to the chimney as well, and popping an exhaust through the roof would not have been that difficult. Instead, they put it into the dining area, and then... built walls around it. The new walls were, probably, a foot away from the furnace while the furnace was located 6 inches or so from the original wall. We couldn't figure out the thinking, but we didn't like the furnace location, nor the walls. With a plan to eventually move the furnace into the garage, I tore down the walls around it.

I took the time to remove the baseboards, the door trim, door frames and the doors. I removed the trim nails and collected these reusable bits onto the garage rafters. I then went after the drywall with a rubber mallet. I didn't want to make a huge mess, I just wanted the walls down. So, I loosened the drywall from behind and then pulled sections off with gloved hands. The refuse went out to the dump pile, and I turned to the framing. This was fun. I smacked the inner wall framing a couple of times with the long-handle sledge until the bottom came free. Then, I wrenched the 2x4 back and forth to remove it from the upper. One by one the inner pieces were removed, leaving the corner and the door frames. For the door frame-framing (the 2x4's that create the rough door opening to which the door frame is attached), I removed the header first, and then the side pieces could remove in a similar fashion to the middle framing bits. Then, I took out the corner. Again, this was simply smashing with a sledge and prying with a wrecking bar until they gave way. Most of the corner came out in one large section. The ends nearest the original walls were next, and the top plate came down with those, leaving the footer. the footers were set into the original hardwood floor with 3-inch-long nails. To get to those, I carved out the top of the 2x4 with a screwdriver and then leveraged the top of the nail enough to fit the wrecking bar underneath. Some subtle pressure later and the nails were out, and the footer was out. The space seemed much larger.
 
More Masking
walls? what walls?
With the furnace now exposed, I could paint those original walls, but I did not want paint on the furnace or the nicely finished original wood floors around it. So, I spent a couple of hours with paper, plastic and tape covering everything except the venting on the front of the furnace and the exhaust to the chimney. I left those for actual paint-time because I want to keep running the furnace until then.  I know that the exhaust would meld or burn anything I wrapped it with and the front of the furnace needs to be open when in service. On paint day, I turned the furnace off for the shoot, and covered the exhaust with film, the front of the furnace with a sheet of waste cardboard.

Prime Time
Nemo at NewOldHouse
After the walls were washed and I had checked and rechecked that everything had been masked, I had considered priming everything. I decided that it was probably excessive, especially considering how clean the walls were once Boo was done with them. Still, there were some stains, so we got some some Kilz2 to cover them. The Kilz2 does not cover odors, and there were still some remaining cat smells. So, I thought about getting some original oil-based Kilz and shooting the lower 3 feet of all the walls to try to contain that. Again, overkill. I concluded that the cat urine smell was probably not in the plaster, it is probably coming from that space between the hardwood floor and the baseboards. So, I decided that after we stripped the masking out, I would shoot that space with some enzyme-based cleaner (like this).

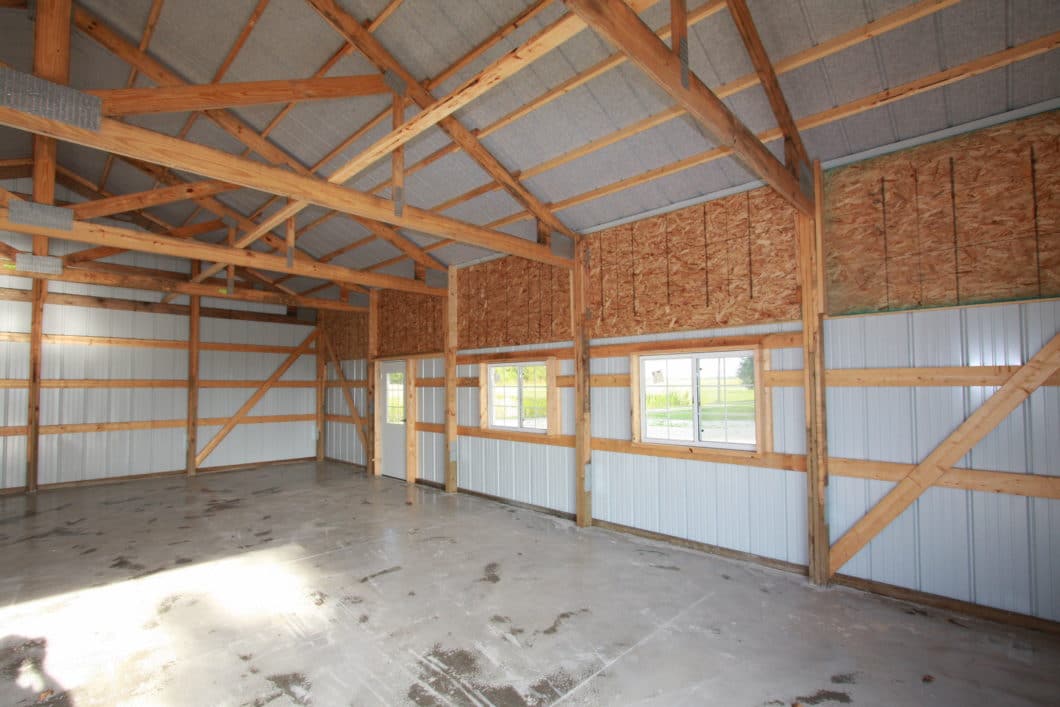
While I did not prime everything, I did prime the popcorn ceilings in the "new addition" bedrooms (built in early 60's) out of concern for how much paint they would suck up. I shot the stains as well as the original pink paint that appeared where I removed the walls around the furnace, and the area in one of the addition bedrooms where a shelving unit had been removed. Most of these areas were reachable without having to move the sprayer. I needed to move it once, from the rear of the house to where the furnace is. Before I cleaned up the equipment and put everything away, though, I took the operation out to the now-clean future tool/parts shed and shot that entire interior with the Kilz2. It was bare wood, and I figured painting it white would help illuminate the space once filled with shelves and some lighting. The shed has a high shelf/storage area so unlike my spray adventures so far, I needed to work from a ladder to hit the shelf and ceiling well. Even still, this spray was fast, and since I had started early in the day, I felt confident that I could get most of the interior spray done.

Shooting for Good... Enough
tool shed primed
Our original plan was to buy really good white exterior paint. At $300US per 5 gallons, we changed our minds, and bought generic indoor/outdoor eggshell white paint. The house is still white, but we may need to paint again sooner. So what? There is quite a bit of siding that needs replacing, so little harm done. Fast-forward a few weeks and Boo and I got to a similar conversation about the interior paint. I painted our current house interior with an eggshell "Brazilian Tan", which is beautiful, but the house was already dark and even though the Brazilian Tan was lighter than the paint it went on top of, it's still pretty dark in there. Even in the summer. NewOldHouse is not in perma-shade like the current place it, but we decided we want it to be super bright.

We talked about painting the walls with some color, but the main rooms have coved ceilings, making it difficult to draw a line where the colored wall would meet a white ceiling. Many older houses have a picture rail that will draw that line for you. Since we don't, and we were not sure what to do color-wise AND draw-the-line-wise, we went with.... generic indoor/outdoor eggshell white paint. Sound familiar? Yep, it's the exact same paint. Why keep all these tins of touch-up paint when you can keep only one? LOL. I'm sure this paint will be acting as a primer for the next coat (that has a color), it's just a question of when. For now, white walls go with any decor... well... they will go with ours anyway.

Paint On!
furthest room shot
With the stains and popcorn ceilings primed, I switched over from the Kilz2 to the eggshell and grabbed a quick bite. My time shooting Zed taught me that once you start, you really can't stop unless there is a clear line where the painting can stop. I also remembered that ventilation is super important, so I set a box fan in the open front door (blowing out), and had the kitchen windows wide open. I wasn't sure how long the Kilz2 had been drying on the ceilings in the back bedrooms, so I started with the shed. This gave Boo the most time remaining to clean whatever walls or ceilings we had not yet cleaned. By doing the shed first, I also took advantage of the little daylight Oregon has at this time of year. The shed painted like it primed, though I fogged (light passes at a greater distance) some of the wood panels after I completed the shoot, trying to get consistent coverage. In the end, most of the walls will be covered with shelves, so the handiwork won't really show, but I have a hard time half-assing things.

Once the tool shed was painted, I moved the sprayer into the furthest new-addition bedroom, and shot it completely. I started with the closet and then the ceiling. Then, I shot the window frames and finally the walls and baseboard, working my way towards the doorway. This kept the paint hose from hitting freshly painted walls or trim, and the sprayer in one spot for the duration of that room. Once the rest of the room was done, I moved the sprayer into the next bedroom and shot the doorway and the door. Last, I cracked the large window to let some fresh air in.
 
front living room shot
I sprayed the next bedroom following the same pattern: closet, ceiling, window frames, walls and baseboards. Again, I backed my way out of the room, moved the sprayer and then shot the doorway and the door. I continued this pattern, backing down the rear hallway, shooting the ceiling, then walls before moving the sprayer into the one original bedroom. Unlike the other 2 bedrooms, I decided that shooting the window frames early effectively restricted the amount of light I had to work with. So, I shot the window frame after I did the baseboards. Similar to the other rooms, though, I left the space around the doorway for after I moved the sprayer, and shot that area last. After cracking the window, I hit the hallway, turned off the furnace, removed the thermostat and then shot the hallway, avoiding the cold air intake.
 
At this point, it was past 430PM, so twilight was setting in. Without meaningful light, my shoot was done for the day. So, I popped the thermostat back in, turned the furnace on and cleaned up the sprayer for the night.
 
Second Verse, Same as the First
main room, start of day 2
When I returned the following morning, I walked the area which needed to be painted. The furnace was not 100% covered yet and in the middle of the main space Boo and I had set out all of the built-in drawers and the pieces of my desk to get painted with the rest of the house. Navigating these items while shooting the ceiling was not a good idea. So, I moved the drawers, desk cabinets and shelving into the front bedroom to get shot. Next, I looked at the ceilings; we had not quite finished washing all of it, so I TSP'd a section. Last, the doorway into the partially demolished kitchen was unimpeded. Everything that had been setting in the main room for our workday comforts (camping chairs, snack cooler, etc) were in the kitchen too. So, I added overlapping plastic sheeting over the doorway, so overspray would not blow onto our creature comforts.

Ready for another shoot, I donned the old white overalls, wrapped my head with a white T-shirt, set up the sprayer and got after it. I started with the walls around the furnace, so I could unmask and re-start it at the earliest moment. I moved through the space anti-clockwise, shooting the eating nook first, then the main living space and finally the den-like area directly rear of the living room. Satisfied, I moved the sprayer into the front hall and shot the drawers, etc set up in the front bedroom, completing the spray. End-to-end, it was probably around 6 hours of shooting plus a few hours of cleaning / prep on the second shoot day.
 
Clean Your Tools
main living space complete
To clean the sprayer, I put about 2 gallons of water into a clean 5 gallon bucket. Before I dropped the sprayer pickup tune into it, I hosed the pickup tube off with the garden hose. Now somewhat clean, I put the pickup tube into the water and the priming hose back into the paint. I primed the machine until water was coming out the priming hose, and then I shifted that hose into a recently emptied 5 gallon now-slop bucket. I continued to prime until the priming hose was running clear. Then, I switched over to "sprayer" from "prime" and did the same thing: shot into the paint (reversed the tip) until it started to get watery, then switched over to the slop bucket. Once the gun was shooting mostly clear, I shut things down, released the pressure and took the pieces into the garage sink for cleaning. Since most of the paint was already run out, cleaning with running water and soap was relatively quick. Paint needs warm air, so I set the furnace to run the fan all night and I left the box fan running as well, to help speed the drying.
 
Strip, Lights
further room done
Boo and I returned the following day and started pulling the masking off. For me, the most important thing was that we didn't have many thin or bare spots. I only found one 2-foot by 3-foot bare spot on one ceiling, and I decided to fix it with a flat-nap roller rather than pull out the sprayer. Otherwise, the coverage looked good. Sure, there were some heavy spots, and I attribute that to the hard-to-see from lack of light. Regardless, we pulled the paper and film from the windows, light fixtures and floors, rolling it into a big puffy pile as we went. We discovered some spots where the tape did not hold, allowing for paint to get on the floors, but overall, the finished product looks really good. Once the paper was up, I cleaned each light fixture and mounted it, with bulbs.

This was a huge milestone. With the interior of both the house and the tool/parts shed painted, we can start moving non-essential things (like Nemo, the Audi A4 B5) over to the NewOldHouse. Nemo drove over with no issues, by the way. We need to source, paint, measure, cut and install 1-inch quarter round pretty much everywhere the new painted baseboard approaches the wood floor, though. If you look at these couple of pictures, you can see the gap. I expect we will be doing the 1/4-round a room at a time so it doesn't become a huge undertaking. Of course, at one room at a time, it could take quite a while to complete. Once we do it, I'll post on how we went after it.
 
Because moving is really only interesting to the person who is moving, I won't post on it. If something else happens that might actually be interesting, I'll post on it. Otherwise, until after the move, thanks, as always, for following along-

Tuesday, November 8, 2022

Who'll Stop the Rain

Short answer: no one. Today's post is about managing around that unstoppable rain that appears every autumn in the Pacific Northwest.

Before I begin, my parents have been experiencing health issues and appear to be entering their last chapter with us. My musings here have not included them much, but my son T and I moved them here 12 or 15 years ago from the Boston area. They have been a consistent presence in our lives ever since, especially for Boo. Their recent health decline started almost immediately after we signed the paperwork on the NewOldHouse. Accordingly, our time has been split between tending to them and the NewOldHouse projects. Boo and I have also hosted various family members who travel into town for well-wishing and visiting the folks. If you were wondering why we were moving so slowly, these factors are certainly part of it. In truth, the time spent doing something on the house is a welcome respite from the near-constant gravity we feel as we watch their final days approach. We welcome your prayers (in whatever form that takes for you), and encourage you to connect with your elders, or your youngers, if even just for a few minutes.
 
UPDATE.... I wrote this entry on Thursday (3-November), and my dad's health took a nosedive almost immediately afterwards. My family members who are not local rushed to Oregon on Friday, and we said our final goodbye to my dad on Saturday (5-November). A week earlier, Dad and I were sitting around talking to T about his life in LA. Time really can be unpredictable. 
 
On to dodging the rain-

Garage Coveting
one can dream
I have been working on a fleet of cars without a meaningful garage, much less a shop, pretty much since I started this blog. The house we have been in for the last 6 years, much like the house we were in for the 3 years before that, has a basic 2-car garage. Prior to that, we were in a condo with no garage at all. Unlike the last house, this 2-car garage really is too small to fit a car any larger than an English compact (Mini, MG, eg). So, the only car that has been parked in the garage for a meaningful duration has been Oliver, the 1978 MGB. For a short stretch, Zed, the 1979 280ZX sat in the other bay. Zed is wider than Oliver, and that other bay is where all of my shelving of parts and tools was, so actually working on anything became impossible. So, I worked on cars in the driveway, and when it rained, I worked in the rain. When it was 95* with a blasting sun, I set up a small shade, but generally worked in the heat. So, a couple of years ago, we got those canopies for the driveway. These were absolutely heaven-sent, allowing me to clown on cars out of the worst of the weather extremes nearly year-round.

NewOldHouse has an original, attached, single-car garage with the original door. That door alone, is pretty cool in that it has cables and pulleys connecting to a large counter-weight to help you open and close the door. Regardless of the cool factor, only one car can fit, and after asking Boo to park in the rain for 9 years while I took up the indoor spots and the canopied area, that one garage spot needs to be hers for the next 9 years. Or longer.

Sheds and Canopies
the "fourth" canopy
The NewOldHouse came with 2 chicken shacks, that I mentioned last time. One of them will hold my parts and tools. The sheds lock, and at 8 feet wide by 12 feet deep, plus nearly 10 feet tall at the peak, they are large sheds. Some of the tool-shed floor needs repair, but that's a weekend day of work. Otherwise, it's clean enough, and after I shoot the interior with Kilz and then basic white paint, it will feel like an entirely different space.

But, what about the cars? I have too many of them, yes, but I still need to keep them in fairly good shape, and not let them rust out from below nor get rained on all winter. To remedy, I started by moving the 2 canopies around and behind NewOldHouse. Under the one closest to the house, I parked Zed. The one next to it is dedicated to the car I am working on other than Zed. For now, that will be Nemo, I think, to get the passenger window regulator replaced, the power steering working and maybe add a stereo. To compliment these 2 canopies, I bought 2 more ($140US each at Harbor Freight), and assembled them nose-to-rear adjacent to the side of the first 2. The furthest of these canopies is now 40 feet from the house, and will protect Oliver from the rain. For a floor, we got gray tarps, again, from Harbor Freight. These will act like a vapor barrier, keeping the wet ground from encouraging rust from below. Because rain doesn't come straight down, I will need to get out there with a squeegee after rain storms to keep the water from pooling under things.

The fourth canopy (between the old and new canopy) is set up outside the shed, and will be my staging ground for parts from the old garage. I expect to spend a few weekends this winter simply going through parts, sorting them by vehicle and purpose so I can find things more easily. After getting that tool cabinet (See $50 Tool Chest), and sorting my tools, I was stunned by how much faster I was able to work simply because I could find the tool I needed so much faster. I figure if I can do the same for my parts, I could see a similar improvement.

At some point, these canopies will correlate to work bays. Rather than number them, and accidentally create some kind of priority or pecking order, I have named them after my Grateful Dead heroes: Jerry, Phil, Pigpen and Bob, from nearest the house to furthest from.

Downspouts and Diverters
spider legs, right
I mentioned the foundation vents being below grade, and some of my efforts to resolve for water getting into the crawlspace (basically digging out around them) in my Vehicular Paperwork post. Part of the below-grade problem is the location of the downspouts and the fact that they, like so much of the rest of the house, are original to 1948. Back then, houses did not have their downspouts connected to a central sewer system; they simply dumped water on the ground next to your foundation. If the ground is higher than the vent, then that water dumps into your crawlspace or basement. Neat. To remedy, Boo and I got a few box-style diverters (like this) which have a square catch bin that you set under the downspout. Attached to the side of the catch bin is a 8-foot long, 2-inch diameter flexible hose that you route away from your house. We did this for the downspouts which dumped near a vent. For the remaining downspouts, we used old-skool technology: a simple u-channel style diverter (like this) that you set on the ground under the downspout and the water runs down the u-channel to the other end, moving the contact point of water-to-dirt 2 feet or so further away from your foundation.

new canopies
We tried a few other things before landing on these solutions. We tried digging ditches for the water to follow. It wouldn't. Then, we tried flexible hosing attached to the end of the downspouts. Those worked, sort of, but we needed to gang a few together to get the water far enough away from the vents. And, they were white, so from a distance, it looked like the house had grown spider legs.

The day after we installed the linked diverters, we got almost 1/2 an inch of rain. While the rain was its most intense, we were at the house, and looked at how the diverters performed. They handled the volume easily, routing the water well away from the house. The below-grade foundation vents remained completely dry. While I still intend to do something to protect those vents from water entry, I don't feel like that is an emergency any longer.

That's it for today. Thanks, as always, for following along-

Tuesday, November 1, 2022

Zed Moves

I have been doing all kinds of things to get NewOldHouse ready for us to move. The exterior is painted. The interior is almost ready for paint after many more days of caulking and masking. Because we knew the end of the dry days were almost upon us, I took a couple days off work so Boo and I could get after some outside stuff. Today's post covers that.

Back to Back Chicken Shacks
Zed's new home
That's right. This property has two 8' x 12' locking sheds right next to each other that the prior owners were using as chicken shacks. The one closer to the house looked to be in better shape, while it's Furthur (see what I did there?) twin has a failing roof. We decided that we would clear them of chicken scat, hay and whatever else we found and then determine what to do with them. After a few minutes of working on the better-shape shed with a respirator and a shovel, it was clear that it was salvage-able, and had not had any rodent activity (no rat scat). I got the nasty out first with a shovel, then with a rake, then a broom and finally with a high-pressure hose. Once cleared, I sprayed it with house-wash and rinsed it down. The front-most section of flooring will need a replacement sheet of plywood/chipboard, but the rest of the shed will work, and serve as my car-parts/tool shed until a more permanent shop can be constructed.

The other shed did not see as much progress. The roof and the entire floor will need to be replaced. Still, that's a couple hundred dollars of plywood (plus some roofing material that we happen to have lying around) to repair a shed that would cost, like, 5K(US$) new. It will hold garden implements and supplies, and can do that even with a rotted floor... until we can get some time to repair it. Eventually, the lawn tractor will even get parked in there. I will return to the scat-removal and clean-up of the FurthurShed after we move. The repairs will probably wait until next year. But, to help protect it for one more year, Boo and I stapled thick, large black garbage bags (flat) over the holes in the roof. Now, that sounds pretty ShadeTree, and it absolutely is. Still, after a couple relatively heavy rains since, the inside of that shack is dry, so the wood that is not rotted will not get worse before we can get out there next year and repair them right.

Zed in Motion
man-hunt on
With the sheds ready to be pressed into service, we cleared the area where the 2 carports were assembled, around the back of the house. The grass was cut down to the dirt, all of the little weedy shrubs were cut down, and then the car ports were set in place: as tight to the house as they could go without bumping into the siding. Last, we laid out a tarp to act as a vapor barrier between the earth and Zed's underside. We were ready to move Zed. Before I started working on how to tow him, I thought I could try to drive him. Sure, he has no interior, no glass, no side mirrors, no tail lights, a 4-year-expired registration, it's raining, it's garbage day and there is an active man-hunt in the neighborhood by Beaverton's finest. Still, it's worth trying; worst case, I have to tow him. Regardless of outcome, it would be a funny story.

Long ago, I had drained Zed of gas by loosening the fuel line in the engine compartment and firing up the fuel pump, pumping the fuel into a gas can that I then used to fill the lawn mower. I had not tried to start Zed again. Knowing this day was coming, I had charged his battery and then disconnected the negative terminal (saving the charge). After confirming the battery was full (12.5V), I poured a fresh gallon of gas into his tank, hooked up the negative cable to the battery, flipped the ignition and fuel pump switches and tuned the key. BahRoom... he fired right up. Now, even though I had pumped the fuel out, there remained some old gas remnants in the lines or the injectors were kinda fouled. Regardless, Zed ran rough, and did not want to idle. I babied him along until he settled down and idled. Cool. So he runs. I took the next step and tried to back him up, but he wouldn't budge. I felt like his brakes were rusted on. I tried to high-rev reverse to break the brakes free, but that didn't work. I suspected the rear brakes were rusted tight from sitting motionless for a couple of years.

the "nicer" shack, before
Undeterred, I chocked his front wheels. I raised the passenger side rear wheel by the axle with my trolley-jack and removed the wheel. I shot rust buster onto the brake shoes (which looked pretty much worn to nothing anyway) and then hit the caliper with a framing hammer, sometimes using a flattened chisel on the pad, to loosen the rust-hold. After a few cycles, I could see that the brake shoe no longer held to the rotor. So, I slapped the wheel back on, lowered the jack. I repeated this on the driver side... all while keeping my head on a swivel for the police escapee (hence, no pictures). Satisfied, I pulled the wheel chocks. I topped off the brake fluid to make sure the front calipers would have the most capability of stopping us, since the rears were now covered in oil.

Feeling confident, I put my red plastic toolbox on the floor for a make-shift seat to try to drive Zed again. I bungie-corded the driver door shut, and fired him up. He started a little rough again, but settled into an idle quickly. I popped him into reverse and Zed started to back up. I navigated around the shrub on the corner of the parking spot and then down my not-quite-straight driveway by looking through the passenger-side tail light hole. It being garbage day, I had to wait for the truck to clear out of the cul-de-sac, but that let the engine idle a little more, working more of that bad gas out and good gas in.

the "nicer" shack, after
The brakes took some pumping to get to a full stop, but I figured it was mid-day during a work-week and I was driving about a block-and-a-half, so the risk was low. I got the rest of the way out of the driveway, put Zed into first, and puttered down the street, stopped at the sign on the corner, and turned onto the more highly-used street to the NewOldHouse. I could see cop cars down the street both behind me and in front of me (picture above shows cops 2 doors down from our new house), but no cops between me and the NewOldHouse. I went for it. I puttered to the house, straight down the drive and around the back. It took a 3-point turn, but Zed now sits on top of a grey tarp, underneath a carport, ready for me to revisit once we're moved (shown in the top picture).

I think that's about it for today. Boo and I are finding that with each potential challenge presented by this house, it always looks worse than it really is. From the chicken shacks to the interior plaster, once things get cleaned, the condition underneath is not nearly as bad as it looked. I continue to get more excited about what this new home, and a potential new shop, could mean.

Thanks, as always, for following along-