Showing posts with label A4. Show all posts

Tuesday, June 13, 2023

Car-go-round

As we hit Summer, I find my attention going in 100 directions at once. When you have many cars, each with small problems, and a house in mid-rehab, that scatter is probably that much worse. With the rehab work going on, I will have limited time to work on cars, but Boo has asked me to think about setting aside one day a week to it since I take such pleasure from it, and life can't always be about to-do lists, home construction and your job. So, today's post tries to bring some order to the car-chaos, with a hope that I will have some time to clown on one or more of these open items this summer.

Oliver
Oliver is the 1978 MGB. Some may look at Oliver like he was my mid-life crisis car. In truth, he was a car that could fit in the super-small garage I had and needed work. He was something I could work on that wasn't Hapy, the 1972 VW bus, and I could be out of the rain when I did it. Oliver definitely met that goal and I really needed something other than Hapy to wrench on for a while. The goal Oliver has not yet met is passing DEQ. So, he is not legally drive-able. Oliver's list of incomplete items is fairly short, though. I believe, he could pass DEQ today if the carb is adjusted right. He just needs another run through DEQ to see how close I am. He got a new battery for the move to the NewOldHouse, and since then he has sat under one of those 5L car covers with the battery disconnected.

Beyond DEQ, the heated seat circuit did not get completed, and there remains a leak under the windscreen on the passenger side. Perhaps most importantly the brakes are still spongey and I think it is because the brake master cylinder was not bled prior to install. I asked the guys at Les Schwab to do it when I bought a set of tires from them. They sold me the tires, failed to bleed the brakes, and that's why I now buy tires at Firestone. Anyway, I bought a brake bleeder kit, (and will document my process) and hope to get him to DEQ before this top-down season has really started.

Zed
Ah Zed, the 1978 Datsun 280ZX. After a spring and summer of bodywork, Zed still needs a lot. I won't rerun that history, but there was a lot of sanding and shaping. Then, I had that heroic drive from oldHouse to NewOldHouse, sitting on a toolbox for a front seat (See Zed Moves). Once parked, he got a 10x20 to sit under while we worked on the house. Well, the weather had other plans, lifting and tossing the canopy multiple times, putting multiple rubs and deep scratches into the paint (See Hello Windstorm, My Old Friend). So, Zed will need another round of sanding and painting. Now that I have seen the Eastwood 9mm in the sun, I am not as enamored with it. I see a slight olive green in that dark grey and the pitted finish is not to my liking at all. So, I will probably sand down below the paint to some degree, re-shoot the black primer and shoot a different color. Of course, the body kit is installed and it's not coming off. So, I will need to get creative to get good coverage down low. Now parked next to Oliver with a matching 5L car cover, they are twins. I do not expect to do much of anything on Zed this Summer.
 
Hapy
In the Phil and Friends post (See Phil and Phrends Road Report), I mentioned a few things that needed attention before the next drive in Hapy, the 1972 VW camperbus. The most glaring was the loss of the brake booster. I removed the hose from the booster and tested the vacuum on the booster unit. I applied 15 pounds of vacuum and over the course of a few minutes, it decayed a couple of pounds. To me, that is satisfactory. Then, I tested the vacuum on the hose I had just removed. It held no vacuum. So, I acquired and installed Gates vacuum hose. One quick test drive later, the brakes are good. I installed the cage for the stereo so it is well locked into the glove box install location. I also affixed a mount for the UltraGauge on the steering wheel support so the UltraGauge is directly below the speedometer now. I do not expect Hapy will have meaningful work done to him for the rest of the Summer. Instead, he will be set up for DrivewayFest between trips so we can enjoy our clubhouse-on-wheels. Hapy has been used a few times since we moved as my daily-driver when Boo needs to take Toyotruck somewhere. Every time, since we moved to the NewOldHouse, he has started right up. I mentioned the saga about towing him here. The starter swap-out was easy and the right fix (See Hapy Lives Again).

Nemo
Nemo (1997 Audi A4 Quattro) has left the fleet, enjoying a new lease on life in Idaho. See Fare Well, Nemo.

GoRo
GoRo (2009 Audi A4 Quattro) had a series of issues appear over last winter. First, the outer driver handle stopped working. So, to get in, you needed to reach through either from the passenger side or from the rear seat to get the door open. What a pain. Then, the battery started to misbehave, not holding charge. While looking for the charger studs, the hood latch broke. So, GoRo sat for most of the winter, until Boo got the hood latch repaired (she hired our friend Courtney at MobilePDX). Even Courtney doesn't want to touch the outer door latch, so we're not sure what we are going to do about that. I need to get the battery replaced, and then maybe I'll take it on. Either way, we are going to sell GoRo. We figure it hasn't been driven since last December, and we have been just fine without it.

ToyoTruck
Recall that Boo and I bought ToyoTruck (2005 Toyota pickup) from her sister. We had agreed to the price before the ice-storm sent the truck into a pole, damaging the passenger front corner. I replaced a bunch of things, but did not shoot the paint. The top of the truck has suffered sun, wind or seaside damage to the paint as well, so when I paint the replaced bodyparts, the top half of the truck (at least) needs paint as well. This truck has minor dents on a few panels as well, so before I shoot anything, I'll work those dents out first. ToyoTruck is our true daily-driver. I hope, once GoRo is gone, and Oliver is legal, perhaps we will drive Oliver and Hapy around, leaving the truck home more.

When I can get away from house construction projects, I will be getting after this stuff, starting with Oliver. He is such a fun ride, and it would be a shame to lose another Summer to something like DEQ. I know I have not been posting much, basically since we bought this house. That day, car work mostly came to a halt, and house construction is much slower and frankly less interesting to post on. I will make me next post a catch-up on what's happened here since my April post.
Thanks, as always, for following along-

Tuesday, November 29, 2022

Fare Well, Nemo

Brief post today.

Nemo Departs
This past Spring/Summer, I thought I had sold Nemo (1997 Audi A4 Quattro) to our friend Garry. After repairing the driver rear bearing and replacing the axle with it, the power steering blew a hose and he lost interest. So, it came back. Truth be told, Nemo never left the driveway; Garry did the repair here. I figured I would do what was needed to get Nemo through smog and then figure out what to do. So, I repaired his exhaust, replaced the catalytic converter, downpipe and O2 sensor. I was ready to take him to Oregon DEQ when  the NewOldHouse purchase happened and so Nemo just kind of sat. Fast forward a few weeks and I get a text from Garry, now living in Idaho. His friend expressed interest. So, I shot some pictures and video with my phone and sent them on. 2 days later, he is here, with a friend, a truck and a tow-dolly. They crawled around on Nemo for a while, took him for a drive.... paid me cash and drove away with him. Just like that, the herd is thinned my one.

Mom Moves
With my Dad's rather sudden decline and then final departure early this month, my Mom lost the person who had eyes on her 24/7. Her health has been an issue for some time, so having her living alone in a somewhat basic assisted-living facility was no longer safe for her or the facility. So, she is moving to a stepped-care facility 4 blocks from here. That move is today (29-Nov). Since her space is significantly reducing, we will move her and her most treasured belongings to the new place. Everything else is moving here, so it can be gone through with heat and beverages and comfortable seating.

NewOldHouse Update
Since my CoViD battle ended, I have returned in earnest to the restoration of the NewOldHouse. When the flooring guys were here last Summer, they removed all of the 1/4-round. As they removed it, they clumped it by room and taped the clumps together. Unfortunately, some of that careful work was undone, and some of the 1/4-round went to the dump. What remains is semi-documented. I have been puzzling-out which pieces go where, re-marking them and then shooting them with BIN primer. Once dry, I set the pieces where they will be re-attached to the baseboard. Prior to priming, they get the nails removed and then a good cleaning. I have a small pile of un-matched pieces and a larger pile of not-yet-attempted pieces. I will be continuing this game next weekend.

Other than playing with 1/4-round, I resolved the canopy catastrophe, consolidating 2 damaged canopies into one viable one. You can see things are back to "normal" in the picture on the right, with the "Jerry" canopy restored. If you look closely, you can see stacks of 1/4-round under the canopy on the left (Phil). I have also cleaned, rust-converted and painted the heat vents. We decided that the original vents could be salvaged, and if they were painted a color that roughly matched the floor, they would sort of disappear into the wood floor. For the most part, this turned out to be correct, though I don't have a good picture to share.

The bathroom progress was temporarily halted by the discovery of the sub-floor damage. Boo crawled back under the house to see how extensive it was.. and it is really quite contained. There are 3 1x4 (sub-floor) boards that rest between the top of the beams and the wood floor which need to be replaced. But even then, the section that needs replacing is only between 2 beams, and the beams themselves are in great condition, showing no damage from the leak.

As part of the preparation for a bunch of mom's stuff appearing here, I tore down the living room stereo equipment and moved it out of the way. While this isn't terribly interesting stuff, it does further prove that life is either Tetris or Monopoly, and today it's Tetris.

With each passing day spent at NewOldHouse, it feels more and more ready for occupancy. Sure, we don't have a functioning bathroom yet, nor will we have a functioning kitchen for some time. Still, we believe that we will be moving into NewOldHouse by the end of January. I guess that's it for today. I know there isn't much car content these days; that is also true of my life, and I feel it. The sooner the house is ready, the sooner I will be back wrenching on Hapy. Thanks, as always, for following along-

Tuesday, November 15, 2022

If It Doesn't Move, Paint It (Final)

After weeks of spackle, caulk and masking, we were finally ready to shoot the interior of NewOldHouse. We would have arrived here earlier had we not digressed outdoors, but when the rains come, you need to have already gotten your wet/dry solved, or you will be doing it in the rain while everything gets wet. Anyway, today's post covers the final adventure in paint, and a few other things that happened along the way because.. of course.

Just as I completed the work described in this post, I tested positive for CoViD. I am living proof that living a hermit lifestyle is not a guarantee that you won't get CoViD. I have been going to a pizza place in Hillsboro for an open jam on Wednesdays as my only outing, so at least I know where it happened. I've been down nearly 10 days with it now, so progress on cars, the house, even my job is, obviously, halted. Good times.

The Walls Came Down
thar's a furnace in thar
For some reason, when the prior owners installed the gas furnace, they put it into the main living space. I thought it was because of the proximity to the chimney, but from the garage, there is a straight path to the chimney as well, and popping an exhaust through the roof would not have been that difficult. Instead, they put it into the dining area, and then... built walls around it. The new walls were, probably, a foot away from the furnace while the furnace was located 6 inches or so from the original wall. We couldn't figure out the thinking, but we didn't like the furnace location, nor the walls. With a plan to eventually move the furnace into the garage, I tore down the walls around it.

I took the time to remove the baseboards, the door trim, door frames and the doors. I removed the trim nails and collected these reusable bits onto the garage rafters. I then went after the drywall with a rubber mallet. I didn't want to make a huge mess, I just wanted the walls down. So, I loosened the drywall from behind and then pulled sections off with gloved hands. The refuse went out to the dump pile, and I turned to the framing. This was fun. I smacked the inner wall framing a couple of times with the long-handle sledge until the bottom came free. Then, I wrenched the 2x4 back and forth to remove it from the upper. One by one the inner pieces were removed, leaving the corner and the door frames. For the door frame-framing (the 2x4's that create the rough door opening to which the door frame is attached), I removed the header first, and then the side pieces could remove in a similar fashion to the middle framing bits. Then, I took out the corner. Again, this was simply smashing with a sledge and prying with a wrecking bar until they gave way. Most of the corner came out in one large section. The ends nearest the original walls were next, and the top plate came down with those, leaving the footer. the footers were set into the original hardwood floor with 3-inch-long nails. To get to those, I carved out the top of the 2x4 with a screwdriver and then leveraged the top of the nail enough to fit the wrecking bar underneath. Some subtle pressure later and the nails were out, and the footer was out. The space seemed much larger.
 
More Masking
walls? what walls?
With the furnace now exposed, I could paint those original walls, but I did not want paint on the furnace or the nicely finished original wood floors around it. So, I spent a couple of hours with paper, plastic and tape covering everything except the venting on the front of the furnace and the exhaust to the chimney. I left those for actual paint-time because I want to keep running the furnace until then.  I know that the exhaust would meld or burn anything I wrapped it with and the front of the furnace needs to be open when in service. On paint day, I turned the furnace off for the shoot, and covered the exhaust with film, the front of the furnace with a sheet of waste cardboard.

Prime Time
Nemo at NewOldHouse
After the walls were washed and I had checked and rechecked that everything had been masked, I had considered priming everything. I decided that it was probably excessive, especially considering how clean the walls were once Boo was done with them. Still, there were some stains, so we got some some Kilz2 to cover them. The Kilz2 does not cover odors, and there were still some remaining cat smells. So, I thought about getting some original oil-based Kilz and shooting the lower 3 feet of all the walls to try to contain that. Again, overkill. I concluded that the cat urine smell was probably not in the plaster, it is probably coming from that space between the hardwood floor and the baseboards. So, I decided that after we stripped the masking out, I would shoot that space with some enzyme-based cleaner (like this).

While I did not prime everything, I did prime the popcorn ceilings in the "new addition" bedrooms (built in early 60's) out of concern for how much paint they would suck up. I shot the stains as well as the original pink paint that appeared where I removed the walls around the furnace, and the area in one of the addition bedrooms where a shelving unit had been removed. Most of these areas were reachable without having to move the sprayer. I needed to move it once, from the rear of the house to where the furnace is. Before I cleaned up the equipment and put everything away, though, I took the operation out to the now-clean future tool/parts shed and shot that entire interior with the Kilz2. It was bare wood, and I figured painting it white would help illuminate the space once filled with shelves and some lighting. The shed has a high shelf/storage area so unlike my spray adventures so far, I needed to work from a ladder to hit the shelf and ceiling well. Even still, this spray was fast, and since I had started early in the day, I felt confident that I could get most of the interior spray done.

Shooting for Good... Enough
tool shed primed
Our original plan was to buy really good white exterior paint. At $300US per 5 gallons, we changed our minds, and bought generic indoor/outdoor eggshell white paint. The house is still white, but we may need to paint again sooner. So what? There is quite a bit of siding that needs replacing, so little harm done. Fast-forward a few weeks and Boo and I got to a similar conversation about the interior paint. I painted our current house interior with an eggshell "Brazilian Tan", which is beautiful, but the house was already dark and even though the Brazilian Tan was lighter than the paint it went on top of, it's still pretty dark in there. Even in the summer. NewOldHouse is not in perma-shade like the current place it, but we decided we want it to be super bright.

We talked about painting the walls with some color, but the main rooms have coved ceilings, making it difficult to draw a line where the colored wall would meet a white ceiling. Many older houses have a picture rail that will draw that line for you. Since we don't, and we were not sure what to do color-wise AND draw-the-line-wise, we went with.... generic indoor/outdoor eggshell white paint. Sound familiar? Yep, it's the exact same paint. Why keep all these tins of touch-up paint when you can keep only one? LOL. I'm sure this paint will be acting as a primer for the next coat (that has a color), it's just a question of when. For now, white walls go with any decor... well... they will go with ours anyway.

Paint On!
furthest room shot
With the stains and popcorn ceilings primed, I switched over from the Kilz2 to the eggshell and grabbed a quick bite. My time shooting Zed taught me that once you start, you really can't stop unless there is a clear line where the painting can stop. I also remembered that ventilation is super important, so I set a box fan in the open front door (blowing out), and had the kitchen windows wide open. I wasn't sure how long the Kilz2 had been drying on the ceilings in the back bedrooms, so I started with the shed. This gave Boo the most time remaining to clean whatever walls or ceilings we had not yet cleaned. By doing the shed first, I also took advantage of the little daylight Oregon has at this time of year. The shed painted like it primed, though I fogged (light passes at a greater distance) some of the wood panels after I completed the shoot, trying to get consistent coverage. In the end, most of the walls will be covered with shelves, so the handiwork won't really show, but I have a hard time half-assing things.

Once the tool shed was painted, I moved the sprayer into the furthest new-addition bedroom, and shot it completely. I started with the closet and then the ceiling. Then, I shot the window frames and finally the walls and baseboard, working my way towards the doorway. This kept the paint hose from hitting freshly painted walls or trim, and the sprayer in one spot for the duration of that room. Once the rest of the room was done, I moved the sprayer into the next bedroom and shot the doorway and the door. Last, I cracked the large window to let some fresh air in.
 
front living room shot
I sprayed the next bedroom following the same pattern: closet, ceiling, window frames, walls and baseboards. Again, I backed my way out of the room, moved the sprayer and then shot the doorway and the door. I continued this pattern, backing down the rear hallway, shooting the ceiling, then walls before moving the sprayer into the one original bedroom. Unlike the other 2 bedrooms, I decided that shooting the window frames early effectively restricted the amount of light I had to work with. So, I shot the window frame after I did the baseboards. Similar to the other rooms, though, I left the space around the doorway for after I moved the sprayer, and shot that area last. After cracking the window, I hit the hallway, turned off the furnace, removed the thermostat and then shot the hallway, avoiding the cold air intake.
 
At this point, it was past 430PM, so twilight was setting in. Without meaningful light, my shoot was done for the day. So, I popped the thermostat back in, turned the furnace on and cleaned up the sprayer for the night.
 
Second Verse, Same as the First
main room, start of day 2
When I returned the following morning, I walked the area which needed to be painted. The furnace was not 100% covered yet and in the middle of the main space Boo and I had set out all of the built-in drawers and the pieces of my desk to get painted with the rest of the house. Navigating these items while shooting the ceiling was not a good idea. So, I moved the drawers, desk cabinets and shelving into the front bedroom to get shot. Next, I looked at the ceilings; we had not quite finished washing all of it, so I TSP'd a section. Last, the doorway into the partially demolished kitchen was unimpeded. Everything that had been setting in the main room for our workday comforts (camping chairs, snack cooler, etc) were in the kitchen too. So, I added overlapping plastic sheeting over the doorway, so overspray would not blow onto our creature comforts.

Ready for another shoot, I donned the old white overalls, wrapped my head with a white T-shirt, set up the sprayer and got after it. I started with the walls around the furnace, so I could unmask and re-start it at the earliest moment. I moved through the space anti-clockwise, shooting the eating nook first, then the main living space and finally the den-like area directly rear of the living room. Satisfied, I moved the sprayer into the front hall and shot the drawers, etc set up in the front bedroom, completing the spray. End-to-end, it was probably around 6 hours of shooting plus a few hours of cleaning / prep on the second shoot day.
 
Clean Your Tools
main living space complete
To clean the sprayer, I put about 2 gallons of water into a clean 5 gallon bucket. Before I dropped the sprayer pickup tune into it, I hosed the pickup tube off with the garden hose. Now somewhat clean, I put the pickup tube into the water and the priming hose back into the paint. I primed the machine until water was coming out the priming hose, and then I shifted that hose into a recently emptied 5 gallon now-slop bucket. I continued to prime until the priming hose was running clear. Then, I switched over to "sprayer" from "prime" and did the same thing: shot into the paint (reversed the tip) until it started to get watery, then switched over to the slop bucket. Once the gun was shooting mostly clear, I shut things down, released the pressure and took the pieces into the garage sink for cleaning. Since most of the paint was already run out, cleaning with running water and soap was relatively quick. Paint needs warm air, so I set the furnace to run the fan all night and I left the box fan running as well, to help speed the drying.
 
Strip, Lights
further room done
Boo and I returned the following day and started pulling the masking off. For me, the most important thing was that we didn't have many thin or bare spots. I only found one 2-foot by 3-foot bare spot on one ceiling, and I decided to fix it with a flat-nap roller rather than pull out the sprayer. Otherwise, the coverage looked good. Sure, there were some heavy spots, and I attribute that to the hard-to-see from lack of light. Regardless, we pulled the paper and film from the windows, light fixtures and floors, rolling it into a big puffy pile as we went. We discovered some spots where the tape did not hold, allowing for paint to get on the floors, but overall, the finished product looks really good. Once the paper was up, I cleaned each light fixture and mounted it, with bulbs.

This was a huge milestone. With the interior of both the house and the tool/parts shed painted, we can start moving non-essential things (like Nemo, the Audi A4 B5) over to the NewOldHouse. Nemo drove over with no issues, by the way. We need to source, paint, measure, cut and install 1-inch quarter round pretty much everywhere the new painted baseboard approaches the wood floor, though. If you look at these couple of pictures, you can see the gap. I expect we will be doing the 1/4-round a room at a time so it doesn't become a huge undertaking. Of course, at one room at a time, it could take quite a while to complete. Once we do it, I'll post on how we went after it.
 
Because moving is really only interesting to the person who is moving, I won't post on it. If something else happens that might actually be interesting, I'll post on it. Otherwise, until after the move, thanks, as always, for following along-

Tuesday, July 26, 2022

Nemo Time

Remember Nemo? He's the 1997 Audi A4 (B5 body style) that T bought and wrestled with for a few years, replacing the clutch and brake master cylinders as well as the clutch slave cylinder and repairing so many other things. I also did a TON on this car (just what I posted on), so the fact that he needed more was a little, well... frustrating. When T moved to LA, he signed Nemo over to me, and then we thought we had sold it within the family, after replacing the driver-side rear axle and wheel bearing. Only to have the power steering fail... ending that transfer. So, Nemo has sat in my driveway. He has many little issues: a water leak into the driver's footwell, a broken front passenger window regulator, a big hole in the exhaust, a sunroof that won't open, some other little missing bits, and, of course, the failed power steering. Today's post covers my efforts to resolve enough of these items so he can be registered and driven again.

Before I begin, the sanding on Zed continues. I will post an update next week, hopefully, with some meaningful progress. In the meantime, I have slowly crawled along with Nemo over the last few weeks, so I thought an update was in order.

Water Leak
Schmidty sniffing the ECU box
I believe I solved the water leak when I discovered that the plastic box that holds the ECU was not entirely attached. There is an obvious nut on the outside, near the driver fender. There is a second nut inside the box closer to the engine, back near the fire wall. Underneath the ECU, is a large (like 1 inch by 3 inch) rectangle opening into the footwell. This hole has a gasket, but if the box is not held down firmly enough to engage the gasket, water which finds its way under the box (which is a for-sure here in rainy PacNW) will run straight into the driver footwell. In Nemo's case, the inner nut was simply not there. I found one, and snugged it down. Problem solved. I hope.

Accessing the Exhaust
big old rusty dirty cat
The big hole in the exhaust has been a major pain to solve. The aftermarket cat-back exhaust installed by a prior owner did not have any support between the end of the header and the rear axle. It did, however, have a section of flex-pipe immediately after the header, creating the car's lowest point. So, when the car drove over speed bumps or dramatic driveway transitions, it was the flex-pipe which hit the ground. Eventually, that flex-pipe failed. With the failure came a Check-Engine-Light (CEL) preventing a DEQ pass. To resolve, I removed the catalytic converter, downpipe and mid-pipe so I could replace the failed flex-pipe. This removal is challenged by the usual issues with exhaust hardware, but the Audi has additional things, like heat shields, in the way. So, the air box needs to come out, and the passenger front wheel comes off so you can access everything. Even then, Audi engineers seem to like to use different fastener types and sizes pretty much everywhere. Of course, the owner plays a role here too.

Cat Away
cat out
After trying a wide array of tools, I ultimately needed a hacksaw blade to cut through the rusted bolts between the catalytic converter and the down pipe. The PO had used regular steel fasteners to attach them, and even after multiple days of spraying Kroil on them, they were rusted tight. I cut the bolts, sending the hacksaw blade between the opposing flanges, at least far enough for the bolts to snap in half when I applied torque to one end with a socket-wrench. This took some time and patience, and because of how the bolts are oriented in the engine compartment, I was only able to sever 2 of them. This loosened the connection enough for the downpipe to rotate on that last bolt, allowing me to pull the 2 out the top of the engine as a unit. I cut the other bolt off, separating the 2 pieces, on the driveway. Holding the downpipe still with my boot, I cut the lip of the flex-pipe from it using my angle grinder.

Before I started, I ordered a brand-new catalytic converter, thinking that the one that was on there was 10+ years old, and of unknown working condition. After spending many hours cutting through rusty bolts with a hand-held hacksaw blade, I do NOT want to do this R&R again even if the fasteners are new. So, I'm grateful I made that purchase decision. After I got the cat on the ground I could see the Audi symbol on it, so either it was replaced at a dealer a long time ago or it was the original. Either way, at almost 300k miles, it is unlikely that catalytic converter was still doing its job well. Well enough to pass Oregon DEQ? We'll never know. Besides, the old bolts are rust-attached to that old thing, so re-install would have been considerably challenged.

new cheap hanger
On the other end of the hole in the exhaust, I removed the mid-pipe (2 bolts), cut off the remains of the flex-pipe with the death wheel and re-installed the mid-pipe. I added a support immediately behind where the flex-pipe-to-mid-pipe joint will appear so it is held up and away from the ground better. For the support, I got one of those cheap bolt-on hangers, attaching to the rear of the transmission through an unused bolt hole in the rear of the case.

Cat In
Moving back up front, I installed the new cat first, re-introducing the original O2 sensors as I went. To the cat, I added the down pipe and then finally connected the down pipe and mid-pipe with the flex pipe, fitting things together with clamps and exhaust dope. 

I got Nemo back on the ground to take him for a test spin around the usual neighborhood track. Before backing him off the ramps, I checked the exhaust for leaks, and it looked good, with a little puff of smoke coming out the tailpipe. The exhaust sounded much better, and it doesn't leak. So, around the block we went. It still hangs low, but it is fairly well tucked up under the body compared to before. The rear end ride height is so low, there is a near-constant threat of bottoming out. I will need to resolve that soon. He drove great; plenty of pull from the turbo, and the exhaust was much quieter than he had been on the last test drive. Clearly, the noise and smoke is going out the tail now. I thought I might have heard the rear passenger wheel bearing, though, so there may still be more adventure coming. And, yes, you can drive a car with failed power steering; you just need forearms like Popeye if you need to turn the wheels when the car is not in motion.... like to maneuver it out of a shop bay into the driveway through a 9 point turn. 

Oh Two
Oh Nemo.... O2
Unfortunately, the CEL is still on, with a code (P0134) indicating that the upstream (before cat) O2 sensor is bad. When I considered the smoke puff out the tailpipe when it was sitting on ramps, this makes sense: if the computer doesn't know the air-fuel mixture sent from the O2 sensor, it sends a richer fuel mixture to protect the engine from being too lean, which is why a failing O2 sensor is a DEQ auto-fail. So, I ordered a replacement upstream O2 sensor and now I'm waiting on shipping before I take another test. Since the error code did not include a code for the downstream O2 sensor, one might think that the old catalytic converter was still working. As I pondered this, I picked it up from one end, and I could hear dust settling through it. So, even if it wasn't toast, it was soon to be. When the new O2 sensor arrives, I'll slap it in, clear the code and go for a spin. If the CEL doesn't return, we may take him through DEQ before the next update. 

That's it for today. Like I mentioned at the top, the sanding on Zed continues. After sanding him smooth with the 320-grit, I did not like some of the orange-peel effect I found underneath, so I sanded the primer end-to-end with 320-grit again. Thanks, as always, for following along-

Tuesday, June 15, 2021

Nemo Re-Assembled

I think this will be a quick post. In my last, rather lengthy, post about Nemo, I described the effort to get him running again. Today, I cover the electrical mop-up and the other little bits to get Nemo ready for regular use... by someone. While this is barely post-worthy, the wiring fix did take me a few hours, so in a way this is just documenting how I spent a Saturday. Besides, the weather has turned too cold to spray primer or paint, so Zed sits waiting.

Car-Toys Vent
I will start with a predictable slam on the hacks at Car Toys. Recall that when they replaced Nemo's stereo, they were directly asked/told not to cut up the wiring, rather to use a pigtail. With a generic response of along the lines of "we'll do it right" wink/finger-point, they did exactly what no one wants a radio installer to do: cut wires off of a harness plug and then direct-wire a new stereo into those bare wires. So, I give them a "that's not right" glower/different-finger-gesture. All-told, they cut the 8 speaker wires, switched and steady power, ground, power antennae and illumination. The part I don't understand is why they do not have a cache of pigtails for common cars. All VW's and Audi's from, like, the mid-80's thru modern cars use the same 2 8-pin female plugs... one 8-pin plug for the speakers and one 8-pin plug for the power, illumination, etc. The corresponding male pigtails run for, like $10US on eBay, and since they plug right in, the install is faster, while also cleaner: at a workbench, the custom pigtail for the new stereo can be wired into the Audi/VW standard male pigtails. Then, you take the stereo head-unit and the cable to the car, plug in each end and you're done. Cleaner, easier, faster. Instead, Car Toys does it lazier, longer, stupider and uglier... and much harder to undo.

Stereo Wiring Un-Hack
With the center console fully opened up, I had great access to the great wire hack. I started with the speaker wires, mostly because bits of the CarToys wire-extensions (1 each purple, grey and green) were still attached to a few wires post-theft, so I could tell what they used to be used for. Once those 8 wires were sorted, the remaining wires were much easier to isolate. The only difficult pair were the switched and steady power sources, because both were plain red wires. A simple voltage test (one had 12V and one didn't while at rest) resolved that. Yes, there was a hot wire bouncing around back there. Once the pigtails were wired up, I zip tied the wires into a cable on either side of the wire butt-joints so any gentle pulling would not cause a wire joint to separate.

Climate Control and Console Re-Assembly
With the loose wires sorted, the center console already looked 100% better. I continued the re-assembly by plugging in the climate control unit. While this has 4 plugs, they are each slightly different sizes so they can only go in one way. Once plugged in, I slid the unit into place and threaded in the Torx bolts to hold it in. Then, the console cover can snap into place. 2 8mm Allen head screws later, the center console is together again. I take satisfaction in seeing the stereo plug through the hole where a stereo should be. I may pick up a cheapy clearance stereo from Crutchfield to completely close the loop... and that hole.

Kick Panel and Re-Lo
All that remained was putting the lower dash panel back on. This panel is held in place by 3 screws: one at the bottom of the fuse box frame and 2 in front of each of the driver's knees. The fuse box frame screw is easy to get to and easy to manage. The 2 in front of the driver's knees, however, require some gravity-defying. I do not know what kind of fastener was originally used; Nemo has slotted bolts. These bolts need to be balanced on the end of the driver and then tilted over about 30* to find the hole in the panel, and then the matching hole in the dash. While this is not hard, it can be frustrating. Once bolted tight, the holes are covered with small plastic bits that snap into place.

Just like that, an interior that looked like it was at a junk yard is re-assembled and looking sharp again. I juggled cars at this point, moving Nemo into a more remote spot, out from under the carport. As before, he started right up like he hadn't been un-start-able for weeks. The juggle created the space needed to get Oliver out for some Summer driving. I did discover, however, that Nemo's front passenger window I replaced also had the front window tracking mechanism damaged when the window was smashed in. So, the window does not go up and down anymore. I will need to hit the junk yard again, to source a replacement window track thing. Neat. I do like going to the junk yard, though, so maybe I'll find some other stuff we need while I'm there. In the meantime, Nemo's air conditioning blows nice and cold, so a stuck window doesn't mean discomfort.

That's it for today. Thanks, as always, for following along-

Tuesday, June 1, 2021

Oh, Nemo

Today's post covers my challenges with Nemo's electrical and computer system simply trying to get him to start, or maybe a signal on the OBD-2 port. The car-work hours that I did not want to spend sanding on Zed, I spent doing this... until this took over. Yeah, I know. I could use another hobby.

No Start
Like so many issues with these old cars, our challenges with Nemo started with him not starting. His battery had been sitting on a trickle charger all winter, but I had left his hood cracked to make room for the alligator clips, so this ultimately was self-inflicted. Love those. But, the path we took to get there was interesting. Nemo is sitting under the fabric carport blocking a garage door. Behind that garage door sits Oliver, the 1978 MGB convertible, that I would very much like to be road testing and otherwise driving around. So, enter my motivation for moving Nemo. Insert key, turn ignition to "RUN". I see some familiar idiot lights, including the battery, oil and check-engine. Turn to "START" and he rev'd but would not start. I went around to the tailpipe and could not smell gas, so I start with the assumption that it is fuel delivery.

Before I did anything else, I considered what I experienced when I turned the key to "RUN". I did not hear the fuel pump cycle. I did not hear the radiator fans kick on. So, something is not getting the "RUN" signal. So, I pull out the UltraGauge and plug it into the OBD-2 port. I get a never-ending "scanning..." message. Well, that's not good. I double-checked the UltraGauge in Hapy, and the computer linked within a few seconds. Okay, we have trouble with Nemo's diagnostic system which could prevent a start or we have multiple things going on. With this car, the latter is probably true. First, I tried to isolate the OBD-2 issue, and kill many many hours doing so.

OBD-2 Issue Diagnosis: General
The early B5 versions of the A4 had some interesting 1 or 2 year only issues. One of the oddities around 1997, when Nemo was sold, was the engineers choice to integrate the stock stereo with the "K-line": the signal processing wiring between the computer, many components and the OBD-2 plug. In these late 90's cars, it is the K-line you are subscribing to, not the more modern "CAN BUS". Okay, cool. There are many modules plugged into the K-line, but they are all in parallel. the diagnosis theory goes that when you get no signal on the K-line it is because one of the modules is faulting out, grounding the K-line. Once you can identify and remove the faulty module, you will get a signal on the K-line. You will probably get a failure code for that module, but you will at least get a signal. So, away we go, trying to figure out what modules are even on the K-line, and then isolating them.

OBD-2 Issue Diagnosis: Radio
The stock radio wiring was unceremoniously cut to pieces by the idiots at Car Toys when they installed an aftermarket stereo. Based on the wiring diagrams I have found and the commentary on the interwebs, I am not sure this car actually had that K-line-in-the-stereo thing. I did check the wires for the right color combinations, and for wires that were the correct colors for the K-line. I was unable to find them. There are, however, many wires sticking out of the hole where the radio used to be... before it was ripped off in Eugene. I intend to re-integrate an original plug before I put all this back together, but that's another day. I moved on to the next possible culprit: the climate control system.

OBD-2 Issue Diagnosis: Climate Control
found in climate
computer
The climate control system in these cars is another little computer. In some models, it is held in place with a couple brass clips. In Nemo, I had to remove the center console cover plate / face and found 2 Phillips screws holding it in. Once threaded out, the unit removes through the front. I unplugged the unit and checked the OBD-2 for a signal. Nope. I did, however, find a soda/beer can pull tab inside it (picture on the right, here, laying on the carpet after I removed it from inside the climate control computer thing). So, that was interesting. Next.

OBD-2 Issue Diagnosis: ABS (Brakes)
The fine folks on the interwebs have found that the ABS sometimes causes K-Line problems. The way to identify if it is the problem is to disconnect the plug. The ABS unit is on the driver (left) side, next to the washer bottle. You simply pull up on the silver metal tab and the plug lifts out of the socket. I found a piece of electrical tape floating around in there. Another question-mark from the prior owner. Neat. I checked the OBD-2 for a signal. Nope. I shot the socket and the plug with DeOxit and left it disconnected for the rest of my tests. I figured I might as well leave it better than it was (DeOxit, not leaving it unplugged). Next!

OBD-2 Issue Diagnosis: Dash Cluster
Moving on, we consider the dash cluster. The entire thing is held in by 2 Torx-head screws from the front, hidden behind a cover plate just above the steering wheel. Pull the cover plate, remove the screws and it pops right out. I unplugged the various cable plugs and checked the OBD-2 again. Nope. Grr... Next!!

OBD-2 Issue Diagnosis: ECU
example A4 ECU 
It seems like every system on the engine that has more than one wire into it delivers some signal to the computer. So, this seemed like the next logical step. I figured if I could get a signal after unplugging the small plug on the ECU, I would have shown that the issue is in the engine compartment and I could put everything in the cabin back together again. If the issue remains, then it could be the ECU. So, I disconnected the small plug from the ECU and we still didn't have a K-line signal. Grr...

So, I plugged the ECU, ABS and the dash cluster back in, turned the key to RUN and heard the click-snap of some relays firing, but no fuel pump nor fan spin. I could not remember if I heard the relays before, but this changed my thinking. If at least some of the relays are firing, then the ECU is telling them to. If there is a Check Engine Light, then the ECU must be at least partially working. Perhaps the K-line / OBD-2 issue is completely unrelated and this is just a simple fuel supply issue. So.. new plan: get the fuel pump to fire.

Fuel Pump Test
As is so often the case in laboratory settings, the pre-work for the experiment is where all the time is taken. Such is the case here. I started by removing the plate covering the fuel pump. This sits behind the rear seat in the trunk on the passenger (right) side, and is held in place with 3 very short Phillips screws. Once the plate is removed, you can see the top of the fuel pump. There are 2 fuel lines, one supply and one return, and a single electric plug. I found that slightly wiggling the plug allowed it to pull off the pump. YMMV. Once removed, you will see 4 pins. 2 of them are for the fuel level and 2 are for the pump. I started my tests with basic resistance and continuity-to-ground. Things seemed fine, so I shifted focus to test-firing the pump by applying 12V to the pump.

This is where the experiment set up took some time relative to the actual test execution. I ran a pair of wires from near the battery (not hooked up) back to the fuel pump. At the battery, I taped 10A fuse to the "red" wire and alligator-clipped the other side of the blade to the positive battery post. I alligator-clipped the "black" wire to the negative post. Back at the fuel pump, I applied the red and black wires to the fuel pump and it fired right up. I held the wires there a few second to demonstrate that it would not just run for a second and die. So, we have a good pump, but the pump won't fire from a relay signal. So, next we check the voltage from the relay, after we put the experiment wiring away.

Fuel Pump Relay Test
A4 Fuel Pump Relay
Back up front, I took a red wire, stuck it into the voltage-supply pin in the wiring plug at the fuel pump and tossed the other end through the cabin, over the outer edge of the driver seat. My plan was to compare the voltage sent to the pump at the pump. Since the relay only pops for a second when you turn on the ignition, I had to have my test equipment near the ignition key. I stuck my black lead against the metal fuse box mount, held the red lead against the wire I tossed through and turned the ignition to "RUN". I got 5V. I checked other spots around the fuse box and got 13V, so I started thinking that the relay was bad, dropping the voltage from 12/13V to 5V which, of course, is not enough to run the pump. So, I swapped out the relay... and the fuel pump still would not run. Great. I concluded that the 5V I read was actually the base charge for the fuel level sender and not the supply for running the pump. 

So, I checked the voltage at the supply-side of the relay: 13V. I jumpered across the relay pins, and the pump fired up. So, we're back to the ECU is not sending a signal. Fearing it is the ECU, I went looking for any other reason. I recalled that when Dot (the white 2000 VW Jetta 2.0 which broke the timing belt) failed, one of the theories for not starting was a crank position sensor. The thinking is that if the ECU doesn't know where in the revolution the crank is, it doesn't know when to fire, so it doesn't try. It is not as clear whether a failing crank sensor would prevent the fuel pump relay from getting a signal from the ECU, however. As much as I have tried to avoid it, it felt like I was sliding into just-swap-parts problem solving. At $35US for the least expensive part-to-swap (crank position sensors start closer to $60US), this can get needlessly expensive very quickly.

Crank Position Sensor (CKP)
A4 Crank Position Sensor
I have mentioned before my belief that the Audi engineers are sadists. Only someone who takes pleasure in other's pain could arrange for replacement items to be so hard to get to. Case-in-point: the crank position sensor. The crank runs the length of the block (obviously), so given a blank canvas, an engineer could potentially place a sensor anywhere along that axis. Chosen location? Directly under/behind the oil filter so you either have to remove the oil filter (forcing an oil change, which arguably is due) OR you need to perform contortions to get an Allen-head wrench in there. If you go this route, consider that the further the bolt comes out, the closer you get to the oil filter. At least there is only one fastener. These sensors have a long lead on them that plugs into the engine harness... behind the coolant bottle. In Nemo's case, this plug was fairly easy to get to. There are methods for testing the sensor, of course.

The Audi/VW sensor has 3 wires, from pin 1-3: power | signal | ground where the power and signal connect to the ECU and the ground finds its way to the chassis. To test, 12V and ground need to be supplied to the sensor plug (once disconnected from the harness) and a multimeter checking the signal wire for an AC wave signal while the engine is turning. No signal = bad sensor. Since no local shops had a CKP, I returned to sanding Bondo in Zed while I waited for the part to arrive.

Once I had the part in hand, I checked the resistance between the pins. I got 500ohms +/- between the middle pin and one of the outer pins. Using that as a baseline, I swapped out the CKP and then tested the one I had just removed. Same resistance. So, I concluded there was nothing wrong with the old one and put it in the stash of A4 spare parts (with the fuel pump relay).

ECU Swap
At this point, I had run completely out of ideas fo4r why the ECU was not sending a "go" signal to the fuel pump relay. I hit the local junkyard looking for a just-dropped-off A4 to scavenge the ECU. None of the A4's there had the right ECU, but I did get an ECU box cover: Nemo's had a good-sized hole in it where I thought water might have entered. Without another option, I hit eBarf and found an ECU with the same part number as the one as was currently in Nemo at a salvage yard on the East Coast (with a 30 day return policy!). Hopeful, I swapped out the ECU's which consisted of pulling out the big plugs in the back of the old and plugging them into the new one, since the box was still lid-less. I had some concern that energizing the ECU could fry it if the underlying condition still existed.

Still, I turned the key to "RUN" anyway... and heard the radiator fans and fuel pump cycle for a second before shutting off. This was how things used to work. So, I turned to start and he fired right up. I have concluded that my first guess was the correct one: I had left the hood open a little bit to make room for the alligator clips on the trickle charger, and with the hole in the ECU box lid, water got into the ECU and partly fried it. If I had not had the experience with the chipped ECU for Hapy when the computer semi-worked, I would not have been so quick to accept this. The Check Engine Light lit, so the A4 chat-boards all assume that means the ECU is fine. NOT TRUE. It could be partly damaged, like Nemo's.

The climate control is still in pieces, the lower dash panel is off, and the radio wiring, well, it's the same as it was: a mess. While I can move Nemo out of the way so Oliver can go for a spin, Nemo is not ready for driving around just yet. The re-assembly will wait, and I'll probably post on at least the re-wiring of the stereo plugs that the idiots at CarToys cut apart. I did, however, install the ECU box lid, complete with threading in the screws to hold it tightly shut. No more water getting in there.

Thanks, as always, for following along-

Tuesday, October 20, 2020

Car Ports and Car Noises

What a difference a week makes. In my last post, I mentioned that I had helped T moved some stuff out of the one garage bay. Since then, K got the rest of his stuff, so Oliver is back in the garage. Also, the 2 carports from Harbor Freight arrived. So, I quickly moved from all cars out in the open and no sheltered space to work to 3 cars under some kind of roof, creating all kinds of work space. So, today's brief post if about getting the car ports up, and some diagnosis into the noises coming from Nemo.

Car Port Assembly x2
400 sqft of not raining
I have a small 2-car garage. I underscore small because Oliver (1978 MGB) barely fits between the garage door and the walkway along the opposite wall. Considering the MGB is one of the shortest cars out there, I couldn't imagine parking a Caddy or one of those big pickup trucks. Simply put, it wouldn't fit. So, when I think about how I'm going to complete Zed (1979 280XZ) this winter, I shudder. It's way too small to shoot paint, and with the gas furnace in there, I couldn't paint while heating the house, so the plan unravels fairly quickly. So, I got a couple of those 10' x 20' car ports that Harbor Freight sells (~$120US each). My driveway has a slight tilt towards the garage, but it's otherwise fairly flat.

V between
While I would have preferred a purchase ship-to-store option, the harbor freight website doesn't offer that. Instead, they offer $7US to ship it by FedEx Ground. That sounds like a cost-loss on their part, especially for a pair of these car ports, but they arrived before the primer from Eastwood (which still hasn't arrived). The assembly is actually very easy. The instructions have only a handful of steps and the exploded drawing is not as bizarre as IKEA furniture. I used a rubber mallet to get the pipes to fit together quickly. I was able to get each one assembled in about 2 hours, measured from when I walked out my garage door with a full box to walking back in after set-up and recycling/throwing away the packaging.

I set one over the top of Zed, and the other right next to it. I would rather not have a 20' dripped seam between them, and pushed the posts right next to one another. I took the 8-inch-or-so hangdown from one, and flipped it up over the top of the neighboring car port. The other hangdown, I pulled across and clipped to the tie-down seam, which runs along the inside, above the bottom rail. Then, I forced the pipes together and cable-tied them. This created a small V shape of car port tarp between the rails, running all the way front-to-back. My plan is that this will direct the water down to the lower end of the carport. I think this will work except for those super-heavy rain events we get sometimes. We'll see.

A4 Front Clunk
top of front strut, example
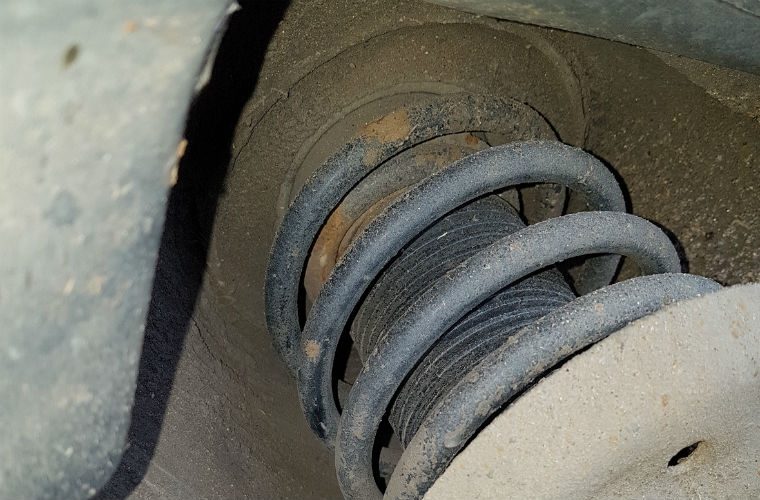
Now for some car content. After getting all the little things fixed on Nemo, I took him for a short test drive to see how he felt. He felt pretty good. Lots of boost, and plenty of power, but he made lots of noise. I could hear a clunk pretty much on every little bump. I figured it was the sway-bar bushings and replaced them: 13mm bolts hold the clamps on, and the bushing has a slit in it so you just need to remove the clamps, pull off the old bushing, slap on the new one and put the clamp back on. Times 2. The noise got a little better, but after pushing the fenders up and down, I believe the problem is in the strut-mount. From what I've read, after market struts that lower the front end (like Nemo has) put more pressure on the strut-mounts than the stock ones do, transferring some of the burden from the springs to the mounts to hold the front end up. This causes them to wear prematurely. So, I will be looking to replace those. Since I have a very healthy fear of strut springs, I will probably remove the struts and have new mounts installed by one of the shops around here. Better to pay with some hard earned cash than with some body damage.

A4 Rear Hum
Also on that test drive, I noticed that the rear end would make a humming noise once I got above about 30mph. I figured it was the wheel bearings, so I put the back end up on jackstands to confirm. The wheels had no play in them. None. Curious, I pulled it out of gear and spun the wheels, listening for noises (that would translate into a hum at speed). I heard clicking coming from the inner CV joints. So, that means at least removing one or both rear axles. Fun. Of course, with the AWD, I can't be 100% sure the bearings aren't bad. I may not have gotten the wheels spinning fast enough to make noise.

the diff oil fill, example
I intended to drain and fill the rear diff while the rear end was up in the air, but the fill plug is stripped. While I was under there, I got to see just how much caked on grease could remain attached to the outside of a differential without falling off. The answer: a LOT. I am really concerned about the health of this diff, and the whole rear-end, for that matter. Before I go any further with it, I will collect a second opinion. After that, I think it will have it's ass-end in the air for a while as I replace CV joints, and/or wheel bearings and fight off the fill plug so I can refresh the fluid. I'm not sure a 20+ year old 230k+ mile A4 is worth terribly much, but this is how we learn, and this could be a useful daily-driver for someone, maybe, eventually.

Well, that's it for today. I have not gotten back into the Zed paintwork since I put up the car ports. I really wanted to get Nemo road-able first. With the car ports up, I have more paint prep to do, and I need to figure out some sides for the car port space so I can heat and paint. Thanks, as always for following along-

Tuesday, September 15, 2020

More A4

Today's post gets us that much closer to being done with T's old A4, Nemo. I still have to replace a button and mess with the hood, but after today's post, I am very close.

Before I begin, a couple quick personal notes. First, T is fighting forest fires around Oregon this Summer. If you are not tracking the fires in the news, this is one of the worst fire seasons on record. So, having a son out in it, makes this all the more scary. It makes working on his old car quite surreal, of course, with the air quality this past week, I haven't been working on anything. Second, yesterday was the 1-year anniversary of our dear brother Travis' motorcycle accident. In an odd twist, we just long-term loaned Flash to his niece. We really miss you, Travis. One year later, we think of you every day.

We are living through some strange days, between police behavior, the protests, the violence, the CoViD, the anti-maskers, the widespread fires, recurring power outages and brown-outs, and the lead up to the election, I greatly look forward to some semblance of stability sometime soon. 2020 has been emotionally exhausting; 2021 can't arrive soon enough.

A/C
If you live somewhere hot, having Air Conditioning (A/C) is pretty important. Here in the western side of Oregon, A/C is nice to have, but not as critical for the hot weather. The system's ability to remove moisture from the cabin is much more important. I have lamented this before, but our temperature likes to float around the dew point. This leaves moisture hanging in the air and residing on surfaces. This includes the inside of your car's windows. This moisture is quickly removed by flipping on your air conditioning as your car warms up in the morning. For this reason, I felt it was very important to get the A/C working. All I needed to do was charge it.

The instructions on the A/C charge bottle are fairly accurate. First, get your engine running with the A/C system on full. This is to get the system pressurized. In my case, the air blowing out the vents was quite warm. Under the hood, locate the 2 A/C lines. The thicker one is the lower pressure line, and that's the one you want to work with. Thread off the protective cap, and connect hose from the recharge bottle to the nipple. The gauge should show you current pressure in the system. On the A4, it was negligible. Disconnect the hose from the nipple and shake the bottle. Adjust the target pressure based on ambient temperature by rotating the cover on the gauge. The ambient temperature is on the bottom and the target window is between 2 lines on the pressure-read side of the gauge. Then, re-connect the hose to the nipple, and while shifting the bottle from an upside-down orientation to horizontal, pull the trigger to dispense A/C charge into the system. I counted slowly to ten while holding the trigger and then releasing so I could see how the pressure responded. It took 3 pulls like that to get the pressure into the target pressure zone.

With the engine still running and the A/C still on full blast, check whether the temperature coming out of the vents is any better. In our case, the air was nice and cool. Solved!

Trunk
lid where latch goes
The trunk lid on the A4 used to work. The button on the trunk lid used to open it, and the button on the dash used to work as well. At some point, they stopped. Then, the trunk wouldn't stay closed for a while. T would hit a bump and the trunk would flap open and shut. Most recently, the trunk wouldn't open at all. It was effectively locked shut. Loading your trunk through the rear seats is not really viable. T had purchased a replacement lid from a junk yard, but it was gold, rather than high-gloss black.

We start our efforts by removing the carpeted inner skin of the trunk by crawling into the trunk from the passenger compartment and removing the 10 +/- Phillips head screws holding the skin to the lid. There are 2 hiding in the pull handle. Once all are removed, the panel will flop down, exposing the latch. Using a screwdriver to save my fingers, I pushed against the latch workings to get the lid to pop.

old on top
Once open, we can see what's what. It appears that there are 2 styles of latch mechanism on these trunks. The one on Nemo lacks a key-lock. The latch on the donor has one. The part that actually latches, however, is pretty much the same. And, that is the part that was not operating correctly on Nemo. The button under the dash didn't work regardless, and the button on the trunk still doesn't work, but it was the latch that was the real problem. The latch is held to the lid with 2 13mm nuts, and is activated by a lever which moves the mechanism from right to left to unlatch. In the upper picture on the right, here, you can see it's rusty end protruding from the left in the little hole. I discovered that the actual mechanisms are slightly different beyond the key / no-key difference. The point at which the lever attaches to the mechanism is not in the exact same place, so I had to re-locate the activation motor about 15mm to the left in order for the latch, when at rest, to remain closed, and open when activated.

Since the activation motor had been mounted with bolts threaded through mounting holes in the trunk, I felt uncomfortable just boring holes. Instead, I set the bolts aside and used cable-ties to set the activator in the right spot. I threaded on the replacement latch mechanism, connected the lever and set the motor. Once the cable-ties were taut, I confirmed the activation of the latch by jumping across the wires that connect to the broken-and-removed trunk switch on the dash. Several tests were followed by multiple trunk closing/opening trials before I was convinced that I had it right. I decided to leave the cable ties in-place because the right-hand bolt hole for the activation motor was over a natural hole/gap in the trunk so I couldn't effectively mount it with the old fasteners. The right edge of the hole is visible on the left edge of  that upper picture. The cable-ties should hold for a good long time as-is, even if it does feel a little janky. With the inner skin back in place, you can't see the new latch or the janky-installed activation motor, so it's all good. And, it works. I just need to replace the button on the dash. I'd like to get the button on the trunk lid to work, but there is some mystery wiring in there, and getting to that button is fairly difficult. It is possible that it is shut-out because of some lock somewhere that I haven't been able to find. German engineering strikes again.

Hood
trunk card
The hood on Nemo is the last big visual issue I wanted to improve. This is T's second A4, so I can't remember if we replaced this hood or if it was on his old one. Regardless, this hood was painted with what looks like black primer. There was no sheen. None. The rest of the car is a high-gloss black color, so the hood didn't look that great. Additionally, the front grill was also painted flat black, but over the course of many miles of driving, some of the paint had chipped, both on the grill and on the nose of he hood. It looked bad. So, off to the parts store I go to get some paint. The card in the trunk says the paint code is LY9B. The duplicolor paint-match sheet didn't have a reference to that paint code, so I got the one they DID have for black.

The hood removed very easily. The hood stand is held on with a little C-clip, and then the little post slides out. I set my tool box on the engine intake to hold the hood up, and then removed the front 2 bolts from the hinge (13mm). I loosened the rear ones before carefully removing them all the way with my fingers so I could keep control of the hood when the last bolt gave. It surprisingly didn't shift around. I moved it to a pair of sawhorses on the lawn, and proceeded to sand it with 250-grit sandpaper. I got all of the weird anomalies off, and then washed it to get all of the dust off. I felt ready to paint.

I blew 2 cans onto that hood, but the color just didn't get as dark, nor as shiny as I expected. Audi offered 2 colors of black, and the one I needed was a super-deep super-shiny black. The one I got, however, was more of a dark charcoal and sort of satin finished. I will need to paint it again, with a different, blacker, paint. Before I repaint it, I will play around with 1000 grit sandpaper and maybe a buffer to see if I can get this paint to look decent. I figure this is an opportunity to practice buffing new paint, so I will take the opportunity before painting over it. Who knows? Maybe I can get the it looking good enough that I don't re-paint it... but I doubt it. Currently, it looks like a carbon-fiber hood, which might work for some, but not most, drivers.

I think that's it for today. If the sanding buffing experiment becomes a thing, I'll post on it. Otherwise, I will probably be reverting to the Zed (1979 280ZX) after I have Nemo's hood installed. As we move deeper into September, I am feeling the pressure to get the body-filler spread and sanded. Wet season is coming! Thanks, as always, for following along.