Showing posts with label cold. Show all posts

Tuesday, March 10, 2026

Hapy Drives Again

It has been a long 18+ months without having a member of our family kicking around with us. But, Hapy is one injection-pump re-seal away from daily-driver status. Today, I'll go through the last little things. Again, my regrets for not taking many pictures. I have been away from fixing and blogging so I have fallen out of the habit of snapping a picture while I'm doing the doing. Also, I got hit by whatever flu thing that's been going around and was flat-backin bed-ridden for the last 3 weeks.

Clutch Adjustment
post-test drive
I touched on this at the end of my last post. I had to add an extra small spacer at the end of the Bowden tube as well as on the very end adjuster. To be fair, I really didn't need the one on the adjuster, but I would would not have much adjustment thread left if I hadn't. I ordered a replacement clutch cable and when it arrives, I will keep it under the rock-n-roll bed until I get to replacing it. I expect I will replace that cable relatively soon, but I want some fun drives before I take him off the road again, even to do something that I could do (and have done) on the roadside.
 
The standard adjustment advice is to shift the tension on the cable as felt by your foot on the pedal such that there is no engagement until the pedal has moved a good inch down towards the floor. This prevents premature wear on the clutch and/or throwout bearing. You don't want the throwout bearing riding on the clutch spindles all the time. That's noisy and introduces premature wear. What I did not recall from prior clownings on the cable was that the arm protruding from the transaxle would have so much play in it before the throw-out bearing touched the pressure plate at all. I recall it practically resting on the pressure plate, but my memory is not reliable. Anyway, I felt that the arm needed to press against the spring a little bit to get the adjustment correct. As I think on it now, that spring being engaged is what holds the clutch pedal all the way up so it's right. It just felt foreign. Honestly, it has been so long since I worked on Hapy, lots of this work has felt unusual.
 
Tail Light Show
Bowden Tube pic from theSamba
The tail lights were acting really strange prior to my first intended test drive after getting the clutch sorted. I start assessing the lights rather simply: run the hazards first. Since no other systems are involved, the blinkers ought to all light up together and turn off together. The left (driver) side was lighting up opposite from the others. When I added in simple running lights (still no key in ignition), the tail lights were a light show of blinking. I had initially thought that I did something funny with the reverse switch, but that is a simple dumb switch that allows 12V through when the transaxle is in reverse. So, I ruled that out. I concluded that the ground for the light fixture was poor, weak or virtually non-existent, causing the 12V to seek a ground though alternative paths of other not-illuminated lights, causing them to light up.
 
Getting into the Cavity 
The left (driver) side tail light is hidden behind a panel I added to offer colder air to the engine (See VW Bus Cold Air Intake). I had forgotten how much of the ugly TDI wiring was also hidden back there when I removed the panel. Anyway, first, I disconnected the cold air pipe at the last rubber coupling before the turn into the hidden cavity under the spare tire well. Then, I removed the 4 nuts holding the pipe flashing, and removed the air filter "assembly". While this was out of the bus, I thoroughly cleaned the air filter and shop-vac'd the cavity. With the air filter out of the way, I removed most of the screws holding the panel in place with a slotted screwdriver and bent the panel out of the way to access the tail light assembly.
 
Grounding
left side panel under spare
Immediately after sticking my head and a small flashlight into the space, I spotted a ground that had fallen off the grounding tab on the rear next to the light assembly. I popped that back onto the ground tab and tested the lights. There was no noticeable impact, but those grounds were probably used by something, so some other issue just got resolved.

I decided to add a ground directly from the metal back-plate of the tail light assembly to the unused grounding tab next to the one I had just resolved. I added what I call a "chair" tab splitter (because it looks kinda like a chair), that turns one tab into 2, to the grounding tab on the rear of the tail light. I re-attached the existing ground to one side of the "chair" and added a short brown wire to the other side, connecting it to the unused tab on the rear body. I then retested, and the crazy light show was over, and the left tail lights were much brighter. So much so, that I decided to add a ground the right side tail light, in hopes of balancing the lights.
 
The right (passenger) side is much easier to access on Hapy, but probably harder for anyone without a cold air intake cavity thing because the battery makes things tight. Unlike the left side, I disconnected the light fixture from the bus and hung it out the rear while I worked. I basically did the same thing as I did on the left/driver side: chair splitter, used an unused nearby grounding tab. Once reassembled, the left side did not see as significant an improvement, but I think the original grounding wire is shared between the lights so the right side was already getting benefit from what I did on the left side before I started messing with it, I just hadn't noticed during the left-side test.
 
Test Drive
At this point, I felt that I was safe enough to travel on a shared street. So, I backed out of the shop, down the lane-way and out to the street. He easily went into 1st gear and away we went. I did not have the little UltraGauge plugged in, choosing instead to use my senses to vibe the test loop. Hapy ran great. Power on demand at my foot, easily shifting from gear to gear, and getting into 4th but only barely before dropping back down. He still popped out of second when I quick-decelerated, but it was not as immediate and on a light decelerate he stayed in gear. So, there's some improvement there; I did not expect any. The exhaust was much quieter; I think some of my "wow this bus is loud" that drove to all the sound containment may have been at least in part from the broken exhaust-to-muffler joint. Facepalm.
 
The drive was not without its issues, tho. While the cooling fan and intercooler fans both came on by the manual switch, the intercooler fan was louder than I remembered. This could in part be because I couldn't hear it over the exhaust. Also, the noise of the turbo through the right cooling "ear" (behind the rear-most right side window) was unexpectedly loud. Again, this could have been masked by the louder exhaust and isn't really a bad thing. In a way, it's kinda cool and I can't hear it from inside the bus. Its only when walking around it did I hear any of these things and none of these are deal-breakers or send-him-to-the-shop things. I did notice that the dual-gauge I installed during the CoViD lockdown was acting funny (See Oil Temperature and Pressure). The pressure rose to the top and never came down and the temperature basically sat just off the bottom. I figured either the wires fell off on one end or the sender went bad.
 
Fixing Oil Gauge
left nut missing
Having the UltraGauge is great, but I really prefer just using the simple dual oil gauge. I can see if the temp is getting too high without a digital readout changing every few seconds. In fact, I have a VDO coolant temp gauge in my stuff somewhere that I have thought about adding into the dashpod and then I really wouldn't need the UltraGauge anymore. Anyway, solving the dual-gauge was fairly straightforward, starting with the engine-end. I figured that I did lots of moving things around, so simply disconnecting and re-connecting those wires to the sender would remove that variable. One quick peek, and clearly that was the problem: one of the M4 knurled nuts had shaken it's way loose and completely fell off. I ordered a set of 5 (the smallest set I could find not on amazon, and it still cost, like $15US). When I installed, I put some blue locktite on there so these don't shake off either. I was very grateful to not have to open the dash.
 
Diesel Leak Persists
catching the leak
Two years ago, when Hapy first started having hard-start issues, it was a fuel leak coming from his injection pump. Back then, there was literally fuel flying all over the engine bay. I spent time getting the top-end of the pump sealed, and that resolved the flying fuel and most of the hard-to-start issues, but it was during those months that I ground down the ring gear, putting us on the last 18 month trajectory. Also, I continued to lose prime in the pump, but without visible leaks. Now, I can see the pump dripping on the ground. So, the seal between the body and the head appears to be the problem, and its getting worse. I ordered a replacement deluxe kit from DieselGeek. Rather than do that seal myself, I have asked our old friend Justin (OldPoopie) to do it for a couple of reasons. First, he does these all the time, but more importantly, he has the computer bits to really get the timing spot-on. I expect that once the pump has been re-sealed and the timing set, Hapy will be a monster.
 
Well, that's it for today. Justin is super busy, so it will be a month or so before he can get hands on Hapy. In the meantime, I will be shifting focus onto doors for the shop, we have some house projects to chase and maybe I will be getting my hands on Oliver, the 1978 MGB. It feels like nice weather is not too far away, and taking the MG on a picnic run with Boo would be awfully sweet. Thanks, as always, for following along- 

Tuesday, March 15, 2022

VW Bus Cold Air Intake

Back when Hapy was getting regular long summer drives, I noticed that the engine bay would get pretty warm. Recall back to the Newberry trip report for example. So, I put together a cold air intake concept to drop the temp going into the turbo inlet. I really do not expect to notice much of a performance difference. While I understand a cold air intake can reduce intake temps, and improve engine performance by a handful of HP, I just don't think what I did will have that kind of impact. Still, it was fun to do.

For someone running the original engine, with the engine tins and surrounding foam in place, this modification makes absolutely no sense. The tins already effectively separate the hot side of the engine from the air intake. If you have lost your tins (or foam), and for some reason cannot replace them -or- you are running a modified engine where tins cannot be fitted, something like this might work for you too to keep the hot side from meaningfully impacting your intake air temperature. This whole bit is triggering memories of that old Burger King advertisement about keeping the hot side hot and the cool side cool.
 
Before I begin, today marks the Ides of March. I am not really sure how to recommend ways to celebrate that. Pay off your debts? Enjoy a celebration picnic with revelry and drinking? Wander out of town in an animal skin? Perhaps we can all just hope Putin will suffer Caesar's fate this day for the inhumanity he is visiting upon our Ukrainian friends. Whatever transpires, in a couple days, it will be St. Patrick's Day. So, I will just get some rest to prepare for that. Hopefully, we can tip a drink within 2 meters of dear friends to celebrate a post-pandemic Spring.

Orientation Thoughts
On topic, consider the VW bay window bus engine bay from the rear hatch (picture on the right is of a '68). Most to the rear on the left is an otherwise unused battery tray. Some folks (like late-bay Westy-drivers) have a luxury battery there to power the fridge when shore-power is not available. On Hapy, there are just a lot of wires, so it's actually not much to look at. The spare tire well hangs down towards the front, meeting the rear tire well. Above to the rear there is a tall open area that eventually reaches the finned ear behind the rear window. Running along the bottom edge, front-to-rear, there is a small lip or perhaps a pinch weld that's about half an inch tall. My thought: wall this in, and create a pass-through for my engine intake, isolating it from the heat generator (engine exhaust and the turbo). Keep the cool side cool.

Parts
My go-to for all things metal fabrication these days (at least for air movement) is HVAC flashing, and this is no exception: I started with some basic 20ga HVAC flashing that I had lying around ($0). Onto the air intake, I need to add a 90* turn ($14US from siliconeintakes.com) so the air filter which used to sit next to the rear end of the spare tire well can instead go into the new cavity. The last piece is pipe flashing (like this) which cost me about $18US to provide safe passage for the aluminum pipe through the HVAC. The air cleaner needs to fit through the hole left in the basic wall when the pipe flashing is removed, so getting one large enough for this purpose was important. I had some HVAC flashing lying around, but at the time I did this, a 4 foot by 3 foot sheet (common size) would have run about $20US. A smaller sheet would cost a little less, but not much. So, all-in this would cost around $50US plus your time.

Cleanup
paper model
I learned along the way that this wall idea is not as straight-forward as it looked. As I started trying to model with a large sheet of brown paper, I realized there were some wiring clean-up items left undone. I tidied up the wiring a little bit, and strung as much as I could into the upper rear corner where the fuel vent line passes into the new cavity, securing them together (and to the vent line) with a cable/zip-tie. Below this bundle of wires, at the rear-most bottom, a couple of wires need to pass as well, so that makes 2 gaps to manage. The front-to-back T-12 cable (See the Chasing the Hapy Electrical Gremlins posts for context) routes into the engine bay where the flat rear meets the upward angle of the rear tire well, so that's a third gap to seal. Last, the stock TDI engine management cable routes into the engine bay from under the center-point of the spare tire well, so that's 4 gaps. Had I planned for this when I did the wiring, I could have potentially cut this list in half, or even reduced it to one. I preferred to not revisit the electrical again this winter, after last winter's adventure. So, I made 4 distinct gaps for wires to pass through. I numbered them in the image of the paper model on the right, here.

Model with Paper
With the wiring bundled, I could start working on the wall... with a model. I started with brown packing paper. These days, so many things ship with large sheets of brown paper as the padding, and that stuff is nice and thick, and sometimes wide enough for things like this. It is also 100% recyclable (unlike the bubble wrap), so I'm doubly a fan. Anyway, I started with a basic measurement: 22 inches deep by 16 inches tall. Of course, I discovered that the hole is not square, and the 22 inch measurement is correct from the bottom of the rear wall to the point where the engine bay curves towards the fuel tank. The top is more than 24 inches from rear to top of fuel-tank compartment. Also, the section is not flat: the bottom curves slightly inwards while the top remains straight.
 
cardboard model 1
Then Cardboard
After a few rounds of test-fit, measure/cut and some added painter tape for strength, or for adding material for sizing, I arrived at an approximate paper model. I transferred the paper model to cardboard with a pencil using some tracing and some angle-square. Consider: the rear wall makes a 90* angle with both the top and the bottom, and (I thought) the rear wall is straight. The top run is straight, though I chose to cut some of the area away which would have been pressed against the spare tire well. I made this choice for 2 reasons: first, the vacuum control valves are mounted there, and I did not want to move them. Second, having a sheet of metal against metal like that would have created rattle noise I would have to solve. With my outline and wire bundle cut-outs defined, I cut the line with a razor blade and cleaned up the edges with scissors.

test-fitting a model
With this stiffer model, I performed another few rounds of test-fit, measure/cut until the cardboard wall completely covered the gap, the wire bundles easily fit through their respective gaps and the edges of the wall were clearly in a place where I could envision mounting. The final cardboard model, in-place in the picture on the right, also eliminated a large triangular shape from the lower front corner which would otherwise have set against the driver-side wheel well. Similar to the cut out from the spare tire well, having a large metal-to-metal contact area would create a vibration-noise opportunity. Looking back, this cardboard wall looked at least as good, if not better than, the final metal wall.

Then Model with Cardboard Again
The front and bottom have a lip I can easily attach to. The top and rear will need some kind thought and some creative drilling. One additional consideration: on the rear pillar, there are grounding points which cannot be disturbed. I decided to add a small tab on either side (above and below) to hold the new wall to the rear. The top will mount directly to the spare tire well for the front 2/3rds. The rearmost section of the top, will not get any treatment at all. I thought about it, and decided that there were already enough planned fastener points to hold the wall stable without adding another hole in the cabin floor. I transferred the cardboard model to another sheet of cardboard after a few repeated fit-attempts. I want to make sure the HVAC, when cut, will fit correctly. Last, I modeled mounting tabs with scrap cardboard and more blue painters tape so I would have them in the right place and the right size when I cut the HVAC. The picture above was taken before I added the mounting tabs to the model.

Plan the Intake Pass-Thru
note imperfect rear line
With the cardboard wall in place, that side of the engine bay looked considerably better... well, it hid what looked bad, anyway. Motivated, I planned the intake route based on the placement of the new 90* aluminum intake pipe. I made a rough cut in that general area of the cardboard wall and put it back in. The 90* pipe is too long on both ends. I needed to remove about 4 inches from the end that juts into the cavity, so there would be room for the air filter (7" tall from rubber grommet to chrome top) without it touching the side of the bus. The filter housing allows for up to 2 inches of pipe before it bottoms out, so there is some wiggle room for my cut on that end. Similarly, the engine-intake end of the 90* pipe needs to be shortened. Again, the silicone collar that attaches the new pipe to the air flow meter on the end of the intake allows for a couple of inches of play. I did not make the actual cuts to the pipe at this point, though.
 
The intake looked about right, so I added in the pipe flashing. I drew the edge of the flashing on the cardboard and then drew another set of lines 3/4-inch to the interior of the tracings. I cut the smaller square out of the cardboard, making a square that was about 6-1/2 inches per side. I tested that I could pass the air filter through that hole. Otherwise, maintenance of the air filter would require removing the entire wall. It fit, but barely, leaving about a quarter of an inch on each side (the widest part of the filter is 6-inch diameter).

Adjustments
HVAC test fit
I transferred the last model above to a sheet of HVAC, but I did not fit properly and had to do another round of cardboard before I was able to get a good HVAC design. The big barrier for me was the location of the vacuum valves (so probably not an issue for anyone else). Ultimately, I removed the valves that were no longer being used (anti-shudder and EGR), and moved the turbo controller to the rear mount. This freed up the front edge of the spare tire well. The second issue will appear for everyone who tries this: I thought that the rear inner wall was perpendicular to the floor and ceiling. It is not. Consider, the contour of the rear of the bus has a slight curve; the inner skin does as well. The picture just above on the right shows the deviation from pure vertical / 90* angle. That picture also shows on the bottom rear corner that the body panels do not have clean 90* transitions either. I cut off that little tab in future efforts. With these considerations, the models were working: showing me how to get to a viable wall.
 
Assemble
prepping the wall
For the second time, I transferred my cardboard model to HVAC flashing, complete with marks for mounting tabs. I cut the HVAC with my tin-snips, and formed the wire pass-thru's with pliers. For clarity, I marked the outline of the hole and then cut crossing lines through the center of that marked area. I folded the triangular bits of HVAC back upon itself to create the opening while also avoiding a sharp edge where the wire bundles would pass. With a hammer and dolly, I smashed the fold-back flat. By doubling the material at the openings, the wall was effectively stiffened; I had not anticipated, but will definitely appreciate that. For the upper rear wire pass-thru, I left a tang or tab nearest the rear wall that I could bend back into place, so the rear edge of gap #1 (visible in the pictures of the installed cardboard model) could get covered up once the wall was in place. Once I drilled the mounting holes in the tabs I set the wall in-place, marked the holes on the bus and drilled them out.

Pipe Flashing
wall installed
At this point, I considered how I would attach the pipe flashing to the HVAC. First, I transferred the square-ish hole from the cardboard model to the HVAC, and cut it. I need to be able to remove this section so I can clean the air filter. I drilled out 4 holes in the pipe flashing, one each per side, where the rubber had dimples for that purpose. I set the pipe flashing in place and marked the HVAC. These spots were within the folded-back HVAC, making the area thick enough to tap. Sweet! So, with a M4 (.75 thread-pitch) tap, I tapped the 4 holes in the HVAC. Into these threaded holes, I sent bolts from the cold-air side with thread-lock so these bolts will act like studs for the pipe flashing. The picture above on the right shows the studs through the HVAC.

Finishing
cold air intake
I moved the wall into place and secured it to the side of the bus with sheet metal screws. I had thought about tapping the holes and using bolts instead. The holes were too hard to access with a tap and I don't think this wall will be coming out with much frequency anyway. Even so, removing some sheet metal screws is not hard. With the wall in, I re-checked my measurements for cutting the aluminum pipe. Once verified with the permanent position of the pass-thru, I cut the pipe down. I pushed the shortened 90* aluminum pipe through the rubber collar and attached the air filter. I sent the air filter into the cavity, and maneuvered the not-filter-end of the 90* pipe through a connecting silicone collar to the rest of the intake. I set the pipe flashing against the HVAC and threaded on the 4 9mm nuts.
 
When I maintain the air filter, the process will be the same as this initial install: remove 4 nuts, loosen the hose clamp and remove the cold air intake assembly. After I clean the air filter, I would re-install by fitting the flashing atop the studs, finger on the nuts, get the pipes connected and then cinch down the nuts.

final install
Now, Hapy has a cold air intake, and the left side of the engine bay is no longer a complete visual downer. Instead, we have a nice clean wall and the engine will get colder air than it used to. This wall does have some small gaps, of course, so the air will not be as cool as it could have been. Perhaps I will circle back later with something on top of the wall to better seal the edges and pass-thru's. Longer term, I may apply a thermal layer onto the engine-bay side to help reduce temperatures even more. The picture on the right, here, shows it in its current (final) state, though a keen eye will see that I had not yet plugged in the AFM (air flow meter) when I took the picture.
 
This took quite a while to actually complete, having started before the 2021 winter holidays. I had other things going on, and this was a lower priority for sure. Also, there were multiple modeling cycles as I figured out the unique puzzles added to the driver side of the engine compartment from adding a TDI (and related vacuum control valves) to the mix.

That's it for today. Thanks, as always, for following along-

Tuesday, December 3, 2019

TDI Fighting Frost

Another departure from the TDI retrospective posts, today's post covers my efforts to install a FrostHeater into the new-to-us 2004 TDI JettaWagon. I discovered that this is a later-year model, so it does not have the ALH engine, rather the BEW. Neat. But, that's a different story.

Why a FrostHeater?
Our weather turned especially cold in September and never really recovered, here in the Pacific Northwest. While the rest of the country appeared to enjoy nice warmer weather (as evidenced by the short sleeves at the Major League Baseball playoff games), we were breaking out our hats and gloves. After scraping ice multiple days, I decided something that got the engine warmer faster would be a good idea, both for the car's engine as well as it's inhabitants.
http://www.frostheater.com/

I looked for and found the FrostHeater, courtesy of the TDIClub. Everyone loves these things, and while they are more expensive than many others, they are 100% USA made and they do exactly what you would expect: the coolant is heated so the engine is warm when you try to start it. So simple. No weird hot-patch glued to the oil pan, creating a small area of intense heat, and not really helping the engine warm up. There were tales of those things falling off, too, so mid-winter you are suddenly without it. Not good. It's hard enough to work on the car outside when the weather is kinda crummy; full-on winter is beyond-the-pale unpleasant.

More Sadism
I brushed up against the sadistic nature of the German auto-engineers when I did the head removal on T's Audi A4, Nemo (See Sadist Engineering). That was nothing compared to what they set up when they did the hoses behind the radiator in the TDI. On the driver side, we have the oil:coolant exchanger where the oil is cooled or warmed by the coolant. This is actually a really great idea, but the way it was implemented puts your hands behind the fan housing, if you want to mess with those hoses. At some point, you will need to replace them. In my case, I was removing the hose that runs from the bottom of the exchanger to the upper radiator hose. The rear of the fan housing, at least in my case, is hard and sharp-edged. By the time I was finished, my hands looked like I had spent the day baling hay: covered with little cuts (20 or more of varying lengths and depths on each arm/hand) and pink from knuckles to elbows. Note to the reader: get a set of hose spring clamp pliers like those shown in the picture here. The skin on your arms, and potentially many hours of suffering, will be saved.

Lower Hose
Again, I encourage you to get a set of hose spring clamp pliers. I have a set now, and will actually enjoy clowning with these clamps next time. Start by removing the under-engine pan. Then, put a catch-pan below the oil:coolant exchanger and remove the lower hose from it. Allow the coolant to drain. Once you're fairly sure you are not going to get coolant dripping on you, start positioning the heater unit. On this engine block (BEW, remember?), there are 2 holes which could hold the heater. You want the one that is closer to the passenger side, but not yet. First, route the hoses. The lower hose runs parallel to the bottom of the engine block and loops up and around to the lower fitting on the oil:coolant exchanger. I suggest attaching it entirely, with a hose clamp. It is easier to thread the bolt from the heater bracket into the hole in the block if the hose is partly helping you hold it in place. Even then, this is not easy unless you have abnormally long, thin fingers.

Heater Unit
Frostheater unit
Before you start with the bolt, shoot the hole with some brake cleaner and mop it out with a rag or paper towel. If the threads aren't clean, this only gets harder. Anyway, you are on your back, holding the unit up with one hand while slipping your fingers between the bracket and the block. With your finger tips, you will need to wiggle on the bolt, lightly turning it until the threads set. I found the bolt would just bite into the threads before it was too hard to turn with my fingertips. The tight space makes it impossible to gain purchase with more of your fingers. With a 17mm wrench (socket won't fit), tighten it down being careful not to cross-thread the hole.

Upper Hose
In the instructions, the FrostHeater folks indicate that you should route the upper hose before you attach the heater unit. Yes, it could be helpful to do it first. I routed and re-routed this hose many times (both before and after the heater was bolted on), mostly because the directions and pictures were not very useful for this part. The hose runs around the oil filter housing from below. The directions indicate that the hose runs between the AC hose and the housing. While that's correct, they omit the part where it runs around the front to the oil filter housing to the upper radiator hose. The picture in the instructions doesn't show it. Anyway, once you have the hose routed, remove the old hose, and slap that new one on.

Retrospective
The instructions and the web site indicate this is a 45 minute job. It took me 5 hours, which further proves my shop-time math. We test drove it to work the next day to make sure any air bubbles worked their way out, and plugged it in overnight that night. The swift-start and instant-heat from the heater was very welcome. Everything behaved as expected: at start-up, the coolant temperature was at normal operating temp (NOT), and once we started moving, the temp dropped a little bit while the warmed coolant met the cold that was in the radiator. After the coolant blended, the temperature rose back up to NOT quickly, like, by the time we were on the main roads. While this install was a super PITA, we will enjoy this heat for years. Already this autumn we have greatly appreciated how little we have had to scrape ice even though all the other cars in the driveway had icy windows in the mornings. Having heat coming out the vents before we're out of the driveway is really really nice too.

The main take-aways from this are: get a set of those hose clamp pliers, give yourself lots of time, and recognize that the hoses are probably original, so they will be super stubborn to come off. If I ever get to driving Hapy in the winter, I would definitely install one of these. In fact, this install gives me a thought for how I could install the coolant filter I got over the Summer.

That's it for today. Thanks, as always, for following along.

Tuesday, July 9, 2019

4Peaks 2019 - Festival Report

Ah yes, the annual report on what happened at 4Peaks. Before I start, I have to say that 4Peaks is an annual tradition for a reason. We absolutely love 4Peaks. So, please read any criticisms through that lens; we love it and we want it to be as great as it can be. I already posted on the travel adventures, and I'll post about the music next, so this post is just about the festival itself.

Attendees
This year, Boo and I were joined by GratefulEd and our old friend Mayhem. As I mentioned in the Road Report (See 4Peaks 2019 - Road Report), we crashed at Mayhem's ranch the night before the gates opened. The following morning, we carabused to the lot with GratefulEd's Belle leading our 2-bus parade. Recall, Belle is a 1973 VW camperbus with a Riviera pop-top, but a fairly custom interior. Similar to Hapy, Belle is not really a looker, in that she was painted with dark green fence paint. She does have lots of cool old stickers and flags, though. This year, GratefulEd added an observation deck on top of his luggage rack, so he (or anyone else) could sit in a deck chair and look out across the festival grounds high above the cars. You can see the ladder access to the deck in the picture on the right, and me testing it out in the picture below that.

Who's Bus?
Between the stickers, flags and the observation deck, GratefulEd had lots of folks asking questions about Belle. Based on the way we were set up, I think Hapy just disappeared into the back ground. No, I'm NOT jealous; it's actually the way we prefer it. I didn't get many questions about Hapy; in fact, I think the only questions were out of reference to Belle, like after learning Belle was a '73, they would ask what year Hapy was. If I get around to painting his lower half over the winter (like I originally planned 10 years ago), it will be interesting to see if suddenly there is interest. Again, that's not what I want necessarily, it would simply be an interesting sociological experiment.

Last year (see 4Peaks 2018 - Festival Report), I said that I wasn't a huge fan of the GoWesty designated lot because it felt like we were hanging in an art gallery with a bunch of really nice looking art. Hapy is built for camping, not gawking, so he attracts very little attention, even when we're all by ourselves. This year, though, the GoWesty lot was not as formally laid out, so it didn't feel nearly as much like a car show. Maybe Ziggy heard some feedback after last year and changed it up. I dunno. Either way, I didn't overhear the "I like that one better" comments like I did last year, and we had far more passersby drop in, so regardless of why, it was better.

Arrival and Set Up
sunset by Peaks, Hapy nose on left
Anyway, we arrived at 4Peaks around 11:30. All printed and internet documentation said that early entry (before noon) was reserved for the "GoWesty" folks like us. That clearly wasn't the case, though, as we entered a scene of camps getting set up all over the grounds. Regardless, we found our way to the GoWesty zone, and parked in a "L" shape with Belle. Belle was parked facing head-tail perpendicular to the fire lane while Hapy was parked parallel, with his nose pointing towards the stage. This put our privacy screen where passersby on one of the main roads could see it. More importantly, this placed the observation deck pointing at the mountains, so GratefulEd could sit with a book, listen to the music and when he raised his eyes, he was looking at the 4Peaks for which the festival was named.

Central Oregon can be windy, and this year, the wind was fairly consistent. When the sun was out, the wind was blowing at least 10mph steadily, gusting higher. The predominant direction was from the stages up towards us striking Hapy's windscreen, so shortly after we had the Busdepot canopies up, GratefulEd and Mayhem put up a double-king size tie-dyed sheet along the wind side. We zip-tied the canopies together, and zip-tied the sheet to the poles, creating a mostly-wind-blocked zone. Within 30 minutes we had pop tops and canopies up, the lot couch out, carpets down, and beverages opened. Since it was barely past noon and the first band didn't start until 5, we had all afternoon to settle in and meet our neighbors.

Weather the Weather
While the wind was strong when the sun was up, the temperature was low most of the time (barely scraped into the mid-70F's on Saturday as the 4-day high) and very cold at night. The first night, it dropped into the upper 30F's, and the wind didn't entirely disappear. Fortunately, I had brought our Little Buddy heater, so we fired that up to semi-warm our living room space. It never rained, and after that first night it wasn't quite as cold, but it still got down to or below 40F overnight every night. Boo and I planned and packed for cold, so between lined pants, knit hats and a warm jacket, we held our own against the cold, and it didn't get us down. That first night, we made hot chocolate for the 4 of us to put some warm inside. Otherwise, we required no heroics. Turns out dancing is a great way to warm up.

Friends Found
Within the first hour, we found Mike-and-Suzie from last year. They, again, volunteered a couple of early shifts, but otherwise we didn't see them much this year. They brought a friend from their hometown who hadn't been to a festival before, so they spent most of their time separated in their own space. We met Jay and Alice from Bellingham, who told us about a small 2-day festival they have there. Alice was fighting a cold, so we didn't see her much, but we ran into Jay everywhere. Our next-door neighbor, JerseyPaul, was a chronic vagabonder, spending months on the road at a time. He had a story for every occasion. Boo played a round of corn-hole with a guy named Bip who we are fairly sure we met at the Black Sheep Family reunion a few years ago. He had an amazing energy.

I was able to connect with Chris the coffee-roaster from last year and give him a pint of Kahlua I had made with some of the coffee beans he gifted us last year. He gifted more beans this year, so we may have started some kind of quid-pro-quo thing. NewTrailerRussel was set up across the fire lane from us. He turned us on to some really good, kinda trippy music from a band named Beirut and showed us the inside of his trailer. It is amazing how light and well-considered new trailers are. He had adorned the walls with little electric candles giving the entire space a terrific warm glow. So nice.

We met lots of other folks too, whose names escape me. For us, the personal connections are why we go to smaller festivals, so having had so much time to meet and connect was especially important to us. We head for the festival with the intent to "see more music this year", but what we clearly really want is more personal connections, so that is ultimately how we direct our time. We vote with our wallets, and we vote with our feet. Everyone does. Sometimes, it takes some thinking to realize what you voted for.

The Junction
Similar to last year, we were within 15 meters of the major intersection at the center of the camp zone, called "The Junction". Many of the complaints I had about last year's Junction were resolved. The coffee place actually sold coffee. The Dump City Dumplings were not located at The Junction, they were inside. There was a caged trailer for axe-throwing. That's right. $5US for 5 throws. We didn't see many takers, but the proprietors were in good spirits. Boo and I met with a guy who drove from Central America and back again twice a year, hauling clothing for selling at festivals like this one in an old Ford Econoline van (picture on the right). We bought a couple of gifts, but it was the getting to know him, and how he approaches life that was the gift to ourselves. He lives in central Oregon, working a "normal" job for 6 months to support his other life of 6 months in Central America where he acquires cloth and clothing to sell.

It wasn't all perfect, though. The coffee cart only had coffee, so requests for anything requiring espresso was not available. Also, there was a Subaru dealership set up right at the corner who would set up this massive super-bright light as they were leaving for the night. Presumably, this was so that passersby would look at their table of pamphlets when the dealership representative left. It was so bright, it disturbed the light-art installation across the street, detracting from it such that you really couldn't see the lights. It was awful, so, we solved that problem for everyone by unplugging the light each night after they left. The twilight that remained was from the light glow of the art installation. Ahh... that's right.

Porta-Potties
It's rare to comment about the row of plastic cubicles at festivals. When it happens it usually isn't good. So, mark this: the porta-potties at 4Peaks this year were the best managed, cleanest services I have ever experienced. When freshly cleaned, they smelled like Bubble Yum bubble gum, and that smell lasted well into the cubicle being heavily used. Only on the very last day as we were leaving did they start to resemble porta-potties pretty much everywhere: gross.

Vendors and Food
Kidlandia tent
For the most part, we bring our own food and drink. This year, we were each given a Silipint cup so we festival-goers would produce less waste. It will be interesting to see how well that shook out, once they tally the garbage costs. I visited the Silipint booth at The Junction (their booth was a Unimog), but they were il-prepared to talk about their products, nor did they have any for sale or even for show. I'm honestly not sure why they were there.

Within the venue, there are many craft and food vendors. We usually check them all out a little bit, and sometimes we buy something. This year, we were less generous after the trump tax bill killing our finances, but the wares were pretty amazing.

more Kidlandia
For food, there were local restaurants and farms represented. We got peaches and kettle corn from a Tumalo Farm, and got tacos from a Bend taco stand. With Taco's in hand, and Andy Frasco cranking on the tent stage, Boo and I walked through the scattered tables looking for a place to sit. One table was occupied by one person, Brenda, so we asked to sit. We talked as we ate, and learned about another festival at the end of July (Newberry Event) that we are going to try very hard to make. Brenda's friend Alisa joined us and was super-passionate about it. Brenda shared that getting the word out about that festival had been difficult, so it was no surprise that we hadn't heard of it. Since it is a MS benefit, the lack of awareness is all the more important to solve. She decided to post handbills by the end of our conversation, but I wonder if we would have heard about it at all had we not joined her at her table to eat. To me, again, it is the interpersonal connections which draws us to 4Peaks every year.

Overall, this year's 4Peaks was a total hit. I'll get to the music in my next post, but the vibe and the people we met were fantastic. We didn't want to leave, when the time came, but we could feel the draw of home. We stayed almost to the end of the final performer before dropping the pop-top, loading up the last few bits of gear and firing up Hapy's engine for the drive home. Of course, we plan to go again next year. I expect GratefulEd will again, perhaps with his wife. I suspect that Mayhem will join us again; perhaps he will bring his family with him.

1... 2... 3... 4Peaks!

Tuesday, July 10, 2018

MGB - carpeting (part 1)

Today's post covers getting the carpets into the little British car. Like so many of my posts, this got a little long, so I'm going to cut it into 2 pieces. At least there are lots of pictures this time.

How Did We Get Here
With a top now keeping out the elements, I was ready to install the carpet I had intended to install over a year ago. Recall Winter before last... I had a willing volunteer in K2 wanting to help on the little car. I was up to my elbows in front-end rebuild and couldn't fit a second pair of hands into what I was doing. I thought he could pull the front seats and the carpets (so we could replace them) while I finished the front end. The seller said that the floors were good but just the carpets needed to be replaced. At the time of purchase, I couldn't really see the floors because of shadows or whatever. So, when K2 pulled the carpets out and we saw a rust hole, it lead to a lost Summer of driving the roadster. Instead, we spent weekends cutting and prepping the floors, had a welding party and sealed in the floors. We added paint and noise reducer. Now, we were ready to lay some carpet, so I ordered "standard" set of carpets (versus the expensive wool or deep-pile ones on the market).

Noise and Temperature Containment First
In my years of working on the bus, there has been a steady drumbeat of containing noise. Driving an empty bus is like sitting in a metal shed through a thunderstorm. Its crazy loud. Lots of MG owners like the loud, so what I did at this point may not sit well with them. I don't care. It's my car, so I'll do what I please.

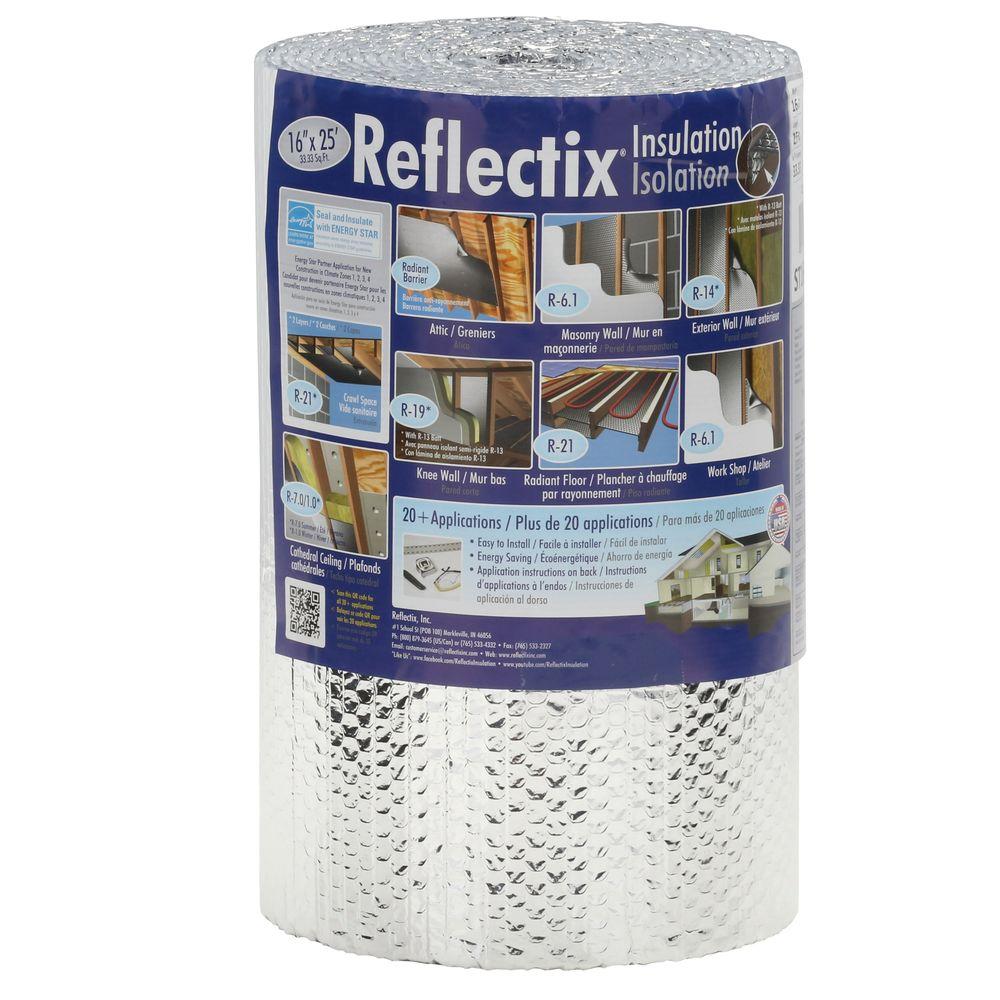
I know from driving this car around that the heat from the engine bay and exhaust heat up the interior, even without a top. While this might be nice in the winter, it's not so great in mid-Summer. To reduce heat, I chose to put closed cell foil-sided insulation (like this) behind the carpet sections in the footwells as well as under the driver and passenger seats. This should reduce both heat and noise. But I didn't stop there.

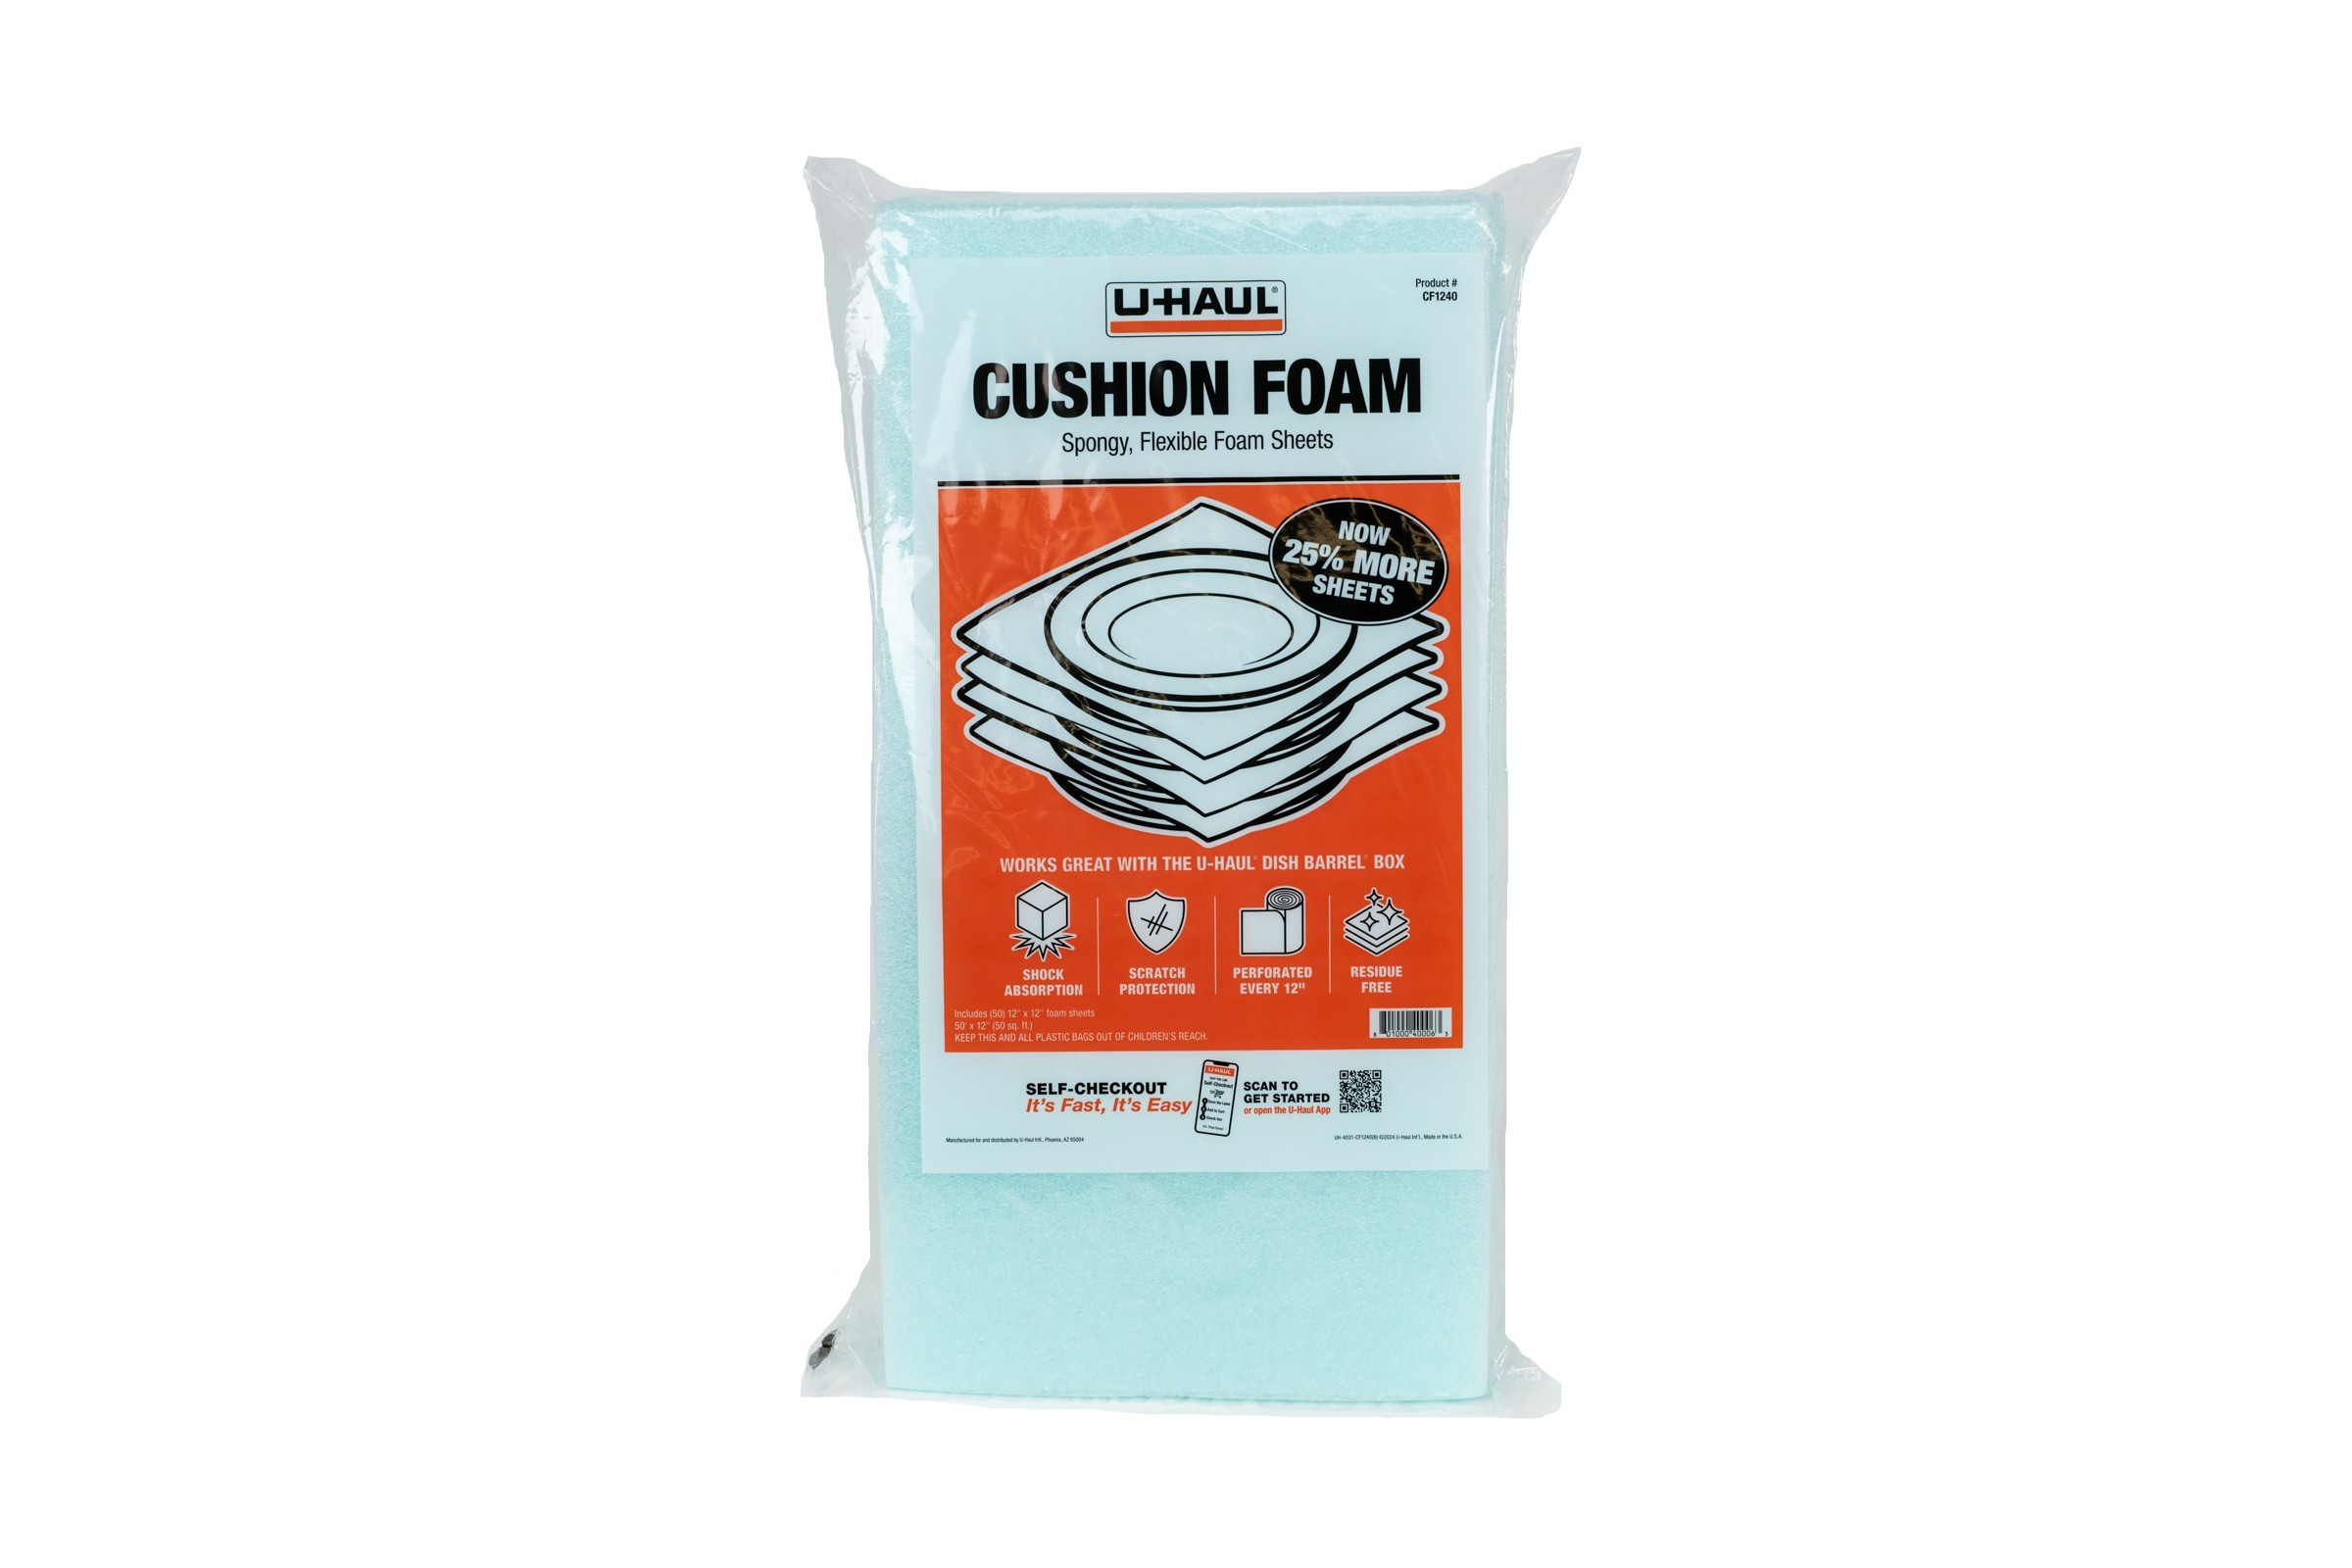
Except for the carpet over the rear shelf and the carpet on the main floor, the carpet is supposed to be glued directly to the steel. This includes the very front of the footwells, the sills, the rear wheel arches, etc. As I said earlier, I put that closed cell foil-backed insulation in the footwells and under the floor carpets. I wanted to add some additional soft to the other carpeted areas both for noise and for carpet depth when touched. The foil-sided insulation was too thick in the other areas, and I wasn't looking for temperature containment anyway, so I got some 3/32" closed-cell packing sheets from UHaul (like this). You wouldn't think it would make much of a difference, but simply tapping the steel with and without the foam was significantly different. These sheets are closed foam, so they don't absorb water and are very malleable.

Whether I was using the foil-backed or the UHaul foam, I used the carpet piece as a guide, traced it onto the planned under-layment and then cut with sharp shears. In some cases, I further trimmed the insulation to it wouldn't be visible after carpet was on top of it. I put some form of insulation under every piece of carpet except the transmission tunnel. I know the tunnel gets warm and I didn't know how the packing foam was going to perform with the heat. I wasn't sure how the carpet would appear on top of the foil-backed insulation, and whether the console would sit properly on top of it. Since that is the most visible section of carpet, and I'm not sure if I'm even going to install the full center console, I installed that section of carpet as directed: directly on top of the steel.

That's it for this part of the post. As you can see from the picture below, the cat continues to prove that he's a real shop-kitty, getting into whatever project we have going on. Of course, his help comes in the form of bringing work to a complete stop, but he's a cat. That's about all you can expect. Well, he could sit down right in the middle of the work; yes, he does that too. Thanks for following along, and I'll finish this up next time-


Tuesday, January 30, 2018

One of the Many Joys of Home Ownership

Taking a short and unexpected break from fixing cars, today's post is a distraction. Sorry I missed a post last week. I spent the week flat on my back fighting off one of the worst colds I've ever suffered. The story below didn't contribute to either contracting nor prolonging that cold.

Basics
If you were to break down the core requirements for a dwelling, and then prioritize them, what order would they fall into? I'd start with shelter from rain and wind: roof and walls. After that, one could argue that everything else is nice-to-have, especially in more rustic parts of the world. In the non-rural areas of the States (like most countries), things like running water and some form of temperature control are assumed. Hot water even. How about a not-dirt floor? Sure, that sounds modern.

On top of these basics, lots of folks are trying to layer in "smart" technologies so they can turn on lights or set the thermostat from their phone when they aren't home. Sounds cool, but after the whizz-bang wears off, do people actually use that stuff? I don't know. I'm pretty sure the excitement wears off in a few weeks and pretty soon you've forgotten the password.

Heat Wave without Water
Anyway, when one of these basic systems fail, you realize just how precarious and fragile your security bubble is. Last Summer, we awoke to a failed water heater. It failed in glorious fashion, leaking water all over the garage floor, trashing cardboard boxes, carpet and anything non-metal as it went. It did create an opportunity to clean the garage, of course. And we took it. More importantly, it reminded us of the fragility I mentioned. Since it was July, and one of the hottest stretches of the Summer, lacking a shower had an extra burden to it. Additionally, I couldn't figure out how to fix any of the plumbing so that there was water pressure  even just cold so we were without water for a few days. Again, it was Summer, and we had kids enjoying Summer break, so there were many trips to the corner store to bridge the gap. I installed a new water heater, and we were back to normal in a few days. Looking back through my posts, it was such a non-event, it didn't make it into even an opening or closing comment, much less garner an entire posting.

6 Inches
This brings us to our latest reminder of our fragility. It was the end of the calendar year, and my extended family had retreated to the mountains. T had gone out of town and C had to work, so we had a couple of friends minding the house (more specifically, minding the cat who was really minding the house). C had a few hours on Friday before he had to work, so he stopped over to grind some paint off the rear driver quarter panel. As I mentioned earlier (See: Z - Work that Body), we had moved the ZX project into the garage. C, expressing concern over getting dust everywhere, pushed the ZX into the driveway to grind the paint. When he was finished and had to get off to work, he tried to push the ZX back into the garage. With the slight uphill into the garage, though, he couldn't. So, he fired up the engine to move it in ... but accidentally put it in a little too far... pushing the big red rolling tool cabinet into the water heater... which pushed the water heater into the pipes behind it. It moved about 6 inches. Those 6 inches started an avalanche of trouble.

Above the water heater, the feed line burst, sending a thin stream of water over the top of the water heater and on top of the rolling tool cabinet. At the bottom of the water heater, the gas line split, venting natural gas into the garage. The couple minding the cat turned off valves and called the gas company, but before long the fire trucks arrived, cherries flashing. Fire fighters kicked everyone out of the house. The gas company closed and locked the meter. The cat-minders were let back into the house after the fumes cleared, but by then it was after 6. On Friday, December 29th and freezing temperatures were forecast. With no water. And no heat. And no one available to fix anything until the following Tuesday... if you're lucky.

Cold Snap without Water... or Gas
Fortunately, one of our cat-minders is a handyman. He was able to re-establish our cold water (so the restrooms were functioning) and repair the gas lines. With a few space heaters and a portable Coleman stove they were able to mind the cat until we got home. You see, the gas company won't turn the gas on until someone licensed performs a leak-down test on the repair, then they will inspect it. Only after that will they turn the gas back on. I understand their conservative approach, but when the temps are below freezing, the process could really use a fast lane.

Boo and I got home on Jan1, and were met by the cat-minding couple. We surveyed the damage, expressed our appreciation for keeping both the cat and the house safe... and for helping C through a rough time. Then, we started reaching out to a contractor we know to get everything back to normal again. He, like so many folks immediately after NewYears were groggily getting back to work. He was available to connect with us on Wednesday. He surveyed the work done by the handyman, thought it looked pretty good and started calling for the gas company to come take a look.

We learned that indeed the gas company won't turn on your gas until a leak down test is performed, but that was not even the half of it. Before the gas company will talk to you, you need the gas lines inspected by the city. The city won't inspect non-permitted work (even if, or maybe especially if, it's done by a home owner). So, step one: get $167 down to city hall and get a work permit. Then, schedule an inspection. We were fortunate and we got inspected on Wednesday evening. While waiting, we ran the leak-down test and pressure-tested the hot water heater (both passed). The inspector was one of those who felt the need to find things wrong, and he cited a bunch of things to be changed even though the repairs simply exchanged broken pipes with a not-broken pipes. So, Thursday was spent making all kinds of additional changes involving 2x4's so the inspector could return Friday morning, which he did. He approved the work, and switched our "red tag" on the meter to green (meaning the gas company was allowed to turn the gas back on, pending their inspection). Then, the contractor was allowed to hook up the water heater and try to get NW Natural to turn us back on. The NW Natural inspector arrived shortly before 5 on Friday, approved all of the work, making comments about the age and condition of things, and then turned everything back on. Unlike the city inspector, there is no requirement for us to do anything the gas company guy said, so we probably won't. As it stood at this point, those 6 inches cost us about $1000US with about half of it because of things the city inspector added. At least we didn't need to replace the water heater.

Normal?
By Friday night, things were back to normal. T had returned from out of town and grabbed a shower. We had the heat cranking to raise the base temperatures of the no-space-heater spaces, and our little bubble was starting to reform. As we sat down to dinner, we realized that we hadn't had the TV on for almost the entire stretch we didn't have heat or hot water. It seemed as though our having to glamp in our house shifted us to a different mindset. We had access to other modern amenities, like the internet and cable television; we just didn't use them. Instead, we sat in the hot tub and talked, or focused on basics like getting clean with an electric kettle and a dishpan. As the days of suffering fade into the past, it was just as interesting to see our old use patterns return as if they had never left. It does make me wonder how much of our daily behaviors really stem from independent thought versus rote actions we've honed over time. Perhaps, if the environment changes enough, the rote behaviors don't come into play.

Well, that's all I have this week. We are back to normal. The garage was an absolute mess afterwards, so I spent the following weekend cleaning things up. The progress on the list of car projects has ground to a halt, pending the no-gas and clean-up, so there may be a short pause in postings while I get some blog-worthy things done. The missing post from last week was purely sickness related, so there could be more ahead. Sorry.

Thanks, as always, for following along. More soon-


Friday, June 30, 2017

4Peaks 2017 Road Report

So I understand that this blog is supposed to be about my bus and my travels in him. And I realize that the last bunch of posts have had nothing to do with the bus. I'm taking a break from the MGB front end rebuild set of posts to hit a couple bus-related ones (pause for applause). For starters, I'm starting with a classic road report, detailing our annual trip to Bend for the 4Peaks music festival with our good friend Grateful Ed in his trusty '73 VW Riviera Poptop, Belle.

Not Really Prepped
In prior years, I've used a local music festival as a way to knock the kinks out of the systems before taking the 4-hour drive to Bend for 4Peaks. Since the Hootenanny isn't held anymore, I don't have that built-in system. So, my road-ready testing isn't quite as, uh.. exhaustive. I made sure Hapy could start, he was clean and empty of not-camping stuff. I verified his oil and coolant levels were right. He was ready enough to drive around town, I figured. I did replace the front door seals, though. I remembered from the year before how cold the bus was on the drive because the seals were gone. I bought the really nice grey ones through CIP1, replacing the black Brasil-sourced ones I had been wrestling with for years.

Tank Fill
About a week before we were supposed to leave, I fired up Hapy and drove to the corner fueling station to fill it up. I took Boo and K2 with me, and thought I'd show off just how much better Hapy's off-the-line acceleration is. Well... he wasn't as snappy as he was before I ran him out of fuel, but he left the stop line pretty quickly. We got to the gas station, and got the diesel flowing while I washed the windshield a couple of times. Once filled, I turned the key... and nothing. I figured I did something electrical, so we pushed the bus into a parking space. Boo and K2 walked home for another car to give me a jump while I started diagnosing things. I was fully stymied until Boo got back and we started with her at the wheel trying the key while I wiggled wires and re-set relays. I went to the battery and was messing with the thick cables and Hapy started acting like he had the right voltages. During my efforts, I moved the battery ever-so-slightly forward, and then Hapy fired right up like nothing happened. I remembered that the battery sliding back into the rear tail light housing causes this problem for some reason. Grr.. I really need to solve that permanently.

After that, Hapy drove great the rest of the week. I didn't try to show off his acceleration again, nor did I really stress him, but I got him up to temperature, and puttered around town.

Drive There
The night before we left, Boo accepted a new job. In order to keep things moving forward, she needed to fill out a bunch of paperwork and take a pee test before we left town. So, we fit all that around our exit. We had initially intended to meet Ed at his place south of Portland around 10AM, but we ended up leaving closer to 11:30. We were still well out of heavy traffic periods and headed south on I-5 towards Salem. With Belle leading, Hapy drove great. His temps stayed down, and it wasn't long before we had turned onto OR-22 heading east off the plain and into the forest. Belle was driving without windshield wipers, but the Rain-X was pushing the sprinkles out of Ed's line of sight. We visited the Maples Rest Area in Gates, checked Belle's oil and took a brief break. It was after we passed through Idanha that Hapy started to have speed issues. I wasn't able to get the throttle to respond on hills. While it wasn't a huge deal, it started to weigh on me as we worked our way up and down and up and down through the Cascades and over the Santiam Pass on US20. Still, the drive was beautiful and the new front door seals really held out the cold draft and rain. The little heater produced a little heat, so while Boo had a blanket on her lap, I was perfectly comfortable in little more than a jerga.

We hit Sisters before 3, and we were feeling really good about our progress. For the first time I can remember, we made it from end-to-end through Sisters without coming to a complete stop.

The venue for 4Peaks was moved this year. Until this year, it was held in Tumalo, NorthWest of Bend at the Rockin A Ranch. This year, it was held South and East of Bend at Stevenson's Ranch so we had an extra 10 miles or so to travel, but through the city. We stopped at a gas station near the ranch for Ed to fill Belle with petrol and I got ice.

I'll have a separate post about the festival entry, the location, the scene, the people, the music, etc. Suffice to say, it was awesome. We drew the conclusion that the sluggish accelerator pedal was because of gunk getting into the fuel filter when I ran the bus out of fuel. Not having a spare fuel filter (bad bus owner), nor access to a parts store meant I was driving home with a restrictor in my fuel system.

Getting Home
We didn't really want to leave, but Ed had to be at work on Monday, and the festival, though open longer than past years, still closed at 4. And, of course, we had a 4 hour drive home to do. While the weather on the way out was a test of our buses against wind and rain, the drive home was a test against a summer solstice sun and desert heat. We left the festival around noon and hit a filling station before doing anything else. Since we had traveled over 200 miles since the no-start fill a week before, I concluded I would need fuel before leaving civilization and entering the central Oregon desert. I bought just over 6-1/2 gallons, recording 32mpg on the drive out plus the around-town driving the week before. Ed joked about how you can't burn too much fuel if you can't get it to your engine. Good one, Ed.

We had decided before we left for the festival that we would drive home a different way to change the scenery. After the sluggish hills on the way out, we thought that driving US26 through Government Camp might not have as many ups and downs as US20. We hadn't considered that the US26 route left us in the desert for far longer, and that the temperatures were in the 90's compared to the 50's on the way out. This created a different stress... on the cooling system.

Hot Stop Hot Again
The drive north on US97 was steady going. Redmond had some traffic, but Metolius and Madras were mostly unpopulated. Actually, when I consider how large an event is coming to Madras for the total eclipse in August, the town appeared largely for sale. Many store fronts and undeveloped lots had for sale signs on them. That's not a very positive statement for the health of Madras. It is in Madras that we left the US97 for the US26 and our flat uneventful drive changed. The road out of Madras starts with a long uphill pull. Hapy didn't have that lack of acceleration, but his temperatures started to climb. When he reached 195* I pulled over and let him cool back down. More hills, more desert heat and more altitude meant that his temps would rise again, and again. I started letting his temps run up to 202* before pulling over to cool him down. Each time, Ed would pull over with us, or somewhere ahead of us so we could continue our carabus. That is, until finally, we had to let Ed go while we let Hapy cool way down. Boo and I had a roadside picnic in the middle of the Warm Springs Reservation and Hapy's temperature dropped down into the low 170's. Still, it didn't take long before we were climbing again, and his temps were high again. All told, we stopped 6 or 7 times including the picnic stop between Madras and Government Camp.

SkiBowl
I've mentioned SkiBowl a number of times. I love playing in the snow there. After such a hard climb up the east side of Mt. Hood, Boo and I decided Hapy needed a longer rest, and we could use a beer so we stopped at SkiBowl West. The bar (Beer Stube) isn't open during non-ski season, but the cafe is, and they sell beer in cans, so we split a tallboy on the back porch. As we sat, we could see that there is still snow at the top of upper bowl, even though it was over 85* at the lodge. SkiBowl is in the process of switching over from winter to summer sports, where they leverage their ski lifts to enable mountain bikers the ultimate: a lift to the top so you only have to ride downhill. Although it was Sunday, we only saw 2 cyclists the entire time we were there. We will be back, with as many boys as we can muster, to play on that hill. That's just too fun.

Home At Last
The drive from SkiBowl on home was completely non-eventful. The accelerator was responsive and the engine temp never climbed above 192*. I don't know if it was the desert, the higher altitudes or what, but once back on the west side of the Cascades, Hapy drove like a champ. We drove US26 to OR212 through Boring and then connected with I-205 around to I-5 and finally onto OR217 home. He even handled the interstate traffic easily. Still, I need to look at the coolant. I think the coolant / distilled water mixture is off, and that caused the radiator to be unable to manage the engine heat.

I haven't filled up since we got home, and I know I need to soon. Overall, Hapy was great. As a camping vessel, he was a pleasure. I'll get into that in another post, but simply as transportation I know I need to do a better job of getting him ready before taking him out of round-town puttering or he'll leave me stranded. And it will be completely my fault.

That's it for this time. Thanks, as always, for following along. I'll post about the festival, and a new bus-change I did to improve the camping experience soon.