Tuesday, July 31, 2018

4Peaks 2018 - Road Report

In my last post, I talked through the festival experience, omitting everything and anything that might have happened to Hapy. I decided that I would leave all of that for the road report: keep the road report about the bus and festival report about the festival. So, today's post is all about what happened on the way there, what befell the bus while we were there and what happened on the way home.

Getting Out of Dodge
view out the window the morning
after Vagabonding.
That's the Santiam River.
After last year's late-night drive to ChinookFest in Central Washington, Boo and I thought we should do it again. The drive itself was pleasant and fun (except for the emergency room part). The roads are empty at that time of night and the air temps are cool to help keep the bus cool. We work regular jobs, too, so we aren't ready to start packing until 7:PM or later so we have a choice of either waking up at home trying to motivate out early and hope to get to the festival early-ish -OR- leave crazy late and crash somewhere along the way, knowing that we'll wake and drive to the gate. I like option 2. This departure was similar to the ChinookFest exit in that we were leaving by 10. Just as we were pulling away from the house a freak thunderstorm hit, drenching us at the corner Safeway where we got ice and a few last minute things. We could hear the thunder deep inside the store, it was hitting so hard. For folks who don't live in the PacNW, this is very unusual. Storms like this don't even make the news in the MidWest, but here in the mild Pacific NorthWest it was all the locals were talking about when we got home 4 days later. We hit the road, and Hapy settled into the drive.

To Salem
We stopped in Wilsonville to grab some dinner, but the Black Bear was closed. So, we moved on until we saw a Denny's sign. Neither Boo nor I have been in a Denny's in years and hadn't realized they had a new budget menu. We both ate well and had a $14 total tab (plus tip). That's nuts. I don't know how they stay open with prices like that. Anyway, the engine temps had been climbing steadily since the Black Bear pull-over, and I discovered that one of the fan wires had shaken loose. Yep, that seems to happen every trip. A quick bit of fiddling and the fans were running, and we were back on our way. No sooner were we back on the road than we saw the OR-22 sign, and we were able to pull off the freeway onto the slower, easier state route. Though Hapy's temps still climbed on long uphills, they would settle back down when we hit a straight-away or downhill. I'd like to try to solve for the uphill temps by lowering the radiator an inch or two, but as you'll see by the end, I have bigger things to solve. I noticed that if I rotated the headlight switch to increase or decrease the dashboard backlight, the headlights would flicker a little bit. I made a mental note to replace the switch.

Vagabonding
It didn't take long before the late nights and early mornings of a typical work-week started catching up with us. Hapy, unlike his occupants, was doing great. We saw signs for Silver Falls State Park, and Boo exclaimed that she had never seen Silver Falls. Well, that's an Oregon icon that everyone should see when they visit, much less live here. So, we nosed off the highway and followed signs to the park. 30 minutes later, we arrived at a "campground full" sign. Too bad they don't post that, say, at the freeway turnoff. We found our way back to OR-22 another 30 minutes later, feeling all the more tired. We chased a few other signs before pulling over along the side of the road where there was a very deep shoulder (at 44.7673810N, -122.5331920W) just west of Mill City, OR.

After the original vagabonding during Almost Frog Lake (see part 2), we have this pretty well down. Well, Boo does. We free the bed by moving stuff into the front seats, cover the windows and crash for a few hours. In Oregon, the cops don't hassle you. We've talked to a few folks about this, and in the more remote areas, it is totally acceptable. I wouldn't suggest it in the cities and towns, but for places where OSP patrols. We awoke needing a restroom and coffee. We found both at a small roadside coffee cart on the north side of the highway just east of the Maples Rest Area. Coffee'd and with breakfast from the cooler, we were back on our way. We made great time past the reservoirs, over the pass, through Sisters and Bend to the venue. We arrived at 11:AM, an hour before the gate was supposed to open, but they waved us in anyway. Within a few minutes, we had our wristbands and were puttering up the hillside to the GoWesty camp zone.

No Charge Battery
When we were roadside, setting up for a night's vagabonding, I noticed that the cabin lights weren't terribly bright. I had put the accessory battery on the charger, but the battery acted like there wasn't a charge to take, so I removed the charger. I was starting to have second thoughts about that. After getting Hapy nice and flat, we set up and I tried to charge our phones. No dice. Then, the power converter would just beep at us, refusing even to light a very low amperage string of holiday lights. I checked the battery level and it was down to 8V. Huh? I figured that we could run cabin lights for a little while, but by the second night, we were on lantern lighting only. With all that solar energy coming from the sky, its a shame we don't have a collector. Something for the list, I guess. Fortunately, the 4Peaks folks have a vendor who provides a solar charging station, so we would spend an hour there in the morning, soaking up some sun ourselves while our phones charged up. It was because of the battery that these festival posts have virtually no pictures: I had no phone (and, therefore no camera) most of the time.

While we didn't have much electricity, Boo completed her camp shower vision at 4Peaks. I'll post independently about that since this post is already pretty long and we haven't gotten to the adventure part yet.

Where There's Smoke
With our stuff stowed and good-bye's shared, we left the festival grounds, filled up with diesel and headed towards OR97 and OR22 towards home. By now, it was mid-afternoon, and the hottest part of the day. The radiator kept up, though, keeping the engine temps under 196*F even on the longest uphill runs. Somewhere between Tumalo and Sisters I noted a whiff of smoke. I looked down and smoke started first as a wisp and then as a billow from between my knees. If this were a typical front-engine'd car, you would start thinking about engine fires. The only thing that far forward is the fuse box and the spare tire. Anyway, we were fortunate to have a small road intersecting with the highway, so we dodged onto the shoulder at the corner, turned off the ignition and flipped on the hazard lights. I jumped out to make sure the hazards were on and saw the headlights were lit even though that switch was off. I went around back and removed the positive battery cable, thinking that the electrical was completely borked. While I was around the back of Hapy, Boo headed off down the side street.

On The Tow Again
I paused for a minute, considering the heat of the sun, and what could I fix on the roadside. Then, Boo came around to me and pointed to a shady spot on the side of the road where we could push Hapy. And so we did. While Boo made peanut butter and jelly (PBJ) sandwiches, I pulled out the Bentley book and started looking at the wires. One wire had it's plastic completely burned off and a couple of others had swollen marks indicating they had been touched by heat as well. All of them fed from one side of the fuse box into the steering column. I figured the ignition wires were toasted, but to repair I would need to remove the steering wheel to get at the wire bundle. Removing the steering wheel requires a 27mm socket, which I don't carry in the bus, so we were stuck and contacted AAA. We sat in the shade eating PBJ sandwiches while we waited for the flatbed. It arrived about 2 hours after the first puff of smoke and we arrived home 3 hours after that.

Resolving to Repair
Years ago, I bought a replacement ignition switch. The original switch has been tempermental, not wanting to turn without considerable coaxing. I didn't want to go through the hassle of the install back then, so the switch has sat on my parts shelf. I ordered a replacement ignition harness from BusDepot. I will post about the replacement of the switch and harness effort once it's completed. In the meantime, we are in the heart of festival season and it looks like we may have to go to our first summer music event without Hapy since 2011. I sincerely hope I can get this fixed before the one after that. I'm looking forward to turning the key without challenge, and having all the smoke stay inside the plastic tubes.

Thanks, as always, for following along.

Tuesday, July 24, 2018

4Peaks 2018 - Festival Report

We took our now seemingly annual trip to Central Oregon for the 11th 4Peaks Music Festival. This brief post covers the festival part. I'll post separately (as I'm wont to do) about the drive there and back. After you've done an event a few times, the retrospective is really a summary of what changed and what didn't. Rather than just list things that way (which is how I started this post), I'll group things a little bit topically instead.

Location, Location, Location
What is true in real estate, is also so true in music festivals. A big festival at the city dump would be an awful experience no matter how good the music was, just as a festival on the outskirts of Bend with a great view of the Cascade Mountains is going to be a great experience no matter how memorable the bands are. In addition, the new-last-year festival grounds are spacious, allowing everyone spread-out room with large swaths of grassy field between camper sections. For example, from under our canopy we watched kids flying kites in the grass field (easily 20 meters across) between us and the neighboring car-camping zone.

EDIT: 4peaks removed the image of the map from 2018, so rather than have a broken image link, I removed it. I usually do not reference from the source; I usually download it to prevent this, but shit happens. end edit.

New this year was a specialty camp zone designated for camper vans sponsored by GoWesty. It is the light-blue rectangle-ish area pointing at 7 o'clock on the map image to the right here. This scene was orchestrated by "Ziggy", who got the festival to designate the space, found a sponsor, etc. GoWesty just brought an older well-worn Vanagon with an awesome TrailStomper SportsRig trailer and a sign. I think the concept was received well, GoWesty had a good time and I hope, if they do it again, they figure out how to bring some wares to sell to the camper-van community. Anyway, we had RSVP'd for that zone and found ourselves at the gate early enough to get the second spot in from "the Junction". We had set up at the intersection of the Junction last year, and hadn't intended to be so deep in the mix this year, but it turned out to be a great spot: level, near everything (not that anything is too far from anything else) and lots of friendly neighbors. In retrospect, though, I don't think we'll do the Westy-only camp next year.

Why? Consider when you see a beautiful painting on the wall all by itself. You can enjoy that painting, examine it, sit with it. When it is moved into a show with 30 other paintings, you can't help but compare them. A painting that you really liked is now being compare/contrasted with others, and that's not the point of art. I don't want to put Hapy in a spot where he is being weighed against others like that, so we'll just car-camp next year. For those who were walking by, it could have been intimidating. At most festivals, we have walkers-by asking about Hapy, and we love walking folks through it. We had zero non-Vanagon folks stop by this year.

The main festival area was oriented differently this year. The main stage was placed where the side tent was last year, and it pointed towards the camping zone. The tent/side stage was past where the food was last year, and it, too, had the stage facing the camping area. As a result, you could hear both stages if the conditions were right (little wind and no competing music). This made for some really wonderful sun-set and star-gazing in the Junction while listening to the bands.

Music
Every other year, there was a particular band or two that we went 4Peaks to see. This year, I bought the tickets before the lineup was announced, and none of the names really jumped out as the reason to go. Still, the bands were good. We probably saw more of the bands than other years, and we definitely heard more because of how the stages were oriented. Boo and I designated Kimock as our favorite with Maxwell Friedman following in second. Yes, both were on the smaller stage; most of the bands we really enjoyed were. The larger staged bands were good, yes, but the smaller stage had the New Mastersounds, Mojo Green, Chiringa!, Scott Pemberton... On the main stage, Mother Hips wasn't as good as I'd expected, and Poor Man's Whisky had a power outage. Nahko was good and North Mississippi All Stars were too, but, again, not as good as I thought they'd be. Maybe I need to check my expectations. Last band callout: Joe Craven and the Sometimers played a bunch of Grateful Dead tunes and did a really fine job. Of the main-stagers, they alone exceeded expectations.

This year, 4Peaks expanded to a third stage. Sort of. They added a small stage inside the kids' area (called Kidlandia) where singer-songwriters, possibly duets, would play. Unfortunately, this schedule wasn't as well circulated, so if you didn't have kids, you may have missed it entirely. I knew that our Sunday morning favorite Makaila was playing the kid's stage and we were able to grab some of her set. Honestly, she deserved a better setting, and wouldn't be surprised if she bags 4Peaks next year if that's the stage she's offered. With this change, they also abandoned the child performers who used to grace the stage on Sunday morning. I have mixed feelings about that; the kids were great, but Maxwell Friedman and Chiringa! played on Sunday. You can't get everything.

The Junction
The Junction is an intersection of the 2 major car-paths through the festival. Last year, The Furthur bus was parked there. There are a handful of vendors, there is a late-night kids movie after dark and this year highlighted a large figure (it looked like a Jesus fish standing on its tail) that shifted colors. 4Peaks had announced a fourth stage in The Junction, but that didn't materialize. The location of the Junction had moved west from it's location last year, and in so doing moved away from a small wooden stage. That small stage was unmoved, so it was out of the mix and the kids used it like a playground. Maybe that was why live music didn't happen at The Junction. Instead, one of the vendors (Dump City Dumplings) insisted on sporadically playing genre-inconsistent music from their food cart. It was not good. Actually, it just interrupted the music flowing from the stage. Next to them was a coffee and beverage cart that wasn't selling coffee. In the end, the Junction was a step down from what it was last year. Great for star-gazing when the DumpCity folks were between their interruptions.

Overall, we met some great new people, like Chris the coffee-roaster, Rachel the always-working festival staffer (who owned the dark vanagon behind Hapy in the picture above) and Mike-and-Suzie with the overheating Vanagon (just barely in the frame of that same picture). The music was good, the weather was just about perfect and when Sunday afternoon arrived, we really didn't want to leave. I'll post the road report separately; it was an adventure.

Tuesday, July 17, 2018

MGB - carpeting (part 2)

This is a continuation of the previous post about installing the carpets into the MGB. At this point, I've mapped all of the various pieces of carpet to where they go in the car and I've traced and then cut thick or thin insulation to go under the carpet for the respective sections. Now, it's time to play with spray epoxy.

Back to the Directions
For the install, I followed the directions for the order which carpet first, second, etc. For each piece of carpet, I had something to go under it (except the transmission tunnel). For each piece which directed gluing straight to steel, I would test fit the insulation, then test fit with insulation and carpet. If necessary, I would trim the insulation a little bit so it wasn't visible. Then, I'd spray epoxy onto the insulation and install it, holding it in-place for a 30-count or longer. Then, I'd test fit the carpet on top of the glued-down insulation, then epoxy it into place by spraying epoxy onto the carpet underside. Remember to let the epoxy set-up a little bit before slapping the things together. Wet won't hold; it needs to tack-up a little bit: spray the underside well away from the car, let it set up for 15-30 seconds and then apply in-place. If you, the reader, are looking at this for guidance, take care with the transmission tunnel carpet. I realized after mine was in that a shifter cover plate hadn't been put back in, so I needed to cut a small line in my carpet in front of the shifter to enable that re-install. Since it will live under a console, it doesn't really matter, but I really don't like cutting when I don't need to. Honestly, it is really hard to tell that the carpet was cut there now even without the console.

No Glue, But No Snaps
The carpets that sit on the floor under the persons in the car and the piece on the back deck are not glued in. Instead, they were held in place with snaps from the factory. Since I replaced my floors, many of the old snaps were gone. I had a decision to make: install the snaps or try something else. Knowing that the snaps had to be in exactly the right place for them to align with the snaps in the carpets, or there would be lumps in my brand new carpet, I decided to not install snaps. But, I needed something to hold the floor mat especially under the driver's feet. Otherwise, it could slide around under the pedals making for a dangerous driving condition. I found Velcro at Ace Hardware that was designed for wet conditions and it could hold up to 30 pounds. Since we just need to hold carpet, this felt like a good way to go. I cut sections out of the insulation, glued the Velcro to the underside of the carpet and corresponding spot on the floor. Now, the carpet holds in place, and retains it's original ability to be removed for cleaning and access to drain plugs. And no lumps.

Cutting Holes
In order to re-install seat belts and the seats, this brand new carpet needs to have holes cut into it. I found this a little hard to embrace at first. Since I was putting insulation under all of the various pieces, though, I could figure out exactly where the hole was supposed to go with something that wasn't carpet and then transfer that spot onto the carpet. This worked well for the sill carpets (that section from the ledge along the bottom of the door to the main floor) where the lower seat belt mount hole is, but greatly complicated an already difficult wheel arch. Fortunately, the transmission tunnel carpet had the holes pre-punched. This made aligning the carpet easier in that respect, but made the overall install of that carpet much more harrowing because everything had to line up perfectly.... with epoxy sprayed on it. Move quickly.

The last holes to put into the carpets are the holes for the bolts to hold the seat rails. In the MG, each seat is held in with 4 7/16" bolts. The carpets do not ship with the holes pre-punched, so you need to locate them yourself. Not all of these holes pop out the bottom; in fact, only one does. The front 2 pass into a cross-member and one of the rear ones does too, leaving just the one. I started with just the insulation down, and pushed a finish nail up through the one hole. This removed front-back and left-right sliding of the insulation while I located the other holes. These, I found in a more traditional way of folding back the insulation until I could locate the hole, and guestimated where it passed through the insulation. While some holes took more than one try, I located the holes with finish nails, leaving them in the insulation for transfer to the carpet. Taking the insulation to a table, I set the carpet on top of the insulation and pushed the finish nail through the carpet, marking the hole, and then put blue tape on top of the nail to hold the mark. With an exacto-blade, I cut a small "X" at each nail, testing the size with the seat-rail bolt so the hole was only as large as needed to be. With the bolts pushed through the holes in both the carpet and insulation, I could set the carpet in place and then put in the seats.

Seats In
Once the carpets were in, I put the seats back in. The seats were originally installed with a wood slat running under the steel rail to lift it up off the carpet a little bit. Not surprisingly, these wood slats were rotted away. Instead, I boosted the seat up off the carpet by putting a slightly over-sized nut under the seat rail where each of the bolts passed through to the floor: one per bolt. These 4 nuts created little stands for the seat rail so it sits just above the carpet. I expected this to be a challenge, between the low ceiling created by the convertible top, the small holes, getting a nut under the rail, juggling an old seat, etc, but it really wasn't. The blue tape gave me clear targets for the holes in the seat rails so I could get the seat in the right spot without the carpet moving. Then, one corner at a time, I lifted the rail, slid a nut under the rail and the the bolt through the rail, then the bolt and finally into the hole in the floor. I would lightly thread the bolt and then move on. I tightened the bolts snug as pair: front then rear.

Finishing
I finished out the rough-in by making a small cut in the transmission tunnel carpet and installing the shift plate. I followed my now-usual pattern of soaking the old plate in vinegar for a few days to get the rust off; then, cleaned primed and painted it. The install of the plate was simple: re-use the 3 Phillips screws at the front. I re-used the original shift boot after cleaning it up with some Meguiar's vinyl cleaner just to get the shifter together and looking fairly good. I'll be switching out the shifter boot with the rest of the interior panels and seat covers later. The boot is held down with a new black ring and chrome bolts. The ring and bolts were less than $10US, but that change greatly improved the finished look.

I installed new door rubber seals and the stamped-steel transoms (with new screws) to complete the effort. The ends of rubber seals are held in place with small chrome bits, and otherwise just press onto the lip which runs along the edge of the carpeted sills. The stamped-steel transoms are held on with 6 small screws, and after some polishing, look fairly decent for original pieces.

Now, it looks and sounds like a "real" car. When the doors are shut and windows up, the car purrs. When I stomp on the fast pedal, it has a little roar to it. I still need to put the center console in (for climate control) and it could use a radio, but the little car is about ready to be a daily driver.

Thanks, as always, for following along.

Tuesday, July 10, 2018

MGB - carpeting (part 1)

Today's post covers getting the carpets into the little British car. Like so many of my posts, this got a little long, so I'm going to cut it into 2 pieces. At least there are lots of pictures this time.

How Did We Get Here
With a top now keeping out the elements, I was ready to install the carpet I had intended to install over a year ago. Recall Winter before last... I had a willing volunteer in K2 wanting to help on the little car. I was up to my elbows in front-end rebuild and couldn't fit a second pair of hands into what I was doing. I thought he could pull the front seats and the carpets (so we could replace them) while I finished the front end. The seller said that the floors were good but just the carpets needed to be replaced. At the time of purchase, I couldn't really see the floors because of shadows or whatever. So, when K2 pulled the carpets out and we saw a rust hole, it lead to a lost Summer of driving the roadster. Instead, we spent weekends cutting and prepping the floors, had a welding party and sealed in the floors. We added paint and noise reducer. Now, we were ready to lay some carpet, so I ordered "standard" set of carpets (versus the expensive wool or deep-pile ones on the market).

Noise and Temperature Containment First
In my years of working on the bus, there has been a steady drumbeat of containing noise. Driving an empty bus is like sitting in a metal shed through a thunderstorm. Its crazy loud. Lots of MG owners like the loud, so what I did at this point may not sit well with them. I don't care. It's my car, so I'll do what I please.

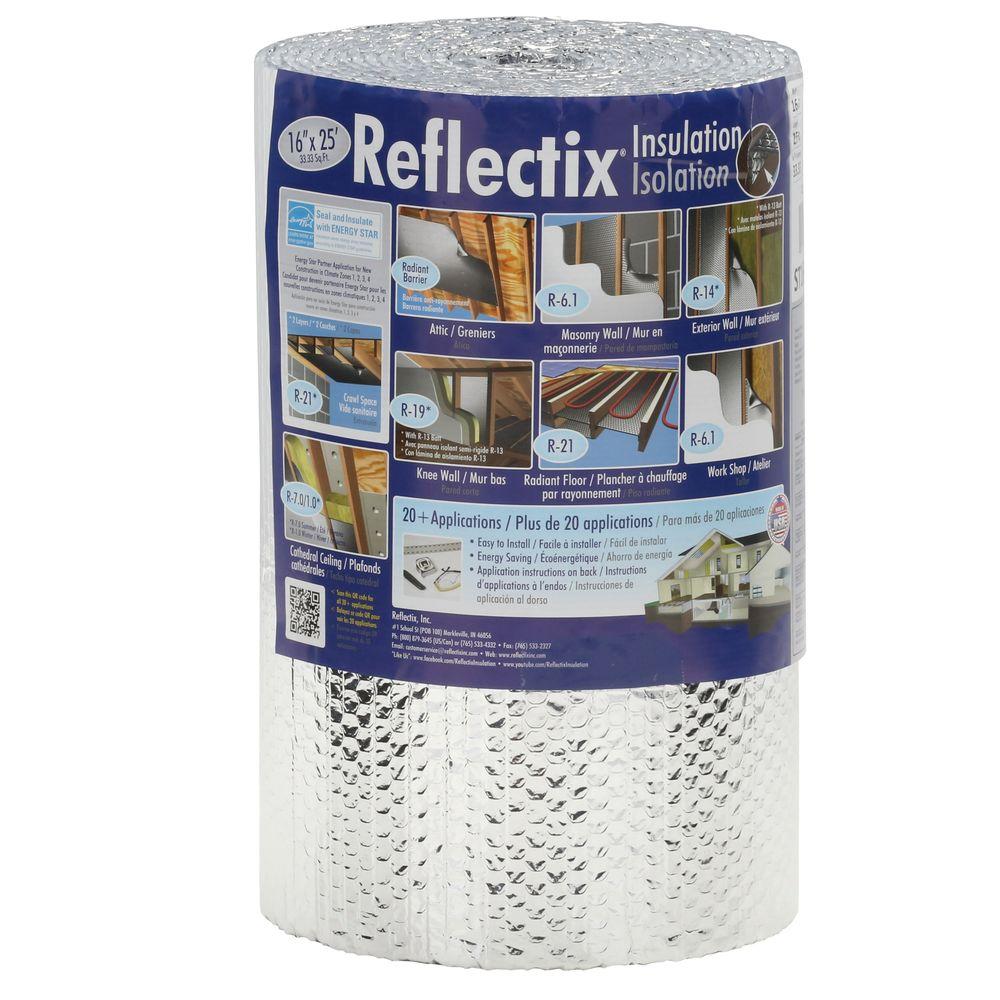
I know from driving this car around that the heat from the engine bay and exhaust heat up the interior, even without a top. While this might be nice in the winter, it's not so great in mid-Summer. To reduce heat, I chose to put closed cell foil-sided insulation (like this) behind the carpet sections in the footwells as well as under the driver and passenger seats. This should reduce both heat and noise. But I didn't stop there.

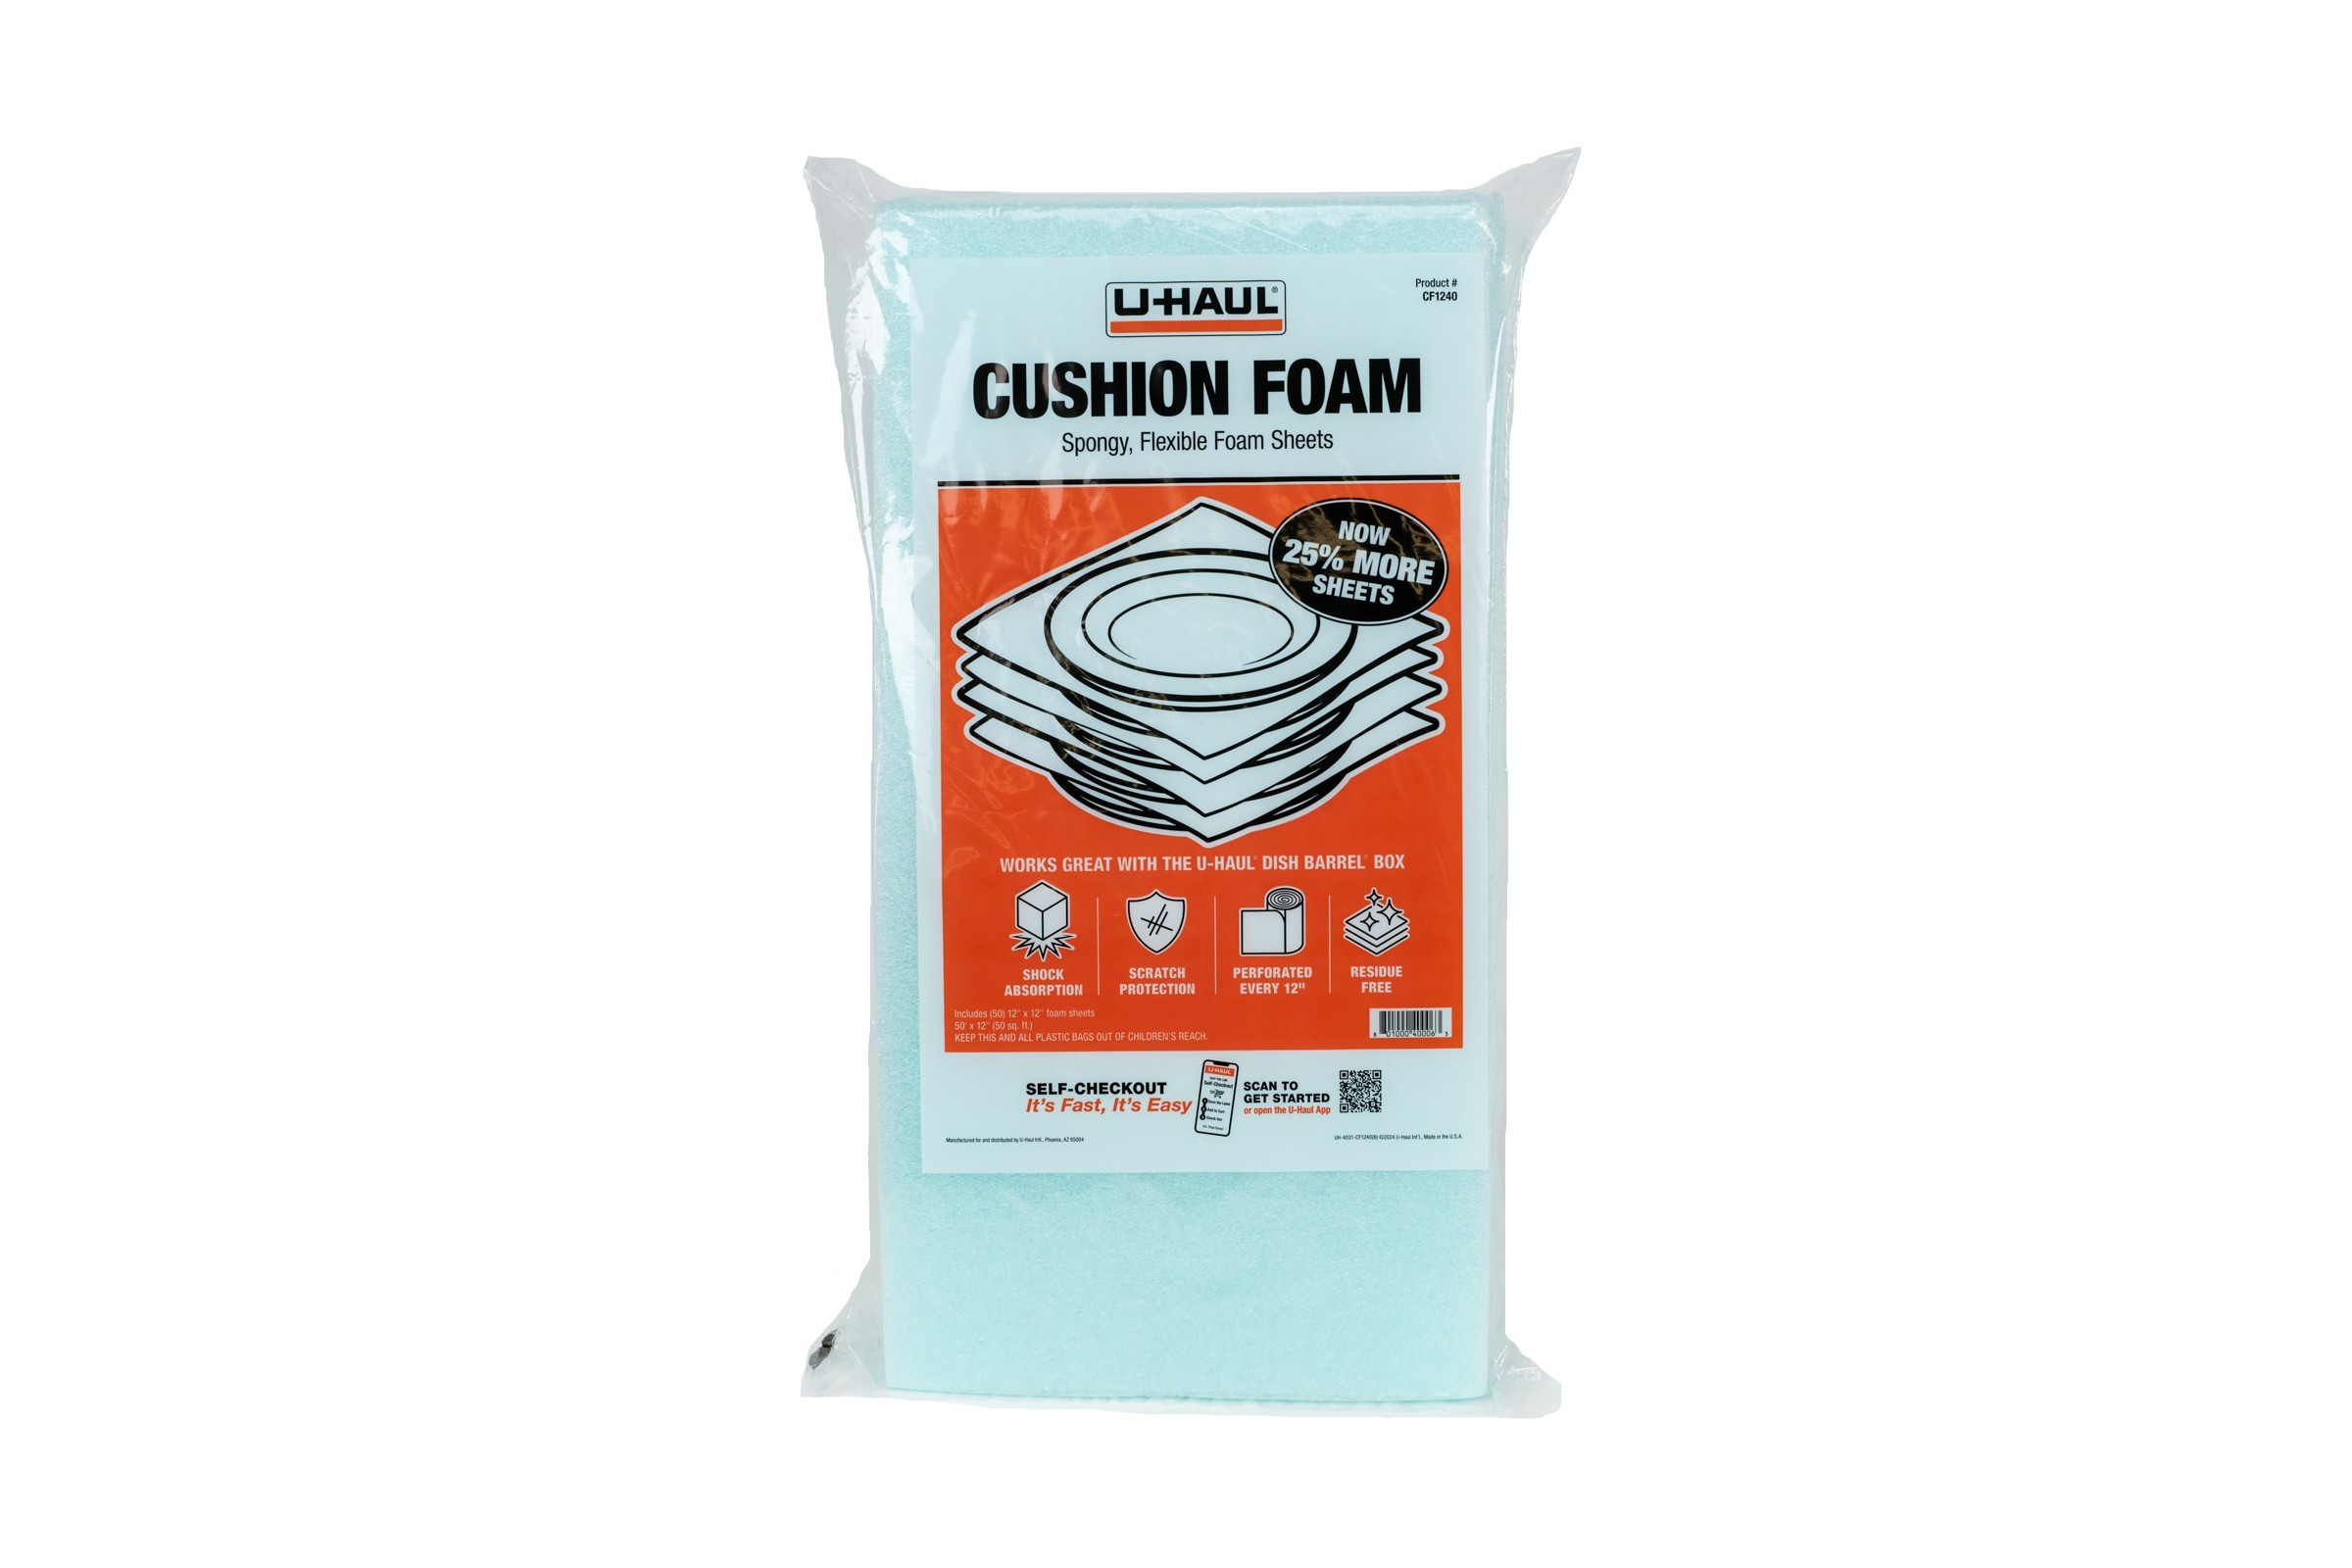
Except for the carpet over the rear shelf and the carpet on the main floor, the carpet is supposed to be glued directly to the steel. This includes the very front of the footwells, the sills, the rear wheel arches, etc. As I said earlier, I put that closed cell foil-backed insulation in the footwells and under the floor carpets. I wanted to add some additional soft to the other carpeted areas both for noise and for carpet depth when touched. The foil-sided insulation was too thick in the other areas, and I wasn't looking for temperature containment anyway, so I got some 3/32" closed-cell packing sheets from UHaul (like this). You wouldn't think it would make much of a difference, but simply tapping the steel with and without the foam was significantly different. These sheets are closed foam, so they don't absorb water and are very malleable.

Whether I was using the foil-backed or the UHaul foam, I used the carpet piece as a guide, traced it onto the planned under-layment and then cut with sharp shears. In some cases, I further trimmed the insulation to it wouldn't be visible after carpet was on top of it. I put some form of insulation under every piece of carpet except the transmission tunnel. I know the tunnel gets warm and I didn't know how the packing foam was going to perform with the heat. I wasn't sure how the carpet would appear on top of the foil-backed insulation, and whether the console would sit properly on top of it. Since that is the most visible section of carpet, and I'm not sure if I'm even going to install the full center console, I installed that section of carpet as directed: directly on top of the steel.

That's it for this part of the post. As you can see from the picture below, the cat continues to prove that he's a real shop-kitty, getting into whatever project we have going on. Of course, his help comes in the form of bringing work to a complete stop, but he's a cat. That's about all you can expect. Well, he could sit down right in the middle of the work; yes, he does that too. Thanks for following along, and I'll finish this up next time-


Tuesday, July 3, 2018

Turbo-Bus Turbo'ing Again

Quick post today. I've had recurring issues with the charged-air plumbing. I think I now have them solved. Before I get into it, for my fellow Americans: Hapy Independence Day. May we all live a little less dependent upon corporates and money and a little more dependent upon each other this year.

Ka-Bang
On the test-drive I took following the install of the radiator and starter (see radiator 1 and 2 and starter here), the charged air plumbing separated again. This time, it was whiel stomping on the accelerator up a hill so when it separated, it made a huge bang. I thought I'd back-fired it was so loud. Backfiring a turbo'd diesel? Nah.. I don't think so. So, I gingerly finished the journey and popped the rear flap behind the license plate. Yep, that cursed charged air pipe had worked itself apart again. After solving the post-turbo / pre-intercooler plumbing a couple of years ago, the pipe running along the rear frame from the intercooler to the elbow up to the intake has become the weak-point. It has been coming apart with increasing frequency, exposing the engine to unfiltered air while removing the turbo from the power. The first one is engine life-threatening, the other just annoying. It needs to be solved.

Simple Solve
In a considerably marked contrast from pretty much everything else I do on this bus, the solution here was actually quite simple. The elbow had been zip-tied to the rear engine mount so it would not work itself free from the intake tubing on top of the engine. I had done that when I solved the turbo-to-intercooler separations a few years ago. I had thought that suspending the intercooler with wire would continue to be sufficient to hold the rest of it together. Yeah.. that was wrong. The weight of the intercooler presented a constant tug on the plumbing. So, to solve, I isolated the intercooler from the plumbing by better securing the plumbing. "How's that," you ask. The pipe running from the intercooler towards the intake runs right along the rear engine support bar that Hal fab'd up 10 years ago. Once I got all the rubber and aluminum parts back together, and hose-clamped snug, I simply zip-tied the charged air pipe, and each of the rubber ends, to the frame support. The weight of the intercooler is now supported by the wire from the bottom, and through zip-ties holding the top to the bar. It doesn't move any more.

So, that's it for the charged air, and that's it for today's post. Thanks, as always, for following along-