Thursday, December 31, 2020

Chasing the Hapy Electrical Gremlins (part 4)

Before I begin, I hope we all have a 2021 that allows us to all forget just how bad 2020 was. That really capped off quite a decade. Anyway, with the new decade now in front of us, let's all work together on making our little worlds more friendly, livable and Hapy. On that, I spent way more hours than I could count over the last few weeks clowning on this wiring. I work slowly, so even when I have a huge block of time, meticulous work takes nearly forever. I got so carried away in fact, I missed my usual posting day this week, so this one is a little late. HNY!
 
Wiring Diagram
I have completed the wiring diagram. I mentioned in a comment on that last post that I had to start over because of differences between the Jetta and New Beetle of the same year. So goes. I now have a 12-page custom wiring diagram for this build. It includes things that I have not yet completed nor posted about (like a glow-plug light), but it does NOT include anything about the original bus. So, when working on something related to the TDI, we use this new one. When addressing something in the 50-year old transporter, we reference the Bentley. I expect that I will be making small modifications to the diagram based on what happens during the harness surgery. I figure that if the diagram isn't accurate, it really isn't very valuable.
 
Complete the Cut-Apart
When I last posted, I was in the process of cutting down the part of the wiring harness that ties into the fuse box and relays. I have worked on this area before. In retrospect, I maintain that leaving the engine harnesses that go to the ECU untouched is the right answer. I had looked at cutting them down too, and concluded that is playing with fire. Besides, just this one harness was quite a time consumer. This harness has the T10 plugs (white, black, orange, blue) and a T6 that in the NewBeetle's case is red, but on other cars it is brown. As I mentioned, this also has the fuse box, and relays. It also includes the dashpod, an OBD-II plug, an oval "T10" that is also black that lives in the engine compartment and there are a handful of little 2 or 3 pin plugs for the alternator, air conditioning and coolant level. It's really a random collection of things; making a decent custom harness from it is not all that easy. Anyway, my goal was to label-label-cut enough so I could remove the harness and thin it out. After the over-zealous cutting I mentioned in my last post, this was going to get much bigger. I got the last few of that "handful of little things" label-label-cut so I could bring the whole thing onto my kitchen table. I will get into the thinning in a future post (probably my next one).

Install Plan
Few things that go well happen purely accidentally. You have to make a plan. With the fuse box, relays and dashpod out of the way, I could re-assess the spare tire well which I'm now calling the "wiring compartment". I need to keep the dashpod wired-in for the engine to run correctly. Since it is rather small, I planned for it to go into the far end of the compartment, with the rounded top slightly pitched so I can see it when I'm tinkering with the compartment exposed. On the other end, nearest the rear hatch, I planned to put the ECU, with the new fuse/relay box in between. For this to work, I'll need to shorten many wires in the harness I just removed, but the result will be a wiring compartment with a few cables, but no spaghetti. The T10's will plug into the thicker ECU harness below deck, so there will be some cleaning, arranging or obfuscating I'll need to do there.

Dashpod Mount
The donor pieces I received included the plastic surround for the New Beetle dash. The front/top cover snaps in place, hiding the screws that hold the dashpod to the plastic mount. This cover, however, makes the dashpod too wide to fit in the spare tire well, so I tossed it. I also had to cut down the plastic mount so it would fit, leaving the front-most flat section and the lower plastic bits that support the screw-holes for the dashpod. The second picture from the top shows the dashpod in 2 pieces. The upper 2 pieces were cut apart. I set and reset, fiddled with and eventually arrived at a spot for the dashpod. I marked holes, drilled them out and sent long screws thru the dashpod mount into the front curved side of the tire well. The dash pod clicked into place, and was quickly screwed into place. I checked clearance for the 2 cables that click into the dash pod, and there were no issues.

ECU (computer) Mount
Mounting the computer was not as simple. I received what looked like the plastic ECU holder back when I first got the New Beetle TDI, but I could not figure out how to orient the ECU so it would fit between the base and the protective flap door thing. So, I tossed the base, and screwed the flap door into the spare tire well instead. The ECU sits quite nicely on there and the cables are unimpeded. I will need to either Velcro the ECU to the mount or use something else. I will use short hook-end straps (like these) for now, since I have a few of them, so they are free. I intend to treat myself (and Hapy) to a Malone tune, eventually. I'll go Velcro after that, since I don't know how the Malone tune thing works with sending a computer in or if you get a flash download or what. Something to learn, and post about later, I guess.

Fuse / Relay Box Mount
final-ish look
With the ECU and dashpod located, there was really only just enough room for that fuse/relay box to fit between them as you can see from the picture on the side here. I chose to locate it on the inside of the wheel well, but it could just as easily gone on the other side. This way, the fuses are furthest from the rear hatch, but the orientation is consistent with my drawings (where I have the fuses at the top). This was a relatively simple matter of aligning the top of the closed fuse box with the top of the rear deck, marking the spots and boring them out. A standard hand drill doesn't fit there, so I put the drill bit in my Dremel. That is probably not the best solution, so I don't recommend it, but without one of those fancy 90* air-powered drill things, we make do with what we have.
 
That's it for today. Next time, I intend to get into the harness surgery. Thanks for following along and Hapy New Year-

Tuesday, December 15, 2020

Chasing the Hapy Electrical Gremlins (part 3)

Continuing on our journey through the darkness of the wiring rat's nest.
 
Shouldn't Have Cut That
not quite "before",
dashpod already pulled
I'll just jump right into the interesting part. Well, mostly. I started in the engine compartment and removed the wiring related to the coolant heater first: the relay box, the wires down to the glow plugs, etc. That much was great. Then, I moved on to looking at some of the wiring above, and as the bold-faced line implies, I cut something I would best not have.
 
Reflect back to the last time I clowned around on this wiring, I dug deep into the fuse-box. I started by pulling the fuses for circuits Hap doesn't need. Circuit by circuit, I cut that unnecessary wiring by referencing fuse sockets where the fuses had been pulled. That plan worked great. Lots of extra wiring got removed, and the engine still ran. I still had the sporadic not-limp-mode, and the occasional Hapy-don't-wanna-start issues, but they both seemed improved. Well, this time around, I got into the fusebox and saw a few wires that did not appear to have a partner on the other side of the fuse. So, I figured I just missed them the first time, and cut them. Well, that was wrong. Their "missing partner" was actually a common-line always-hot (circuit 30 in VW-speak) that was kind of hidden from view. Well, I didn't see them anyway. The wires I cut are for powering "engine control" circuits, of course. So, kinda important. Ugh.

Fuse Box Smaller
don't actually need
any of these relays
Once I realized that the wires I cut were critical, I needed a new plan. A while back, I bought a small relay box thing off eBay that has 6 relay slots and 6 fuse sockets. Once it arrived, I looked at how many fuses were in the donor fuse box and how many sockets were in that smaller box and the math did not add up. That was all before I did the clear out I mentioned above. After that, I was down to 7 fuses, and one of them was for the OBDII plug that I don't actually use. So, I think the fuse socket numbers may work. As for the relays, I only need 2 of the donor relays: the infamous 109 (main power) and old 180 (glow plugs). All the other ones can go, which leaves me 4 slots for other things, like the "RUN" and "START" trigger relays I have connecting the ignition from the front to the electrical from the donor. Neat. I didn't mean to change the fuse box and the relay plastic holder thing, but when I cut those two engine control wires the die was cast.

Label, Label, Cut
smarter way to remove
extra wiring
So, into the darkness we go. I started with the more obvious wires, like the thin little wires on the 180 (glow plug) relay. Then, I moved on to the T10 plugs. There are 5 (Blue, White, Black, Orange and Brown) 10-pin plugs in the mix of all that rat-nest. I unplugged them, and started dissecting by labeling either side of the cut, describing what is on the other side, and cutting. This picture on the right here explains the wire coming from the ignition switch position 86s as an example of how I dealt wit the wire-snarl.

While that sounds like quick work, I have moved slowly, researching each wire first, to make sure I don't have another "engine control" mishap. And, I want to do more than just label where it went; I want to know what it does first. This is a lot like a jigsaw puzzle where the more you do, the faster it goes until you eventually have all of the wires you intend to cut labelled and cut apart. I am almost done, which means the next post on wiring should include some building back up.

Diagramming
One last thing I have been doing, is crafting my own wiring diagram. I started by scanned the wiring diagram for the early ALH engine (80-pin ECU) from the Bentley. There are 13 pages. I am examining each circuit across the diagram and editing the image of the page to reflect what my circuitry will look like. I am retaining the original circuit numbering, etc. but adding the number of the fuse that I am using in the new fuse box to the documentation. Perhaps more importantly, I am erasing the wire references to things that I no longer have, like the coolant warming glow-plug stuff. My thinking is that this way someone who knows the original wiring (looking at you, Justin) can understand the diagram just as well as I do. This diagram will replace the diagrams in the 3-ring binder, since the 2 sets in there are both for later ALH models, so they are informative, but not exactly 100% representative. Between the cold and the dark, the diagramming effort helps me feel like I am moving forward while also creating clarity around the work.

My CoViD-19 Plea
I take a 2 mile walk pretty much every day to shake off the cabin fever and to get some exercise. Every day, I see 20-30 people also out taking walks, riding bikes or taking a run as well. That's great except I can count on one hand the number of people I encounter with a mask on at all (even worn wrong). The other day, I counted 3 people out of 28. Seriously. Our tiny state is consistently seeing over 1200 new cases a day, which is alarming when you consider our "summer peak" was 430 cases a day. Please keep your masks on, its not a political statement, it's not a chin-strap and it doesn't work unless it covers your nose and mouth. It's to protect others from you, not the other way around. We don't know if you have the virus or not, and quite frankly, if you're wandering around without a mask, and hanging around with others who don't have masks, then even if you had a test today... you don't know either. Just because you're outside doesn't mean you can run/walk/bike right past other people a-huffin and a-puffin (and sometimes a-coffin) without a mask. We are all tired of this, but that doesn't change anything about the importance of respecting it, and each other --

Tuesday, December 8, 2020

Hapy Heat Circle-Back

Brief post this week. I've been tearing down the electrical in the bus, and it's really not that photogenic. I'm not really sure how to post about it since it really is very boring from a read-all-about-it perspective. It does, however, take an incredible amount of time. I have spent probably 10 hours just slowly working through the circuits, figuring out what's what and then cutting and labeling things so I can put it all back together, but cleaner. So, while I figure out how to not bore people to tears, here's a quick update on the furnace.

Hapy outside townhouse
before Champoeg trip
As I post this, I am realizing that it was 10 years ago that my first marriage dissolved and, perhaps correspondingly, the TDI transplant really got legs. How time flies. Over the course of this next year, I will be hitting other 10-year milestones: getting my townhouse apartment (See Hey Strangers), that first camping trip with the boys to Champoeg State Park (See One Small Step for Van) in the TDI-powered bus, and meeting Boo (See Football, Friends and Further). Funny how 10 years later, we are still making improvements on Hapy, I am still fiddling with the TDI electrical and his exterior doesn't look much better. Where were we? Oh yeah, furnace fun.
 
Yeah Yeah, Follow the Manufacturer's Instructions
It's been a few months since I did the parking heater / camping heater install. As directed by the manufacturer, I have been turning the heater on and letting it run through it's cycles about every 6 weeks since. My last runs have been these last 2 weekends. 2 weeks ago, it was super cold (low 40*F's or ~5*C), so I thought it would be interesting to see how the heater sorted itself out. The heater had the interior of the bus genuinely warm in about 10 minutes.
 
Can't Leave Well Enough Alone
I thought I would experiment with the fuel pump frequency at the low end of the maintain cycle. This is the speed at which the heater would run when you achieved the target temperature. I figured that even at the recommended 1.3, the noise coming through could be disruptive when you're sleeping in the middle of nowhere. So, why not see if it can go super slow? So, I set it to 1, which is below the manufacturer's recommended low. I left the bus alone for a while to see if it could arrive at stasis. When I returned about an hour later, the inside of the bus was kind of exhausty-smelling. Yuck. I shut things down, and thought about whether I had an exhaust leak. I had not had that smell before, so either I hadn't run the tests long enough before, or maybe that manufacturer setting was related.

Not a Leak, Just a Bad Idea
Fast forward a week, and I'm ready to test again. This time, the temperature is just above freezing. I turned on the heater, using the built-in Afterburner WiFi, from my living room. This is so cool. So, I'm in my living room, and simply connect to the WiFi and go to 192.168.4.1 on a browser and bam, there's the controls for the heater. Tap on the thermostat image and a popup asks if you want to start the heater. Once that process started, I changed the fuel pump low setting back to 1.3. After about an hour, I checked the Afterburner browser on my phone. The heater was maintaining 68*F (20*C), and was in a maintain cycle running the fuel pump at 1.3. So, I put on my shoes and coat and went out to Hapy. No exhaust smell, just the smell of warm metal from the furnace. Of course it was totally comfy.
 
I now conclude that when you go below their recommendation, the heater still works, but I think the fan speed is somehow involved in the force at which the exhaust is expelled. Continuing this thought, since the fuel pump was set so low, the fan ran super slow, and the exhaust fumes built up inside the bus. Neat.

So, that's it for today. Basically, if you were wondering if you can run the heater at a setting below the manufacturer's recommendation, that answer is "yes", but the risk is not just premature wear. The greater, or at least more immediate, risk is that exhaust may not properly vent, so you could create an unsafe condition inside your bus. Thanks for following along-

Tuesday, December 1, 2020

Chasing the Hapy Electrical Gremlins (part 2)

Today continues where I left off with Hapy. Last, I had pulled a cable from the rear to the front, through small openings in the frame. I wired up the accelerator pedal plug into the new cable, as well as the ignition switch. Today, we take the next few steps.

Looking Up at 40F (4C)
Yes, it is still cold. It is December, after all. Now that Thanksgiving is behind us, the holiday music can come out in full force. Meanwhile, I'm dreaming of a not-rat's-nest wiring set up. Though, I suppose, a white Christmas would be pretty great too. We start with getting the wiring up front completely tidied up. I wrapped the exposed wires from the cable with 1/2" plastic wire wrap so it remains one cable almost all the way to the ignition switch. I split off the 6 wires for the accelerator pedal from the main bundle in front of the hand brake (front is front), and wrapped that in another plastic wrap. I ran that bundle behind the accelerator pedal support down to the pedal assembly. I then fed the excess cable down through the floor, leaving a little slack in the cable, but only just a little. The work in the cab is basically done for now.

Underneath
At this point, I slid under the front end and started sending cable back towards the rear. I was only able to get about midway before the original wire clump started to become a problem. See, I reused many of the same pass-throughs that I had used 10 years ago, and pushing the cable back against these wires was really not happening. So, recognizing that the old wires are no longer needed, I removed them. Unfortunately, they were taped to the 4-wire bundle for the brake switch, so I needed to remove that bundle as well. I wasn't using that circuit anyway: it only serves to notify the ECU that the brake has been pressed so turn off cruise control. I am obviously not using cruise control, so all of those wires go. I cleared wires all the way back to the spare-tire well, and confirmed the wire colors on the accelerator pedal circuit: they match. So, while the plug changed after the 1998 New Beetle TDI implementation, the wire colors didn't. Neat.

Lower Rat Nest Tear Down
Original outlet flange
Way back when I first did the swap, I had a Vanagon rear seat heater sitting on the accessory battery tray. That heater blocked from view how bad the wiring snarl was un the engine bay. Once the heater was removed this past Summer, it could have been obvious... if I'd looked. I did at this point in this rewire, and chose to start the cleanup right there. Hidden behind the heater were the relays and other associated wiring for the coolant glow plugs. For those not in-the-know, the manual transmission TDI's delivered with an aluminum coolant outlet flange. That flange had 3 glow plugs to warm the coolant. This flange was on this engine, but the coolant outlet sticks out the wrong side. In the bus, it sticks into the fuel tank. So, I swapped it out for the plastic coolant outlet flange that routes to the sides. Anyway, all that extra wiring and relay box were just sitting there. Were. They have been removed now. I moved a couple of ground wires that were in the middle of everything and then took all of the other wiring and pushed it up through the hole into the spare tire well. The cables that remain in the engine compartment are mostly against the compartment ceiling now. I didn't do much more, because I want the wiring up above to dictate how much more I do.

Research Again
It has been 10 years since I really looked at this wiring. Fortunately, TheSamba contributor AndyBees sent me a tome of wiring knowledge back then, and since I did not meaningfully stray from his work it will very much help me now. I barely scratched the surface of this documentation when I first did this install, though I did keep it in a 3-ring binder, with the other bus books in Hapy. 10 years ago, my goal was to just get it working and then I planned to circle-back and improve / clean it up. Well, after years of wrestling with the coolant (first leaks, then overheating) and then needing a break from the bus (hence, Oliver, the 1978 MGB), I'm only now getting to this. Based on a few hours of study, I expect I will be able to significantly reduce the remaining wiring. For example, I still have relays and wiring related to the radiator fan controls, even though I have those fans on a dashboard switch. And, of course, I will not be doing cruise control. There will be other discoveries as I go.

This is as far as I've gotten. My next steps are to start eliminating wiring related to functionality I am not going to retain (cruise control, etc). Since Hapy is outside/carported, this may take a while as I wait for nicer (read: warmer) days. We usually get a 50F/10C-degree day here and there. Since Hapy is blocking the garage bay where Oliver is parked, I may get my wrenching fix with some little projects on him when the weather is too cold to play with Hapy. Time, or more like weather, will tell. Thanks, as always for following along. Please stay isolated, and wear your mask / wash your hands when you can't.

Tuesday, November 24, 2020

Chasing the Hapy Electrical Gremlins (part 1)

In the Summer of 2019, we barely made it home at the end of the Dog Days 333 (See parts 1 and 2). Hapy decided to just not start on command anymore. He was dropping into that modified limp mode and it was happening not just when he was cold, but pretty much at random. I promised him that I would fix it as we sat idling in a Dundee convenience store parking lot while C was in getting us drinks. Today's post starts that "fix it" journey. Before I begin, for my US readers, Hapy ThxGiving. For CoViD's sake, please stay home.

One Last Time
Hapy parked in tarmac spot
Hapy's usual home
After I finished the priming of all the Zed body panels (See Zed Prime), I moved them into the garage. This freed a covered one-car parking space. I had initially planned to put Nemo back in there and get after his wheel bearings. I decided instead that with the CoViD-19 numbers climbing to all-time highs, maybe it was okay if I didn't have a car that could take me too terribly far. Nemo can get me to the corner store and back; that's plenty until I can get the wheel bearings done.. once I confirm that they are the source of the noise, and it isn't just loud tires. So, I switched it up, and I am instead jumping into the Hapy electrical. I could have gone after this stuff at any point during the nice warm summer. That just wouldn't have been consistent with all the other work that's been done on this beast, so of course instead I chose some of the coldest days this year to do it.

First, I had to get Hapy into the spot. He is usually parked on a tarmac strip at the curve of our driveway so we can see him out our bedroom window. Yeah, we're weird. For any other car, moving it would be a simple effort of start, drive forward, reverse into the spot. Once I got the other cars out of the way, it was his turn, and just like so many times before, he just didn't want to start. I turned the key to start and nothing happened. Sigh. So, I tried to push him. Nope. There's a little dip in the tarmac that he would roll back into. I had to pull him onto the concrete with a trucker's chain around his front sway bar at one end (his front tow hook was pancaked by the prior owner) and around Nemo's front end on the other end. Fun. While I was trying to figure out how I was going to push him back into the covered spot, I lamented out loud to Hapy "why can't you just start one more time?". His response: he started. Of course; good boy. So, I backed him into the covered spot, and turned off the key.

Running Cable
In the TDI retrospective about secondary electrical, I mentioned replacing the single wires I originally installed 10 years ago with a cable. Well, I bought 30 feet (~10m) of 12-wire 16ga cable for this job when I bought cable for the additional gauge (see Oil Pressure and Temperature Part 4). It is not quite as thick as my ring finger as a sealed cable, and it has a nice thick jacket on it. I figured that the computer and rat's nest wiring is on the driver (left) side, as are the accelerator pedal and ignition switch. So, running the cable along the driver side made more sense than running it along the other side. Turned out, I thought the same thing 10 years ago, as the old wire bundle ran that way. I started from the rear, threading the cable through the bottom of the spare tire well and down into the engine compartment. From there, I ran it through manufactured holes in the frame over the rear suspension, along the inside of the mid-section frame rail to the cross member near the new heater location. I pressed the cable through a square hole in the cross-member, under the brake booster and then through another square hole into the area covered by the front belly pan. I had bored a large (~1/2 inch diameter) hole at the very front over the Summer when I routed the heater fan control cable through. I had planned to reuse that hole for this cable, and it fit with very little trouble. I pushed and pulled about 5 feet of cable up through that hole so I could stand alongside the driver seat to do the wiring bits.

Wire Front First
The 12-wire bundle is more than I was really ready for. The accelerator pedal needs 6 of them. The start and run signals account for 2 more and the OBDII signal is the last. The other wires will be used in the future for things like a speed sensor and a glow plug light. Like the extra wire in the cable I strung for the oil temp and pressure for a low coolant warning, I'll get to those later. For posterity (and my own personal reference later), these are the circuits for the 12-wire cable. I will update this as I make changes or discover mistakes:

circuit wire color purpose
1 Red Accelerator Pedal 1
2 Yellow
Accelerator Pedal 2
3 Orange Accelerator Pedal 3
4 Brown Accelerator Pedal 4
5 Blue Accelerator Pedal 5
6 Black Accelerator Pedal 6
7 Red/Black Ignition - START
8 Blue/Black Speed Sensor
9 Orange/Black OBD-II
10 Yellow/Black Ignition - RUN
11 Brown/Black Glow Plug signal
12 Black/Red OPEN

I started with the ignition, splicing into the existing "RUN" circuit with the new signal wire. I figure the existing stuff (like lights) need power too, so the existing wire will simply feed old circuit #15. For the "START" signal, I just ran the new wire. The old starter signal was pretty batty, but it proved the TDI install was viable. Recall, it ran from the ignition down the old wire to right near the starter where it was spliced into a new wire that ran around the engine compartment to the spare tire hole through a relay to the computer, which then signaled TDI-donor relay to fire the starter... thru a new wire to the starter solenoid. There's like 20' (7m) of excessive and old wiring that I can eliminate. Then, I moved to the accelerator pedal.

Now, recall that I had to swap out the original round-plug accelerator pedal plug with a newer-model flat one after the old fly-by-wire pedal started to short out. I took a picture to help me identify which wire is which at the other end, but because the plug was changed, I expect the wire colors were as well, so when I cut the old wires off, I left about 1/2 inch of flat-plug wire on there so I can compare with the picture (here on the right) when I get to the rear-end wiring.

EDIT: I have updated the picture on the right here and the wiring reference above to reflect the actual circuit numbers in the wiring diagrams to avoid any confusion. Originally, the numbers ran the wrong direction relative to the official wiring schematics.

Even without the change, it was important to consider placement of the cable and the things that were going to be wired into it when I made my cuts to the wires. The ignition, speed sensor, etc are all at the dash where the accelerator is at the right foot. I made sure there was about 3 feet (1m) of cable between the ignition and the accelerator pedal cuts so there is room for cable routing. Also, it was important to pre-route the cable as much as I could so we didn't end up with the cable running in front of the steering column or goofy some other way.

Next
I admit, that doesn't sound like much. I moved the bus, ran some cable and did the wiring at the front end. Still, in sub 40*F (4C) it was a feat getting that much done without going numb. The weather around here is decidedly cold. I accept that I will not be able to get things done on Hapy very quickly, but with him out of the rain, at least it is not completely miserable. Just cold. If I can stand the cold, I will finish up the wire cable in the front by wrapping it with some plastic wrap, and pressing the excess cable back into the belly pan. Then, I'll push/pull the excess back to the rear so I have room to wire up the controls back there, probably leaving me close to 3m of leftover cable. There is a great deal of electrical housekeeping that I have not done back there. I think this is the right time to clean all that up, removing the unnecessary, trimming and mounting, etc so it is nice and clean. And, or course, our sporadic modified limp mode will no longer appear. It's all about staying warm enough to take small steps forward and eventually the wiring will be done. Then, I'll switch to diagnosing Nemo's rear bearings again.

Thanks, as always, for following along. Posts may appear more slowly as my work slows down. I'm still working on it (and staying CoViD safe, of course).

Tuesday, November 17, 2020

Zed Prime

No, not like Optimus Prime. Today we celebrate getting Zed primed in 2k hi-build primer. Before I begin, the CoViD numbers are getting flat-out scary, but it doesn't seem like folks are taking this news and processing it into action. I take a walk every afternoon for some exercise around suburban residential streets and there are lots of fellow walkers or runners out there. Please remember that just because you're outside, it doesn't mean you can walk right up to me without a mask. I'm wearing one to protect you; show me the same courtesy, dammit. Now, about that primer.

Layout
panels set up for paint
set up for ease of movement
I started out by backing Nemo out of the other covered spot, and laying a big blue tarp on the driveway where it had been. I then planned my route for moving from panel to panel with a spraygun and air hose. I moved the air compressor out of the garage, but at the edge of it's power cord. I wanted to make sure I could get at different angles without bumping into wet paint, and without dropping the air hose across a panel.

Clean
This is the part that most car shows don't televise: the endless cleaning. Garage Squad is the clear exception, but I think that's because the car owner is usually doing it. Anyway, by now, dust from the Bondo is pretty much everywhere. Your hands and the oils ever-present on them (combined with Bondo dust or not), have run all over all of the panels. Both of these things ruin paint jobs. So, we start with a bottle of degreaser and a roll of paper towels. Since the car has been outside and the weather has been windy and damp, I did not feel it was necessary to shop-vac the interior before I began. I stand by that decision, but I encourage you to vacuum or air-compressor blow-out crevices at least. With bottle and towels in hand, you clean everywhere you intend to put primer. And clean the places nearby so tape will stick. I found the degreaser left a film on plastic so I had to reclean those plastic pieces with window cleaner sprayed onto paper towel so I could get tape to stick. Neat.

Mask
280ZX driver side rear quarter panel
driver side rear quarter
With everything clean, I completed the masking next. I had started a few weeks ago, masking off the engine bay and the windshield. The sides of the dashboard near the doors, the door seals and some of the door hardware all needed to be masked. The fuel inlet did too. Again, it is probably worth stating that the purpose of masking it to keep paint off of stuff you don't want painted. That sounds obvious, but sometimes we get aggressive with tape and overdo it. So, with that perspective, it is better to under mask and have a little bit of rubber or chrome get paint on it than to over-mask, and have a line of unpainted body when you pull tape. Been there; it really sucks. Removing a little paint from rubber or chrome is way better than trying to get paint on that edge after you've messed up the masking. Last, I cut up some kitchen garbage bags and covered the tires. I'm not sure if we are going to keep them or not, but either way overspray would make them worth less. 

Paint Gun Assembly
harbor freight air regulator with gauge
I knew that once I had metal etching material applied, I was all-in on priming. Metal etch is an acid that converts rust, but it also cuts into the steel, making primer adhere better, but also creating a means of rust suddenly appear where it otherwise wasn't. With mid-Fall NorthWestern Oregon weather (read: damp), you do not want to create a rust opportunity. So, I set up my paint gun next.

A while back I got 3 of those purple Harbor Freight paint guns. I figured I would have a different gun for each of the various steps: prime, paint and clear. Well, since then I got a much better gun (ATOM X27) for applying the color and clear. For primer, though, especially this high-build stuff that has some thickness to it, I did not want to put that through the new gun.

The purple Harbor Freight paint gun ships with one tip, a 1.4mm one. That is too small to reasonably throw thick primer. The Eastwood guide for this 2k high-build primer suggests anything from 1.8 to 2.5mm. So, I drilled out the 1.4mm tip with a 5/64" (1.98mm) drill bit to get as close to a 2mm hole as I could. I did this a few weeks ago during paint gun disassembly, cleaning with lacquer thinner and re-assembly. Now, with the gun set up with a nearly 2mm tip, I was about ready. For timing... from end-to-end, gun disassembly, tip-drill, cleaning and re-assembly took a little over an hour. I work slow.

280ZX passenger side rear quarter panel
passenger rear quarter
To the air-inlet, I applied plumbers tape, and then threaded on a regulator with a pressure gauge (like this, also pictured on the right here). On the threaded end went more plumbers tape and then a inline desiccant dryer/filter (like this) and more plumbers tape. To that last bit, I threaded on an air hose quick-release. I set the whole contraption into a spray gun stand (like this) that was held firm to my bench under the weight of a vice. Be advised, these things are not balanced, and need to be fixed to something -or- have the baseplate under something super heavy (like a bench vice that I never attached to the bench) or they will fall.

Etch
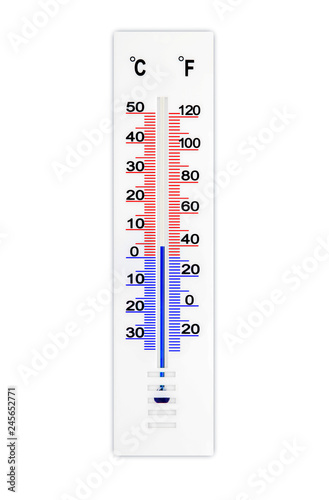
With the panels clean, the gun ready and the masking done, I grabbed my small bottle of Eastwood metal etch and a foam brush. Panel by panel, I liberally applied metal etch. Because it was in the upper 50'sF (14*C) and relatively damp, the metal etch stayed wet for quite a while. That's a good thing, as it gives the acid time to cut into the metal and convert any rust without creating flash-rust.

Mix a Batch
280ZX hood in high-build primer
hood looks real flat
Again, not like Letterkenny. The Eastwood hi-build 2k polyester primer requires the addition of liquid hardener: 0.2oz hardener per 10oz of primer. The cup that comes with the purple gun max's out at 20oz. so, I made 15oz batches per spray cycle. 15oz of material needs 0.3oz of hardener. Now, I have an old plastic syringe from when I was playing with biodiesel years ago that holds up to 12ml's, but it is graded in milliliters not oz. Apply some math and we need 8.87ml of hardener for 15oz of primer.

I grabbed a plastic mixing pitcher from the kitchen baking materials (did I mention that my wife loves me? I'm a lucky man.) and with blue tape marked the 15oz. line with the top edge of the tape. I did this so that I could quickly see when I hit 15oz while dumping paint from a 1-gallon pail. I opened the can, and then spent about 15 minutes thoroughly mixing the primer, deep churning the solids off the bottom so it was consistent top to bottom. 

Once mixed, I poured 15oz into the mixing pitcher (to the top of the blue tape) and opened the hardener. The hardener comes in a tube, but is as thin as water, so getting it into a syringe was not really a fruitful exercise. To solve, I removed the plunger, turned it upright (small hole at the bottom) and covered the small hole with my gloved finger. Into the now-open other end of the syringe, I squeezed just shy of 9ml in and then dumped it into the mixing pitcher. I mixed for about a minute and then poured the now-activated primer into the gun paint cup and threaded on the lid. I repeated this process 3 more times during the primer-shoot.
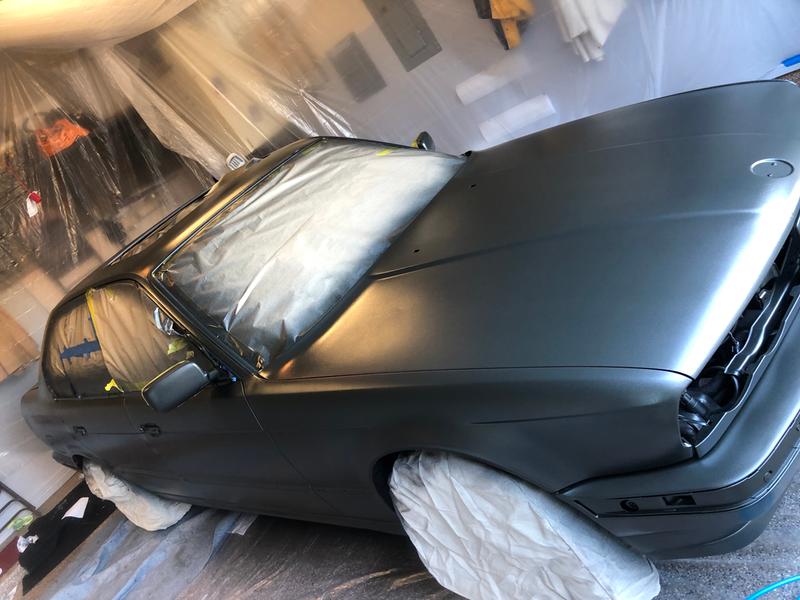
Prime
280ZX passenger side headlight bucket in high-build primer
passenger headlight bucket
With primer in the cup, the lid fastened, the air compressor turned on and my painting overalls on, I was ready to go. I set the air pressure at the compressor to 40 and played with the regulator at the gun to get to 30psi while spraying. I got there, but I think, in retrospect, it would have been better had I run the pressure at the compressor higher so I could get more pressure through the gun. I say that because I found that the fan was not as wide as I would have liked, which forced me to hold the gun closer to the panel (like 4 inches rather than 6-8).

It is recommended that you test your fan on cardboard. I was shooting primer and was going to be shooting multiple coats, so I was fine with getting the fan set on a fender while shooting. My car, my choice. It took me a few passes to get my pass-speed right, but after 3 coats, the coverage looks really good. I found that I was initially moving too quickly, making my first coat quite light. Also, because I have a 21 gallon air compressor, I had to wait for the pressure a few times. Honestly, I expected much more waiting.

Because of the high-build nature of the primer, I made sure that I got a nice build everywhere, and then circled back on the trouble spots (fenders) for some extra. Once it all dried overnight, the panels look very smooth, though after touching them, they will definitely require a bunch of sanding. I haven't decided if another round of primer will be necessary. I guess we'll see after the sanding. At this point, though, I am super-happy with how everything looks.

Clean Up
280ZX passenger door in high build primer
passenger door
Similar to the cleaning of the car prior to painting, the cleanup of tools gets virtually no coverage in MotorTrend / Velocity / Speed television shows. That's really too bad. I know it isn't terribly entertaining television, but ignoring it implies a bad habit of not cleaning things as the way that the professionals do it. We know that is absolutely not the case. I spent over 2 hours spraying primer and another hour cleaning up. I may be slow, but I try to be meticulous. I started by pouring some fresh lacquer thinner into the paint cup and sloshing it around. This didn't free the dried-on primer, but the still wet primer was now suspended in lacquer thinner. I sprayed the material out until the cup was empty, and then removed the air line from the gun. I removed the cup and set it aside while I poured more lacquer thinner into the measuring pitcher. I used the pitcher from this point as the cleaning "sink". I dunked the cup in the "sink" a few times while I cleaned other things so the remaining paint on it wouldn't dry.

I removed the mix nuzzle (on the end that sets the fan-direction vertical or horizontal) off the front spray gun and then pulled the needle from the rear. With a pair of channel-lock pliers, I removed the tip housing, and placed them all into the pitcher. I set the gun in last, upside down. I added more lacquer thinner and then started cleaning things with a brush, getting all primer off of everything, including the outside of the paint gun housing and the paint cup. Once everything was completely clean and wiped down (an hour later), I re-assembled the gun, wiped out the paint cup and put everything away.

Some might argue that these guns are only $15US so why bother cleaning them. To me, treating them as single-use is an environmentally hostile way to operate. Ideally, I would not even have these, and I would have high quality tools (like the ATOM X27) instead. Still, the way we treat our expensive tools is how we should treat our cheap ones, IMHO. I have heard that these start leaking after no more than 10 hours of use, so I may have a couple more jobs before this starts to fail on me. That's still more than once. 

Curing
I let the panels (and the main shell, of course) sit in-place and under the carports overnight. The following morning, it had started to sprinkle so I carefully moved the panels back into the warm garage. I will let them sit until I am ready to sand the primer. I expect I will know if another round of primer will be necessary or not from that. Either way, the window for painting this Fall is effectively closed. Even if I can get sides onto these carports, it will be very hard to warm 400 square feet of space to 70*F (21*C) when it is under 40*F (4*C) outside. Any cooler than 60*F (~15*C), the paint won't behave properly, and it seems like everyone encourages painting at temps closer to 70*F (21*C).

I have read that the polyester primer can protect the metal underneath if the primer is not disturbed (read: sanded). Once you sand it, it is much easier for moisture to get in. I don't know if that's true, but I will be leaving the car un-sanded in primer since I can't get paint on it, so we'll find out. For now, everything except the main shell is in the garage. The shell is sitting under a car port. So, it is semi-outside, but out of direct weather and (extremely limited seasonal) sunshine.

Thanks, as always, for following along. Once the Zed body parts were moved out of the car port, I moved Hapy in, so I expect to be returning to Hapy work in the next few posts. 
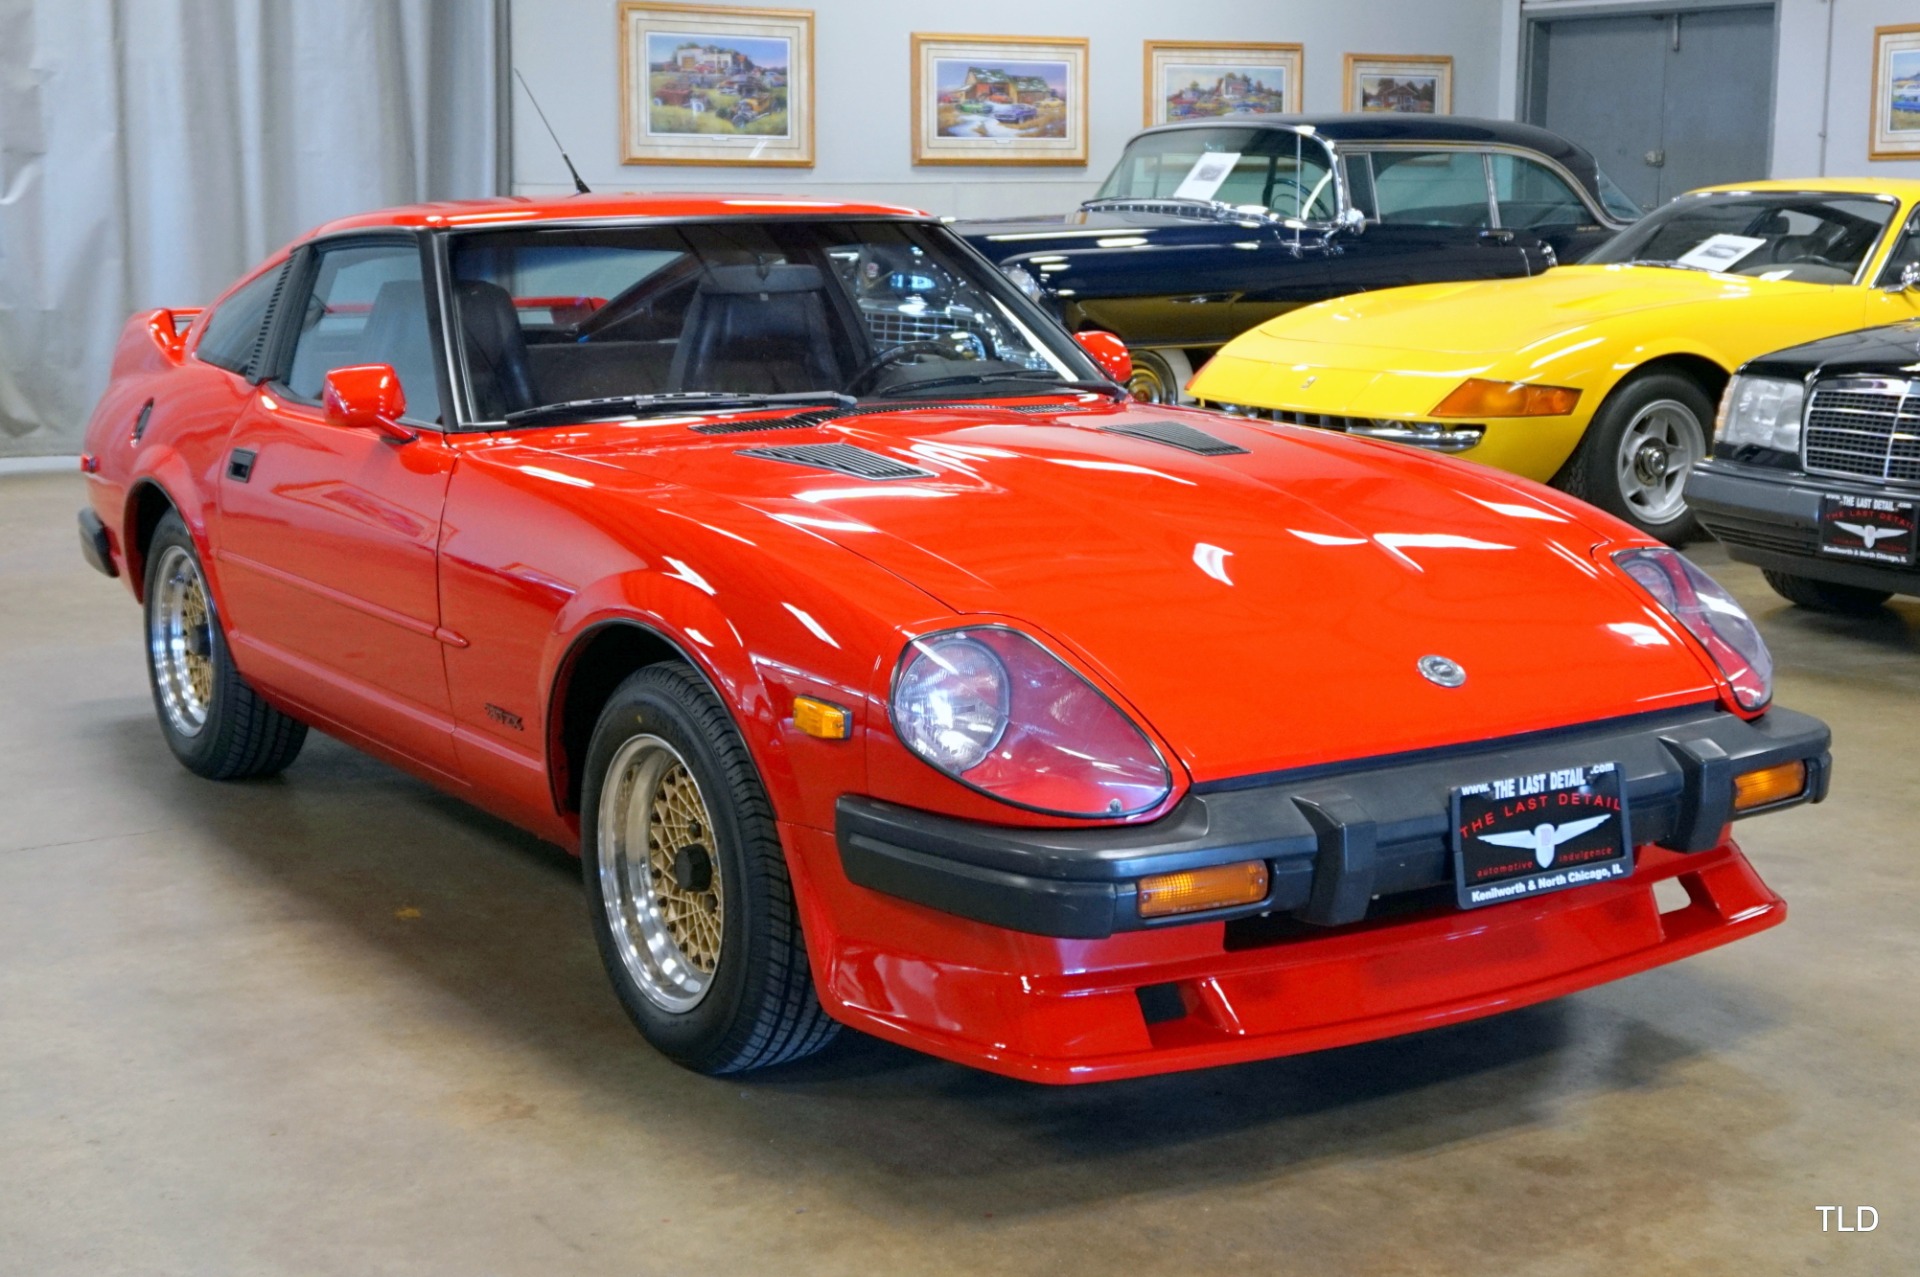
Tuesday, November 10, 2020

Decoding Hapy M-codes

I miss my bus. No, I mean, he is still parked out front, but he hasn't really seen much street since the Summer of 2018. Figure, with CoViD-19, all of our Summer plans were thrown out. We tried to plan a quick overnight vagabond, but even that was fraught with CoViD-fear. I routed that frustration energy into all kinds of project last winter / spring / summer, ranging from a parking furnace to a defroster. Now that the weather has turned, and our corral has thinned, he will be getting pressed into service when I need to get somewhere.... until I replace the rear bearings on Nemo, the 1997 Audi A4. So, while I set up projects for the winter, I thought I would post my M-codes, and what they mean. All of this was from my notes from 2004, but I since validated all of it here on type2.com.

Camper Designation
The first code after the VIN is for the poptop. My code is 518 which is for the Westy. I have read that 517 is for a true campmobile and 609 is for the campmobile deluxe.

Color Codes
Below the camper are the color codes. My line starts with "99 26" which indicates L90D or "Pastel White" exterior color. It is followed by "51" for dark beige leatherette interior.

Options
picture of Hapy under autumn trees
Hapy awaits the road
On the same line as the color codes, my option codes start with "A02". That is for a group code or a group of options that were applied as part of a package. This package included mostly basic stuff: 020: Speedometer & odometer in Miles, 026: Activated Charcoal canister, 089: Laminated Windshield, 102: Rear window heating, 206: Anti-glare Rear View Mirror, 506: Dual circuit Brakes, 511: Padded Dashboard, 524: US / Canada spec Sealed beam headlights, Red Tail lights, Side marker lights & Backup lights, 525: US / Canada spec seat belts.

After "A02", I have code "P31" which means Westfalia SO 70/2 interior. Then I have "172" which means radial (steel belted) tires followed by "507" for vent-wing windows in the front doors.

During my research I found that there were "bad weather packages" that included intermittent wipers and front/rear fog lights. Sure would be cool to find one of those.

Manufacture Date
The next line starts with the week number and day-of-week that the bus was assembled. Since it is a 1972 model year, it was constructed either in late 1971 or early 1972. Since the week number is high (36), we can conclude it was a week in 1971. Since the first few days of 1971 are mid-week, so they are shared with 1970, the actual manufacture date gets a little blurry. I have assumed that any day in the year that appears in a week marks that week as week 1. Accepting that assumption, week 36 is Monday 31-August thru Sunday 5-September. That's how the ISO defines a week. I do not know if the Germans used "0" to reflect the first day of the week or "1". Computer geeks start with 0, but I think in 1971, they probably started with 1. So, the 4th day of that week would be September 3rd. The guy who built the type2.com page confirmed that single number was for the day of the week where 1=Monday. I cross-checked by week math against the famous RAtwell, and his week math is the same as mine, so I think Hapy was born on 3-Sep-1971.

If we take the ISO rules for a week then week 1 is the first full week of the year. So, week 36 is the week of September 6-12 of 1971. The 4th day of that week would be September 9th. So confusing. For years, I thought his birthday was September 3rd, and it wasn't until I went to validate that for this post (So I didn't get it wrong) did I consider the blurriness of week 1. I intend to celebrate Hapy's 50th birthday on September 3rd AND September 9th so we definitely get it. September 3rd will be the Friday before Labor Day in the US and September 9th will be the Thursday before ChinookFest (if they hold it). So, either way, there's a ready-made party for his birthday.

Mysteries
After the manufacture week and day, there is a 4-digit code "7628" that I have been unable to identify. Based on some web-wandering it may have to do with production planning. Then, it has "UJ" which should correlate to a shipping destination. The "U" means US, but the "J" is a bit unclear.

Next, I have "2319" which indicates that this is a (2) type2, (3) Kombi, (1) that's left hand drive, with a sliding door on the right and (9) a camper. The last 2 numbers I have translate to engine (4) and transmission (1 - manual). I have not had much luck decoding the engine code of "4", but I'm running a TDI now, so it doesn't apply anyway.

Tuesday, November 3, 2020

Bondo Sand Repeat

Back months ago, I said something like "you're never really ready for paint", and that's because we generally get in our own way. Today's meandering post is about how I am refusing to accept the prep and start shooting primer. Of course, the temperatures running below the recommended by the paint manufacturer isn't helping.

For those of you in the US, today is Election Day. While so many are focused on the Presidential race, there are many races and measures on the ballot that could impact your life more directly. I hope you took the time to vote, and are here reading this as an escape from election coverage. I know I look at my cars as an opportunity for respite, away from the challenges of every day life (or political bs). This blog is absolutely a part of that, and I'll leave it at that.

Bondo Zed
I had a whole post not too long ago about how I thought I was done with the body work on Zed only to do some more. Well, since then, I just can't let it go. I keep finding little things, and I can't let them go. So, I whip up another batch, apply, sand and recheck. I have lost track of how many cycles I have done, but I would like to think that I'm learning along the way. Since I don't know how well the hi-build primer is going to fix things, I may be overdoing things. Regardless, one of my motivators is my color choice for the finished product.

Color Thinking
silver Datsun 280ZX from wikipedia
I spent a few hours looking at pictures of 280ZX's, trying to land on a color. I entered the search with something in mind, but I wanted to see what these cars looked like in a finished state. I also recognized that the darker the paint color, and the higher the gloss, the more imperfections in the paint prep are visible. So, if you go with a dark dark black with a super high gloss so you could, potentially, see a clear reflection from feet away. The prep work needs to be perfect for a color and finish like that. At the other end of that spectrum, if you paint a low-sheen white or off-white, the little misses are not as obvious. I have found a dirty white car looks cleaner than a dirty black car too, but I digress. So, if your vehicle looks good in white or cream or light yellow and it's your first paint job (or you don't have a lot of time), the minor things may not be nearly as visible if you go with one of those colors. So, what do I mean by "minor things"?

Minor Misses
red Datsun 280ZX
all cars look good in red
The kinds of things I am finding during these last rounds with the Zed are varied. One example is larger, but very shallow indentations in an otherwise straight panel. For example, on the hood, there are multiple little sags in the metal that look almost like they appeared because a child sat on the hood and it depressed a little bit. If the hood was painted flat black, would it show? Probably not too much, but I have done my best to minimize those shallow sags. I have also found very small, but deep chips in the steel. They almost look like someone took a jeweler's screwdriver and stabbed the panel. Multiple times. These could have been filled by the hi-build 2k primer, but I fixed them with bondo instead just to be sure.

Ultimately, panel by panel, I would feel like the panel was done, so I would wipe it down with a towel. Then, I would go over it lightly with 400 grit to get the metal and the patches all the same degree of smooth, at the level pre-described by the paint manufacturer. Last, I would hold it up to the light at various angles, slide my bare hands over the entire panel, both quickly and super slow.. seeking something that felt wrong. Piece by piece I would accept a panel and set it aside. First, it was the 2 doors, then a fender, then the hood and finally that last fender. Ironically, the first area that I accepted was the main shell (rear quarters and tin top).

Zed Color
dark gray color sample
Eastwood intermix gray
All this time, I'm thinking about what color I want to shoot Zed. When C was doing the work, he was thinking flat-black. While I agree that some cars, possibly even a 280ZX, look great in flat black. I'm not sure I want to go that way for the entire car. Like I indicated above, I looked at lots of pictures, and, while there are lots of colors of 280ZX's out there, only a small handful of colors really look good. Of course, this is totally my opinion, and the shortlist is basically the color list that pretty much every car looks good in: Red, Dark Blue, Silver, Dark Gray and Black. Zed was silver when we got him, Flash is silver and KLack is silver, so pretty much silver is out. I intend to paint the lower 2/3 of Hapy a dark blue so that's out. High gloss black would show too many imperfections and it is well documented (though I can't find a link) that red cars are pulled over most often, so that leaves Dark Gray. This is sort of a compromise between Black and Silver, both of which look really good on a 280ZX. 

metallic gray color sample
Eastwood 9mm Gray
So, I take this idea to my resident style expert (Boo) who suggested that maybe a metallic flake would look better. We are looking at Eastwood's 9mm Gunmetal Gray Metallic -or- their GearHead Gray Intermix. We are going to need 2 gallons anyway, since I will be shooting inside the hood, some interior spots that don't get covered with plastic, etc. So, the cost ends up being about the same. Based on the photos, I tend to agree with her. The metallic flake looks like it creates more depth, and may be a little darker. What is hard to tell is which one will be more forgiving of my prep work. The picture on the right here is of a BMW 5-series shot with the Eastwood 9mm Gray. The owner had not yet color sanded nor clear-coated it, so it is a very honest image of what it looks like fresh from the gun. It looks a lot like the graphite metallic gray color I have seen on a 2019 or 2020 Mercedes.

I guess that's it for today. The primer shipping fiasco has finally come to a conclusion, with it's arrival during the cold snap. We are not expecting weather to be accommodating to spraying paint for much longer. So, while I may be ready for shooting primer, I may not actually have an opportunity to shoot it unless I figure out how to put sides and a non-flame heat source inside the car ports. Before then, I still have to metal etch the bare steel, wipe the whole thing down with degreaser and mineral sprits and, of course, complete the masking. So, there is still plenty to do before I'm ready to actually put primer in a gun and start shooting. Honestly, it could be Spring before priming actually happens.

Thanks, as always, for following along-

Tuesday, October 20, 2020

Car Ports and Car Noises

What a difference a week makes. In my last post, I mentioned that I had helped T moved some stuff out of the one garage bay. Since then, K got the rest of his stuff, so Oliver is back in the garage. Also, the 2 carports from Harbor Freight arrived. So, I quickly moved from all cars out in the open and no sheltered space to work to 3 cars under some kind of roof, creating all kinds of work space. So, today's brief post if about getting the car ports up, and some diagnosis into the noises coming from Nemo.

Car Port Assembly x2
400 sqft of not raining
I have a small 2-car garage. I underscore small because Oliver (1978 MGB) barely fits between the garage door and the walkway along the opposite wall. Considering the MGB is one of the shortest cars out there, I couldn't imagine parking a Caddy or one of those big pickup trucks. Simply put, it wouldn't fit. So, when I think about how I'm going to complete Zed (1979 280XZ) this winter, I shudder. It's way too small to shoot paint, and with the gas furnace in there, I couldn't paint while heating the house, so the plan unravels fairly quickly. So, I got a couple of those 10' x 20' car ports that Harbor Freight sells (~$120US each). My driveway has a slight tilt towards the garage, but it's otherwise fairly flat.

V between
While I would have preferred a purchase ship-to-store option, the harbor freight website doesn't offer that. Instead, they offer $7US to ship it by FedEx Ground. That sounds like a cost-loss on their part, especially for a pair of these car ports, but they arrived before the primer from Eastwood (which still hasn't arrived). The assembly is actually very easy. The instructions have only a handful of steps and the exploded drawing is not as bizarre as IKEA furniture. I used a rubber mallet to get the pipes to fit together quickly. I was able to get each one assembled in about 2 hours, measured from when I walked out my garage door with a full box to walking back in after set-up and recycling/throwing away the packaging.

I set one over the top of Zed, and the other right next to it. I would rather not have a 20' dripped seam between them, and pushed the posts right next to one another. I took the 8-inch-or-so hangdown from one, and flipped it up over the top of the neighboring car port. The other hangdown, I pulled across and clipped to the tie-down seam, which runs along the inside, above the bottom rail. Then, I forced the pipes together and cable-tied them. This created a small V shape of car port tarp between the rails, running all the way front-to-back. My plan is that this will direct the water down to the lower end of the carport. I think this will work except for those super-heavy rain events we get sometimes. We'll see.

A4 Front Clunk
top of front strut, example
Now for some car content. After getting all the little things fixed on Nemo, I took him for a short test drive to see how he felt. He felt pretty good. Lots of boost, and plenty of power, but he made lots of noise. I could hear a clunk pretty much on every little bump. I figured it was the sway-bar bushings and replaced them: 13mm bolts hold the clamps on, and the bushing has a slit in it so you just need to remove the clamps, pull off the old bushing, slap on the new one and put the clamp back on. Times 2. The noise got a little better, but after pushing the fenders up and down, I believe the problem is in the strut-mount. From what I've read, after market struts that lower the front end (like Nemo has) put more pressure on the strut-mounts than the stock ones do, transferring some of the burden from the springs to the mounts to hold the front end up. This causes them to wear prematurely. So, I will be looking to replace those. Since I have a very healthy fear of strut springs, I will probably remove the struts and have new mounts installed by one of the shops around here. Better to pay with some hard earned cash than with some body damage.

A4 Rear Hum
Also on that test drive, I noticed that the rear end would make a humming noise once I got above about 30mph. I figured it was the wheel bearings, so I put the back end up on jackstands to confirm. The wheels had no play in them. None. Curious, I pulled it out of gear and spun the wheels, listening for noises (that would translate into a hum at speed). I heard clicking coming from the inner CV joints. So, that means at least removing one or both rear axles. Fun. Of course, with the AWD, I can't be 100% sure the bearings aren't bad. I may not have gotten the wheels spinning fast enough to make noise.

the diff oil fill, example
I intended to drain and fill the rear diff while the rear end was up in the air, but the fill plug is stripped. While I was under there, I got to see just how much caked on grease could remain attached to the outside of a differential without falling off. The answer: a LOT. I am really concerned about the health of this diff, and the whole rear-end, for that matter. Before I go any further with it, I will collect a second opinion. After that, I think it will have it's ass-end in the air for a while as I replace CV joints, and/or wheel bearings and fight off the fill plug so I can refresh the fluid. I'm not sure a 20+ year old 230k+ mile A4 is worth terribly much, but this is how we learn, and this could be a useful daily-driver for someone, maybe, eventually.

Well, that's it for today. I have not gotten back into the Zed paintwork since I put up the car ports. I really wanted to get Nemo road-able first. With the car ports up, I have more paint prep to do, and I need to figure out some sides for the car port space so I can heat and paint. Thanks, as always for following along-

Tuesday, October 13, 2020

Enter Rainman

In much the same way Metallica describes the arrival of Sandman, we in the great Pacific Northwest greet the seasonal rains. Today, I describe alternatives to prevent the rain putting a hard stop on all of our projects.

Tarp
We start with the most obvious water protection: the basic tarp. I tuck you in, keep you free from sin... til the (Rainman) he comes. A tarp thrown over your made-of-steel project works great if you are trying to hide it from the neighbors. The benefits end there, however. No matter how awesome-fantastic your tarp is, it will capture / trap / hold moisture.. against that made-of-steel project. Your best-case outcome is that you have lots of mold or moss growing under there come spring when the rains stop. Your worst-case scenario is your project acquired a new rusty patina or one or more of your seals leaked and now you have mildew inside or rust inside. In the end, I think throwing a tarp over your project is possibly worse than nothing at all. At least when it is uncovered you will feel motivated to do something about it. A tarp just hides the truth from you.... until you remove it. All winter you're sleeping with one eye open.

Car Cover
I got one of those fancy $200+US bus covers from BusDepot a few years ago. It worked great the first year or two. After that, the UV light or something caused it to not work so well anymore. Last year, when I pulled the cover off, there was moisture all over the inside of it, mold on the fiberglass poptop, and a slime on the rest of the bus. Yuck. I know my seals are good, so this year, he is going without a cover, and I'll just cycle the cabin furnace (See Parking Heater 1, 2, 3, 4, 5, final) more frequently to keep him dry inside. Recall from Seasonal Cleaning, I use a desiccant as well. In the end, a car cover is little more than a collection of tarps that have been sewn into the shape of your car. They may last a little longer than a single season, but for the price, it just makes more sense to invest in something more.

Instant Canopy / Sun Shade
So, we can't have some plastic sheet draped over a car for 7 months and expect the car to be better for it. Who knew? So, we try one of those $99 pop-up canopy things. These are great in the summer when you're working in an otherwise sunny spot. They go up in minutes and you can do it by yourself. Most excellent. Of course, they are only 10 feet square, so the only kind of vehicle that could completely fit underneath it would be a motorcycle. Not even Oliver, the MGB, or the old corvette pictured here can completely fit under one. But it's close. So, you move it around to create shade where you're working. Enter Rainman. These things cannot withstand rain. I mean 0 rain. They are not designed for water to run off the edges. If you look at the picture on the right, you can imagine this scene: it pools up along the lower edge, slowly stretching the top until you have these large pools of water suspended over your project. At $99, the structure is not terribly strong, so something bends and then another thing breaks and suddenly, you have gallons of water dropping onto your project all at once. And, your canopy is trash.

Farmer Market Canopy
How about an upgrade? The canopies that the vendors use at farmer's markets and music festivals, for example, are great. They can withstand some wind, and some rain. They come with detachable sides. So far so good, except they cost about 3x an instant canopy. Of course, they are also 10 feet square, so no normal car can fit inside, just like the $99 deal above. I got one of these a while back, and I am using it for now, while I await my next solution. I have removed the front clip (front fenders and hood) from Zed, so the rear 2/3 are covered by the canopy, and put a tarp (yes, I know they are not great) over the engine compartment. No pooling water. The wind doesn't seem to touch it. Still, the 10 feet deep part makes it fairly unusable for working on a car in the rain, unless you don't mind either having half of the car sticking out into the rain while you and one end are dry or having the other end nice and dry while you and the thing you're working on out in the rain. The latter of those seems silly, especially since you just spent $300US on a rain-capable covering.

Temporary Carport
My last effort to foil the Rainman is a Harbor Freight temporary carport. These are 20 feet long by 10 feet wide, have no sides, but appear to be able to withstand rain. I don't know about wind. The videos I have seen online are unclear since most of them show a carport that is mostly protected on the sides by trees and/or shrubs or by a more permanent structure like a shed, garage or house.

Unfortunately, getting one of these things is becoming quite an undertaking. It seems that every restaurant that wishes to remain viable during the rainy season has concluded that these are the best way to keep their patrons dry during the CoViD no-inside-seating thing. As a result, as soon as a truck arrives in the greater Portland area with some, they are gone. So, I went online and ordered from their website. In a normal world, delivery is about a week. In this modern dysfunctional dystopia, I can't get an estimated delivery date. Why? Between COViD and the wild/forest fires, FedEx has effectively ground to a halt in the Portland area. For example: I ordered primer for Zed in early September. It took 2 weeks for it to get to a Portland FedEx warehouse, and it has sat there since. I called FedEx and asked about it. The response? Forest fires. They could have said "sunspots" for as helpful as that was. We still have no idea when it will move out of the warehouse. I may have to take a Saturday and drive out to the airport to collect it in person.

Temporary Garage
Similar to the carport, this is a Harbor Freight item which costs more ($170US versus $120US), but it includes sides and a roll-up door. Based on what I can see in the videos, however, you can't assemble them without the sides, so that reduced flexibility turned me off to them. Recognizing that I could roll up the sides, I looked for them at the big Harbor Freight in Tigard, and they were out of them just like the carports. So, either the restaurants are getting desperate or lots of folks decided that it was time to fight off the Rainman this year. Or, maybe, the supply chain issues we are all experiencing with seemingly everything has hit Harbor Freight as well. Regardless, I will wait for FedEx to get their act together since I'm already into this solve with an order, and my packages will eventually all be at the airport, waiting. I suspect these garages are fairly good, though the reviews indicate that they are not as weather resistant as their carport brothers. Maybe the sides catch more air, causing the structure to fail.

Car Content
After the last post about Zed's Bondo (See Bondo Zed), I continued to perfect his body with cycles of Bondo aplication and sanding for another couple of weeks. I found a technique that worked very well for getting the patch fairly perfect: on my sanding block, I had an old 320 grit paper. I held some some 80-grit onto the sanding surface and sanded down until I got to where I wanted to evaluate it. I then set the 80-grit aside and did a quick cuff with the 320 already on the block. This got the Bondo as smooth as the body so I could check for dips without getting false feels from the rough Bondo. And, this allowed me to use one block with 2 different grits, speeding the process.

I guess that's it for today. I have some winterization for Hapy to do: pulling the luxury battery, removing the cushions and fabrics, etc. Of course, that's hardly post-worthy stuff. There are things that need doing on Nemo, the A4, and Oliver. I just need to create a workspace that will keep me and the projects out of the rain first. I helped T load out of one garage bay, leaving just a few of K's belongings blocking up Oliver's spot. When the carports arrive, I'll get those up and get the projects moving again. Until then, we sit and watch Rainman have his day. Thanks, as always, for following along-