Showing posts with label starter. Show all posts

Tuesday, January 27, 2026

Hapy Re-Assembly Continues

First, thanks for following along. I know blogs have fallen far out of favor, with videos and such being the preferred means for getting information. I can't watch videos at work, but I can read, so for me, this is still viable. There's an old saying about not having a face for video, or a voice for radio, you can still print. That's me. Besides, I barely have time to do my thing and write about it, much less shoot and produce video. I don't know how those content producers get any sleep, especially the ones who aren't making any money at it, which, lets be honest, that's most of them. More power to them, and I greatly appreciate their efforts. When I finally wind down at night, I love me some car-fixin videos.
 
So, where were we? Oh yeah, Hapy was almost assembled. Well, his engine and transaxle were mated and they were mounted to the bus. That's the fun, exciting, sexy part. What's left is everything else. I stayed under the bus and finished everything there first before getting after the from-above stuff. I didn't take any pictures, mostly because with all the extra layers simply moving around under the bus is a challenge.
 
Transaxle Finish
I started at the front and worked by way backwards. This started with the nose-mount. At some point when the transaxle was removed, one of the mounting bolts broke off inside the threaded body mount. I know I need to resolve this, and practically every time I get under the bus, I shoot that broken-off bolt with some penetrating oil. I believe the front mount carries very little actual weight, but it does make sure the transaxle remains aligned. I gotta get that bolt out and replaced, but not today. With the one bolt in, I connected the grounding strap. I slid to the left side and connected the Bowden tube and clutch cable. I make a point of leaving bolts partly threaded into where they go so (a) I don't lose them and (b) so I know where they go when I return to a project 6 months later. This made installing the Bowden tube just the usual challenge and not accentuated with a bolt search first. To make the threading of the butterfly nut on the end of the cable easier, I prop up the clutch pedal and then put vice-grips where the cable meets the threaded end. Lots of tightening later, I then test the play of the pedal and slide back under a few times to make sure the pedal has an inch or so of travel before the pedal meets resistance.
 
The last thing on the transaxle is the reverse light plug. In my efforts to install, I smashed the reverse light plug quite a bit. Perhaps this happened when the transaxle fell of the jack this past summer. Hard to know. Anyway, with needle-nose pliers I straightened them out. The leads, have been in the same position for so many years that they were already pre-oriented for the right spots to plug in. 
 
Rear (Anti-)Sway Bar 
Sliding further rearward, I got after the rear sway bar. I will again mention how helpful this bar has been for handling, especially in a strong cross-wind. I will also stress how important it is to have it out of the way for a transaxle R&R. I raised the center of the bar with the TravisJack so I could use both hands on the various mounts. I made sure to put a small smear of clear, hi-temp grease (not black axle grease) on the hard bushings, finger-threaded everything and then nutted every thing down. The grease extends the life of the hard bushings, by reducing the direct-wear of hard bar twisting against them. I had not greased these previously, but we really have not run more than a few hundred miles since I put this bar on.
 
Starter
Now we're getting near the end of the below-the-bus stuff, with the starter going in. With the newer starter adapter, with the studs to hang the starter on, the install is much easier. It really is as easy as popping on there and nutting down with a 17mm socket. The top nut can be a challenge to reach, but the rest of it is easy. Pop on the 12V send from the battery and the 12V send-to-front onto the main post, nut down with a 14mm. Last, pop on the starter trigger. Done. Next!
from warmer summer days

Before sliding out, I hooked up the ground from the right side of the engine to the frame.
 
Fueling
For the most part, I left the fuel system in-tact. Right now, I start to feel the advantages of not pulling the motor all the way out of the engine bay. All I did to enable this job was remove the big Caterpillar fuel filter from the frame, and drape it on the engine. So, a couple of bolts later, the fuel system is back together, hopefully holding prime.
 
Cooling
Similar to the fueling system, I minimally disconnected the cooling system. So, I thought it would be just as easy. I lifted the overflow bottle and noticed the bottle was low, and could hear splashing noise coming from the driver side. I lowered the bottle and the steady stream stopped, so clearly there was a breach up higher in the system, and not a breech in the radiator cooling lines or something that would have potentially cost me all of the coolant. Sure enough, the coolant temperature sensor that plugs into the coolant outlet flange was loose and the c-clip was no where to be seen. It is highly likely that the clip was lost last Summer. At this point, I ordered a replacement, and moved on, but not without laughing at how, again, the coolant outlet flange bit me again. 
 
Charged Air
All I removed from the charged air system were the 2 silicone elbows that connect the inter-cooler to the system. Then, the inter-cooler can be moved out of the way for the work. The silicone elbows are held in-place with large clamps that require a special tool (or lots of patience with channel-lock pliers). I used both. Once complete, I noticed that the little blower fan I have on the inter-cooler was barely clinging to the inter-cooler so I fixed that with some new zip-ties. I intend to one day replace the air-to-air inter-cooler with an air-to-water system, reducing overall inbound air temperatures and freeing up some engine compartment space.
 
This was as far as I could really go without that little clip. So, this is where I stopped while waiting for them to arrive from ECS Tuning. While waiting for the coolant temperature sensor c-clip to arrive, I put the battery on the charger. Next time, we'll get after that little clip and whatever other adventures we uncover.
 
Thanks, as always, for following along- 
 

Thursday, May 29, 2025

Hapy's Flywheel Needs Dentures

This last year has been distraction-filled at least with regards to my loving on my cars. We don't have a garage and we don't really even have a driveway. We have a small square patch of concrete just outside the garage door. Between that and the street are wood chips on dirt. Added to that was this recurring issue with Hapy not starting, I did not have much motivation. I did not want to lie in the mud, or work in the rain. So, I didn't. Instead, I focused on getting a garage built. Well, it's getting to nice weather again, and it would be great to have Hapy running. So, I looked back on the posts over the last year and I only lightly mentioned the recurring no-start or starting challenges in passing during the Road Report from 2024 Four Peaks. So, there's more story there. Today, I'll fill in the history and diagnosis.
 
Flat Beddin
ready for work
I mentioned that I drove Hapy, loaded with gear, to a Sunkicks show and after-party last June. That was actually the last show with all of the original members, but I digress. The prior year I had been having sporadic not wanting to start issues that I thought I had traced to the Injection Pump (IP) leaks. While the leaking IP was part of the problem, 12 years of ongoing Hapy-won't-start-easily issues has brought a cost. So, he didn't start the following day and he was towed home. I replaced the starter, he fired up, but I had little faith in him. So, for the 4Peaks trip (See 2024 4Peaks Road Report), we did not shut him off when we hit rest areas or whatever, and only had to start him twice the entire trip: once to leave the Winco parking lot and once to leave the 4Peaks camping lot. Both times he started with little fanfare.
 
Once.. Twice... Three Times a Starter
bad teeth
After we returned home, however, he would not start again. I did all that work with the doors (see The Doors) and the door cards (See Door Cards), believing that the new starter was all I needed. Wrong. The next time I went to start him was to take a road trip, again, loaded with gear. Nope. Afterwards, I tried replacing the starter, and had the same issue. I tried with a couple of other ones over the winter, thinking that I was just getting garbage starters. I replaced the transaxle -to- starter adapter, thinking it was the starter not engaging with the ring gear on the flywheel, but peeking through the starter hole did not reveal much.... until this last time (Sat, 24-May). After removing the starter for what felt like the 50th time, I got my phone up in there and took a picture of the ring gear on the flywheel. You can see in the picture on the right here, it's badly chewed up with many broken teeth. So, we have to lower the engine/transaxle, separate them so I can remove the flywheel and send it down to Kennedy Engineering in Southern California to have the ring gear replaced... if it can be replaced. Some of their older flywheels were all one unit, and this one is approaching 20 years old. A replacement flywheel with ring gear installed is a 4 week wait and $215US while getting the ring gear removed and replaced is 2 weeks and $40US (an additional $45US to have the flywheel resurfaced, if needed). I am hoping the ring gear can be separated. Otherwise, we lose all of June.
 
What a Drag
Nina's temporary home
Last Fall, when I was unable to get Hapy running, I hooked a tow chain to the front and hauled him around the back of the farmhouse. He was left parked on a bed of wood-chips and over time he was sinking into the ground. It got to the point that this last time I went to R&R the starter, I could barely get under the rear sway bar. Boo and I decided that doing an in-place engine drop there would not be fruitful, so we again hooked up a tow chain, this time to Hapy's rear. With Boo driving the truck, I steered Hapy backwards out of the yard, through the fence and out onto the street. Our plan was to roll downhill about 50 feet and then drive the truck in nose-first, dragging Hapy into the driveway where we would push him onto the concrete slab in front of the garage. Boo suggested I try to roll-start him. She figured, if we have to tow him all the way up the hill, it's not really any different than the 50 feet we were already going to do. So, we unhooked the tow chain and let gravity (and some Boo-shoving) get him rolling. I put Hapy into 3rd (kept poppin out of 2nd), and after some rough revs he fired up. I drove him down the street, and within 10 meters the black smoke stopped and the engine settled. I turned around triumphant to a dancing-in-the-street Boo. With her help I backed him onto the concrete pad, leaving about half a meter between his rear and the garage door. It was only for a few minutes, but dang I miss driving him. So much fun.
 
With Hapy in place, I used the tow chain and the come-along to move Nina, the 1964 VW Beetle into the spot where Hapy was. This cleared the rear pathway back to where the shop is going too. I wrapped the weekend with Hapy's usual spring wash. Next weekend starts the engine/transaxle drop. The following week I will send the flywheel off to Kennedy. It will be 2-4 weeks before I have a replacement in hand.
 
That's it for now. We expect the excavation work for the shop to start this week. It will be interesting to see whether we have a shop, or if Hapy is running again first. Thanks, as always, for following along-

Wednesday, November 22, 2023

Hapy Update

Today I could continue the dissertation on the effort to move the furnace in our 1948 farmhouse. Instead, I actually have something car related... the check-in on Hapy that I said I was going to do in a prior post and then flat-forgot. Remember Hapy? He's the 1972 VW camperbus that launched this blog. I meant to post this yesterday, time got away from me.

Hapy No Start Returns
A few weeks ago, as the weather turned cold, Hapy became increasingly difficult to start. Again. I figured it was the same issue as last time (See Hapy No Start Again), and started checking things with my multi-meter. I started where the old problem was: the main fuse for the glow plugs. Nope, there's a clean over-12V signal there. Then, I checked the voltage at the relay, and it was fine there too. Same for the resistance in the wire and the fuse.. no issues. So, I started thinking about the glow plugs themselves. I swapped this set in when I put in the chipped CPU and bigger nozzles, but not because there was anything wrong with the ones that were in there. I had this set of plugs that I had lying around for a few years, and I was selling Flash. Flash had failing glow plugs (resistance tests between the plugs were not within a few ohms of each other). So, rather than put the new set into Flash, I got selfish and put Hapy's nothing-wrong-with-them plugs into Flash and installed the new-never-opened plugs into Hapy. Looking back, I don't think these plugs were nearly as good. I think we have had starting-while-cool problems from the beginning, but it was Summer when I did the swap and never thought about it. Until now.

I pulled the rear-most plug (#4?) and tested it by resting the glow plug threads against a grounded bit of steel on the engine and triggering the ignition to "run". After a 3 count, the tip of the plug started to glow orange. After another 3 count, I could hear the relay click off, and the tip returned to black. I did this a few times and each time it took a few seconds for the plug to respond and even then it was only the very tip. Based on some internet imagery, I concluded that those plugs were insufficient and bought a fresh set.

A few days prior to installing the new set, I started hitting the in-engine plugs with some Kroil penetrating oil at dinnertime. I did not want a plug to break off or damage the head during removal. Whether it was necessary or not, the plugs removed relatively easily. All of them had soot on them when they were removed. Into the trash they went. For each of the new ones, I applied some anti-seize onto the threads prior to installing and then only snugged them down (did not torque the snot out of them).

Unfortunately, my efforts to start Hapy when the glow plugs were not working did a number on the starter. Again. So, my attempt to start him after replacing the glow plugs was not fruitful. Since I did the glow plug swap around the furnace work, and the furnace still is not operational, I self-limited my time to just swapping the plugs and then getting back under the house. I returned the following weekend (bumming rides and car-sharing with Boo the week between) to remove and inspect the starter.

should be 1 part, not 2
I admit, I expected the starter to just need a remove / re-install cycle. I was wrong. This rebuilt starter was installed in June 2023. After a summer of being my "daily driver", the starter was cycled well less than 500 times. I guess rebuilt Bosch starters are not all the same. Maybe the starter was a Bosch but the rebuild was done with cheap-o parts, leaving just the case as a Bosch unit. Regardless, it did not take very long to notice that the seal on the end (which is supposed to go around the shaft which juts out when 12V is applied) wasn't there anymore. It had potato-chipped inside the little pocket where the nose of the starter goes. Neat! So, off to the internets I went looking for a suitable replacement. I decided to get a new one from MetalManParts. Run by MetalNerd, his site only sells things that he personally fabricated or installed into his own vehicle. I have purchased both types of things from him before and have no regrets. Since Bosch was sold off to Seg Automotive, he now supplies new starters from them. I trust that if he is selling them, he is using them.

Sadly, the install of a starter has become fairly rote, since I've done it so many times. I simply put a 19mm socket, 13mm socket, a ratchet and a couple extensions into my pocket, slide under the bus with the starter and it's installed in less than 15 minutes now. If the rear sway bar were not there, I could probably have it done half that time. Of course, I ran the battery down with all my glow plug testing, so it got a spell on the battery charger before I could test my handiwork. Once that was resolved, I turned the key to "run", counted to 6 (for the glow plugs, it's 45*F here) and returned the key to "off". I repeated and then tried to start. Fired right up! I let him run a few minutes to top off the battery and now he is back to being my daily driver.

Hapy Heat Not Heat
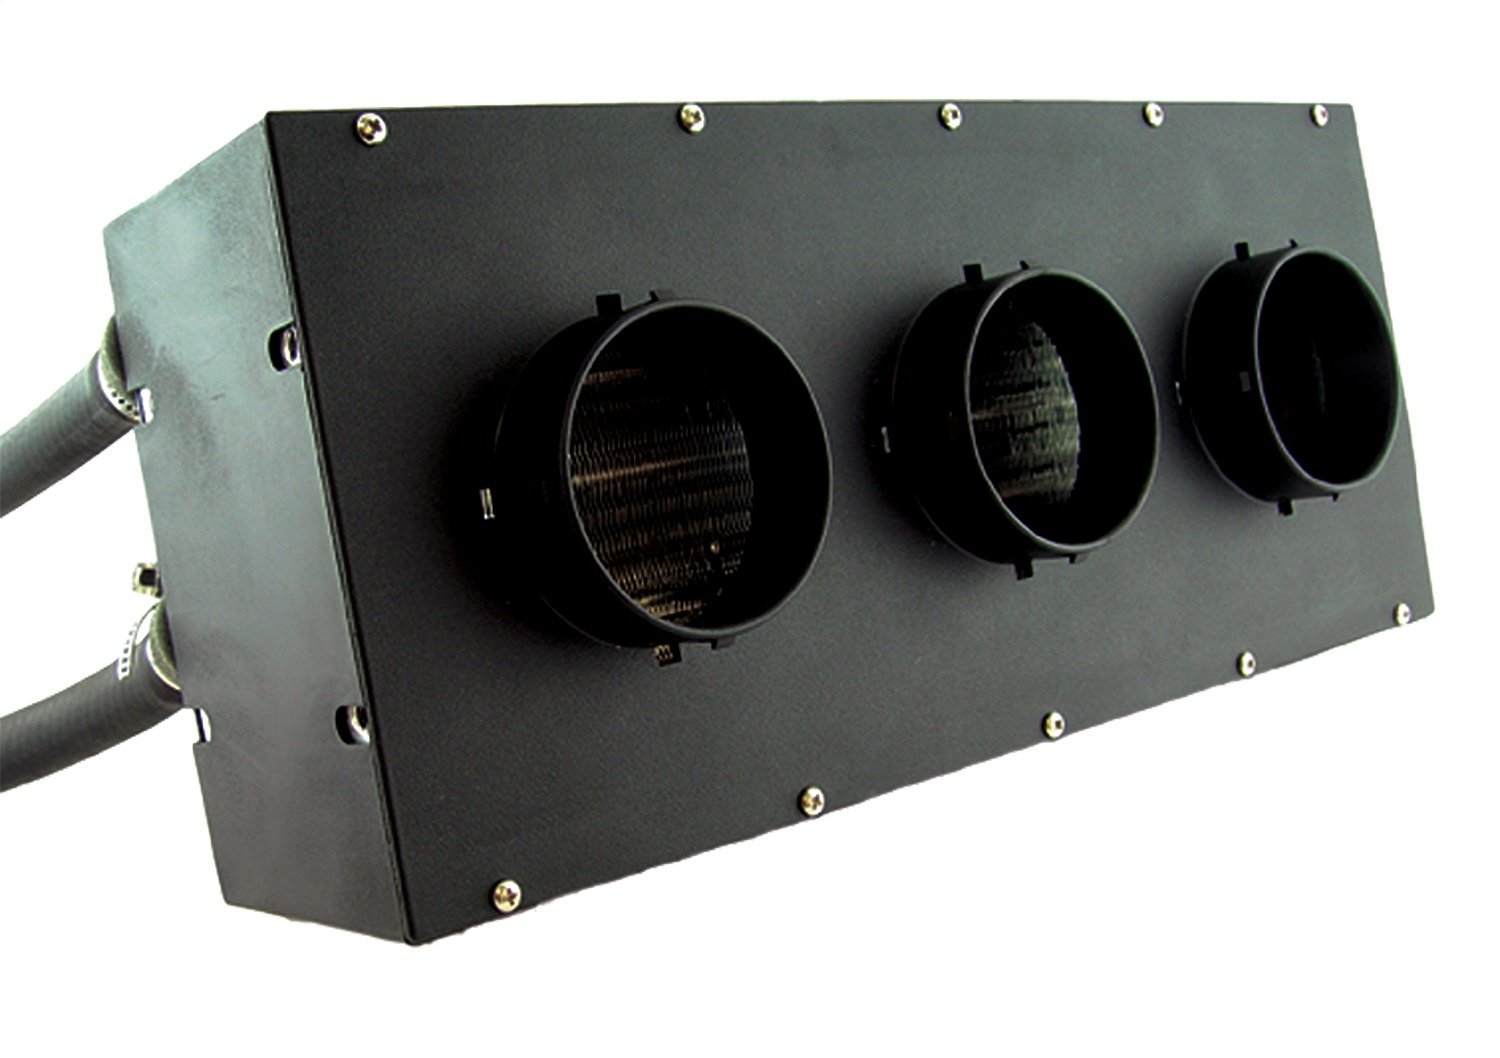
Remember all that effort I went through to install the Vanagon rear heater under the bus for some heat? While that was fun, the result is not much heat. I described the lack of warm on the drive to and from the Cascade Equinox festival. Beyond the lack of detectable warmth, opening the valve to try to get heat has resulted in a coolant leak. I can attribute no other source for why Hapy's coolant level is suddenly not holding. So, I turned the valve back off and will be replacing the Vanagon rear seat heater with something else: a Maradyne Fans Stoker heater.

Maradyne, but could be any
There are lots of auxiliary fans which all look the same and have the same spec's (300cfm, 40k BTU - airflow and heating capacity, respectively). JEGS has their own, for example, that looks identical. Since I am unsure who is the originator, I went with a manufacturer with a known, solid reputation. There is little documentation and hardly any photos of this particular unit on the interwebs, making this choice perhaps a little more risky. I find the 40k BTU number everyone is using to be gross hyperbole, but I don't know how to test that nor the 300cfm number. I will bench test to get some amp-draw numbers before I install it. The amp-draw might be useful information for the next person since even Maradyne doesn't list this detail on their product page. And, it could be one more thing that is exactly the same on all of these units. For future reference, the JEGS unit draws 5.5, 7.1 and 11.6 amps (for low, medium and high settings respectively). I had relays in-place for the medium and high draw switch positions for the Vanagon unit. I don't know if I  will re-use them. Perhaps the amp-draw numbers will help me decide.

One other thing to point out: none of these heaters ship with a coolant control valve. Since I was leveraging the valve in the Vanagon, I have to add one of these or the heat will be on maximum all the time. I included this "vintage" control valve in my order. I thought about going with an electric one, but decided that I would really like to re-use one of the big original heat-sliders on the dash to control the amount of coolant flowing into the heater core. That feels more authentic than another knob attached to the bottom of the dash. Of course, I haven't ever had that control cable, so I will be running this either full-on or full-off until I do.

For now, this means that trips in Hapy will be just like all the other trips I've ever made with him in the not-Summer. They will be cold. It will be like driving around in an ice-fishing shed, unless I can either install that heater soon-ish -OR- get the little Chinese diesel heater/furnace working.... or both. Since I do not have a garage and I barely have a 4-meter square piece of concrete to work on... and I have a house furnace to fix, I do not think Hapy's heat will get addressed terribly soon. At least I have the parts for when I do. Of course, now that he is my daily-driver again, I may decide another week without a furnace might be a fair trade for some heat, any heat, in Hapy.

That's it for today. Thanks, as always, for following along-

Tuesday, July 4, 2023

Hapy No-Start Again

Sadness arrived again just prior to Summer Solstice: Hapy refused to start. Today's post covers the initial issue, it's resolution and the subsequent issue that arose along the way. Finally a car post! Before I begin, for my US readers, Hapy Independence Day.

Glow-Plug Not Glowing
I jumped into the driver seat to get to an appointment on a relatively cool weekday morning. By relatively cool, I mean 55*F (13*C) or so. Hapy didn't want to start, and he was throwing a code. I checked and it was the glow-plug P0380 error. Joy. Hapy had been harder to start in the mornings on cooler days, and I probably could have put one and one together, but my brain is pretty full these days. Anyway, that evening after work, I shifted into diagnosis mode. It being so close to the solstice, we have workable daylight until 830PM or so. I started with checking the resistance for the 4 plugs. I feel like I replaced these when I did the new injectors, and when I tested them (lowest resistance setting on your multi-meter, you want them within like .6 of each other)... they all came up with the exact same resistance (.8). So, not a glow-plug problem. Before tearing into the harness that Justin and I installed, I thought I would check the relay and the fuse.  

First, I pulled the relay and checked the voltage at the relay: almost 0V. I concluded it was not the relay. Recall that I just redid all the wiring a couple of years ago, so I pulled out the notebook diagramming the circuits, and found the right battery-top fuse. It's the same as the one any other TDI of this vintage uses: #2. Knowing the wire was fresh, I figured it was probably not the wire. Still, it was wise to check the connectivity of the wire: almost 0 resistance, so the wire is good. I moved on to the fuse.

original adapter
On the supply-side of the fuse, I had 12.45V. Hmm... even after all those start attempts, and there were many, I still had lots of juice. On the other side of the fuse, however, I had almost 0V. Not 0, just a shade above 0. So, the fuse wasn't blown, it was just acting like a big-ol resistor. So, I removed the nuts (10mm) and pulled the fuse. Sure enough, there was almost infinite resistance. These fuses are basically a metal bar (see picture above), but because they are exposed to the elements, they can become compromised by the weather. I do not have a replacement, so I cleaned it up with a metal file. I would grind away on the crud a bit, check resistance and repeat. Once I was able to consistently get nearly 0 resistance through the fuse no matter where I set the probes, I re-installed it. The referenced image on the top-right, shows both the result of some filing (on the ends) and the built-up crud in the center. That crud covered the entire fuse bar.

Grinding Starter
new adapter
Had I not allowed the glow-plug situation bloom into a dead-bus condition, I would have been driving that next day. Unfortunately, In my repeated attempts to start the engine, the symptoms went from won't start to won't start and now it's grinding. Neat. I was having a minor flashback to the last time the bus was stranded, and started to conclude that the glow-plug circuit was probably the originating cause then too. Anyway, I got under the bus, and noted that the starter was a little loose. I tightened everything down, and tried again. The engine tried to turn a little bit, but then returned to grinding. I removed and re-installed the starter. Same thing happened. Thinking maybe I fried the starter again, I removed and tested it. The gear popped out and ran like mad. So, nope, starter seems good. I did note, however, that some of the edges of the teeth were ground/broken off. Much of the gear, however, looked brand-new. I re-installed and had the same experience. One other observation: the addition of the rear anti-sway bar significantly impacts the freedom of movement under the bus around the starter. The bar is right where either your arm or your head wants to be for starter work. I am glad I have the bar when I'm driving, but, wow, it's hard to work around.

At this point, it was finally getting too dark to see. So, I put the tools away and thought about things. I concluded that the adapter that I bought and modified all those years ago was the true issue. Had the glow-plugs not prevented a start, I probably could have kept going for years. Instead, that weakness helped point out another one: the adapter is too thick, so the starter gear only engages for the first, maybe 1/2 to 2/3 of the gear width. Since repeated failed starting attempts caused many of the tips to chip off, there simply is not enough meat on the gear to mesh enough with the flywheel to actually turn the engine. Fortunately, there are now adapters designed for the TDI start mating to an old 002 transmission. I ordered one ($89US from Dune Buggy Warehouse), hoping I would not need to replace the starter again when the only thing wrong with this one are the chipped teeth. Since the starters cost double the price of the adapter, I felt this was worth trying.

hanging adapter
In the images on the above right, you can see that the starter seats slightly deeper into the newer adapter. The actual adapters seem to be about the same thickness, but the cut-out for the nose of the starter appears to be slightly deeper with the new one. The new adapter delivered with bolts that were far too long, and includes studs/nuts rather than bolts to hang the starter. I really like the change to studs, since the installer is otherwise holding the starter in place with one hand while setting bolts. This new design means that you can hang the starter on the bolts and then set the nuts. The kit also includes a small tube of blue locktite, which is to be used to set the studs and hex bolts.

The install was very easy, and the adapter seated very well. One of my challenges with the original adapter was that it did not seat perfectly. Recall, I had to grind some of the adapter to sit against the transaxle (See TDI Install Retrospective: Primary Electrical for more details). I believe it was still imperfect, as I noticed that the starter had a slight wobble when I installing and re-installing it. The new adapter, however, sat perfectly flat, and by re-using the (8mm hex) bolts from that old adapter (with some blue locktite), it popped right on and held firm. The starter set on the studs, and the 19mm nuts threaded on without issue. The kit includes lock-washers, which I hope will help prevent the nuts from backing off. The primary electrical (13mm nut) was next and then the trigger plug.... which suffered a splicing failure and needed repair. Considering that splice lasted 12+ years and multiple starter install/removal/re-install cycles, it's failure comes as no surprise.

bolt differences
With the starter in, I hooked up the battery again and realized that I had not put it on a charger after the failed start attempts. Well.. it was at 12.45V when I did the glow-plug thing, so I figured there was enough there to start. I was right; with a turn of the key, the engine fired immediately. I mean immediately, I never heard the starter, didn't hear the engine think about starting. I turned the key and the engine was running. I cannot remember Hapy starting that fast before.

So, that's it for today. With Hapy running, he has returned to my daily-driver. I have been sitting in on bass around Hillsboro, so having a means of getting myself and my stuff to an event independently was fairly important. After Hapy, we only have ToyoTruck as a dependable daily-driver since we are unloading GoRo (per Car-Go-Round).

Thanks, as always, for following along-

Tuesday, April 11, 2023

Hapy Lives Again

For the first time in maybe 8 months, I have a car-repair-based update. I got Hapy running again, so today's post covers that.

Flatbed Again
At some point, I would love to go back through all my pictures of Hapy, so I could identify how many times he has ridden on a flat bed home. I know he got a lift home from a few of the Eugene trips, many of the 4Peaks Festivals, and his most recent was the 500 feet from our old house to NewOldHouse. At no point have we ever questioned whether Hapy is "worth it". Hapy is a family member; we just do what needs doing. So, a few weeks ago when Hapy wouldn't start, he got towed to NewOldHouse (See Four-Wheeled Friends to NewOldHouse) and was dropped off alongside the attached garage. That was not his designated spot, however, so our friend John and I used many meters of chain to move him into position with a come-along. We wrapped a soft strap around a decent-sized apple tree at one end and another one around Hapy's front sway-bar (Hapy's front tow-hook was pancaked before he came to us, so I removed it). In between, we ran chain between the tree and the come-along in front of Hapy. In about 20 minutes we had Hapy on the tarped area with his tires sitting on the patio blocks beneath.

No Start Diagnosis
I started my consideration of the no-start issue without preconceived notions about cause. While intuition might be accurate, it can also send you down an unnecessary path. Still, I ordered a replacement rebuilt Bosch starter (from AutoHausAZ.com) so I would have it on-hand in case the starter proved to be part of the problem. The day after we left the old house for the last time, I headed out to Hapy with his ignition key. I wanted to refresh my memory of the sound when I turn the key. It was a metal-on-metal grinding. If you get a rur-rur-rur noise or no noises at all, it might be your battery needing a charge. The metal-on-metal indicated that the gear on the starter was not engaging with the gears on the flywheeel -or- the engine was seized and it was engaging, but unable to turn the engine. Our wet-crappy winter has been well documented, but we have not had deep-cold that would have foiled the anti-freeze, causing the block to fracture, though. There could have been other reasons for the engine to lock up, but I did not want to entertain those thoughts just yet. So, I ruled out the engine-broken possibility for the moment and looked at other things: namely, the starter was not engaging.

To look at the starter, I had to slide under the bus. Over the years, I have worked on Hapy out in the elements for practically the entire time I've owned him. Most of the time, he was parked on concrete or tarmac, so sliding underneath was a quick slide on a sheet of cardboard. Now, like a period of time in Lake Oswego, he is parked over dirt. In Lake Oswego, it was a dished out mud puddle, marking the absolute low for working conditions. Here, the ground is uneven and lumpy, with a rise just forward of the main crossbeam. With the rear anti-sway bar now installed, the space to access the starter was more difficult that some other times. Of course, with the tarp, rain can pool. To remedy, I swept the puddles off with a broom. So goes. One day, a garage, but at this point, I am looking forward to just a simple concrete pad.

Starter Not Engaging
which would you use?
Once I got under the bus, I figured there could be 2 possible reasons for the starter not engaging: starter bad OR starter not aligning (or both). Before I went hunting for tools, I tried to give the starter a wiggle and it shifted fairly easily by hand. So, of course, the starter would not engage: the starter would get triggered and the torque of trying to grab the flywheel would bump the starter, preventing the teeth from meshing. Because the TDI starter does not natively fit the 002 bellhousing, I purchased and then customized an adapter designed for a Vanagon. The starter was firmly attached to the adapter, but the adapter had loosened from the bellhousing. I hoped simply tightening the adapter would fix the issue, so I went hunting in the ToolShed for the Allen sockets and a matching ratchet.

In this moment, I really missed my black tool cabinet and was reminded of so many of my earlier efforts spending considerable time looking for tools. There was one effort back then where I dumped my toolbox contents on the driveway so I could find tools faster. I found myself growing frustrated with the current state and then embraced one of Boo's teachings: combat the frustration with gratitude. "How's that," you ask. I recognized that I was experiencing a true 1st-world problem and perhaps I could be grateful that I have so many things, I cannot find what I need. I could be grateful to have a dry locked space to keep my tools and parts so they don't get lost or stolen. I could be grateful for even having a vehicle to work on. Last, I do not need this vehicle to get to a job in the morning or get my kids from somewhere, adding stress; Hapy could sit like this for weeks and it would have no material impact on my life. The fact that he was broken down in my new yard rather than along a roadside somewhere was reason enough to be grateful.

Feeling re-centered, I found the #8 Allen (that fit the mounting bolts) and tried to tighten the adapter. The next attempt to start also resulted in the grind, but the engine turned a little bit. This told me 3 things: the engine was fine, the starter might still be the problem and the adapter may still be the root issue.

Starter Swapped
Before I went any further, I disconnected the battery positive cable from the battery with a 10mm socket. Then, with a pocket full of sockets, and corresponding ratchet with long extension, I supine army-crawled back under the bus. The main power cable is held to the front (front is front) of the starter with either a 12mm or 13mm nut. In the image above, you may be able to see that the old one was 13mm, the new one is 12mm. With the power cable disconnected, I unplugged the trigger signal by squeezing and pulling it off the tab. Last, I loosened and then removed the upper and then lower 19mm mounting bolts. With the old starter free, I could consider the adapter plate. I wanted to remove the bolts, put some thread-lock on and re-install. I was unable to find my tube of blue thread-lock, though. Believe me, I tried. Knowing the bolts could eventually work themselves loose again, I simply made sure they were tight. Even after my earlier tightening attempt, the upper adapter bolt had some room to fully seat. The upper starter mounting ear partially blocked that mounting bolt, though, so I really needed to get the starter all the way off before I could torque it down. When the day comes that I return to this with thread-lock, that upper bolt will need it.

I pulled out the rebuilt starter and compared it to the one I had just removed from Hapy. Note the picture above. The one I had removed (top of picture) was not as good a rebuild, at least cosmetically. The black paint was done after it was assembled, and got all over the place. The gear had some chips from the miss-starts and there was rust on the solenoid. Since the replacement in-hand was virtually perfect and cost around $160US (before core deposit), I was inclined to install it. Since I had to put a starter in at this point anyway, I put in the new one: main mounting bolts first (19mm), then the main power cable (12mm) and then the trigger wire (clip clicks in).

Hapy Starts and Runs Again
I put the main positive battery cable back in place and tightened it down (10mm). With hope in my heart, I jumped into the front seat and turn the key to "run". All of the expected lights came on, but I wondered if I had run the battery down with my prior start attempts. I turned the key to start, and Hapy fired right up, settling into an idle fairly quickly. I let him run for a few minutes to charge the battery back up before shutting him off.

I wanted to take Hapy for a drive but we have had considerable rain since I moved Hapy over to NewOldHouse. In fact, it rained while I was diagnosing and swapping the starter. The reality is that between Hapy's rear bumper and the street lies 20 meters of long grass in squishy soft earth. Simply put, I didn't want to get stuck. Well, the next day, Boo had ToyoTruck loaded with steel recycling and ran out of time to get the load to the recycler. I had to get to Hillsboro, so I took Hapy. As has become his norm, he fired up and drove great. We reversed over the soft earth without really making an indentation into the grass so my concerns may not have been warranted. Considering how badly that same ground got torn up by ToyoTruck, I love these Destination A/T Firestone tires (See Hammered Rims Part 3) on Hapy even more.

Because I have the luxury battery still in off-season mode (disconnected to retain the charge), the trip to Hillsboro was radio-less, but fun. His throttle responded well and the noise-killer I had installed last year really cuts down on the low-frequency noise. Because there were so many posts on and during the noise-reduction, I'll list them out below instead of putting them in-line like I usually do. There are leaks around the front doors, creating a pair of whistles, but overall the noise level is significantly reduced. As has been his behavior for as long as I can remember, the drive home was highlighted by something going wrong. This time it was a fail causing the cooling fans to stop. His temperature did not climb above 190*F, though. I had expected one of the wires had shaken loose on my spirited drive home, but after checking things with the multi-meter I found that wasn't the case. The main power run from the battery-top fuse to the relay was not sending juice all the way to the relay. Why? I had spliced a 4-inch section of wire at the end of one long wire and that splice had failed: I had voltage at the splice, but not at the female wire connector 4 inches later. I redid the connection with a new female connector and without the 4-inch section. The fans operate again. This serves as more evidence that using one single wire (of the right gauge) rather than splicing wires is better for longer term operability / maintainability.

That's it for today. I expect to return to unpacking/nesting or kitchen demo. While I was driving Hapy, I realized how much camping gear I had stowed in him. He is kind of a rolling shed, so I may unpack him a little bit so he can be a more viable, load-carrying-capable daily-driver... once I figure out where to put the gear. More first world problems, for which I can be grateful-

Thanks, as always, for following along-
 
Noise Deadening posts:
Hapy Noises (Part 1) - discussed materials 
Hapy Noises (Part 2) - more material discussion plus db level readings
Noise Control Update - applying the Constrained Layered Dampener (CLD)
Noise Control Continues - rear and mid interior deadened
Hapy Cab Gets Quiet - the cab gets the noise deadening treatment

Tuesday, March 28, 2023

4-Wheeled Friends to NewOldHouse

On it's surface, one would not think moving some cars from one house to another, especially when the move is less than 500 feet would warrant an entire post. Well, let's remember that Murphy's Law is always present and these are cars which have not moved maybe for months, maybe since last Summer.

Site Preparation
during site prep
Before I could move any more cars, I needed to set up a place for them to land, even temporarily. NewOldHouse doesn't really have a driveway other than a small concrete pad in front of the attached garage. A single car can fit on the pad, but if that car is any larger than a compact, the old-skool flip-up garage door would not open. Earlier in this NewOldHouse odyssey, ToyoTruck got stuck behind the house while we were spreading wood chips. So, absent a hard surface, and having a significant mud bog practically everywhere else, determining a viable spot posed it's own challenge.

Boo and I decided we would ignore the mud for a moment and consider where, ideally, the cars would sit. To reduce the tendency for the vehicles to sink into the ground, I measured, leveled and placed 4 larger patio blocks where the tires would go. Under the patio blocks, I added a thin layer of sand to reduce the risk of the block breaking. Last, to protect the underside of the older vehicles (Hapy, the 1972 VW camperbus, and Oliver, the 1978 MGB) I laid a tarp on the ground. This should reduce the moisture-effect which increases underside rust when you park on dirt.

To side-step the mud, we waited until we had a couple of dry days and moved the vehicles once it was clear that the ground was dry. And so the adventure begins.

GoRo Goes
rare March sunny day
I started with the car I thought would be the most troublesome: GoRo, the 2009 Audi A4. GoRo had a rough winter, like the rest of us. After one of the overnight freezes, the outer handle for the driver door broke. So, to get in, you need to either get in the passenger side and reach over or open the rear driver-side door and reach through. Either way, it is annoying, but workable. A couple of weeks later, the hood latch broke. Fortunately, it happened after it unlatched, but one should not drive with the hood unlatched for safety reasons and we don't want to latch the hood because then it's stuck closed. So, GoRo has sat for a couple of months waiting to get repair-attention around the move. While it sat, the battery ran down. I hooked up a trickle charger overnight the night before and then it started up the morning we wanted to move it. I moved GoRo into the street-adjacent spot next to the wood-chip driveway so once it is fixed it can easily come and go without interrupting the driveway flow. Our old friend Courtney, of MobilePDX, will be fixing the hood release and driver door latch so GoRo can be put back into regular service. I could do it, but I do not have the hours in the day to get it done remotely soon.

Hapy not Happy
flatbed again
The last time I drove Hapy, it was to Pizzario, a small wood-fired pizza place in downtown Hillsboro, to sit-in on a Wednesday-night jam. That was 2-November. If I remember correctly, he started and ran great, but inside was really cold. I contracted CoViD19 that night, so my memory of how he started is kind of fuzzy. Anyway, he had been sitting with a trickle charger on his battery so 4-1/2 months after he was last driven I expected him to start right up and we would have a heroic drive to NewOldHouse. Maybe we'd take a victory lap or pickup something to eat while we were savoring our success. Nope. Instead, his starter made a horrible loud grinding noise. I concluded that the starter failed, and the little gear in the starter was not protruding all the way into the bellhousing and therefore failing to mesh with the teeth on the flywheel. I was immediately reminded of when we moved into this/existing/old house from the rental next door, and ended up selling 2Dot0 because moving it was just one too many things to manage. Obviously, we are not selling Hapy. Instead, I got AAA to put him on a flatbed for the 500 foot move. The driver was a champ and did his best to get Hapy close to his prepared spot, but overhead wires limited him. So, with a come-along and 15+ meters of chain, our friend John and I moved Hapy into place. I may try hitting the starter with a hammer a couple of times to see if that re-enables the starter, but I vaguely remember some after-run from the starter last Summer indicating that it was starting to die. More than likely, I bought a lower-grade starter as the replacement, and it just failed prematurely as cheap parts do. Even if the hammer-trick works, it would just be delaying the inevitable and he is in a good spot to replace the starter, so now that I've typed all that, I bought a replacement, higher quality, starter and will swap it in.

Oliver Shifts
almost there
I have struggled with the idea of parking a convertible outside. After losing 4 canopies to wind and snow this winter, I felt my considerable fear was warranted. I moved forward with it for 2 reasons. First, I have no choice. We need to get out of the old house and the garage at NewOldHouse is full of kitchen cabinets. So, there is no room inside. Second, we have a neighbor around the corner who has parked his brand new Mazda Miata MX5 in his driveway all winter. His car is fine and arguably worth considerably more, at least in terms of replacement cost.

Similar to Hapy, Oliver has been on a trickle charger all winter, so I figured his battery was good and he would start up. At some point during the few days prior, someone had unplugged the trickle charger and his battery was completely flat when I went to move him. I put him on another charger, and put gas into his tank. The charger did not resolve his battery, and I had to replace it before turning the key wouldn't immediately flatten the battery. I got a group 24 Duralast battery from Autozone and learned that the old battery was actually a group 35. A group 35 is smaller. I figured the PO probably did that for easier install, but I have read that the group 35 does not have the same pop at start. I'm not sure that's actually true, but it is usually best to install the correct group battery for your car regardless of what the interweb experts say. Anyway, with the battery replaced and some gas in the tank, starting was still not immediate. The fuel I put in the tank needed to get pushed by the fuel pump up to the carb, and fill the bowl. I worked the butterfly at the carb to get some atomized fuel into the intake and with a billow of smoke he started up.

in place
I drove Oliver over the NewOldHouse, wishing his registration was updated so I could take a longer spin. He drove well with no noticeable exhaust, shifting easily. His throttle responded right away, implying the carb-leaning adjustments I did last summer to eliminate the bog worked. Perhaps he is ready for another run at Oregon DEQ. Since he still has a leak under the windscreen and the rains have not yet left for the summer, that run has to wait. I parked Oliver next to Zed, behind the house. All 4 of his tires are on patio blocks set on top of a tarp. I covered him with a "Gold Shield 5L" cover from CarCover.com to keep him dry.

The picture on the right was taken before I put the cover on, obviously, but you can see the tarp on the ground and the patio blocks. Now that the cover is on, it drops down almost all the way to the ground so the tarp and blocks are mostly not visible. Since he was moved and covered, we have had rain (because, of course, it's western Oregon) and the cover has kept Oliver dry and the cover did not appear to even look wet while it was raining. I'm not sure how that works.

That's it for today. While the effort to move these three was in some cases significant, and they all need some kind of repair, I am thrilled to have them home. Thanks, as always, for following along-

Tuesday, February 2, 2021

P0121 - the 1200 rpm limp mode - Final

Today I complete the saga of trying to resolve the P0121 error that persisted after I re-wired the front-to-back cable, the fuse box (main donor) harness and the fuse box / relay box. It is terribly ironic that this post arrives on Groundhogs Day. I have had drive-by-wire (P0121) issues so much since I did this conversion, it was like my own personal Groundhogs Day every time I dropped into that 1200 rpm zone. Queue the Sonny and Cher song. With only one error code, you would think this would have been easy. Nope. At least, after all the wiring changes, I only had the one code.

Pedal Pedal
new on bottom
When I left off my last post, I had concluded that the wiring was not the issue, and ordered a replacement pedal. These aren't cheap, but I found one for around $100US (which was a really good price). It took a while to get here from the east coast, but once in-hand, I thought it would be interesting to compare the new and the old. Physically, they are very similar, but the old one has a removable panel. I pulled out the multi-meter and started testing the resistance between all of the pins on both pedals. This was illuminating.

Then, I popped each pedal into a bench vice so I could depress the pedal by tightening the vice. This allowed me to measure how the resistance changed across the pins as the pedal was depressed. Generally, both pedals demonstrated the same direction of resistance change relative to the direction of the pedal movement, but there were some definite differences. For example, the resting resistance between the pins (which had a corresponding resistance on the other pedal) was lower on the old pedal than the new one. I was able to correct for most of the difference by shifting the little cover on the old pedal forward (front-is-front / away from the footpad). Prior to moving the cover, it was near the mid-point of the front-to-back adjustability.

The biggest difference I found was that on the new pedal, there was infinite resistance between pins 2 and 4 when the pedal was 0% depressed. The old pedal, however, had a measurable resistance (1760 on the second-to-highest sensitivity). Once the new pedal moved even a little off of 0% depressed, resistance was measurable. I thought this was the big tell that the old pedal was the cause, but before I get into the in-situ test, here are some tables and notes around my testing of the 2 pedals. I suspect there will be readers who are only here for that.

Testing Static Resistance between Pins 
inside the removable
cover
In the table below, the multi-meter was set at the second-to-most sensitive resistance measuring. The number on the top is from the new pedal, and the number below it is from the old one before I tweaked the little cover position. 

The word "flash" means that even though I tested these pin resistances 5 or 6 times, on the new pedal, the resistance between these pins would flash a quick 4-digit number and then go to infinity. I tried to measure it with different settings on the multi-meter, but for my purposes, it was clearly very different from the "old" pedal. Since it happened every time, I concluded it was not caused by my probe accidentally touching pin 3 while approaching pin 4. I did experience intermittent issues with my cheap $5US Harbor Freight multi-meter where the whole plastic probe would fall off the lead. The multiple tests ruled that out as a cause for the "flash" as well.

The "fix" for the probe-fall-off: Strip back a little bit extra off the end of the probe wire and push it back into the probe. Check continuity between the probes. Down to 0 or nearly 0? Perfect. Hold the wire and probe steady and tape the wire to the probe, and then run more tape up the wire a couple of inches. That wire won't pop out easily again.

Where were we? Oh, yeah.. while there are 6 pins, there was not a measurable resistance between most of them. That is why some pins are not on the tables at all and some pin intersections have a blank square. In both cases, there was no measurable resistance. Pin 1, for example, had no measurable resistance to any other pin. Neat, eh?

3 4 6
2 1320
900
flash
1760
3 1010
996
5 1070
945
 
Testing Transient Resistance between Pins
Next, let's look at the throttle testing in the vice. So, consider these values as "when the pedal is depressed, the resistance between the pins..."

hunting gremlin
3 4 6
2 unchanged
unchanged
*drops (1590, 1480)
drops (1570)
3 rises (1422, 1700)
rises (1300)
5 infinite
infinite

The * is to show that the resistance between the pins suddenly changes from infinite to something (high) 4-digit measurable once the pedal is starting to get depressed. The resistance between pins 5 and 6 goes to infinite as soon as the pedal starts being depressed. This is all really cool stuff, but are we closer to having an accelerator pedal again? Well, I plugged the 6-pin flat-connector into new pedal and started the engine. Idle... and then 1200 rpm mode. So, nope. So, next I checked the voltage of the 6 pins on the flat connector, and put my findings in another table below. Perhaps this would have been a good thing to test while waiting for the pedal to arrive. Or better yet checking before ordering one. Hindsight is great.

Voltage at the Flat Connector
The "should be" column is from comment #7 on this posting on the TDIClub. Fred's TDIClub is such a fantastic resource. Highly recommend for the knowledge, and they are generally nice folks too, unlike some other boards where so many replies to questions are "use the search function". Helping not helping.

should be no key key to run
1 0-90%: 9+V no V
not ground
..8V
2 5v no V
not ground
5V
3 ground ground ground
4 .35V -> 4.5V no V
not ground
2.7V
5 0%: 0V
>0%: 2.758V
no V
not ground
8V
6 ground ground ground

So, I looked at this table and some of the values look spot-on, like the 5V reference voltage on pin 2 and the grounds on 3 and 6. The other 3 look like I wired them incorrectly. Like, maybe wire 5 should be going to pin 1, wire 1 to pin 4 and wire 4 to pin 5. At least then the voltages would be in the right ballpark. So, before I assume that my ECU is fried (the only other reason I can come up with for this), I decided to change some of the wiring to reflect this re-arrange first. Considering the difficulty I had determining the logic at the blue T10 I mentioned in the last post, this felt very much like a real possible cause.

Change 3 Wires
more hunting gremlin
Since the wiring on the fuse-box / relay-box harness was very hard to get to, and the 6-pin flat-connector is very easy to get to, I decided to change the wiring at the 6-pin flat-connector. This will force an update to my wiring diagram, but this was the fastest route to testing the theory while minimizing the potential "bump risk" (you bump something and now you have a whole new set of problems). Anyway, this re-wire was very easy: label the 3 wires, cut the heat-shrink, unwire, re-wire, re-heat-shrink.

Of course, any final test couldn't be without it's own challenges, as the electrical acted batty for about a day while I chased gremlins again. Something was creating a vibe, making the system act like the battery was dead. For example, the hazard switch would cause the relay to buzz, lights wouldn't come on, etc but a voltage test on the battery was fine. After several hours of tearing the dash board apart, believing I had bumped something when doing the flat-connector, I removed the battery from the bus and verified it had over 13.5V (full charge). So, I put the battery on the bumper and hooked up the battery cables, omitting the float charger, and tried the hazard. Success. Then I turned the key to run and everything acted normal. Love you, Hapy. Root cause: current owner error not tightening the positive battery cable on the battery post after changing the wiring. Sigh, sometimes are better than some times.

I pulled the positive cable off the battery and re-assembled the dash. While I was there, I cleaned all of the fuses and their connections with rubbing alcohol, and then zip-tied the fuse box up out of the way (it has never been screwed to the bus since I bought it). With the front-end cleaned up, I put the positive cable back on the battery (still sitting on the bumper) and checked again that things were normal. With the key turned to run, I checked the voltages on the flat-connector, and now the pins aligned with the table above.

Test Fire
battery on "bumper"
Feeling confident, I turned off the key, plugged in the new accelerator pedal and test fired the bus. Engine started, sat at idle, threw no codes... and working the pedal with my hands revved the engine. Hazah! To complete the loop, I removed the battery cables from the battery, and put the battery back in the bus. While I was there, I resolved some wire routing, and implemented a battery strap-down with the webbing I used to hold the speaker box in the MGB trunk (See Speaker Box Install Finish). This also is holding the battery-top fuse-box on top of the battery. I returned the battery cables to the battery posts (this time tightening them down) and did another test fire. Start, run and rev. With all the wiring and cables now sorted, I was able to re-install the original engine hatch prop, which means no more holding it open with either my head or a stick (like in the picture on the right, here, you can see a stick all the way to the left). More winning. And, of course, I bolted the pedal to the support post and tested the foot feel before heading inside for a celebratory smoothie.

The next day, I set out re-test the old pedal to see if that small resistance difference between pins 2 and 4 was meaningful. It isn't. The old pedal works correctly now, just like the new one: no codes, engine rev's. Since the new pedal is bolted in, I decided to leave it, and put the old pedal into my parts bin. In the end, the sporadic P0121 error that Hapy and I have suffered for the last few years was ultimately caused by something in the wiring that I replaced with the front-to-back cable at the start of the Chasing Electrical Gremlins saga (See part 1). Still, I will be putting the old pedal in a large Ziplock baggie under the rock-n-roll bed in case this new pedal fails on the road. So, this completes my efforts with the P0121. I hope the resistance and voltage (courtesy of TDIClub) information above is helpful to others as you diagnose your own P0121 error. 

Thanks, as always, for following along-

Tuesday, January 19, 2021

Chasing the Hapy Electrical Gremlins (final)

Well, it may have taken a while, but with today's post, we are done with the re-wire of the "fuse box harness". I did not mean for this to become such a large endeavor, but that's what happens when you lose focus for a few minutes and cut some wires too close to the fuse-box for you to re-integrate them. I was asleep at the switch and missed my usual release time, so it's a few hours later than usual this week. Hapy last day of the worst US presidency in modern history; may the transition to the new guy be a smooth reflection of 200+ years of our democracy in action.

I realize that for many readers, this series has not been terribly interesting. I get that. Electrical sucks. However, if you were thinking about doing a swap, I think this series helps demonstrate how much of the swap work is done with a multi-meter, and how little is done with a shop-crane / engine hoist (or a floor jack).

Today, I will go over my steps to determine what went wrong in my system test in part 5. Apologies for no pictures of my testing. I'm not sure what would have been picture-worthy, except, maybe, my "fused wire", but that's not terribly interesting, I don't think. I mean, it's just 2 wires, each with a male wire connector on one end (to plug into relay sockets) and a female connector on the other. The two wires are then joined with a bladed fuse plugged into the female connectors on the 2 wires. So: male connector - wire - female connector - bladed fuse - female connector - wire - male connector. Easy peasy.

The T-12
Before I get into it, I realized after posting part 6 that I put a picture from when I was integrating the T12 wires into the front-to-back cable, but I didn't give any context nor explanation. That picture was illustrating that once I cut the cable, it wanted to spring back through the engine compartment and over the driver-side axle. Resisting that spring-effect does not help one make solid wire connections. So, I held the cable in-place with a vice-grip. Some of the ShadeTree solutions are just funny enough to be photographed.

Isolate
I mentioned in part 6 that I removed the diode between the RUN and START relays. This isolated those 2 circuits. I continued down this path by pulling all of the relays and fuses from the new fuse box, disconnecting the two always hot (30) circuits from the battery-top fuse box, unplugging the "D plug" from the alternator and removing the connection to the reverse switch. So, now, the engine and new fuse box are completely isolated. My plan to find the issue is from here, we slowly add things back in, testing each planned connection first.

Original Bus Loom
I started with the main bus. This wasn't touched, but still, if we can eliminate that huge variable, so much the better. So, I turned the key to run, flipped on the running lights and then the headlights. I even flashed the high-beams. Everything was working great at this point, but nothing in the old loom was changed. I did discover that one of the grounds on the front (front-is-front) of the dash was falling off, so I tightened the connector with some needle-nose pliers and kept moving. I felt confident that the test I had just done was not going to trigger a battery discharge. I did not have that feeling for anything I spent weeks modifying, so the rest of the tests below were much more careful. The next step is re-integrating the donor stuff.

New Fuse / Relay Box
My process was pretty much the same for evaluating and connecting the donor stuff and new fuse box: Identify the circuit, and before you connect it, check the amp draw. Pretty much, regardless of the reading, I then tested the connection by bridging the gap with a fused wire. I would select a fuse that was appropriate for the circuit being tested. In the case of the red always-hot wire going to the new fuse box (relays 109, RUN and START), I used a 20A fuse, and it didn't pop. To be fair, this test really only proved that this red wire was not itself going to ground independently of the key going to "run"... which wasn't happening. And, the relays were all pulled when I did this. So, this test was not as meaningful as I thought it was when I did it. I connected the circuit and verified voltage at the relay 109 socket 30,  before moving on.

Once I had the main power to the 109 relay, I popped it in place and the tested the RUN relay socket. Similar to the process I described above, I checked the amp draw between pin sockets 30 and 87. Then, I made the connection between them with a (20A) fused wire. Once validated, I only put the relay in once to confirm that turning the ignition key caused the same behavior. It did. After that, I did not plug in the relay simply because the ignition key is 15 feet away from this fuse box, and I just did not want to have to keep going out from under the carport into the pouring rain. Besides, this kept the testing isolated, as I continued to trigger RUN tests with a fused wire jumping from 30 to 87 in the RUN socket for the rest of the fuse box tests. I validated that socket 30 of the START relay socket was present. Yep yep.

I repeated this testing process with each of fuses 1-3 (11/15, 12 and 29 respectively) in the new fuse box, and then the connection with relay 109 before inserting relay 109. In each case, the steps were to check the amp draw first, then insert the fuse. Next, I repeated that process with fuses 4-6 (32, 34 and 43 respectively). I had a moment where my relay 109 was humming during the investigation of fuses 4 or 6 (34 / 43) which I tracked down to my not having had two grounds (one for the ECU and one for the main harness) re-attached during testing. Now, after the fact, I think this could have been a big deal, but as I worked through these steps, it was not apparent.

At this point, I had all 6 of the fuses installed and the 109 relay. When I bridged across pin sockets 30 and 87 of the RUN relay, the dash-pod would illuminate, the odometer displayed and idiot lights would come on. After a few seconds, most of the idiot lights turned off. The glow-plug light flashed though, and I realized that I had not yet tested the glow plug relay. I repeated the process for the glow-plug relay (180) and last, plugged the relay in. Once power was applied via the RUN socket, everything was the same except the glow-plug light winked out with the others. I had not yet wired in the always-hot (30) for the glow plug, though, so that was next. Same amp draw and voltage check process, same result.

Front-to-Back Run Relay
I figured testing the RUN and START relays was next. First, I plugged in the alternator "D" plug and tested everything again. As before, everything was as it should be. As I worked through this stuff, I suspected it was one of 2 things: either it was related to the "other 2 relays" I haven't really documented -or- it was because of this plug, since I split this signal to the front of the bus. So, my next test (of the RUN) relay from the ignition switch would be done first without the "D plug" clicked in.
 
This test was rather simple: stuff a standard Bosch-style relay ( I re-used one of the "53's" from the donor) and turn the key to run up front. I had already done this once before so this should not have been dramatic, and it wasn't. The donor electronics did the same thing as before. Feeling confident, I figured that the starter circuit would be just as seamless. That was not the case, and it was here that we found our cause.

On a side note, the relays with a "53" stamped on them appear in a few places in the TDI relay panel, but they also appear in the little relay box for triggering the coolant glow plugs. So, I figure these should be up to the task of carrying some decent current. Not that either of these do that, but the RUN relay needs to be on so long as the key is on, so I would think that takes some stamina. Oddly, in the 10 years since I first did this, the old Radio Shack basic 12V automotive relay never failed me.

Starter Relay and Starter
I started this test like the others: test amp draw, bridge the 30 and 87 relay sockets with a fused wire and see what happens. The starter grunted like it was gonna try to start the engine, so I quickly pulled the wire and figured things were fine. I put another spare donor "53" relay in the socket and turned the key to RUN and then to START. This time, what happened was what happened during my full system test: a pop followed by everything going dark. Concerned that the starter was blown, and that was causing the problem, I pulled and tested the starter.

I have an old battery sitting on my garage floor for things like this. I ran a set of jumper cables from the battery (negative to starter mount tab, positive to positive post on the solenoid. Then, with my fused wire, I jumped from that positive post to the start trigger and the start fired right up. 

Since the starter tested fine, I slapped it back in. While I was on my back working the long mounting bolts back in, I remembered that I had split the START signal at the ignition just like I had split the RUN signal. At the time, I had not yet hosed the wiring in the donor fuse-box with my aggressive wire-cutting, so I was intending to keep the original starter trigger from the ignition, but to also send a start signal to the donor ignition switch wiring so the ECU knew when a start was being attempted. This all made sense at the time, though now in retrospect I realize that the ECU doesn't need to know you're starting. Later, after this effort mushroomed, I connected the starter signal to the T6 like the donor engine was triggered, and forgot about the old start signal wire. So, now that none of that old stuff is being retained, that old start signal was going somewhere... and possibly shorting us out. 

Start Trigger
I very much wanted to test this theory. First, I confirmed that I had not screwed up anything new: get the battery hooked back up, verify it's at 12V or higher and reset for the prior test with the RUN relay, etc. Turned the key, and we're looking at a code-free dash-pod again. Nice. I turned off the key, and cut the wire from the start side of the ignition key to the original bus starter wire, and reset the key to RUN. Back at the fuse-box, I tested the START relay and the engine tried to start. Hoping that we may have found our root cause, I went back up front and turned off the key.

Remember how I removed that diode between the RUN and START signals? I confirmed that the RUN side of the ignition switch continues to deliver 12V when the key moves to START at this point. I simply measured the voltage at RUN when I turned the key to START. Since the START position was now only sending 12V down to the relay socket, nothing happened. We did still have 12V at RUN, so the diode is not part of the new wiring.

Back at the bus rear, I replaced the donor "53" relay into the START relay slot, plugged the alternator "D" back in and returned to the front of the bus. I turned the key to RUN... all the usual lights lit up. I turned the key to START... and Hapy started. He sat idling while I danced around a little bit. I did notice, however, that the battery light on the donor dash-pod was still on. So was the light on the bus dash. So, while Hapy starts and idles, some issues remain. Okay, we'll figure that out... Also, after a few minutes, Hapy's idle increased from bouncing around 900 to... 1200 rpm firm.

Next!
Ugh, the dreaded 1200 limp mode is still around. I'll be working on that next, as well as hooking up the reverse lights, and looking into those other 2 accessory relays that apparently were not part of the problem. I have some documentation to mop up with regards to the diagram, so I'll be spending a few evenings getting that done too.

I will have different blog posts and titles for all of that stuff (may not post on the diagramming), since this was really about simplifying the wiring. You could argue that this "Electrical Gremlins" series started because I couldn't get Hapy to start with any consistency, and now I can. So, that's it for today. Thanks, as always, for following along-