In the past, I have created 3 separate posts for a festival: the road, the bands and then the festival itself. When the road trip brought perils, this made sense. Lately, though, Hapy has been driving so well, I don't really have much to say in the the road report. So, the road gets a subheading. We did not see much of the music this time either, so there's no point for a separate post there either. So, one big post.
There and Back Again
We had not taken a trip in Hapy since LeisureFest, but we had our gear relatively well organized. Unlike our usual night-time exit, we were unable to dodge out of work early. So, we did like everyone else and loaded up in the morning instead. We had some typical delays, like cleaning things and getting Tuukka to Aunt Linda's. We left home around 3, got some B20 at the usual corner station with a couple bags of ice and hit OR217 South. Cascade Equinox Festival is held in Redmond (due east of Sisters), so the route is fairly familiar: OR217 to I-5 to OR22 to OR20 into Sisters. From there, it's OR126 to Redmond. We have done the route as far as Sisters for 4Peaks, so we know the landmarks. We had not been through the Detroit Lake area since the wildfires a couple of years ago, so seeing both the devastation and the start of the regrowth was breathtaking. Hapy ran like a champ, and after the heavy traffic on I-5 lightened up south of Wilsonville, he purred the rest of the way.
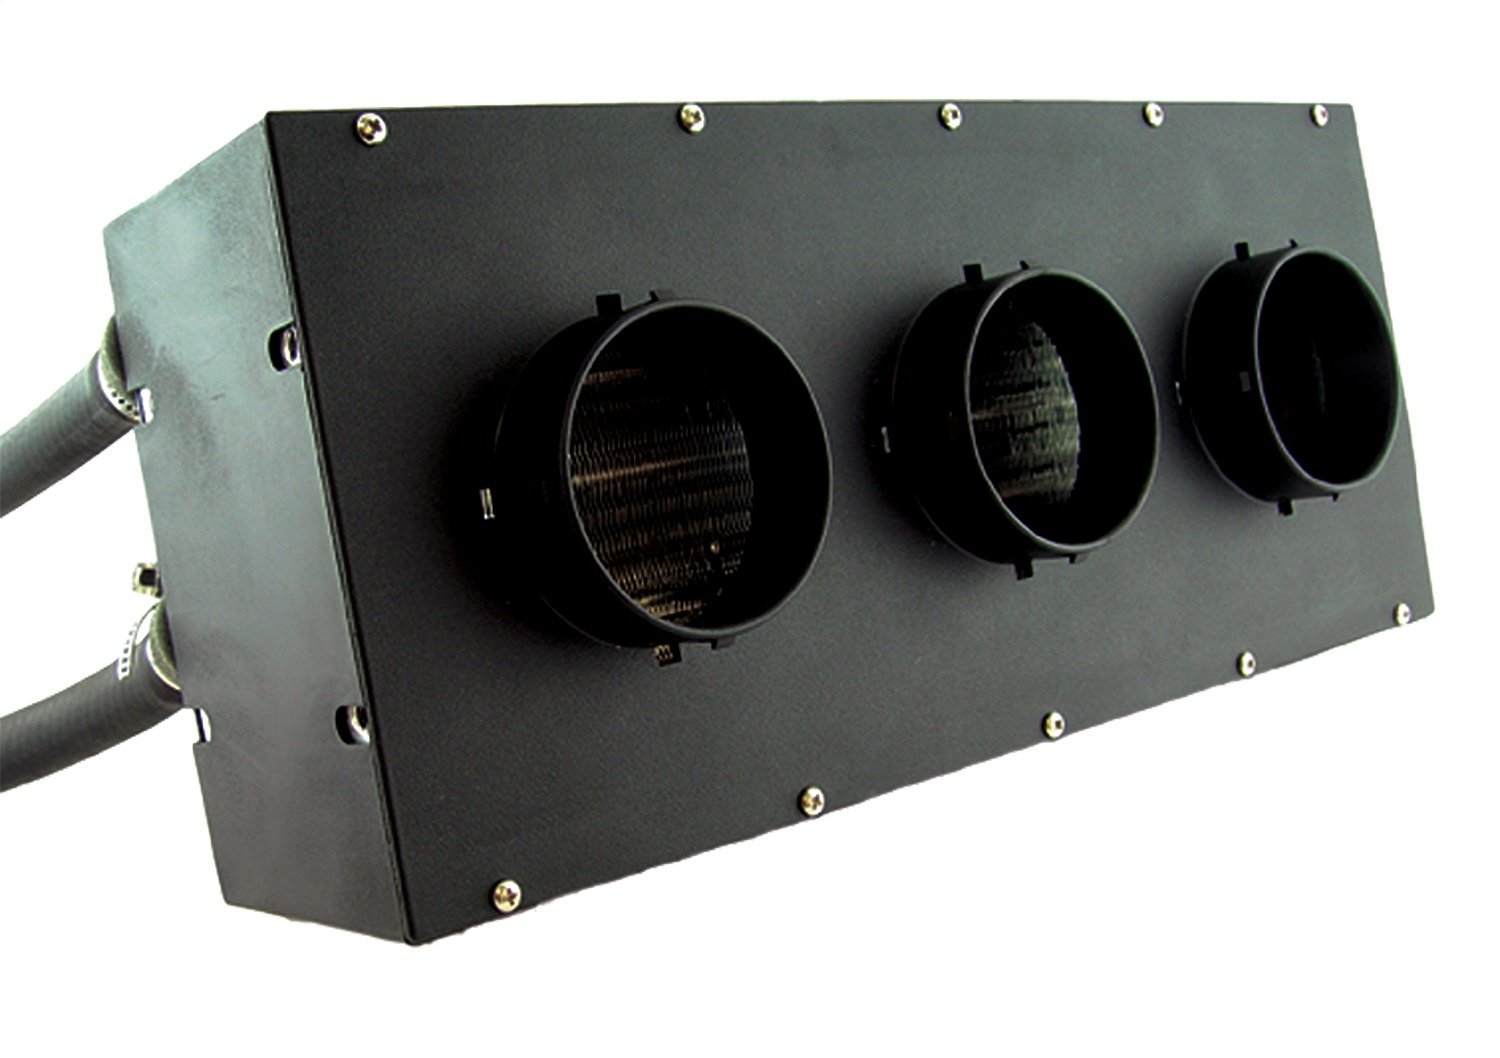
We determined that the Vanagon rear-heater that I installed as a means of producing some heat in the bus is simply not up for the task. Since this heater capacity was designed as an auxillary heater for the back seat in a Vanagon, this should surprise no one, including me. To wit, we had virtually no heat on the drive out and only suggestions of heat on the way back. We remedied with lap-blankets, but I will need to do something more significant eventually. On the way out, we stopped only once at a rest area along OR20. On the way back we stopped at the iconic
Sno-Cap in Sisters for lunch. We love Sno-Cap; the shakes are great and the service is small-town warm. The drive home was colored with a steady rain, which Hapy absolutely loved. His temp barely reached 185* most of the time, and with the help of a super-slow driver behind us holding back the heavy Sunday afternoon traffic through the mountains, we had OR22 to ourselves most of the way to Salem. We continue to consistently around 30mpg, even when loaded with gear. This trip was no different; when I finally filled up (after driving to the festival and back plus some around town driving) he got over 300 miles and about 30mpg.
Festival Upsides
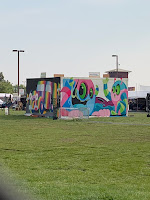 |
| installation art |
Since one of the organizers for Cascade Equinox is the organizer for 4Peaks, Boo and I had an idea of what Cascade Equinox was going to be like. We were mistaken, but that wasn't all bad. There were 4 large installation art pieces being created over the course of the weekend. It was fun to watch the artists work, and see their pieces evolve. There were 6 music locations within the secured area, with up to 5 of them going at once. This created many options for what to see/hear when. The vendor area was significantly larger than 4Peaks, offering a wide array of products. I bought, and then lost, a ring, but otherwise our back-to-school shopping was limited. We sampled a few of the food vendors, and they were both good and popular. In terms of services, there were free showers and there was never a queue for a porta-potty.
Camping in Hapy, we discovered some upsides as well. We had not really used the side-walls of the BusDepot canopy before, but we did this time. They were incredibly easy to put up and take down, held firm in the gusty winds and the biggest surprise was how well they held in the heat from a Little Buddy heater. We slept very well and the sound-killer that I installed held the seemingly constant subwoofer to the background. We camped on flat, soft grass and had ample space for the bus and our canopy. We were able to collect solar to boost our luxury battery on Saturday. We had enough water from home so we did not need to source more, we brought plenty of simple food so we only cooked what and when we needed to. As far as a camping experience, it was great. Boo even got to read some of her book.
Festival Downsides
Unfortunately, there were quite a few things that did not go well. Some of these could be chalked up to a first-time event, but since both of the organizers have done events before, the oversights are worth noting.
Ticketing
 |
| the elusive map |
When I first learned of this festival, I got super-early bird tickets the day they went on sale. At the time, they had not figured out camping nor even the schedule of things, just that it was equinox weekend. At some point, I was contacted about a car-camping ticket, so I added one. We discovered upon arrival that the terms of the festival attendance tickets changed / were refined after we bought them and that "early entry" was now an add-on. So, at the gate at 9:PM I had to pay another $145US or park outside and drive in / set up the next morning. We were cold so we paid, leaving us that much less to spend on vendors. In retrospect, perhaps we could have gone in in the morning. Anyway, once through the gates, we were led to the car-camping zone.
Camping
Some of the biggest misses were around how they managed campers. First, the area was mapped out in very long (100 meters?) lines where cars were parked with one set of tires on the lines (see in top picture) and between the lines of parked cars alternated camps and fire-lane. On paper, this makes sense for maximum density. Because every car was hood-to-trunk with the car on either side, there were no cut-thru's for people to just walk by, so no one did. Accessing services meant walking all the way to the end of the fire-lane and then finding services. Which leads to the next 2 misses: porta-potties and water.
Drinking Water
When spending multiple days in the desert, it is highly advised to drink lots of water. In fact, from the stage at 4Peaks, we are often reminded to drink water. In light of this, the lack of access to drinking water for a large swath of the car-camping area was especially noticeable. Fortunately, Boo and I brought our usual 5 gallon water jug and I filled it before we left simply because our water here tastes very good, and water elsewhere often does not. Bringing our own is a luxury item, unless we find ourselves in a place which does not provide and suddenly it is a very precious resource. We discovered that there was a single source of water on the other side of the festival grounds (but within the camping ring around the festival grounds), had we walked that far. The return walk with a full 5-gallon would not have been fun.
Porta-Potties
Okay, all porta-potties are gross. That's just a given. In the camping zone, they were clumped in large groups, but very far apart. Once you made your way there, they were not serviced often, leaving you to bring-your-own-supplies. The first cleaning took place mid-afternoon Saturday, so for those who arrived when the gates opened on Thursday, that's a long go. Beyond that, the porta-potties themselves were especially disgusting. Even after they were cleaned, there was black mold on the walls and inexplicable yuck on the floor. Fortunately, once the gates opened, there were better services inside: actual bathrooms which appeared to have been cleaned before the festival started but not afterwards. So, it was bring-your-own-supplies even then. Had security been more thorough, it would have made for interesting conversations.
Gate Entry
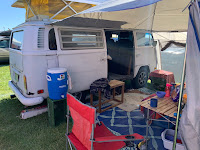 |
| sidewalls hold in heat! |
Because of staffing or staff-allocation of security, the entry gate from the camping area into the "secured" festival area did not open until almost noon every day. On Friday, they didn't open until 2:30. Since the stages started at 10:AM, and most of the folks who would have been inside were camping, the early artists did not enjoy much of an audience. For campers who did not bring food, water or coffee with them (we see this a lot at festivals), they needed to trek to the other side of the festival grounds to gain entry thru the main gate for breakfast.
Security
Since this was the first year, Boo and I could forgive the marked lack of volunteers. What was surprising, though, was the large number of security people. Once the camper gate was staffed, there were at least 6 security people there, though it was usually 8 or 10. Only one person got through at a time, with one security person checking a bag and another patting people down. I don't know what the other 4-6 people were doing beside appearing as a show of force. Even still, it was evident that many of the security people were on their first assignment as Boo and I watched them get verbal training one morning prior to opening the gate. Even still, I am not sure what they actually stopped from entering. On the last day, I had forgotten that I had a pocketknife in my pocket; they didn't find it and I didn't volunteer it. They never found my bathroom supply in my cargo-pant pocket.
Maps / Directionals / Signs
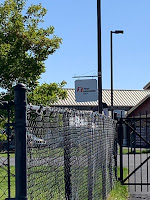 |
| camper entry |
Once through the gate, there was very little to help you gain your bearings. There wasn't a map posted in physical form anywhere. On Friday afternoon, I found the map above buried on the website. Inside the festival grounds, however, there were no guideposts and very few signs. At one point on Friday, we asked a vendor what stage we were next to, and they didn't know either. With the map above, we figured out later that it was Harvest.
Use of Space
I wasn't sure where else to put these. First, there were carnival rides in the middle of product and food vending. This seemed like a strange place to put them, and, frankly, they appeared to be little used when we walked past. I understand that having a Ferris Wheel at a festival has become an expectation, but I honestly don't know why though I can see the appeal of combining psychedelics and carnival rides to a much younger version of myself. It still seemed strange to have them in the middle of vending. Second, there were 2 stages near one another (Equinox and Harvest) which created a sonic cacophony in between while a third indoor stage (Gravity) that wasn't used all day. Unfortunately for the vendors in the zone between Harvest and Equinox, this area was fairly clear of attendees whenever both stages were going. What made this such an odd decision was that the Harvest stage had artists who could have otherwise been in the "Gravity" stage/room, in terms of space. Gravity was a great room, easily larger than the tented "small stage" at 4Peaks, but it was empty until after Harvest closed for the night, at which point it opened. In our humble opinion, the Harvest stage could be eliminated, using that space for more vendor/food/hangout space. Maybe that's where the Ferris Wheel goes? Regardless, staging those Harvest-artists in Gravity where they are not competing with Equinox for sound-space would have enabled the attendees to really hear what they're doing... and maybe hang out for whoever is next. Considering how cold it was, simply being inside could have increased the audiences for the Harvest staged artists.
Impressions
 |
| "follow your dreams" |
We did see some of the bands and were very impressed with how much Yak Attack has grown since we saw them years ago. They pulled a huge crowd into the Harvest stage area, getting a couple hundred people groovin. DirtWire, and Phantogram also stood out to us.
Unfortunately, our festival experience was colored by 2 independent health challenges. First, I appear to suffer some form of altitude-sensitive anemia so it takes me a couple of days to adjust to the higher altitude of central Oregon (2k feet above sea level). I had a similar super-low-energy experience at 4Peaks in 2017(?), and recognize that I need to supplement with iron prior to going -or- arrive a couple of days early if I want to avoid that. Second, we had a fried rice dish from one of the vendors and triggered Boo's sensitivity to MSG. We ate and she almost immediately fell asleep, missing Friday night's artists. Last, it was cold and windy the entire time. The overnight temperatures were below 4*C (40*F) and daytime highs barely touched 20*C (68*F). Once the wind chill is added in, temperature was a near-constant challenge.
Totally unrelated, but I feel compelled to at least comment on it: do you see that sign in the "camper entry" picture? First Interstate Bank. First Interstate suffered a hostile takeover by Wells Fargo over 25 years ago, yet there are multiple First Interstate Bank signs around the fairgrounds, and they are in amazing shape. Clearly, the operators of the venue take care of the space if 25+ year old signs can look that good after sitting outdoors the entire time.
As we look back on this festival, I don't think we will be returning. The vibe of the festival seemed to be very "stick-with-your-tribe" oriented. From how the camping area was set up to tables near food vending to hang-out zones, none of the design appeared to support creating chance encounters or accidental conversations with people you didn't know. Quite the contrary, it seemed designed to support small groups staying connected to each other, but disconnected from everyone else. Even a queue for the porta-potties or restrooms creates that kind of 1:1 shared experience. The last picture, however, illustrates how the attendees were looking for that greater connection as this came from a "take something leave something" table that someone had set out in the fire-lane near their car. We left a fist-full of tea bags which had been picked up by someone else shortly thereafter. Clearly, there was a pulse there that the organizers failed to tap. Anyway, we wish them luck, but we will probably be celebrating the autumnal equinox in other ways in the future.
That's it for now. Back to the furnace next week-