Showing posts with label heat. Show all posts

Tuesday, March 26, 2024

Fixing Hapy Furnace (part 2)

Picking up where I left off the last post, Hapy has an operational furnace again.

Fuel Pump Swap
As I mentioned in my last post, the fuel pump which originally delivered with the heater/furnace would not work when I tried to bring things back to life. I splurged and bought a more expensive "quiet" model for $50US rather than another standard pump for $20US. I figured quieter or not, the more expensive pump may have better parts in it, and it may last longer whether it is quieter or not. Or it was just a marketing gimmick and I got took. Let's chalk it up to the cost of an experiment.

The old fuel line path was relatively simple. The "hard" (clear but firm plastic) lines that delivered with the furnace had short (50mm / 2-inch) stretches of fuel hose between them and the pump. The pump was suspended from a cross beam by the included rubber mount held in place by a single sheet metal screw. After a few turns with a screwdriver, the pump was on the ground. A few more and the fuel lines were removed from it. The supply fuel line started dripping fuel after a few seconds, so I caught it with a pan. The line on the pressurized side was completely empty, so no drips. I simply reversed the removal: added the rubber mount from the supply end of the pump, added the supply fuel line, suspended the pump from the cross beam and then added the pressurized-side line.

Prime and Fire Up
The Afterburner has a control page where you can direct only the fuel pump to fire up. This allows you to get fuel all the way to the furnace without the glow plug turning on (drawing the battery and maybe burning out the glow plug). I had not connected the pressure line to the furnace, but I wanted to clear the lines of any bad fuel, so I moved the pan under the dangling hardline and triggered the Afterburner to prime. Within a minute of the prime starting, fuel started spurting out the end of the line. It took longer than I expected it to, but perhaps that is an indication of how little fuel these units actually consume. Once the fuel leaving the pressure line looked like the fuel supplied at a filling station, I stopped the prime function and connected the hardline to the fuel hose dangling from the furnace.

While the pump was slightly larger than the original, it did not seem much quieter during the prime. Of course, I hadn't heard it pump in a couple of years, and memory is a funny thing. I do recall that when the furnace was running, I could hear the tick-tick-tick of the fuel pump over the whoosh of the furnace. With this in mind, I set the furnace to start. I did not want to consider the experiment with the new thicker, dedicated wiring yet, so I left the battery tender hooked up. At no point did the battery fall below 13.5V so either the tender was working hard, or the new wiring is a hit.

Regardless, the glow plug got lit, the fan started spinning and after 2 or 3 minutes the furnace ignited. This felt like a considerably longer period of time than before. Perhaps the priming was incomplete and I needed to prime again after connecting the hose to the furnace. Perhaps it took time to ignite simply because it had been so long. Once it ignited, a huge plume of smoke poured out of the little muffler. There was virtually no wind, so the cloud grew and sat slowly obscuring first the rear end of the bus and slowly 2/3 of the bus before a light breeze broke it up. After a few minutes, the cloud dissipated and the exhaust emission was reduced to nothing. All that remained was a light smokey haze inside the bus. I regret not taking a picture of that.

Noise Observations
While the temperature inside the bus slowly crept up from 55*F (13*C), I noted the noises. I could only hear the fuel pump ticking inside the cabinet where the furnace is located and even then, only when I stuck my head into the cabinet. I think the pressurized line is transmitting it. I stuck my head into the rock-n-roll cabinet above the spot where pump is actually installed and could not hear it. Maybe this new pump is quieter. Then, I moved outside where in the past I could clearly hear the pump from several feet away, even from the passenger-door side. I could not hear it, but I could hear the furnace whoosh. Of course, my muffler-ing of the furnace is different this time, having removed the second small rectangular muffler and the motorbike muffler. Perhaps the pump is no quieter, but the furnace is that much louder. To determine if the muffler configuration is a variable, I decided I will conduct another test at a different time, after re-attaching the other muffler bits. I had thought about bringing them along for while-parked use, and maybe I will need to, out of respect for our festival-going neighbors. In the past, I took decibel readings, but they were for while the furnace held a temperature, not during temp catch-up (full blast).

I will continue to experiment with noise readings and post if I find any readings are different than they were 4 years ago. I expect that once I put the extra rectangular and motorbike mufflers on, the readings will be what they were before. The only real mystery to me is whether the fuel pump can be heard over it. At this point, though, the pump seems significantly quieter.

Thanks, as always, for following along-

Tuesday, March 19, 2024

Fixing Hapy Furnace (part 1)

Having finally arrived at a place where we have some heat while we're moving, I felt motivated to fix the heat for when we are standing still. Today's post covers most of the saga of getting a Chinese diesel heater operational again. Spoiler alert: the heater isn't running by the end of this post.

Brief History
Back in the early days of CoViD, I installed one of those Chinese diesel parking heaters into Hapy (See Parking Heater 1, 2, 3, 4, 5 and Final for deep detail). While I was able to run it a few times, I found that the heater pulled the voltage way down on whichever battery was connected to it. I tried to solve by providing multiple batteries to source from: one to start, one to run, but switching from battery to battery seemed like a bad practice. I had other priorities, so I just let the furnace sit unused. When I did the sound deadening effort and the luxury electrical re-wire, I dismantled the cabinet which housed the furnace so I could get sound deadener underneath it and electrical cables through it. This meant dismantling part of the furnace too. Later, when the band wanted to use Hapy for the album cover, I removed the furnace exhaust so it would not appear in pictures. So, I had a furnace without an exhaust, and would draw way too much juice.

Electrical
Over time, and with more learning about electrical stuff, I have concluded that the wire used to convey electricity but perhaps more importantly the wire for a ground were far too thin. It was due to these thin wires that the voltage would drop so badly as the furnace attempted to compensate. Wires which would have been barely up to the job had the battery been sitting right on top of the heater will definitely NOT be up to the task once you move the battery a few feet away. This is exacerbated by running the ground to the body of the bus instead of back to the battery. The ground location should not matter as much, but I'm citing it as a participant cause anyway. So, addressing the electrical came first after removing the furnace from the bus.

A small harness of wires leaves the furnace body and enters a black plug (see picture on the right). The harness that ships with the furnace includes a pigtail that clicks into the furnace black plug. To my eye, the red and black wires in the pigtail are not nearly as thick as the wires leaving the furnace. This probably saved the manufacturer a few pennies, but the amp draw issue starts right there (and in my case got worse). So, I cut the main power and main ground wires from the furnace black plug and put male/female wire ends on them (12V/ground respectively). I made them different so I couldn't accidentally plug it in backwards. I then prepped a thick 2-wire black/red cable with matching wire ends, and routed it over to the luxury battery. At the battery end, I added a ring terminal for the ground and added a 20Amp fuse into the positive side before adding a ring terminal on that end. I left things detached as I switched to preparing for the exhaust.

Exhaust
From under the bus, it was clear that I had not made the hole(s) large enough for the exhaust, intake and fuel to be easily maintained. Quite the contrary, I had installed it such that once it was all together, it would have to all come apart to fix anything. Frowny-face. So, I started by cutting a 4-inch square hole into the lower belly pan. Many buses do not have these, but I got lucky. Anyway, with the hole cut I could see where the furnace sat, and noticed that the exhaust was getting pinched by the too-small hole in the floor as the exhaust left the furnace. So, I went topside and expanded the upper hole both in the floor of the cabinet and the steel floor of the bus. With the larger hole, the exhaust easily fits and things could be maintained from below. Still, I did what I could on the furnace itself before lowering it in: Connect a 6" long stretch of fuel line, attach a small circle of window screen to the intake (so bugs and pebbles don't get in) and then attach maybe a foot of heat-wrapped exhaust. I set the furnace in place and attached a small subset of the muffler arrangement I had used before: just one rectangular muffler. I may bring the expanded muffler set up for use when we are in tighter camping spots (like festivals), so we can bolt-on some extra quiet. I mounted the muffler to the underside of the frame rail, with the outlet pointing rearward and slightly away from center (picture on the right).

A keen eye can see some fresh Rustoleum primer + paint above the muffler where I discovered some rust had eaten all the way through the body. When I was working on the other stuff I ground the metal down, removing the rust, but exposing the holes. Sadness. That rust traces back to when this bus had a small vent window directly above this spot. That vent window was badly leaking and the rust had already been forming to the point of marring the paint when I bought this bus over 20 years ago. I eliminated the vent window in 2015 (See Calling "glass") with a window I purchased from BusBoys in Redding, CA in 2009. Some things move slower than others.

Fuel
I shifted over to fueling at this point. The fuel line that had been between the included "hard" line and the furnace had breeched, probably when I did the sound deadening. The fuel in the line looked dark, so I dropped the line into an empty pail, and figured I would prime the fuel system, and purge the bad fuel at the same time. Unfortunately, the fuel pump is no longer functional, so I am waiting on a replacement to finish this job.

Afterburner
Back when I first did this job, I bought an Afterburner from the guy who hand builds them in Australia. Apparently, there are people building knock-offs, eating into his business, since they basically have cloned his work. So, if you are looking at getting the much nicer controller for your parking heater, please connect with Mr. Jones in Australia and get the real deal. Anyway, with the Afterburner, I tried to prime the fuel system, but the fuel pump wouldn't respond. When I unplugged the pump, I got a code; I concluded the wiring to the pump was good but pump was bad. So I ordered a new, supposedly quieter, one. We'll see. While I was clowning around with the Afterburner, I got it onto my home network, downloaded the newest firmware and wandered around the new-to-me website that the Afterburner hosts. It's really cool. I am looking forward to triggering the furnace to warm the bus from inside. For reference, here is a link to the user manual.

This is as far as I've gotten. I am waiting for a new fuel pump to arrive. I need to purge the old lines of nasty fuel, and install that new pump. I expect there will be other discoveries, and I need to rebuild the cabinet innards. There's always opportunities to improve things. Anyway, thanks, as always, for following along-

Tuesday, February 27, 2024

Hapy Heat Repeat (Part 1)

Ask anyone who has owned or simply driven an old air-cooled Volkswagen in not-Summer and 9 times out of 10 they will regale you with tales of being cold. These awesome vehicles were designed to have heat, its just that they were also designed to be owner-maintained, and maintaining the cabin climate control is not easy. With aftermarket replacements of J-tubes for heater boxes, cardboard pieces eventually failing over time and long channels under the car (where road salt, etc gets in), it's no wonder heat doesn't make it. Anyway, today's post documents another attempt to get some warmth into Hapy, specifically onto my feet and maybe even onto the windscreen.

Why the Obsession
By now, you must wonder why am I so focused on getting heat into the bus. And I get it. Put on a coat or something, right? Besides, it's not like we really get snow in the Northwestern Willamette Valley. This is all true. For folks who own these cars and busses in genuine snow country, I suspect either they are summer-only vehicles or you are far more brave than I, driving in moon boots or something. Around here, we really only have about 10 weeks of warm-to-hot weather out of the 52 in a year. For the rest of the year it is either cold or cold and raining. Driving around in the cold is not as fun when you're bundled up (ski-gear head to toe) and still cold. Regardless, the temperature is hovering around the dew point during those 42 weeks, and overnight for most of the 10 weeks of warm-to-hot season. In the mountains, it approaches the dew point earlier in the evening and remains later into the morning. So, having a means of getting the fog off the windscreen, and not adding to it, is super important.

The Plan
so it begins
Last November, I posted an update (see: Hapy Update) where I replaced Hapy's crappy glow plugs with a new set. I did not circle-back on that since, but he has started without a hitch all winter. Those plugs are fantastic. The real test will be how well they behave next winter. Anyway, in that post, I mentioned that I had acquired a Maradyne Fans heater unit and shut off the Vanagon rear-seat-heat unit because I believed it had started leaking again. We had a "break" in the weather (almost 10*C / 50*F and only occasional rain), so I took the unit out to Hapy. The think was to remove the old, and swap in the new. Ain't nuttin ever that easy, but it's in now.

Old Heat Exit
The Vanagon rear-seat-heat was suspended from beneath the belly of the bus just forward off the radiator. I had fab'd a custom plenum from the heater unit into the original 3" diameter air channel, run coolant lines along the driver side to feed it and run electrical from the dash to control the fan. I hadn't tried to control the valve, choosing to leave it on or off by setting the valve before a drive instead. I unplugged the electrical first, then the flashing/plenum that routed the air into the 3" channel. Then I set to removing the heater from the underside of the bus. Both of the nuts at the bottom of the threaded bolt supporting the unit had rusted so I had to encourage them with a hammer.

Last, the coolant lines needed to be removed. I held the lines closed with vice grips so I did not lose a bunch of coolant and then set a dishpan underneath so I didn't spread coolant all over the ground when I disconnected things. The lines removed easily enough and a small amount of coolant dribbled into the pan. From this I concluded that the unit had been the source of the leak in the cooling system or there would have been more than the few ounces that appeared. I set the unit aside and shifted to the new heater.

New Heater Hung
mounting angle
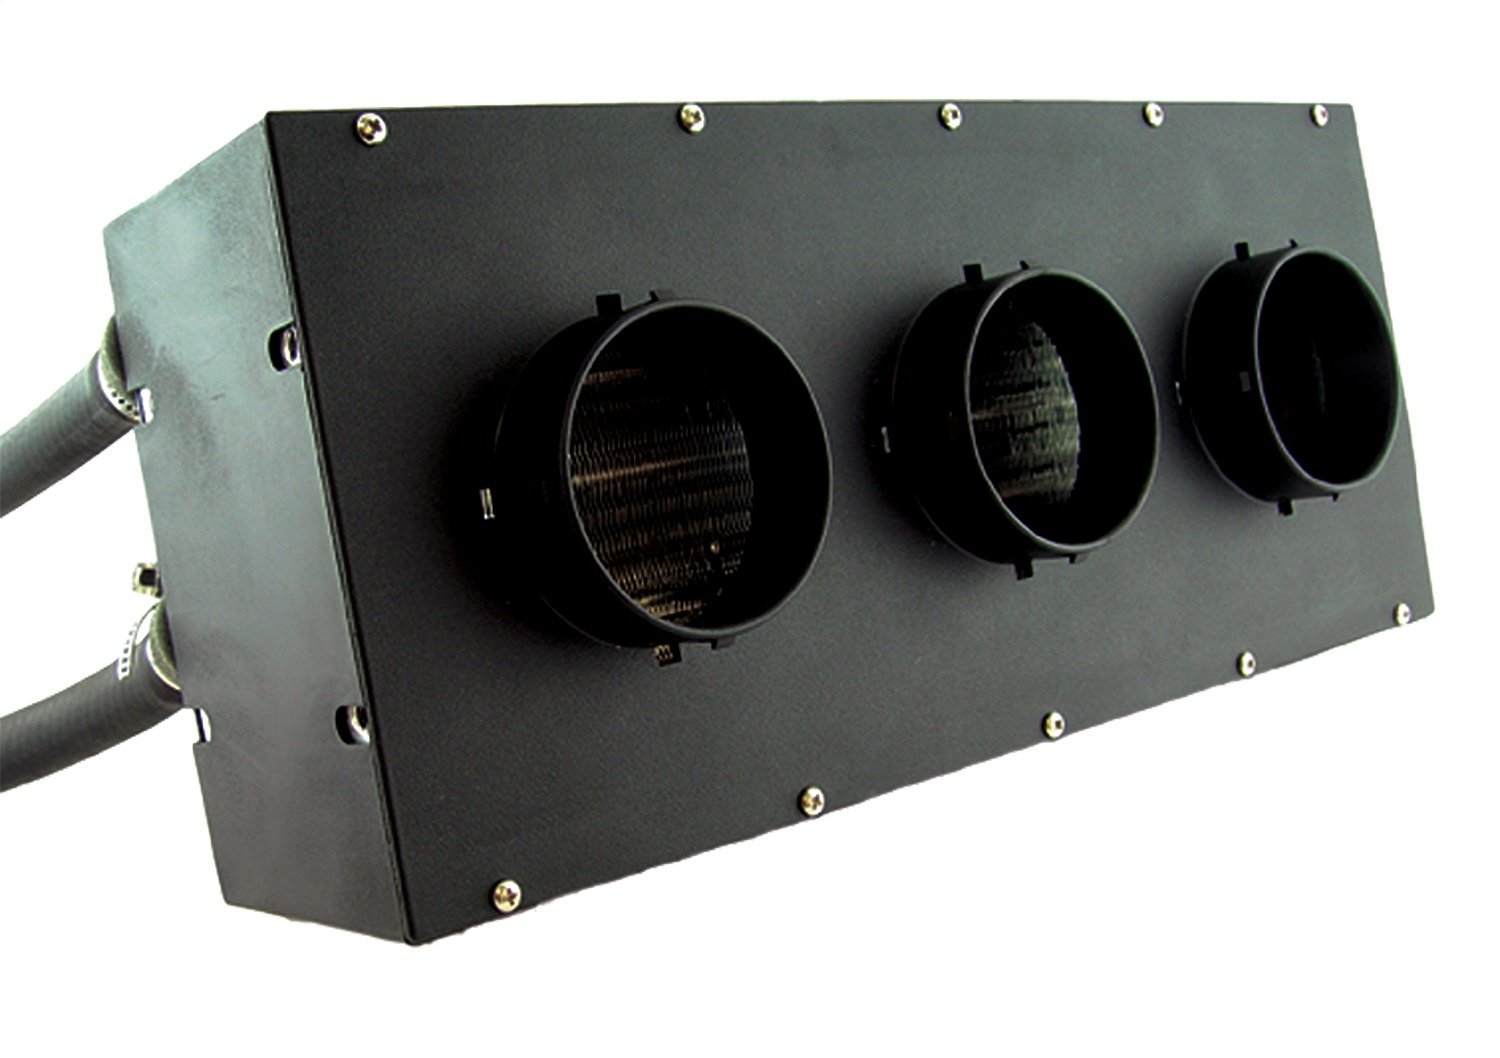
For installing the new unit, I started with placement thinks. I wanted it in essentially the same place, running air into the same 3" diameter hole. The force and size of this new unit dwarfs the Vanagon rear-seat-heat unit, however. The Vanagon unit is 6" tall and about 9" wide. The Maradyne unit is also 6" tall, but it is almost 18" wide. The Maradyne unit arrived with a cover that had 3 3" vent protrusions. The outer edges of those protrusions are 13" apart, so I decided I would retain the cover and enclose the vent protrusions inside my new plenum. I was unable to reuse any of the old piece.

After some failed attempts to place the heater straight/level with the ground, I shifted the mounting hardware so the new heater was at approximate 45* angle with the bus, pointing upwards. One would reasonably assume this would cause the unit to hang considerably lower, but because of the placement of the fans, the unit is only about an inch lower. How? Well, in this configuration, the top edge of the heater unit nearly touches the floor of the bus. Neither the Vanagon rear-seat-heat nor this unit could do that in the horizontal position because of all the various pipes running under the floor. In the picture on the right, here, the heater looks much lower than the radiator; that is probably caused by the angle I held the phone. In reality, the radiator is a hair lower. The mounting brackets have 2 holes, designed to be used with the enclosed screws. Yes, that's right, screws, and short ones at that. With this install design weakness in mind, I suspended the heater from a pair of metal tubes under the bus floor with.. wait for it... cable ties. Yeah, that is so RoadKill; I am not a fan of using cable ties this way. Having said that, I have not ever experienced a failure with cable ties, and if my 20-year history with Hapy is any guide I will be up under this bus fairly frequently. So, I will be able to monitor the health of these ties and resolve before any real issue arises.

Plumb It
With the heater relatively stable, I flipped to the driver side of the bus and started working on the coolant lines. As I mentioned in the referenced post from November, I picked up an old-skool control valve. Prior to installing, I noticed that the valve seemed to operate more like a shut-off valve than a gradual taper. When "closed", it was definitely closed, but it remained mostly shut through about half of it's travel, then opened up very quickly through the next 1/4 of it's travel and then that last 1/4 its no more open, in fact it almost seems to close a little bit. So, from closed to open the valve really only had to move a little over 1/4 of it's overall travel. I chose to drill out a little bit of material at the barely open part of the valve so that the first 1/2 of travel now actually opens a little bit near the end of that movement. Overall, I think the open-to-closed is closer to 1/2 the overall travel now.

Once modified, installing the coolant lines part was fairly easy. I cut a short stretch off of the return line, and added that to the return off the heater. To that I attached the valve, minding the indicated direction of coolant flow marked on the side. Last, I connected the supply and return lines and then removed the vice grips. I am not 100% thrilled with the routing of the hoses and will incorporate a 45* angle so they are not forced so route to low. After this picture was taken, I shortened the return line another inch or so to reduce the droop a little bit. I poured a bunch of water into the coolant bottle and called it a day as it was starting to get dark.

Plenum
I returned the following morning to complete the job. In a typical install of one of these Maradyne heaters, either the purchaser connects 3" hoses to the outlets or maybe some directional vents (neither are included). Remaining a-typical, I assembled a 4 sided plenum, like the one before it, held together with the higher-end flashy ducting tape.. The top is a 13" by 5" rectangle with 1" long drop-down sides, with a 45* angled rear tail and an up-turned front (image on the right). The bottom is 13" long by 4" (with 1" drop-sides along the shorter edge) and the plenum sides are right triangles with 4" long sides. Remaining ever cost-conscious, I cut material from the old furnace intake. Recall, it was 15" square, so I cut up one side and got 13" length with 1" for the drop-sides with one cut. I taped on the top and bottom first, then the sides, and closed up all the gaps. I get this is not exactly contours-quality... this is far from that. This is all about getting on the road with whatever heat I can extract from a TDI engine. Besides, the last taped-together plenum lasted a few years and would have continued had I not torn it apart for this install.

Electrical
Before I got started on the electrical, I looked back on the post I wrote about the Vanagon rear-seat-heat fans (See Defrosting - Part 4). I discovered that the fan switch that I bought for that install was the exact same as the one that delivered with the Maradyne fans, just with a different knob. So, while I could run new wires and replace the switch, I didn't need to. So, I didn't. Instead, I cut the 3-wire plug off the fan power wires and the ring terminal, leaving enough material so I could reuse it somewhere later. I added female spade connectors to the four wires. I could easily identify the ground wire and low-fan wire so I connected those and tested the fan. Success! And even on low, this fan is more powerful than the Vanagon rear-seat-heat unit on medium. It probably rivals that unit on high, in terms of airflow, but not fan noise. This is super quiet: no fan noise, only the sounds of the rush of air.

With a multi-meter, I confirmed which of the remaining 2 disconnected wires was the wire for medium. I decided that since I had a strong 12V signal, I would reuse the relays and simply wire up the fan. This was also much easier and it insurers that the wires won't melt when I turn the fan on one of the higher settings. The air flow on the "medium" setting is considerable. Boo and I have noticed that the heat in ToyoTruck is most effective on the not-highest setting, concluding that the air speed is so high on the highest setting, it is unable to pull heat out of the heater core as it passes through. As I wired up the high fan, I considered that we could have a similar issue in Hapy now, and may really only use the lower 2 speeds. Time will tell.

Any time the coolant system is open, there are a series of engine runs or test drives followed by adding water and coolant until it levels off. Since I did not need to drive Hapy during the week following this work, I didn't run the engine. Instead, I prepared for "part 2".

The inlets for the fans are drawing outside air and the control valve is still managed by rolling under the bus. I'll get to the valve eventually, but I don't want to wait too long. The drawing outside air, however, needs to be considered right away. As it is, a drive through one of our seemingly ever-present puddles and I've got warm fog blowing up on the windscreen. At least until I route the fan inlets to the bus interior. Since wet season will persist for another few months, I got after changing the air source shortly after I completed this post. I added the image on the right here to illustrate the first problem I encountered: the return coolant line runs straight through where an air inlet would go. Of course, the support bracket isn't helping either.

Thanks, as always, for following along-

Wednesday, November 22, 2023

Hapy Update

Today I could continue the dissertation on the effort to move the furnace in our 1948 farmhouse. Instead, I actually have something car related... the check-in on Hapy that I said I was going to do in a prior post and then flat-forgot. Remember Hapy? He's the 1972 VW camperbus that launched this blog. I meant to post this yesterday, time got away from me.

Hapy No Start Returns
A few weeks ago, as the weather turned cold, Hapy became increasingly difficult to start. Again. I figured it was the same issue as last time (See Hapy No Start Again), and started checking things with my multi-meter. I started where the old problem was: the main fuse for the glow plugs. Nope, there's a clean over-12V signal there. Then, I checked the voltage at the relay, and it was fine there too. Same for the resistance in the wire and the fuse.. no issues. So, I started thinking about the glow plugs themselves. I swapped this set in when I put in the chipped CPU and bigger nozzles, but not because there was anything wrong with the ones that were in there. I had this set of plugs that I had lying around for a few years, and I was selling Flash. Flash had failing glow plugs (resistance tests between the plugs were not within a few ohms of each other). So, rather than put the new set into Flash, I got selfish and put Hapy's nothing-wrong-with-them plugs into Flash and installed the new-never-opened plugs into Hapy. Looking back, I don't think these plugs were nearly as good. I think we have had starting-while-cool problems from the beginning, but it was Summer when I did the swap and never thought about it. Until now.

I pulled the rear-most plug (#4?) and tested it by resting the glow plug threads against a grounded bit of steel on the engine and triggering the ignition to "run". After a 3 count, the tip of the plug started to glow orange. After another 3 count, I could hear the relay click off, and the tip returned to black. I did this a few times and each time it took a few seconds for the plug to respond and even then it was only the very tip. Based on some internet imagery, I concluded that those plugs were insufficient and bought a fresh set.

A few days prior to installing the new set, I started hitting the in-engine plugs with some Kroil penetrating oil at dinnertime. I did not want a plug to break off or damage the head during removal. Whether it was necessary or not, the plugs removed relatively easily. All of them had soot on them when they were removed. Into the trash they went. For each of the new ones, I applied some anti-seize onto the threads prior to installing and then only snugged them down (did not torque the snot out of them).

Unfortunately, my efforts to start Hapy when the glow plugs were not working did a number on the starter. Again. So, my attempt to start him after replacing the glow plugs was not fruitful. Since I did the glow plug swap around the furnace work, and the furnace still is not operational, I self-limited my time to just swapping the plugs and then getting back under the house. I returned the following weekend (bumming rides and car-sharing with Boo the week between) to remove and inspect the starter.

should be 1 part, not 2
I admit, I expected the starter to just need a remove / re-install cycle. I was wrong. This rebuilt starter was installed in June 2023. After a summer of being my "daily driver", the starter was cycled well less than 500 times. I guess rebuilt Bosch starters are not all the same. Maybe the starter was a Bosch but the rebuild was done with cheap-o parts, leaving just the case as a Bosch unit. Regardless, it did not take very long to notice that the seal on the end (which is supposed to go around the shaft which juts out when 12V is applied) wasn't there anymore. It had potato-chipped inside the little pocket where the nose of the starter goes. Neat! So, off to the internets I went looking for a suitable replacement. I decided to get a new one from MetalManParts. Run by MetalNerd, his site only sells things that he personally fabricated or installed into his own vehicle. I have purchased both types of things from him before and have no regrets. Since Bosch was sold off to Seg Automotive, he now supplies new starters from them. I trust that if he is selling them, he is using them.

Sadly, the install of a starter has become fairly rote, since I've done it so many times. I simply put a 19mm socket, 13mm socket, a ratchet and a couple extensions into my pocket, slide under the bus with the starter and it's installed in less than 15 minutes now. If the rear sway bar were not there, I could probably have it done half that time. Of course, I ran the battery down with all my glow plug testing, so it got a spell on the battery charger before I could test my handiwork. Once that was resolved, I turned the key to "run", counted to 6 (for the glow plugs, it's 45*F here) and returned the key to "off". I repeated and then tried to start. Fired right up! I let him run a few minutes to top off the battery and now he is back to being my daily driver.

Hapy Heat Not Heat
Remember all that effort I went through to install the Vanagon rear heater under the bus for some heat? While that was fun, the result is not much heat. I described the lack of warm on the drive to and from the Cascade Equinox festival. Beyond the lack of detectable warmth, opening the valve to try to get heat has resulted in a coolant leak. I can attribute no other source for why Hapy's coolant level is suddenly not holding. So, I turned the valve back off and will be replacing the Vanagon rear seat heater with something else: a Maradyne Fans Stoker heater.

Maradyne, but could be any
There are lots of auxiliary fans which all look the same and have the same spec's (300cfm, 40k BTU - airflow and heating capacity, respectively). JEGS has their own, for example, that looks identical. Since I am unsure who is the originator, I went with a manufacturer with a known, solid reputation. There is little documentation and hardly any photos of this particular unit on the interwebs, making this choice perhaps a little more risky. I find the 40k BTU number everyone is using to be gross hyperbole, but I don't know how to test that nor the 300cfm number. I will bench test to get some amp-draw numbers before I install it. The amp-draw might be useful information for the next person since even Maradyne doesn't list this detail on their product page. And, it could be one more thing that is exactly the same on all of these units. For future reference, the JEGS unit draws 5.5, 7.1 and 11.6 amps (for low, medium and high settings respectively). I had relays in-place for the medium and high draw switch positions for the Vanagon unit. I don't know if I  will re-use them. Perhaps the amp-draw numbers will help me decide.

One other thing to point out: none of these heaters ship with a coolant control valve. Since I was leveraging the valve in the Vanagon, I have to add one of these or the heat will be on maximum all the time. I included this "vintage" control valve in my order. I thought about going with an electric one, but decided that I would really like to re-use one of the big original heat-sliders on the dash to control the amount of coolant flowing into the heater core. That feels more authentic than another knob attached to the bottom of the dash. Of course, I haven't ever had that control cable, so I will be running this either full-on or full-off until I do.

For now, this means that trips in Hapy will be just like all the other trips I've ever made with him in the not-Summer. They will be cold. It will be like driving around in an ice-fishing shed, unless I can either install that heater soon-ish -OR- get the little Chinese diesel heater/furnace working.... or both. Since I do not have a garage and I barely have a 4-meter square piece of concrete to work on... and I have a house furnace to fix, I do not think Hapy's heat will get addressed terribly soon. At least I have the parts for when I do. Of course, now that he is my daily-driver again, I may decide another week without a furnace might be a fair trade for some heat, any heat, in Hapy.

That's it for today. Thanks, as always, for following along-

Tuesday, November 7, 2023

Setting the Furnace

Continuing the fun with the furnace today. It being October, of course we had another issue with Hapy not starting so I'll touch on that as well. EDIT: oops. Didn't post on Hapy. Next time, I swear!

Plan and Plan Again
today's end-state
Recall our plan to move the furnace into the crawlspace. We had the work bid by a furnace company and they quoted us $12kUS; we recognized that as a "go away" price and chose to do it ourselves. My biggest considerations are around the combustion exhaust, so I spent some time researching this. According to multiple sources, an 80% efficient furnace needs a double-walled exhaust (check) and it must have an upward pitch of no less than .25" per foot. I thought that was fairly flat, so checked other sources. From this data point, I collected others, like how far from the ground is the bottom/top of the exhaust pipe heading into the chimney, where the exhaust exists the furnace, etc. With these numbers in mind, I set to planning where to set the furnace.

planning a hole
Initially, I planned to put it directly beneath where it had previously been. This would have changed the routing of the conditioned air, gas line, cold intake and exhaust the least. Unfortunately, this would have put the furnace right against a main beam running the width of the house, making seasonal maintenance impossible. Additionally, that spot under the furnace had an unexpected rectangular concrete curb that was smaller than the space we needed cleared. So, the furnace is going to be adjacent to that curb'd rectangle, but because the distance to the chimney is around 3 feet, and I would like an angle of assent that is greater than the minimum, the furnace will need to be almost on the ground. So, a plan that wound have suspended the furnace from the floor joists will be replaced with a plan that has the furnace a-fixed to the ground instead.

Dig Another Hole
hole dug
Obviously, I am not going to simply set the furnace on the vapor barrier on the ground. Beyond the fact that there are safety issues, the furnace needs to be up off the ground height-wise to get the exhaust angle I want and to minimize both the conditioned air and gas line routing. Instead, I decided to dig a foundation and set the furnace on a stand. That sounds so simple until you get down to trying to dig a hole when the headroom between the dirt and the bottom of the floor joists is less than 2 feet. Starting with my tools, I had a 5 gallon bucket for removing dirt, a small-bladed shovel with a broken-off handle, a crescent-moon scraper thing and a 4-prong hoe. I cut 3 sides of a rectangle into the vapor barrier with scissors and peeled it away, leaving a 2 foot by 3 foot rectangle of rough dirt. With the tools I mentioned, I removed probably 60 gallons of dirt, leaving a 2 foot by 3 foot hole nearly a foot deep. This took almost 3 hours since the whole thing was done on my belly.

gravelling
After taking a break for a few days, I returned and repaired the vapor barrier with thick black garbage bags. Along the cut edges, I made sure the plastic overlapped more than a handful of inches, and I lined the hole with sufficient slack so the additional layers of material would not cause gaps to form. Once satisfied, I added a 1/2 yard of gravel and moved it flat with a garden rake and then my gloved hands. On top of the gravel, I set 6 1-foot-square patio blocks. For each block, I made sure it was flat, and then flat to the adjacent block. As you can imagine for each block, this required multiple install-remove-install cycles and then additional ones to get the overall 6-block space flat. Between the gravel and the blocks, I probably spent 2 hours getting it level. This crawlspace patio will serve as a foundation for a stand upon which the furnace will rest.

Rack It
crawlspace patio
I initially thought I would simply use a pair of hot water heater stands for the furnace. I figured, they could withstand the weight of a full hot water heater so they could definitely hold a 70# furnace. I priced them but the cost and availability was not good. While searching, I found air conditioner stands designed to hold up to 400#. While local availability was again nil, the price was the same as for one hot water heater stand, and they are height adjustable. The rack I ordered was lost in shipping, so I switched the plan again. This time, I ordered a non-adjustable storage rack capable of holding 1000#. While I won't need anything that strong, this rack is also 2 foot by 3 foot in dimensions so it will fit into the hole, and potentially support the furnace better. When the rack arrived, I took the pieces into the crawlspace to consider my options. The rack is only "adjustable" by cutting legs to the height I need them to be. So.. adjust once, really.

prepping the legs
Accordingly, I wanted to be sure of my height, so I considered the exhaust run from where I expected the furnace to be over to the chimney. By suspending a long exhaust run, I could consider the angle of assent and the final destination for that edge of the furnace. From this, I could measure and math to the needed length for the furnace stand legs. You may notice from the pictures that I needed to move a couple of the blocks around too. Once satisfied, I took the rack back out from the crawlspace and cut the legs. Since the stand is really just unbraced legs, I added angle-irons at the bottom so I could mount the stand to the patio block. I then took the pieces to the crawlspace and re-assembled the stand. I set the stand where I planned, marked the holes on the patio blocks and took the stand apart again. Now, I could drill holes and mount the legs to the blocks. With the legs attached to the patio block, but not torqued down, I could set the stand top on, and then torque the concrete screws. I checked level along the way, pleased that all of this amateur work is level. Last, I bolted the legs to the top, using blue locktite so they would not work themselves loose from furnace vibration.

With the rack assembled, I was ready to move the furnace onto the stand. The gas line and the electrical will both enter the furnace from the bottom, and these will need to be routed so the "front" cover can be removed for seasonal servicing. The electrical entry has some wiggle room, but the gas line does not. I needed to account for these as I considered where on the stand the furnace would be placed. The stand is more than large enough to account for that adjustment and the space beneath it has ample room to run gas and electric.

rack installed
The furnace is heavy and the ceiling in the crawlspace is limited. I had feared that pushing and lifting it would be quite the undertaking for me (Boo had to work). My fears were not warranted, it turned out. To prevent the furnace from getting scratched up, I left in place the moving blanket in which we had moved it around under the house. This also reduced the friction as I moved it around. I set the furnace rear-ward of center on the stand, further from the chimney. This aligned with where I had expected it to go, mostly, leaving me with an exhaust run of around 3 feet along the plane, with a slight diagonal turn in it.. when I install it. The picture at the top of the post shows how it is right now, and no, the end furthest away is not touching the ground; it just kinda looks that way.

Exhausting
Once the furnace was in, I spent some time rough-assembling the exhaust. This consisted of taking the old exhaust down to it's most basic pieces and assembling a path that had the correct angles and took a slightly indirect route so I could route the cold air intake without interference. Once roughed-in, I took it back apart so I could easily get to the other side of the furnace. I have a great deal of "conditioned" air work to do, and having the fuller access will make that work easier.

This has gotten super long, and it has covered a few weeks of work. I was able to get another few hours in, but I'll couple that with whatever I get done next weekend into my next post. The calendar says 7-November, so, clearly, the weather is starting to get cold. We were fairly motivated when the daily high temperatures dropped into Autumn temps. We are getting overnight lows below freezing now, so there is no lack of motivation nor pressure. Still, I want to do it right and have a safe space once it is completed. Since I am doing it mostly by myself, it will only go so fast. At this point, I hope to have an operational furnace by the Winter Solstice.

Thanks, as always, for following along-

Tuesday, October 3, 2023

Cascade Equinox Festival 2023 - Report

In the past, I have created 3 separate posts for a festival: the road, the bands and then the festival itself. When the road trip brought perils, this made sense. Lately, though, Hapy has been driving so well, I don't really have much to say in the the road report. So, the road gets a subheading. We did not see much of the music this time either, so there's no point for a separate post there either. So, one big post.

There and Back Again
We had not taken a trip in Hapy since LeisureFest, but we had our gear relatively well organized. Unlike our usual night-time exit, we were unable to dodge out of work early. So, we did like everyone else and loaded up in the morning instead. We had some typical delays, like cleaning things and getting Tuukka to Aunt Linda's. We left home around 3, got some B20 at the usual corner station with a couple bags of ice and hit OR217 South. Cascade Equinox Festival is held in Redmond (due east of Sisters), so the route is fairly familiar: OR217 to I-5 to OR22 to OR20 into Sisters. From there, it's OR126 to Redmond. We have done the route as far as Sisters for 4Peaks, so we know the landmarks. We had not been through the Detroit Lake area since the wildfires a couple of years ago, so seeing both the devastation and the start of the regrowth was breathtaking. Hapy ran like a champ, and after the heavy traffic on I-5 lightened up south of Wilsonville, he purred the rest of the way.

We determined that the Vanagon rear-heater that I installed as a means of producing some heat in the bus is simply not up for the task. Since this heater capacity was designed as an auxillary heater for the back seat in a Vanagon, this should surprise no one, including me. To wit, we had virtually no heat on the drive out and only suggestions of heat on the way back. We remedied with lap-blankets, but I will need to do something more significant eventually. On the way out, we stopped only once at a rest area along OR20. On the way back we stopped at the iconic Sno-Cap in Sisters for lunch. We love Sno-Cap; the shakes are great and the service is small-town warm. The drive home was colored with a steady rain, which Hapy absolutely loved. His temp barely reached 185* most of the time, and with the help of a super-slow driver behind us holding back the heavy Sunday afternoon traffic through the mountains, we had OR22 to ourselves most of the way to Salem. We continue to consistently around 30mpg, even when loaded with gear. This trip was no different; when I finally filled up (after driving to the festival and back plus some around town driving) he got over 300 miles and about 30mpg.

Festival Upsides
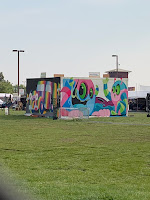
installation art
Since one of the organizers for Cascade Equinox is the organizer for 4Peaks, Boo and I had an idea of what Cascade Equinox was going to be like. We were mistaken, but that wasn't all bad. There were 4 large installation art pieces being created over the course of the weekend. It was fun to watch the artists work, and see their pieces evolve. There were 6 music locations within the secured area, with up to 5 of them going at once. This created many options for what to see/hear when. The vendor area was significantly larger than 4Peaks, offering a wide array of products. I bought, and then lost, a ring, but otherwise our back-to-school shopping was limited. We sampled a few of the food vendors, and they were both good and popular. In terms of services, there were free showers and there was never a queue for a porta-potty.

Camping in Hapy, we discovered some upsides as well. We had not really used the side-walls of the BusDepot canopy before, but we did this time. They were incredibly easy to put up and take down, held firm in the gusty winds and the biggest surprise was how well they held in the heat from a Little Buddy heater. We slept very well and the sound-killer that I installed held the seemingly constant subwoofer to the background. We camped on flat, soft grass and had ample space for the bus and our canopy. We were able to collect solar to boost our luxury battery on Saturday. We had enough water from home so we did not need to source more, we brought plenty of simple food so we only cooked what and when we needed to. As far as a camping experience, it was great. Boo even got to read some of her book.

Festival Downsides
Unfortunately, there were quite a few things that did not go well. Some of these could be chalked up to a first-time event, but since both of the organizers have done events before, the oversights are worth noting.
Ticketing
the elusive map
When I first learned of this festival, I got super-early bird tickets the day they went on sale. At the time, they had not figured out camping nor even the schedule of things, just that it was equinox weekend. At some point, I was contacted about a car-camping ticket, so I added one. We discovered upon arrival that the terms of the festival attendance tickets changed / were refined after we bought them and that "early entry" was now an add-on. So, at the gate at 9:PM I had to pay another $145US or park outside and drive in / set up the next morning. We were cold so we paid, leaving us that much less to spend on vendors. In retrospect, perhaps we could have gone in in the morning. Anyway, once through the gates, we were led to the car-camping zone. 
Camping
Some of the biggest misses were around how they managed campers. First, the area was mapped out in very long (100 meters?) lines where cars were parked with one set of tires on the lines (see in top picture) and between the lines of parked cars alternated camps and fire-lane. On paper, this makes sense for maximum density. Because every car was hood-to-trunk with the car on either side, there were no cut-thru's for people to just walk by, so no one did. Accessing services meant walking all the way to the end of the fire-lane and then finding services. Which leads to the next 2 misses: porta-potties and water.
Drinking Water
When spending multiple days in the desert, it is highly advised to drink lots of water. In fact, from the stage at 4Peaks, we are often reminded to drink water. In light of this, the lack of access to drinking water for a large swath of the car-camping area was especially noticeable. Fortunately, Boo and I brought our usual 5 gallon water jug and I filled it before we left simply because our water here tastes very good, and water elsewhere often does not. Bringing our own is a luxury item, unless we find ourselves in a place which does not provide and suddenly it is a very precious resource. We discovered that there was a single source of water on the other side of the festival grounds (but within the camping ring around the festival grounds), had we walked that far. The return walk with a full 5-gallon would not have been fun.
Porta-Potties
Okay, all porta-potties are gross. That's just a given. In the camping zone, they were clumped in large groups, but very far apart. Once you made your way there, they were not serviced often, leaving you to bring-your-own-supplies. The first cleaning took place mid-afternoon Saturday, so for those who arrived when the gates opened on Thursday, that's a long go. Beyond that, the porta-potties themselves were especially disgusting. Even after they were cleaned, there was black mold on the walls and inexplicable yuck on the floor. Fortunately, once the gates opened, there were better services inside: actual bathrooms which appeared to have been cleaned before the festival started but not afterwards. So, it was bring-your-own-supplies even then. Had security been more thorough, it would have made for interesting conversations.
Gate Entry
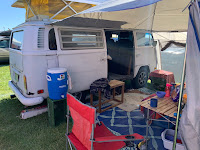
sidewalls hold in heat!
Because of staffing or staff-allocation of security, the entry gate from the camping area into the "secured" festival area did not open until almost noon every day. On Friday, they didn't open until 2:30. Since the stages started at 10:AM, and most of the folks who would have been inside were camping, the early artists did not enjoy much of an audience. For campers who did not bring food, water or coffee with them (we see this a lot at festivals), they needed to trek to the other side of the festival grounds to gain entry thru the main gate for breakfast.
Security
Since this was the first year, Boo and I could forgive the marked lack of volunteers. What was surprising, though, was the large number of security people. Once the camper gate was staffed, there were at least 6 security people there, though it was usually 8 or 10. Only one person got through at a time, with one security person checking a bag and another patting people down. I don't know what the other 4-6 people were doing beside appearing as a show of force. Even still, it was evident that many of the security people were on their first assignment as Boo and I watched them get verbal training one morning prior to opening the gate. Even still, I am not sure what they actually stopped from entering. On the last day, I had forgotten that I had a pocketknife in my pocket; they didn't find it and I didn't volunteer it. They never found my bathroom supply in my cargo-pant pocket.
Maps / Directionals / Signs
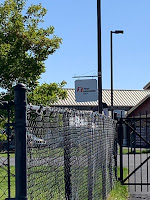
camper entry
Once through the gate, there was very little to help you gain your bearings. There wasn't a map posted in physical form anywhere. On Friday afternoon, I found the map above buried on the website. Inside the festival grounds, however, there were no guideposts and very few signs. At one point on Friday, we asked a vendor what stage we were next to, and they didn't know either. With the map above, we figured out later that it was Harvest.
Use of Space
I wasn't sure where else to put these. First, there were carnival rides in the middle of product and food vending. This seemed like a strange place to put them, and, frankly, they appeared to be little used when we walked past. I understand that having a Ferris Wheel at a festival has become an expectation, but I honestly don't know why though I can see the appeal of combining psychedelics and carnival rides to a much younger version of myself. It still seemed strange to have them in the middle of vending. Second, there were 2 stages near one another (Equinox and Harvest) which created a sonic cacophony in between while a third indoor stage (Gravity) that wasn't used all day. Unfortunately for the vendors in the zone between Harvest and Equinox, this area was fairly clear of attendees whenever both stages were going. What made this such an odd decision was that the Harvest stage had artists who could have otherwise been in the "Gravity" stage/room, in terms of space. Gravity was a great room, easily larger than the tented "small stage" at 4Peaks, but it was empty until after Harvest closed for the night, at which point it opened. In our humble opinion, the Harvest stage could be eliminated, using that space for more vendor/food/hangout space. Maybe that's where the Ferris Wheel goes? Regardless, staging those Harvest-artists in Gravity where they are not competing with Equinox for sound-space would have enabled the attendees to really hear what they're doing... and maybe hang out for whoever is next. Considering how cold it was, simply being inside could have increased the audiences for the Harvest staged artists.

Impressions
"follow your dreams"
We did see some of the bands and were very impressed with how much Yak Attack has grown since we saw them years ago. They pulled a huge crowd into the Harvest stage area, getting a couple hundred people groovin. DirtWire, and Phantogram also stood out to us.

Unfortunately, our festival experience was colored by 2 independent health challenges. First, I appear to suffer some form of altitude-sensitive anemia so it takes me a couple of days to adjust to the higher altitude of central Oregon (2k  feet above sea level). I had a similar super-low-energy experience at 4Peaks in 2017(?), and recognize that I need to supplement with iron prior to going -or- arrive a couple of days early if I want to avoid that. Second, we had a fried rice dish from one of the vendors and triggered Boo's sensitivity to MSG. We ate and she almost immediately fell asleep, missing Friday night's artists. Last, it was cold and windy the entire time. The overnight temperatures were below 4*C (40*F) and daytime highs barely touched 20*C (68*F). Once the wind chill is added in, temperature was a near-constant challenge.

Totally unrelated, but I feel compelled to at least comment on it: do you see that sign in the "camper entry" picture? First Interstate Bank. First Interstate suffered a hostile takeover by Wells Fargo over 25 years ago, yet there are multiple First Interstate Bank signs around the fairgrounds, and they are in amazing shape. Clearly, the operators of the venue take care of the space if 25+ year old signs can look that good after sitting outdoors the entire time.

As we look back on this festival, I don't think we will be returning. The vibe of the festival seemed to be very "stick-with-your-tribe" oriented. From how the camping area was set up to tables near food vending to hang-out zones, none of the design appeared to support creating chance encounters or accidental conversations with people you didn't know. Quite the contrary, it seemed designed to support small groups staying connected to each other, but disconnected from everyone else. Even a queue for the porta-potties or restrooms creates that kind of 1:1 shared experience. The last picture, however, illustrates how the attendees were looking for that greater connection as this came from a "take something leave something" table that someone had set out in the fire-lane near their car. We left a fist-full of tea bags which had been picked up by someone else shortly thereafter. Clearly, there was a pulse there that the organizers failed to tap. Anyway, we wish them luck, but we will probably be celebrating the autumnal equinox in other ways in the future.

That's it for now. Back to the furnace next week-

Tuesday, September 26, 2023

Down in the Hole

Today's post is continuing the fun with the furnace. We took a weekend off for a family wedding and all the events around it. So, when we returned, we had a hole cut in the floor, a dozen 5-gallon buckets worth of dirt removed from beneath it, and the furnace slid over to the edge of the hole.

Chimney Cleared
placed for now
Before Boo and I got after moving the furnace, we felt that getting the chimney liner removed and the blockage between the floors removed needed to happen first. Also, by keeping the furnace out of the way, the chimney folks would have the most space available. We hired a father son team (DGC Chimney Service) to do the dirty business we were unable to complete ourselves. This also created an opportunity to have this chimney inspected and repaired, if necessary. They started by removing the aluminum sleeve out the top of the chimney. It is in re-usable shape, so we just need to add about 8 feet to it and re-feed it down the chimney to vent the new furnace location. Once it was out, they cleared the mortar plug that had been placed between the floors and then swept out the remaining soot. After an inspection and read-out, they were done. All-in, they were here for 2 hours.

lowered
During the read-out, they shared that the top 2 courses of the chimney needed to be repaired. These are not structural, so they insisted a homeowner could do it. Otherwise, the chimney is in incredibly good shape. The age of this house pre-dates the building code requiring the terra-cotta tile liner. Prior to that code change, masons would apply a thin layer of mortar by hand inside the chimney as it was being constructed. Once complete, there would be an uninterrupted skin from bottom to top. While cohesive, this was a great liner of a chimney. Unfortunately, this mortar is more sensitive to the acidic emissions which pass through a chimney. When the residue on the mortar skin is met with rainwater, the mortar is slowly eaten away. So, ordinarily a house this old would have some areas of the mortar liner, especially nearest the top, compromised. That is not the case here, so somehow we're lucky. Perhaps the chimney was cleaned annually. Regardless, I need to repair the top 2 courses and re-introduce a liner down through to the crawlspace.

Furnace Lowered
rotated 90*
With DGC's work complete, Boo and I could return to moving the furnace. As I mentioned, it was on the edge of the hole in the floor and I had dug out a bunch of dirt below. To keep things clean, we set out a blue tarp over the dug-out hole. Then, we wrapped the furnace with a pair of load straps, tying the ends so the furnace had 2 long canvas straps around it. Boo and I used those straps as handles, shifting the furnace first over and then through the hole in the floor. The hole was cut exactly right for the size of the furnace, but it di not account for the machine screw heads sticking out from the sides. So, the furnace would hang up on the screwheads on the floor joists. We encouraged the furnace to pass with a booted foot and once the screwheads passed the top edge they dug into the joist just enough to prevent the furnace from falling through. A couple of centimeters after the top edge of the furnace passed the bottom of the floor joist, the furnace rested on the blue tarp.

Once on the ground, Boo ducked through the hole where the furnace used to be and returned the furnace from the crawlspace. Then, as I lifted up on the straps, Boo pulled the bottom edge towards her, tilting the top away. The furnace rotated on it's horizontal axis until it had turned 90*. At this point, I climbed down behind the furnace and Boo and I wrapped it with a moving blanket. Then, as Boo pulled, I pushed the furnace over the plastic vapor barrier over to the base of the chimney (to be fair, Boo pulled more than I pushed). We left the furnace like that, wrapped in a moving blanket, and not quite where it's going, but fairly close.

More Vent Fun
insulation stripped
With the furnace somewhat settled, I took a closer look at the rectangular vent/ducting we had taken down for the furnace removal. It looked awful. The ducts had been wrapped with open-cell pink fiberglass insulation. On surface, that sounds like a great idea, but this crawlspace had been inhabited by rodents. So, the fiberglass was, uh.. let's just say guh-nasty, gross, disgusting. Wearing a respirator (of course), I removed the insulation from the larger run and carefully swept up the droppings and dust into a plastic garbage bag and removed the bags from the crawlspace. The other duct needs to have a similar treatment, but the one which was stripped of insulation now looks brand new. We had feared that they would need to be replaced, but now, we will simply clean the insides with a vacuum and long-handled brush. Of course, with the furnace re-location, the venting will need some re-orientation, but we may be able to escape with only a few small pieces rather than a full vent replacement.

This is where we're at. For Pacific Northwesterners, you are well aware of how our weather has shifted from summer to autumn-ish over the past few weeks. Overnight low temperatures have dropped into single-digit C (below 50*F) and daytime highs are barely breaking 20C (68*F). Not having an operational furnace nor a meaningful alternative heat source may very well become an issue before we get the furnace operational, based solely on the speed at which we have gotten to this point. Fear is the ultimate motivator; we will have heat this winter. It will be interesting to see if we have heat by Halloween, though.

Thanks, as always, for following along-

Tuesday, August 29, 2023

Furnace Freed

Continuing the NewOld House construction, today's post is about disconnecting the furnace, and considering our options for what's next.

Hapy Update
I know I have not written much about cars lately, so here's a quick update on Hapy. I don't drive every day, but Hapy has been my main vehicle all summer. The other night, I grew frustrated with someone driving at least 10 mph below the speed limit in the left lane. I was cruising around 2k RPM in 3rd (around 30mph in a 45mph zone). An opening appeared in the right lane, so I stepped on it and started changing lanes. I guess I stepped on it too hard because I smoked the tires for a second before they grabbed, launching us forward. Goes to show, the KermaTDI bigger nozzles and Malone Tuning CPU chip were significant improvements. Since I have been driving him so much, it is now time to do his front brakes. I am still questioning the brake booster, so once the front brakes are done, I may revisit the booster and master cylinder. Since Hapy has become the gear-hauler for the band I've been playing in, taking him off the road has larger implications than ever. Anyway, back to the furnace.

Exhaust
furnace freed
Because of the way the furnace was installed, I had to get the exhaust stack out of the way first. The furnace is not a 95% efficiency-or-better, so the exhaust is both double-walled and transfers more than just water vapor. Still, it is put together the same as one of the high efficiency ones, it is just double walled instead of single. Some pieces twist-lock together and others are held together with sheet metal screws. With a 1/4" hex socket on the cordless torque driver, I made quick work of all of the sheet metal screws. I was able to remove the exhaust in sections and set them aside. Once the entire exhaust, from furnace-to-chimney-liner was removed, I shifted to the cold air intake or "return" in HVAC parlance.

Cold Air Intake
On this furnace install, the cold air return/intake enters from above. So, while warm air rises and cold air drops, our cold air return was installed 6 feet up into the wall. Genius. It was simple to take apart, though. The protective grill was held on with 3" long screws, which also held the air filter in place. Behind that the HVAC flashing was bent to create a flute or trumpet-bell shape to route air from the grill through the hole in the wall into the main intake. From there, the intake took a 90* turn down into the top of the furnace. Easy-peasy. The intake was similarly held together with sheet metal screws, and it came apart just as easily as the exhaust had. The sole difference was that each seam had the fancy shiny duct tape. That came off fast too. Once in pieces and the trumpet-bell bits bent straight, the whole unit came free.

Hot Side
exhaust removed
Once the "cold" air passes into the furnace, the squirrel-cage blower pushes it through the heating element and down into the chase below. In our case, that chase is large, rectangular and takes an immediate hard 90* turn along the main beam. From that chase, the round insulated heat conduits attach, routing the air to the various registers around the house. None of that needed to be touched for the furnace removal. All I needed to do was detach the furnace from the floor. Again, sheet metal screws held a double-thick 90* bend of HVAC flashing between the side of the furnace and the top of the chase interface. Once removed, the furnace was free-floating. We intend to re-use as much of the original "hot side" as we can. The round insulated tube things were all replaced when the crawlspace was done, so they are effectively new. The places where heat needs to go remains the same and whichever furnace we put in the crawlspace, it can send heat (or should I say processed air) down the same paths.

Electric
Next came the electric stuff. I started by removing the thermostat and the trigger cable from it to the furnace. We don't know if we are going to retain that thermostat, nor are we sure it is going back in the same spot. Either way, it was a standard 5-wire control cable, so re-installing it or doing net-new is very little difference in cost. Having it all out so we could make decisions was worth the few minutes.

Obviously, a gas furnace still needs electricity to run the squirrel-cage fan, so I flipped the breaker for the furnace and disconnected it at the furnace end. I pushed the wire through the hole in the floor. Next, I disconnected the ground wire which the prior installer had connected to the gas line. While I would like to accept that this was safe, it really didn't feel like it. I think we will run a fresh 3-wire line if we reuse this furnace. Since an electric furnace requires 220V, that would also get a new line.

Gas
gas and electric shutoffs
All that remained was the gas line. After our little excitement a few years ago when Zed went crashing into our gas water heater at the old house (See One of the Many Joys of Home Ownership), I was not exactly wanting to do this part. Our pipe-fitter (also licensed plumber) friend offered to do it. So, Lana came by, shut off the gas at the meter, disconnected the gas line under the house where it bent up to the furnace and capped it off. Together we push/pulled the disconnected end up through the hole in the floor, leaving the furnace completely disconnected.

Considerations
We have a curious cat, so we are leaving the furnace pretty much where it was while we figure things out. Otherwise, we would have a cat stuck in the heat system as fast as you can ask "where'd the cat go". Meanwhile we have some things to figure out. The furnace was manufactured in August 2019. The house was vacated around a year later, so the folks who installed the furnace got one winter out of it. We bought the place last year and used it this past winter so this furnace has 2 years of use. There are at least 15 more in it. Knowing that natural gas prices will continue to climb, eventually this furnace will be more expensive to run on a month-to-month basis than an electrical one, but that isn't the case today. Today, a gas furnace is considerably less expensive to run. A heat pump is different, but we don't have one of those. Adding a heat pump to this system would be a $8-10k upgrade. We are not in a financial place to do that. Assuming either system can reuse the existing hot side, and routing the cold return from the hole in the floor will be effectively the same, we can eliminate those from the decision: its a wash.

August 2019
So, we are looking at electric-only or gas-only. Since this furnace is practically brand new, and in-hand, it probably makes the best financial sense to keep it, and install it under the house. Before we jump in, we need to route the gas and the exhaust -or- get 220V under there and set up the trigger cable. The gas is already right there. We may need to add some flex-pipe depending on where the furnace ends up, but the gas part seems easy. For 220V, we have multiple extra slots in the breaker panel, so it would just be a matter of adding a breaker and threading the wire through. I know how this furnace was set up so re-introducing the trigger wire is easy. I don't know anything about a new furnace, so while it is probably not that hard, it would be something new and potentially challenging. Last, the gas furnace needs to have the exhaust routed. The chimney goes through the floor, but we don't know if there is a clean-out at the bottom. That would tell us if the chimney is hollow below the floor (we think it is), and therefore available for having the exhaust run into it. This mystery needs to be resolved if we are going to retain the gas furnace for a few years. I think, for the bigger financial picture, it makes sense to relocate this furnace rather than spend even $1500US on an electric one. I cannot imagine routing the exhaust would cost half that, and the 220V routing versus gas routing is a cost-wash. So, really it comes down to the cost of the exhaust versus the cost of a new furnace plus the increase in monthly cost to run the electric... even if we could sell the gas furnace to offset some of the initial outlay. I think, the gas makes better cost-sense. Once we make a determination about the chimney, we'll know.

Well, that's it for now. thanks, as always, for following along-