Today's post covers the pitfalls of simply swapping out parts hoping you find the thing that doesn't work along the way.... by way of describing how we got T's A4 running again. You may remember my mentioning the purchase in this post from April.
First, I should explain how his A4 got it's name: Nemo. It is named after the orange fish cartoon character because the B5 A4 had the big driver outside mirror and the tiny passenger side mirror - just like Nemo and his little fin.
Coolant Leaks
It all started with a persistent issue with the Nemo's cooling system. This model, known as the "B5", has many of the same engineering ideas that the TDI engine in Hapy and Flash possess. There's the hard-to-reach plastic outlet flange with a coolant temperature sensor in it. It has the thermostat stashed under a plastic housing. Either or both of these can fail during an overheat. In Nemo's case, both failed. So, we replaced them. T had filled the engine with tap water (to save his wallet and the environment from leaking coolant) and took a test drive around the neighborhood. He drove until the thermostat opened up and then drove it back up onto the ramps to check for leaks and to drain and fill the cooling system when it cooled off... and then it wouldn't start again.
We discovered that the coolant temperature sensor wasn't good (Check Engine Light throwing a coolant temperature code), so we replaced it. That sensor was bad out of the box (thanks Napa!), discovered through a check engine light code and the temperature on the dashboard showing over 150*F first thing in the morning after sitting in the driveway all night. That needle shouldn't have moved. So, we got another one from the only-on-the-east-side Discount Auto Parts. With that replacement, we no longer had a check engine light and the temperature needle was appropriately sitting on the peg when we first turn the key to run. Perfect. Except it still wouldn't start.
Could It Be Fuel?
First, T thought it was fuel-related, so he started with the fuel filter. These are half hidden around the fuel tank, so you need to partially lower the tank to get to the filter. Fun. Because they are so hard to get to, they're not replaced regularly enough, so this looked like a pretty likely issue. Even with the filter replaced, though, it wouldn't start. We did notice that the fuel pump wasn't as loud, so that filter probably needed a change. Next, we tried to check the fuel pressure with a tool borrowed from AutoZone. Unfortunately,the A4 1.8 Turbo engine fuel rail does not have a facility for testing the fuel pressure, but we were able to produce a stream of fuel at the injector rail once we disconnected the fuel line. So, the pump was pushing fuel, just we couldn't tell at what pressure. At this point, T elected to buy a new fuel pump as a precaution and replace the injectors. The pump hasn't been replaced yet at this point, but we're still not running. We could smell fuel during the start attempts, so we started thinking maybe it wasn't fuel... maybe it was spark.
Could it Be Spark?
We started with the basics: are any of the fuses related to engine control blown? No, none of them are blown, and they were all the right amperage for the fuse-box numbered spot based on the owners manual. How about the spark plugs? Ew, they looked gross, so we replaced them with a set of Bosch, the same manufacturer of the plugs we pulled. I know spark plugs are a religious thing. I tend to get plugs from manufacturers that are from the same country-of-origin as the car, so Bosch for German, NGK for Japanese, Champion for US... it's worked so far. I'm sure there's a "right" way, but with all the religious fighting, the "right" way has been lost in the noise. Anyway, new plugs didn't do it.
So, we tested the coil packs. At this point, one of T's friends was over, and he found a site on his phone that detailed the correct resistance range between the various pins on the coil packs. All packs were within the right range. If I learn the site we used, I'll post it on here.
Then, I found a mention on the Audizine site that the crank position sensor (CPS) can fail, but not trigger a check engine light. When this happens, the engine won't start because the computer doesn't know when to send a fire signal to the corresponding coil pack. Makes sense. So, I ordered an OEM one from AutohausAZ. The removal of one of these is a bear if you don't remove the oil filter first. With the oil filter out of the way, it's easy with a small Allen wrench. With it in the way, it can come off, but getting a wrist in there with an Allen key can test your patience. The new CPS didn't make a difference though. After our experience with the bad-in-box coolant temperature sensor, I was not convinced the CPS swap was a success.
We pressed on. The Audizine posts also described simply re-setting the ECU by removing a cable from the battery. Yeah, that didn't work, but I discovered that the ECU on this A4 is not the original, which implies that maybe the PO chipped the car and didn't share that. Or, maybe, he had a similar issue, fried his ECU and bought a junkyard ECU. That's not a bad thing, necessarily. It's just one more variable.
Ultimately, the issue was a bad ground for the bar that runs along the coil packs. In this particular A4, there was a separate ground wire run from the negative post to 2 bolts, one on each end of a metal bar. Over time, they had loosened up. Once they were tightened down, the car fired right up. To be fair, the coil packs are now throwing codes, so they will need to be replaced, but the car runs again.
That's today's adventure. Thanks, as always, for following along-
Tuesday, September 25, 2018
Tuesday, September 18, 2018
MGB Gets Sound, Version 2
In a prior post, I'd described my initial work on getting a stereo into the little MG. Today's post covers the second step in the process: replacing the front speakers.
Ugh with the Old
The MGB delivered with small speakers mounted in the doors. With a black interior, one could say that they disappear a little bit into the black door cards, but I'm not one of those people. I think the interior of the MGB is a little busy for it's size, and having speakers, patterns, a door pull, window winder and a door latch (with lock) all jammed into such a small space makes the doors look cluttered. Since the door is so small, the speaker can't be very big either, so the stock speaker is a 4" round. For the amount of road noise when driving, that speaker is really only good when you're sitting still. Preferably with the engine off. Since at least one of the speakers in my little car was blown, I decided to move right into version 2 of the sound system: Getting better front speakers.
Location
Since I didn't want the speakers in the doors for clutter and size reasons, I had to look elsewhere for placement. The MGB is tiny, so there aren't a whole lot of options, especially options that are balanced between the driver and passenger sides. I spent some time twisted around so my head was in the footwell, holding a speaker in various angles and locations to see if I could find a spot where it was out from the driver's feet, but also not creating a weird balance issue with the passenger side. I concluded that if I could get the speaker to stand almost on edge along the outer rails, it could mirror driver to passenger sides while staying out of everyone's feet. I could imagine a piece of wood or something to hold it up, but I decided that the angles and cuts to make a true enclosure would be quite a bit of work. So, how to mount so it looks like a quality job?
Enclosures
I hit eBarf looking for speaker enclosures for footwells and rear decks. There are a surprisingly large set of options and colors out there. I bought a pair of these from Diablo Royale, and while there were a little expensive at $60 for some molded plastic that lacks a rear panel as well as a means of attaching to the car, they were up to the job. While I was on eBarf, I got a pair of these steel mesh speaker covers from the Music Masters since the pair of 6-1/2 inch speakers I had somehow had lost their covers over multiple moves.
Measure, Cut, Trim
I collected the speakers, the enclosures and the speaker covers onto my kitchen table and planned the work. First, I ran thick blue painter tape along the edge of the flat round face you see in the picture above. This gave me a clean write-able surface to mark my cut line. I removed the foam ring from the speaker and drew along the inner edge with a pen onto the tape. This inner edge matched the edge of the inner lip of the speaker. I moved outside with a hand drill and my Dremel (cutting tool attached). I drilled a pilot hole near the inside edge of the pen line and then cut along the inner edge of the line with the Dremel. The hole was fairly close to a fit and after a few cycles of test fit - grind with the Dremel - wipe down the plastic shavings - test fit, the speakers fit snug in the holes.
While holding the speaker in the hole, oriented as I wanted them, I drilled a pilot hole through the mounting holes, and through the enclosure. Ideally, I would have used long tipped pen, or re-used the foam, but I wanted to make sure the holes were exactly right, and the foam holes were much larger than the tiny holes in the speaker frame. After verifying that the speaker held to the enclosure with some small wood screws, I shifted focus to the steel mesh speaker covers.
Speaker Covers
The speaker covers are a 2-piece design with a hidden mounting ring inside the cover. The cover itself is pressed onto the mounting ring, hiding the means by which it was fastened to the speaker. In my case, this is a good thing.
The holes in the mounting ring aligned with a set of holes in the speaker frame by angle (one each every 90*), but they ran along a greater diameter setting them about 3/8 of an inch away from the holes in the speaker frame, so I couldn't just connect them. I tried to use small zip-ties, but that wasn't working, so switched to bailing wire. Yes, I have bailing wire twist-tying the covers to my speakers. I cut short pieces of wire, twisted them super-tight and then pressed the extra wire between the outer edge of the speaker and the inner edge of the mounting ring. With the ring attached, I could still fit the small wood screws through the mount holes so I was good to go.
Mounting
With steel mesh covers installed, I was ready to fit the enclosures into the foot wells. For this, I used 2 3-inch Phillips head screws, set through the enclosure but hidden by the installed speaker. With the screws in place, I set the enclosure where I wanted it, and used the sharp points of the screws to mark my drill pilot holes. I drilled a tiny pilot hole, tested the fit and then widened the hole to fit the screw thickness. Before I did the final mounting, I cut the old speaker wires at the door jams and fed the wires through the enclosures. The driver side wire was long enough to hide its route. The passenger side, however, is still visible, but I'll solve for that in version 3. With the wires dangling through, I tightened the enclosures down snug. Be careful not to over tighten, or the enclosure will warp and the speaker will no longer sit flush.
I crimped female wire connectors onto the respective speaker wires, and plugged in the speakers. With the speakers wired, I carefully fit the speakers and threaded in the wood screws. Last, I set the steel mesh covers on so they were uniformly set on the mounting ring.
Testing
The proof of the location choice can really only be tested with sitting in the seat and firing up the sounds. In the picture on the right here, you can see my grubby jeans and work boots easily fitting in the passenger seat, without my seating space compromised. I could have slid the seat back on the rails for more room, but that would have been cheating the picture. I don't drive around in those boots, though, so this actually looks worse than it really is.
The speaker just disappears into the driver side. I switched into a pair of sneakers and tried out the pedals. I had no interference at all. I couldn't tell there was a speaker there.
The true test, once we demonstrated that we could sit with the speakers in place, but not on... was firing up the stereo. This time, Boo and I tested it with a live CD by The Band. We found that because the rear speakers are so much closer to our ears, we had to fade-to-front a bit. Once we found that balance, though, we were surrounded by music, and didn't need to play it very loud to feel it's presence. Even at talking volume, we were wrapped in sound.
That's it for today. I'm not sure when I'll get after version 3: adding the sub-woofer. I think that will depend on what else I get working on. For now, the intense heat is over and we're enjoying our last few weeks of autumn before the rains really set in, putting the convertible in the garage for the winter... and corresponding winter projects.
Thanks, as always, for following along-
Ugh with the Old
 |
| not my ride, but a fair example of "before" |
Location
 |
| Diablo Royale enclosure |
Enclosures
 |
| kitchen table prep |
Measure, Cut, Trim
 |
| cutting |
While holding the speaker in the hole, oriented as I wanted them, I drilled a pilot hole through the mounting holes, and through the enclosure. Ideally, I would have used long tipped pen, or re-used the foam, but I wanted to make sure the holes were exactly right, and the foam holes were much larger than the tiny holes in the speaker frame. After verifying that the speaker held to the enclosure with some small wood screws, I shifted focus to the steel mesh speaker covers.
Speaker Covers
 |
| 6-1/2" covers |
The holes in the mounting ring aligned with a set of holes in the speaker frame by angle (one each every 90*), but they ran along a greater diameter setting them about 3/8 of an inch away from the holes in the speaker frame, so I couldn't just connect them. I tried to use small zip-ties, but that wasn't working, so switched to bailing wire. Yes, I have bailing wire twist-tying the covers to my speakers. I cut short pieces of wire, twisted them super-tight and then pressed the extra wire between the outer edge of the speaker and the inner edge of the mounting ring. With the ring attached, I could still fit the small wood screws through the mount holes so I was good to go.
Mounting
 |
| driver side installed |
 |
| passenger side installed |
Testing
The proof of the location choice can really only be tested with sitting in the seat and firing up the sounds. In the picture on the right here, you can see my grubby jeans and work boots easily fitting in the passenger seat, without my seating space compromised. I could have slid the seat back on the rails for more room, but that would have been cheating the picture. I don't drive around in those boots, though, so this actually looks worse than it really is.
The speaker just disappears into the driver side. I switched into a pair of sneakers and tried out the pedals. I had no interference at all. I couldn't tell there was a speaker there.
The true test, once we demonstrated that we could sit with the speakers in place, but not on... was firing up the stereo. This time, Boo and I tested it with a live CD by The Band. We found that because the rear speakers are so much closer to our ears, we had to fade-to-front a bit. Once we found that balance, though, we were surrounded by music, and didn't need to play it very loud to feel it's presence. Even at talking volume, we were wrapped in sound.
That's it for today. I'm not sure when I'll get after version 3: adding the sub-woofer. I think that will depend on what else I get working on. For now, the intense heat is over and we're enjoying our last few weeks of autumn before the rains really set in, putting the convertible in the garage for the winter... and corresponding winter projects.
Thanks, as always, for following along-
Tuesday, September 11, 2018
Deck Transformed
We have a brief break from the oppressive heat waves, so I attacked our deck. Today's post has little car content. I just wanted to post on this since it took so long, and therefore got in the way of generating car content. For those who still remember, my condolences to the families of the victims of the 9/11 attack.
Power Wash
This journey started with a basic powerwash. We knew that with the change in the weather, any remaining moss from the prior year will quickly grow back and make the deck as slippery as ice with the first rain. To avoid the moss quick return, we simply powerwash it. Boo bought one a few years ago, but I had the time, so I took a turn this year. Things to remember for next time: check that you have the blaster tip set to fan and not cone before pointing it at anything, and it's okay to start with a low power setting first, if you aren't sure. I didn't do any permanent damage to the deck, but a few boards got chopped a little bit by the cone on high pressure.
Once the deck was clean, we could see that lots of the stain had seen better days, and some decking was going to need some holes solved. We didn't want to lay out for a whole new deck surface, nor did we want new boards to look all new and shiny next to the really old ones, so we decided to reduce the footprint size and use some boards we removed as donor material to patch holes.
Pry Apart
So, the deck has seen better days. It was kind of neglected by the prior owner the last few years she lived there, and we haven't done anything to it since we moved in (See Move Again for that fun). Instead, the boys have used it to work on skateboarding antics. So, we have a few holes to go with some rotting boards. I got a 24" wrecking bar from HomeDespot and removed around 10 planks, including the 4 rows closest to the house. We decided that we could live without the first 2 rows and still have that edge of the deck place-foot on the patio. This took a little finesse to pull up a board in the middle of other boards without meaningfully damaging either. I found that placing the wedge-end between the boards, with the angle facing the one I intended to remove, and applying steady leverage, the nails would give a little bit. By repeating the process, the end would start to lift from the deck enough for the wedge to get underneath and then I could work down the plank, lifting it, with the nails still in it.
Put Back Together
I collected all of the boards and removed the nails. During removal, I considered the condition of the board. A few were rotted from end to end. Others had a hole and a couple had both holes and rot spots. I selected boards which just had a hole from the skateboarding and cut them to fit the gaps created during removal. Because we were shortening the deck by 2 planks, I had more material than gaps, in theory. We really didn't want to use new wood, if it could be avoided, because we knew that the new boards would not blend as well. I ended up with enough material to fit the gaps, and had a few feet of left over viable wood. I could tell during the re-install, though, that I would need to replace more boards next year or the year after.
Sanding
 Once the deck was gap-free, it was still an ugly red-ish gray deck. While I could have just painted it, I wanted it to look better, especially after I'd already put in around 8 hours on it. So, I grabbed my belt-sander and a stack of 100-grit belts. I would have used something with a more coarse grit, but I had 100, so I used 100. Plank by plank, I sanded the loose red off, and got down to where most of the board was its natural creamy color with some red streaks. This took 6 hours, and it's very dusty. Like any paint job, though, the top coat is a reflection of the work performed underneath. It was unpleasant work, and had me walking funny for 2 days, but the final result showed that effort.
Stain
I let the deck sit for a week after sanding it. In part, this was because I had a job to get to, part of it was because I could barely walk, much less crawl around and part of it was other distractions. Regardless, after a week of high temps and dry winds, the deck was ready to stain. So, we broom-swept it a couple of times and went over it with a leaf-blower a couple of times. Still, there was a thin film of dust, evidenced by the dust on our clothes after staining.
We started at the far end, working one plank at a time, and getting the hard-to-reach spots first. As best we could, we would finish a small area on a board with the brush stroke going from the unpainted into the painted area, eliminating brush-marks. With Boo and I working this part together, the deck was stained in 4 hours. This included the front facia, but like the rest of the job did not include the bench nor the fence. For future reference, we used semi-transparent "chocolate" stain (this stuff and referenced in the picture), and the deck required a full gallon, leaving about 1 cup in the bottom of the can for touch-up.
That's it for today. After staining in the heat, we spent the rest of the weekend relaxing... except for helping T with his A4. I'll probably post on that at some point. Anyway, thanks for following along, and there's more car/bus content coming.
Power Wash
 |
| post power-wash |
Once the deck was clean, we could see that lots of the stain had seen better days, and some decking was going to need some holes solved. We didn't want to lay out for a whole new deck surface, nor did we want new boards to look all new and shiny next to the really old ones, so we decided to reduce the footprint size and use some boards we removed as donor material to patch holes.
Pry Apart
 |
| mid-way thru pry-apart |
Put Back Together
 |
| mostly sanded |
Sanding
Once the deck was gap-free, it was still an ugly red-ish gray deck. While I could have just painted it, I wanted it to look better, especially after I'd already put in around 8 hours on it. So, I grabbed my belt-sander and a stack of 100-grit belts. I would have used something with a more coarse grit, but I had 100, so I used 100. Plank by plank, I sanded the loose red off, and got down to where most of the board was its natural creamy color with some red streaks. This took 6 hours, and it's very dusty. Like any paint job, though, the top coat is a reflection of the work performed underneath. It was unpleasant work, and had me walking funny for 2 days, but the final result showed that effort.Stain
I let the deck sit for a week after sanding it. In part, this was because I had a job to get to, part of it was because I could barely walk, much less crawl around and part of it was other distractions. Regardless, after a week of high temps and dry winds, the deck was ready to stain. So, we broom-swept it a couple of times and went over it with a leaf-blower a couple of times. Still, there was a thin film of dust, evidenced by the dust on our clothes after staining.
 |
| finished deck, drying |
That's it for today. After staining in the heat, we spent the rest of the weekend relaxing... except for helping T with his A4. I'll probably post on that at some point. Anyway, thanks for following along, and there's more car/bus content coming.
Tuesday, September 4, 2018
MGB Gets Sound
Today's post starts my journey for sounds in the convertible. For my US readers, happy day-after-Labor-Day and welcome to the most productive period of the calendar year (which ends with Thanksgiving). I suspect my productivity with my project cars will be affected inversely, so my stream of posts may see some breaks along the way. On to the music-
Humble Beginnings
Many years ago, I lived in a really sketchy area of Las Vegas. It was a 4-plex with 2 apartments up and two on the street level where our apartment was. We had bars on the windows, and crack vials greeting us every morning when we left through the heavy steel door, but the rent was cheap. And it was big. There were some folks living upstairs from us who decided to have a party with a punk band one night. As thick as the steel door was, the floors weren't, and we could clearly tell where the drummer was set up by watching the ceiling shake with his bass drum. As the clock ticked by, the band didn't let up, and the size of the crowd didn't seem to be shrinking either. By 3:AM, we had tried getting the attention of the renters upstairs, but our request to settle down was greeted with a middle finger. So, we went a different way. I took my bass cabinet, and set it on the coffee table, pointed at the ceiling underneath the center of the vibration. We routed the headphone jack from our stereo through an instrument patch cable into the bass cabinet input and played a version of "Passenger" that featured some HUGE Phil bombs (them be big blasts from the Grateful Dead bass man for those not in the know). By the second Phil bomb, the band had stopped. We had made our point... and I planted a seed in my brain for incredibly loud, but clean music. Could I do that in a car?
To Sub or Not To Sub
In thinking about sound in a convertible, you need to consider that the wind and road noise, even with the top up, is much louder than a tin-top. Once the top is down, the wind consumes sound. Of the various frequencies, the high-end cuts through, but the low and mid-range disappear. For a bass-lover, this creates a worst-case scenario: no lows. So, no Phil Bombs. For a larger convertible, like the caddy in the picture here, building in a sub-woofer is kind of a no-brainer. You gotta get that bass. With this little MGB, though, space is such a premium, how can a woofer get added and have it perform? We will start with a 10" sub, and then build a custom box.
Planning a Box
There are a few free box configuration calculators on the internet, and some are very advanced (like this one), asking questions I don't understand. I stuck with something simple (this one): take the manufacturer's recommended enclosure space and build a box with that area in mind. The sub I'm looking at (JL Audio) requires .65 cubic feet of enclosed space, which is roughly 18" x 11" x 9". A box that big needs to go in the boot since the roadster has effectively no free space in the cabin. I figured that if I could keep it as tight against the trunk front wall (front-is-front), I could still manage a serviceable trunk.So, I started with a rectangle concept.
Apparently, directing your sub towards the rear creates the greatest decibels, so I incorporated that into the plan, pointing the sub towards the open trunk. I had intended to have 6x9 speakers in that area, though. From some older posts, you've probably seen the horizontal openings I left in that wall when I patched the PO hack-up. I wasn't able to duplicate that pattern while fitting a box because of the location of the gas tank vent lines. So, I modified the plan to include 6x9's mounted vertically to the front of the box. To allow for the sound to make it into the cabin effectively, I'll need to cut more of that wall.
I tried various plans, each with cardboard, cutting and shaping to fit into the trunk, between the hinges and under the gas vapor pipes. With each concept, I would test fit into the trunk and test the operation of the trunk lid, and consider how I was going to address the trunk light. When you think you have it, double check every measurement, and confirm the cardboard box sets as you envisioned. Then, buy a couple sheets of 2' x 4' 3/4" MDF, a bottle of carpenters glue, and some wood-screws that have at least an inch of thread and about an inch of no-thread closest to the head. The no-thread allows the screw to pull the sheets together while being tightened.
Build-a-Box
The actual cutting, drilling and glue/screwing together of a box sounds so simple. If you have good woodworking tools, it probably is. I have a circular saw, a hand drill and a jigsaw. Ideally, you would have a table saw a drill press and a band or scroll saw. The idea is the same, though with the hand tools it can take days versus hours. You've been warned. Anyway, take your confirmed measurements from the cardboard plan. With these outside dimensions, you need to account for the width of the MDF. Remove twice that width to account for it; and remove it from the shortest sides. For example, my box is wider than it is tall and taller than it is deep. So, for all dimensions which intersect with the sides, I removed 1-1/2 inches since this is the smallest piece. I also removed 1-1/2 inches from the long side. This way, the longest pieces don't have the visible seams. The research I did shows that this is the recommended way to do it. Double and triple check the measurements and mark which side of the line you want the saw blade to run against by marking an "X" on the waste side. Then start cutting. At the earliest opportunity, start test fitting pieces to each other, and then in the trunk.
Once everything is cut for size, test fit the whole box. Shave what needs to be shaved. Re-cut pieces if you need to. Then, plan your speaker hole(s). Since I don't have my sub-woofer in-hand yet, I did not cut or attach the rear side. I did plan for and cut the holes for the 6x9 speakers so they sit vertically, about 1/2" from the edges. Once they are front-mounted, there will be less than 3" protruding into the box, so I will add baffles around them, maximizing the area containing the sub. To assemble the box, pre-drill each mating side with 2 or 3 holes for the screws. Lay on the glue thick, set the pieces together and thread the screws in. The glue is really holding the sides together; the screws are really there for support so don't do as many as I did, it was way too much work and for no gain.. I assembled all sides except the rear and test fit against the trunk wall. The fit is just what I'd aimed for.
I stopped work on the box at this point so I could get a version one of a stereo installed. This also provided me time to pull together money for an amplifier and a sub-woofer. When I get back to it, I'll document it here.
Head Unit
Regardless of whether I'm going to run a 5-channel amplifier or a 1-channel just for the sub, I need a stereo first. I looked at various units available on Crutchfield, but their site assumes that an MG can't fit a stereo that's deeper than about 4 inches. I tested that assumption with an old car stereo and it fit without issues. So, I ignored what Crutchfield said about fitment in the center console (I don't recommend ignoring them, they're pretty smart). Since this is a convertible, there is a higher probability of water getting near the unit. Also, there is the real problem with glare from sunlight. These are common problems with boat stereos, so I shifted my shopping to focus on boat stereos. This is when Crutchfield was very helpful; their reviews were critical. The JVC and Pioneer offerings were universally panned. The Sony (MEX-M70BT) had great reviews, plays all kinds of CD formats, includes hands-free Bluetooth phone call support, an iPhone app to control it -and- it is low-glare, marine, etc. All for under $120. Sold... to me by Crutchfield.
Version One
I wired both the always-on and switched power for the the stereo into an always-hot circuit, and set the stereo to auto-off 30 seconds after I remove the face. It's a convertible; I won't be leaving the face on it when I leave, but I don't want to drain the battery by leaving the ignition switched to run when I want to sit and listen to music somewhere. I can operate a power button regardless. I installed the 6x9's into the horizonal holes in the trunk wall, but ran wire long enough for me to plan an amp. I reused the existing front speakers, knowing that my 6-1/2" rounds will probably go into custom enclosures in the footwells... in a not-too-distant future version. This initial version was to get sounds into the convertible, while spending the least. With the stereo wired, speakers wired, antennae wired, it was ready to go, so I popped the positive cable back onto the battery and fired up the radio. Soundgarden always sounds good, but when playing through a new system, as the first song through that system, "Spoon Man" was just that much better.
That's it for today. I expect to get back to the speaker-box eventually. I think I'll be mounting the 6-1/2 inch speakers before that. I'm discovering that the driver door speaker was fried when I bought the car; now, I can hear it farting. Yuck, and... fade-to-rear. As always, thanks for following along-
Humble Beginnings
| it was kinda like this upstairs... |
To Sub or Not To Sub
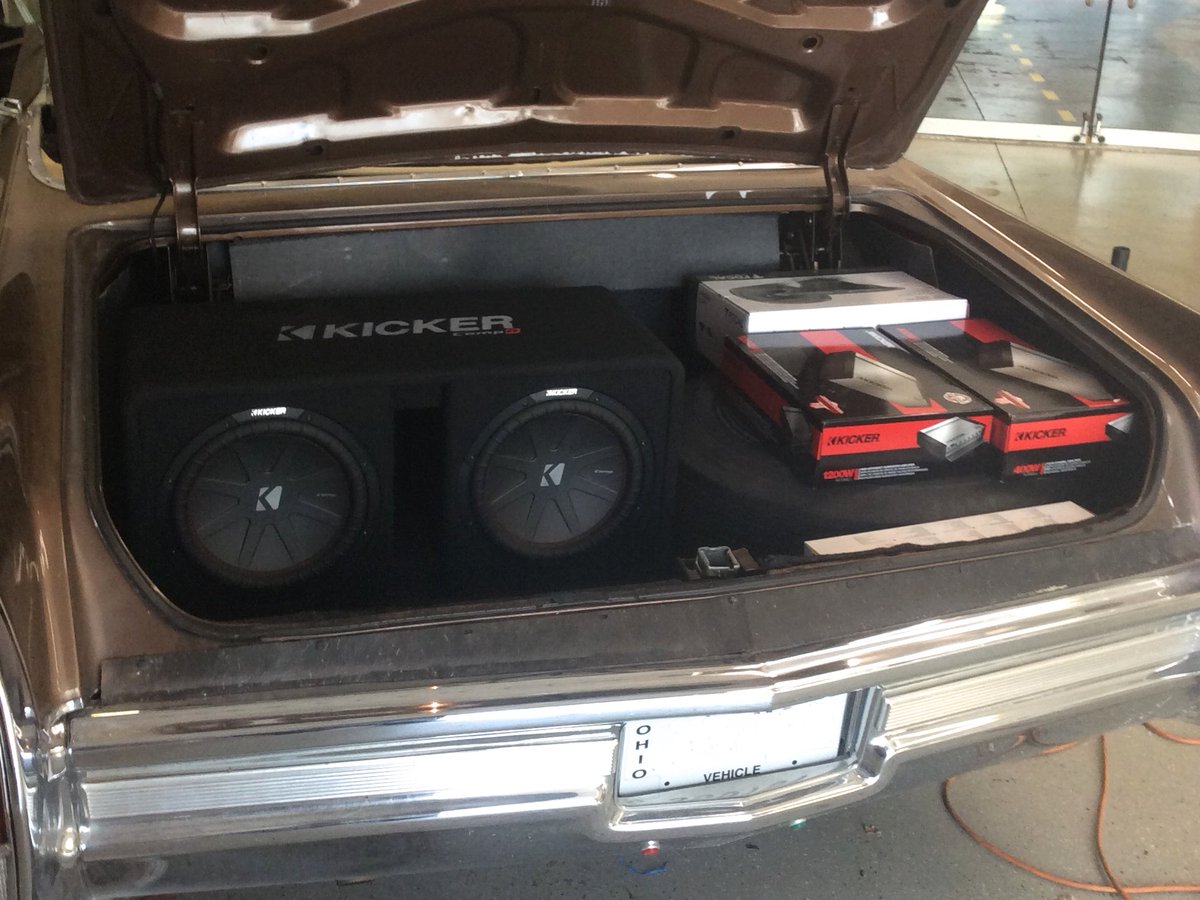 |
| You gotta get that bass |
Planning a Box
 |
| start with cardboard |
Apparently, directing your sub towards the rear creates the greatest decibels, so I incorporated that into the plan, pointing the sub towards the open trunk. I had intended to have 6x9 speakers in that area, though. From some older posts, you've probably seen the horizontal openings I left in that wall when I patched the PO hack-up. I wasn't able to duplicate that pattern while fitting a box because of the location of the gas tank vent lines. So, I modified the plan to include 6x9's mounted vertically to the front of the box. To allow for the sound to make it into the cabin effectively, I'll need to cut more of that wall.
I tried various plans, each with cardboard, cutting and shaping to fit into the trunk, between the hinges and under the gas vapor pipes. With each concept, I would test fit into the trunk and test the operation of the trunk lid, and consider how I was going to address the trunk light. When you think you have it, double check every measurement, and confirm the cardboard box sets as you envisioned. Then, buy a couple sheets of 2' x 4' 3/4" MDF, a bottle of carpenters glue, and some wood-screws that have at least an inch of thread and about an inch of no-thread closest to the head. The no-thread allows the screw to pull the sheets together while being tightened.
Build-a-Box
 |
| label the parts, directional arrows help |
 |
| way too many screws |
I stopped work on the box at this point so I could get a version one of a stereo installed. This also provided me time to pull together money for an amplifier and a sub-woofer. When I get back to it, I'll document it here.
Head Unit
 |
| the Sony MEX-M70BT |
Version One
I wired both the always-on and switched power for the the stereo into an always-hot circuit, and set the stereo to auto-off 30 seconds after I remove the face. It's a convertible; I won't be leaving the face on it when I leave, but I don't want to drain the battery by leaving the ignition switched to run when I want to sit and listen to music somewhere. I can operate a power button regardless. I installed the 6x9's into the horizonal holes in the trunk wall, but ran wire long enough for me to plan an amp. I reused the existing front speakers, knowing that my 6-1/2" rounds will probably go into custom enclosures in the footwells... in a not-too-distant future version. This initial version was to get sounds into the convertible, while spending the least. With the stereo wired, speakers wired, antennae wired, it was ready to go, so I popped the positive cable back onto the battery and fired up the radio. Soundgarden always sounds good, but when playing through a new system, as the first song through that system, "Spoon Man" was just that much better.
That's it for today. I expect to get back to the speaker-box eventually. I think I'll be mounting the 6-1/2 inch speakers before that. I'm discovering that the driver door speaker was fried when I bought the car; now, I can hear it farting. Yuck, and... fade-to-rear. As always, thanks for following along-
Subscribe to:
Posts (Atom)