Wednesday, December 21, 2011

Holiday approacheth

What is it about the holidays that seems to make time disappear?  I really didn't "do" Christmas this year, yet I don't have any more time than I did last year.  At least it doesn't feel like it.  Anyway, today, I'll give an overdue update on the state of the bus, and give an update on my elbow.  First things first...

Elbow Whacked
Between Halloween and last weekend, I've been up to the mountain to snowboard 9 times.  On my 6th trip, I was on my last run of the night at Ski Bowl when I caught a toe-edge and was too tired to kick through it.  Instead, I went down.  Now, we had received some pretty decent snow leading up to ThanksGiving, but its been cold and dry since, making the snow increasingly hard-pack and icy.  So, when I went down, it was onto concrete-hard snowpack.  I knew I was going down, so I tried to turn my shoulder into it so I could roll through, but I went down faster than I could react and landed on my left elbow.  It hurt.  It hurt bad.  Sharp pain.  Hard to fully straighten or bend my arm without pain.  Not good. I finished the run gingerly, filled a plastic bag with snow, and applied that to my elbow for the drive off the mountain.
A smarter, more aware person than me would have gone to a doctor.  Nope, I'm a dummy.  Instead, I went snowboarding again a few days later and fell on it again.  Same spot.  Ye-ouch.  Then, in an unparalleled case of extreme-dumb, I went one more time.  I didn't actually snowboard that time, but it wasn't for health reasons.  We got there late and by the time the kids were equipped and sliding, it was 8:PM, so I figured I'd just hold down a barstool at the lodge.  Now, nearly 10 days later, my elbow still hurts when I bump it, move my arm certain ways, and I can't lean on it.  I have a doctor appointment this afternoon.  If I broke it, he may need to do something severe to set it.   I may lose some mobility in my arm for the next couple of weeks, leading to a less fun week off between Christmas and NewYears (when I planned to snowboard at least 3 times).  Lesson learned.
UPDATE: doc says its tendon damage. Keep frozen peas on it, and take ibuprofen.  Apply kinesio tape to help reduce strain on the tendon. If I plan to snowboard, wear an elbow guard like skateboarders wear.  Great news.  Looks like I'll be back on the mountain next week afterall.  hahaha!!!!

Christmas Painting
Every family treats gift-giving differently.  Some enter arms-races to see who can buy the most stuff for someone else.  I never understood those folks, but I suspect they are the same folks who buy a BMW because a neighbor bought one.  Anyway, my family (my parents, brothers w/wives, sisters w/husbands) draw names for the one person for whom you will give a gift.  For years, I have painted a small (around 4" each side) ceramic house for my randomly selected family member.  These take a considerable amount of time, like 40+ hours, so I spend most of my time between ThanksGiving (when the names are selected) and Christmas trying to get the house completed.  Of course, there are all of the other tasks of life sprinkled in, other social expectations, etc, so that's where my holidaze go.  Since the name I received this year is not local, I should have already been finished and had it wrapped and on a southbound truck.  But, since the family gift exchange isn't until the 28th, I have a few extra days.  Thank goodness.  On the side here there's a picture of a couple I painted a few years back for my sister and her husband (different years, of course).


Bus not Busy
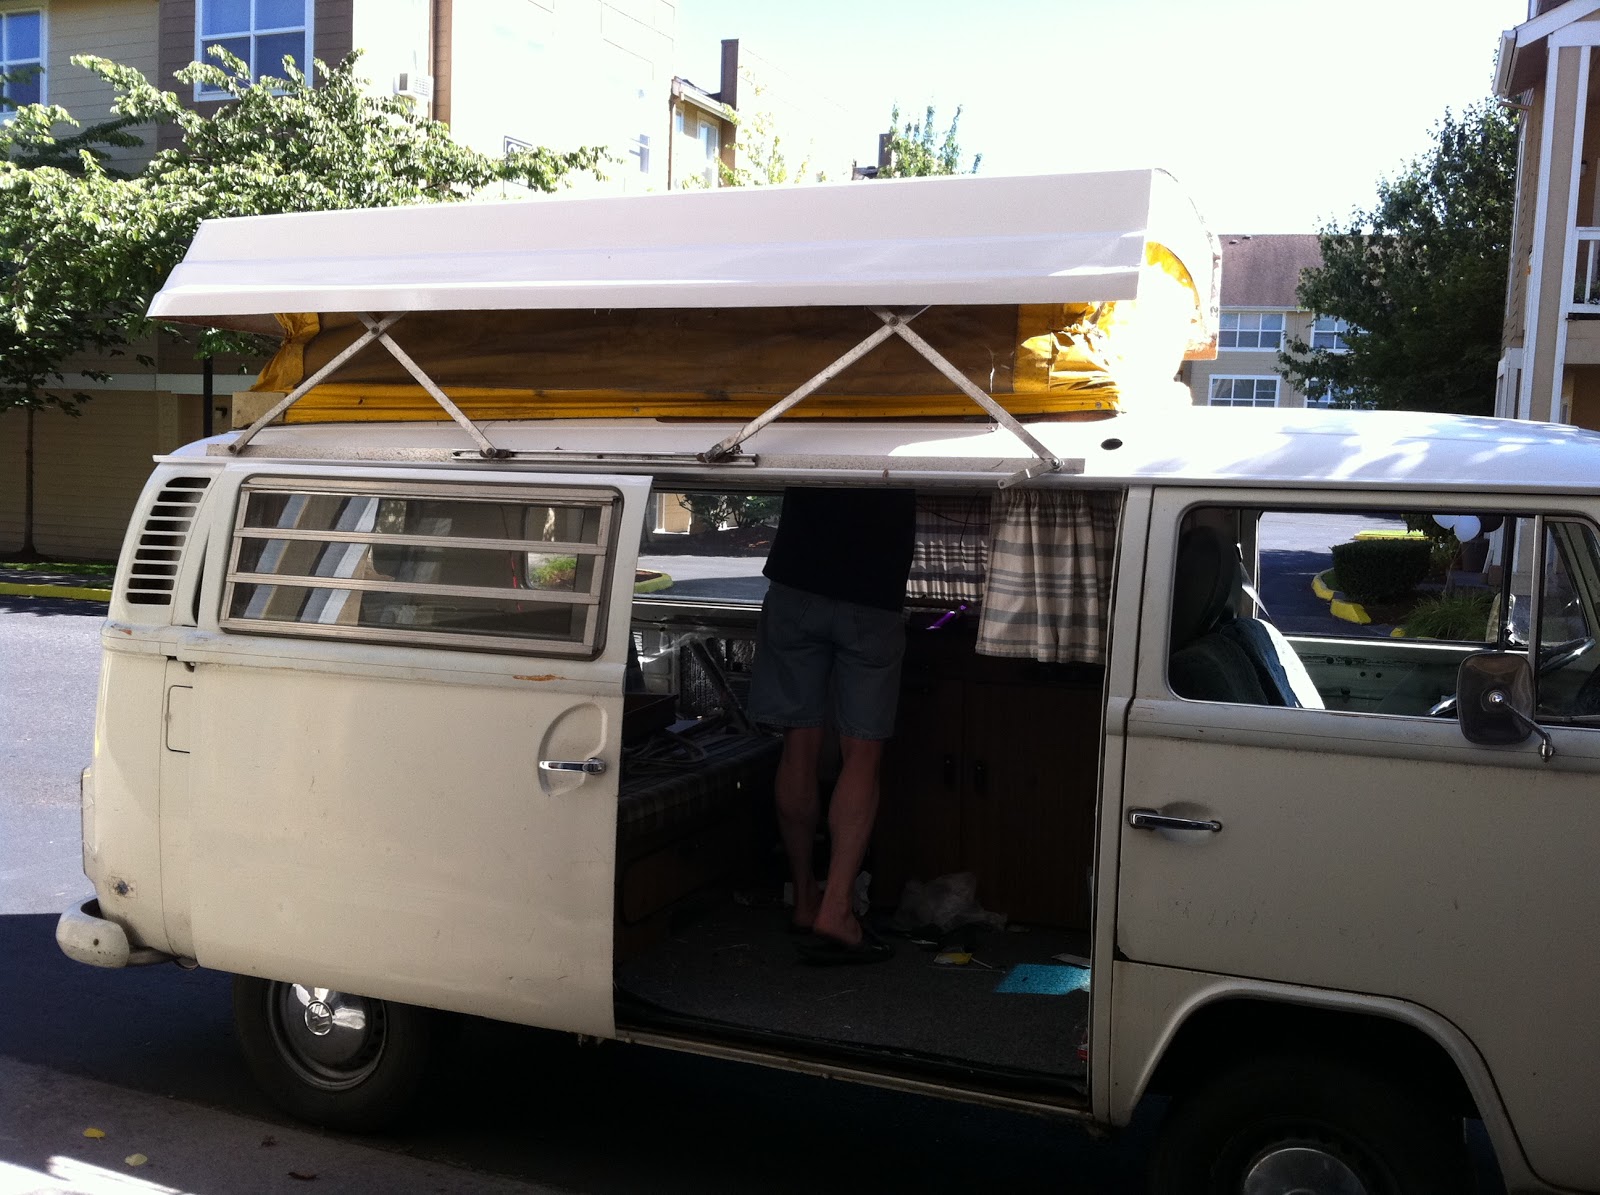
There isn't really a great deal of news on the bus-front.  I have the new ECU plug, so I could start the harness surgery at any time.  I just need some time.  With the ceramic painting time constraint and limit, I haven't been able to focus on the harness.  The bus still on jack stands (though he doesn't need to be), and the new snow tires are sitting on the cabin floor.  I've neglected him, though he's been in a warm dry garage, so it's not all bad.  I want to give him some good focus on Xmas morning.  Maybe slap on the snow tires and take a quick spin around the neighborhood with the Justin's harness.  We'll see.

I expect the painting to complete in the next few days.  So, I should be able to bang-out the harness by the middle of next week.  Depending on what the doctor says about my elbow, its still possible that I could be taking the boys up to the mountain in the bus before NewYears.  If the doctor needs to isolate my arm, I won't be driving, much less installing a newly repaired harness in, my bus.  Keeping my fingers crossed that my elbow is fine (just badly bone-bruised), my painting completes soon, and the harness surgery is quick and error-free.

As always, thanks for following along, and have a Merry Christmas.

Friday, December 9, 2011

Foiled Again

Cue a picture of a cartoon villain, twisting the ends of a long thin mustache...

what I got on top
early ALH on bottom
Harnessed
The engine harness I bought sight-unseen was not for an early ALH engine.  I take at least some of the fault here since the guy I bought it from called and we talked about what it looked like.  What we didn't talk about, though, was what the ECU plug looked like.  Since this plug is the only one I know is bad on my harness, that one was the single most important one for me to ask about.  I didn't.  So, when the box arrived, I opened it like a kid at Christmas.  I took one look at that plug and knew I'd struck coal in my stocking.

Now, the fun starts.  I was unable to return the harness because the guy I bought it from had already spent the money and indicated that I did get what he said it was: it is an engine harness for an ALH engine.  The fact that it is not an "early", and therefore doesn't fit is my problem.  Of course, this position wasn't articulated until after I'd returned the harness, so now I have no harness, and no money.  Sweet!  ... and just in time for Christmas.  The guy did say he would return the harness on delivery, so I'll have my useless-to-me harness again.  To eBay I go, I guess.  It does have a brand new glow-plug section in it, though, so that alone is worth $70.  Before I go that route, though, I'll look up the part number on the ECU plug and verify what models and years it fits.
UPDATE (2011-12-21): I did some googling and found the harness fits an AJM engine, not an ALH:  fits 1998-2000 Passat, Jetta and Golf with a highest HP output (130BHP) diesel engine available at the time.

I did buy a replacement ECU plug on eBay.  After all this time, I finally found someone just selling a plug with 3" of wire bundle attached.  I didn't want to perform this kind of surgery, but a $30 plug beats a $150 harness if the rest of the harness is good (which it should be).  Had I found a plug like this before, though, I would have gotten it then.  In 3 years, I'd never seen just a plug with some wire bundle for sale.  Good deal, great timing. I'll have to wait on that work until I finish my other Christmas time commitments, but I still hope to get the bus onto the mountain before NewYears.

Tires
As I write this, my studded snow tires are being mounted onto an extra set of 14" rims I got off Craigslist a couple of years ago.  They're black, so its almost like they were designed for snow tires.  Since they're 14" tires, though, I will be retaining my 52mph top speed in the bus for winter driving.  I'm certain this will frustrate other motorists as they try to speed past the beautiful countryside on their way to the lift lines.  Ah well.  I do have a set of 15" rims which fit the rear hubs.  If I had that harness money back, I could probably get a pair of 15" studded snows and increase my top speed... but only by a few mph.  Ultimately, my top speed is controlled by the high-rpm expecting 002 transaxle.  I'll address that next Summer.... if I have the money.  Or, I'll have another year to remind myself that the journey is the destination, and traveling at 50mph allows me a greater opportunity to make the most of that destination.  Later this winter, I will be chanting this mantra as I drive up Mt. Hood at 50mph, heading a line of Chevy Behemoth's and Ford Monstrosity's chomping at my rear bumper.  :)

Thanks for following along.

Thursday, December 1, 2011

White Friday

As I've mentioned before, my boys and I have a tradition we started a few years ago (Holding Pattern taking Hold) where we get some snow time during the ThanksGiving break rather than retail time.  On that first holiday weekend, we went on Saturday, but in the last 2 years, we've gone on the day after ThanksGiving.  The newsfolks (and far too many people, in my opinion) refer to that as Black Friday.  The ruckus leading up to ThanksGiving about what sales are where and who's going to have the biggest lines completely blots out the whole being thankful message of the season.  So, to give the sickening consumerism the finger, we get away from the stores, the televisions and the crowds (presumably) and head for the snow.

Departure
My boys slept in.  I told them I wouldn't wake them as a means of getting them to go to sleep ThanksGiving Night, but the excitement of going to the mountain on opening weekend was too much for them.  I finally awoke them around 9.  Since the lifts opened at 9:30, and we were still in Beaverton, we clearly were not going to be there for the first lift.  No matter; both of my brothers were going to meet us up there, and they both have little ones, so we figured they couldn't actually beat us there.  A quick-slam breakfast and we hit the road.

White Friday
We tried a weird longer route, but we got there by 11:15.  The traffic to the mountain was steady.  The climb up Timberline Hwy required chains.  The parking at the lot was to overflow and there were sizable lines at the lifts.  Considering it was considered the beginning of unbridled consumerism season, the turnout for White Friday was fantastic.  Then, came the conditions.  The snow was powdery.  The air dry, the visibility infinite and the winds still.  Perfect day for playing.  C got separated again, so we spent time looking for him at one point, but he wisely realized he was in the wrong spot and stayed put.  We met both of my brothers' families and visited in Wy-East, then headed down the mountain to Summit for some sledding before dark.  We ended the day saying our goodbyes in the Summit Lodge after hot coffee / cocoa.  Perfect White Friday.


I hope you take the opportunity to celebrate White Friday next year.  The retailers will survive without you, but can you survive the retailers without first giving yourself a break?  Go to the snow, play with your kids or your friends and breathe in the crisp fresh air.  The malls will be there for you later.


The bus progresses.  I'm waiting for a replacement engine harness so I can return the borrowed harness to Justin.  I bought some used snow tires too, so we'll be able to take the bus up to Government Camp / Ski Bowl this winter.  I'm not quite daring enough to try Timberline, but we'll see.  Thanks for following along, and I'll post again soon-

Saturday, November 26, 2011

Tank's Giving

Okay, horrible pun.  Guilty.  Still, I hope you all had a pleasant ThanksGiving holiday.  For those blessed with a 4 day work-stoppage weekend, I hope you were able to make the most of it.  I was able to celebrate White Friday with a large group of fellow non-consumers.  I'll talk about that another time so I can talk through how to put a fuel tank back into an early bay-window bus today.

Clearance
Before you do anything, you need to verify that there's nothing between the rear hatch and the tank compartment.  This sounds obvious, but the tank is deeper than you may think, so you need a clear shot through.  The stock wiring harness shouldn't get in the way, but if you have any customization (like, oh, I don't know... a TDI engine instead of he flat-four), you may have some wire-dangle issues.  Solve those.  Zip-ties are your friend.  Also, if your stock engine is still in, you can slip the tank around it, but everything above the heads must come off first.  That includes the intake, carb (or FI), filters (air & fuel), etc.  Its actually easier just lowering it out of the way like I described in an earlier post.  The actual removal of the stock engine is very well covered in the Idot's Guide.  If the engine is on the shop floor, make sure you have at least 1/2 of the left-to-right space clear from the floor to ceiling of the tank compartment back to the rear hatch.

slide along right side and rotate into place
Vector
Steering the tank through the rear hatch and into place is an exercise in patience.  Enter this step knowing you will have to do it many times, and you will not be unpleasantly surprised with an entire afternoon lost to wrestling your tank in.  Before you start, set the foam seal back into position.  On my TDI-powered bus, I needed to raise the right side (using my BusDepot bus jack) so I could get past the engine on the floor.
I sent the left edge in first and routed it around the engine into place.  Get the tank partway into the tank compartment and attach the level sender wire and the ground wire.  Then, the tank can settle into place with wiggling.  Slide underneath and check that you can't see the foam seal.  If you can, you can try to move it with your fingers from below, or re-set the tank.  Neither are fun, but both work.  Using fingers from below is faster, though.  You can feel when the tank is settled into place.

Assembly
Now, you can start re-connecting things.  I did them in this order: fuel filler hose, fuel vent line, fuel return line (mine re-uses one of the original vent lines), fuel feed line.  As I mentioned in an earlier post, I replaced my fuel filler hose with a bent section of steel pipe from the muffler shop.  I was able to find the right size Viton hose at CarQuest, but only in straight sections.  So, I cut 2 3" collars from the hose, and I use them to abut the tank to the bent-pipe and from the bent-pipe to the filler on the side of the bus.
wire it up before final placement
Re-use your clamps only if they were in nearly-new condition.  Otherwise, they aren't that expensive, but its better that than have one fail and cause leaks.  It is a major pain swapping those clamps after everything is back in place.  Last, the hold-down straps are cinched into place.  This is a little challenging if the engine is in the engine bay, but on the floor.  Since I put a heating unit in my engine compartment, and ran the air hose forward along the left side, it really gets in the way.  Still, there's a washer and a 13mm nut (you need both).  Use a deep socket and put a vice grip on the strap so it doesn't torque as you tighten.

That's it for today.  We had a great White Friday, and I'll post about that soon, as well as the engine install headway.  Thanks for following along!

Tuesday, November 22, 2011

Taste of Winter

I haven't really been paying any attention to the weather beyond the Great Pacific NorthWest.  Like so many folks, I get caught up in what's happening in my life or immediately around me and just don't look up.  So, for those of you suffering with floods, power outages, freak freezes or blizzards, I hope your troubles end soon.  For those of us in the Great Pacific NorthWest, Summer switched to Fall and then to Winter rather quickly.  I'm going to talk about my trips to the mountain over the past few weeks today, and take a short break from my postings about the bus.

November Snow
view out bar window
Mt. Hood is home to as many as 6 different ski areas.  At its peak, there is a glacier providing a surface for sliding nearly all year 'round at Timberline.  Sliding on the glacier (Palmer Field), though, is really not that great, unless you like sliding on a sheet of ice pellets.  Yuck.  Still, if you want to slide in the first week of  November, you have few alternatives.  We have been fortunate, though, and the top of Mt. Hood got a bunch of snow the last week of October and the first week of November, so it wasn't all ice.  Boo and I only took a couple of lifts before they closed them for the day, but we got to try out our new passes and her new skis.

Timberline Lodge
The ski-part of the resort wasn't really open yet.  We walked through Wy-East Day Lodge on the way in, and it was still actively being remodeled.  The entire food court area was a construction zone.  So, once the lifts closed, and we took our final slide down, we visited the main lodge.  The main lodge was in the movie The Shining as its greatest claim to fame.  It was built as part of a WPA (Works Progress Administration) in 1936.  The woodwork is pretty amazing, with exposed timber structures across the ceilings.  There is a massive central smokestack serves 8 fireplaces on 2 floors.  We hit the Ram's Head bar on the upper floor, found a table by the window and watched the snow.. with a couple drinks.  Great way to end a day of sliding.

7 Days Later
Timberline Hwy
A week later, we took the boys up for a day on the mountain.  Unlike the prior week, this time the wind was so strong at the top of the mountain, Palmer Field was closed.  In fact, the only open stretch of snow (and corresponding lift) was the bunny slope between the parking lots.  Had it been mid-season, and SkiBowl was open, we would have gone there.  Instead, since the season wasn't even open yet, we played on the bunny slope.  C strove for the highest number of times around and counted 29 runs in the 2 hours we were there.  Clearly, C got very comfortable with his new skis.  T used his old board, but felt like he was back to mid-season form by the end of the day.  They shut off the lifts at 2:30 again.

Uno Mas
The following Saturday, this past weekend, Boo and I went up again.  This time, Timberline had a 54" base including over 10" of fresh powder.  Almost half of the runs were open and one of the other major resorts (Meadows) opened.  The opening of Meadows probably accounted for the light crowd at Timberline.  The snow, though, was incredible and the visibility was fantastic.  I hadn't really seen much of Timberline's runs, and even now I've only half.  Still, the sliding was amazing.  I fell a bunch of times, so I was clearly trying hard enough.  After 3 hours, my legs were burning.and I had to call uncle.  It wasn't until I het the gym yesterday that the pains finally went away.

White Friday
looking down the valley near Govt Camp
In years past, my boys and I would celebrate the Friday after Thanksgiving by going to the snow.  We call it White Friday, in a response to the Black Friday capitalism-on-steroids media circus which seems to lock-grip so many Americans.  Rather than "fighting prices", we'll be fighting gravity.  I strongly encourage you to do the same.  The crowds are smaller, the air is better and it'll probably cost you less.

Anyway, thanks for following along.  I'll follow up next time with a bus update.... and probably more stories from the snow.

Friday, November 18, 2011

Pulling the Fuel Tank

Today I'll cover removing the tank from the Baywindow bus.  When I touch something that's only relevant for a TDI, I'll say as much.  Mostly, though, the process is the same.  I'm starting from after the engine has been dropped (or removed entirely).  Some steps are actually easier when the engine is still in-place versus on the shop floor but within the engine bay.  I'll call out when that's the case too, so you can plan accordingly.

Empty Tank
tank sender. note wires, bolts
This should be somewhat obvious, but I'm putting it out there anyway.  If your tank is blocked because foreign matter is in your tank, you'll need a siphon to pump it mostly dry.  I got a manual pump at Harbor Freight for $10.  They also had a bulb-style pump for $6, but that looked a little too disposable/one use only.  Your experience may disprove that, so please let me know.  This is easier when the engine is in-place and not on the shop floor in the engine bay.

Remove Fuel Feed Line
Depending on your engine, the route of your engine fuel feed line is different.  Its purpose is the same, and the time at which it is removed is as well.  Its easier to remove the thread-in fuel line attachment when the engine is not on the floor.  If you drained your tank through this line,  It was already disconnected from filters, etc.  If you siphoned, disconnect the fuel feed line from the engine-end first, draining the line as you go.  Last, place a bucket under the tank outlet and un-thread it from the tank.  A last little bit will come out of your tank.  If you have a tank from a fuel injected engine, you'll need to remove the return line too.  It ties in down below as well, and should be removed the same way.  My tank was a single-outlet style.

Remove Firewall
If you are running a gasoline engine, you should have a firewall between your fuel supply and the engine.  This is held on by screws from below.  These are hard to find and the engine has to be in-place or you'll be cursing the gods trying to get this wall out.  The top edge is also held in with screws, but these are easier to find.  I removed my firewall when I switched fuel sources, and don't use it anymore.  So, I can't remember how many screws there are.  Sorry.

Remove Tank Vent line(s)
If you're running the TDI (and don't have a fuel injected tank), one of the vent outlets is being used for the return line.  Remove this and drain it.  The true vent lines can be removed and the brass/copper tubes need to be removed as well.

Remove Fuel Filler Hose
Be very careful with this hose.  This is no longer available (NLA) from the dealer or online.  So, if you damage it or decide you need to be able to fill a different fuel (like switching from gasoline to diesel), a replacement will be a creative effort.  The hose doesn't need to be completely removed to get the tank out, but the tank-end does need to be disconnected.  I found disconnecting at the tank first to be easier than disconnecting at the filler anyway.  I had a steel pipe bent to match my filler hose by the fine folks at Meineke when I chose to replace mine when I switched to diesel.

slide out right side
Disconnect Fuel Level Sender Wires
Disconnect the fuel level sender wire from the sending unit.  It takes a thin wrist or a hooked wire to pull the signal wire from the tank compartment.  There's a mid-wire connector where you can disconnect.  Disconnect the grounding wire too.  The grounding location varies, but mine is dead-center in the compartment ceiling where the firewall is attached.

Loosen Hold Down Straps
You could have done this earlier, but removing the lines would have been harder had the tank been free-floating.  The straps are held on from below and you'd think it would be easier with the engine in, but the starter kind of blocks the right-side one.  They take a 13mm deep socket.  I suggest putting a vice-grip on the strap near the point where it passes through the base as the strap twists as it is loosened, and the vice-grip holds it firm.  The nut has a washer behind it; don't lose it.

Pull Tank
Now, the tank should separate from the floor of the tank compartment with a little wiggling.  Remember that the engine feed outlet on the bottom of the tank is the low point and that there's a foam gasket where the bottom bowl would touch the tank compartment floor.  You're going to want that when you re-install.  Rather than "store it somewhere safe" and lose it, I just leave it in the tank compartment.  Everyone has their own system, though.  The tank needs to slide out over the top of your engine (on shop floor) down the right (passenger) side of the engine bay.  Because of the height of the engine on my ATV Jack adapter, I need to raise the right side almost to the top of the Bus Depot tire jack limit.  Total non-sequitor, but if you're still using the stock jack, I encourage you to get one of those Bus Depot jacks.

If you're going to get the tank re-lined, remove the fuel level sender.  It's held on with 6 8mm bolts.  At this point, I took my tank to Mac's Radiator.  They cut holes in the bottom, bead-blasted it inside and out and then lined it.  The outside was painted with primer.  All told it took about a week and cost $200.  Once I considered the cost of materials and the number of hours as well as questioned how well I would have gotten all the gunk out, I concluded $200 was money well spent.

That's it for today.  I'll cover the re-install of the tank and engine over the next couple of posts.  I'm still not 100% done with the re-install, so that shoudl give you an idea of how busy I've been and how long this really takes.

Thursday, November 10, 2011

Engine Extraction

Today, I'll cover the steps to remove my TDi engine. This may only really benefit me, but if anyone else ever does the same install, this could be helpful for them too. I know I'll refer back to this the next time I have to drop it - for the transaxle replacement anyway.

Safety first, always
Disconnect the battery. While you're looking at the electrical, disconnect the computer plug and the B+ nut on the alternator. Disconnect the ground strap from the block. Now is the best time to raise the bus so it is on jackstands too.

Fuel System
The driver for dropping the engine was to gain access to my fuel tank, which became blocked on my trip to Eugene. One last point on that: when I went to drain the tank, the clear filter was 1/2 full again. It seems that the tow sloshed the tank enough to clear the blockage. Anyway, I ran a dip tube down the overflow pipe and into the tank. Through this dip tube, I pumped the tank nearly empty. Then, I disconnected the drain and caught the rest of the fuel in a bucket. All told, I had over 5 gallons left in the tank, so the fuel gauge was reading about right (at just under 1/2 full). The return lines, vent line and stock filter were drained next. Last, the stock filter was removed from its mount and set on top of the engine. The mount was also removed.

Vacuum System
The only part of the vacuum system which needed to be removed was the vacuum ball, and even then, it was only so the fuel tank could be removed. For an engine drop, the vacuum system can remain in tact. The vacuum lines which run down the intake need to be removed from the intake, though.

Exhaust
After the fuel lines and electrical, the exhaust needs to come out. The exhaust is bolts to the turbo with 2 nuts and one bolt, all 13mm. The hanger on the rear was done poorly (thanks Meineke) and requires some gymnastics to get disconnected. Re-install is equally frustrating. The exhaust drops down and can be turned so it slides out pretty easily.

Intake
The air filter is mounted to the side of the bus, so the intake pipe is disconnected at the filter. Unplug the computer plug at the AFM, remove the hold-down screw for the hard-plastic pipe at the intake. On the other end, remove the bolts holding the post-turbo air pipe at the inlet. Last, disconnect the pipe leading from the turbo to the intercooler. This is the nasty little bit that kept failing on that drive to Eugene, so consider how to disassemble carefully. Once these disconnections are made, the entire intake unit should drop straight down. Rotate the pipes around and move the intercooler towards the front. The pipes will pass through and under, allowing the unit to be removed under the bumper.

Cooling
Since the engine is not getting removed, just lowered, the coolant does not need to be drained. In fact, the heater core and almost all of the lines can remain in-place and untouched. The exceptions include the water bottle and bracket (so the fuel tank can pass) and the zip-ties holding the radiator runner pipes in place. These zip-ties would have tension on them as the engine dropped if they were not cut and re-zipped. Make sure the bottle is tightly capped. Set the bottle on top of the engine of on the jack cradle. Regardless of where it goes, it will need to sit below the engine for the tank to be removed, so it will get very full of fluid. If the cap it not secure, you'll make a mess. Disconnect the level sender plug and move that cable out of the way.

Transaxle
Disconnect the CV joints and the clutch cable. The transaxle will rise and fall with the engine, so these need to be loose. Put a small jack under the front of the transaxle and remove the nose-mount. 15mm and 16mm bolts, if memory serves.

Physical Mounts
At this point, the engine is free of anything which would impede its movement up and down a few feet. If the engine is being removed entirely, the harnesses would also need to be unplugged, the coolant drained and pipes separated. Slide an ATV jack with an engine cradle (adapter) under the engine. I looked through my old posts and I realize I never posted on how I built it. The closest I get is with this post showing a close up of it. Anyway, slide the cradle under the engine and take a touch of the weight onto it. Now, disconnect the stock mount from the tower and the engine. Once removed, the tower needs to be removed (for tank removal), and the bracket needs to be removed from the engine (so it can be lowered). Last, remove the long bolts which connect the bellhousing to the transaxle rear mount. These bolts are 13mm-15mm. Once removed, the engine should lower easily with the ATV jack and transaxle jack used in tandem.

Thanks for sitting through a somewhat dull posting about how to drop my TDI engine. This will be very useful for me in the future.  To add some value to the casual reader, here are some handy links I've used over the years:


www.ratwell.com <- long time owner of '79 bus.  excellent accurate info. my usual first stop
www.thesamba.com/vw <- forums of lots of VW owners.
www.type2.com <- dedicated old-skool VW owners site and email list.

www.busdepot.com <- great genuine parts
www.azautoparts.com <- dealer parts at cost. limited offerings, but always good prices for all cars

Saturday, November 5, 2011

Furthur - the Return

I know its been a while and I apologize for that.  I've been covering a second job at work, so I'm basically working all the time these days.  Fortunately, a replacement has been selected, so I'll be returning to having only one job again soon.  Today, I'll talk about the adventure I had on the drive home.

out the passenger side while waiting
Carabus
We rolled out of the campground earlier than I really expected - around 10.  After 3 days of late nights, music and dancing, I figured we'd sleep in later.  Since the bus doesn't have much in terms of curtains right now, the morning sun got me up pretty early.  So, after quick-charging our cell phones, slugging some coffee and grubbing some cold cereal, Ed (in Belle) and I (in Hapy) headed north through Coburn and onto I-5 North.
With my currently limited top-speed, Ed eventually grew impatient, passed and disappeared through my windscreen.  Since he had a much longer drive over to the Oregon Coast before wheeling home, I totally expected him to split.  It was shortly after we parted ways that things started to get interesting.

Sputtering
out the windscreen while waiting
One advantage to not having a stereo is being able to get very attuned to what your engine sounds like when its running well.  It also gives you very early clues when things are starting to go wrong.  It started with a little sputter.  Like the engine missed or something.  We kept on cruising, but now I was on high alert.  Another sputter... and then another... and then... I could hear the engine starting to die.  So, I popped it out of gear, let the engine fail and rolled slowly below the speed limit, into the breakdown lane and then eventually to a stop.  Fortunately, I found myself in a very wide breakdown area.  I had an idea of what went wrong, so I went around back to confirm.  When I broke camp, I put most of my stuff on the floor in the passenger area rather than the rear deck.  This made engine access easy.

Fuel-less
My initial guess was proven accurate seconds after I opened the engine lid: the clear primary fuel filter I put between the tank and the stock filter was completely dry. 
Hah.  I jumped back into the driver seat and checked my milage, and I should have half a tank.  Curious.  So, I pulled the filler cap and waited for a break in traffic.  When one arrived, I rocked the bus and put my ear to the filler hole: splash-splash.  So... not fuel-less?  So, the tank has foreign matter in it blocking the outlet.  Drat!  Not something I can fix roadside, so AAA gets the call.

Towed Again
tucking him home
AAA was responsive, but I had to wait an hour while a flat-bed truck became available.  It seems I was not the only northbound microbus that got a AAA call.  Funny.  While I waited, I messed around with some of my interior electrical, and got the poptop dome light to work.  Sweet!  Anyway, Dave the driver was very careful and did a great job hoisting my bus onto his truck.  The drive back to Beaqverton was not nearly as climactic as the drive south was.  Between the completely different weather (now cloudy with spitting rain) and hte different means, I was a little down.  Dave was able to arrange his truck such that he was able to perfectly tuck the bus into his sleeping spot in my garage.

So ends the adventure of attending Furthur.  I did take a peek at the clear filter a few days after getting home and it had some fuel in it, further supporting the floaties-in-the-tank theory.  Since the return, I've taken steps to fix this, and I'll post what those steps were next time around.  As always, thanks for following along.

Tuesday, October 18, 2011

Furthur - the Lot

I'll cover the experiences from the parking lot over the 3 days of the shows in Eugene.  In the greater scheme, this makes more sense.  Besides, the days kind of run together, so going chronologically isn't really possible.

Shakedown Street
typical owner disposition
The Saturday morning print of the Eugene newspaper declared a successful "bust" of the vending along Shakedown Street.  Now, if you've been to a Grateful Dead-like event, you know what this area is.  For those who have not been so exposed, Shakedown Street is a zone somewhere in the parking lot where a large percentage of the vending takes place.  This zone is usually close to the arena, and is where the highest foot-traffic would naturally happen.  This is not a space designated by anyone.  In fact, it springs up on its own where the first-arrivers think it makes the most sense.  This "bust" had a little effect on the vending scene, though, and actually created multiple mini-Shakedown's as well as walk-about vending.  I liked the walk-abouts.  But even in my touring days, that was how I sold things before dark.  Laying out a sheet or a cooler on Shakedown Street was too high-risk for me back then.  One GDP (Grateful Dead Productions) violation cop, and you could be out hundreds of dollars.  Staff-Pro's usually targetted illegal liquor or drug sales, but from the article in the paper, they were busting everybody for selling anything... except tickets.  Funny how that's turned.

Wares without Art

One of the great contributions the "illegal" vending brought to the event used to be the iconic artistry placed onto T-shirts through 2-4 color silk screens.  This artistry would take a modern icon and "Deadify" it.  For example, one of my favorite shirts from years ago was a Bart Simpson T-shirt where Bart was wearing a tie-die and cut-off shorts.  Under the cartoon drawing was the phrase "Bart it on Down the Line" - playing on the song title "Beat it on Down the Line".  These types of shirts no longer appear at Dead-related shows, and I find that very disappointing.  Disappointing to the point, in fact, that Mike, Ed, Boo and I talked about different creative ideas taking modern cultural references and making T-shirts out of them.  We may just get into the T-shirt business, if we can isolate some time for it.  In the end, I did buy a couple of wood coasters.  These coasters have a Steal-Your-Face in the center or a Tour poster-looking image inside.  I like the creativity in creating a coaster, and they are totally functional!
Belle and Hapy wait for us to return from the show

Tire-kicking
As you may imagine, rolling into the lot as part of a microbus caravan, Ed and I attracted a little attention.  Belle was festooned with a big flag in her luggage rack on the way in on Sunday, and Hapy remained his usual sleeper-looking self the 2 days I drove him in (Fri & Sat).  The looks on the faces of those in-the-know when I passed, though, was pretty funny.  ACVW (Air Cooled VolksWagen) fans know what an ACVW sounds like.  So, when my city-bus sounding microbus passed, a look of confusion followed.  Funny stuff.  By the time we parked, there was usually at least one person wanting to check out our sleds.  As I may have mentioned in the previous post, Ed would park nose in and I'd back in next to him so our sliders faced each other.  This made for a nice little sitting area as we enjoyed our beverages... (yes, staff-pro official, these are coffee's in our coffee cups)...

We met a number of VW folks, over the course of the 3 days.  From the TDI-transplant curious, to BioDieselers, to purists.  The purists wanted to talk to Ed.  I popped the rear hatch a few times, and talked at great length with a guy from Corvallis who is working on a production-able nose-mount radiator for water-cooled engine conversions.  Cool!  I hope to hear more from him about his project.  I may not ave the stomach for moving the rad, but having these kinds of conversations is a great way to learn about improvement ideas.

It was a beautiful 3 days, weather-wise, crowd-wise and music-wise.  The lot wasn't over-burdened with booming stereos, had good Microbus, Vanagon and Eurovan representation and had a good positive energy.  More next time about the ride home....

Friday, October 14, 2011

Furthur - To Eugene

So many things to cover, I'm just going to have to start writing more often.  My last post was before the trip to Eugene, so I owe a trip report, a summary of the shows, the trip home, and inevitable work-that-followed-the-trip stuff.  I'll hit the trip report today.

GDTRFB (well, good, actually)
The first show in Eugene was on a Friday night.  Without a place to stay Thursday, I planned for an early departure Friday morning.  That plan was delayed when my brother (co-pilot for the southbound trip) needed to work until noon.  Still, leaving downtown Portland by 1:PM was pretty good.  We were also supposed to meet-up with Ed and Mike in Belle, but we were unable to connect on that either.  If Ed hasn't posted his trip report yet, he had to run out to the coast to collect Mike the night before.
Anyway, I topped the tank at the local fueling station and calculated my milage: 31mpg.  Yes, that's right, 31mpg... in a bus... without the new (better suited) transaxle.  I still don't know how much capacity the tank has, but if I assume 12 gallons, that's a 372 mile single-fill travel capacity.  By that estimate, I wouldn't need to fuel-up until after returning from Eugene.  This was an important bit of data later.
With the tank full, and the fuel gauge still not operating correctly (showing "E"), I hit US26 into Portland.  I hit cruising speed at 51mph (3100 rpm), stayed in the right lane and enjoyed sitting behind the wheel again.  The bus handled great, traffic was light and the day was starting to get warm.  Perfect.  My brother was ready to go within minutes of my arriving at his office, so we greabbed some Quizno's and headed south.  The bus doesn't have a radio, so we reverted to old-skool travel time-passing: talking and laughing.

Wheels Broke Down, the Leader Won't Draw
About the time we reached Aurora, I noticed we didn't have the power I'd expected on hills.  I know we had some hills during the drive to Champoeg, so there was something amiss.  Also, the cooling fans were not acting as effectively.  The temp was staying under control, but the base temperature was floating between 195* and 200*, not around 185* where I expected it to be.  These 2 indicators were distracting me, so we pulled into the Charbonneau rest area.  After letting things cool off (and eating our Quizno's), I discovered that the pipe leaving the turbo headed for the intercooler had separated from one of the couplings.  As a result, the air headed for the engine was (a) unfiltered and (b) naturally aspirated or non-turbo charged.  I re-connected the pipe, tightened it down and called Ed to see what was going on with his end of the trip.  He was working his way through the Coast Range, so we would'nt be seeing him until Salem at the earliest.  Back onto the road we go.

Bound to Cover Just a Little More Ground
The pipe connection I described above separated again within 30 minutes of leaving the Charbonneau rest area.  This time, I could feel it.  The power loss followed by the slightly raised temperature.  I figured "no problem, now I know what I'll be doing on Saturday".  We stopped again to verify, and re-repair, but I could tell no damage was being done.  I took the opportunity this time to verify the oil level and coolant too.  All good.  So, my brother and I just did the drive, and when we hit hills, just stayed as far to the right as we could go, singing "just a little bit harder just a little bit more, a little bit furthur than you've gone before"... to keep the bus motivated :)

The Music Never Stopped
We didn't need to stop again, and blew through Salem, Albany, etc. at our top speed (51mph).  The campground we chose was just north of Eugene, so we took the exit before (Coburg) and actually got to the campground before Ed, Mike & Belle.  All told, we had 2 stops and made the trip in under 3 hours.  We set up the shed (tiny tent for holding belongings so the bus isn't cluttered with crap), cleared the bus of non-show-critical items, and waited for Ed, Mike and Belle.  I re-attached the pipe again.  They arrived before 6, and we prepared the rest of the site (EZ-up over the table, enjoyed some barley-pops, talked to some fellow show-attending campers, etc.).  There was some interest in the busses, but ours weren't the only ones in the campground, so it wasn't one of those "wow I had one of those" kinds of conversations, it was more along the lines of "oh, so that's a '73 Riviera, I have a '69 campmobile over there (pointing)".

Inspiration... move me brightly
Feeling fresh, we carabused from the campground to the ampitheater parking lot: 1 mile of rural Lane country followed by 4 miles of suburbia.  Being Eugene, we were not the only busses driving around, so the impact of 2 in a row was virtually 0.  Still, it was a great sensation for me to be finally carabusing to a Dead show in my bus.  Another milepost, if you will.  We parked the busses, Belle nose in, me backed in so the sliders faced each other, and we settled into our evening.

I paused a minute to consider the last time I sat in a parking lot waiting for the Dead.  2 years earlier, my bus was a collection of parts, lacking direction, plans for some sub-systems and, mostly, my attention.  I stood outside Belle in that lot and stated "I won't see the Dead again until I can get there in my own bus".  Kennedy had his mission to the moon speech, and I guess that was mine.  In that moment of pause, I had reached that goal.  It's hard to describe the feeling of satisfaction, but to be there with the friends who witnessed my statement was truly special.

More next time--

Monday, September 19, 2011

Football, Friends and Further

It feel like Summer was just in full swing and suddenly school is starting, the rain is falling, and football is on the tv.  Wow.  Insta-Autumn.  In typical Pacific Northwest style, we couldn't start the school year without the first week being one of the nicest of the Summer.  Sorry kids, the parents get to enjoy this one solo.  I'll flap today about some more personal goings-on, and touch on a trip planned for the weekend.

Football
In my new digs, I'm rediscovering how much I enjoy American Football.  College ball, NFL, its all good, and if I'm not careful, it will consume all of my weekend time.  Contrasting this new interest are parental responsibilities with both boys playing soccer (or should I say "Football"?).  Basically, helicopter-parenting season has opened, and this past weekend was quite an opening weekend.  C played his second game, pulling in a few assists from his mid-fielder position, and his brother T played a spirited game (also at mid-fielder), though I couldn't tell if he got any assists.  It was really fun to see both of them play with such passion.  As much as they say lacrosse is their favorite sport, they play soccer with a true love of the game.

Family
After the games, I hosted the "family" birthday celebration for C.  I tried to go a little further than usual in setting up the party, blowing up balloons and stringing streamers (okay, actually my new friend Boo did most of that, but I'll get to that later).  It was a mid-afternoon affair, to fit around little-niece and nephew naps with an abundance of finger foods.  Beer was flowing, and conversations light.  Overall, it was a great time, and C felt the love from everyone.  After the cousins and grandparents left, we ordered pizza and watched a movie: his choice - I am Number 4.  Great b-day celebration for sure.

Friends
Well, with the divorce finalized for a few months, and life somewhat settled down, my finding new, uh.. friends... was inevitable.  Dating has been a surreal experience for me, but fun for sure.  I've recently started seeing someone exclusively, though.  Out of privacy respect, her name will be omitted from posts like my boys' names and I'll just call her "Boo".

Further
Further (the remaining members of the Grateful Dead) is performing 3 nights at a tiny outdoor ampitheater in Eugene, Oregon.  Its been 2 years since "The Dead" played the Bay Area and the Gorge.  It was on that trip in Ed's bus (Belle) that really re-focused me on getting my bus project completed.  *see the "WALSTIB" posts for details on that trip* This time, I'll be driving my bus, cara-bus style, with Ed & Belle down to Eugene.  Sure, its only a couple hundred miles, but its the longest drive I've taken in him since the engine transplant.  We'll be camping a few miles from the venue to boot, so as Summer turns to Fall officially, we'll be squeezing one last camping weekend in.

Tonight, I need to get a short in the dash resolved and get the fuel tank level signal working so I can make the trip safely.  You don't want to run a diesel engine empty.... or drive out of a "Dead" show at night without tail lights.  That's a cop's dream, and a DeadHead nightmare.

More next time, and thanks again for following along.

Saturday, September 3, 2011

so much for tomorrow

Okay, I just need to stop saying I'm going to post anything, and just do what I do.  Clearly, I can't hold myself to a schedule, even when I publicly state I'll do something.  Again, my apologies.  I'll touch on some "life stuff" today.  After that, I'll head down to the bus and start working on material for the next posting.  Honestly, now that he's running, my posts will probably happen less often. Well, at least until ski season opens and we start driving the bus up the mountain for a day of sliding :)

Champoeg
I ran a basic trip report in my last post covering the road trip to Champoeg State Park and back.  The boys and I drove past the exist on the freeway this past week (in the Jetta), and we got talking about our camping trip again.  Since it was our only trip of the season, it had all the usual "first trip of the season" a-ha moments.  Among them, both boys understood again that camping night time is colder than at home night time, so bringing pants and fleece jackets are a good idea regardless of how hot it is when you leave civilization.  Mostly, we remembered how much time you have in a single day when you're camping.  By leaving all the time-saving devices at home, we actually had more free time.  Not sure how that works, but I'm sure it only works for a couple of days.  Hmm..  sounds like an experiment or a dare for another season.

Like all trips, there was a small collection of stuff we brought that we didn't use at all (lacrosse sticks), stuff we brought that I thought wouldn't get used, but was used a heck of a lot (bikes) and stuff we forgot, but muddled through without (spoons).  We made a list of things to bring next time (including spoons), of course.  In the end, though, we spent most of our time down by the Willamette River, splashing in the water and making a mud/clay wall.  Fun stuff.

Nested
The weekend after the camping trip, the boys returned to their mom's house for the week.  I'd been waiting for some cash to roll in so I could finish making my place a little more home-y.  For example, I had a tv sitting on top of a bass amp with a pile of stereo equipment around it.  It looked kinda like it was set there during the move-in in April and then never touched.  In fact, that's exactly what happened.  I got a tv stand-thing, re-arranged everything again, framed some posters, decorated the boys' room and the hallway.  Basically, the place is ready for outsider viewing.  I'd hoped to be at this point in time for hockey season, and I made it in time for football.  Sweet.  Drop by for part of a game if you're in the area.  I may make you look at the bus engine during a commercial, though, so you've been warned...

Boys Back
I got the boys back on Sunday night, but they're already back with their mom (Labor Day Weekend).  They loved my place before, but I think they like the energy in it now even more.  I had to work this week, so my folks minded them during the day Mon-Wed.  T is old enough to watch his brother, but they can't use the pool or get beyond BMX bike-range without a licensed driver.  Great thanks to my folks for being available.  The boys found a local BMX bike track and used it a few times while they were with me.

Oregon State Fair
On Thursday, I took the day off from work and took the boys to the Oregon State Fair.  I hadn't been to the fair in a few years, but it rang familiar.  Big barns full of show animals, carnival rides and a bilk-your-money arcade... live music and many booths of sellers.  We couldn't find the Alpaca's, but we did find the horses, cows, pigs, goats and sheep.  There were some beautiful animals, and being so close to them we city-folk get a much better idea of how large they really are.
There were 2 big downsides, though, that the Fair organizers should re-think.  First, the only water available was for purchase only in enviro-hostile plastic bottles or given out in tiny dixie cups by Bible-thumpers or Culligan water salesmen.  Ain't nuttin' free.  I was able to find a single old-school water fountain where I could refill my water bottles, but the Fair folks should change this policy.  Second, almost every vendor was cash-only.  So, if you prefer plastic you either didn't buy stuff (like me) or you hit the $4-per-transaction-fee ATM's which were everywhere.  Clearly, the Fair was getting a taste of those fees, and I think that's rotten.  The few vendors who handled their own credit card transactions got my business, I spent my cash on food.

Well, this got long.  I suppose I should post more often, and this could have been 3 posts instead of one massive one.  *shrug* It's getting late if I'm going to look at my bus today, so I better get to it.  Hope you're having a nice Labor Day weekend, either with friends, family or live music.  More next time...

Thursday, August 18, 2011

One Small Step for Van....

So, the maiden voyage of the TDI-powered microbus has concluded.  It wasn't without its scary moments, but it was a great success.  I'll hit the mechanical road-digest stuff today, and I'll come back around to the human-side stuff tomorrow.

liftoff from home
Houston, We Have Liftoff
Tuesday started with loading up camping gear and bikes (2 on a rear strap-on rack, one in the cabin).  The load-up was not terribly interesting, other than I forgot all the little things that used to go without mention before.  Things forgotten: dish towels, body soap & shampoo, extra towels, for example.  There were plenty of other things, but we didn't leave our positive attitudes, our extra coolant, bag of how-to-fix-it books, toolbox of ratchets, screwdrivers and wrenches.  This proved very important later.  From the house, we went straight to Fred Meyers for last minute "oh, yeah, we need that" stuff, like a solar lantern, ice, propane and of course fuel and air for the tires.  It was a little surreal to order diesel.  The guy looked at me a little funny and said "you mean regular".  "No," I say with a grin. "I mean #2 diesel".  I then photographed the fill up like a total geek.
yes, I meant Diesel :)
Loaded for bear, and ready to roll, I couldn't find 1st gear, so we pulled out of the shopping center parking lot uphill in second.  The engine didn't like that and acted like it dropped into "limp mode".  Aw crap.  Pull to the side, kill the engine.... Fret.....  Fret some more...... Restart the engine, and everything's fine again.  Hmm... something to ponder while I watch the UltraGauge.

Apollo 13
As I mentioned in my last post, the boys and I gave thanks to each of you who have helped us on this journey when we turned onto Roy Rogers Road towards Sherwood.  The drive through the highland cow country of Washing ton County was beautiful, and the engine temp finally reached the magic 185* mark.  It held there, then climbed some more.  By 190*, I had flipped the fan switch, and the temp dropped back down to 185*, at which point, I turned the fans back off again.  This cycle repeated a few times as we entered Sherwood.  That is, until we reached 99W and I suddenly saw white smoke billowing.  "Houston, we have a problem".  I flipped the fans and the smoke cleared, but I knew something was wrong.  I made the turn onto 99W and into the next parking lot: one for a NAPA.  What luck!

hose on ground not so good.
Once parked, I jumped out to see what was wrong.  The return hose from the radiator had separated from its coupling and one end was now lying on the ground.  A small puddle of coolant had appeared.  Good times.  Seeing how we were in front of a NAPA, though, getting more coolant and a hose clamp (missing from the hose now) would be an easy task... and a very short walk.  No need for the lifeboat, but exposing the coolant bottle means emptying the rear deck of our belongings, and removing the rear bike rack.

One Small Step For Van
While shooting the breeze with the guys at NAPA, I described my engineering failure: there are no barbs on my coupling, so it would just be a matter of time before this happened again.  They leaped to the phones, calling different parts suppliers until they found a company in Tualatin that had 1-1/4" double-barbed couplers. "2 please," I say.  NAPA went an got them for me from them within 30 minutes.  During that 30 minute wait, we walked next door to the Safeway and had lunch.  Perfect.  No sooner had we returned, the couplers arrived.  They were installed, coolant fed into the bottle, system bled and we were ready to roll within an hour.  Knowing more air bubbles would appear, we pulled out of the NAPA parking lot.
 
new double-barbed couplers
Later on, while driving down 99W, I was unable to influence the temperature.  We pulled over, re-exposed the coolant bottle, and topped it off.  Dang air bubbles.  Re-bled, and we were off.  This time for good.  The rest of the trip was temperature cycling, laughing with the boys and enjoying the corners of Yamhill and Marion Counties.

One Giant Step for Van-Kind
After being parked for 2 days, there were no fresh fluids under the bus before we left the campground.  The coolant bottle was a touch low, so I topped him off again.  I expect a few more air bubbles to appear before its all done, but I think the worst is past.  The under-mount radiator has proven effective, and the TDI engine has proven to be an effective power plant for a microbus.  As many have pointed out along the way "that transaxle isn't well suited to that engine".  Very true.  At 3k RPM, the bus is moving around 45mph in 4th gear with 14" tires.  I have a set of 15" rims that I plan to use for tires in the future, but I'm sure a re-geared transaxle is in the future.  That's a $1500+ statement.... and it reminds me that no bus or project vehicle is ever finished.  Just some portion of it is.  Today, the engine transplant project is complete.  Tomorrow, some other project will begin, but for today at least I dance and sing in celebration that my bus lives again.
true satisfaction. greetings from Champoeg State Park

Monday, August 15, 2011

Mop up, and man up

It's been a week, and I've gotten a bunch of little things done. I'll run through that and again ring that "fear" bell. Fun ahead!

Mop up
As I said, last week was very productive. The boys were with their mom, so I focused on bus stuff... Well, for the first few days anyway. I already detailed the relay setup for the cooling fans. That was Monday. On Tuesday, I wired in a toggle switch (after hitting the gym and working late). Wednesday, I scrubbed the interior of the bellows and hard-mounted the bed base to the frame with finish nails. I finished the wiring above the sink/stove too. There's an issue there, tho, and the cabin lights don't light up. I think my ground is bad because there is voltage at the switch.

Saturday, I mounted the toggle switch next to the hazard switch, fixed my rear driving lights so they actually light up, cleaned up some loose wiring and re-connected the speedometer cable. The running lights turned out to be a few simple things. First, fuse #2 was bad. Second, the right rear tail bulb was bad. I spent an hour checking wires before going to those. Doh!  Basically, I mopped up all the leftover bits on Sunday, vacuumed the carpets, etc

Man Up
I picked up the boys on Sunday and they were a little disappointed that I didn't arrive in the bus.  They thought that may mean the camping trip was cancelled, or the bus wasn't ready.  The reality is, I wasn't ready to take him on the freeway.  OR 217 is not a very forgiving freeway by Oregon standards, but bottom line I need to man up and drive this thing.  Today, we ran an errand in him: to CostCo.  He drove great, and we easily fit a huge cart full of food into the passenger compartment.  We didn't even use the rear deck.  I forget how easily the bus carries a bunch of stuff.  I'll be collecting a piece of furniture next week and I think I know how I'll get it home now.  It won't be a rented truck from Home Depot :)

On The Road Again
We take our first camping trip in 4 years starting tomorrow.  These years have seen many changes, and it will be surreal to be camping in the bus without their mom, or the dog.  Still, it will be nice to be out on the open road again, humming along and again seeing the world through a Bay Window Bus windscreen.  The boys and I packed the camping equipment tonight, and we'll finish tomorrow morning.  We'll slap the bikes on the rear carrier, hit the local grocery and head South for a couple of nights.

As we pull onto the 2-lane road through the cow patches of Washington County, I'll be thinking of all the folks who helped make this project a reality.  Hal, and the hours and hours he put in on the engine mount, helping me decide what design would work best.  Justin, and the low priced labor and numerous free parts (including the loaner engine harness I'm currently running) to get the TDI engine running perfectly.  Andy, my TDIClub friend who sent months of personal research on the TDI wiring as well as his personal support along the way.  Toby, for the pop top work, and ready hand for anything else that popped up.  Ed (owner of Belle) who kept reminding me of my end goal with regular drive-bys and the famous ride-alongs to see the Dead.  Ed the Welder, who performed the magic on the fuel tank so long ago.  Eric, the guy in Georgia who salvaged the engine, crated and shipped it to me.  KEP for their sending me a second adapter plate at 1/2 price when I needlessly broke the first one.  Of course, the numerous others who have provided insights on problems or their own projects as motivations along the way.  This project would not be where it is today without every single one of you.

Suffice to say, no project is completed on an island.  We all need each other to make these kinds of crazy ideas go from concept to completion.  I greatly value each of you for your time or financial sacrifice to help make this possible.  I can't thank you enough.  I can say, though, that my next post will be documenting a road trip; the first road trip in years.  In that, we all can celebrate.  Thanks for following along all these years, and I promise over the next 6 months I will back-document final solutions for each of the separate sub-systems, so the next guy who gets a cray idea to put a diesel engine in his bus has a workable roadmap... at least to start from :)

Tuesday, August 9, 2011

Keeping it Cool

I wanted to post a quick update on the cooling fan work I did last night.  As you may remember from an earlier post, I was concerned about whether the fans kicked on during my anti-NASCAR test drives.  I watched the temperature rise on the UltraGauge, and even level off at 185*.  I think that was when the thermostat opened and the full coolant circuit (routing through the radiator) was active.  This allowed the 68* coolant that was sitting in the radiator to mingle with the 185* coolant leaving the engine.  Predictably, the temperature dropped temporarily and then increased again.  I didn't have the patience to watch the coolant rise too far above 190* before I got uneasy and stopped the test drive.  I should have hopped out at that point to see if either of the fans were spinning.  Wanting a backup system for fan activation was the driver for last night's efforts.

Relay Enabled
I re-attacked the fan wiring last night.  My first change was to tie the fans together so they both turn on and shut off together.  Having just one spin seemed silly.  To protect wiring, I have both fans activated off of an automotive (30A) relay triggered from the temperature switch in the radiator.  Now, when the "low speed" temperature is reached, both fans will fire.  I don't have a destination for the "high speed" signal yet, but I think I might wire it to my oil idiot light on the original dash.  That way, if I'm getting too hot, I'll have a visual queue to cool it.

Panic Switch
Now that both fans turn when the temperature switch says to fire, my concerns about whether that switch will always work kick in.  Honestly, I'm not sure if the current switch works.  Now, I could remove the switch (effectively draining the entire cooling system) and install a new one.  Yes, that would be the proper course.  Rather than do that, I wired in a panic switch for the fans.  Now, if I see the temperature running high, and lack the confidence in the fans turning on automagically, I can flip a switch (with an LED to show me that I did so) and fire them up.  The B+ side of the switch is running on circuit 30, so I can fire the fans after shutting off the engine.  Since the coolant will stop moving at that point, it is limited in utility, but it might help cool a little bit.  The tests of the switch and relay were positive, so I'm ready to test-drive again.

With all of these modifications, the wiring near the driver's feet has become, uh... rat-nest-like.  I'll spend some time cleaning that up tomorrow night, freeing up Saturday for test drives and final bits and pieces on the pop top.  Thanks for following along, and if all goes well, I'll be on the road Saturday doing more than just an anti-NASCAR this time.  WooHoo!

Saturday, August 6, 2011

Tight Topside

In my last post, I mentioned troubles with getting the top to settle-down properly.  I'll post on how that resolved, and touch on some other random pop-top related things today.

Westy strap holding Riviera Top
Great Pair
So, I've mentioned that the hole for the Riviera top is larger and more square than the sunroof hole.  This lead to some interesting challenges for getting the inner wood framing to fit.  Included in this was a need to change how the front section will fit.  This forces a change to both the font hold-downs and the bow that holds the front bellows to the roof of the bus.  For the hold-downs, I pulled the 2 side hold-downs from the old westy top.  They fit well, and seem up to the task.  Like the original Riviera, there are 4 hold-downs, 1 of the originals on each side and 2 westy ones along the front.


note original hole
(black spot above screw head)
For the front bow, I re-used the original, but had to cut short sections of the ends to fit it.  To avoid putting too much stress on the bellows, I didn't reuse the original holes, but created new ones closer to the edge.  This way, the bellows are not stretched at all when the top is fully open.  Hopefully, this will extend its life a little bit.


Pointing Straight Ahead
After that last post, I realized that I didn't even try to align the feet front-to-back.  Dummy.  A quick measurement showed that the driver-side was a full inch further forward than the passenger side.  This would explain why it didn't close, and why it was diagonally pointing off to the passenger side at the front.  I matched the rear feet, screwed in one screw each at the front and back and verified the movement.  Perfect.


Nice Rack
Screw holding front p-side
With the top settled down, and the front of the bellows tightened down, that left installing the luggage rack.  I lowered the top down and pushed the luggage rack as far into the top as  I could get it, and shook it a little bit.  The top is held down by 4 long washered Phillips-head screws.  I marked the holes with a ball-point pen, and drilled the holes with a 7/64 bit.  Out of concern for water tracking under the rear of the rack back into the bus, I layered "rope" insulation along the rear edge just like I used around the edge of the bellows.  Once the top was screwed in place, I forced my hand under the inner edge and sealed the malleable stuff against the   top and the roof of the bus.  I tested it with light, but I still need to test it with water.

completed. tight seam.
That's it for today.  The boys helped some, but they've kinda lost interest in the work part of this project and are ready for the test-drive part.  I can't say I blame them.  I'm ready for the test driving part too.  I have one last thing I want to do first: install a radiator fan over-ride switch.  I hope to tackle that on Monday so I can take a few test flights this week.  Its very very close now, my friends.  My plan to take the boys camping in mid-August may actually come to fruition.

Thursday, August 4, 2011

No New Tales to Tell

It's been the dog-days of Summer around my place the last 2 weeks, and getting into the bus hasn't been really happening.  Between the Brew Fest, and my niece's birthday on Saturday, last weekend was a wash.  I was able to start getting the scissor-support mounted, but they aren't quite on right, so I'll be re-starting that effort.  Unfortunately, that means that the little bit I did get done, I'll be doing again.

Since the top isn't really "on", I can't test drive it.  With a planned first camping trip just a few weeks away, my evenings and weekends are going to become very full very soon, starting tonight.  I have my boys with me this week, so I'll have to figure out a way of getting their hands involved too.

I wanted to post something, since it's been nearly 10 days since my last post, but, like the headline says, "No New Tales to Tell".  Once I have the scissor-supports solved, I'll share the pictures I've taken along the way.  Suffice to say, the supports have 2 long steel feet that run the length of the bus.  If they are not positioned exactly right, the top won't close, and it won't sit right.  Mine aren't, so it doesn't.  I think the driver's side rail is too far forward, so I'll try moving it towards the rear to see if that helps.  Since the support "feet" don't have channels for the screws to pass through (instead its just a tiny hole), adjusting the top means new holes in the roof for every adjustment.  Something to think about improving if you are thinking about putting a Riviera top on your non-Riviera bus.

That's all for now.  Like I said, I'll post when I have the top solved, and explain what I found as the cause.  I'll back-post a picture of the mis-aligned top to this posting later.

Tuesday, July 26, 2011

Riviera Top on... Mostly

With the help of a couple of friends, and my 2 boys, the new Riviera pop top moved from my garage floor to the top of the bus.  We made some discoveries along the way.  Today, I'll back-document what happened.  It was hot and long, so I'm very grateful to both Ed and Toby for sacrificing a nice Saturday afternoon with their families to be with mine.

Preparations and Discoveries
initial placement. Toby eyeing things
After the test run last Thursday, I felt comfortable moving the bus out into the driveway of the complex.  So, as Ed was arriving, I got the bus into position just outside my garage.  While still exchanging pleasantries, Toby arrived, and we were ready to go.  I'd spent a couple of hours before they arrived digging through Toby's photo album dedicated to the Riviera pop top removal he performed.  Through examining his pictures, and my interior, I made some important discoveries.  These were confirmed, as you'll see.

showing cut-out "X"
First and foremost, the Westy was based on the sunroof style transporter while the Riviera was based on a standard transporter.  This drove a few differences which are important.  The sunroof bus has 2 roof panels with a 2" gap between them running from the rear of the opening back to the rear of the bus.  This is where the sunroof slider would hide when the roof was open.  The front of the sunroof opening is not straight, either.  There's a kick-out off-center on the driver's side where the sunroof crank would appear.  Contrast these 2 conditions with the hole cut at the Riviera factory in Beaverton Oregon (where Riviera's were made), and things get interesting.  The transporter has only the one roof section, for starters.  The front of the hole is straight.... and about 3 inches closer to the front.  Also the sides were closer to the drip-rails in the Riviera bus than the Westy hole.  When we looked at how the interior foamy bits all tied together, its clear there will be some customization needed.  More importantly, though, the Riviera facto
after cutting p-side
ry firmed-up the hole by applying wood strips around the underside of the hole and mounting wood strips (which are a-fixed to the bellows) through the steel from above into the wood strips below.  Since these lower wood strips roughly aligned with the support steel Volkswagen installed in the sunroof transporter, the lower strips can be ignored for our install.

Top On
extra 6mm screws.  frame sits in the rail
It is with those differences in mind that I chose to not do anything to prepare for the top install prior to the guys arriving.  This meant that the first step was actually the step I needed them for: muscling the top onto the bus.  They kindly recognized that I'd just painted the roof, but there wasn't a way we were going to get that top installed without scratching it, so I said as much and we jumped in.  I took the back, Ed took the passenger front corner and Toby took the driver front corner.  This put Toby in the spot of having to climb into the bus during the install.  We approached the bus from the rear passenger corner, lifting vertically while moving towards the front.  The 3 of us were better able to get it on the bus than we'd expected.  The quick-part ended there, though.

thanks Toby.
The lower bellows frame for the Riviera top is not flat.  There is a portion of the wood frame that hangs down into the hole.  The Riviera-shaped hole.  I have a sunroof-shaped hole.  They aren't the same.  Enter saws.  To make the frame fit, 3 inches of lower frame needs to be notched out.  The notch needs to be 1" high (up to the bottom edge of the bellows).  With the notch cut out of both the driver and passenger side fronts, the lower frame started to fit.  We spent the next couple of hours measuring and remeasuring, shoving the lower bellows wood frame around to get it into the right spot.  Once we got the spot set, we started chewing through drill bits trying to get a pilot hole bored.  Fun times.  There are 3 hex-topped (6mm) screws on each side holding the lower bellows frame to the bus-roof.  Since we omitted the lower wood strips, we put 2 more 6mm hex screws through the lower bellows frame into the sides of the sunroof hole.  To make sure we were square, we brought the bed plywood sheet (under the bellow frame) and set everything.  Re-measuring. Re-setting.  Then, we marked the holes, moved the lower frame out of the way, bored the holes and screwed it down.  We're square, and the bellows are fixed to the bus-roof.
back home w/top on

Next, I need to resolve the water barrier at the bottom of the bellows and get the scissors-supports mounted. Then, I'll clean-up the top interior and the foamy customization I mentioned earlier in this post.  Should be a productive weekend.  Oh, I almost forgot: he fits in the garage.... once I disconnect the auto-door opening, push the door as open as I can make it, and hold the door open with a vice-grip!  Love it!  As always, thanks for following along,