Showing posts with label hapy. Show all posts

Wednesday, June 3, 2026

More Moving

Today's post follows the last one, sort of. Today I focus on moving stuff basically from one storage location (the attached carriage-house-sized one-car garage) to another (the tool shed or the shop floor). In re-reading it, there is really a lot of history context with some moving stuff mixed in.
 
But First 
most empty since 2022
Before I get into it, I understand that a blog about fixing cars really ought to, you know, talk about fixing cars sometimes. I get it. I really do. I like working on cars, and when I have time, space and a car that needs fixing, that's how I prefer to spend time. Over the past 2 years, I have spent a great deal of time focusing on creating the space for that to happen. In light of that, I think it is worth noting that I understand the economic space many of us are in. Costs for everything seem to climb more every day while our respective salaries and wages are flat. Affordability may be a catch-phrase for politicians, but for the rest of us its a daily life reality.
 
When I look back on the last year of posts talking about getting a shop built, I recognize how tone-deaf much of that must feel to those in real financial difficulty. I totally understand that. Please consider that I started this before the election in November of 2024 and had committed to $22k of steel building before the tariff wars started in 2025 and had the concrete poured, building installed and the doors started before trump attacked Iran this year, sending our fragile economy skidding into the ditch. I had already started down a path which could not be easily changed before things got really bad.
 
Now, Boo and I are in the same financial binds as most of the US: income flat, outflow increasing. Accordingly, I will not be getting any new-to-me cars/projects nor really invest much in fancy new after-market parts to install on any of the ones I have. What does this mean for a blog about fixing cars? Well, it kinda means that I won't be posting as often and when I do it will be more about repairs than about some new thing except for the parts and bits I collected before we bought the farmhouse in 2022. I have boxes of interesting things that I never got to, like a 2-1/2" universal exhaust kit for the bus, a 3rd brake light idea for the bus (from junkyard parts), a trailer wiring package to go with the tow hitch, etc. So, there will be things. And, of course, I still have the locked up engine on Nina ('64/'65 Beetle) to free, a bunch of little things to finish on Oliver ('78 MGB) and a disassembled '79 280zx (Zed) to put together. Most of that work would require very little in terms of parts.
 
Garage
acquisition day 2022
This 1948 farmhouse has what I would call a carriage-house style attached garage. I say that because only the smallest of cars could possibly fit with the door closed. Oliver, the MGB, could fit. Astra and Nina could fit. That's the end of the list. Hapy is too tall and probably too long. The XRunner is definitely too long. I think even Zed is too long. Further complicating the garage is a fixed work bench along the rear wall that protrudes almost a full meter off the wall and the laundry machines near the front, narrowing at least the feel of the width of the space. I think Astra will still fit, but it will need to be mostly empty.
 
Shortly after we bought the house, before we had meaningfully cleaned anything, Boo and I scored a solid wood, full kitchen's worth of era-correct cabinets from the rebuilding center for $420US. The rebuilding center is not a store room; quite the opposite. Everything you buy must leave the store that day or it's theirs again. So, we lasso'd Boo's ex-husband (and his mini van) and some helpers (our local kids) and ran all of the cabinets over to the farmhouse. And slammed them into the garage on top of one another. The fate of that garage had been written the day we bought it: it would be the staging area for building supplies until the house was livable. Those cabinets were the first but far from the last. And then it continued to be the store room for all kinds of things. Until now.
 
farmhouse at winter solstice
With the shop taking all car-related stuff and car-related tools, almost a third of the stuff in the garage was moved. Over the last weekend in May, I moved everything home-repair related out to the now empty and clean tool shed. That represented almost another third of the stuff that used to be in the garage. As I cleared an area of things, I shop-vac'd all the dust bunnies and old cobwebby string-things. What remains in the garage are camping gear, ski gear, holiday decorations and household goods storage. The rafters are still full of lumber. So, I have to clear that to somewhere and then there is a bunch more vacuuming of ick. I have a couple of extra kitchen cabinets which need to move to the shop and I still have the big black rolling cabinet that needs to move too. Once those three big items move, we can park Astra in there. Boo had been gone for the weekend, baby-sitting our little grand-niece (A) while her mama was at a wedding. When she returned and saw the garage space, she immediately started envisioning a project space for herself. I love that, and if we do it right, we can still move things around and park her car in there between projects.
 
Car Stuff
There has been some car stuff, though. Hapy is my "daily driver" again, getting me to and from a show with Brenda on Sunday. Astra, now that her alternator is keeping her all charged and start-able has started complaining about her power steering. It is making a low hum most of the time and actual turning has gotten harder at the extreme edges of the range. I checked fluid (nothing on the stick: that's bad) and topped it off. I expect one of the rubber hoses is failing so I will need to do a deeper diagnosis this weekend. For now, though, the added fluid appeared to quiet the hum a little bit and the steering is better until the last bit. It could resolve as the air works its way out the hoses, but I think there is an active leak so it will only get worse before I find and fix. Work on Saturday! Yeay!
 
Wrap up
Yep, that was an unusual post. There is a considerable amount of economic uncertainty around us. For some, it is the loss of discretionary spending while others are dealing with food or even housing scarcity. We all can feel some foundational insecurity, maybe while filling your tank or grocery cart, paying utility bills or thinking about how to keep your kids safe this summer. I see it in faces. Fewer smiles, more worry-lines. It is a hard time for most of us. So please, let that person pull in front of you, give everyone a little grace. Grace is free. So are hugs and smiles and waves. Everything else seems to be more expensive than it was yesterday and the shorter-term future looks like it will be more of the same.

Thanks, as always, for following along-

Thursday, May 14, 2026

Building a Shop - Construction Permit Complete

For a project that started in December of 2024, I am surprised it took so long for the shop to reach "complete" for it's initial build permit. Today, I'll review some highlights and touch on a Hapy adventure.
 
The Doors
shop permitted
I had an entire post about the doors (See Building a Shop - Doors) where I detailed almost buying the wrong size big door. Then, we got things right. That big door faces north. Next to it, our contractor guy Ray installed a basic HomeDepot-special 36" (1 meter) wide person door. That door is the only door with an external-facing lock. Moving around to the west side, we have a 10-foot (3.3m) wide opening. In the Ghost of GoRo post, I mentioned the west-facing barn doors that Ray built. I will give them more detail below. The southern opening also got a barn-door style install, though the actual doors are a little different.
 
Ray's Custom Doors
barn doors by seating area
I'll start with the west-facing big barn doors. First, we sourced an external barn door rail system (~$300US) capable of supporting a few hundred pounds. The opening had a double header, so most of the rail was mounted to that, through the exterior skin. In order to create sufficient space for a door to hang, the rail install includes a small block of 2x4 between the rail and the outer skin at each bolt-point. The header only spanned the opening, so on either side, from the inside, Ray added a 2x4 on the inside for the mounting to attach to. The south-facing smaller doors had a similar barn rail system installed. We followed the pattern of using 2x4 blocks to create the offset, and using 2x4 planks inside for the mount to attach to. Unlike the west-facing door, the south-facing did not have a double header, so the entire rail needed the 2x4's installed.

southern doors
With the rails in, Ray shifted to construction of the doors. All 4 doors were framed with Sun-wood. This is exterior-qualified wood, but lighter than cedar and not chem-y like pressure treated. Because the west-facing doors are bigger, they were assembled with brackets to hold them square. And, they had angled planks added for strength against twisting or flexing. The south-facing doors were joined with biscuits, and did not have the angled planks added. Once the frames were ready and test fit, the west-side doors had siding attached so they match the building. The southern doors were skinned with clear plexiglass. This will allow the little bit of winter light we get from the southern sky to leak into the shop.

Once the doors were assembled, Ray re-hung them, and installed interior grab handles to operate them. On both sets of doors, we added guides into the concrete so the doors would not move away from the building while in place or traveling. Last, I added a lock to each door so they could not be opened from the outside. I need to prime and paint the south-facing doors, but they are operational as-is.
 
Inspected
southern doors
When I had the building inspected in August of 2025, the inspector asked for 2 things: install the doors and add a landing for the person-door. With the doors now complete, and the landing added in September (See Building a Shop - Steel Building Erected), I was ready for an inspection. So, on Monday I ordered the inspection. The inspector checked the boxes on Tuesday and now I have an officially completed building (per drawings, spec's and inspections). What does this really mean? Well, in terms of the permit and inspections, it means I get to pay taxes on the land improvement, and my home owner's insurance just went up. It also means that anything contained within that shop is now covered under my home-owner's insurance and if something catastrophic happens to the building, I'm covered insurance-wise.
 
What does this mean in terms of my personal use of it? Very little, frankly. I needed the doors so I could lock it. Once lockable, I can start storing tools out there, so I can work on a car in the shop and not walk the 40 meters from the shop to my tools in the garage and then the 40 meters back again. I have already repaired 3 cars in that shop with a 4th (Astra needs her alternator replaced) heading in on Friday. having a lockable shop means I can do that work that much faster because my tools will be right there.
 
Retrospective
where we began
Being an advocate of both Agile and Continuous Process Improvement (CPI), I believe that some kind of look-back when a project reaches its end is healthy and helps you and others make better decisions in the future. So, with that in mind, what did I learn that I haven't already mentioned?
 
     Permits: I covered most of the discoveries along the way in the linked permits post. Get Clean Water Services involved early and make sure you manage both erosion during the construction as well as any mud getting tracked into the street. Either can got your job flagged and then things get much harder.
 
    Survey: The "106" inspection is all about proper placement of the building relative to your plan and the property lines. If you don't know where your lines are and can't figure it out, you will need a survey, or you may not pass the first inspection. I split this inspection into 2 visits, with the first being informal wholly focused on the site location. This was Vai-the-concrete-guy's idea and he was 100% right.
 
excavated
    
Bidding: get lots of bids. I had 3 and had I gone with one of them, it would have cost me ~$5k more for the flatwork. Part of every conversation about the flatwork included a conversation about the excavation. For every bid, the excavation was a meaningful amount, even though it's not terribly time consuming, especially for out project. This might be something we could have done ourselves, but the schedule worked out better having Vai do it all. Last, make sure every bidder fully understands all of the parts of the plan. Vai had a brain-fade about the carve-outs for the lift and had I not asked about it after they ran the compactor, there could have been an issue. This served as a reminder that without a designated general contractor, YOU are the GC.
 
    Inspections: While Clean Water Services did verify that the erosion control measures were in place, and made sure that the storm outflow was planned for, the adherence to that plan was not in any inspection.Does this mean it isn't needed? No, nor does it mean that it won't be part of your project, it just wasn't part of mine and I managed the storm water with french drains once I was unable to attach gutters. So, I have a rock pit in my yard without purpose. The inspector can be your friend. Case-in-point, I would not have even known about an "Ufer" if the inspector had not mentioned it and then approved it. I now have a passing-electrical ground because of the inspector.
 
cleared and framed for concrete
    Concrete: I asked the concrete contractor specifically what, if anything, I needed to do once the concrete was poured. He said "nothing", and I got surface cracks because it did not cure uniformly. The correct answer is "try to keep the surface wet with a garden hose for a couple of days". Then, the top does not dry too fast relative to the concrete beneath. 
 
    Oregon Carports: these folks were great from start to finish. They were easy to work with, the plans were spot-on for the permits and inspections and the installers were fast and nice guys. It would have been nice to know that a gutter could not be installed without retro-fitting, but at this point we have weathered a full wet season easily.
 
    Driveway: When I planned the shop, I knew that the ground sloped downhill south to north but I did not account for the west-to-east down slope. Topology matters. After the steel building was up, I had over 1/3m (an American foot) drop off at the southeast corner. This led to many hours of hauling and spreading rock. Since my labor is free, this did not factor into final costs, but it may factor into your plans.
 
    Overhead Doors of Portland: Similar to Oregon Carports, the overhead guys were great to work with. They found us a door that just smashes for less than half of what I would have paid for new. They stopped by late last week to install a header board over the door and install the weather seals. Both after my check had long cleared. We will be using these guys again.
steel skeleton
 
    Ray: Ray is a star. He has been a contractor building things since he was a teenager. Now, he's getting near retirement and is not taking on any new customers. So, those of us lucky to have worked with him in the past are blessed to still have him, at least for a little while. One of Ray's greatest strengths is looking at a project without filters. He can imagine what you are looking to do and make it happen. He built the barn doors, yes, but he also built our kitchen with salvaged cabinets. 
 
Timeline
For history's sake, and in response to my "how did this take so long?" question above, here's the time line for the build, start to end. There was a break in the action over the winter Oct2025-Mar2026 while we financially recovered a little bit from the costs incurred so far. We needed to get onto Ray's calendar and figure out the doors a bit too.
 
2024-AugustBoo and I decide to build a shop and figure out about where we want it
2024-December: steel building ordered from Oregon Carports
2025-January: permit started with Washington County (WC) ($700)
2025-March: Clean Water Services (CWS) involvement in plan
2025-April: permit accepted, initial payment of ~$1k
2025-May: self-performed survey, soliciting concrete bids; locating and placing "straw wattle"
2025-June: CWS inspection, excavation, WC site inspection, concrete poured, WC "106" inspection 
2025-July: steel building installed on foundation
2025-August: french drain install around foundation, WC "199" inspection fail
2025-September: rock and gravel of drain, north-side access
2025-October: move 4 cars before rains hit
-- work suspended to save some money -- 
2026-March: west-side barn doors, north-side person door installed
2026-April: north-side overhead door installed
2026-May: south-side barn doors installed, WC "199" inspection pass
 
Costs
Similar to the timeline, I'll detail the costs as I can find them. Of course these were all in as-of-that-day US$. With TrumpTarrifs and trumpflation, your numbers may vary widely from these.
        0: Advise from WashCo, inspectors and Clean Water Services
  1800: Permits with Washington County
23000: steel building from Oregon Carports
15500: excavation, framing, concrete pouring, incl $500 for the concrete pump rental
  7500: north-facing big door from Overhead Door of Portland, incl install and opener
  4800: all other doors, incl hardware, custom build, installs
    800: french drain materials, gravel
    500: large rocks for storm outflow
53900: TOTAL
 
From these numbers, I conclude that when you think about building a shop, the cost of the building itself could be less than half the overall costs. I paid more for permits than I did for rock and gravel, which is also interesting. The 4 doors cost almost half of what the overall building cost too. I could have had fewer openings, or installed a solid overhead door to lower costs, but I'm glad I didn't. Also it is worth noting that this shop has no electrical yet. I expect that will be a 5-figure as well since I will need a trench to run power, a panel, and then lots of cabling contained in conduit. Eek. I do not expect that work to take place any time soon. Instead, I will operate with a long extension cord from the house for as long as I can manage.
 
Hapy Shifting
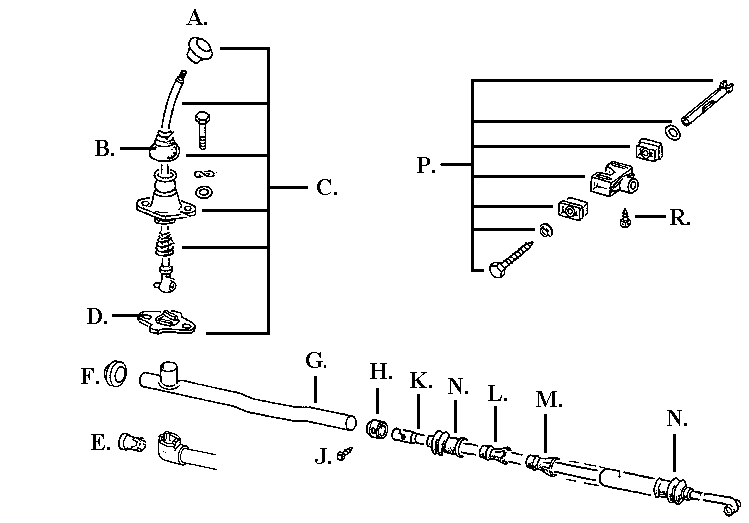
In my last post, I celebrated Hapy shifting so well. That turned out to be premature. The next day, I lost the ability to put Hapy into gear and had to limp home in rush hour from around the corner.. in 3rd gear. One hot clutch later I was back in front of the garage and there he sat for a few days until I could get a look at him. Of all the things that could come apart, I did not expect the bolt going through the pin in the shift linkage at the front of the transaxle. In the image on the right, it's the screw in sub-component "P". I expected the grub-screw ("R" in the image) to have fallen out because I could not remember if I had run the bailing wire through or not. Turned out I did, and the grub screw was doing fine.
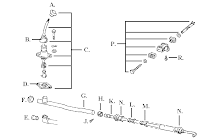
 
shifter diagram
I pulled the pin out and rummaged through my drawers of fasteners and found a 11mm bolt that fit. After around 20 minutes of wrestling, which consists of slightly moving the shifter in the cab, getting back under the bus, test fitting and repeating until you can muscle the pin through the hard plastic bits in the cage AND through the end of the linkage running from the front. This time, I put blue thread-lock on the bolt added a washer and sent it into the pin. I torqued it down as best I could considering my body position and the lack of something firm to grab on the opposite end. I used a pair of pliers to hold it.
 
Hapy is back to shifting normally again.
 
Wrap Up
After Ray finished the doors and I had locks on them all, I sat in one of the rear seats from C's new mini-van / stealth-camper we set in the shop as a seating area. I took a moment to just absorb. We so often will not take those minutes, choosing instead to rush off to the next thing. I sat for a few minutes, radio playing softly in the background and simply looked around at my shop. I really can't believe it. After so many years of lying in puddles, sliding on my back on wood chips or just outside in the rain, I cannot imagine what it will be like to work inside, on a hard dry surface come winter. Even now, as we head into summer, I will be working in the shade, on cool concrete, not hot tarmac. Of course, between then and now, I have a great deal of stuff to move and organize, but as of today, the shop is open and I can't wait to get out there.
Thanks, as always, for following along- 

Wednesday, April 22, 2026

Hapy not Spittin Fuel

I managed to get Hapy, the 1972 TDI-powered microbus, over to Justin to get the injection pump re-sealed this weekend. Today's post covers that adventure as well as a quick trip thru a K'Lack (2004 VW Jetta Wagon) issue.
 
Getting There
head seal complete
It has been 2 years since Hapy really went much of anywhere. Most of that time, he sat waiting for attention either in an unknown, but unstartable state or in pieces. Once I had him re-assembled with a new flywheel/ring gear and had a test drive, the original reason for him to have starting problems re-appeared: Injection Pump losing prime. I was able to prime the pump with a MityVac and then crack the injectors to get him running. And, in that way I took him on a short test drive, found some issues with the lights, etc. There remained many other issues, but at least I could get him running, stopping and had my lights so I could drive him an hour and 20 minutes to Justin's shop.
 
The night before our start-of-day appointment, I got Hapy out of the back and filled with B-20 biodiesel ($6.40/gal. same as dinoDiesel. Thanks, Trump). That morning, I filled up with coffee and hit the road. Most of the drive from West Beaverton to Justin's shop is on back country roads with few other drivers on an early Saturday morning and even fewer traffic lights. It was in the 50's (F low-teens C) and clear, making the drive very pleasant. At some point after I fixed the rear speakers, the stereo lost access to 12V so I drove in silence, a familiar scene for Hapy. The road was so easy, the thermostat never opened. I had the cabin heat on, so I may have been pulling just enough heat off the engine to keep the thermostat closed. Based on the UltraGauge, the engine temp was hovering around 180*F so running "cold". When I pulled into town off the country roads, I had a few cases of not finding 2nd gear. I noted that for followup later. When I arrived, Justin and I hung out for a bit before getting started. He has so many interesting projects all going at once, you have to absorb it all. I mean, who puts a TDI in an Audi TT while also putting one into a Rabbit pickup? Love that! The way he scraps discards and re-uses them for the basis of tools is pretty awesome too. He's even teaching himself TIG welding. Small crush, maybe. Okay, fine. He does do some impressive stuff.
 
Injection Pump (IP) Reseal
hammer mod perfecting IQ
Justin had encouraged me to get the seal kit from Cascade German, since they are local-to-Oregon, when we first set the apointment. I had already purchased the deluxe kit from DieselGeek. I didn't understand the difference. These 2 kits definitely vary in their intended purpose, so they have some meaningful differences. The Cascade German version is actually less expensive, but it includes all of the little seals usually replaced when a legit shop does the re-seal. The DieselGeek kit has far fewer seals (just the 2 on top and the head-to-base seal) and it is designed for the home-mechanic to re-seal the pump in their garage without removing the pump from the vehicle. The DieselGeek deluxe kit is more expensive because it includes specialty bits a car owner probably does not have, but are needed for the job. This differentiation is important and your case may lead you to the larger kit even if you do not intend to replace much more than the 3 included in the DieselGeek deluxe.
 
Once Justin discovered the gap, we made-do with the smaller kit. Justin replaced the top 2 seals first and then moved onto the head-to-base seal. Rather than use the included "retraction limiting bolt" and try to fit the new head seal over the top of it, the head was removed, and I held the guts of the pump in-place while Justin cleaned all the surfaces and installed the new seal onto the head. Once installed, he hooked up the VagCom and hammer-mod'd (link to Hammer Mod thread on TDIClub) the injection quantity (IQ). Justin was aiming for 6.0 mg/stk because the engine was cold (54*C).
 
The engine bay was pretty dirty, so lots of time was spent getting the IP clean before we began as well as afterwards when the whole engine got a cleaning. After it dried off a bit, we let the engine idle and we looked for leaks. None found. Justin did ask about how the starter was mating to the flywheel. It does sound loud, like it may not be meshing quite right. I'll need to remove and reinstall the starter and the starter adapter to see if I can get things to sit right. The original adapter and starter that I put in just worked for years. I would expect the new-also-stock starter would fit the same. Since this is a new adapter, that is actually designed for the application, versus one I dremel'd to fit, I would think it would fit better. It's a puzzler, but one I will consider carefully as I remove/reinstall (R&R) the starter to get it to hit the ring gear more cleanly.
 
Getting Home
If there is anything we have learned over the years about Hapy, its that he loves going places and really does not like going home. How many times have I left home and the road trip to 4 Peaks or some camping spot went great and the drive home was either very challenging or partially performed by a flatbed? Too many. This trip was no different. At first, Hapy ran great. The engine was responsive and stayed cool. Somewhere around McMinnville a charged air pipe popped off, leaving me running naturally aspirated the rest of the drive home. This served as yet another reminder to never leave home with Hapy without some tools. While the turbo is great for the overall power-band, its absence is really noticeable when trying to leave the line and get up to traffic speed. Now that it was about noon on an absolutely stunner of a day, the roads were busy where they had been empty a few hours before.
 
By the time I was approaching the Dundee Bypass, I was having increasing difficulty finding 1st and 2nd gear. Sometimes, one or the other would be right there. Other times, it was a "can't find it, grind it" experience. This persisted all the way home, forcing me to sometimes leave a stop line in 3rd. When you add in the no-turbo, I had some dissatisfied fellow travelers around me. I did get home, however, and I drove Hapy all the way into the shop so I can chase these issues.

K'Lack
After having something to eat, I switched over to K'Lack, the 2004 TDI Jetta Wagon with a BEW motor. It had been throwing a crank position sensor error, lighting up the check engine light (CEL), preventing it from passing smog. I had ordered a replacement from Cascade on Thursday, and it was in the morning mail on Saturday when I got home from Justin's. The removal/replacement of these is not complicated (remove bolt, unplug from harness, install is reverse), but getting to the sensor and the weird bolt head complicate things. The sensor sits right behind the oil filter on the front, when the engine installed transverse like normal. The bolt head is a 9mm 12-point. Half of my sockets are 6-point and the other half are 12's, designed, I think, for easier application onto hex bolts. In this weird case, that socket set perfectly onto the 12-point bolt head. With the right socket, short extension and ratchet the bolt comes out fairly easily. The plug end is fitted into a metal tang, but otherwise once unplugged, the whole thing can just get dropped through the gaps onto the ground.
 
To install, I plugged it in first and then covered the sensor with a rubber glove to lower it past the engine ick and then below the car. Could I have cleaned the engine bay before starting? Yes. But then I would have been lying in mud since the car was on my front lawn, not back in the shop and I didn't want to lay in a puddle. At this point, I found having another person to be your eyes is very helpful. I got under the car, un-gloved and suspended sensor in hand and had Boo tell me east-west, up down until I was able to send the sensor into the hole. By doing it in this order, the sensor wanted to be oriented such that the bolt holes lined up naturally. I sent the bolt thru, tightened with the socket/ratchet combo and I was done. Since I cleared the code we need to run a few cycles until it is ready to smog.
 
For the legal-minded, Oregon cops are interested in registration violations after years of looking the other way post-CoViD. K'Lack got a registration-violation ticket while legally parked in downtown Portland. Drivers beware.
 
Hapy Wrenching
Feeling confident, I switched back to Hapy, and re-connected the charged air hose. As I suspected, it was one of the rubber-to-metal bits. I cleaned both the outside of the metal pipe and the inside of the rubber with brake cleaner so they were more apt to stay together and then tightened the clamp down.
 
I next wanted to chase why the lower gears were sporadically missing. I checked the front of the transaxle to see if it was out of position at all. Nope. Right before Boo and I bought this house, I bought a Gene Berg shifter. The new-at-that-time seats were higher than stock, moving the approximately-stock-length Scat gear shift further away. The Gene Berg shifter is a few inches longer, so I figured there would be less leaning. I had not gotten to installing it before the house was bought and life took a turn. Anyway, at this point I looked at the Scat shifter I had installed, probably over 15 years ago and slid the vinyl boot up the shifter. The plastic bits on either side of the shifter appeared to be allowing more play than I remembered. Hmm. Then, I looked at the rest of that mechanism. It was very rusty, especially the foot that rests on the floor. I shot the bolts with Kroil and after waiting a couple of minutes, removed them with a 13mm spanner/socket combination.
 
rust under shifter
The floor under the shifter had meaningful rust to match the rust on the shifter foot. I don't know how much play was created by the plastic bits, nor how much may have been introduced by the rust. I do recall, however, that the Scat shifter instructions did not account for adjusting the placement of the shifter front/back nor left/right. When looking at the foot profile, it looks very much like it is designed to sit squarely in the oval without any adjustment at all. I don't know if this was a terribly good design, but I will be installing the Gene Berg shifter which does allow for adjusting. I cleaned up the rust dust, shot the floor and the shift-rod end with brake cleaner and got everything as clean as I could. Then, I painted the area with Eastwood's Rust Encapsulater (the new stuff is even better than the original) and called it a day. I still need to treat from below. I shot the picture on the right here as I was almost done applying the paint.
 
Wrap
Well, that's where we stand right now. I have been in and out of the shop a few times since Saturday and there is not a single drop of fuel on the floor under Hapy. So, we can close the book on the IP leak. I intend to complete the shifter swap and then R&R the starter next. I hope that will be the end of both issues, but I suspect there will be more to do than that. Then, of course, there are all the other things like a fuel level gauge, the radio, and the diesel heater just off the top of my head. There are many incomplete items on Hapy. Now that I have a mostly-inside (one doorway remains), concrete floor'd space to work, my desire to work on these cars has really kicked into a new level.
 
Thanks, as always, for following along and more next time-

Wednesday, April 15, 2026

Building a Shop - Doors

Ia accept that putting a garage door on your shop is barely car-content, but it is the big deal around here, and it is at least tangentially related to cars. Recall, the shop was designed with 4 openings: on the North, the big door and a person door; facing West, a barn door and facing South a to-be-determined door. I lightly described the barn door in the Ghost of GoRo. Today's post is about getting a big door for the front of the shop and all the stuff around that.
 
Before I begin, for my US readers, happy tax day. I recognize there are very curious ways this administration and his congress are choosing to allocate money, and today of all days, that "curious" feels more acute. You may not be able to influence their choices, but you can choose to vote with your wallet every day. Please direct your purchasing choices into small businesses. Those mom and pop operators are your neighbors. When you invest in them you are investing directly into your community, and not into some corporation which takes from it.
 
Measure Twice
This is so obvious and yet, this was almost my biggest mistake. When I first was designing the shop, I had the front of the shop (facing north) almost completely open for a massive door: 6 meters / 18 feet wide by 3.3 meters /10 feet tall. My thought at the time was that 6 meters would easily allow me to move 2 cars side-by-side without having to get either too deep into the shop. Like, I could have one sticking halfway out and still get a car in. This was great thinking until I decided I wanted a way to get in/out through a "man" (I say "person", but I'm not pronoun-hostile either) door. I also wanted this facing North, next to the big garage-style roll-up door. This way I could leave the big door closed and still come and go through a door with a lock on it. Consider the barn door is locked from the inside, and that was always the plan. I have no idea what the southern door will be like, but it may not have an externally-facing lock on it.
 
no wind inside
Anyway, fast-forward to after it is built and I am looking for a tracked roll-up door. After spending weeks looking for a 18' x 10' door, I have a site visit by a local door company (Overhead Door of Portland) who has a used door that big. We run the tape and sure-enough the opening is 10' high, the clearance above is adequate. Then we check the door width and it's only 16' (5 2/3m). Duh. When I added the person door, I reduced the size of the roll-up door and completely forgot. Ultimately, this saved me a bunch of money, though, because a standard residential tracked roll-up door is 5 2/3m (16 feet). When I say a bunch of money, the used door he had would have to cost me $14k US including install and an opener. The larger opening also would have pushed me into a commercial-grade door, so it would have weighed nearly double the residential door.
 
Patience Pays
open, windy inside
With the more accurate measurement, the fine folks over at Overhead Door of Portland dug into their stock of used doors. After a few weeks, they had a suitable door. Boo and I want a glass door, to maximize the light coming on for cold daytime work (think: winter weekends) and to not block overhead lights when it's open. We both also thought that a clear door would more closely approximate an old filling station look that we both had romanticals about. These glass doors, though, are less common and more expensive. The door they have is undamaged, but whoever had installed it chose to mask off the glass and then rattle-can paint the doors and rails with black Rustoleum paint. That decision would have been totally fine, had they prepared the surface for paint. At bare minimum the doors needed to be scuffed with 300-grit to 400-grit sand paper (or a red ScotchBrite pad) so the paint would have something to bite into and then wiped down. They did not and the paint did not. Instead, the paint is flaking off and is not presentable to most. For our purpose: make opening clear, yet lockable while looking old-Skool... it is perfect. We may change our minds and fix the paint, but for today, we are happy with it.
 
Car Mad Dash
Hapy's spot
As is so often the case, this was a full-on hurry up and wait. Well, really, it was more of a wait and then hurry-up. I have been looking for a door since the shop was built and now that we found one, the install was planned for less than a week later. From my prior post, you know that Oliver is against the east wall, right up against the big door opening. And, he was not running. Next to him is Hapy, barely jutting out the big opening and barely running. I needed to get both cars out the way and the lane way clear so they could get in there with the doors and equipment to get the door installed.
 
Getting Hapy out was easy: re-prime the Injection Pump with the MityVac, crack the injectors, pop the starter to a count of 5, re-tighten the injectors, start and back him out. This took less than an hour and I parked him in his longer-term designated spot where we can more easily visit and drive him. Yeah, I said visit; he's family.
 
Oliver drove!
Moving Oliver was a bigger deal, but only because I made it so. I wanted him to leave the shop under his own power. So that meant getting him running. In my last post, I described solving his fuel system. I don't know if it was insufficient patience or if I flooded the carb, but he would not start that day. A week later, and I have Hapy out of the way, I was ready to push Oliver out if I had to. First, I checked his spark plugs. They smelled like gas and were fairly black (fuel mixture probably too rich). I hit them with a wire brush and then re-set the gaps (0.033", internets recommend between 0.025" and 0.038") depending on lots of factors. I turned the key, got the fuel pump to prime and then quiet way down. At the carb with my hand, I "pumped" the accelerator a couple of times. At the wheel, I pulled the choke and tried to start him. After a few seconds, he started to act like he wanted to and after a few more tries, he fired up and held idle. This was the first time he ran since I rebuilt the carb, so an historic moment. Attempts to vary the engine speed with the accelerator pedal were fruitless, so I idled out of the shop, down the inclined gravel drive, and parked him in front of the person door. I was able to confirm that the throttle cable was junked. It would not stay on the pedal arm and then I was unable to move it consistently by hand. I'll be replacing that soon.
 
Final Prep
installers getting started
With the cars out of the way, I could get the last bits done for the door installers. I had strung outdoor patio lights around the inside of the shop, extending across the large door opening. So, half of that strand needed to come down. Last, I swept the floor which had not been really looked at since I moved the cars in last fall. With Oliver and Hapy out of the shop, I was able to really appreciate the size of my new workspace. It's really nice, and I will need to make a focused effort to leave myself room to work by not housing all of the cars inside all the time.
 
Door Install
The 2 installers from Overhead Door of Portland arrived as-scheduled around 10AM. They backed most of the way down the lane-way so the distance to carry the panels and runners was shorter. In half an hour, the doors were off the truck and positioned for installing (picture on the right). By 1130AM, 4 of the 5 door panels were installed on the runners and they were a-fixing the runners to the building. By 1PM, the door was in, the runners set, and the spring installed. Within the next hour, the install was complete, and Chris and Chase were showing us how the various controllers worked. With the door open, obviously, its almost like being outside. Well, its exactly like it was before the door was there: Full wind and misty rain on my face. Overhead, once lights are installed, the door will not block the light from reaching us beneath. That's huge. When the door is shut, the sound, wind and rain all stop. I did not expect the degree to which the air movement and sound would change. It is significant.
 
Wrap
Well, that's it for today. Next, I will be replacing the rear brakes on K'Lack (2004 Jetta TDI driven by my niece), replacing the throttle cable on Oliver and bringing Hapy over to Justin's to have the Injection Pump resealed. I don't know if any of those are really blog-post-worthy. Summer is coming, and having a safe vehicle (or a few safe vehicles) for Summer adventures starts now. As always, thanks for following along-

Thursday, March 26, 2026

The Ghost of GoRo

I have been coming off of an illness, having been sick for almost a month. Yeah, whatever that thing is going around got me good. In the meantime, we have gotten some headway on the shop doors and I got to start thinking about what's next on Oliver to get him on the road for the Summer. Today, though, is a cautionary tale about selling a car, no matter who you sell it to.
 
What's GoRo
GoRo
I'll back up a little bit first. Back in June of 2023, in my "Small Fence, Big Difference" post (link here) I mentioned in passing that we had sold GoRo, our 2009 Audi A4 to a guy down the street. We told him multiple times prior to closing the sale that he really did not want the car, that there were weird issues with the transmission, interior plastic bits were breaking off and that it was a generally crappy car. He would not heed our concerns, saying it was for his daughter, he could get the mechanicals fixed up fine, etc. There was still a couple of months left on the existing registration, and he was going to have to drive it to his mechanic, and then over to Department of Environmental Quality (DEQ) to get registered. So, Boo with her ever generous heart, let him take the car with the tags on it. We went inside and recorded the sale with the state of Oregon immediately.
 
Sales Daisy Chain
Of course, we were right. He took the car and within a couple of weeks he had sold it. But, he didn't tell us, nor did he remove the tags that we had left on there for him. In Oregon, you have a month after buying a car to change the registration. Since he hadn't had the car for a full month, he was officially in the clear, but whoever he sold it to also sold it within a few days, and we lost the handle on the ownership after that. 
 
Ticket Parade 
Why is all of this important? Within a few days after our
barn door
neighbor sold the car, we got our first of many speeding or other moving violation caught-on-camera ticket, followed by parking tickets and toll-lane charges. We got tickets from Montana, Texas, California and Colorado. In each case, we sent copies of proof that we no longer owned the car. For the tickets which came from legitimate state, county or city governments, the tickets were waived. In the case where the ticket was for not paying a toll on a "private road", the charging entity did not care that were were not the owners and could prove that we were not even in the state at the time of the violation. Instead, they sent the ticket to collections, dinging our credit. To prevent further damage to our credit, we paid that one. Most of these tickets arrived within the first 6 months after the car was sold.
 
Final Straw
This week, we got what we believe to be the final ticket. GoRo had been impounded in the City of Merced and would remain in their custody until we came down to their office and paid the bail on parking tickets. We don't care and after a while they will put the car up for auction, and it will be someone else's problem. I just hope the auction house or the City of Merced removes the license plates before handing it off to another sucker.
 
Buh Bye GoRo
barn door, inside
By the time we sold off GoRo, Boo and I pretty much hated the car. The seats were stiff like bleachers, increasing internal switches were failing, plastic bits were falling off, the transmission shifted funny, etc. It outside looked great, but wow, what a lemon of a car. The lesson here for us and for you: even if you're selling the car to your friend, remove the tags. If you are all down for the sale and want to be generous, drive over to DMV and remove the tags while your friend is getting temporary plates. Once that car leaves your possession, there is no telling what will happen to that car. You could find yourself with a big pile of tickets from uninterested parties who only want money, and are willing to hammer your credit to get it.
 
Car and Shop Stuff
I mentioned at the top that we have made headway on the doors on the shop. Recall, I have 4 openings which need closings. Over the past month, our friend Ray has built barn doors for the large opening facing west using extra siding I had added to the order for the shop so those doors could get made. It is a 10 foot wide opening, so the doors are each just over 5 feet wide. They totally look the part and glide open/shut easily. We also installed a "people door" on the north elevation or facing the farm house. This leaves a 8 foot wide doorway on the backside and the main large garage door next to the people door. I have been saving for the big door. While that doorway is a standard 16' wide, it is 10' high (just in case someone comes along with something really big, I guess). So, it is a semi-standard door.
 
On cars, I have Hapy about as ready to visit Justin as I can make him. Since he hasn't really driven since I put him back together, I really would have liked to have driven him a little more. With Diesel hitting $6/gallon around here, I all the more do not want to be driving with a fuel leak. So, his next drive will be to Justin's place.
 
voltage gauge upper right
To keep my hands busy, I have been looking at Oliver, the 1978 MGB. I couldn't get him to start when I went to move him into the shop and I didn't really look into why at the time, I just hauled him. I slid under the rear end and discovered why: I had drained all of his fuel out the last time I parked him. If I remember right, I put that fuel into the lawn tractor and the rest into Astra. Antyway, I test-fired the fuel pump with 12V directly from the battery and the fuel pump works. So, if it does not come on with the ignition key-turn, it's a wiring issue. After messing with that, I removed the voltage gauge from the dash and will be sourcing switched power for that. I had simply used the always-hot 12V for the clock I had replaced, but that runs the battery down eventually. I hope to have some time this weekend to finish the voltage gauge, put some gas in and see if I can get him to run, and idle. Then maybe I'll back him out and give him a long overdue bath and a drive-around.
 
Well, that's it for today. Keep your license plates when you sell your cars, and thanks, as always, for following along- 

Tuesday, February 17, 2026

Hapy Runs Again

Picking up where I left off last time, we had Hapy mostly in one piece, needing coolant. His exhaust was still in pieces, rear bumper on the ground and he had not started since June of 2024.
 
Coolant
full moon down the street
There is really no adventure here, but in the interest of being thorough, I topped off Hapy's coolant with some G40. I worked air bubbles out of his system by squeezing hoses, but they won't really fully work themselves free until the engine is running. So, after a couple more top-offs, I called it good and capped the overflow and coolant bottles.
 
Exhaust
The not-my-favorite, too-small-diameter, cheap exhaust installed on this engine all those years ago went back on. This was not my first choice, but I want Hapy running, so I'll circle-back on a new exhaust later. The old one came apart where the piping enters the muffler. I think the cheap muffler failed allowing the section of pipe to which the exhaust "downpipe" (we'll call it that: it's the pipe that leads from the turbo, but it does make it sound awfully grand) was welded to fall out of the muffler body. The weld is a good 4 inches from the end of the pipe which clearly fits inside the muffler body and sets inside an inner pipe within. I regret not taking a picture here; apologies.
 
ShadeTree mechanic'ing
So, I hung the muffler body by the support hook and then set to attaching the downpipe. There is one stud attached to the turbo that the 3-holed flange hangs on. Then, you swing the rest of it into place, square the gasket and send the other bolts (with washers) through. A 13mm spanner is needed for the lower bolt, but the other 2 can be approached with a socket. With the muffler swinging on its mount and the downpipe firmly a-fixed, I set the pipe into the muffler and literally hammered the muffler into the pipe with a rubber mallet. These parts will easily work themselves apart again, if I didn't do something. So, I went full shade-tree, and added a 1" angle bracket, screwed into the muffler and the pipe to hold it together. The picture on the right, here, tells the tale. Not a proud moment but that will all go to the landfill / recycler eventually.
 
Bumper
Feeling confident that Hapy would be a runner again very soon, I installed the rear bumper / tow hitch component. I detailed the original install of the tow hitch in Bus Tow Hitch. Re-install is not nearly as involved. 15mm socket needed. I set the hitch onto the TravisJack and lifted it close to where it would eventually sit and then balanced on the TravisJack while I set bolts. I fingered-on the left (driver) side and then the right (passenger) side, taking care not to drop the unit off the jack and onto me. I discovered that the exhaust pipe leaving the muffler hung in the way, but a solid kick with my boot resolved it without causing any damage to anything. Just needed some sudden blunt force. Once all 6 bolts were finger tight, I set the bumper where I wanted it depth and parallel-to-the rear-wise and torqued them down.
 
Injection Pump Prime
electrical connection cleaner
Any time I let Hapy sit undriven for a while, the injection pump loses prime. I believe this is because of a failing seal, but it's the one that's much harder to get to (and I don't have on-hand). So, I have let that sit to be solved another day. Enter the mighty MityVac. Since I disconnected the large fuel filter for the flywheel replacement, I was unsure if that filter was completely full, so I started with the line which enters the injection pump, moving to the return side of the pump next. This is relatively straightforward: disconnect the fuel line, apply vacuum with the MityVac (using the collection bottle between the pump and the fuel line, of course) until the collection bottle consistently gets fuel. Then, remove the vacuum contraption and reconnect the line. For the return line, I also clamped the return line from the injectors to the pump so I did not lose vacuum through them. Once the pump was full, I cracked the hard lines at the injectors with a 17mm spanner. This last bit of priming needs to be done by turning the ignition and counting to 5. Well, that's how I did it. When I returned to the engine compartment, each of the 4 injectors had some fuel sitting on top where the hard line connected. I snugged them back tight.
 
DeOx-it D5
Before I ran to the cab to give the engine a try, I wanted to make sure all of the plug-in bits were set. So, I went around the top of the engine, disconnecting, shooting-DeOxit D5 into the connectors and clicking them back together. This served 2 functions. First, a simple survey of the top of the engine allowed me to see if I had missed anything. Second, every electrical connection was confirmed a good-click connection and it was cleaned/deoxidized for a better connection. Having done this, and it only taking literally a minute, I intend to include a similar final survey when doing top-side maintenance going forward. Its so easy, and removes many possible variables to failures.
 
And Then It Happened
At this point, I felt that I had done everything I could to set up for a successful first start since June of 2024. I put the trans-axle into neutral turned the key to run and saw the familiar lights. With an inhale, I turned the key to start and after about 3 seconds he fired up. I didn't expect immediate, since fuel still needed to get pushed down into the injectors, but he started well and ran strong, arriving at a comfortable idle almost immediately. I left him run for a while, sitting in my shop in neutral while I checked for leaks and drips. There were none, which was little short of a miracle.
 
I thought about giving him a little test drive, but I have not solved for the electrical cord for the FrostHeater yet. Curious, though, I tried to ease him into gear, but he wouldn't. Knowing that he easily moved in and out of gear when the engine was not running, I concluded that the clutch cable needs adjusting.

Clutch Adjustment
This adjustment took a little bit of effort, but with a thicker spacer where the Bowden tube meets the mount on the transaxle, and another spacer on the adjuster, I was able to get the clutch to engage and disengage properly. The Bowden tube needs a curve in it to reduce clutch chatter, so this was needed regardless. The fact that I needed a spacer on the adjuster tells me that the cable that I replaced.. jeez.. almost 20 years ago... may be stretching. This is often a warning that the cable will fail soon. So, time to order a replacement.

I used a Velcro ties to hold the FrostHeater cable up and out of the way. But, before I wrapped it up, I tried the FrostHeater, and I think it might be broken. I'll have to do some research, but I expected the unit or at least the top hose to warm up to the touch a little bit. I did not notice any warming, so that effort may have been for nothing after all. Again, I will look into it and I may get a replacement unit, but I'll be pretty bummed if it was really only used a couple of times before it got damaged.

Here's a video of him running, probably 3 minutes after his first start in like 18 months.


I noticed that the rear lights were acting all weird, but a different kind of weird than usual after messing with the battery. So, I did not want to risk a drive-about. It seems like every time I touch the battery, the tail lights short-out such that stepping on the brakes completes an unexpected circuit. That's the usual. This time, the reverse lights were lit up and the blinkers were acting all strange, but only the rear. I think I may have done something with the reverse lights, like reversing the plugs when I wired up the switch, but I ran out of daylight before I could get after it. I'll diagnose and attempt to fix it next time. 

Thanks, as always for following along, and I'll post with any test-drive observations, and other improvements as they happen. At this point, I am thrilled that Hapy self-starts and can move around again--

Tuesday, February 3, 2026

Hapy Gets a FrostHeater

Today, I nearly complete the re-assembly from the flywheel (well, ring gear, really) replacement that has been an open effort since US Independence Day. I had to order a clip to hold the coolant temperature sensor in the coolant outlet flange, so this post picks up where I left off after placing that order. Before I begin, hapy belated GroundHogs Day or Imbolc, if you're a little less western in your seasonal outlook. Either way, there's 6 more weeks of winter because Spring Equinox is still 6 weeks away no matter what a Pennsylvania rodent sees. Anyway...
 
Some History 
installed
For background, Hapy was having increasing trouble starting over the past 2 years. I thought I was getting poorly manufactured starters because every time I replaced one, he would be okay to start for a few times. That was until the last couple, including a new highly-recommended starter from IDParts and a fresh local rebuild of the original TDI starter by a very reputable rebuilder. I concluded the teeth on the "ring gear" or in my case the teeth on the flywheel since this flywheel was one formed unit, had broken off enough that the starter teeth could not engage. This started a path that started with removing the engine-transaxle on my falling-into-pieces driveway, having the transaxle fall off a jack and popping off a flange, hauling Hapy in a sketchy way back to the shop, and finally, now, almost completely reassembled. When this saga completes, he would have been not running since July of 2024 (when we drove home from the final 4Peaks Music Festival).
 
FrostHeater
Frostheater is a vendor who uses a widely available Zerostart 3309040 coolant heater with hoses and brackets for a custom fit for various makes and models. If you have not tried one and are tired of cycling your glow-plugs multiple times before you can start your diesel in the winter, I suggest giving them a look. The unit Frostheater uses looks to be the top of the line from Zerostart in terms of build, capacity and cost. There are plastic other brands, and block heaters that are effectively a glue-on heating pad, but I have found these FrostHeaters to be really effective. From what I can tell, there are no moving parts. By placing the unit near the lowest point of the oil cooler loop the unit draws colder coolant from the oil cooler and the warmed coolant flows up through the upper bib into the head. That rising heated coolant then puts pressure on the coolant in the block to move into that vacuum, through the oil cooler and the loop completes. A few years ago, I installed a Frostheater into a 2004 VW Jetta Wagon (K'Lack). It worked great. We sold K'Lack to our niece a few months later, and she never used the heater. So, when we had to do a major timing belt and cam shaft maintenance, OldPoopie removed the FrostHeater, and restored the original coolant line which I left in place when I installed the Frostheater. The Frostheater and related hoses went into a box for future Hapy consideration.
 
Coolant Temperature Sensor
#6 in diagram
Before I get too far ahead of the story, I installed the coolant temperature sensor and retaining clip first. That sentence is easy to type, but the actual install is very unpleasant. In Hapy, the coolant outlet flange sits behind the fuel tank and barely above the top of the body cross-support that also contains the center-mount for the transaxle. So, there is no way to insert the clip from below, it must go in from above. Directly above the insertion point for the temperature sensor, however, is the to-the-heater side of the coolant outlet flange, leaving a 1/4" or so to fit the clip. Since the orientation of the clip is straight  up and down, there is not enough room to simply slide it in. Of course, let's not forget that you can't actually see anything because it is all on the front side of the engine. For the ALH-TDI engine install into the bay-window bus, I believe this is the single issue that challenges the install. It is minor, in the grand scheme, but it is still highly unpleasant when you need to replace this sensor.
 
So, how do we do this? With a fingernail, I find the slot on the far side (front) of the flange where the one side of the clip will go, and send one "leg" of the clip into that slot while holding the sensor firmly in place. The clip will flex hard, and the inner "leg" of the clip needs to bend somewhere while the first notch of the clip is slid in, I found that having it flex away from the flange (towards the sensor) gave me something to work with. Once the clip is most of the way down and it seems like the clip can't possibly flex any more, push the flexed inner "leg" towards the flange until it clicks into the hidden slot. I spent a couple of hours wrestling with this, and broke a clip along the way, but this method does work. These clips are inexpensive, so buy several when you need to install one. Also, I found it much easier to access the coolant flange from the driver side (the sensor side) if the charged air hose is removed.
 
FrostHeater Install
where fits FrostHeater
I could have stayed on target at this point, filled the system with coolant and started test firing the engine. In fact, I try to follow that pattern more recently: finish what you started, then do the next thing. In this case, I had already lost the coolant from just below the outlet flange and above. I figured swapping out one hose for 2 with the coolant heater was not a significant scope increase when compared to the effort to open the system to add the heater later. I figured adding it later could be years away.
 
All of the install drawings and instructions I was able to find gave very model-specific directions. I was able to determine through loosely related searches that the life of the heater is significantly extended if it does not suffer the constant vibration of being attached to the engine block. So, I looked for a place along the right side of the engine bay where it would be low enough to be nearly the lowest point relative to the engine block while still being reachable by the hoses I had on-hand. That area has a small wire bundle, the main 12V line and the diesel fuel lines, so my placement will need to be careful, but there is a section a few inches front-to-back where it could go. With that general placement decided, I shifted to hoses.
 
The BEW TDI hoses that were part of the FrostHeater kit are not an exact fit for my early ALH TDI. The top hose (red line in the drawing on the right), which runs from the top of the heater into the head hose bib which protrudes on the oil cooler side of the engine just below the coolant outlet flange (#11 in drawing), had an extra bend at the far end that I trimmed off. I felt that the extra bend made the hose want to have a large arc which would have created a hard-to-manage air pocket -or- it was a kinking risk, reducing the coolant flow. The lower hose that runs from the lower bib on the oil cooler to the lower bib on the heater simply would not work for where I could install the heater and still use the upper hose. So, I decided to reuse the hose I had originally running from the oil cooler to the head for the lower hose from oil cooler to heater (blue line in drawing).
 
viewed thru top hatch
Now, we get to hard-mounting the heater to the engine bay. The BEW install bracket on top of the heater unit was oriented to mount to the left side of something. I don't remember what. But the bracket could be easily removed with a 7/16" socket and flipped over, aligning the bracket for a right-side install. Flipping the bracket also placed the heater about an inch lower and set the angle of the bracket against the lip of the engine bay, offering some additional support. With the hoses attached, the heater unit had a smaller range of motion for deciding where to mount it without putting stress on the hoses. Still, I was able to find a spot where the bundle of wires and everything else would not get bound beneath the bracket, and marked it with a sharpie. I planned for and then drilled for a M6 rivnut. The M6 was considerably smaller than the original, but the heater is super light and I was fairly sure that bolt was designed to go into a pre-existing hole. I say "planned for" because once I got the hole drilled, there was no way I was going to be able to fit the hand-riveter into the engine bay and set the rivnut. So, instead, I simply sent the bolt through and nutted from behind like most things. It is still a M6 bolt, using washers, of course, just no fancy riv-nut. So, to remove, I will need 2 wrenches rather than one. Not a big deal.
 
Fill 'er Up
from behind approx level
With the cooling system seemingly buttoned up, it was time to add coolant and burp out the air bubbles. This is where my effort ran out of supplies: no G40 coolant on hand. I added some water to confirm there were no leaks, and after shifting the upper hose clamp on the FrostHeater, there were not any. In the picture on the right, here, you can see how well tucked up and out of the way it is, even though it is below the oil cooler. Note the dry, albeit stained, concrete floor underneath. No leaks.
 
I still need to solve for the routing of the electrical cord so it can be reached relatively easily on a cold day, but far enough out of the way that it is not subjected to flying gravel and road debris. At this point, I am looking at tucking it up behind the right rear wheel, under the battery tray and holding it in place with a strip of cable-management Velcro.It might be time to consider mud flaps back there to help protect the cable from tire kick up.
 
Last, when I removed the exhaust at the start of this project, it came apart where the pipe meets the muffler. To be honest, I was never terribly pleased with the exhaust that was put on there. But, it did last 15 years, so I can't complain too much. Still, I have a 2" exhaust kit that is a bunch of straights and turns that I intend to eventually cobble together into a better exhaust. I think, to get Hapy on the road, I will put the existing, falling apart system back in. Then, I can plan for the 2" exhaust as a near-future improvement.
 
Thanks, as always, for following along, and I intend to get coolant this week and get Hapy running next weekend.