Showing posts with label Westfalia. Show all posts

Tuesday, February 27, 2024

Hapy Heat Repeat (Part 1)

Ask anyone who has owned or simply driven an old air-cooled Volkswagen in not-Summer and 9 times out of 10 they will regale you with tales of being cold. These awesome vehicles were designed to have heat, its just that they were also designed to be owner-maintained, and maintaining the cabin climate control is not easy. With aftermarket replacements of J-tubes for heater boxes, cardboard pieces eventually failing over time and long channels under the car (where road salt, etc gets in), it's no wonder heat doesn't make it. Anyway, today's post documents another attempt to get some warmth into Hapy, specifically onto my feet and maybe even onto the windscreen.

Why the Obsession
By now, you must wonder why am I so focused on getting heat into the bus. And I get it. Put on a coat or something, right? Besides, it's not like we really get snow in the Northwestern Willamette Valley. This is all true. For folks who own these cars and busses in genuine snow country, I suspect either they are summer-only vehicles or you are far more brave than I, driving in moon boots or something. Around here, we really only have about 10 weeks of warm-to-hot weather out of the 52 in a year. For the rest of the year it is either cold or cold and raining. Driving around in the cold is not as fun when you're bundled up (ski-gear head to toe) and still cold. Regardless, the temperature is hovering around the dew point during those 42 weeks, and overnight for most of the 10 weeks of warm-to-hot season. In the mountains, it approaches the dew point earlier in the evening and remains later into the morning. So, having a means of getting the fog off the windscreen, and not adding to it, is super important.

The Plan
so it begins
Last November, I posted an update (see: Hapy Update) where I replaced Hapy's crappy glow plugs with a new set. I did not circle-back on that since, but he has started without a hitch all winter. Those plugs are fantastic. The real test will be how well they behave next winter. Anyway, in that post, I mentioned that I had acquired a Maradyne Fans heater unit and shut off the Vanagon rear-seat-heat unit because I believed it had started leaking again. We had a "break" in the weather (almost 10*C / 50*F and only occasional rain), so I took the unit out to Hapy. The think was to remove the old, and swap in the new. Ain't nuttin ever that easy, but it's in now.

Old Heat Exit
The Vanagon rear-seat-heat was suspended from beneath the belly of the bus just forward off the radiator. I had fab'd a custom plenum from the heater unit into the original 3" diameter air channel, run coolant lines along the driver side to feed it and run electrical from the dash to control the fan. I hadn't tried to control the valve, choosing to leave it on or off by setting the valve before a drive instead. I unplugged the electrical first, then the flashing/plenum that routed the air into the 3" channel. Then I set to removing the heater from the underside of the bus. Both of the nuts at the bottom of the threaded bolt supporting the unit had rusted so I had to encourage them with a hammer.

Last, the coolant lines needed to be removed. I held the lines closed with vice grips so I did not lose a bunch of coolant and then set a dishpan underneath so I didn't spread coolant all over the ground when I disconnected things. The lines removed easily enough and a small amount of coolant dribbled into the pan. From this I concluded that the unit had been the source of the leak in the cooling system or there would have been more than the few ounces that appeared. I set the unit aside and shifted to the new heater.

New Heater Hung
mounting angle
For installing the new unit, I started with placement thinks. I wanted it in essentially the same place, running air into the same 3" diameter hole. The force and size of this new unit dwarfs the Vanagon rear-seat-heat unit, however. The Vanagon unit is 6" tall and about 9" wide. The Maradyne unit is also 6" tall, but it is almost 18" wide. The Maradyne unit arrived with a cover that had 3 3" vent protrusions. The outer edges of those protrusions are 13" apart, so I decided I would retain the cover and enclose the vent protrusions inside my new plenum. I was unable to reuse any of the old piece.

After some failed attempts to place the heater straight/level with the ground, I shifted the mounting hardware so the new heater was at approximate 45* angle with the bus, pointing upwards. One would reasonably assume this would cause the unit to hang considerably lower, but because of the placement of the fans, the unit is only about an inch lower. How? Well, in this configuration, the top edge of the heater unit nearly touches the floor of the bus. Neither the Vanagon rear-seat-heat nor this unit could do that in the horizontal position because of all the various pipes running under the floor. In the picture on the right, here, the heater looks much lower than the radiator; that is probably caused by the angle I held the phone. In reality, the radiator is a hair lower. The mounting brackets have 2 holes, designed to be used with the enclosed screws. Yes, that's right, screws, and short ones at that. With this install design weakness in mind, I suspended the heater from a pair of metal tubes under the bus floor with.. wait for it... cable ties. Yeah, that is so RoadKill; I am not a fan of using cable ties this way. Having said that, I have not ever experienced a failure with cable ties, and if my 20-year history with Hapy is any guide I will be up under this bus fairly frequently. So, I will be able to monitor the health of these ties and resolve before any real issue arises.

Plumb It
With the heater relatively stable, I flipped to the driver side of the bus and started working on the coolant lines. As I mentioned in the referenced post from November, I picked up an old-skool control valve. Prior to installing, I noticed that the valve seemed to operate more like a shut-off valve than a gradual taper. When "closed", it was definitely closed, but it remained mostly shut through about half of it's travel, then opened up very quickly through the next 1/4 of it's travel and then that last 1/4 its no more open, in fact it almost seems to close a little bit. So, from closed to open the valve really only had to move a little over 1/4 of it's overall travel. I chose to drill out a little bit of material at the barely open part of the valve so that the first 1/2 of travel now actually opens a little bit near the end of that movement. Overall, I think the open-to-closed is closer to 1/2 the overall travel now.

Once modified, installing the coolant lines part was fairly easy. I cut a short stretch off of the return line, and added that to the return off the heater. To that I attached the valve, minding the indicated direction of coolant flow marked on the side. Last, I connected the supply and return lines and then removed the vice grips. I am not 100% thrilled with the routing of the hoses and will incorporate a 45* angle so they are not forced so route to low. After this picture was taken, I shortened the return line another inch or so to reduce the droop a little bit. I poured a bunch of water into the coolant bottle and called it a day as it was starting to get dark.

Plenum
I returned the following morning to complete the job. In a typical install of one of these Maradyne heaters, either the purchaser connects 3" hoses to the outlets or maybe some directional vents (neither are included). Remaining a-typical, I assembled a 4 sided plenum, like the one before it, held together with the higher-end flashy ducting tape.. The top is a 13" by 5" rectangle with 1" long drop-down sides, with a 45* angled rear tail and an up-turned front (image on the right). The bottom is 13" long by 4" (with 1" drop-sides along the shorter edge) and the plenum sides are right triangles with 4" long sides. Remaining ever cost-conscious, I cut material from the old furnace intake. Recall, it was 15" square, so I cut up one side and got 13" length with 1" for the drop-sides with one cut. I taped on the top and bottom first, then the sides, and closed up all the gaps. I get this is not exactly contours-quality... this is far from that. This is all about getting on the road with whatever heat I can extract from a TDI engine. Besides, the last taped-together plenum lasted a few years and would have continued had I not torn it apart for this install.

Electrical
Before I got started on the electrical, I looked back on the post I wrote about the Vanagon rear-seat-heat fans (See Defrosting - Part 4). I discovered that the fan switch that I bought for that install was the exact same as the one that delivered with the Maradyne fans, just with a different knob. So, while I could run new wires and replace the switch, I didn't need to. So, I didn't. Instead, I cut the 3-wire plug off the fan power wires and the ring terminal, leaving enough material so I could reuse it somewhere later. I added female spade connectors to the four wires. I could easily identify the ground wire and low-fan wire so I connected those and tested the fan. Success! And even on low, this fan is more powerful than the Vanagon rear-seat-heat unit on medium. It probably rivals that unit on high, in terms of airflow, but not fan noise. This is super quiet: no fan noise, only the sounds of the rush of air.

With a multi-meter, I confirmed which of the remaining 2 disconnected wires was the wire for medium. I decided that since I had a strong 12V signal, I would reuse the relays and simply wire up the fan. This was also much easier and it insurers that the wires won't melt when I turn the fan on one of the higher settings. The air flow on the "medium" setting is considerable. Boo and I have noticed that the heat in ToyoTruck is most effective on the not-highest setting, concluding that the air speed is so high on the highest setting, it is unable to pull heat out of the heater core as it passes through. As I wired up the high fan, I considered that we could have a similar issue in Hapy now, and may really only use the lower 2 speeds. Time will tell.

Any time the coolant system is open, there are a series of engine runs or test drives followed by adding water and coolant until it levels off. Since I did not need to drive Hapy during the week following this work, I didn't run the engine. Instead, I prepared for "part 2".

The inlets for the fans are drawing outside air and the control valve is still managed by rolling under the bus. I'll get to the valve eventually, but I don't want to wait too long. The drawing outside air, however, needs to be considered right away. As it is, a drive through one of our seemingly ever-present puddles and I've got warm fog blowing up on the windscreen. At least until I route the fan inlets to the bus interior. Since wet season will persist for another few months, I got after changing the air source shortly after I completed this post. I added the image on the right here to illustrate the first problem I encountered: the return coolant line runs straight through where an air inlet would go. Of course, the support bracket isn't helping either.

Thanks, as always, for following along-

Tuesday, January 16, 2024

Hapy Electrical Fix and Planning

A few weeks ago, I rotated the headlight switch clockwise and that caused a short that allowed a wire to release it's smoke. Today's post covers that resolution, with some expected twists and closes with a plan to update the fuse box.

Poof
72 bus wiring diagram
First, I accept that what happened was entirely my fault. I turned a push-pull knob, and the housing was loose so I created a short. At first, I thought I had grounded a pin on the back of the switch. Based on the wire which fried, I'm not so sure, but the grey wire fell off of pin 58. That wire fall was what caused the running lights to not function: they tie into fuses 1 and 2 which control them. It wasn't wire 58 which fried.

So, I dug into the interweb. I found another person who had the buzzing noise from their flasher relay and they discovered the root cause was that the dashboard did not have power. Sounds about right, I suppose, so we remove the dash to see. The dash removes with 4 screws. If you are fortunate enough to have the vent and oily-smelling-air controls, you may need to manage them first. I have the older style controls which originally had the little colored spring-loaded clips. Of course, Hapy didn't have the colored clips, and still doesn't. Anyway, remove anything from the vent control levers which impede the dash removal, remove the 4 screws and detach the speedometer cable. Then, the dash lifts straight out (a little diagonal) to the steering wheel. At that point, I rotate it so the face points to the floor. To me, this puts the least pressure on the wires while exposing them for me to see. From here, I could see that the black wire from fuse 12 that delivers 12V to the dash had it's plastic casing melted off. How and why that wire fried rather than popping the fuse, I don't know. The fuse was and is still there, it was relatively new (like, in the last 5 years), the right rating and it was seated properly.

Clumsy
1 fried wire
Knowing which wire needed to be replaced is a great first step. Getting that wire replaced without negatively impacting anything else in the original electrical system, however, is a virtually impossible task. Such was the case this time. First, I pulled the wrong wire out of the fuse box, and as I did, I dislodged a couple of fuses. Then, I got the wire back in and dislodged some other ones. Finally, I found and removed the bad wire from the fuse box, bumping a wire out of the high-beam relay holder as I did. Neat.

I formed a new multi-female-spade-connector wire, using the fried one as a pattern. With a multi-meter, I confirmed the connectivity between all of the end points had 0 resistance and returned to Hapy's driver seat. I plugged the wire into the tabs on the dash, and dangled it behind, finding the tab in the fuse box. Again, I unsettled a few fuses, but once they were in place again, I started testing. First, I confirmed that the running lights and headlights came on. It being daytime, I could tell the lights were on, but not that the headlights were the high-beams. I turned the key to run and the buzzing was gone. The turn signals worked, the hazards worked, and continued to work when I turned off the key. I even test started the engine to prove things were good. What I didn't test: the wipers. It seems that when I was messing around with the fuses, I failed to reseat fuse 11 (which controls the wipers and the rear defogger) after reseating what felt like all of the others -or- another wire fell off. I didn't discover that the wipers didn't work until I tried to take a drive at night in the pouring rain. So much fun. I don't think Hapy likes the winter weather very much; he does seem quite persistent in staying in the driveway.

About Had It
So, after spending so much time diagnosing issues only to discover the issue was the 50+ year-old fuse box or really the style of fuse used in the 50+ year old fuse box, I have decided to look into replacing it. I say that because the wire that fried was on a fuse that didn't blow and the fuses are in the box so loosely now they become disconnected simply by brushing past them. Based on my research, I understand the fuse-box layout / purpose to be this table below. I will replace with a simple 12-slot 12-independent-circuit box that uses spade fuses instead of the old buss style. It will ultimately use the same circuit numbers as before for all of the things I am keeping (never had ambulance fans, nor ignition buzzer, nor interior lights). Plus, it will include things I need, like radiator fans and the fan for the heater.

Fuse # Original Purpose Changed Purpose
1a front running lights, license plate light
2a rear running lights
3b passenger low headlight
4b driver low headlight
5b passenger high beam
6b driver high beam
7* open? looks like it was for ambulance fans radiator fans
8* emergency flasher and interior light emergency flasher only
9* ignition buzzer, rear interior light interior heater fan
10# horn, brake light warning switch/light
11# windshield wiper, rear defogger plus the windshield washer pump
12# dashboard, emergency flasher
rear backup light
a: supply-side from light switch
b: supply-side from headlight flasher (dimmer relay)
*: always hot
#: switched
&: inline fuse not in fuse box

I will be adding a master circuit-breaker as well back by the starter (where the main 12V source for the fuse box comes from) so there is a safety on the entire #30 circuit that goes to the ignition and the head light switch via the supply-side of the always-hot fuses. I do not know when I will get after this, though. The joy I have had since removing the rat's nest of wires for the engine control has been significant. The wires for the original bus have their problems, and I will be replacing some of the runs (particularly the rear tail lights), but for the most part, they have been up to the task. I just need to find a way to stay somewhat dry and maybe a little not-freezing so I can get after it. Since it is January, I recognize my opportunities for something this big will probably not appear for a while. Still, I can't keep letting smoke out of the wires, and I would very much like to get Hapy out of the driveway for a safe drive-around before spring. For the Pacific NorthWest, that starts with getting the wipers working again and then getting the high-beams turned off.

That's it for today. Thanks, as always, for following along-

Tuesday, October 3, 2023

Cascade Equinox Festival 2023 - Report

In the past, I have created 3 separate posts for a festival: the road, the bands and then the festival itself. When the road trip brought perils, this made sense. Lately, though, Hapy has been driving so well, I don't really have much to say in the the road report. So, the road gets a subheading. We did not see much of the music this time either, so there's no point for a separate post there either. So, one big post.

There and Back Again
We had not taken a trip in Hapy since LeisureFest, but we had our gear relatively well organized. Unlike our usual night-time exit, we were unable to dodge out of work early. So, we did like everyone else and loaded up in the morning instead. We had some typical delays, like cleaning things and getting Tuukka to Aunt Linda's. We left home around 3, got some B20 at the usual corner station with a couple bags of ice and hit OR217 South. Cascade Equinox Festival is held in Redmond (due east of Sisters), so the route is fairly familiar: OR217 to I-5 to OR22 to OR20 into Sisters. From there, it's OR126 to Redmond. We have done the route as far as Sisters for 4Peaks, so we know the landmarks. We had not been through the Detroit Lake area since the wildfires a couple of years ago, so seeing both the devastation and the start of the regrowth was breathtaking. Hapy ran like a champ, and after the heavy traffic on I-5 lightened up south of Wilsonville, he purred the rest of the way.

We determined that the Vanagon rear-heater that I installed as a means of producing some heat in the bus is simply not up for the task. Since this heater capacity was designed as an auxillary heater for the back seat in a Vanagon, this should surprise no one, including me. To wit, we had virtually no heat on the drive out and only suggestions of heat on the way back. We remedied with lap-blankets, but I will need to do something more significant eventually. On the way out, we stopped only once at a rest area along OR20. On the way back we stopped at the iconic Sno-Cap in Sisters for lunch. We love Sno-Cap; the shakes are great and the service is small-town warm. The drive home was colored with a steady rain, which Hapy absolutely loved. His temp barely reached 185* most of the time, and with the help of a super-slow driver behind us holding back the heavy Sunday afternoon traffic through the mountains, we had OR22 to ourselves most of the way to Salem. We continue to consistently around 30mpg, even when loaded with gear. This trip was no different; when I finally filled up (after driving to the festival and back plus some around town driving) he got over 300 miles and about 30mpg.

Festival Upsides
installation art
Since one of the organizers for Cascade Equinox is the organizer for 4Peaks, Boo and I had an idea of what Cascade Equinox was going to be like. We were mistaken, but that wasn't all bad. There were 4 large installation art pieces being created over the course of the weekend. It was fun to watch the artists work, and see their pieces evolve. There were 6 music locations within the secured area, with up to 5 of them going at once. This created many options for what to see/hear when. The vendor area was significantly larger than 4Peaks, offering a wide array of products. I bought, and then lost, a ring, but otherwise our back-to-school shopping was limited. We sampled a few of the food vendors, and they were both good and popular. In terms of services, there were free showers and there was never a queue for a porta-potty.

Camping in Hapy, we discovered some upsides as well. We had not really used the side-walls of the BusDepot canopy before, but we did this time. They were incredibly easy to put up and take down, held firm in the gusty winds and the biggest surprise was how well they held in the heat from a Little Buddy heater. We slept very well and the sound-killer that I installed held the seemingly constant subwoofer to the background. We camped on flat, soft grass and had ample space for the bus and our canopy. We were able to collect solar to boost our luxury battery on Saturday. We had enough water from home so we did not need to source more, we brought plenty of simple food so we only cooked what and when we needed to. As far as a camping experience, it was great. Boo even got to read some of her book.

Festival Downsides
Unfortunately, there were quite a few things that did not go well. Some of these could be chalked up to a first-time event, but since both of the organizers have done events before, the oversights are worth noting.
Ticketing
the elusive map
When I first learned of this festival, I got super-early bird tickets the day they went on sale. At the time, they had not figured out camping nor even the schedule of things, just that it was equinox weekend. At some point, I was contacted about a car-camping ticket, so I added one. We discovered upon arrival that the terms of the festival attendance tickets changed / were refined after we bought them and that "early entry" was now an add-on. So, at the gate at 9:PM I had to pay another $145US or park outside and drive in / set up the next morning. We were cold so we paid, leaving us that much less to spend on vendors. In retrospect, perhaps we could have gone in in the morning. Anyway, once through the gates, we were led to the car-camping zone. 
Camping
Some of the biggest misses were around how they managed campers. First, the area was mapped out in very long (100 meters?) lines where cars were parked with one set of tires on the lines (see in top picture) and between the lines of parked cars alternated camps and fire-lane. On paper, this makes sense for maximum density. Because every car was hood-to-trunk with the car on either side, there were no cut-thru's for people to just walk by, so no one did. Accessing services meant walking all the way to the end of the fire-lane and then finding services. Which leads to the next 2 misses: porta-potties and water.
Drinking Water
When spending multiple days in the desert, it is highly advised to drink lots of water. In fact, from the stage at 4Peaks, we are often reminded to drink water. In light of this, the lack of access to drinking water for a large swath of the car-camping area was especially noticeable. Fortunately, Boo and I brought our usual 5 gallon water jug and I filled it before we left simply because our water here tastes very good, and water elsewhere often does not. Bringing our own is a luxury item, unless we find ourselves in a place which does not provide and suddenly it is a very precious resource. We discovered that there was a single source of water on the other side of the festival grounds (but within the camping ring around the festival grounds), had we walked that far. The return walk with a full 5-gallon would not have been fun.
Porta-Potties
Okay, all porta-potties are gross. That's just a given. In the camping zone, they were clumped in large groups, but very far apart. Once you made your way there, they were not serviced often, leaving you to bring-your-own-supplies. The first cleaning took place mid-afternoon Saturday, so for those who arrived when the gates opened on Thursday, that's a long go. Beyond that, the porta-potties themselves were especially disgusting. Even after they were cleaned, there was black mold on the walls and inexplicable yuck on the floor. Fortunately, once the gates opened, there were better services inside: actual bathrooms which appeared to have been cleaned before the festival started but not afterwards. So, it was bring-your-own-supplies even then. Had security been more thorough, it would have made for interesting conversations.
Gate Entry
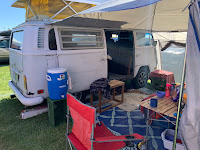
sidewalls hold in heat!
Because of staffing or staff-allocation of security, the entry gate from the camping area into the "secured" festival area did not open until almost noon every day. On Friday, they didn't open until 2:30. Since the stages started at 10:AM, and most of the folks who would have been inside were camping, the early artists did not enjoy much of an audience. For campers who did not bring food, water or coffee with them (we see this a lot at festivals), they needed to trek to the other side of the festival grounds to gain entry thru the main gate for breakfast.
Security
Since this was the first year, Boo and I could forgive the marked lack of volunteers. What was surprising, though, was the large number of security people. Once the camper gate was staffed, there were at least 6 security people there, though it was usually 8 or 10. Only one person got through at a time, with one security person checking a bag and another patting people down. I don't know what the other 4-6 people were doing beside appearing as a show of force. Even still, it was evident that many of the security people were on their first assignment as Boo and I watched them get verbal training one morning prior to opening the gate. Even still, I am not sure what they actually stopped from entering. On the last day, I had forgotten that I had a pocketknife in my pocket; they didn't find it and I didn't volunteer it. They never found my bathroom supply in my cargo-pant pocket.
Maps / Directionals / Signs
camper entry
Once through the gate, there was very little to help you gain your bearings. There wasn't a map posted in physical form anywhere. On Friday afternoon, I found the map above buried on the website. Inside the festival grounds, however, there were no guideposts and very few signs. At one point on Friday, we asked a vendor what stage we were next to, and they didn't know either. With the map above, we figured out later that it was Harvest.
Use of Space
I wasn't sure where else to put these. First, there were carnival rides in the middle of product and food vending. This seemed like a strange place to put them, and, frankly, they appeared to be little used when we walked past. I understand that having a Ferris Wheel at a festival has become an expectation, but I honestly don't know why though I can see the appeal of combining psychedelics and carnival rides to a much younger version of myself. It still seemed strange to have them in the middle of vending. Second, there were 2 stages near one another (Equinox and Harvest) which created a sonic cacophony in between while a third indoor stage (Gravity) that wasn't used all day. Unfortunately for the vendors in the zone between Harvest and Equinox, this area was fairly clear of attendees whenever both stages were going. What made this such an odd decision was that the Harvest stage had artists who could have otherwise been in the "Gravity" stage/room, in terms of space. Gravity was a great room, easily larger than the tented "small stage" at 4Peaks, but it was empty until after Harvest closed for the night, at which point it opened. In our humble opinion, the Harvest stage could be eliminated, using that space for more vendor/food/hangout space. Maybe that's where the Ferris Wheel goes? Regardless, staging those Harvest-artists in Gravity where they are not competing with Equinox for sound-space would have enabled the attendees to really hear what they're doing... and maybe hang out for whoever is next. Considering how cold it was, simply being inside could have increased the audiences for the Harvest staged artists.

Impressions
"follow your dreams"
We did see some of the bands and were very impressed with how much Yak Attack has grown since we saw them years ago. They pulled a huge crowd into the Harvest stage area, getting a couple hundred people groovin. DirtWire, and Phantogram also stood out to us.

Unfortunately, our festival experience was colored by 2 independent health challenges. First, I appear to suffer some form of altitude-sensitive anemia so it takes me a couple of days to adjust to the higher altitude of central Oregon (2k  feet above sea level). I had a similar super-low-energy experience at 4Peaks in 2017(?), and recognize that I need to supplement with iron prior to going -or- arrive a couple of days early if I want to avoid that. Second, we had a fried rice dish from one of the vendors and triggered Boo's sensitivity to MSG. We ate and she almost immediately fell asleep, missing Friday night's artists. Last, it was cold and windy the entire time. The overnight temperatures were below 4*C (40*F) and daytime highs barely touched 20*C (68*F). Once the wind chill is added in, temperature was a near-constant challenge.

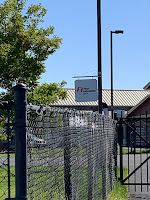
Totally unrelated, but I feel compelled to at least comment on it: do you see that sign in the "camper entry" picture? First Interstate Bank. First Interstate suffered a hostile takeover by Wells Fargo over 25 years ago, yet there are multiple First Interstate Bank signs around the fairgrounds, and they are in amazing shape. Clearly, the operators of the venue take care of the space if 25+ year old signs can look that good after sitting outdoors the entire time.

As we look back on this festival, I don't think we will be returning. The vibe of the festival seemed to be very "stick-with-your-tribe" oriented. From how the camping area was set up to tables near food vending to hang-out zones, none of the design appeared to support creating chance encounters or accidental conversations with people you didn't know. Quite the contrary, it seemed designed to support small groups staying connected to each other, but disconnected from everyone else. Even a queue for the porta-potties or restrooms creates that kind of 1:1 shared experience. The last picture, however, illustrates how the attendees were looking for that greater connection as this came from a "take something leave something" table that someone had set out in the fire-lane near their car. We left a fist-full of tea bags which had been picked up by someone else shortly thereafter. Clearly, there was a pulse there that the organizers failed to tap. Anyway, we wish them luck, but we will probably be celebrating the autumnal equinox in other ways in the future.

That's it for now. Back to the furnace next week-

Tuesday, April 11, 2023

Hapy Lives Again

For the first time in maybe 8 months, I have a car-repair-based update. I got Hapy running again, so today's post covers that.

Flatbed Again
At some point, I would love to go back through all my pictures of Hapy, so I could identify how many times he has ridden on a flat bed home. I know he got a lift home from a few of the Eugene trips, many of the 4Peaks Festivals, and his most recent was the 500 feet from our old house to NewOldHouse. At no point have we ever questioned whether Hapy is "worth it". Hapy is a family member; we just do what needs doing. So, a few weeks ago when Hapy wouldn't start, he got towed to NewOldHouse (See Four-Wheeled Friends to NewOldHouse) and was dropped off alongside the attached garage. That was not his designated spot, however, so our friend John and I used many meters of chain to move him into position with a come-along. We wrapped a soft strap around a decent-sized apple tree at one end and another one around Hapy's front sway-bar (Hapy's front tow-hook was pancaked before he came to us, so I removed it). In between, we ran chain between the tree and the come-along in front of Hapy. In about 20 minutes we had Hapy on the tarped area with his tires sitting on the patio blocks beneath.

No Start Diagnosis
I started my consideration of the no-start issue without preconceived notions about cause. While intuition might be accurate, it can also send you down an unnecessary path. Still, I ordered a replacement rebuilt Bosch starter (from AutoHausAZ.com) so I would have it on-hand in case the starter proved to be part of the problem. The day after we left the old house for the last time, I headed out to Hapy with his ignition key. I wanted to refresh my memory of the sound when I turn the key. It was a metal-on-metal grinding. If you get a rur-rur-rur noise or no noises at all, it might be your battery needing a charge. The metal-on-metal indicated that the gear on the starter was not engaging with the gears on the flywheeel -or- the engine was seized and it was engaging, but unable to turn the engine. Our wet-crappy winter has been well documented, but we have not had deep-cold that would have foiled the anti-freeze, causing the block to fracture, though. There could have been other reasons for the engine to lock up, but I did not want to entertain those thoughts just yet. So, I ruled out the engine-broken possibility for the moment and looked at other things: namely, the starter was not engaging.

To look at the starter, I had to slide under the bus. Over the years, I have worked on Hapy out in the elements for practically the entire time I've owned him. Most of the time, he was parked on concrete or tarmac, so sliding underneath was a quick slide on a sheet of cardboard. Now, like a period of time in Lake Oswego, he is parked over dirt. In Lake Oswego, it was a dished out mud puddle, marking the absolute low for working conditions. Here, the ground is uneven and lumpy, with a rise just forward of the main crossbeam. With the rear anti-sway bar now installed, the space to access the starter was more difficult that some other times. Of course, with the tarp, rain can pool. To remedy, I swept the puddles off with a broom. So goes. One day, a garage, but at this point, I am looking forward to just a simple concrete pad.

Starter Not Engaging
which would you use?
Once I got under the bus, I figured there could be 2 possible reasons for the starter not engaging: starter bad OR starter not aligning (or both). Before I went hunting for tools, I tried to give the starter a wiggle and it shifted fairly easily by hand. So, of course, the starter would not engage: the starter would get triggered and the torque of trying to grab the flywheel would bump the starter, preventing the teeth from meshing. Because the TDI starter does not natively fit the 002 bellhousing, I purchased and then customized an adapter designed for a Vanagon. The starter was firmly attached to the adapter, but the adapter had loosened from the bellhousing. I hoped simply tightening the adapter would fix the issue, so I went hunting in the ToolShed for the Allen sockets and a matching ratchet.

In this moment, I really missed my black tool cabinet and was reminded of so many of my earlier efforts spending considerable time looking for tools. There was one effort back then where I dumped my toolbox contents on the driveway so I could find tools faster. I found myself growing frustrated with the current state and then embraced one of Boo's teachings: combat the frustration with gratitude. "How's that," you ask. I recognized that I was experiencing a true 1st-world problem and perhaps I could be grateful that I have so many things, I cannot find what I need. I could be grateful to have a dry locked space to keep my tools and parts so they don't get lost or stolen. I could be grateful for even having a vehicle to work on. Last, I do not need this vehicle to get to a job in the morning or get my kids from somewhere, adding stress; Hapy could sit like this for weeks and it would have no material impact on my life. The fact that he was broken down in my new yard rather than along a roadside somewhere was reason enough to be grateful.

Feeling re-centered, I found the #8 Allen (that fit the mounting bolts) and tried to tighten the adapter. The next attempt to start also resulted in the grind, but the engine turned a little bit. This told me 3 things: the engine was fine, the starter might still be the problem and the adapter may still be the root issue.

Starter Swapped
Before I went any further, I disconnected the battery positive cable from the battery with a 10mm socket. Then, with a pocket full of sockets, and corresponding ratchet with long extension, I supine army-crawled back under the bus. The main power cable is held to the front (front is front) of the starter with either a 12mm or 13mm nut. In the image above, you may be able to see that the old one was 13mm, the new one is 12mm. With the power cable disconnected, I unplugged the trigger signal by squeezing and pulling it off the tab. Last, I loosened and then removed the upper and then lower 19mm mounting bolts. With the old starter free, I could consider the adapter plate. I wanted to remove the bolts, put some thread-lock on and re-install. I was unable to find my tube of blue thread-lock, though. Believe me, I tried. Knowing the bolts could eventually work themselves loose again, I simply made sure they were tight. Even after my earlier tightening attempt, the upper adapter bolt had some room to fully seat. The upper starter mounting ear partially blocked that mounting bolt, though, so I really needed to get the starter all the way off before I could torque it down. When the day comes that I return to this with thread-lock, that upper bolt will need it.

I pulled out the rebuilt starter and compared it to the one I had just removed from Hapy. Note the picture above. The one I had removed (top of picture) was not as good a rebuild, at least cosmetically. The black paint was done after it was assembled, and got all over the place. The gear had some chips from the miss-starts and there was rust on the solenoid. Since the replacement in-hand was virtually perfect and cost around $160US (before core deposit), I was inclined to install it. Since I had to put a starter in at this point anyway, I put in the new one: main mounting bolts first (19mm), then the main power cable (12mm) and then the trigger wire (clip clicks in).

Hapy Starts and Runs Again
I put the main positive battery cable back in place and tightened it down (10mm). With hope in my heart, I jumped into the front seat and turn the key to "run". All of the expected lights came on, but I wondered if I had run the battery down with my prior start attempts. I turned the key to start, and Hapy fired right up, settling into an idle fairly quickly. I let him run for a few minutes to charge the battery back up before shutting him off.

I wanted to take Hapy for a drive but we have had considerable rain since I moved Hapy over to NewOldHouse. In fact, it rained while I was diagnosing and swapping the starter. The reality is that between Hapy's rear bumper and the street lies 20 meters of long grass in squishy soft earth. Simply put, I didn't want to get stuck. Well, the next day, Boo had ToyoTruck loaded with steel recycling and ran out of time to get the load to the recycler. I had to get to Hillsboro, so I took Hapy. As has become his norm, he fired up and drove great. We reversed over the soft earth without really making an indentation into the grass so my concerns may not have been warranted. Considering how badly that same ground got torn up by ToyoTruck, I love these Destination A/T Firestone tires (See Hammered Rims Part 3) on Hapy even more.

Because I have the luxury battery still in off-season mode (disconnected to retain the charge), the trip to Hillsboro was radio-less, but fun. His throttle responded well and the noise-killer I had installed last year really cuts down on the low-frequency noise. Because there were so many posts on and during the noise-reduction, I'll list them out below instead of putting them in-line like I usually do. There are leaks around the front doors, creating a pair of whistles, but overall the noise level is significantly reduced. As has been his behavior for as long as I can remember, the drive home was highlighted by something going wrong. This time it was a fail causing the cooling fans to stop. His temperature did not climb above 190*F, though. I had expected one of the wires had shaken loose on my spirited drive home, but after checking things with the multi-meter I found that wasn't the case. The main power run from the battery-top fuse to the relay was not sending juice all the way to the relay. Why? I had spliced a 4-inch section of wire at the end of one long wire and that splice had failed: I had voltage at the splice, but not at the female wire connector 4 inches later. I redid the connection with a new female connector and without the 4-inch section. The fans operate again. This serves as more evidence that using one single wire (of the right gauge) rather than splicing wires is better for longer term operability / maintainability.

That's it for today. I expect to return to unpacking/nesting or kitchen demo. While I was driving Hapy, I realized how much camping gear I had stowed in him. He is kind of a rolling shed, so I may unpack him a little bit so he can be a more viable, load-carrying-capable daily-driver... once I figure out where to put the gear. More first world problems, for which I can be grateful-

Thanks, as always, for following along-
 
Noise Deadening posts:
Hapy Noises (Part 1) - discussed materials 
Hapy Noises (Part 2) - more material discussion plus db level readings
Noise Control Update - applying the Constrained Layered Dampener (CLD)
Noise Control Continues - rear and mid interior deadened
Hapy Cab Gets Quiet - the cab gets the noise deadening treatment

Tuesday, June 21, 2022

Interior Carded

Once the headbanger was installed, getting the interior to a usable state was a downhill run. This post is really more a collection of all the little things that got done so we could hit the road. So, for today, "complete" means "good enough for this Summer"; it does not mean we're done. I will be picking this up once camping season comes to an end in October. Before I begin, Hapy Summer Solstice.

Cab Floor Complete
I had left some of the MLV splits un-taped. So, I started with that. I discovered that the Jute and MLV was too wide between the outer edges of the seat rails and the doors to allow them to close easily, so I trimmed them down. Then, the edges were taped down.

Sun Visors
sun visors in
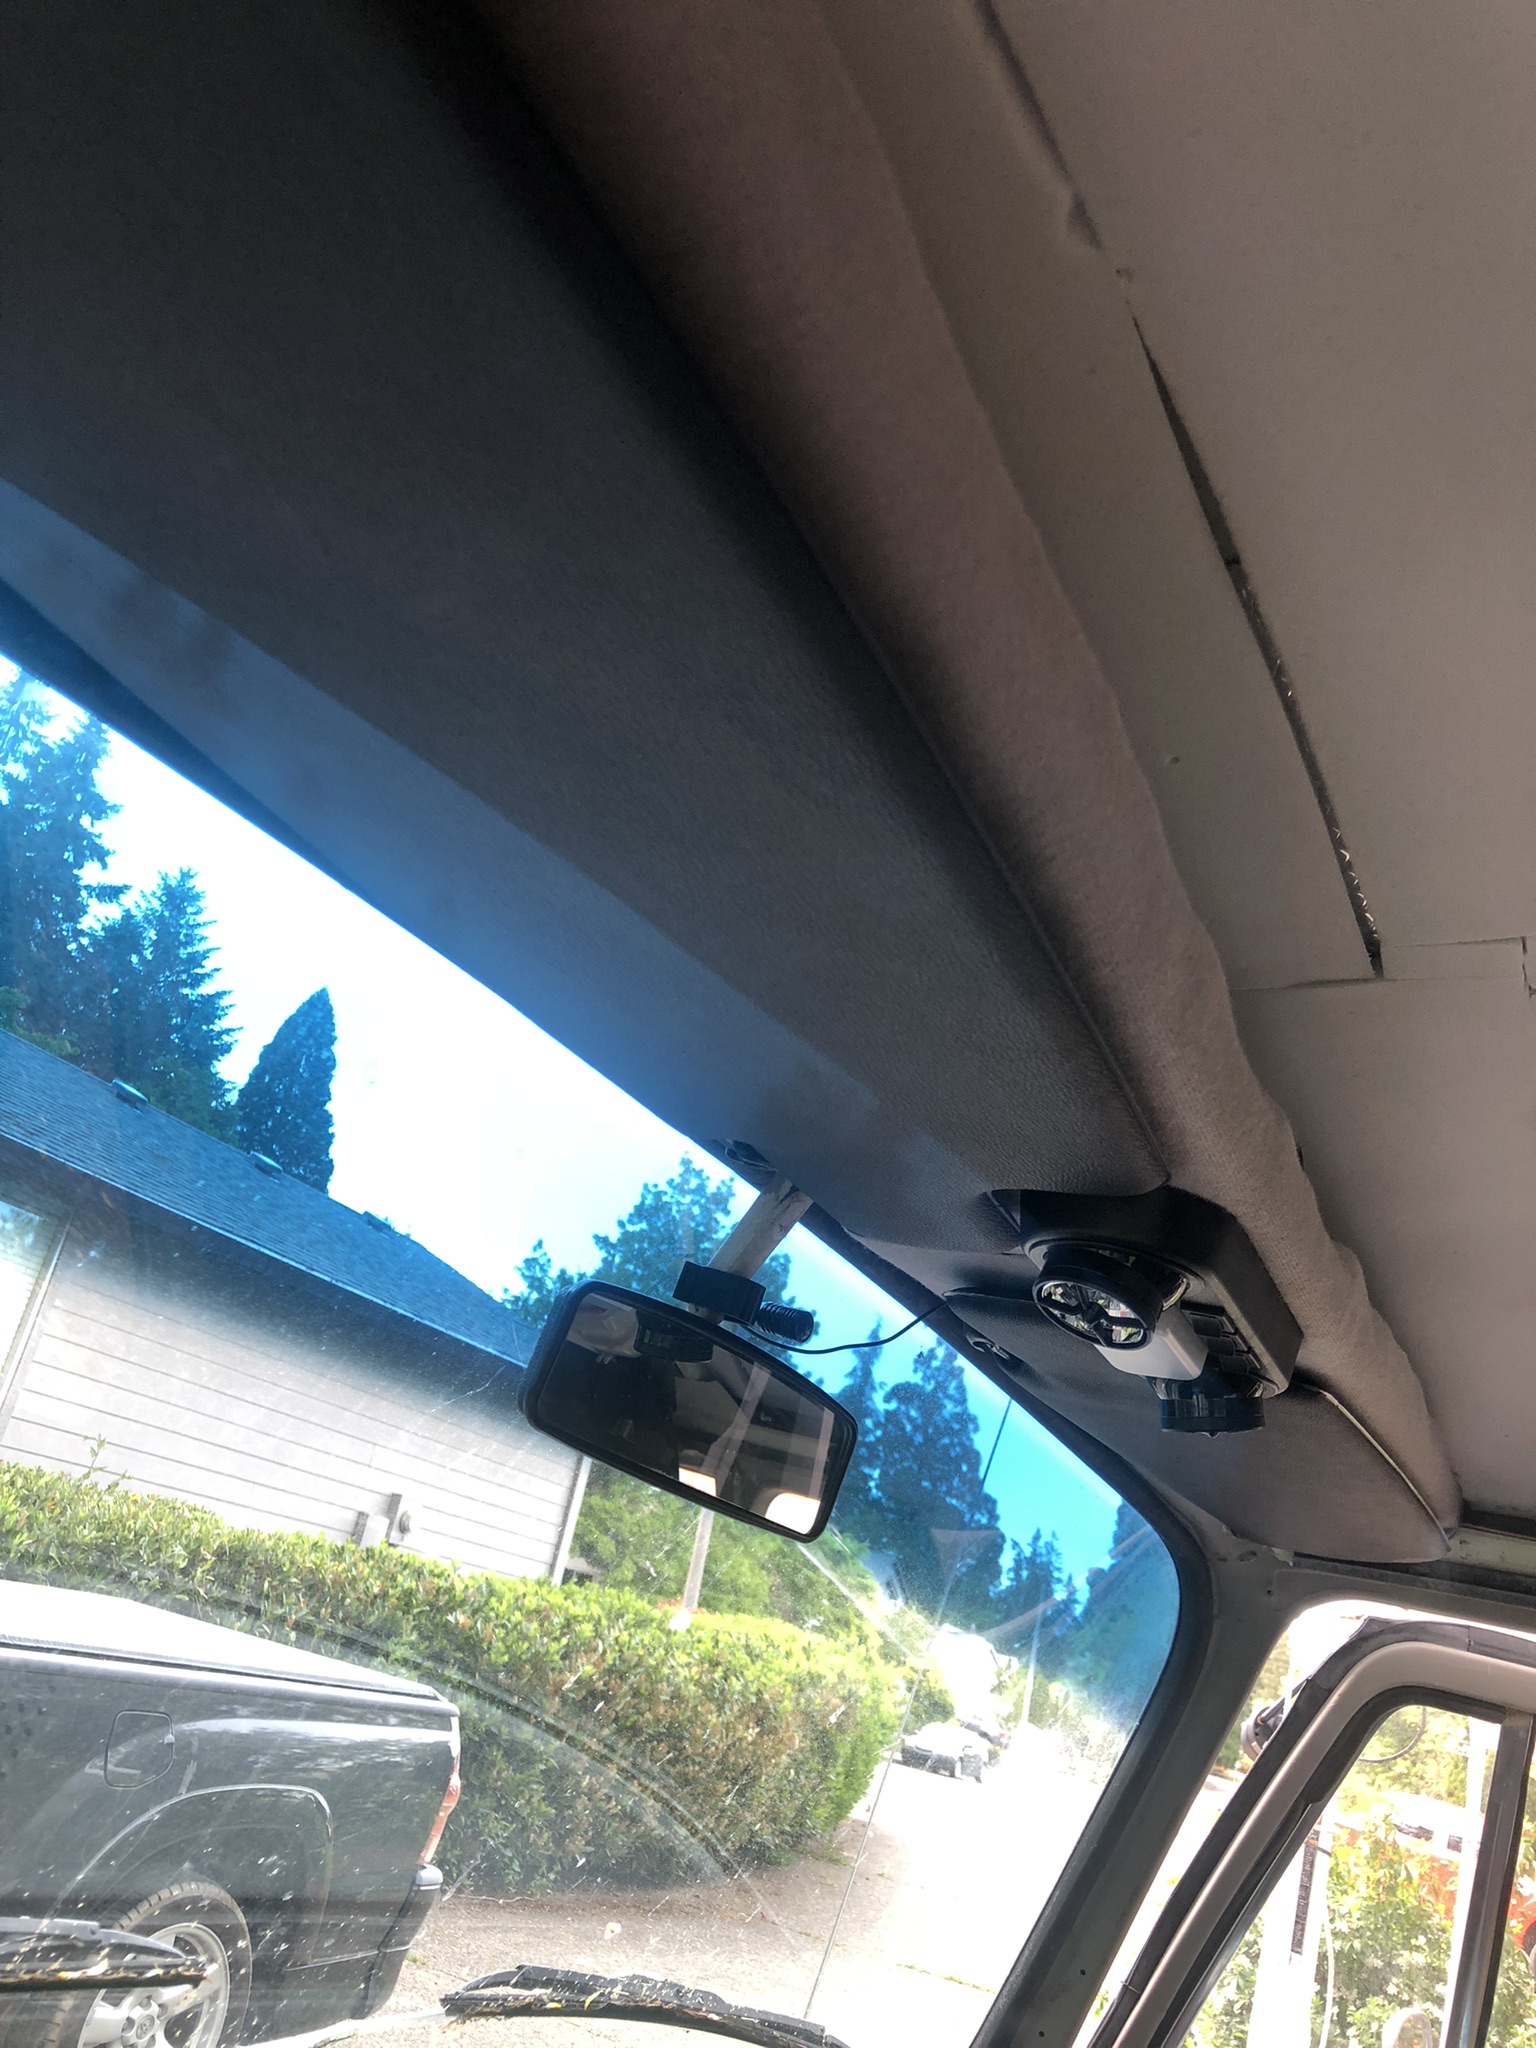
One of the upsides to the new shelf was the potential addition of sun-visors. The visors that are on the market these days are not the same as the ones I removed; that could be a reflection of my old visors, however. These new ones are shaped differently, with a pop-out on the end that is designed to go behind / around the mirror, and the little stick on the end that is supposed to go into the little keeper near the mirror is therefore much shorter. So, if I was looking for a direct-replacement, these would NOT have fit properly, but, again, it is entirely possible that the PO installed bug visors or something way back when. The mounting base near the A-pillar is the same. I re-tapped the holes, knowing at least one, if not all of them, had metal screws instead of bolts at one time before. I threaded M4 Phillips bolts in to hold the visors. I attached the little keeper thing to the underside of the shelf. So, the visor, when not in use, tucks flat to the underside of the shelf. It turned out that the weird shape of the visor allowed it to almost wrap around the light fixture, looking like it was designed for that install. Sometimes, its just better to be lucky than good.

Cab Door Cards
cab cards nearly complete
Recall, my old door cards were falling apart cardboard. There's a cat in Arizona named Werksberg who makes door cards out of PVC, and I ordered a set last Fall (his TheSamba ad). Apparently, his costs are skyrocketing so if you want some of these and have been sitting on the fence, you might get priced out if you don't make a decision soon. Anyway, I was finally ready to install the fronts. Unlike the original cards which need to be installed with metal clips into little rubber boots, these cards deliver with small plastic molly's which press through the card into the original holes. They appear re-usable. We'll see. The driver door card is not staying put, even after adding double-sided tape so I may need to add screws.

When I removed the original-to-me cards, I removed the little door vent things. I set them in my trove of parts and did not install them when I put on the cardboard cards. I put them on this time. The door looks much more finished now, as you can see in the picture above-right, here. The rest of the card install is the same as original. The window crank removes / installs with a Phillips screwdriver. As does the chrome door latch mechanism and the door pull strap. Once installed, the door looks so much better than it did. I have not decided if I will apply the thin closed cell foam or not, but I am not doing it for now.

Kicks
partitions and mid-walls carded
The last thing I got after in the cab was the re-install of the kick panels. With the new flooring and 4-1/2" speakers, this was not as simple as before. Still, I found by setting the outer edge and then bending the card, I could get it pretty much where I wanted it. I pulled the jute and MLV up, allowing the card to sit on the floor. I could remove them, and cut off the lower 1/2" so they sit on top instead. Meh. Something to think about as we drive around this summer.

Slider Door
Moving rearward, I pulled the middle row seat out and the original-to-me slider door card. The slider had not gotten much treatment over the years, so it got CLD and 2 layers of Mega Zorbe. I thought the extra layer might reduce the racket when the door opens. It didn't at first. I spent some time with oil & grease cleaner working on the door runners, and that actually helped a little bit. The lower door roller is the source of the lion's share of the noise and noticed that the outer edge of the runner was a simple 1/4" tall thin bit of steel. So, I ran some leftover white "U" seal I had from doing the luggage rack to see if that would help. Nope. It effectively pressed the wheel against the inner steel track edge, causing it to make a different, but equally unpleasant, noise. I concluded the wheel was the noise-creator, and I ordered a replacement lower guide with a vinyl wheel, instead of steel.
rear tail gate carded

There are 2 bolts and one Allen-screw holding the guide to the door. The bolts on the old guide were so rusted, they broke off, leaving me with just an Allen-bolt holding the guide in place. I will periodically shoot those rusted bolts with penetrant, and when I am able to remove them, I will use M6 bolts in their place. I will apply anti-seize, though. With the new lower guide in, the door was quieter, and operated more smoothly, but the upper guide was making noticeable noise now. So, I removed it, and improved it with penetrating oil until the guide-wheel would easily spin between my fingers. I re-installed it, and now the door was as quiet as a modern slider.

More Cards
I had some daylight remaining, so I grabbed the door card for the slider, and installed it. I also installed the card for the wall opposite the slider, and installed it. I did the rear tail gate and the extra cards for the rear-facing partitions behind the front seats. Each of these took some fiddling to get right, but that was on account of Hapy, not because of the cards. These things are great; the holes are mostly in the exactly right spots and the bag of Mollys had more than enough fasteners for me to damage a bunch of them and still not run out. I believe I can fit more sound deadener between the partition cards and the partition, and I may need some foam to reduce vibration noise, but right now, the interior of the bus looks really good. Removing those cards to add noise deadener will be simple when /if  I choose to do it.

I have a couple of cards remaining to be installed along the seat pedestals and I'll do them as the mood strikes / time permits. For those keeping track at home, I have installed the panels which sit at either end of the rock-n-roll bed, arching over the rear wheel wells, and have I attached the panels that cover the bare steel in the sleeping area. Because the sleeping area cards abut the rear-wheel cards, I needed to do them in the right order. As you can see in the image on the right, here, these cards, when used together, make a nearly seamless span. Boo and I will especially appreciate the sleeping area cards when we're camping. There are few things as jar-awake as having some bare skin touch up against the metal side after it has cooled down overnight. That is some quick-awakening. While this plastic / PVC will not be a great deal better, it does create a foundation for some foam and then some fabric later.

At this point, I felt ready for a test flight. I'll post on that next time. Thanks, as always, for following along-

Tuesday, June 14, 2022

Enter the Headbanger (Part 3)

I thought I had gotten as far on the headbanger as I intended to for this camping season.... but, today, I wrap this puppy up. Pretty much. I designed, assembled and wired it in Part 1. In Part 2, I figured out how to mount it into the bus, filled in all the gaps with cardboard and applied trunk carpet everywhere a headliner would not be. And, of course, there was more wiring. Today, we complete the headbanger enough for use while we consider how and if it could be improved.

Before I begin, for my US readers, Hapy Flag Day. Earlier this year, I mentioned Phil and Phrends touring through the PacNW. We did that run, and I'll post on that adventure here shortly. But first, the completion-ish of the headbanger.

Headlining the Headbanger
The next logical step was applying headliner to the parts of the headbanger that were still exposed cardboard and OSB. I had a section of material that had been cut off the start of the roll that was about 2 feet deep (56" wide). I needed 19 inches. With the extra material, I was able to get the lines in the headliner to align with the bottom straight edge of the headbanger. I set the cabinet upside down on the tool cabinet with the rear edge facing me. I flopped the material over the speaker boxes and set the lines parallel with the rear edge. I rolled the material back on itself and applied contact cement to the OSB (2 coats) and then a light brushing on the headliner backside. I set the edge and flattened it with my hands. Once set, I rotated the cabinet 180* so the just-cemented part was facing away from me. I worked my way towards me, applying generous amounts of contact cement from side to side in about 6" wide swathes. I double-coated the cabinet, while single-coating the headliner. At each step, I smoothed the headliner down so there were minimal wrinkles and pulls.

With the main section covered, I considered the sides. I had enough material so I didn't need to cut completely separate pieces, but I would need a seam. I decided to make a long seam along the angled section rather than a short seam along the flat bottom at the rear. I did this for 2 reasons. First, the lines of the headliner run straight up-and-down like this, and they would have been running at an odd angle had I just folded along that edge. Second, I was having a hard time visualizing where to make the cut along that shorter edge. I made the fold, applied the headliner with contact cement and then cut off the extra floppy bit. In the end, I am not thrilled with the seam and will look for ideas for how to cover it with something visually inobtrusive. From a distance, it looks fine, I suppose.

All wrapped with headliner, I needed to remove the section in the middle. This cut was not my finest work, and after the less than perfect seams along the outer edge, these cuts further confirmed the need for something to clean-up the transition from trunk carpet to headliner. a small plastic 90* strip might work. Anyway, last, I cut the holes for the speakers and then poked holes through the headliner from inside the speaker boxes for the speaker mounting screws.

Install
I had hoped to have the headliner on the rear ceiling before installing the headbanger, but it's not in and I want to get Hapy on the road. So, I jumped to the install, and ultimately, this was a good thing. My method for raising the cabinet for install is unorthodox, but it worked. I set a plastic recycling tub onto the rear bed cushion. Onto that, I stacked the top and bottom cushions for the rock-n-roll bed. This wobbly stack sets the cabinet in the perfect spot to send through the rear bolts. These are all M4 bolts with lock washers and plain washers. These line up perfectly. Added to the left-center bolt are the grounding ring terminals for the USB chargers. I sent the bolts through enough to loosely hold the rear of the cabinet in place. While I could still reach them, I plugged in the speaker and the USB wires. Then I moved around to the front.

Up front, I discovered that the outer mounts were not going to work. The passenger side mount had the riv-nut in the wrong place (just barely, but wrong). The driver side mount riv-nut did not set, falling out as I tried to thread into it. I discovered that the location was too roundy for a riv-nut to really grab on after trying to set another riv-nut and failing. I know, I posted that I checked the alignment in part 2. I did, but checking the alignment and actually installing are 2 different things, and they are apparently different enough to matter. Lesson learned. So, the front is now held in place with 2 M4 bolts instead of 4. These were sent up the center, around the leading edge "gap filler". Now that it is all together and in place, that center gap fill probably could have been eliminated. As it is, it is very close to the rear light fixture. I may remove it in a later version, but it really does finish off that top edge, and it does pull the 2 speaker box sides together. As to the front edge mounts, I may send through a couple self-tapping sheet metal screws to help hold the cabinet up. It pains me to think that way, though, and as of right now, the cabinet it holding firm to the ceiling.

Once I had the front bolts torqued down, I torqued down the rear ones, and made sure the cables were tucked up out of the way. Satisfied, I pulled the rock-n-roll bed cushions and the recycling tub down. You can see the cushions through the rear window in the picture below.

Speaker Install
Installing speakers is not exactly new ground to cover. The only thing that made this interesting was that I was doing it upside down. Quick side-bar, though... I was able to get in and out the rear tail gate much easier than I expected to. In fact, it is easier to get in/out that way now, than it was 10+ years ago when the original 1972 Westfalia shelf was in there. Figure that I am not getting more nimble; this much smaller unit, and, with the angled front (front is front), it is not nearly as intrusive as the old shelf. I was able to sit upright on the bed (no rock-n-roll parts yet). I would wager that if I sat up suddenly in the middle of the night from a dead sleep, I would not slam my head against the underside of this cabinet. More and more winning.

Anyway, about the speaker install: One speaker at a time, I stuffed poly-fill into the speaker boxes... well, I stuffed poly-fill into the sides and corners of the speaker-boxes. Putting it anywhere else, it would have just fallen out. Then, I wired up the speaker and held it in place (with the cover) and screwed it into the headbanger. Repeat for the second side. Once wired up, I flipped the switch to turn them on and shazam, we have more sound blowing. Anxious to try it out, I closed all the doors, hopped into the driver seat and cranked up whatever was playing on the hard rock station at the time (Cowboy by Kid Rock). Wow. So much sound. After Kid Rock finished, Pink Floyd's "Dark Side of the Moon" started, giving me a sense of the system's fuller dynamics. This is gonna be fun.

Well, that's it for now. I will probably revisit the headbanger when I lower it to put the headliner on the rear ceiling. We are going to drive around like this for a while, though, to see whether we really need or want to change anything. Right now, it seems pretty great.

Thanks, as always, for following along-

Tuesday, June 7, 2022

Returning to Hapy Sounds - Part 3

I think I've touched pretty much every other part of Hapy's sound system this winter/spring, so I guess it's only right to finish it up with improving the head unit install. Of course, no stereo entry is complete without some fun with wiring, so there's some of that too. I am still pushing hard to have the bus ready for camping season. So, while this may seem to be a departure from the shortest trip to complete, we can't go camping or long-distance driving without sounds. In a way, the ability to easily hear the stereo was what triggered the noise containment project. We just gotta have it.

How Did We Get Here?
planning the cut
While I was working on getting sound deadener behind the original cardboard glove box, I decided to remove it for better access. I had already disconnected the luxury electrical set up for the electrical rough-in (See Ceiling Wire Rough In), so I simply unplugged the head unit that I had stashed in the glove box and pushed the plug out the hole I had bored in it. After emptying the remaining contents into a small cardboard box, I looked at the glove box. I discovered that the old cardboard box was holding on for dear life, and the removal of the support bar (Phillips screw on the underside of the glove box) did it in. The rear edge (front is front) that is pressed up against the dash had been all raggedy anyway, and once I started removing the box, that edge powdered off in chunks. So, I ordered one of those ABS plastic replacements. With the deteriorating original box in hand, I considered how I could more permanently mount the stereo when the new ABS box arrived. These were on back-order, like so many things these days, so I had to wait a while to complete this.

Solve the Head
mock-up with original box
I got a Metra Universal under-dash mounting kit (model 99-9000), and started fiddling with how that rectangular kit could fit into the rounded glove box. After several measure and test-fit attempts, it was fairly clear that hanging the stereo from the top of the box was not practical. The glove box was too shallow and the mounting kit too deep. I would have had to cut a large rectangle out of the rear of the glove box, and I'm not sure it would have fit right afterwards.

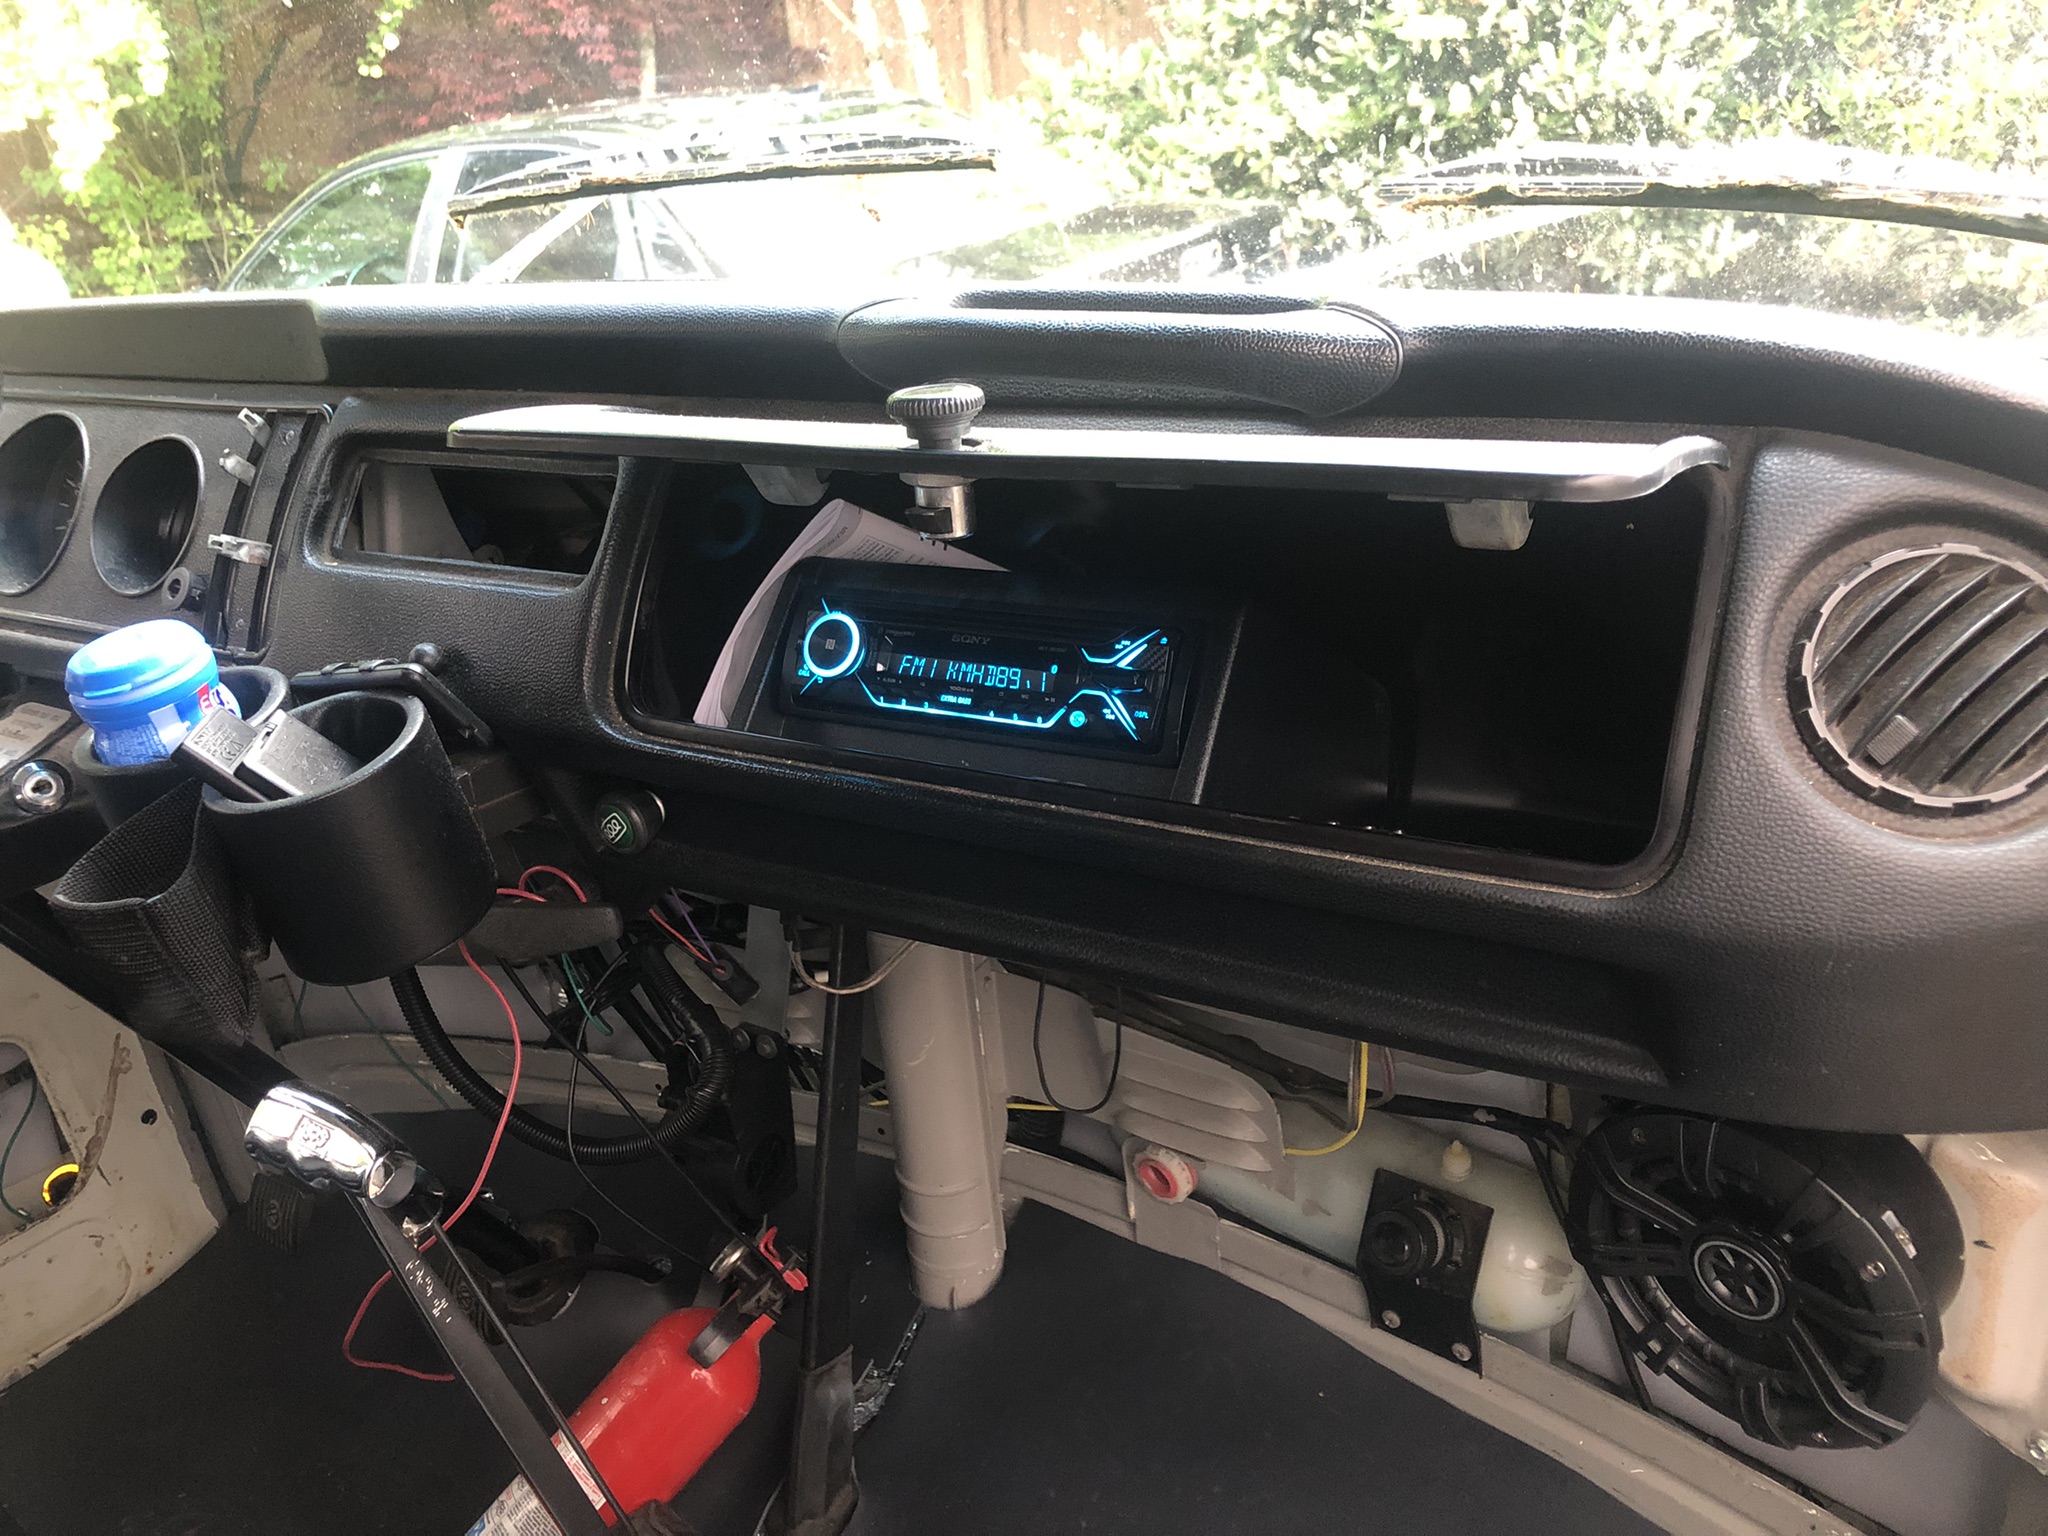
Back when I first got this head unit, I set the head unit in the glove box, on top of the molded shipping cardboard. It fit, and I could manage all of the buttons. Since hanging the box from above didn't work, I tried the kit upside down, mounting to the floor of the glove box. The kit was still too deep, but only by an inch or so. I measured, marked and cut an angle off the rear and it snugged right in. I confirmed that the stereo unit did not extend past the shortest point in the trimmed-down mount-box-thing. To mount the cut-down box to the glove box, things got interesting. I have demonstrated multiple times that I cannot manage to transfer measurements consistently. So, rather than swiss-cheese the underside of the box, I set the kit where I wanted it and marked two holes on the inside (blue tape, then a marker) of the box. I drilled out those 2 holes so I could align the rest of the box from below. I set the box such that the holes aligned and then held it in place with vice-grips while I marked the rest of the holes. Then, I drilled them out. Even then, the holes were not 100% perfect, so I expanded them where needed with a file. I added a hole at the rear of the glove box for the wiring pigtail with a hole saw and then attached the mounting kit with M3 bolts. That sentence took seconds to write, but the work took a couple of hours: tiny bolts + little finger room = patience needed.

Because, Wiring
marking holes
When I did the head unit the first time, I simply ran the power wire on the floor under the carpet. That was very Agile, demonstrated that having a stereo was a good thing, and that leveraging the luxury battery was a great call. So, since the stereo and the rest of the wiring in the bus was torn apart anyway, I changed the wire routing. Similar to the T12 front-to-back cable, I ran 2 sets of speaker cables and a power cable from behind the dash, down through the cable port behind the accelerator pedal and under the bus. I ran this collection of wiring along the frame and then found an existing factory hole (probably a drain hole) just inside of the passenger rear suspension up into the rock-n-roll bed. To keep things straight, the speaker wires were marked with tape (yellow-left, orange-right).

The yellow power wire was routed over to the driver side under the rock-n-roll bed and lightly tucked into place so it doesn't dangle into things and then integrated into the new fuse box (See Luxury Electrical Restored). Onto the speaker wires, I re-integrated the female wire connectors that I had before. One pair of two is under the rock-n-roll bed on the passenger side. Similar to the power wire, I tucked the wires under the rear edge of the bed floor so they stay out of the way. The other pair (recall there were 2 before) was sent through to the other side of the rock-n-roll bed up into rear of the formerly-fridge cabinet. Later, I may switch the female wire connectors to ports, but not today. At this point, I grabbed the floating remote rear speakers and plugged them in.

Back at the front of the bus, I integrated the various rear-speaker wires. Consider there's the pair that run up the A-pillar and to the rear over the sleeping area and the pair that now run under the bus to the rock-n-roll bed. The pair that run under the bus were the same as the pair that used to run along the floor. When I cut them, I marked them left-right. The pair that were sent up the A-pillar, however, were not. to figure out which one was which, I stripped one pair and clipped them together. Then, at the plug at the rear of the bus, I checked the plugs for continuity between the center-hole and the outer ring. One was infinite, the other was almost 0 resistance. 0 resistance is the winner, so I marked the end at the front with the same color tape (orange:right, IIRC) and then marked the other one. I spliced the remote speaker wire pairs together first, and then added the tiny wire from the stereo loom. I expect I will be adding an amp at some point, so I did not soldier them up. 

Putting it Together
note the mounting bolts
With the speaker wires integrated into the loom, the hard part was done. I spliced in ground and the yellow power wire and cleaned up the loom -to- front speaker connection. We were ready for install. The plastic glove box does not fit as easily into the dash as the old cardboard one does. I think it is a little larger, which really is fine. I needed and found a longer mounting screw (about an inch longer) for the support bar. To set the box in place, I found that suspending it in the support strap with the opening pointing up was most effective. Then, the box just tips into place. Since the box is bigger and less malleable, I focused on getting the bottom edge in the right spot, and let the top edge sit high. I sent the mounting screw home and the box doesn't wiggle at all.

I sent the wiring loom, the antenna cable and the wireless phone mic cord through the hole in the back of the glove box and plugged everything in. I took a quick glance at the fuse box and saw the tell-tale red LED telling me that I had a good circuit. Loving that fuse box feature. I set the stereo into the hole added a 10A fuse and fired up the local jazz station. After a few set-up steps on the stereo and burying the excess wire, the stereo is as complete as it needs to be for this Summer. 

So, the stereo is complete.... until I get a wild hair again to change it again. Like, wouldn't it be cool to have remote speaker plugs outside the slider so we can close the door without interrupting the music when set up for festivals or camping? Moments like this are when it is so obvious that this bus will never be done. There are always new ideas.

That's it for today. Thanks, as always, for following along-