Showing posts with label Rustoleum. Show all posts

Tuesday, March 29, 2022

Refresh the Luggage Tub

Over ten years ago, I purchased and installed the Riviera pop top, bed and luggage tub. In an Agile-like spirit, some of the steps I took were good enough to demonstrate the feature, but not great for the long haul. Today, I re-approach the luggage tub.
 
Why Now?
finished work
A logical question to ask when you take apart something that is functioning is why now? This is an especially good question since I am in the midst of a significant noise control effort already. Well, it was the noise control effort that brought this to my attention. When I was working on the cab ceiling, I discovered that some of the original 1972 Westfalia stuff was not keeping the ceiling sealed. To access the leaks, I had to remove the luggage tub, and things kind of grew from there.

Ceiling Repairs
I mentioned that there were ceiling seal issues. Consider that the hinges and the front-center latch for the original 1972 Westfalia pop-top attach to the top of the bus above the front seats. These are mounted by passing bolts through the ceiling and then threading into some flashing which have embedded nuts. The bolts had been removed, or broke off, but the leaks were coming from where the flashing/nut bit touched the ceiling. These had broken down over the last 10 years and were weeping. So, I removed the flashing, the nuts, and anything else remaining related to the old pop top mechanisms, leaving six holes.
 
cleaning under the luggage tub
In an ideal world, I would have used no-longer-with-us Travis' welder and repaired the holes the correct way with replacement steel cut into small circles. Unfortunately, when Travis passed, a grave-robbing vulture (Bob) swooped in, claimed he and Travis were "like brothers" (say it all deep and blubbery to get the effect), and took everything he could fit into his truck and trailer over multiple trips while my sister-in-law worked through her grief. Bob the vulture took all 4 of Travis' welders. Yes, that's right; all 4 of them (Travis was a pipe-fitter by trade so welded pretty much anything) and a TON of other things, like all of Travis' other tools, for example. Like the Grinch, Bob disappeared as quickly as he had appeared and cleaned out all of Travis' valuables. Just as he was a non-entity before Travis passed, no one has heard from him since. May you die alone, Bob; you are the worst. I was suspicious of you then, and deeply regret not honoring Travis' memory as you cleaned out his legacy. I digress, but suffice to say I do not have access to a welder anymore, so I solved in a more ShadeTree way.
 
heat shrink before/after
First, I closed up the holes from below with the Constrained Layered Dampener (CLD) since I was applying it anyway. This left small, shallow, circular indentations, about the size of a US dime (in diameter) in the top. I filled the indentations with FlexSeal. Once dry, I painted over the FlexSeal and the rest of the top with the same white Rustoleum. Of course, around this work, I removed the tub, cleaned the top (picture above-right shows how filthy it was), and addressed the surface rust with converter and then encapsulator, both from Eastwood. With the tin-top good enough for another 10 years, I shifted to the luggage tub.

Tub Cleanup
The luggage tub needed it's own help. The rack bars were starting to show some rust, and one of them had become disconnected at one end. 10 years ago, when I initially installed the tub, I quick painted it with the white Rustoleum and attached it to the top with 4 long wood-screws. I had completely forgotten I had done that, but it had held on without issue. To my surprise, all 4 screws threaded right out of the metal top when I went to remove the tub. These holes served as the starting point for the more robust mounting I did later.

doing the doing
With the tub now on the floor of my garage, I drilled out the rivets holding the bars to the fiberglass. Over the course of many hours, I sanded them down to bare metal, and got off most of the rust. What remained got the converter/encapsulator treatment and then some white Rustoleum. Unlike the bars, the metal supports that run from side-to-side were in perfect rust-free condition, after sanding off the paint. I chose to leave them unpainted, and polished them with steel-wool before shooting them with clear-coat instead. When I purchased the top and tub, one of the luggage cleats was missing. I chose to replace all of them with stainless steel cleats (footman loops) which I bolted (M3 Allen bolts) instead of rivet'd in place. Incredibly, the footman loops that I used to mount the big speaker box into Oliver, the 1978 MGB, were a perfect fit. While everything was apart, I hauled the tub outside and applied a fresh coat of white Rustoleum to the fiberglass tub. Once the paint was dry, I set the tub on some old carpet bits to protect the finish a little bit.
 
Before I bolted (rather than rivet'd) the now-rust-protected-and-white bars back to the tub (M4 hex bolts), I tried 3/4" inner-diameter clear PVC/Vinyl tubing onto the round part of the bar. I thought this might help the paint last a little longer as well as soften the rack for things placed onto it. Unfortunately, the tube is just a shade too loose. I did not want moisture to wick underneath, and the gaps at the ends just didn't look that great. So, I pulled that off and used 3/4" inner-diameter clear heat-shrink instead. I warmed it carefully with a propane torch, just enough to engage the shrink and have it snug up on the bar. The picture above on the right shows how well the heat shrink sealed the bars. Honestly, FlexSeal probably could have done the same thing.
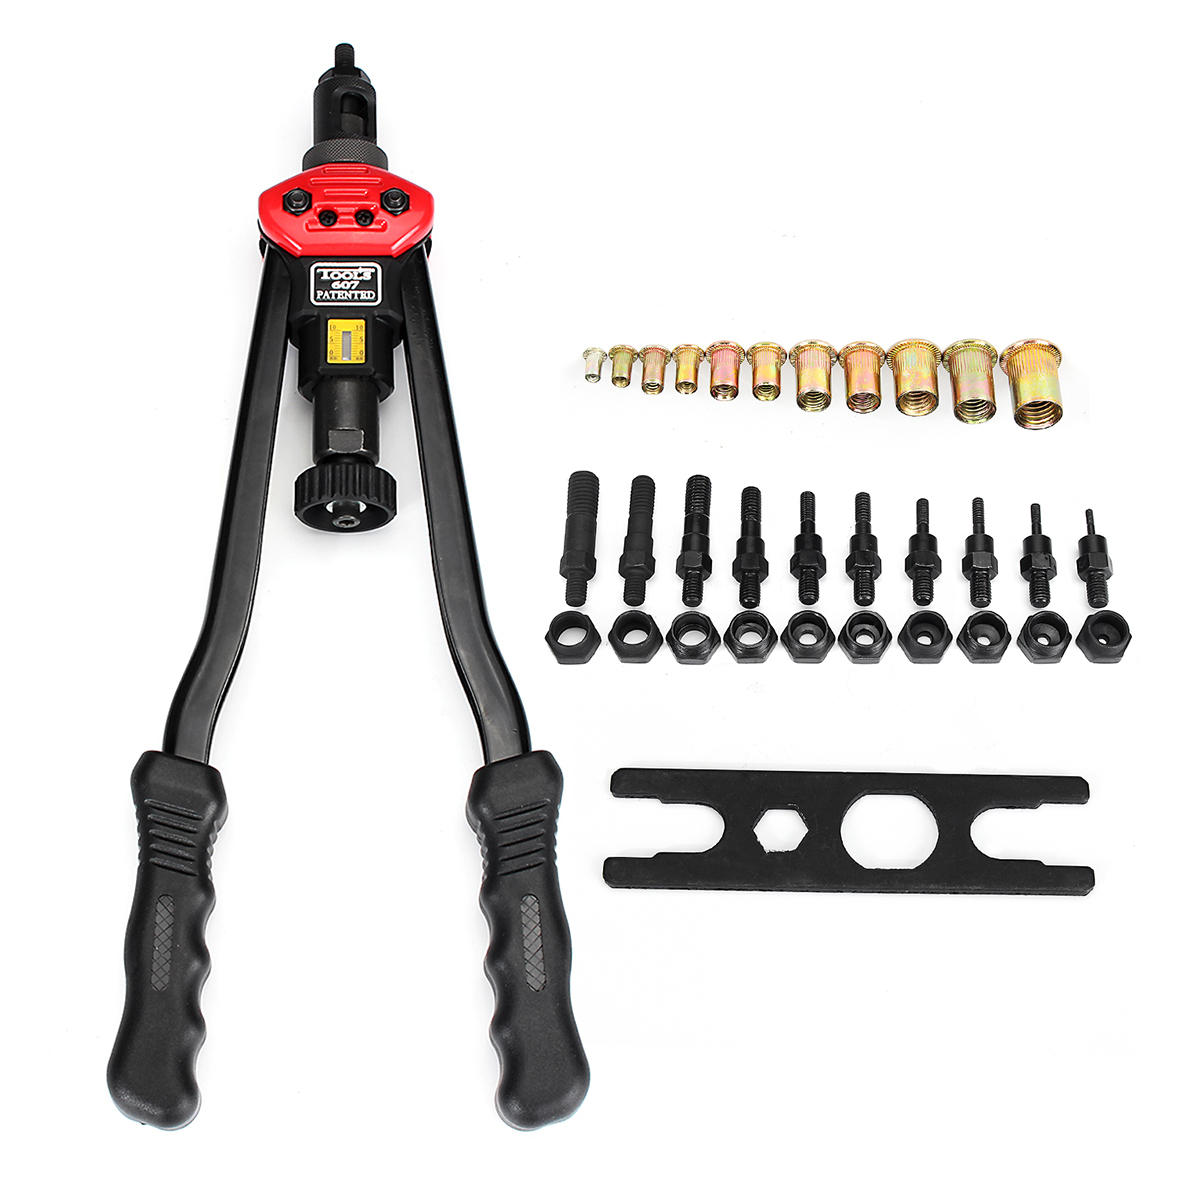
riv-nut tool set

Keeping with the whole noise reduction thing, I added some Noico to the hidden inside of the tub. I figured that it would reduce the vibration noise a little bit. Similar to the effect of adding this stuff to metal, the sound from tapping on the fiberglass changed to a much deeper note after the Noico was added. There is no way to know if this helped at all, but it seemed at least a little logical. The addition of the Noico added maybe a couple of pounds to the luggage tub, but if the noise on the highway is meaningfully reduced, this could be a contributing factor. Something is increasing the noise once we get up above 50mph, and since the luggage tub is right above our heads, it is a reasonably assumed source.

The last thing I did before installing the tub, I added a white pinch-edging around the outer edge. Originally, the Riviera pop-top shipped with a white edging like this. When I purchased this top, it did not have one. I don't think it really does much other than dress the edge a little bit. I could reduce some vibration transmission into the roof from the wind-whip at higher speeds, though. Again, like with the addition of the Noico on the underside of the tub, I'll take every fraction of a decibel reduction I can get. For those thinking of doing this to their luggage tub, it took 15 feet of piping. I had purchased 30 feet, thinking that woudl be enough to do the luggage tub and the pop-top. Clearly my guestimates were way off. I'll need to get more to do the pop-top, and I have enough left over for someone else to do just their tub. 

Tub Install
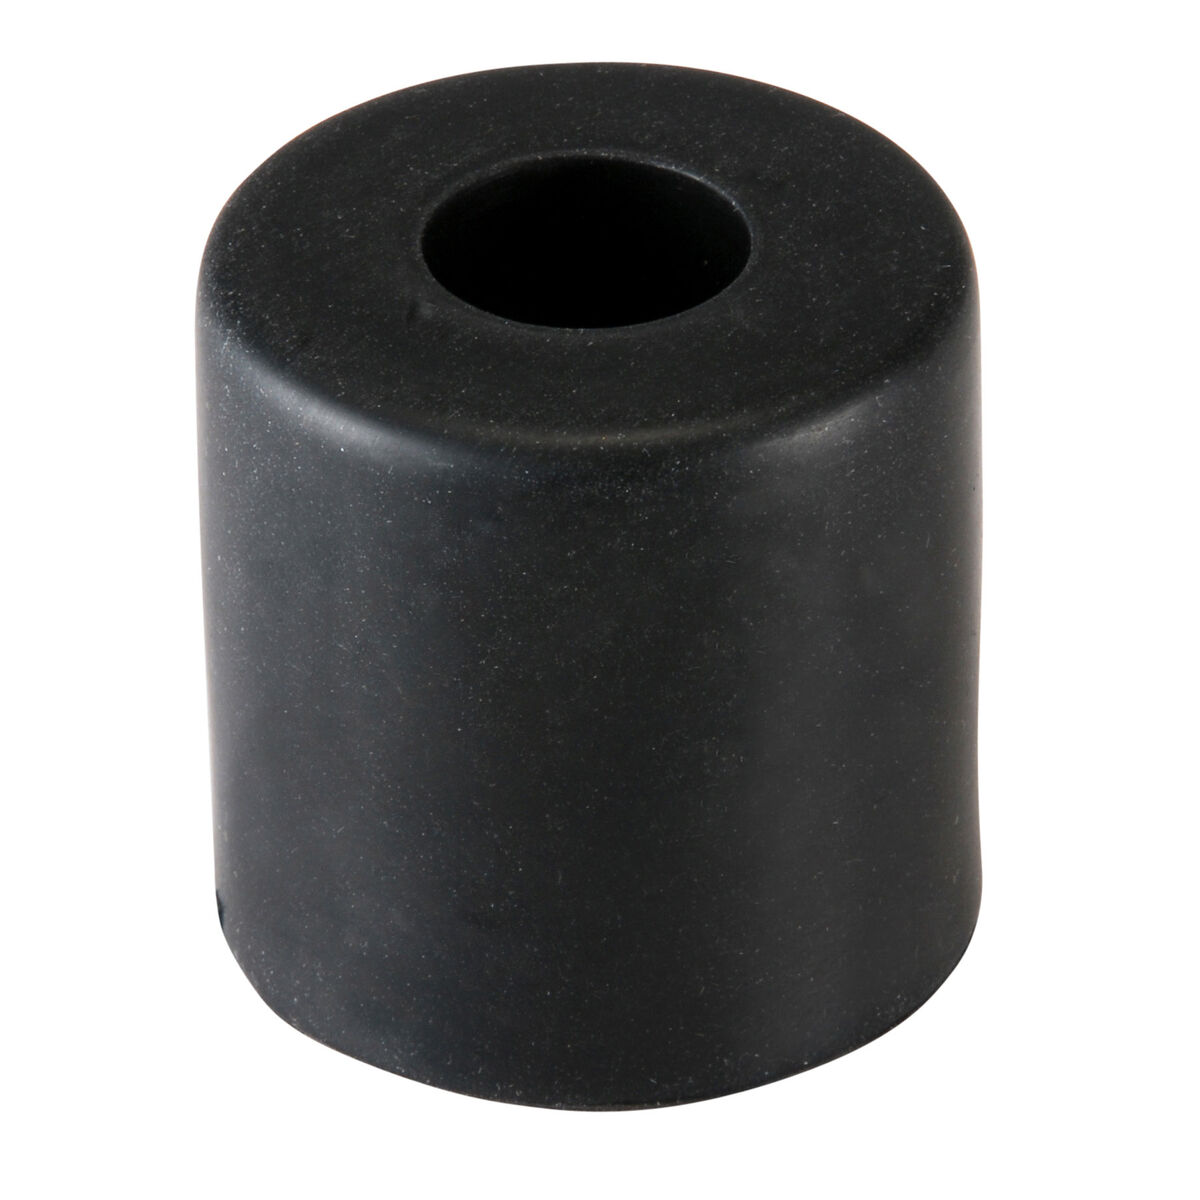
parts-express foot
Of course, I did not want to return to 4 long wood-screws holding the top on. While that appeared to work for 10 years, I did not want to press my luck. In a traditional install, the ASI/Riviera folks would bore 4 holes into the top and weld nuts in place from the underside. The top install would consist of 1 bolt per corner from above, passing through a thick rubber puck into the welded-on nut. Again, I do not have access to a welder, so I could not exactly repeat the original design. I could, however, pop in riv-nuts. A riv-nut installs like a pop-rivet: using a squeeze gun that has a mandrel and riv-nut sized for the job, you put the riv-nut on the installed mandrel, set it through the hole and pop it like a rivet. For the rubber puck, I found 4 rubber feet at a stereo-supply place (parts-express) that are 1-1/2" tall by 1-1/2" across. These feet have a central hole through the center.
 
I drilled out the old mounting holes large enough for the M5 riv-nut to fit. I applied the riv-nut from below: Since the riv-nut has a flush side (side where it is installed from) and a sticks-out side, it would be better for the sticks-out side not to be pointing down towards my head. As you can see from the stock picture of the foot, one end is wide, allowing the sticks-out side of the riv-nut a ready-made home inside.
 
view with the edging
I thought I could counter the Riviera install, and I run M5 stainless steel bolts from inside the cab up through the stereo-supply feet. This did not work for a reason I could not determine. So, I followed the original model with the bolts heading down from above instead: bolt through a fender washer, then the tub, through the rubber foot and into the riv-nut. Fortunately, the bolts I had were long enough to reach the riv-nuts but not so long that they protrude past the flush-side.

This whole affair became an incredible time consumer that I did not plan for. Once I saw the holes, I had to solve. Of course, I did not have to repaint the tub/top, nor swap out the cleats, replace the pop-rivets with stainless hardware, etc. This finished product looks better, will work better and is set up for seasonal maintenance. Which prompts me to encourage you to consider when was the last time you removed any of the plastic bits off your ride to clean up accumulated organic material. Your paint, and perhaps the integrity of your ride, will thank you.

Well, that's it for today. Thanks, as always, for following along-

Tuesday, March 5, 2019

New Seat, What a Treat - Headrests

This is the final installment of the seat reupholstering effort. I have stripped down, sanded, rust-treated and painted the original seat frames (in Part 1). Onto those frames, I have installed the seat webbing (Part 3), new hard-backs (Part 2), foams and covers (Parts 2 and 3). The seats have been installed back into the little car, with head rests, but I have not yet talked about that upholstery effort for those. I will cover that today.

Headrest Extraction
First, you need to separate the headrest from the seat. Obviously, but it's not that easy. With a convertible, moisture gets everywhere. In the Pacific Northwest, moisture gets everywhere. Add those together, and moisture truly gets everywhere. Even into the headrest tube, and enough of it to rust through chrome. My driver seat was easy, but I had to resort to these more drastic measures for the passenger seat: with the top down and the seat still bolted to the floor, stand behind the seat, place one hand on either side and lift as hard as you can. If you are lucky, it will come flying out, bang against the ceiling and not hit you in the head on the way down. If you are unlucky, you may just hurt your back, and the head rest is still stuck. Seriously, these buggers can be that stubborn. Use your best judgement, but it needs to come out to do the seats at all, so if you cannot get it free, forget about recovering your seats.

Old Cover Off
Once in hand, look at the underside of the headrest. There is a plastic strip that runs along the bottom which is held on with 2 Phillips head screws. Mine were really rusty (so I ultimately replaced them) so I needed to take care coaxing them out. If you keep yours, it may be worth soaking them in vinegar to get them rust-free Set the plastic strip aside for cleaning with dish soap and grab a thin slotted screw driver and a pair of needle-nose pliers. The plastic strip covers up staples which hold the cover on. With the screwdriver, work the staples free enough for you to grab with the needle-nose pliers and then pull the staples out. If you are not concerned about the old cover, you can tear the cover off and pull the staples afterwards. I prefer to not destroy things, but everyone is different.

With the staples out, the cover is only holding on through friction. Pull the cover and the foam off of the head rest stem. Do this whether you are reusing the foam or not. If it is original foam, I strongly encourage replacing it, though it can be hard to locate for some cars. I found the MGB headrest foams at Mirror Trim in the UK, and while the cost is a little high, it was worth not having the old foam disintegrate while installing.

Repair and Rust Treat
In my case, there was rust on the square metal head rest "head" as well as down near the bottom of the chrome post. The wood into which the staples were driven was shattered in the driver-side headrest (passenger side wood was in great shape). So, there was some repair and rust treatment needed. First, I taped off the top 3 inches of the chrome post with painters tape. This part of the post on both headrests was in decent shape, and I was opposed to painting them. Once taped, I sanded the "head" thoroughly and scuffed the rust off the chrome below the taped off section. I felt this chrome would not be seen, but needed to be clean for the head rest to work better. Then, I shot the "head" with some gloss-black Rustoleum and removed the tape. The wood strips in the driver head rest needed to be replaced, so I took one piece that was still intact and used it as a pattern. From my woodpile I found a strip of cabinet edging that was the right height and width, and cut two pieces to length. Before I started re-assembling, I cleaned the plastic strips with dish soap and found 4 Phillips head wood screws which would fit through the holes, sit flush once installed and were about the same length as the originals. I used "size 6" thickness, 3/4 inch long wood screws.

Re-Assemble
The headrest foam and cover are not uniform. Both are side specific (front and rear). The nicely tailored edge is on the edge from the front while the un-hemmed edge runs from the rear, and under the front, hemmed edge. The foam is thicker in the front than the rear, but that part is a little more obvious. Similar to stuffing a pillow into a pillowcase, stuff the foam into the cover, making sure that the corners are in the corners and the edges align with the edges. The foam is way bigger than the cover, so I used my thighs, arms, and abdomen to get the foam into the cover. Then, it was a considerable finger exercise to get everything aligned. Once set, though, you will see a slot in the foam for the "head" of the headrest to slide into. With the glossy paint, it slides right in. On the passenger head rest, I found I spent more time fiddling with the head rest post to get it at a depth I liked, but you may not have that issue, as I did not with the driver side. Shrug,

Staple and Screw
Before you grab your staple gun, I suggest that you take your nice and clean plastic strips and test fit them. Similar to the foams, the strips are not mirror-images, the rear side is thicker, but the distance from the post to the screw hole is the same on either side. So, consider where the screws will go, and then plan your staples. Remove the plastic strip, pull the rear flap forward, and under the front (hemmed) flap and hold it in place with your finger. I held it in place where the screw hole was so I would not lose track of it while stapling. Check that you are centering over the wood and place at least 1 staple on either side of the screw hole. There were 2 per side originally, so I did the same, making sure that the amount of stretch across the headrest was uniform as I did. There is a lot to keep track of in order to make it look good and lots of ways you can lose focus so it looks bad. Just do not staple until you are sure.

Once the staples are in, the hard part is over. Slide the plastic strip back into place and screw it to the "head" with rust-free screws. If you ever wanted one of those seat belt keepers (like these in the picture), now would be the time to install them. I do not like losing my seat belt, reaching around for it nor having it bang against the car when I take it off. These little plastic keepers really help, though getting access to a parcel stowed behind the seat is not as easy.

Re-Install
This should be straightforward. In my case, the seat foams were manufactured without holes for the head rests. Perhaps the seat foams were developed to span many years, including years without head rests. Regardless, If you did all-new foams like I did, you will need to find the rectangular hole with your fingers and cut the foam. Take care as you align the cover, the foam and the head rest post. Do not simply grab the chrome lip on the seat cover and push/pull. The chrome lip will easily separate from the cover if you do that. Once you find alignment, trim what little foam you need to and slide the head rest into the seat. I took an extra minute and applied some PB-Blaster brand white lithium grease to the post so it would move more freely in the future. I also applied this grease to the cleaned-to-the-steel seat rails and workings so the seat would slide forward and aft more easily. These little final touches really made a difference in the usability and perception of the seats once you were sitting down in them. I highly recommend taking the extra few minutes to apply the lithium grease.

So that's it. Over the course of about 2 days per seat, they are completely renewed. New foams, new webbing, new covers from top to bottom. The headrests are more functional, the seats tilt and move more freely. Most importantly, they are comfortable. Now that they are installed, I will either finish the wiring of the seat heat, put some effort into the amplifier for the speaker box or carpet the trunk. I will see how I feel when I get to the garage.

Thanks, as always, for following along.

Tuesday, January 22, 2019

New Seat, What a Treat - Part 1

I had a few days off, so rather than spend them playing in the snow or taking a personal trip, I stayed home, and re-upholstered the driver seat of Oliver, the MG. Today's post covers the start of that journey. Sorry today's post is a few hours late.

Old Seat Out
Remember when I installed the old seats on top of the new carpet (See MGB - carpeting (part 2))? Even with the nuts jammed under the seat rails, the seats placed the driver kind of low in the car. Sure, it is a little British car, so you're supposed to sit low. But, there are limits. I figure my eyes should be about 2/3 of the way up the windscreen, and I was around halfway. It felt like I was sitting a hair over the floor, suspended by the vinyl seat cover and little else. I had planned to replace the seat covers, foams, etc last Spring when I had the small win-fall that netted me the new carpet. I just hadn't gotten to the work because I had other things going on, and I wanted to drive the car. So, with this small break, I had my chance. Starting with a basic 7/16" spanner, I removed the 4 bolts which held the driver seat to the floor and removed the driver seat.

I moved the seat upstairs to the shedroom. That room is clean, and all of the interior bits are stored there, so it made more sense than trying to do it in the packed garage or in one of the general living spaces. First, the headrest needs to come off. With the seat on the floor, I stood on the seat bottom and whip-sawed the headrest: pushing it all the way down and then yanking it back up. This violent push/shove blend actually worked, freeing the headrest in a handful of reps. I set the headrest aside, and moved to the Lower Cover.

Old Lower Cover Off
The lower cover is held on with 4 sets of 4 hog rings: one set along each of the sides. I was able to work them free with a small slotted screw driver, exposing the padding underneath. The padding was orange and tattered near the edges. When originally constructed, this foam would sit on top of a 3-sided metal hoop to which 6 rubber straps are attached. This webbing creates a little give to the seat, and provides the lift from underneath. On this seat, the webbing was in disarray. Most of the ends were disconnected and tattered. Fortunately, I had a replacement set for the refresh effort. The pad, cover and webbing were tossed towards the shedroom door and I shifted to the Upper Cover.

Old Upper Cover Off
The upper cover is held on with 4 square clips along the back and 4 hog rings below that, holding the front down. The hog rings flew off with a little pressure with a slotted screwdriver. I did my best to not damage the cover. The square clips needed more coaxing, and since I did not know about them, I had not ordered replacements, so I needed to be careful with the originals. Before the cover will slide off, the seat-angle arm needs to be removed. It is held on with a Phillps head bolt. Once the 2 sets of clips and the angle arm were removed, the cover slid right off the top.

Within the cover, I could see a few interesting things. First, the original foam was orange, and had tattered along the edges. The "hard back" was cardboard that appeared to not be original, nor standard-issue. It looked like a square of cardboard had been cut from a shoe box, or something. It had been taped, with duct tape, to the orange foam. Cool. The tape, cardboard and foam fell apart without much prompting. I think the cover was holding everything together. I tossed the mess atop the Lower Cover mess.

Separate
Now, I was down to the metal. I could see the rust spots, and recognized the need to address the frame. There are 2 plastic hinge covers that protect fingers and the covers from the seat hinge. These remove with a Phillips screwdriver. With the plastic covers set aside, the bolts that represent the hinge can be removed with 1/2 inch spanners. Before I could deal with the rust, though, I removed the seat runners from the bottom of the seat. Moving the seat forward and backward had become difficult, so I wanted to get all that nasty grease and grit out of the runners. I took the seat frame and the runners downstairs, and then focused on the head rest.

Headrest
The seam for the headrest cover is on the bottom, hidden by a small plastic strip, held in place by 2 Phillips screws. With the plastic strip removed, the staples which hold the cover on can be addressed. I used a small slotted screw driver to loosen them, and finished the job with a pair of needle-nose pliers. The cover slides off fairly easily at this point, taking the old foam with it. I had new covers and new foam, but I hadn't anticipated small wood slats along the bottom edge. It is to these slats that the staples and Phillips screws attach. Not all of the wood was bad, but the bottom-most pieces were. I took one good sample from each side and cut pieces that would fit from some scrap wood I had lying around. In a pinch, you could cut up a paint stir-stick: it is the right thickness. The key is finding something thin enough to fit in the channel along the underside of he headrest.

The headrest steel was in a similar state to the rest of the seat frame: some surface rust spots, but no rust-through. I brought it downstairs as well, and moved all 3 pieces to the front porch.

Rust Treatment
Some aspects of working on cars does not change no matter what you are working on: dealing with rust. I attacked the rusty areas with 60-grit sandpaper and then sanded the whole thing with 100-grit. This left a decent edge for paint to bite into. I painted all surfaces with Permatex Rust Treatment, and let them dry overnight. The following morning, I shot them with some black Rustoleum I had in the garage, and hung everything to cure on the front porch with bailing wire.

All of the random other bits got the cleaning treatment. The seat runners, for example, were soaked in de-greaser and cleaned up. All of the little plastic bits and handles were deep cleaned as well. Even the fasteners which I intended to reuse were cleaned up and scrubbed.

I was feeling pretty good at this point. The tear down was easy, the rust invasion was not too bad. I figured the easy part was over, though. Turned out, I was right, but I'll get into that next time. Thanks, as always, for following along-

Tuesday, August 22, 2017

MGB - floor pans (Part 2)

Today we continue the saga of replacing the floor pans in the MGB. In Part 1 (See MGB - floor pans Part 1), we identified the issue, and made decisions on parts and a method. Today, we get into removing the old pans.

Get Safe
$15 at Harbor Freight
This could be a euphemism for something else, but in this case, it is exactly what it says: safety first. You are going to be cutting and then welding steel. This throws lots of sparks. Your car runs on gasoline which is designed to explode when a vapor meets a spark. When you put these together, my best advice is to remove the fuel system entirely and then wait a couple of days to let the fumes leave the remaining lines. That's what I did, and I'll post on that later. Consider too, that the cutoff wheel throws dirt and dust everywhere so wear eye protection at least. I use a face shield, long sleeves, and denim pants to protest myself. And yes that gets hot in the summer when you're working in the sun on your driveway.

Clear Your Paths
Under the right (passenger in the US) side floor, there are small pipes and cables that you don't want to set your cutoff wheel into. These pipes and cables are held to the floor underside with nuts and brackets, and further held into place with some rubber bits. Remove the nuts and the brackets and pull the rubber bits out. Toss all of it into a ziplock and mark it as part of the right floor. You'll want them later. Let the cables and pipes hang as far out of the way as possible. Among these is the fuel feed line, the vapor line and the main power supply from the battery. All super important.

blue tape the cut lines
I had the brake and clutch pedals already removed from my efforts on the master cylinders (post on that coming). I chose to remove the accelerator pedal as well to improve my access. Since it is held on with a bolt and the cable is held on with a pin, this removal is very easy. Now that my floor has been removed, I couldn't imagine how much harder this would have been with them still in place. Mental picture: you're lying down on the door frame, hips-to-feet sprawled out through the driver-door, with your arms extended into the foot-well with a grinder spinning a cut-off wheel at 11,000 RPM. Getting the cuts right without accidentally catching the underside of the brake pedal sounds virtually impossible. I highly recommend removing the pedals, if you can.

Mark the Spot
Before you grab your grinder, you need to find the frame sections underneath. On the right (passenger) side, I followed instructions I found online, where I drilled holes at the corners of various support structures. I then connected those dots with blue painters tape and then drew on those lines with a sharpie so I had clear lines to follow. This did work, but for the left (driver in the US) side, I thought I could do it with fewer steps. The first step is the same: with one had under the car and the other resting on the top of the floor, tap with your bottom hand at the corners of the beams. Feel for the tapping with your top hand, and keep circling in on the spot by tapping until you know exactly where the spot is. Mark it with a sharpie. On the right side, I drilled a hole. On the left, I just marked it and moved on. I ultimately found that the drilling was unnecessary. There are 2 main under-floor rails, one runs from the transmission hump to the edge under the front seat mounts. The other runs from that cross rail between the legs to the front. In the US model, imagine a rail running straight at the brake pedal. These rails are about 2 inches wide, but there is only about 1/2" lip that it spot-welded to.
not-so-fun part

Measure Twice, Cut Once
This phrase has been made famous by arm-chair trades-persons dating back to the stone cutters in Egypt. Still, its a good practice. Double check your marked lines to make sure that you didn't draw a line through a section of frame. Also consider if your cut-path will send you through any of the cables or pipes you moved aside earlier. Cutting through a fuel line, even if it's empty, really sucks. Yes, I did and I'll explain how I fixed it later. Along the rear edge, there are two heavier sections in the corners that are not to be cut out. They create structural stability and should only be removed it they are not doing that job. My bar had a pretty rusty floor, but those sections were fine. Make sure your cut lines take these sections into account.

The Fun Part
The floor is cut out in 3 or 4 sections, separated by the frame rails. Cut the rear out first. The rear section comes out as one large, nearly square piece, and the steel cuts pretty quickly once you get started. With the rear cut and pulled out of the way, you can see the cable, etc on the right side. Next, I cut the outer of the two forward sections. Again, this allowed me to avoid the cables, etc on the right (passenger) side. Last, I cut the inner section, and it was all pretty clean except I nicked the fuel line for about an inch, leaving a nice gash in the metal fuel line. At this point, I was glad I'd pulled the fuel tank, and let the system sit for a week or so.

The Bit
spot weld cutter
With the main sections of the floor out of the way, it feels like you're really on your way. That's until you start to understand what comes next. The floor was attached to the rails at the factory with a big spot-welder, placing a weld every inch or so along both rails and around the outer edge. Those spot welds are what is holding that last inch of steel to the car. I have read where some folks (who are far more skilled with a grinder than I) were able to cut these sections off without any other tool. High praise to them. I am no way skilled enough for that, so I went the more labor-intensive route.

Hit Harbor Freight and buy at least 2 spot-weld cutting bits. They are small, fit in your drill, like a regular drill bit, but they are designed to cut spot welds. The shiny, silver point in the center of the bit is set into the center of the weld, and then you run the drill at a slow speed to cut the sheet metal around the weld. This allows the rest of the sheet metal to rise from the rail. Each bit is reverse-able, so as you burn out the teeth, you can pop it into a vice, loosen it with a 1/4" spanner, flip the bit and tighten. One bit lasts twice as long... which still isn't that long if you run your drill too fast.

So, now that you understand the weld-cutter, slap a grinding wheel or wire wheel onto your grinder and grind on the remaining bits of floor so you can find the spot welds. Between rust, paint and black-tar seam-sealer, you may have to grind a bit to find the spot welds. If you can't find them all or you don't want to grind to find them, there is an alternative; you just need to be willing to use a framing hammer and chisel.

The Not-So-Fun Part
cleaned up
With your spot weld cutter in your drill, and a framing hammer / chisel nearby, pick a spot to start. I went with the easiest to get to: the rear section. The spot welds are easier to find back here too. Pick a spot weld, cut it out (slowly on the drill!). If the metal didn't make a "ting" noise while cutting, it may not be completely free. Given time you'll get the hang of it where you're not cutting too deep (through the frame) nor too shallow (and leaving the metal well attached). If the metal didn't separate, get under the metal edge with your chisel and give it a couple of smacks with the hammer. Eventually, the floor and rail will separate. Now do that about 120 times. Per side. I spent about 4 hours per side doing this, so be prepared. Now, I do things slower than lots of people, so maybe you'll be a lot faster.

As you remove flooring, the remnant will start to flop around. On my first (right/passenger) side, I just crumpled the metal out of my way. While this worked, I found that by cutting strips in straight sections (using tin snips) was more effective. And, ff you set them aside with the larger sections of floor you cut out, you can re-create the shape of the floor later.

Clean It Up
temporary protective paint
Once all of the spot-welded in bits of floor have been removed from the rails, you're ready to clean up. First, look at what you've done. There is a pile of twisted sheet metal lying on the ground next to your car. The rails have some holes drilled through (I know mine sure did). The rails have like 100 little circles of flooring still attached, there's some rusty spots, some paint, and probably some seam sealer. All of that needs to be taken down to bare metal for welding. Grab your grinder, put in a good grinding wheel and get after it. To me, this was the most satisfying part of the process to this point: Simply grinding away the ugly and leaving a nice clean shiny rail. Once the weld points are nice and clean, I switched over to a wire wheel and removed all of the surface rust I could find in the foot well, along the transmission tunnel and the rear, effectively grinding away all of the rust in the seating tub.

Since I was not going to be working on the project for a while, I shot the cleaned up space (including the rails) with primer and some orange Rustoleum so I wouldn't have new rust appear while I was away. This meant I got to grind that paint off later, but if you're not going to jump right into welding, I'd encourage you to consider the same.

That's it for today. More next time. Thanks, as always, for following along-

Friday, May 8, 2015

Dash re-install

After getting a fourth, and presumably final, coat of high-gloss white paint on the upper third of the bus, I spent Sunday afternoon wrestling the dashboard back together. It was really just time consuming because it took 3 attempts. I failed to take any pictures, though. Apologies.

Dash Install, First Start
Following the standard practice of lightly threading all the participant bits together first, I started with the 3 screws on each end of the dashboard which are hidden when the doors are closed. In looking at the black cover plates, I considered that I failed to paint them, but kept going. Next, I attached the front vinyl pad complete with threading the nuts in only to realize that the dash top needs to be into place first. Off comes the vinyl pad. I paused at that point to consider none of the plastic pipes were in yet.

Venting
Before the dash can really get put back together, all of the plastic pipes need to be in place first. This isn't that hard, its just a case of matching. If the inner vent cover plates (near your knee, held on with 6 screws each) are in place, it is best to have them removed for freedom of movement. The end pipes slide right onto their circular dash vent counterparts. Picking the right from left is relatively simple: they only fit on their respective end. The center "Y" is actually harder. It looks like it could fit either way, but the upper end of the "Y" has a bend in it that wraps around the wiper arms. While having it in backwards could look right, once you try to put on the dash-top, you'll see that it doesn't actually fit that way. I also found that it was easy to set the base of the "Y" too deep. Once the dash top is in place, you'll have to fiddle with it anyway, so don't get too hung up on it.

Dash Install, Second Start
I got pretty well to the end of the first paragraph in the next section before realizing that the screw-clips that need to be along the windscreen lip were not in place. So, I did all of that install, and then had to undo it so I could get the clips in. The clips have an up side and a down side. The flat side faces up. The windscreen lip has 8 spots where there is a small indentation on the rear edge and a small hole just in front of it. Each clip needs to sit in the indentation with the clip hole aligned with the hole in the lip. If I'd taken a picture, this would be much more obvious. Anyway, once the clips are in place, you can move on to "Final Start" :-)

Hang the Fusebox
While fiddling with the dash top, I found myself moving the fusebox around, pushing it out of my way. In a flash, I popped the Bentley open and saw where the fusebox was supposed to go. With the dash top out, it was much easier to wrestle it into the right spot. Honestly, I'm not sure I could have gotten it into place with the dash top on. 2 screws later, I won't have the fusebox dangling by the vent cover anymore. It's been hanging there since I bought the bus over 10 years ago. Very satisfying. Simply looking at the driver seat will be all the nicer... and, of course, removing the stress on the wires could only be good. All told, it took me 10 minutes. Sweetness.

Dash Install, Final Start
Anyway... after all the vents are in place, we can re-start the dash install. The front screws are in loosely. Next, wrestle the dash top in. This sounds so easy, but you're managing a thin sheet of steel between the windscreen lip, the rear edge of the dashboard front and the 2 freshly-painted A-pillars. I found that setting the front lip in first worked best. Once in place, the rear edge wants to hang up on the rear edge. By setting a slotted screwdriver or putty knife between them, you can torque on the seam and the dash top falls into place. Wiggle the dash top until the holes in the dashboard front align with the holes in the dash top lip. Now, you can thread the vinyl pad in through the holes. Aren't you glad you did this without the glove box in place? Thread the 10mm nuts onto the vinyl pad bolts and leave them loose, but threaded onto the bolts pretty far. Check your alignment all around, including the front lip. Now, screw the front lip down. Once all of the fasteners are in, you can start torquing things down. I started with the screws on the ends on the dashboard, then the 10MM bolts and finished with the screws along the front lip. Last, pop the little plastic hats onto the screws along the front.

Oh Crap
After all the wrestling with the dash, I was pretty spent. I hit the garage door button and walked into the house. I heard distinct bang-bang-bang noises, but the boys had been running around with lacrosse sticks, so I didn't given it much thought... until the following night. Much earlier, I had set the dash top onto the rear deck of the bus to protect it while I painted the white areas. On Sunday, I popped the rear hatch to get to it for installation. It had been such a nice day, I had left the garage door and hatch open while I worked. So, when I closed the garage door, it bang-bang-banged the rear hatch as it closed, leaving multiple scratches on it. Good thing I used the $50 paint method :) A little sanding, a little painting and the scratches start to melt away. I need another coat of paint, but it will look like it never happened.

That's it for today. Sorry I didn't take pictures of the install along the way. I'd take it apart to take pictures after the fact, but it took me 3 attempts to install. Maybe if I had a little more time before Memorial Day... As always, thanks for following along.

Tuesday, May 5, 2015

$50 paint job

Hapy Cinco-de-Mayo!
A few years ago, there was a sensation across the car-centric internet about a claim that you could paint your car for $50 (original web site). This concept generated an amazing backlash of "myth" web sites and postings de-crying the process. In my usual fashion, I decided I'd try it anyway.

Running Some Numbers
Yeah, that's right. I decided to paint part of the bus with the $50 paint job method. I already had gloss white Rustoleum paint from painting the pop top a few years back. I used the same paint on the bumpers, and they look okay (except for where I dropped the rear bumper on the ground, but that's an easy touch-up). I have all the other usual stuff for non-spray painting... sandpaper in various grits, blue tape.. So, in terms of materials and supplies, I'm sorted. Incremental cost for supplies: $10 can of primer.

I live in a typically-rainy-in-spring area and in a rented house. So, other alternative ideas like shooting paint outside or setting up a temporary spray-shed were not options. Hanging plastic all over the garage wasn't cost-effective, and even if it were, the fumes would have either leaked into the main house, caused an explosion from the open-flame furnace and hot water heater or both. Over-spray and other evidence of painting all over the floor or driveway would have voided the lease too. I even considered setting up a paint shed on the lawn, but the paint would have killed the grass... and the rain could have been a factor anyway (thinking muddy undersurface and humidity disallowing paint to dry). Last, I don't have the skills, equipment nor time.

I went looking for someone to do it for me. Craigslist netted one person and my network was fruitless. Everyone is either already busy or the job is too big. The one person would have required me to tow the bus across town ($75/day for a tow dolly from UHaul) and run me around $1500. He would have taken a week or 10 days from drop off to pick-up.

Calendar Pressures
Since my only real options were either to do it all myself or pay $1500 for someone else to do it, I went digging for a third option. Festival season starts in a few weeks, and we already have tickets to the Hootenanny on Memorial Day weekend. I realized that about a week ago, and forced a third option: only paint the section above the belt-line so I can get the windows back in. I want the upper section white, and that's the paint I have, so I can make decisions about the lower 2/3 later. With that decision effectively made by the calendar, I set off.

Final Prep
Like the interior job, there's always more that you find at the last minute. New tiny rust holes. Little dings. After all that's settled, the old paint got a sanding with 150 grit sandpaper and then a re-sanding with 400 grit. I sanded the entire exterior that way. Then I applied Rustoleum primer with a brush. Yes, a brush. After it dried, I wet-sanded the whole thing with 400 grit paper. It was ready for paint.

Paint
Like the guy in the $50 paint job link, I thinned the Rustoleum 50/50 with mineral spirits. Using a few different sized foam brushes, I brushed on the gloss. Like any other painting, it is important to always maintain a wet edge, and to brush from the unpainted area into the wet edge as you lift off the surface. Those little things will make for a much better brush job. Of course, its still a brush job, so it will only look as good as the sanding you do when it dries. With the thinned paint, it dried overnight and it didn't drip, run or sag as some detractors claim. My garage wasn't terribly warm, but I left a fan going all night. Once dried, I wet-sanded with 400 grit and did another coat. Wash-rinse-repeat, and now I have 3 coats of paint on there. I intend to do at least one more, but I will probably keep repeating until my seals arrive from BusDepot.

That's it for today's installment. The pictures along the right side show the bus in various states with the last couple showing the result after 4 coats with wet-sanding between each. As always, thanks for following along-

Friday, May 1, 2015

Wrapped in Gray

Over the last several months, I have been trying to get a ton of body work done. List so many things, it didn't look that big when I started. Now, though, its become an ordeal, and Memorial Day is approaching. Preferring not to cut too many corners, I prepped the interior well, but used cheap paint to get 'er done.

Grind, Mama, Grind
In Learning As We Go, I described the state of the steel floors. I won't put sticky-rubber on top of a horizontal steel surface again. I have spent many hours grinding the resulting rust down. I removed all of the interior bits, pulled out all of the McMaster-Carr rubber stuff and set to eliminating all of the rust I could find. There wasn't that much, but I made some discoveries along the way. For example, it looks like there was a brake fluid leak before I owned the bus, and that caused some steel issues behind the driver seat. There are new panels welded in there. Unfortunately, the welds have started to rust, as have the replacement panels, so they got ground down like the main floor did.
I also looked for and found some rust spots that had evolved into small holes on the outside. I ground them out, banged on them with a rubber mallet to shake bits loose and ground some more. Like the floor, I double-coated with NAPA Rust Converter (forcing it inside the holes as well) to stop the cancer from spreading.

Sand, Patch, Sand
Once the rust was gone, everything needs to be sanded. For the unaffected areas, its so the new paint has something to adhere to. Then, I grabbed this stuff called Lab Metal that GratefulEd turned me on to. Its a silver putty that dries and sands like body filler, but actually has aluminum in it. Anyway, I had lots of tiny holes in the interior from different interior configurations, multiple window treatment attempts, etc. The Lab Metal applies very easily with a putty knife, and dries very quickly. Keep the lid on your can, or it will dry out on you. I have added paint thinner to my can to keep it extra thin. I've gone over all of the holes in the bus with that stuff. The little rust holes? Gone. The tiny dent near the radio antennae? Gone. It dusts down with sandpaper and patience. Like any other filler (be it Bondo on your car or Spackle in your house), don't over sand, or it will be concave, nullifying your effort.

Vacuum, Wipe Down
Once the holes were filled, and the Lab Metal sanded down, The entire vehicle has to be vacuumed. This took me back to when I used to paint houses. The basic rule was: if you're going to put paint on it, the end of the shop-vac must go across it. Extending that to also include vacuuming anything that was up against where you were going to paint, I ran the duster end of a shop-vac on every inch of the painted bodywork, inside and out. The only thing I didn't vacuum was the ceiling.
Once vacuumed, every inch needs to be wet-wiped with mineral spirits, In cases where there is more than just dust, the surface must be rubbed clean. Like the vacuum, every inch that will receive paint must be wiped down.

Paint
Finally, after all that, you're ready to paint. There are lots of options, and few of them are very good. There's the internet-rumored $50 paint job using hyper-thinned Rustoleum. I tried it on my pop-top and bumpers. It doesn't take getting bumped very well. You can get rattle-can Rustoleum, but that has the same problem plus you have airborne paint so you have to protect everything you don't want painted. You can get one-stage enamel. While it is probably possible to apply it without a spray rig, it won't be easy, and probably won't look very good. Once you get to this stage, you're looking at someone with some skill shooting it. You may as well go for the 2-stage, multi-coat job and spend a few grand on it. For my interior, I went the completely other way. I cringe as I write it (as you will as you read it), but I got basic Home Depot Behr interior enamel and color matched it to the foam headliner I'm planning to put in.
...pausing for effect...
Then, T and I got into painting overalls and brushed in the interior. It looks fantastic. Today. I know very well that it will not stand up to getting bumped, and I'll scrape something when I put the interior back in. I don't care. It takes me less than 30 minutes to empty it by myself, and I don't mind doing touch-up whenever things get scratched. Total paint cost: <$30. After driving around in a seemingly Dalmation themed interior (white with black rust-treatment spots all over it), gray with scratches is a major improvement.

Thursday, February 26, 2015

Windscreen Removal

Well, the prep for painting has really gotten underway now. Today's brief post is about removing the windscreen and what lies beneath. Depending on your windscreen, you may be removing it to replace it. If that's the case, you may not need to take as much care as I did. My glass was perfect, but I needed to get a look at the metal surrounding it as well as get the paint underneath it. One more seal is worth the rust containment.

Cut
multiple passes
For tools, you only really need a box-cutter / X-Acto. Extend the blade halfway. Approach the bus from the front and go to the top corner of the passenger side first. Slide the side of the knife blade against the windscreen with the sharp side pointing down. Cut the rubber seal from top to bottom by sliding the side of the blade against the windscreen. It will resist, so that's why we're only using half of the blade edge. Don't press too hard; let the knife to the work. The harder you fight it, the more likely you will scratch your windscreen. Extend the blade to 3/4 length and run the same seal edge top to bottom. Extend the blade to full length and repeat. This time, you should hear that satisfying noise of the knife against the A-pillar. The rubber should separate from the glass and just hang there. If not, gently run the knife along the A-pillar being careful not to disturb the paint. It is possible a previous owner painted the seal on, ran caulk to try to stop a leak or glued it in. Glue is not necessary for this seal. Nor is caulk, but I've seen some crazy road-side repairs go untouched for years, and caulk is definitely one of them.

Repeat
Repeat the cuts for the driver side and then the top. By now, there should be rubber hanging off the bus, or sitting in strips by your feet. Nicely done. If its an old seal, some of those cuts were very difficult. If it was anything like my first seal replacement on my bus, there were a few spots where I was able to cut right through very easily. I discovered that those spots also aligned with rust. When I cut off the seal the other day, it was only a few years old, and held very well. I'll be getting another Bus-Depot seal for the re-install later.

Bottom Cut Last
Pulled away a little bit
The best is saved for last. When I did my first seal, I had to be careful while I cut the last section. It wasn't holding very well, so I had to keep one hand holding the windscreen while I finished the cut. The newer seal, though, held strong even after I cut off the bottom. The windscreen held to the bus. It held very firm, actually. Your experience may differ, and you may want a buddy around when you make your last cut (as I did a few years ago).

Pop It Out
Old seals don't hold well, so the windscreen may just fall out once you've made your last cut. In my case, I reached one hand through the front door and pushed towards the front while catching the edge out front. This freed the sides, but the center still held. I had to grip the windscreen from the bottom near first the driver side then the passenger side and gently pull forward. Slowly, the seal gave in and handed me my windscreen. I carefully set it where it wouldn't get scratched and pulled out the remains of the seal. If yours was glued in, this could take some time. You want to get back down to smooth metal.

Now What?
glass out. rust inspection
I looked at the rust treatment I did years ago with some POR15. I was impressed. From my memory, the rust had not meaningfully advanced. Still, I needed to sand the whole opening to make sure. It looked pretty good, so I decided I would just expose the rust (read: sand and Dremel) and re-treat it. Then, I'll just handle it like any other metal panel: prime and paint with lots of sanding mixed in. Since it lives under a seal, there's no point in adding Bondo to the rust pits except as practice for visible spots I need to do later. Still, I'm going to skip Bondo'ing here.

As always seems to happen, this small painting effort has grown into a pretty big deal. Next up, removing the dash-top, more rust inspecting and sanding. Apart from deciding how far to go with paint on the interior, I think I'm almost done with the initial prep work. I still have lots of sanding and such to do, though. Unfortunately, that doesn't lend itself to print very well, so it might be a little while before my next few posts appear after this. Thanks for following along.

Wednesday, January 28, 2015

Prepping for Paint

While working on the windshield washer effort, I got to thinking about the paint on the front of the bus. Those 2 tiny nozzles were original as is the paint on most of the bus, and the paint is in about as good a shape as those nozzles were: barely functional. So, once I got the washer bits done, I resolved to getting the paint looked at and decided that I was going to prep and paint the nose.

Organization is Key
headlight can rust
from 12 o'clock to 5
One thing that John Muir was always harping about was the need to properly tag and bag your bits an pieces. I wholeheartedly agree. No matter how optimistic you are about spending every spare moment on your project, things come up. There's a Bruin game on tv or there's a freak snowstorm you want to go play (or have to work) in. So, as bolts come off, collect them into zip-lock baggies and write with a Sharpie on the bag what the bits are for. The only exception to following this religiously is when you can thread the bolt back into its originating location (bumper bolts, eg) where they won't get in the way, or lost.

Beyond the baggies, the parts I removed needed to be categorized. Some things, like the front bumper, don't need any additional work done to them except maybe a soap-water wash or a polish. Others, like the headlamp cans need to be rust sanded, primed and painted. A final pile was created for those things which just needed to be replaced because they were beyond rust repair or a replacement was less expensive than trying to save the old part.

Removing the Bright Work
turn signal during removal
I love that British phrase for what we colonists call "the chrome pieces". Bright work sounds so much more refined. Rather than tape off things, I chose instead to remove everything and go deep on rust while I was at it. The front bumper goes first with 8 bolts: 2 each under the doors and then 2 each on either side of the belly pan. I'd hand-painted it with white rustoleum paint (see Front Bumper part 4) about a year ago. It held up okay, but the white looks dirty already. I guess I should have washed it more often. Regardless, I set the bumper into the back of the bus to start the wash/polish pile.

Once the front bumper was off, I pulled the headlight surrounds (one Phillips-head bolt and it pops out), headlamps and the cans. The original cans have rust spots on them, and the body cavities where the cans reside have a little too. Considering the bus is 40+ years old, I thought that was a really good sign. The headlight surrounds went with the front bumper. As I pulled the cans out of the nose of the bus, I labeled which side each can came from. I separated the bolts and spring and put all of that stuff into a single headlamp baggie. The cans started the rust treat pile. Next, I removed the front turn signals. The lenses are good, but filthy (clean/polish pile) but the housings were spotted with rust. I simply touched the reflector with a finger and it started flaking off. So, the turn signal housings started the "replace" pile. The housings were then joined by the fresh-air vent intake: rust appeared on the back/inside, and a replacement is available at busdepot.

stripped of what could be removed
and the sanding started
The last thing to remove (in my case) is the spare tire hanger. Held on by 3 thick screws, the tire mount appears more universal than I'd realized. It had a dusting of surface rust / patina in a few areas, but, again, it was in great shape for its age. Clearly, it wasn't original, though, as I found a sloppy peace sign had been spray-painted on the nose prior to the tire mount being installed. The tire mount went into the rust treat/paint pile and the screws into a baggie.

Now, the nose is ready for paint. Except... the windshield is still in... and won't it look funny if just the nose is painted, and the doors that match up against the nose aren't? The story continues next time.

Wednesday, October 15, 2014

Rear Bumper Clean-up

On the drive to the coast for the family gathering for Independence Day, I realized that something in the drive-train was leaking oil.  Drips would hit the air turbulence under the bus, atomize, and the resulting mist would get caught in the vacuum behind the moving bus.  Within the vacuum, it would splatter against the rear of the bus; especially the rear bumper.  Over the last few posts, I explained how I solved the leaking oil (it was a bad input shaft seal, damaged by a faulty oil slinger, which was either damaged because I didn't have a pilot bearing in my flywheel or because AA transaxle used an old bell-housing).  Now that the oil leak is solved, I can focus on the last thing I wanted done before the Fall (see Setting and Re-setting Expectations): cleaned up and painted rear bumper.  Today's post covers the start of that journey.

The Missing and the Modesty Skirt
scrub clean first
Like the bolts holding the front bumper on, the square-lock bolts holding the rear bumper are in pretty bad shape.  Rusty.  Painted over with what looks like interior paint.  Missing.  I'll need at least 3 replacements when I'm all done.  At some point during the engine swap project, I removed the splash pans from either end of the rear bumper.  I'm sure that was a good idea at the time, and it gave me the opportunity to troll through my garage looking for them in my boxes of parts.  Like a trip down memory lane, it took longer than it should have, but I found them.  I set them aside and removed the modesty skirt from the bottom of the bumper.  I don't know why the bus has one of these; and I don't see any on the handful of buses I regularly see.  Maybe 1972 was an especially shy year for cars.  Anyway, I hammered it semi-straight-ish.  Then, I taped the front, bottom and sides and put it with the splash pans.  On a sunny day, I spray painted the pans and the unmasked front of the modesty skirt with rubberized undercoating.  Once dry, I removed the tape from the modesty skirt so rest of it could be painted white like the main bumper.

Sanding and Banging
Unlike the front bumper which had 3 distinct pieces, the rear bumper is a long stretch of curved steel.  The curves run top to bottom as well as curl in on the ends.  This made banging it straight more challenging.  Again, like with the front bumper, I aimed for 'good enough for camping kwality' in my bodywork.  Unlike the front bumper, the rear had a couple of very old bumper stickers on it and when they were removed, they took a couple coats of crappy paint with them.  This led to some unwelcome contours I tried to solve with 150-grit sand paper.  I learned along the way that the sand paper could help me identify minor dings by bringing up a lower level of paint around an area.  It was with this technique that I discovered that the bolt holes were centered on dimples the size of US quarters.  Some more banging with the hammer got them flat.

Paint, Wet Sand
undercoated
Once I declared "good enough" on the cyclical sand, hammer, sand process, I pulled out the white Rustoleum I used on the front bumper.  It's been about a year since I did that front bumper, so its time to review how it is holding up.  To be fair, the bus hasn't seen many miles (probably less than a thousand) since it was done, but it has been outside in my driveway where the kids are playing when it wasn't driving to music festivals.  The bumper looks good, and I mean really good.  No rust staining, no blemishes, no cracks or chips.  I applied straight Rustoleum with a foam brush inside and out and set it to dry.  The next morning, it was totally dry.  Total drying time was over 12 hours, but some ranters on the interweb claim it takes forever for this paint to dry.  False.  Just apply it properly: spread a thin coat always keeping a wet edge by brushing into the already painted surface.

Spackle?
After the paint set up, I could see large sections where the paint underneath had been pulled away by bumper stickers.  In a real body shop, they'd probably strip the whole bumper down.  I thought about that.  In a cheap-o body shop, they'd fill with Bondo.  I thought I could experiment with spackle, since that was what I had, and see how it behaves over time.  Worst case, it looks like crap and I strip the bumper down later.  Big deal.  First, I wet-sanded the paint.  I needed to do it anyway, and I figured that would give some teeth for the spackle.  So, with a basic putty knife and a small tub of spackle, I smeared paste over the bigger spots, and some small ones.  I slipped inside and watched some football for a couple hours while it dried and then cuffed the spackle down with 150-grit sandpaper.

More Paint
Once smooth, I wiped the bumper down with a damp paper towel and applied a second coat of white Rustoleum.  Same method, similar results.  This time, though, you could tell where the spackle spots were because the white paint wasn't shiny in those spots.  At this point, I figured I probably should have done something else, but I just plowed ahead: wet sand with 320 grit, another coat of paint, more 320 grit wet sanding.  This time, you really can't tell where the spackle is, but I wasn't 100% sold.  SO, I decided to wait a week and look again next weekend to see if another coat of paint would be needed, would help, or if I'd just be throwing product at a bad idea.

Sunday, March 16, 2014

Front Bumper (part 4)

As much as I wanted to run a full test of prep and paint on the bumper, I simply ran out of patience.  Today, I'll wrap-up the bumper through install.  I may return to it while on-bus, or even pull it to finish later, but I gotta get behind the wheel and drive it again.  There's a zen or inner calm that comes with steering an old bus that just isn't reproducible in anything else.  It's been too long.  On the shortened completion.

Final Wet-Sand
assembly supplies for 1 step
The paint was finally ready for wet-sanding after a full week of drying.  The $50 paint job guy talked about how thinning the paint would shorten the dry-time, but the articles I read didn't call out the more obvious: if its really cold, no degree of thinning will help Rustoleum cure faster.  I think the curing really took the warmer weather (low's above 40*F, high's above 50*F) to settle in and be present for a week.  Like the prior wet-sanding adventures, I used a bucket of soapy water and worn 600-grit sandpaper.  Unlike the primer, though, the thinned paint didn't dust as much.  The 600 grit took out most of the brush marks pretty quickly.

Final Paint
I decided that I over-thinned by going 1/2 and 1/2 paint and mineral spirits the first coat, so I thinned 2/3 paint to 1/3 mineral spirits for the second coat.  I also heated the garage with a recirculating oil heater before I started.  Just be bringing the ambient temp (and the surfaces to be painted) up to closer to 70*F made a very big difference.  The paint didn't run nearly as much, covered a little better, but the thinning held the brush marks at bay.
If you do this, remember two key points: first, always keep a wet edge.  If you try to cover such a broad area that you find yourself applying paint into paint that has become tacky, your paint will not cover right.  Always apply into wet paint.  Second, if you're using a brush, draw your paint-loaded brush from the unpainted area into the already applied wet paint.
While still drawing the brush horizontally across the surface, pull the brush off.  This will minimize brush marks from forming in the first place.
seal held w/blue tape

Redirection
The paint was hard and dry in a few days, but I chose to not color sand.  Rather, I decided that I'd been without the bus long enough.  At some point, I'll do the wet-sanding, and polishing.  In fact, I bought all the needed supplies (1000, 1500 grit paper, polishing bonnet, polish) and a cheap polisher at Harbor Freight for when that day comes.  I figure I'll practice on the bumpers before I try it on the main body.

Bumper Assembly
The early / low-light bay has a 3-part bumper: the main bar plus a step that wraps around to each of the front doors.  The step bolts to the bar with 3 bolts, and a simple seal runs in-between.  The seal fits around the end of the bar with the long edge running behind (rear-side).  When I removed the old seal, it was clearly held firm by the bolts.  Re-assembly is tricky with a single pair of hands, though possible.  I held the seal in place with blue painter's tape while I set it in place with the bolts.  I strongly suggest getting the replacement bolt set from Wolfsburg West.  It made reassembly much easier and the finished product look much better.  Unfortunately, the 1972 bumper steps are held to the body by 2 bolts a-piece and the bolt kit only provided enough for one bolt each.  I will be buying 2 bolts at the local hardware store, but otherwise, it was just what was needed.
rubber step button and tab
The rubber steps go on in the reverse of how they came off.  If you're like me, you probably didn't exactly remember how that went.  First, slide the 4 square tabs that run along the outer edge into their corresponding slots.  From the inside, pull them all the way in with a pair of needle-nose pliers.  Then, wrap the step over the step and press the round buttons into the corresponding holes.  But don't do the one closest to the rear yet.  Next, pull the front edge of the inner lip over the inner edge of the step.  By sliding your finger along the inner edge of the lip, the rest of the lip will seat, until you get to the rear point.  There, you will need to pull that corner out and around the inner lip as well as the corner where it meets the outer edge of the step.  Once you've gotten that around, press that last button through the hole.  It looks sweet, eh?
Once the steps are bolted to the bar with the seals and rubber step in place, we add the frame mounts.  I mentioned in the last post about the appearance of rust where the mounts met the bar.  To reduce the probability of that happening again, I dug into my plumbing supplies and grabbed 4 orange sink washers.  I put the washers around the bolts, between the bumper bar and the frame mounts.  Once the nuts were torqued down, it had no impact on the location of the final mounting or the find-ability of the bolts-to-holes.
sink washers between
frame and bumper

Bumper Install
I would recommend finding a friend to help for this part, if you haven't been able to sucker anyone into helping you yet.  My kids were all playing on their skateboards, and Boo was sleeping off an early morning shift, so I was on my own with my radio.  I set plastic tubs under the spots where the steps mount to the bus frame and carried the bumper assembly over.  I placed the bumper against my quads, squatted down while holding the frame mounts so it wouldn't bounce off the deck nor the front of the bus.  Fun.  I set the steps on the plastic tubs and slid the bumper into the general location.  Then, it was a matter of holding the bumper in the air with one hand while lying on my side and fingering-in bolts.  It was important to get the bolts in just far enough to hold the bumper up so I could make sure it aligned properly.  I then moved to the step-bolts, and threaded them in part-way.  With a tape-measure, I confirmed that the bumper wasn't crooked and tightened the bolts down.

Last, install your license plate, and you're done.  I will be getting new license plat
e hardware so it matches the rest of the new stuff.  The old rusty nuts, washers and ugly bolts just seem out of place with the rest of the bumper.  Truth-be-told, the rest of the bus looks a little out of place with the nice bumper.  Or, maybe, the bumper looks too nice to be on that bus.  There's clearly something not quite aligned.  Anyway,  I still have to solve for the smashed tow-hook (I kinda forgot about it), and finish the 100%-ing of the bumper anyway.  I can say, though, that I can now see every blemish on the front of the bus.  Great.... :)
That's it for today.  I intend to ride the bike or drive the bus to work tomorrow, weather depending.  It seems wrong to hope for rain, here where the rain seems like a constant, but I'd really like to get the bus into the daylight.  Thanks, as always, for following along.
mounted and ready to go