Showing posts with label seat. Show all posts

Tuesday, February 15, 2022

Hapy Seating (Part 2)

When the nice weather (read:camping weather) got behind us, I pulled Hapy off the road to swap out the seats. That was before we got a puppy and my wife changed jobs. I have been doing bus-related things when the rare opportunity presented itself, of course, but these seats just were not getting my attention. I have finally gotten these seats installed. So, today, I will wrap this up.

Out With The Old
Sprinter seats
Recall, we removed GratefulEd's donor seats and stowed them safely in my garage. They will go back to him as soon as these new seats are confirmed viable. The stock passenger seat is held in by a hook-loop between the seatback and the steel partition, and a pair of C-shaped mounts that point up. The seat was designed to remove quickly so you can access the tire jack usually stored beneath. You lift up on the front of the seat, folding it slightly, the hook on the rear slides out of the loop, allowing the seat to be lifted straight up. Pretty clever. The driver seat rides on 2 slides, and is held in place with a more modern toothed rail concept. Like a modern seat, the adjuster unlocks by lifting on a bar under the driver's right leg and then the seat can move front to back. If the bar is lifted and the seat is slid all the way forward, it slides right off the channels. Easy-peasy.

With the stock-ish seats out, we can consider the install of the new seats. In the 2016 Sprinter, these seats are mounted with M10 grade 10.9 (or grade 8 in SAE measures) bolts/nuts. Unable to source these at the local Ace, I had to patronize the Home Despot for fasteners. Moments like this I miss Orchards; their fastener department was massive, well stocked, clearly marked and there was room for multiple shoppers. Anyway, I mentioned in the last post that the "C" mounts for the passenger seat blocked a clean mock up of the new seat on that side. On Hapy, the inner mount was held on with 2 small (10mm head) bolts. The outer mount was welded on (presumably by a PO). So, I removed that one with my angle grinder, a hacksaw and a hammer/chisel. I generally do not like cutting original parts off the bus, but I am fairly sure the outer hook was supposed to be bolted in like the inner hook was, and a prior owner performed a repair or "improvement". I'm going with repair. The loop on the partition is held on with 2 more 10mm bolts. All of these parts dropped into a zip-lock baggie to be misplaced for the foreseeable future in my disaster of a garage. I'm not kidding; I have already lost track of this baggie.

While We're Here
Three of the most dangerous words when it comes to projects are "while we're here". Still, there are times when it makes sense to do something while you are there and things are exposed. For example, you need to remove the air cleaner to get to your spark plugs, so you replace the filter during the out-then-in. That didn't really increase the scope, and you were touching it anyway. In this case, I have very little interest in removing these seats again once they are in, but I know they will be out and back in again. Resisting the urge to do more, there are a few things worth doing while your seats are out. After pulling out the old passenger seat mounts, I spent a little time improving that seat pedestal. I cleaned up all the dust, debris and spent horsehair. I hit some surface rust with rust converter and then topped that with some spray paint. I do not have carpet yet, and I don't want to put the old pedestal wrap carpet (basically trunk carpet) back on. So, yeah, these seats will be coming back out for a carpet install. I hope to install that carpet before Summer travels begin, but it could just as easily happen years from now, which is why I did the rust-treat and paint.
 
Measure, Template, Mark, Repeat
templating
To determine the correct placement of the holes, I started with an 18" x 18" square cardboard template. This matches the length of the seat rails and the distance between their outer edges. I held this template against the bottom of the driver seat, and marked where the mount holes needed to be. Once bored out, the template was ready. I set the driver seat in place and to mark where the front of the seat rails needed to be. Hmm.. the new seat's seat rails are longer than the original. They are so much longer, in fact, that they hang off the front of the pedestal by about an inch so I re-drew the front holes on the cardboard template for the front mounts. The next available hole rearward is about 2 inches back. This places the new hole squarely within the pedestal. Since the seat location is not as clear from the front of the rails (due to the drop in the front before the end of the rail) as the rear of the rails, I marked the pedestal along the rear edges of the rails for the template to align to. After removing the seat, I aligned the template with these marks and then marked where the holes needed to be. 

I test fit and marked where I thought the holes should go and then measured for straightness. And then repeated that cycle until I had the planned seat mounts square. Before boring the holes, it is worth considering that 2 of these holes will pass through the wheel tub into the area where the tires are. Accordingly, getting bolts that are not too long is very important. I got 25mm long (M10 grade 10.9) bolts so they are long enough to pass through the rails, and the steel tubs without protruding very far into the wheel well. While there is enough thread on the bolt in the wheel well for the nut to bite, they are short enough that the tire could not possibly touch it. The passenger-side rear bolt, actually, just has enough thread on it for the nut to fully engage, with no part of the bolt protruding through. The pair of inside bolts, on the other hand, remain inside the seat pedestal. These nuts are hard to reach, but there is plenty of meat on the bolts for the nuts to grab onto. Once I have carpet installed, it will be quite difficult to get a socket on them. I will need to form a flap with the carpet so I can get in there.
 
One thing I found interesting while doing this: the stock driver seat is not square. The front edge angles slightly towards the center of the bus, so as you slide the seat forward, the seat slightly shifts towards the center. I did not duplicate this, but it is interesting.
 
Drillin'
My drill bits have not improved since the rear anti-sway bar install (See Handling the Handling - Rear Anti Roll Bar), so I slowly drilled the holes into the seat pedestals. I had intended to tap the holes so the bolts would thread into the seat pedestal before they were nutted from below. This plan was set aside when I considered how far under the seat the front bolts would be and how hard it would be to wrench them down. So, instead, I bored three them all the way out so the bolt would drop through the holes instead. I did tap the outer rear hole. Once all four holes were drilled out on the passenger side, I set the template in place and set the bolts through. They lined up perfectly. Sweetness.

both seats in. pardon the trash
With the holes for the passenger seat drilled out, I pretty much duplicated the hole locations for the driver side. On the driver side, I chose to drill straight through the original seat rails. I keyed off of an existing hole in the rear outer seat rail, since the template was almost there. The outer holes simply align with the template. This decision prevented some alignment issues, and also set the holes in spots where the original seat rail would not get damaged, and could still be used. This allows for a future decision to put original seats back in, and it provided a couple of additional layers of original German steel, adding to the strength of the overall install. I drilled out the 4 holes in the same stair-step method of drilling out the center hole with a super-tiny bit and bore it out wider with progressively larger bits until it's big enough for the bolt to drop through.

Driver Pedestal
Similar to the passenger pedestal, the driver pedestal got a clean-up, rust treatment and paint. Unlike the passenger side, however, the rust was more prevalent. I think the leak from that old plastic hose from the remote brake reservoir to the master cylinder caused it. So, I included some Eastwood Rust Encapsulator in the treatment. I got completely under the pedestal as well as the mount holes I had just drilled out.
 
Mount Up
With the holes drilled out, it was just a matter of patience getting the bolts in and tightened down. Since the front bolts are buried inside the seat rails, I started with them. I tipped the seat back a touch and wiggled the bolts into the runners so the bolts hung down. I set the seat in place, letting the front bolts fall into their holes. I figured these were harder to solve for than the rears, since I could slide the seat forward to get to those bolts. I lifted up on the seat adjuster and slid the seat forward enough to be able to directly manipulate the rear bolts. The inner rear bolt dropped through easily, and I was able to thread the rear outer bolt into the tapped hole. Once snugged, I threaded on the nut and tightened it down. Then, I set the nut onto the inner rear bolt and slid the seat back. The 2 front bolts were difficult to address with a wrench because the upper slider did not slide past them when the seat was most rear-ward. I was able to hold them in place with a bladed screw-driver while tightening the nuts from below, however. I accept that this means they may not be torqued down as much as any of us would like, but that's how it goes sometimes. Also, I omitted washers from the inner bolts, simply because I didn't have many.

Left Undone
The rear bolts on the driver side encountered some issues that I will need to address. The inner bolt hole intersected with a support rib, so a nut currently cannot fully seat. I need to get in there and trim the rib back. The driver-side outer bolt hole encountered a contour within the wheel well, preventing the nut from setting. This will be easier to resolve: bfh (big fn' hammer) to flatten the contour. I will solve these when I do the noise control steps since I will need to remove the driver seat anyway. I will include washers and will get the fasteners torqued down then too.

Test
At this point, both seats were in. So, Boo and I took a test drive. In our driveway. Without starting the engine. Okay, the test consisted of the two of us simply sitting in the seats, listening to the radio enjoying the new front speaker set up (See Returning to Hapy Sounds Part 1 and Part 2) and imagining the first camping trip. We will have a real test when Hapy is back on the road. I have moved Hapy around the driveway with the new seat. It is firm and supportive, but high. I can't tell yet if it's bad, it's just different. My feet can easily push the pedals all the way to the floor, so there is no safety issue. I will just have to get used to the higher viewpoint.

Tuukka's garage seat
As you can see from that last picture, I have started applying some noise control in the form of vibration deadening material onto the cab ceiling (some ResoNix, plus some leftover Noico). Of course, I am already asking myself whether I should remove those seat partitions, even without adding swivels, so the seats can recline farther. It seems like there is always something to do "next time". Perhaps the most important thing at this point is that I can return the old seats to GratefulEd. Tuukka, the dog, will very much miss them as they have been his go-to spot while hanging out with me in the garage.
 
My last 2 posts prior to this one contained a great deal of idea-mulling. As I just mentioned, I have started some efforts in the noise reduction space and will continue as time allows. Between clearing the spots where it will go in the bus and the careful application of it (lots of measuring and test fitting for the layers above the CLD), there's a lot of time spent which does not translate very well into posts. Still, I have a few other little things I have going on, so I will wrap those up around the noise-contain work so I don't go too many weeks without posting anything.

That's it for now. Thanks, as always, for following along-

Tuesday, October 19, 2021

Hapy Seating

Over the years, Hapy has had 3 sets of front seats. Today, I start down a path of a fourth, and hopefully final, set. For the curious, I continue to Bondo-cycle on the replacement front fender for Zed, as well as sort through the garage. Boo and I have been taking advantage of the waning days of "decent" weather (read: light rain, around 8*C / 45*F) to get some hikes in before late Fall weather really kicks in. So, large steps forward on any car project is not happening right now. Sometimes, you just need to spend some time on a project that you actually want to do. These days, neither the Zed nor my garage are that project, but they are each getting some of my attention. So, as a distraction from that, I'm looking at Hapy's seats.

Seats 1-3
the '74s
I suppose it makes sense to start with what Hapy has had for seating. First, he had his original manufactured-in-1971 seats. These were built before headrests, and while they looked the part, they were completely clapped out, sagging painfully across the entire seat base. The horsehair stuffing was mostly gone and the fabric was dry-rotting away. So, while I was still working in Old Town (an area of downtown Portland now called "the Pearl District") I bought a set of blue-green plaid 1974 seats off craigslist for $20.

The blue-green set were marginally better. Maybe. The seats had been rebuilt at some point with foam, but I discovered along the way that they were getting ditched for $20 for a reason: they were very uncomfortable. Still, they were the seats I had, and they had headrests for better neck protection in an accident. After a few months with them, though, I would have probably gone back to my originals if I had still had them.

A few years ago, GratefulEd swapped out his original 1973 seats with minivan seats (which look and seat great), so he loaned me his seats while I figured something out. The 1973 seats served GratefulEd just fine, but they, too, were worn out. The fabric is so destroyed that the simple aftermarket seat covers cling to the foam underneath, not the seat fabric. Again, these seats are not the most comfortable, but they are better than the '74 set. GratefulEd put many miles on these seats. For, like, 2k of those miles, I rode with him. Still, at some point he wants these back, and at some point I would like a seat that will improve the ride... like the seats he put in Belle.

New Seat, What a Treat
Yeah, I've used that line before. In my scouting around craigslist, I found a set of "comfort" front seats from a 2016 Sprinter for $250. The "comfort" seats are so labelled because they have things like angle control and lumbar support that the "standard" seats do not have. Coming from seats that were little more than an uneven pile of flattened foam wrapped in shredded cloth, these things are puh-lush. With an arm rest. I read reviews of these seats where authors described taking road trips of 8-12 hours and not suffering from leg or back aches or any additional fatigue they could assign to their seats. Sounds perfect, but are they 10x better than those old ratty '74 seats I bought 15 years ago? I think so.

I drove over to the seller in Hapy. Upon arrival, I pulled the front passenger seat out of Hapy and set the Sprinter seat in it's location. It fit well enough to know that it could probably work, and then I jumped in to test-sit it. Ultimately, figuring out how to mount it, deciding whether I go whole-hog and do a swivel-seat upgrade, etc, all only matters if the seat is comfortable for a long drive. Just because some random internet authors said so, doesn't mean it will work for Boo and me. Of course, sitting in a seat for a few seconds won't tell the story either. But, I liked the seats, so I paid the guy, put the seats in the back and headed home. Hapy ran great, by the way: no codes, no stammering; he just cruised and felt peppy.

So, Will It Fit?
extra surround
getting cut off
Before I go too deep into the install, there are some basics. The Sprinter seats are much taller and the bottom is much thicker than any of the stock bus seats. When I placed the seat in, the headrest sat about an inch or so below the ceiling. Because of the original mountpoints in the passenger seat pedestal, I could not position the seat on top of the inner flat very well. As a result, I could only sorta-kinda get a sense for how it would be before the inner seat rail slid down into the well in the middle of the pedestal. So, regardless of what I do, that old passenger-side mountpoint will need to get cut off.

A little concerned about how the driver-side would fit, I pulled the '73 driver seat out and set the Sprinter seat in its place when I got home. This made for a much better assessment because the stock driver seat is mounted with toothed sliders, not large C-hooks sticking up from the pedestal. Still, the height of the seat base wedged my legs under the steering wheel. I confirmed that the seat will be very comfortable, once I have figured out how to lower them. These are built for delivery drivers, service folks and RV's: designed to be sat in a lot for long periods, and Sprinter's are not cheap, so the seats are a reflection of that as well (read: these are good seats). I will not have to cut out the partition for the seats to fit, but removing the partition could make them more adjustable.

Seat Gets Trimmed
While I did not have to cut up the bus, I did have to cut a section of plastic off the seat base. These seats are adjustable in 3 ways: height, seat-back tilt, and seat-base tilt. The height is controlled with a lever on the outside along the base, and it raises / lowers the entire seat above the rails by as much as 3 inches. In the Sprinter, the seat is bolted to a pedestal that is smaller than the seat, so when it is lowered, the bottom plastic surround drops below/around that pedestal. This will not work in a bus installation, as the pedestal is larger than the seat.

new seat (with surround removed)
versus old seat
The plastic surround, however, seems almost designed for this modification. There is an indentation that runs along the lower edge of the cushion, maybe 3 inches above the bottom of the surround (see picture above). I scored this indentation repeatedly with a box-cutter until the lower section fell off, halving the plastic surround's height. The new now-the-bottom sets slightly above the seat rail at the seat adjuster's lowest setting. With this lower surround removed, the seat rests cleanly on the bus seat pedestal (see picture on the right). For a longer legged driver, there are now a few inches of headroom, if the seat needs to be raised.

Install Thinks
Boo and I would love to have at least the passenger seat swivel, if not both, to create more usable space while camped. But Hapy has steel partitions behind the front seats. Those partitions, I think, were critical for collision safety since the back of the passenger seat was literally mounted with a hook-and-ring connector thing to it, and the seat was unable to sit upright without leaning against it. Still, these partitions could also represent some stiffness in holding the sides  of the bus square against twisting or in case of an accident. So, we have a few options:
  1. *Mount the seats in a forward-facing-only orientation, bolting the slider rails to the bus.
  2. Remove the partition behind the passenger seat, install angle iron to take up the side-stiffness, install a swivel base and the seat. Driver side remains just like option 1.
  3. Remove the partition, but don't install a swivel. Maybe, the seat is just removed, reversed and re-installed facing rear-ward when we camp? Maybe instead of using bolts, the seat is mounted with nuts on studs, making the reverse-swap that much easier.
  4. Remove both partitions, install an angle iron for each side for side-stiffness, install a swivel on each side.
  5. Blending options 3 and 4, remove both partitions, but don't install any swivels. One or both seats could be mounted rear-facing when camped.
both seats mocked
My biggest question for whether options 4 or 5 are possible circles back to the steering wheel. Unlike the passenger side, where there is a big open space for the seat back to go when you face it rearward, that wheel is big, and sticks pretty far back from the dashboard. Just looking at the picture on the right here tells the tale. It is hard to imagine that driver seat facing rearward. Frankly, I'm going to have to think carefully about how to just install the driver seat. Use of studs may be necessary simply for that. I asterisked option 1 since that's the most direct option that gets seats in. I can always grow from there. Knowing that any swivel is going to raise the seat more, all the others may not be real options.

Some Prep Is Universal
Regardless of what we choose to do, there are some universal steps I need to take. First, of course, is addressing any rust on top of the seat pedestals. I removed the pedestal carpet a few years ago, and need to re-install it or cut some fresh carpet to install there. I intend to add some noise reduction stuff while everything is open before the carpet goes back in. I would like to move the brake fluid reservoir down into that below-the-seat area to simplify things a little bit. This would also create more possibility for a driver-side swivel (though that is still very remote). I may need to cut off the old driver-side seat tracks, if I run into issues putting holes through for the Sprinter seat rails. On the passenger side, the pointing-up C-hooks need to be cut off. You can see how they interfere in the mock-up picture on the right, here: the seat is pushed further forward because of where the C-hooks are. All of these (except the carpet install) can be done while I mull-over whether I am going to cut off one or both partitions. 

Boo and I tried sitting the mocked up seats just like the picture above shows. Overall, they are very comfortable. They do sit high, though, for our shorter-than-average-for-a-US-person legs. I can fully activate the pedals all the way to the floor, though. For Boo, she may need something under her feet for longer drives so the leg-dangle doesn't negatively impact her lower back. I'm sure we have something that usually travels with us that could stow there which would meet that need. In the past, she has sat with her feet propped up on the dash, so a more permanent step isn't necessary. The partitions do impact the degree to which the seat-back can be tilted. For the driver, I'm not sure how much it matters. For a passenger who sometimes likes to sleep on the drive, this might lead us to removing that partition eventually. At this point, I am going to work on simply mounting the seats and leaving the partitions. We figure I can always circle-back around on removing a partition, but once it's gone, it's gone. Maybe there's a way to just lower the passenger-side partition a couple inches to enable a seat tilt.

That's it for today. I'll post more on this progress as there is some, leveraging the old "Part (x)" to keep them strung together. Thanks, as always, for following along-

Tuesday, June 25, 2019

Zed Progress Report

It has been a long stretch since I posted on the '79 Datsun 280ZX ("Zed") in my garage. Today, is your basic update.

Slow Paint Prep
I'll start with the not so great. Our final efforts last Fall to get Zed in a position for some progress on the paint did not really make a difference. The outer shell is pretty much in the same state: virtually rust free, but still not paint-ready. Not really even close. We were able to remove the tail gate and passenger door, though.

doors and tail gate off
The tail gate is held on by 2 hinges where each hinge has 2 nuts-on-studs on the gate and 2 nuts-on-studs into the body of the car. We removed the nuts on the studs protruding from the car. We'll separate the hinge from the tail gate later. The gate is held up by 2 gas-filled struts. These are original, and still hold the gate up very well. These are held onto a little ball-protrusion by a small bail. I flicked the bail to the side, removed the strut and then put the bail right back on again. I suspect these would be very hard to find items if we lose them. Before you remove the struts and then hinges, the electrical plug for the rear defrogger needs to be unplugged from the harness (rear end of the inside of the roof) and then fed back through the hole in the body. So, its: unplug/feed, remove struts, then hinges. Our install will be the reverse (hinges, struts, feed/plug).

The passenger door is pretty much the same thing, except the hinges are stacked vertically rather than horizontally. It is similar otherwise. We set a floor jack under the far end of the door to hold it upright while we removed the nuts. C worked the wrenches while I held the door steady. Once the nuts were loose, he unplugged the electrical, fed it through and then removed the nuts. One quick tug on the door and it was off.

Think Time
We spent quite a bit of time going through parts and planning our approach. Since the weather was pretty meh most of the times C dropped by, he focused on getting the carpets and seats cleaned. But there was a lot of time available to think about the project. For example, we have 2 sets of door cards, one set with some grey and one set that's all black. The all-black look pretty good, but they do not have window switch holes, they have manual crank holes. Do we want electric windows? We have the wiring, winders, even the switches. Maybe we put them in the center console instead of in the doors? Fortunately, there is plenty of time to think since the car is not in paint yet. We did decide, however, that finishing the paint makes much more sense than assembling any parts of the interior first.

Carpets
cleaned carpet test fit
As part of the slowly-moving-things-forward effort by C, he spent a considerable amount of time cleaning the carpets from the DonorZ. These are a nice grey color, but there were rust stains, cigarette burns and filth rubbed into them. C used a combination of baking soda, vinegar and dish soap to scrub the carpets. Then, he left them for a few months. When he returned, he attacked them with the power washer. They turned out amazing. The elbow grease was important, but I think the power washer did the bulk of the work. And it was fast. After they were washed, we hung them over patio furniture under an overhang (out of the rain) to dry. When wet, they didn't look like much, but after they dried, they actually had a little sparkle to them. Now, cleaning can't fix burn holes, so we thought we should put them in the car so we could see where the holes show up. As luck would have it, they appear under the passenger feet, but C will have floor mats, so they won't be visible most of the time. If we couldn't solve for the burns, C was prepared to dye the carpets black. I'm glad he is sticking with the grey. I think it will help the black parts of the interior "pop" more, and the interior will be brighter during our long dark and gloomy months.

Seats
C crushing it
Speaking of the black interior, part of the DonorZ collection of parts were the seats. When the car arrived, these seats had grey aftermarket covers on them. They look okay, but after seeing what was possible with the carpet, C dug into the seats. Using carpet and upholstery cleanser, mixed with a small-area carpet cleaning machine, C was able to do a similar transformation on the seats as he did with the  carpets (see the picture to the right). We were able to determine why the seats had a cover, though: a black mark about the size of a disc-golf disc was on the seat where the driver's backside would go. After cleaning, though, it was only slightly larger than a deck of cards. And, it wasn't as dark. Perhaps, with a little more cleaning, that black mark could nearly disappear. Similar to the carpets, wherever he worked, they cleaned up very well. We may need to spend a few more cycles on them, but they already look way better than before, and they are 100% original Datsun 280ZX seats. This velour material isn't available anymore, so if we can retain it, the car will hold more value... and it will cost us less.

That's really all that's happened over the last 8 months. C has been working very hard on getting through, arguably, the hardest year in US high school: Junior year. So, that should be his focus. Hopefully, once school lets out for Summer, he will be able to get this project moving forward. I know he wants to drive it, and he definitely enjoys working on it. And, he has really only gotten to do the inglorious parts (paint stripping and cleaning). Finding the time, regardless of how old you are, seems to be a common challenge. Once the work shifts to paint and assembly, I have the feeling that time will suddenly be more abundant. It usually is for me, anyway.

Thanks, as always, for following along.

Tuesday, March 5, 2019

New Seat, What a Treat - Headrests

This is the final installment of the seat reupholstering effort. I have stripped down, sanded, rust-treated and painted the original seat frames (in Part 1). Onto those frames, I have installed the seat webbing (Part 3), new hard-backs (Part 2), foams and covers (Parts 2 and 3). The seats have been installed back into the little car, with head rests, but I have not yet talked about that upholstery effort for those. I will cover that today.

Headrest Extraction
First, you need to separate the headrest from the seat. Obviously, but it's not that easy. With a convertible, moisture gets everywhere. In the Pacific Northwest, moisture gets everywhere. Add those together, and moisture truly gets everywhere. Even into the headrest tube, and enough of it to rust through chrome. My driver seat was easy, but I had to resort to these more drastic measures for the passenger seat: with the top down and the seat still bolted to the floor, stand behind the seat, place one hand on either side and lift as hard as you can. If you are lucky, it will come flying out, bang against the ceiling and not hit you in the head on the way down. If you are unlucky, you may just hurt your back, and the head rest is still stuck. Seriously, these buggers can be that stubborn. Use your best judgement, but it needs to come out to do the seats at all, so if you cannot get it free, forget about recovering your seats.

Old Cover Off
Once in hand, look at the underside of the headrest. There is a plastic strip that runs along the bottom which is held on with 2 Phillips head screws. Mine were really rusty (so I ultimately replaced them) so I needed to take care coaxing them out. If you keep yours, it may be worth soaking them in vinegar to get them rust-free Set the plastic strip aside for cleaning with dish soap and grab a thin slotted screw driver and a pair of needle-nose pliers. The plastic strip covers up staples which hold the cover on. With the screwdriver, work the staples free enough for you to grab with the needle-nose pliers and then pull the staples out. If you are not concerned about the old cover, you can tear the cover off and pull the staples afterwards. I prefer to not destroy things, but everyone is different.

With the staples out, the cover is only holding on through friction. Pull the cover and the foam off of the head rest stem. Do this whether you are reusing the foam or not. If it is original foam, I strongly encourage replacing it, though it can be hard to locate for some cars. I found the MGB headrest foams at Mirror Trim in the UK, and while the cost is a little high, it was worth not having the old foam disintegrate while installing.

Repair and Rust Treat
In my case, there was rust on the square metal head rest "head" as well as down near the bottom of the chrome post. The wood into which the staples were driven was shattered in the driver-side headrest (passenger side wood was in great shape). So, there was some repair and rust treatment needed. First, I taped off the top 3 inches of the chrome post with painters tape. This part of the post on both headrests was in decent shape, and I was opposed to painting them. Once taped, I sanded the "head" thoroughly and scuffed the rust off the chrome below the taped off section. I felt this chrome would not be seen, but needed to be clean for the head rest to work better. Then, I shot the "head" with some gloss-black Rustoleum and removed the tape. The wood strips in the driver head rest needed to be replaced, so I took one piece that was still intact and used it as a pattern. From my woodpile I found a strip of cabinet edging that was the right height and width, and cut two pieces to length. Before I started re-assembling, I cleaned the plastic strips with dish soap and found 4 Phillips head wood screws which would fit through the holes, sit flush once installed and were about the same length as the originals. I used "size 6" thickness, 3/4 inch long wood screws.

Re-Assemble
The headrest foam and cover are not uniform. Both are side specific (front and rear). The nicely tailored edge is on the edge from the front while the un-hemmed edge runs from the rear, and under the front, hemmed edge. The foam is thicker in the front than the rear, but that part is a little more obvious. Similar to stuffing a pillow into a pillowcase, stuff the foam into the cover, making sure that the corners are in the corners and the edges align with the edges. The foam is way bigger than the cover, so I used my thighs, arms, and abdomen to get the foam into the cover. Then, it was a considerable finger exercise to get everything aligned. Once set, though, you will see a slot in the foam for the "head" of the headrest to slide into. With the glossy paint, it slides right in. On the passenger head rest, I found I spent more time fiddling with the head rest post to get it at a depth I liked, but you may not have that issue, as I did not with the driver side. Shrug,

Staple and Screw
Before you grab your staple gun, I suggest that you take your nice and clean plastic strips and test fit them. Similar to the foams, the strips are not mirror-images, the rear side is thicker, but the distance from the post to the screw hole is the same on either side. So, consider where the screws will go, and then plan your staples. Remove the plastic strip, pull the rear flap forward, and under the front (hemmed) flap and hold it in place with your finger. I held it in place where the screw hole was so I would not lose track of it while stapling. Check that you are centering over the wood and place at least 1 staple on either side of the screw hole. There were 2 per side originally, so I did the same, making sure that the amount of stretch across the headrest was uniform as I did. There is a lot to keep track of in order to make it look good and lots of ways you can lose focus so it looks bad. Just do not staple until you are sure.

Once the staples are in, the hard part is over. Slide the plastic strip back into place and screw it to the "head" with rust-free screws. If you ever wanted one of those seat belt keepers (like these in the picture), now would be the time to install them. I do not like losing my seat belt, reaching around for it nor having it bang against the car when I take it off. These little plastic keepers really help, though getting access to a parcel stowed behind the seat is not as easy.

Re-Install
This should be straightforward. In my case, the seat foams were manufactured without holes for the head rests. Perhaps the seat foams were developed to span many years, including years without head rests. Regardless, If you did all-new foams like I did, you will need to find the rectangular hole with your fingers and cut the foam. Take care as you align the cover, the foam and the head rest post. Do not simply grab the chrome lip on the seat cover and push/pull. The chrome lip will easily separate from the cover if you do that. Once you find alignment, trim what little foam you need to and slide the head rest into the seat. I took an extra minute and applied some PB-Blaster brand white lithium grease to the post so it would move more freely in the future. I also applied this grease to the cleaned-to-the-steel seat rails and workings so the seat would slide forward and aft more easily. These little final touches really made a difference in the usability and perception of the seats once you were sitting down in them. I highly recommend taking the extra few minutes to apply the lithium grease.

So that's it. Over the course of about 2 days per seat, they are completely renewed. New foams, new webbing, new covers from top to bottom. The headrests are more functional, the seats tilt and move more freely. Most importantly, they are comfortable. Now that they are installed, I will either finish the wiring of the seat heat, put some effort into the amplifier for the speaker box or carpet the trunk. I will see how I feel when I get to the garage.

Thanks, as always, for following along.

Tuesday, February 19, 2019

New Seat, What a Treat - Part 3

Today, I'll complete the story of getting the driver seat stripped, recovered and installed. When we left off (See New Seat, What a Treat - Part 1 and Part 2) , the old covers had been removed and set aside with the old padding, hog rings and ratty hard-back. The upper seat had been re-foamed with a heat unit, and recovered with a new hard-back. Now held in place with hog rings, it is a completed unit.

Back to One Frame
Before getting to the lower seat, the upper and lower halves need to be put back together. This is quick work with a couple of 1/2" spanners per side. Over each of the hinge points, a plastic protective cover is installed. These keep fingers, cover material and grime from getting into the hinges. They are held on with a single Phillips screw each and are side specific. I had washed these with dish soap, removing 30 years of gross beforehand. At this point, I tested the action of the seat release lever and the movement of the hinge to make sure nothing was binding and that it had a smooth movement. Check.

Lower Seat - Webbing
The upper cover was similar to a pillowcase, with an opening at one end (the bottom). The lower cover only has 4 sides: top, front, left and right. So, it is more like a fitted table cloth. No forceful stuffing to get everything to fit this time. While that sounds easier, the material does not stay put as easily, so I found myself double and triple checking everything at each step.

First, we start with the webbing. I found little advice for how to do this, and based my entire plan on pictures I found on the internet (like this one on the right from MGExperience). The webbing has 4 straps which run left-right and 2 straps which run front to back. These straps are loosely threaded onto a thin, 3-sided, u-shaped metal bar (I'll refer to as the U-bar). The replacement kit arrives with 12 little hooks which hold the webbing contraption to the lower seat frame. The frame has 16 little holes: 2 along the front, 2 along the rear, 5 along each side... and one in each front corner. Apparently, those corner 2 are unnecessary and there is an extra pair along the sides for personal comfort configuration. The bottom of the "U" faces the front of the seat, so the 2 holes in the rear of the frame are for floppy straps that are not dire-connected to the thin metal U-bar. I started at the front, threading one hook each through the gap at the end of the strap, around the U-bar and then into the hole in the frame. With the front done, I worked my way down to the rear, doing holes a strap at a time, one side, then the other. I left the last pair, closest to the rear unused, choosing for the more forward pair thinking it would be more supportive. Last, the rear-end of the straps are hooked into the frame. To help prevent the straps from cutting through the foam, I put a small thin white hand towel on top of the webbing. Others use burlap or canvas. The hand towel was available, free, fit, and will do the job at least as well. There was nothing between the foam and the webbing when I tore the seats down.

Foaming
Unlike the upper seat covers, the lower seat covers and foams are side specific. On the underside of the foam, you will find either LH or RH embossed into the foam. This is because the little notch-outs nearest the seat hinge are not the same. Also, the seat edge along the transmission tunnel is more straight and narrow than the seat edge which runs along the door sill. This allows the seat to move forward and aft on the seat guides much more easily, without hanging up on the transmission tunnel. Since your backside sits in the wide center anyway, you may not really notice. The covers are cut differently, just as the foams are, so match them carefully or you'll be re-doing part of the job. Ask me how I know :)

Lower Seat - Covering
With the webbing in, I pushed the lower seat foam onto the frame and took a seat. Wow. It was like the difference between an old saggy couch and a nice new desk chair. Firm, but totally comfortable; I felt I could sit in it for hours. Those few minutes were inspiring. I pulled the foam and attached the other seat heat unit to it. Similar to the upper, I didn't cut the heater. Instead, I ran it from just behind the front edge all the way to the front edge of the upper cushion. I'll have warmth from the back of my knees to the top of my shoulders. Ha! Once I got the double-sided tape figured out, it attached and held well through the process. For more wiggle room, I tilted the seat upper slightly forward. I took out the new cover, oriented it where it belonged on the foam/heat unit pair and pressed it onto the frame. I say "pressed" because with the seat upper, it took more than just setting it. There was resistance to my getting it all the way back in place. Again, there were many cycles of fitting, adjusting and re-fitting to get the foam aligned with the seams. Minutes taken here are where you'll see the difference in the finished product.

Ring It Up
With the seat bottom where I wanted it, I tested it again (Ohh.. soo nice). If you are following this as a how-to, I strongly encourage you to try this in-the-car! You may find the seat too high. I, regrettably, didn't do this test. Instead, I started on the hog rings. I made sure the heat unit wiring was on the transmission tunnel side, like the upper. With the seat upper helping hold the rear in place, I started there (along the rear) with the rings. Like the upper, I pulled the material until it was well aligned and put 2 rings about a fist apart in the center. Again, following the pattern from before, I did each side of the rear, checking for alignment. Then, I switched to the front, and followed the same pattern: center first, then outer edge, checking for alignment, no wrinkles, etc. Last, I did the rings along the sides, starting with the edge nearest the transmission tunnel. Since the hog ring pliers I got at Harbor Freight were useless, I used my fingers to get them in place (not easy) and channel-lock pliers to snug them down.

Install
So, there were things I did, and things I would encourage others to do differently. I changed my disposable gloves often so I would keep the seat clean. I covered the seat with a large trash bag for the same purpose. One of the things I had failed to do was test out the seat in the car before hog-ringing the lower cushion. Had I done that, perhaps I may have omitted one or more of the webbing straps. I say that because with all of the straps in, and the seat tilted fairly straight up, my line-of-sight out the windscreen is too high. Since the straps are what hold the foam up, I could have tested, removed one, tested again, etc before putting on the cover.

Instead, I carried the finished light-cream-colored seat into my cramped, filthy garage. I held it overhead and found that getting it into the car with the top up was simply frustrating. So, the seat went onto the dinner table while I lowered the top. Take 2: carry the seat high overhead, lowering into the cockpit. For some reason, all of the challenges I expected when I put in the old seats on top of the new carpet happened this time. I couldn't find the holes, then, when I found them, I couldn't get the bolts to thread. Then, once they were finally threaded, I realized that the seat runner was oriented incorrectly.... Last, one of the worst things happened: the front outer bolt and captive nut pairing got stripped.

Fix It
The bolt wouldn't come out of the captive nut, so the captive nut had to be separated from the new floor.... while holding my light-cream-colored seat loosely on top of it. I went the brute-strength method and used a pry bar. In retrospect, this was a great test of the welding of the floor we had done; the welds held better than the sheet metal. The nut released from the floor, the seat was returned to the table and I went looking for a replacement nut. I found one, and, with the welder I had used 18 months earlier to install the floor, I welded that nut into the hole created by the removal of the old one. I covered everything with canvas painting tarps before I welded so any possible errant spark would not land on my new top or new carpet. Since the top of the new nut didn't sit exactly flush with the floor, I slid a washer on top of the other front seat-mount hole to level the front of the seat. I left it alone overnight and the next day the seat went in easily.

I fiddled with the seat incline and found a spot that, while tilted a little further back than I usually drive other cars, the angle totally suits the MGB. This little car has a deep foot well and a short reach of the steering wheel, so it is almost designed for someone who has long legs and a short torso and arms... until you tilt the seat back a little bit. Now, instead of having the steering wheel nearly against your chest, you have some living space... and the angle lowers your line-of-sight through the windscreen such that your eyes are below the sun visors.

That's it for today. I will wrap up with a post about the head rests. Thanks, as always, for following along-

Tuesday, February 12, 2019

New Seat, What a Treat - Part 2

When I last posted about Oliver's seat (See New Seat, What a Treat - Part 1), I had completed the tear down. The old covers were sitting in a pile with the nasty foam and rusted up hog rings. The seat frames and head-rest metal were painted with black Rustoleum and hanging from the beam on the front porch. Today, I start the re-assembly process.

The new covers are a leather / vinyl blend where the part that you sit against is leather but the back of the seat upper and the edges which hang down from the seat are an advanced vinyl that feels leather-ish. This vinyl is fairly durable. The blend reduces the overall cost of the cover by a couple hundred dollars US versus all-leather. The leather is backed with some thin foam padding.

Seat Gets Heat
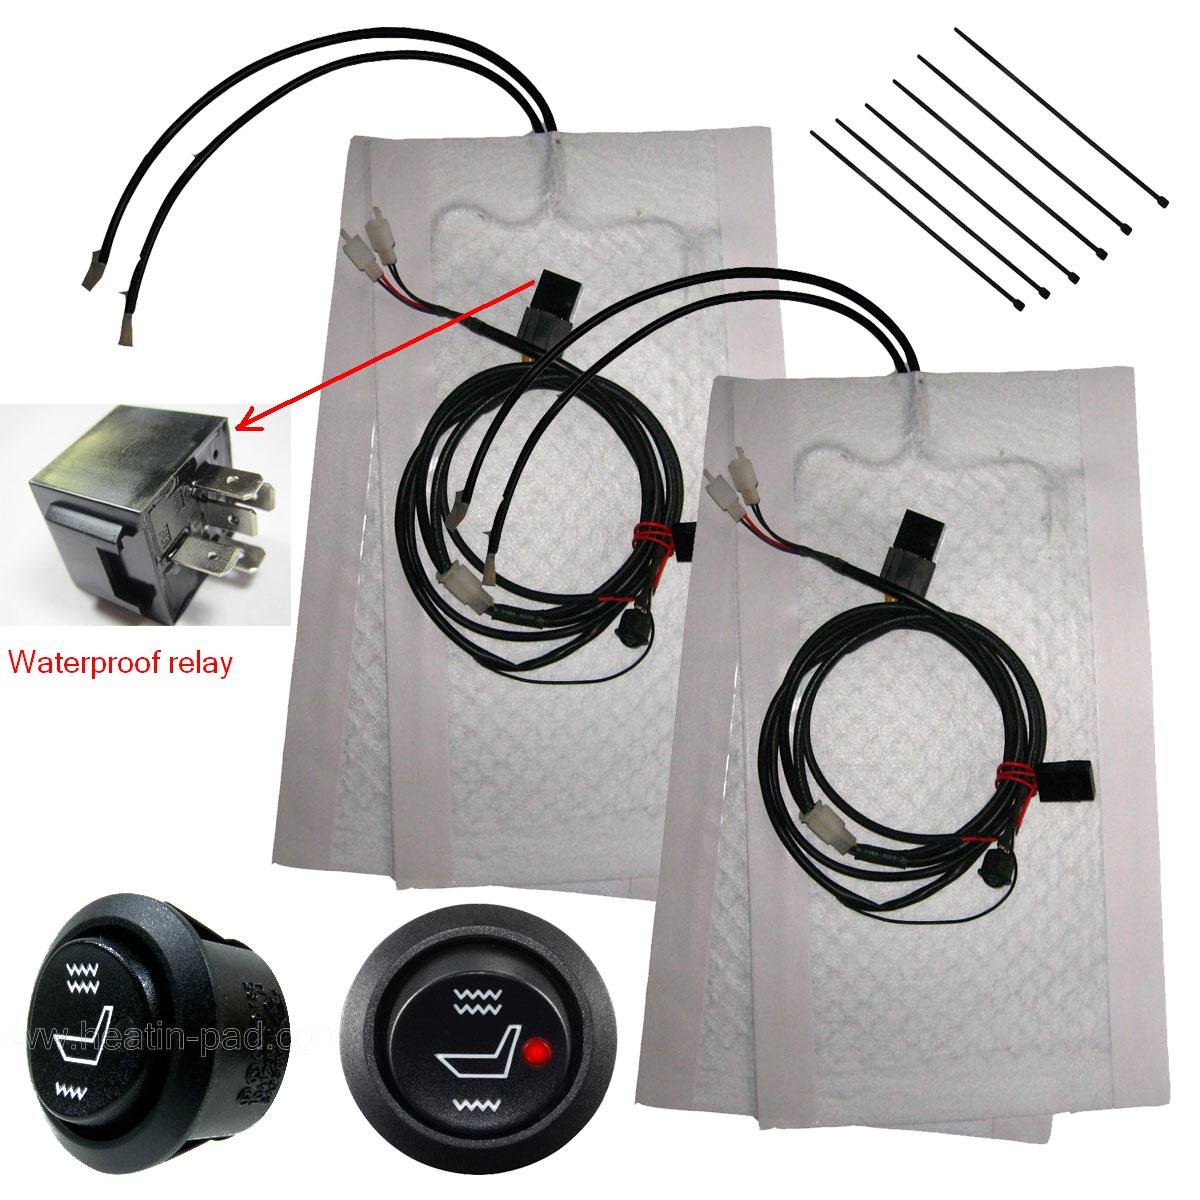
I decided that going through all the trouble of redoing the seats would be even better if I had seat warmers when I was done. While our Pacific Northwest is well known for it's long periods of rain, we actually do get stretches of sunshine, and not just between July 4th and October 15th. We get some nice fall and spring days. Every once in a while, we will get a few days of dry, but cold weather in the dead of winter. On those days I would like the choice of putting the top down and driving in the sun. Actually, having warm seats when it is cold nasty would be super welcomed too. So, as I acquired the foams, seat backing, webbing, hog rings and all the other bits needed to rebuild the seats, I bought a universal seat warming kit for 2 seats. I got a very simple kit with a 3 position switch for each seat that I could install into a fairly small hole. The heating part is a simple white rectangle that rests between the seat foam and the new cover. The base and the back have separate heating elements. While the instructions indicate that the pad can be cut to fit, I chose not to, recognizing that I could render it useless by cutting it incorrectly. Besides, the pad covered the entire seat back and the entire seat base, so we will be getting warmed from the back of our knees to our necks. Yeah.. that is going to be sweet.

These attach to the foams with basic 2-sided tape that runs the length of the rectangle along each edge. The instructions say to tape the pad to the foam before putting on the cover. Cool. Finding the edge of the 2-sided tape was the hardest part.

Upper First
So, with the heating elements figured out, and taped to the face of the upper seat foam, I started with the upper section or the seat back. I had read different techniques, but tried my own. First, I took the new seat hard-back and worked it into the lip around the rear side of the foam. The seat frame will later fit into this groove. With the foam and the hard-back as a unit, I fit the seat cover over the top and stuffed the corners of the foam into the corners of the cover. This is similar to putting a duvet cover on a big old comforter. The corners need to fit right first. Once the corners were in, I set the seam edges of the foam and then the seat back so the lines ran along the edges of each. Now that the foam, back and cover were aligned, I slid the seat frame between the foam and the hard-back. I did this slowly so the foam did not shift inside the cover. The result was exactly what I had hoped. The lines were right on the foam where they should have been. I realize that most auto upholstery is done by setting the foam onto the frame, turning the cover inside-out and slowly rolling the cover onto the foam while applying glue. It did not occur to me that I had missed the glue because the old covers slid right off the old foams, leading me to believe that maybe they weren't glued on before. I should note that after everything was assembled, I have seriously considered removing the upper cover and re-installing it the auto-upholstery standard way.

Ring the Back
With the cover in place, I grabbed at the bag of hog rings and the hog ring pliers I had purchased at Harbor Freight. The pliers were useless, so I chose not to use them. The hog rings that were supplied as the hog ring kit for this seat only had one size of hog ring, but the front edge of the seat back cover needed a larger size if it was going to be mounted the original way. So, I had to solve for clamping down the front edge different than how it had been or find a different set of rings. I decided to mull that over while I did the back. First, I needed to route the cable for the seat heat to the inside edge, so the wiring for activating the seat heat will run along the transmission tunnel rather than along the door sills. The rear side of the cover is held onto the frame with 4 square clips. I pulled the seat back as tight as I could while still retaining the shape and straight lines. Starting in the middle, I pushed on the inner 2 clips. These held the cover in place so I could do each outer clip with just a little tension. The seat back looked really good, so I started looking at options for the front edge.

Ring the Front
The front edge had been held on by 4 larger hog rings clipping to the large tube across the bottom of the back. Next to that large tube is a small tube through which the seat release is controlled. I decided to use the one-size rings on that smaller tube, and, after compressing the rings a little bit with my channel-lock pliers, I was able to use them. Similar to the rear, I pulled the material as tight as I could without distorting the lines (but centering the pleats) and did the 2 center rings first. I did the outer 2 rings one at a time similarly holding the material firm. Ideally, the large pipe would have been used. It occurred to me afterwards that as the seat back incline angle changes, the tension on the cover will vary because of the tube I used. If I am able to source an 8-piece set of larger hog rings, I may change these out without removing the seats.

Outer and Inner Edges
With the cover held on, I considered how to address the lower outer and inner edges which had been held in place with Phillips screws. I did not mention these in the tear down post, mostly because at the time they were a non-story. Down at the bottom, there is one screw on each side that passes through the cover, through a semi-circular, heavy, flat cardboard and then into the frame. You can see the screw head in the picture on the right. The cardboard fits into a little pocket on each side of the cover. I have been unable to find a source for a replacement. So, I put the old flat cardboard bits into the respective sleeves in the new cover, thinking that they, at the very least, would help the cover retain its shape. I chose to not re-install these screws since I could not determine how to best identify where the hole in the frame was without boring exploratory holes. I may come back to this later, though.

That's it for today. I will post about the lower seat, and the big fun of re-installing a light colored seat in a dirty garage later. Thanks, as always, for following along.

Tuesday, January 22, 2019

New Seat, What a Treat - Part 1

I had a few days off, so rather than spend them playing in the snow or taking a personal trip, I stayed home, and re-upholstered the driver seat of Oliver, the MG. Today's post covers the start of that journey. Sorry today's post is a few hours late.

Old Seat Out
Remember when I installed the old seats on top of the new carpet (See MGB - carpeting (part 2))? Even with the nuts jammed under the seat rails, the seats placed the driver kind of low in the car. Sure, it is a little British car, so you're supposed to sit low. But, there are limits. I figure my eyes should be about 2/3 of the way up the windscreen, and I was around halfway. It felt like I was sitting a hair over the floor, suspended by the vinyl seat cover and little else. I had planned to replace the seat covers, foams, etc last Spring when I had the small win-fall that netted me the new carpet. I just hadn't gotten to the work because I had other things going on, and I wanted to drive the car. So, with this small break, I had my chance. Starting with a basic 7/16" spanner, I removed the 4 bolts which held the driver seat to the floor and removed the driver seat.

I moved the seat upstairs to the shedroom. That room is clean, and all of the interior bits are stored there, so it made more sense than trying to do it in the packed garage or in one of the general living spaces. First, the headrest needs to come off. With the seat on the floor, I stood on the seat bottom and whip-sawed the headrest: pushing it all the way down and then yanking it back up. This violent push/shove blend actually worked, freeing the headrest in a handful of reps. I set the headrest aside, and moved to the Lower Cover.

Old Lower Cover Off
The lower cover is held on with 4 sets of 4 hog rings: one set along each of the sides. I was able to work them free with a small slotted screw driver, exposing the padding underneath. The padding was orange and tattered near the edges. When originally constructed, this foam would sit on top of a 3-sided metal hoop to which 6 rubber straps are attached. This webbing creates a little give to the seat, and provides the lift from underneath. On this seat, the webbing was in disarray. Most of the ends were disconnected and tattered. Fortunately, I had a replacement set for the refresh effort. The pad, cover and webbing were tossed towards the shedroom door and I shifted to the Upper Cover.

Old Upper Cover Off
The upper cover is held on with 4 square clips along the back and 4 hog rings below that, holding the front down. The hog rings flew off with a little pressure with a slotted screwdriver. I did my best to not damage the cover. The square clips needed more coaxing, and since I did not know about them, I had not ordered replacements, so I needed to be careful with the originals. Before the cover will slide off, the seat-angle arm needs to be removed. It is held on with a Phillps head bolt. Once the 2 sets of clips and the angle arm were removed, the cover slid right off the top.

Within the cover, I could see a few interesting things. First, the original foam was orange, and had tattered along the edges. The "hard back" was cardboard that appeared to not be original, nor standard-issue. It looked like a square of cardboard had been cut from a shoe box, or something. It had been taped, with duct tape, to the orange foam. Cool. The tape, cardboard and foam fell apart without much prompting. I think the cover was holding everything together. I tossed the mess atop the Lower Cover mess.

Separate
Now, I was down to the metal. I could see the rust spots, and recognized the need to address the frame. There are 2 plastic hinge covers that protect fingers and the covers from the seat hinge. These remove with a Phillips screwdriver. With the plastic covers set aside, the bolts that represent the hinge can be removed with 1/2 inch spanners. Before I could deal with the rust, though, I removed the seat runners from the bottom of the seat. Moving the seat forward and backward had become difficult, so I wanted to get all that nasty grease and grit out of the runners. I took the seat frame and the runners downstairs, and then focused on the head rest.

Headrest
The seam for the headrest cover is on the bottom, hidden by a small plastic strip, held in place by 2 Phillips screws. With the plastic strip removed, the staples which hold the cover on can be addressed. I used a small slotted screw driver to loosen them, and finished the job with a pair of needle-nose pliers. The cover slides off fairly easily at this point, taking the old foam with it. I had new covers and new foam, but I hadn't anticipated small wood slats along the bottom edge. It is to these slats that the staples and Phillips screws attach. Not all of the wood was bad, but the bottom-most pieces were. I took one good sample from each side and cut pieces that would fit from some scrap wood I had lying around. In a pinch, you could cut up a paint stir-stick: it is the right thickness. The key is finding something thin enough to fit in the channel along the underside of he headrest.

The headrest steel was in a similar state to the rest of the seat frame: some surface rust spots, but no rust-through. I brought it downstairs as well, and moved all 3 pieces to the front porch.

Rust Treatment
Some aspects of working on cars does not change no matter what you are working on: dealing with rust. I attacked the rusty areas with 60-grit sandpaper and then sanded the whole thing with 100-grit. This left a decent edge for paint to bite into. I painted all surfaces with Permatex Rust Treatment, and let them dry overnight. The following morning, I shot them with some black Rustoleum I had in the garage, and hung everything to cure on the front porch with bailing wire.

All of the random other bits got the cleaning treatment. The seat runners, for example, were soaked in de-greaser and cleaned up. All of the little plastic bits and handles were deep cleaned as well. Even the fasteners which I intended to reuse were cleaned up and scrubbed.

I was feeling pretty good at this point. The tear down was easy, the rust invasion was not too bad. I figured the easy part was over, though. Turned out, I was right, but I'll get into that next time. Thanks, as always, for following along-

Tuesday, July 17, 2018

MGB - carpeting (part 2)

This is a continuation of the previous post about installing the carpets into the MGB. At this point, I've mapped all of the various pieces of carpet to where they go in the car and I've traced and then cut thick or thin insulation to go under the carpet for the respective sections. Now, it's time to play with spray epoxy.

Back to the Directions
For the install, I followed the directions for the order which carpet first, second, etc. For each piece of carpet, I had something to go under it (except the transmission tunnel). For each piece which directed gluing straight to steel, I would test fit the insulation, then test fit with insulation and carpet. If necessary, I would trim the insulation a little bit so it wasn't visible. Then, I'd spray epoxy onto the insulation and install it, holding it in-place for a 30-count or longer. Then, I'd test fit the carpet on top of the glued-down insulation, then epoxy it into place by spraying epoxy onto the carpet underside. Remember to let the epoxy set-up a little bit before slapping the things together. Wet won't hold; it needs to tack-up a little bit: spray the underside well away from the car, let it set up for 15-30 seconds and then apply in-place. If you, the reader, are looking at this for guidance, take care with the transmission tunnel carpet. I realized after mine was in that a shifter cover plate hadn't been put back in, so I needed to cut a small line in my carpet in front of the shifter to enable that re-install. Since it will live under a console, it doesn't really matter, but I really don't like cutting when I don't need to. Honestly, it is really hard to tell that the carpet was cut there now even without the console.

No Glue, But No Snaps
The carpets that sit on the floor under the persons in the car and the piece on the back deck are not glued in. Instead, they were held in place with snaps from the factory. Since I replaced my floors, many of the old snaps were gone. I had a decision to make: install the snaps or try something else. Knowing that the snaps had to be in exactly the right place for them to align with the snaps in the carpets, or there would be lumps in my brand new carpet, I decided to not install snaps. But, I needed something to hold the floor mat especially under the driver's feet. Otherwise, it could slide around under the pedals making for a dangerous driving condition. I found Velcro at Ace Hardware that was designed for wet conditions and it could hold up to 30 pounds. Since we just need to hold carpet, this felt like a good way to go. I cut sections out of the insulation, glued the Velcro to the underside of the carpet and corresponding spot on the floor. Now, the carpet holds in place, and retains it's original ability to be removed for cleaning and access to drain plugs. And no lumps.

Cutting Holes
In order to re-install seat belts and the seats, this brand new carpet needs to have holes cut into it. I found this a little hard to embrace at first. Since I was putting insulation under all of the various pieces, though, I could figure out exactly where the hole was supposed to go with something that wasn't carpet and then transfer that spot onto the carpet. This worked well for the sill carpets (that section from the ledge along the bottom of the door to the main floor) where the lower seat belt mount hole is, but greatly complicated an already difficult wheel arch. Fortunately, the transmission tunnel carpet had the holes pre-punched. This made aligning the carpet easier in that respect, but made the overall install of that carpet much more harrowing because everything had to line up perfectly.... with epoxy sprayed on it. Move quickly.

The last holes to put into the carpets are the holes for the bolts to hold the seat rails. In the MG, each seat is held in with 4 7/16" bolts. The carpets do not ship with the holes pre-punched, so you need to locate them yourself. Not all of these holes pop out the bottom; in fact, only one does. The front 2 pass into a cross-member and one of the rear ones does too, leaving just the one. I started with just the insulation down, and pushed a finish nail up through the one hole. This removed front-back and left-right sliding of the insulation while I located the other holes. These, I found in a more traditional way of folding back the insulation until I could locate the hole, and guestimated where it passed through the insulation. While some holes took more than one try, I located the holes with finish nails, leaving them in the insulation for transfer to the carpet. Taking the insulation to a table, I set the carpet on top of the insulation and pushed the finish nail through the carpet, marking the hole, and then put blue tape on top of the nail to hold the mark. With an exacto-blade, I cut a small "X" at each nail, testing the size with the seat-rail bolt so the hole was only as large as needed to be. With the bolts pushed through the holes in both the carpet and insulation, I could set the carpet in place and then put in the seats.

Seats In
Once the carpets were in, I put the seats back in. The seats were originally installed with a wood slat running under the steel rail to lift it up off the carpet a little bit. Not surprisingly, these wood slats were rotted away. Instead, I boosted the seat up off the carpet by putting a slightly over-sized nut under the seat rail where each of the bolts passed through to the floor: one per bolt. These 4 nuts created little stands for the seat rail so it sits just above the carpet. I expected this to be a challenge, between the low ceiling created by the convertible top, the small holes, getting a nut under the rail, juggling an old seat, etc, but it really wasn't. The blue tape gave me clear targets for the holes in the seat rails so I could get the seat in the right spot without the carpet moving. Then, one corner at a time, I lifted the rail, slid a nut under the rail and the the bolt through the rail, then the bolt and finally into the hole in the floor. I would lightly thread the bolt and then move on. I tightened the bolts snug as pair: front then rear.

Finishing
I finished out the rough-in by making a small cut in the transmission tunnel carpet and installing the shift plate. I followed my now-usual pattern of soaking the old plate in vinegar for a few days to get the rust off; then, cleaned primed and painted it. The install of the plate was simple: re-use the 3 Phillips screws at the front. I re-used the original shift boot after cleaning it up with some Meguiar's vinyl cleaner just to get the shifter together and looking fairly good. I'll be switching out the shifter boot with the rest of the interior panels and seat covers later. The boot is held down with a new black ring and chrome bolts. The ring and bolts were less than $10US, but that change greatly improved the finished look.

I installed new door rubber seals and the stamped-steel transoms (with new screws) to complete the effort. The ends of rubber seals are held in place with small chrome bits, and otherwise just press onto the lip which runs along the edge of the carpeted sills. The stamped-steel transoms are held on with 6 small screws, and after some polishing, look fairly decent for original pieces.

Now, it looks and sounds like a "real" car. When the doors are shut and windows up, the car purrs. When I stomp on the fast pedal, it has a little roar to it. I still need to put the center console in (for climate control) and it could use a radio, but the little car is about ready to be a daily driver.

Thanks, as always, for following along.

Monday, February 1, 2016

Flash gets Leather and Oil

Continuing the saga of Flash improvements....

Cool Cool Leather
Old seat pattern
Before the holidays, I connected with a new VW friend Jim over a set of seats. My old seats were black cloth. He had a full set of grey leather ones. Since my Jetta was silver, it had silver/grey highlights all over the interior. I figured the grey leather would brighten it up. In the end, I think the grey looks better than the black would have looked. These seats have the heater units in them, but I don't yet have the wiring harness nor switches to activate them. That's something for another day. Unfortunately for Jim, it turned out that the swamp-feet stink was in the seats, not the carpet as I had always thought. So, when we swapped seats (plus some cash on my end), I accidentally swapped out the stink.

Now, these seats are considerably colder in the winter time, as you can imagine. Additionally, the TDI engine is so efficient, it takes a long time for the heater to start producing perceivable heat. So, my commutes have suddenly become much colder. But so much more comfortable underneath. With the new rims (See Flash Gets New Shoes) and these new seats, Flash feels like a new car.

The seats remove pretty easily. For the front, there are plastic covers over the rails that need to be removed first. They are held on with a single Phillips-head bolt each. Then, at the front of the seat, near the center by the floor, there are two bolts which hold the seat down. Remove these bolts and push the seat back. For the rear seats, it is even easier. Fold the base forward, and there is a bail that holds the base to the floor of the car. Unhook this and the seat base comes away. Fold down the seat back, and look at the hingepoint closest to the door. There is a small (about as thick as your finger) silver bar protruding from the seat into a C-shaped clip within the plastic panel. With a slotted screwdriver, push the catch-ring from around the metal bar until the C-shaped clip has its open end facing upward. The seat lifts out... though you may need to wrestle it a little bit. Install is the reverse, and yes it is that simple.

Oil Changes
new grey leather
I changed Flash's oil last weekend, but I haven't been as consistent with my oil changes as I should have been. Honestly, it was much easier when I only had one car to keep track of. Now that I'm mentally tracking on at least 4, I can't do it. I know there are folks out there who use smartphone/PC tools, web based things or even spreadsheets. I am now doing it in a much simpler way: just watch the thousands place on your odometer. When it is a 0 or a 5, it's time to change the oil. This is easy to watch for, and I don't need to remember anything or write anything down. Yes, I know manufacturers say change the oil every 3k miles or every season (if driving habits mean you drive less than 3k miles per season) or after driving through dusty conditions. Most folks don't do the seasonal change because we drive so much. Unfortunately , most folks don't do the dusty conditions change either. That leaves the 3k interval.

I have heard from a few sources that the 3k is what they put in there knowing that most people will delay a little while and that the real interval is 5k.... which aligns perfectly with my little system. With drive-thru oil change places, it's easy to stay on top of it. I prefer to do my own, so I just make sure I have an oil-change-worth of oil available for my cars, and change the oil the weekend after the odometer hits.

That's it for today. More next time on Flash improvements...