Showing posts with label paint. Show all posts

Tuesday, January 10, 2023

Where were we?

Hapy New Year. It has been a busy holiday season for pretty much everyone I know, and Boo and I are no exception. Today's post will touch on some of the things we have been getting after since my last post. 

CoViD Hangover
Cooper Spur snow
During one of my holiday social engagements, I had a conversation with my niece where we were both remarking on how could we have been able to do all the things we're doing now plus have to commute to work every day. I recall, back before the whole CoViD shutdown / work-remote thing started, I would take a train into the city, work in an office all day, train to the gym to work out for an hour or so and then walk a couple miles home. Around that work-week schedule, I went out to play or listen to music, attended ball games, visited friends etc like most people. And, of course, fiddled on cars a little bit. Now that we are more consistently mingling with others, I am having a hard time rationalizing how I was able to do it while maintaining that daily cycle. I know many people are returning to offices, and I wonder if there are more people out there trying to figure out how to make it all work again. Frankly, I think many people are failing at it and that's why there is such a growing discontent. Maybe it's the holidaze, but I swear I am encountering more surly people than ever lately.

Cooper Spur
Tuukka at rest
Of course, my holidaze had much more going on and much more positive interactions than just my realization about the world's increasing surly. Boo and I spent XmasEve and XmasDay with Boo's family. This was emotionally and spiritually taxing for a couple of introverts, but we were warmly welcomed and had a really nice time. The weekend before, my younger siblings and their families joined Boo, Tuukka and I at Cooper Spur, on the east side of Mount Hood. Boo and I took Tuukka for long walks along the groomed cross-country skiing paths, and shared meals, crafts, music and games with my siblings' families. It was a great kick-off to a holiday season.

NewOldHouse - 1/4 round
Anyway, back to what I was originally going to post on: NewOldHouse projects. Among the things left incomplete, preventing us from moving in-earnest into NewOldHouse was the 1/4 round along the baseboards. I touched on this last time, but simply identifying which pieces were to go where was only part of the battle. Once identified, cleaned and primed, I needed to install them. For this, I got a finish-nailer powered by an air compressor, and then moved my air compressor down to NewOldHouse. Working with the nailer was fun: point, press and shoot. I had the 1/4 round installed in a couple hours. Next, I spackled the nail holes, sanded them flush and then caulked the top of the 1/4 round to the base board. Last, I slid around with a paint bucket and brush, brushing in the 1/4-round with the same paint that I shot the walls and trim last summer. Start-to-finish, it took me a few days, working a few hours a day (let's say 15 hours). I need to caulk the bottom of the 1/4-round to the floor with clear silicone caulk (at least along the outer walls), and then the 1/4 round is complete.

NewOldHouse - bathroom
bathroom floor done
The bathroom was in mediocre shape when we bought the house, even after all the rubbish was removed and it was cleaned. There are meaningful divots in the plaster, the sink cabinet was nasty and the floor under the toilet was failing. First, the sink and cabinet were removed. The cabinet went to the dump; I don't remember what we did with the sink. Then, the toilet was removed, and set into the tub while the floor was cleared. Once the linoleum was pulled, we could see the original hardwood floor was in pretty bad shape. We removed the pieces around the waste pipe and could see that the sub-floor had been compromised at one point. We were around this point when I posted last.

Since then, the damaged pieces of sub floor have been removed and replaced. New flooring has been installed on top of that, a full floor sheet of thin veneer was installed on top of that and peel-n-stick tiles applied on top of that. The peel-n-stick took a full day, which seemed like a really long time for a room not much more than 8 square meters (5 foot by 5 foot). Details take time, though, and tiles will not fit exactly without trimming. So, for aesthetics, you want the trimming to be behind the toilet or under a cabinet with the uncut tiles along the main walls that you can easily see. This means, though, that you need to lay everything out to figure out where the cuts need to be for the heat and the waste. Also, orienting the tiles one direction of another takes some laying out, thinking, and laying out again. Quality takes time; slapping things together is fast, but it will always look... well.. slapped together.

Our last hiccup was with the toilet waste flange in the floor. The studs to which the toilet should mount were stripped and rusted to the flange. They needed to be cut off, drilled out, tapped and then new studs threaded before we could install the toilet. Once ready, though, it was a fairly simple process to set the wax ring and install the toilet.

Bathroom Next
cleaning hardware
The sink and cabinet remain ready for install. We purchased a new cabinet / sink / mirror combination at Lowes and the low price is definitely reflected in the workmanship (or lack thereof). Still, it will work, and after some fiddling with the hinges, the doors close without rubbing. The holes for the pulls were not put in the right spots, so the handles are wonky, but again, it will work. We have all the bits and pieces, just with all the holiday events and family in town, we have not installed the sink and cabinet.

Once the sink is in, we will hang a shower rod, and re-hang the door. The hardware for the door has been cleaned up, though. Prior owners had painted without taping things off nor removing hardware so every door handle, strike plate and hinge was covered in multiple coats of paint. I have spent many otherwise-idle hours picking off paint and then rubbing down with steel wool door hardware, yet more remains.

Moving
With the 1/4-round complete, I have started moving things over to NewOldHouse. It is difficult living in one house, wanting to be in another. So, the items selected to move is not easy. I am finding things that we 100% want/need there but can live without for the time being in the current place. Obviously, this makes the move harder, and slower, but until the bathroom is fully functional, we can hang out there, and even sleep there, but it is not quite ready for full time living.

Around this work, Boo and I have been combing through all of the belongings moved here from my parent's old apartment. It has been a considerable undertaking. We have found homes for over half of the items, and while in some ways we are picking up steam, we also realize that the easy things are running out, and we will soon be left with things which only represent value to their original owners. By this, I mean things like personal correspondence, notebooks, etc that are very personal. It feels wrong to simply discard these things, but I think we will just have to work through that.

Canopy Calamity Again
example wrath of Jerry
It seems that no matter what tricks I try, the canopy known as "Jerry" just will not stand. After more windstorms, that canopy lifted and flipped onto it's side, scratching Zed again. Fortunately, the chrome around the rear window and windscreen has not been further dented, nor have either sheets of glass broken. Still, I have had enough risk of that for one winter. So, Boo and I deconstructed Jerry, leaving the poles in a heap. We used the canopy like a tarp, covering Zed for the winter. To prevent water from pooling in the hole where a sunroof will one day be, we placed a large rectangular sheet of stiff foam under the tarp. After a couple gusty days, the tarp has held firm, so Zed is hopefully protected until Spring. I think, between all of the scratches, the disappointment in both the final finish and the olive-green shade within the 9mm color, I will be sanding and re-shooting Zed before I install the interior. Since every time around is a learning opportunity, I expect this next round will be much better than the last, which was better than the one before that. Of course that means Zed will not be driving around next Summer unless we get a freak warm dry spell in April/May.

With the holidays behind us, our next significant event is the memorial for my father, planned for 21-January. For that, Boo and I will be providing our current home to my sister and her family while they visit from the Bay Area. Boo and I are marking that as the drop-date for when we can live in NewOldHouse without having to run here for various things. Please wish us luck. Thanks, as always, for following along. I hope you have a happy, healthy, and emotionally stable NewYear-

Tuesday, November 15, 2022

If It Doesn't Move, Paint It (Final)

After weeks of spackle, caulk and masking, we were finally ready to shoot the interior of NewOldHouse. We would have arrived here earlier had we not digressed outdoors, but when the rains come, you need to have already gotten your wet/dry solved, or you will be doing it in the rain while everything gets wet. Anyway, today's post covers the final adventure in paint, and a few other things that happened along the way because.. of course.

Just as I completed the work described in this post, I tested positive for CoViD. I am living proof that living a hermit lifestyle is not a guarantee that you won't get CoViD. I have been going to a pizza place in Hillsboro for an open jam on Wednesdays as my only outing, so at least I know where it happened. I've been down nearly 10 days with it now, so progress on cars, the house, even my job is, obviously, halted. Good times.

The Walls Came Down
thar's a furnace in thar
For some reason, when the prior owners installed the gas furnace, they put it into the main living space. I thought it was because of the proximity to the chimney, but from the garage, there is a straight path to the chimney as well, and popping an exhaust through the roof would not have been that difficult. Instead, they put it into the dining area, and then... built walls around it. The new walls were, probably, a foot away from the furnace while the furnace was located 6 inches or so from the original wall. We couldn't figure out the thinking, but we didn't like the furnace location, nor the walls. With a plan to eventually move the furnace into the garage, I tore down the walls around it.

I took the time to remove the baseboards, the door trim, door frames and the doors. I removed the trim nails and collected these reusable bits onto the garage rafters. I then went after the drywall with a rubber mallet. I didn't want to make a huge mess, I just wanted the walls down. So, I loosened the drywall from behind and then pulled sections off with gloved hands. The refuse went out to the dump pile, and I turned to the framing. This was fun. I smacked the inner wall framing a couple of times with the long-handle sledge until the bottom came free. Then, I wrenched the 2x4 back and forth to remove it from the upper. One by one the inner pieces were removed, leaving the corner and the door frames. For the door frame-framing (the 2x4's that create the rough door opening to which the door frame is attached), I removed the header first, and then the side pieces could remove in a similar fashion to the middle framing bits. Then, I took out the corner. Again, this was simply smashing with a sledge and prying with a wrecking bar until they gave way. Most of the corner came out in one large section. The ends nearest the original walls were next, and the top plate came down with those, leaving the footer. the footers were set into the original hardwood floor with 3-inch-long nails. To get to those, I carved out the top of the 2x4 with a screwdriver and then leveraged the top of the nail enough to fit the wrecking bar underneath. Some subtle pressure later and the nails were out, and the footer was out. The space seemed much larger.
 
More Masking
walls? what walls?
With the furnace now exposed, I could paint those original walls, but I did not want paint on the furnace or the nicely finished original wood floors around it. So, I spent a couple of hours with paper, plastic and tape covering everything except the venting on the front of the furnace and the exhaust to the chimney. I left those for actual paint-time because I want to keep running the furnace until then.  I know that the exhaust would meld or burn anything I wrapped it with and the front of the furnace needs to be open when in service. On paint day, I turned the furnace off for the shoot, and covered the exhaust with film, the front of the furnace with a sheet of waste cardboard.

Prime Time
Nemo at NewOldHouse
After the walls were washed and I had checked and rechecked that everything had been masked, I had considered priming everything. I decided that it was probably excessive, especially considering how clean the walls were once Boo was done with them. Still, there were some stains, so we got some some Kilz2 to cover them. The Kilz2 does not cover odors, and there were still some remaining cat smells. So, I thought about getting some original oil-based Kilz and shooting the lower 3 feet of all the walls to try to contain that. Again, overkill. I concluded that the cat urine smell was probably not in the plaster, it is probably coming from that space between the hardwood floor and the baseboards. So, I decided that after we stripped the masking out, I would shoot that space with some enzyme-based cleaner (like this).

While I did not prime everything, I did prime the popcorn ceilings in the "new addition" bedrooms (built in early 60's) out of concern for how much paint they would suck up. I shot the stains as well as the original pink paint that appeared where I removed the walls around the furnace, and the area in one of the addition bedrooms where a shelving unit had been removed. Most of these areas were reachable without having to move the sprayer. I needed to move it once, from the rear of the house to where the furnace is. Before I cleaned up the equipment and put everything away, though, I took the operation out to the now-clean future tool/parts shed and shot that entire interior with the Kilz2. It was bare wood, and I figured painting it white would help illuminate the space once filled with shelves and some lighting. The shed has a high shelf/storage area so unlike my spray adventures so far, I needed to work from a ladder to hit the shelf and ceiling well. Even still, this spray was fast, and since I had started early in the day, I felt confident that I could get most of the interior spray done.

Shooting for Good... Enough
tool shed primed
Our original plan was to buy really good white exterior paint. At $300US per 5 gallons, we changed our minds, and bought generic indoor/outdoor eggshell white paint. The house is still white, but we may need to paint again sooner. So what? There is quite a bit of siding that needs replacing, so little harm done. Fast-forward a few weeks and Boo and I got to a similar conversation about the interior paint. I painted our current house interior with an eggshell "Brazilian Tan", which is beautiful, but the house was already dark and even though the Brazilian Tan was lighter than the paint it went on top of, it's still pretty dark in there. Even in the summer. NewOldHouse is not in perma-shade like the current place it, but we decided we want it to be super bright.

We talked about painting the walls with some color, but the main rooms have coved ceilings, making it difficult to draw a line where the colored wall would meet a white ceiling. Many older houses have a picture rail that will draw that line for you. Since we don't, and we were not sure what to do color-wise AND draw-the-line-wise, we went with.... generic indoor/outdoor eggshell white paint. Sound familiar? Yep, it's the exact same paint. Why keep all these tins of touch-up paint when you can keep only one? LOL. I'm sure this paint will be acting as a primer for the next coat (that has a color), it's just a question of when. For now, white walls go with any decor... well... they will go with ours anyway.

Paint On!
furthest room shot
With the stains and popcorn ceilings primed, I switched over from the Kilz2 to the eggshell and grabbed a quick bite. My time shooting Zed taught me that once you start, you really can't stop unless there is a clear line where the painting can stop. I also remembered that ventilation is super important, so I set a box fan in the open front door (blowing out), and had the kitchen windows wide open. I wasn't sure how long the Kilz2 had been drying on the ceilings in the back bedrooms, so I started with the shed. This gave Boo the most time remaining to clean whatever walls or ceilings we had not yet cleaned. By doing the shed first, I also took advantage of the little daylight Oregon has at this time of year. The shed painted like it primed, though I fogged (light passes at a greater distance) some of the wood panels after I completed the shoot, trying to get consistent coverage. In the end, most of the walls will be covered with shelves, so the handiwork won't really show, but I have a hard time half-assing things.

Once the tool shed was painted, I moved the sprayer into the furthest new-addition bedroom, and shot it completely. I started with the closet and then the ceiling. Then, I shot the window frames and finally the walls and baseboard, working my way towards the doorway. This kept the paint hose from hitting freshly painted walls or trim, and the sprayer in one spot for the duration of that room. Once the rest of the room was done, I moved the sprayer into the next bedroom and shot the doorway and the door. Last, I cracked the large window to let some fresh air in.
 
front living room shot
I sprayed the next bedroom following the same pattern: closet, ceiling, window frames, walls and baseboards. Again, I backed my way out of the room, moved the sprayer and then shot the doorway and the door. I continued this pattern, backing down the rear hallway, shooting the ceiling, then walls before moving the sprayer into the one original bedroom. Unlike the other 2 bedrooms, I decided that shooting the window frames early effectively restricted the amount of light I had to work with. So, I shot the window frame after I did the baseboards. Similar to the other rooms, though, I left the space around the doorway for after I moved the sprayer, and shot that area last. After cracking the window, I hit the hallway, turned off the furnace, removed the thermostat and then shot the hallway, avoiding the cold air intake.
 
At this point, it was past 430PM, so twilight was setting in. Without meaningful light, my shoot was done for the day. So, I popped the thermostat back in, turned the furnace on and cleaned up the sprayer for the night.
 
Second Verse, Same as the First
main room, start of day 2
When I returned the following morning, I walked the area which needed to be painted. The furnace was not 100% covered yet and in the middle of the main space Boo and I had set out all of the built-in drawers and the pieces of my desk to get painted with the rest of the house. Navigating these items while shooting the ceiling was not a good idea. So, I moved the drawers, desk cabinets and shelving into the front bedroom to get shot. Next, I looked at the ceilings; we had not quite finished washing all of it, so I TSP'd a section. Last, the doorway into the partially demolished kitchen was unimpeded. Everything that had been setting in the main room for our workday comforts (camping chairs, snack cooler, etc) were in the kitchen too. So, I added overlapping plastic sheeting over the doorway, so overspray would not blow onto our creature comforts.

Ready for another shoot, I donned the old white overalls, wrapped my head with a white T-shirt, set up the sprayer and got after it. I started with the walls around the furnace, so I could unmask and re-start it at the earliest moment. I moved through the space anti-clockwise, shooting the eating nook first, then the main living space and finally the den-like area directly rear of the living room. Satisfied, I moved the sprayer into the front hall and shot the drawers, etc set up in the front bedroom, completing the spray. End-to-end, it was probably around 6 hours of shooting plus a few hours of cleaning / prep on the second shoot day.
 
Clean Your Tools
main living space complete
To clean the sprayer, I put about 2 gallons of water into a clean 5 gallon bucket. Before I dropped the sprayer pickup tune into it, I hosed the pickup tube off with the garden hose. Now somewhat clean, I put the pickup tube into the water and the priming hose back into the paint. I primed the machine until water was coming out the priming hose, and then I shifted that hose into a recently emptied 5 gallon now-slop bucket. I continued to prime until the priming hose was running clear. Then, I switched over to "sprayer" from "prime" and did the same thing: shot into the paint (reversed the tip) until it started to get watery, then switched over to the slop bucket. Once the gun was shooting mostly clear, I shut things down, released the pressure and took the pieces into the garage sink for cleaning. Since most of the paint was already run out, cleaning with running water and soap was relatively quick. Paint needs warm air, so I set the furnace to run the fan all night and I left the box fan running as well, to help speed the drying.
 
Strip, Lights
further room done
Boo and I returned the following day and started pulling the masking off. For me, the most important thing was that we didn't have many thin or bare spots. I only found one 2-foot by 3-foot bare spot on one ceiling, and I decided to fix it with a flat-nap roller rather than pull out the sprayer. Otherwise, the coverage looked good. Sure, there were some heavy spots, and I attribute that to the hard-to-see from lack of light. Regardless, we pulled the paper and film from the windows, light fixtures and floors, rolling it into a big puffy pile as we went. We discovered some spots where the tape did not hold, allowing for paint to get on the floors, but overall, the finished product looks really good. Once the paper was up, I cleaned each light fixture and mounted it, with bulbs.

This was a huge milestone. With the interior of both the house and the tool/parts shed painted, we can start moving non-essential things (like Nemo, the Audi A4 B5) over to the NewOldHouse. Nemo drove over with no issues, by the way. We need to source, paint, measure, cut and install 1-inch quarter round pretty much everywhere the new painted baseboard approaches the wood floor, though. If you look at these couple of pictures, you can see the gap. I expect we will be doing the 1/4-round a room at a time so it doesn't become a huge undertaking. Of course, at one room at a time, it could take quite a while to complete. Once we do it, I'll post on how we went after it.
 
Because moving is really only interesting to the person who is moving, I won't post on it. If something else happens that might actually be interesting, I'll post on it. Otherwise, until after the move, thanks, as always, for following along-

Tuesday, October 18, 2022

Vehicular Paperwork

We continue on NewOldHouse, of course, but there is little interesting to talk about. We have been preparing the interior for paint, and the exterior for the inevitable arrival of autumn rains. I'll describe some of these efforts, but today I renewed the license plates for Hapy, and I thought that might be more interesting. Yeah, like the difference between watching paint dry and watching grass grow....

Prepare for Paint
As with anything paint-related, it is all in the prep work. We started with laying paper on the refinished wood floors and then checking for nails, screws, picture mounts and holes in the walls. Before we got after repairing the holes, the walls and ceilings were washed and rinsed. Then, we solved the holes with spackle. Next, we masked the windows and caulked seams. After removing the light fixtures, I masked those, and the exposed electrical outlets and switches. This took all of 30 seconds to type, but it has taken many days. On the right, here, is the only picture I've taken inside in a while. This is not a terribly informative picture, but is what is.

Prepare for Rain
The seasonal rains are arguably late this year. I usually reference Columbus / Indigenous Peoples' Day as the normal start of rainy season in Northwestern Oregon. Today, it is still sunny and dry. This will not last and we have some things to solve quickly.

First, NewOldHouse has 4 foundation vents which are below grade (meaning the garden dirt is above the bottom of the vent). Recall we had the crawlspace cleared of debris and the vapor barrier replaced. These below-grade vents will allow water to drain into the crawlspace, upsetting that clean and dry space. To remedy, I started by digging out around the vents down a few inches below the concrete lip. I will add a sheet of clear Lexan to the outside to cover the bottom half of the vent opening and seal it with clear caulk. Unfortunately, some of the existing grates are not small enough to prevent mice from getting through... though they fortunately aren't. So, enter Orkin to chase the buggers and replace the grates. Fortunately, they solved all of the other possible access points when they diagnosed the problem; they just ran out of tight-mesh grate stuff. So, once Orkin solves for those grates, I will apply the Lexan to keep any water potential away.

Other than keeping rain out of the house, I needed to set up the carports so Zed stays dry. Recall, Zed still does not have glass installed, so weather can get right in. The car ports are easy to dis-assemble and reassemble, so moving them and getting them set up was not hard. I have discovered, though, that the plastic sheeting is not hardy enough to withstand year-over-year sun and rain battering. They are starting to split, so I will need to replace them more-than-likely before this winter reaches it's end. Still, for now, they are up and the one closest to the NewOldHouse is ready for Zed. Since Zed is not yet a driver, I may be towing him over with the lawn tractor Boo bought from the prior owner. I expect a full comedy of errors that will result in a future post. This picture on the right shows a few things. First, that post is from the carport and that boot is Boo crawling under the house through one of the foundation grates. This one is pretty much at ground level, so I may create a little berm at it's leading edge to keep water from trickling in. That grate is the only entry to the crawlspace.

Vehicle Registration
Now, for what I intended to write about: renewing the registration for Hapy. As has been well documented, I have a few cars. Only one of them is from before 1974 when motor vehicle emission testing became a thing. So, Hapy doesn't need a smog test, but like everyone else, we need to renew his plate stickers every other year. This year is that year. So, I went to OregonDMV.com to renew him and noted that my fee is based on his projected mpg, based on model year, etc. Apparently, the 1972 VW camperbus was expected to get 19mpg or lower. My fee was then driven off of that fact. truth-be-told, I was not getting 19mpg before I started the engine swap, so their assignment was fairly accurate. Curious to see if my fee would be measurably better if my mpg was better, I went looking for their schedule. It turned out that the better your mileage, the more you pay. I suppose this is to offset the loss in tax they get from you when you buy fuel. That just proves that the man will get you coming or going; either way they are gonna get theirs. I had thought about doing the paperwork to tell the state that Hapy was running 30+ mpg on diesel, but I have to pay a fee for that too. And then, I would be paying and extra $30 to register him every 2 years from then on. Clearly, there is a counter-incentive to be transparent.

Another thing worth noting is how low the fee is for car rental companies. They can register almost 2 cars to our one. That hardly seems fair. We individuals need transportation sometimes, for life conditions outside our control. Car rental companies are buying and renting out cars as a business, and the person renting the car is paying the fuel taxes when s/he fills up. I suppose the rental car companies get the sweetheart deal because they can influence our representation in Salem better than we individuals can. Anyway, enough soapbox, it just seems like we are underwriting the rental car companies in the form of a corporate handout. Must be nice.

I meant to publish this last week, and time got away from me. We had a bunch of adventures over this past weekend. I will write them up for sharing in the next few days. thanks, as always, for following along-

Thursday, October 13, 2022

If It Doesn't Move, Paint it (Part 2)

Continuing the journey of getting our new space ready for moving in, we completed the painting of  exterior... so today's post covers that.

But First, Cars
Me, Joe and the truck
Boo and I took an evening off from the house repairs to help our friend Joe. Joe is partway through an engine replacement on a 90's Ford pickup truck, and since I can't really get into any of my projects out of fear of them becoming such a time-suck the house move/swap timing is jeopardized... I got my car-fun in helping out a friend. All we got done in a couple of hours was the install of the power-steering pump, the A/C pump and the serpentine belt, but those are 3 fewer things for Joe to do on his own, so it's a win. I expect we'll be over there again sometime soon to help through the next step, whatever that is.

Caulk
Like so many jobs, I started so optimistically. I thought I could get the caulking done, quick-mask and start shooting in one week. Well, that didn't quite work out. I was able to get the caulking done around work obligations during the week, but I did not anticipate the need to prime the bare wood spots. For caulking, I simply hit every seam between the windows and the siding. Many of these seams were in fair condition, and were still holding after the power-wash and scraping. Still, I ran a thin bead anyway. With a gloved hand, I then ran a finger on the bead of caulk to set it into the gap and flatten it tight against the joining surfaces. This assures a good seal.

Prime
you're not blurry. I was
Boo went to get us some paint and learned from the paint guy that no matter what it says on the 5-gallon tub or on the manufacturer's website, paint needs primer to work best. The stuff that says "self-priming" is really just a marketing shtick. I figured that the paint guy could have been trying to up-sell, but after the Zed painting experience, I was willing to accept paint needs primer. So, we grabbed a 5-gallon of Kilz interior/exterior primer and some brushes.

Ready to start, Boo wisely asked "should we wash the house again first?". When we bought this fixer, the house next door was ALSO sold as a fixer and they had been generating lots of dust clearing their lot. That dust was now a heavy coat on our house. So, with the pressure sprayer full of house-wash soap and a pressure-nozzle on the garden hose, I spent Saturday morning washing the house.

Fortunately, we have been enjoying some late-Summer-like warm dry sunny weather so while I was washing one side of the house, the side I just washed was quickly drying. Once I was done, I switched to brushing the Kilz.

I simply brushed primer everywhere I could see wood. Unfortunately, for some areas that was practically the entire thing. The window frames were especially in-need. I found that the areas which were facing direct sunlight, but had not completely peeled were very paint-thirsty, sucking up a brush-load of paint in just a few inches. We pressed on and by the middle of the following day (Sunday) we had it all primed.

Mask
masked, garage needs primer
While Boo finished the last of the priming, I shifted to masking. The plastic folded film makes masking fairly easy: pick an orientation that allows you to use the least amount of material... line it up so the amount rolled out is wider than you need and cut. Lay the top edge of the plastic against the shorter length of the area you are masking (like a window frame) and tape to the edge, leaving the tape edge far enough from the edge of what you are painting so you get paint everywhere you want it. Then, unfold the sheet. It will cling to the window, so it should not become unwieldy. Once the far edge has been reached either fold back under or cut off the excess. I will usually clean-tape the first edge and work my way down the sides with tape on my way to the final edge. Then, I tape that final edge.

It is a small house, so masking the windows only took me the better part of an afternoon. I completed the task by masking off the gas and electric meters, as well as the water taps. I did not intend to paint the front door trim with the sprayer, so I simply hug some plastic to avoid getting overspray near it. In the picture above, you can see the masked front exterior. Boo primed that garage door after I took the picture.

Shoot
A few weeks ago, Boo and I hit Harbor Freight with a 20% off coupon, so I got one of these for 20% off. Winning. I got a 20-inch tip extension and an extra, smaller tip (which I didn't use). Then, last weekend, Boo picked up some basic white interior/exterior eggshell latex paint. Once the house was ready, I left work early (3PM) Tuesday to get the paint sprayer assembled and primed with water, so I could get a handle on using it. Assembly, priming and getting a feel for it with water took 30 minutes. Once it was ready, I readied the workspace with a 5-gallon of exterior paint, a long extension cord and a drop-cloth. We have a limited number of outlets with the grounding plug, so the biggest challenge was routing electrical so I could keep shooting. The actual sprayer worked great. The coverage was consistent, and while I kept the pressure on it's lowest setting, I still had a paint fan wide enough to completely cover 2 boards of wide siding in a single pass. I did not suffer much over-spray either.

painted
The shoot started around 4PM and took about 90 minutes. To clean up, I put a couple of gallons of water in a spare 5-gallon bucket. I pulled the draw hose out of the paint, wiped the excess paint off and dropped it into the water. I sent the priming overflow into a waste bucket and primed the pump with water. Once the overflow was running cloudy water, I switched from the prime to the spray setting, running the sprayer tip into the waste bucket. I would check the water:paint by spraying onto the dead grass, looking for how white it was. Once it was cloudy water, I shut it down, took it apart and took the hoses and sprayer bits to a sink for more cleaning. I spent, probably, 45 minutes in-total getting the equipment clean and then left it all soaking in soapy water for a final rinse and re-assembly the next day.

The masking is still in place. We will be taking a more in-depth walk-about, looking for thin spots before pulling the masking down. We did walk the work after it was shot, while it was still drying, and it looked very promising. Since the last sections were still very wet, it was hard to determine the quality of the coverage. I hope we will determine the coverage good enough to warrant brushing any thin spots so we can pull the masking and start thinking about the interior paint.

That's it for today. Thanks, as always, for following along-

Tuesday, October 4, 2022

If It Doesn't Move, Paint It (Part 1)

Our youngest son, K2, started his service in the Navy recently, so I am borrowing from an old armed forces adage for today's title. Following seas, K2. On topic, Boo and I are continuing on our NewOldHouse journey, and today's post is about preparing for paint. I say preparing because we haven't gotten to the actual painting part yet. Maybe next week? Who knows, but I'll post part 2 when it happens.

Interior Cleaning
I have mentioned a few times just how grody the NewOldHouse is, or was. After the crawlspace was cleared of rubbish and new vapor barrier installed, things were decidedly better. Then, the floors were cleaned, sanded, stained and sealed. More better. Next for the interior (excepting the kitchen and bathroom), is painting the walls and ceiling. I used to paint houses for a living, so I know how to do this, but before we could paint, we wanted to clean and clear the space. This starts with protecting the floors with paper and plastic so the nice new floors are not damaged. Then, we removed all of the electric outlet and switch covers. Those steps are fast. Next, we started washing the walls and ceiling with TSP (or some similar cleanser). Since this house was so gross, we went with the more industrial TSP rather than something weaker. YMMV. Regardless of what you use, it takes a long time to mop walls and ceilings.

Exterior Scraping
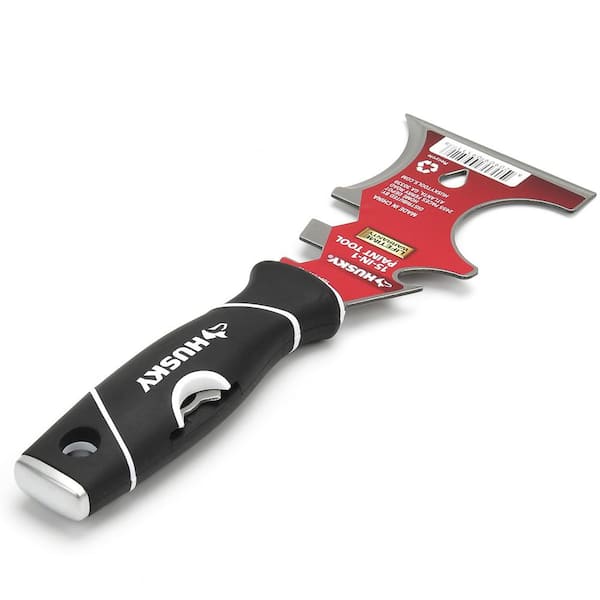
After all that inside-focus, I felt the weather change looming. I have written about this feeling before, and how it effectively drove the effort to get Zed painted before mid-Summer. Well, here we are in autumn and we have a beater-house with peeling 30+ year old paint on it. I hit it hard with the power washer, and thought that would have loosened the paint. I did remove some, but there was more remaining than I expected. I focused on the front and sides for my first weekend of scraping, and after about 10 hours, I had those 3 sides mostly scraped. I did the rear over the course of a few week-day evenings that following week and finished everything the following weekend. I used 2 tools: first what I call a "5-way" that has a sharp-ish blade perpendicular to the handle that is bluff on one end and pointy on the other. I used this tool to pick at paint bubbles and splits to try to lift the paint. If I could, I would grab the edge with a gloved hand and pull the paint off. Regardless, once I got what I could in an area with the 5-way, I would use an old-skool scraper. A classic paint scraper has a handle that's about a foot long with a rectangle on the end in which sits a 2-sided scraping bar. That bar will grab paint edges, peeling or chipping it away -or- it will grind down a paint edge, if it is holding to the siding. The end result is the loose paint comes off and the transition from not-painted to painted is smoothed. Once paint is applied, these transitions are far less visible afterwards. This is strenuous work, however. After spending 2 weekends pushing scrapers, I load up on Monday with ibuprofen for recovery.

5-way on steroids
I found that some areas would have a great deal scraped off, like in the picture on the above right. Other areas, the paint adhered very well. A neighbor offered that the paint came off in areas where moisture could appear from behind, like an uninsulated garage wall (image above is a garage outer wall). I found, too, that the walls which were hit by significant direct sunlight peeled more. In the picture, the top 2 runs of siding were almost perfect; I could not remove paint without more severe steps. This part of the siding is sun-protected by the roofline. The siding further away in the picture is shaded by a large tree. I guess that's one more advantage to surrounding your house with trees: paint lasts longer.

Delaying Exterior Repairs
When you get close enough to your siding to scrape it, you really see every imperfection. Regardless, I knew I had another day of driving nails and shooting caulk before I can cover windows and doors with plastic for shooting paint. I also found some failing areas that will need more attention. I expect that I will get the siding good enough and paint-shot to protect the house this year and will repair wood areas next year, and hand-brush the repairs as I go. The alternative could push the whole painting effort into the rain, and that changes the paint material choices since you can't paint water-based paint in the rain and expect a decent result. The soffits have some rot and the roofers did not clean above the soffits before installing the new roof, so there is work there. I will not get to this due to time constraints. I also found at least one lower window sill with some rot damage (see image on the right). Again, I do not have the time to fully resolve, so I will protect the damage as best I can with a plan to perform more major repairs when the weather changes (or when I can afford to pay someone else to do it).

I was able to walk the outside with a box of nails and a framing hammer, however. I re-set every nail that I could see, to get the siding to sit as tight as it could with the existing fasteners. When I could still hear a hollow thump when I struck the siding with the handle of the hammer, I sent in another nail. I repeated this until the thumps were solid. I also replaced all of the missing corner pieces as I went. 

Next, I will caulk the windows and doors, and eventually get to hanging plastic and shooting paint. Fortunately, the weather forecast is holding for the next week. So, I figure I will spend a few after-work evenings caulking this week, and if all goes well, next weekend I will mask and paint.

Thanks, as always, for following along. I know this isn't car content. Once the house is done enough for move-in, I will be getting to car projects again. All good things in all good time-

Tuesday, August 30, 2022

Zed Body Assembled

Quick post today. This past weekend, Boo, C and I put the hood, rear hatch and doors onto Zed, in that order. That's really all there is today, but we did learn some things, as we always do, along the way.

Hood
hood, door on
We started with the hood, not because we thought it would be easiest, but because it was the closest to the car, and we didn't want to trip over it. When I removed the hood to shoot it, the hood was open. Now, that sounds kind of obvious, but earlier, when I had it off, it had been closed. Back then, I could not get the mounting brackets to shift from closed to open position after I removed it. After all the prep work, I installed it to get the fenders and such to line up. When it came time to paint, I opened the hood and removed it vertically. I was by myself, but I figured if I scratched or dropped it as I removed it, it was not a big deal. For install, though, I needed hands to hold it steady or it would get scratched and that would have been super disappointing. I held one side and C held the other while Boo got all bendy, reaching into the engine bay with the bolts. Once they were fingered in, we lowered the hood (still unlatched) to put on the other panels.

Rear Hatch
hatch, door on
The rear hatch was the easiest of all 4 to install. C and I each held it aloft while Boo fingered on the nuts. The hinges were attached to the body, so they wanted to lay down in a way that we could not get to the underside to put on the nuts. C found some scrap foam and stuffed it under each of the hinges so they popped up enough to get the nuts on. The hatch still needs some adjustment to sit a little higher, I think, but I will probably wait on that until after I have the seal installed so I can get it where it needs to go. I figure I would have to adjust it after the seal goes on anyway.

Passenger Door
C and I planning
For the doors, I left the hinges installed against the car, and removed the bolts from the hinges into the doors. I did this for 2 reasons. First, and most obvious, the bolts that run through the hinges into the body are mostly covered by the fenders when they are installed... like they are now. With the body kit epoxied in place, those fenders are going nowhere. Second, the majority of the install wiggle is in the bolts the go into the car body. Once I got the doors where I wanted them before the last tear-down for paint, it is much easier to get them back where they belong with just the hinge-to-door bolts. Still, this is at least a 2-person operation: one holding the door (from the inside: protect the paint) and another threading in the bolts. I held the door, and moved it as requested while C did the threading. Boo, meanwhile, moved car-port supports and such out of the way.

Driver Door
The driver door was probably the hardest. Consider that the person doing the bolt threading needs to reach past the door from the inside, placing your head where the steering wheel is. Still, the process is the same: one person holds the door steady while the other threads the bolts. We took turns and after about 30 minutes we had the door on.

Front Bumper Adjust
bumper not yet adjusted
At this point, I cut C and Boo loose to get after their own Saturday afternoons while I fiddled with alignment of the various panels. I started with and got the hood square and evenly spaced on either side. I had to loosen the headlight bucket on the passenger side and push it outward, but otherwise the hood aligned relatively easily (read: 30 minutes). The doors latch, and they installed right where they were before, so I will probably leave them be until after the seals go in, like the rear hatch. Because of the nature of the latching mechanism for the doors, there really isn't very much forward/aft movement available, leaving just the height that you would really adjust. I am satisfied that the height is spot on, but once the weight of the glass is added, I may need to adjust them upward to compensate.

While standing back, admiring the front end, I noticed that the front bumper was much closer to the bottom of the passenger side headlight bucket than the driver side. It was a noticeable 10mm difference. I loosened the nuts holding the front bumper bar and tried to lower the passenger side or raise the driver side. It made very little difference (maybe 1-2mm). I had to loosen the front bumper brackets where they mount to the car and shim the driver side to make up the difference. They are exactly even now, but it took some doing.

Well, that's it for today. We have some housing things going on, so I'll probably go dark on the blog for a while. We had an unexpected opportunity to grab a small farmhouse on a large lot around the way. So, my time will be taken with home repair projects and then moving. Suffice to day, I will probably not be doing anything major on a car until winter.

Thanks, as always, for following along-

Tuesday, August 23, 2022

Zed Shot

Following the post from last week, I spent this past weekend getting Zed (1979 Datsun 280zx) painted. This has been such a long time coming, it is really hard to believe the painting is over. I may circle-back around and shoot some touch-up clear coat some day, but for now, the painting is complete. I have not color-sanded nor cut/buffed, but that isn't technically painting.... and I'm not going to do that for a while anyway. Unless I change my mind, cuz that never happens. About that painting...

Scrapping Booger Epoxy
base shot
I concluded my efforts the prior weekend with removing the clamps and confirming that the bumpers held in place. This confirmation was simply me tugging on them in various directions. Everything set right. Starting Saturday morning, I got after reducing the epoxy spread along the seams of the front bumper. Recall, I put that clear epoxy all over where you can't see, but wanted to make sure it really held to the fenders on the ends. So, I applied a bunch where you couldn't see and then ran a bead along the seam. this stuff sands off in boogers, so rather than suffer that again, as I did with the side skirts, I tried a different method this time.

Using the razor blade, I etched two lines, one a hair above and the other a hair below the seam. Then, using a piece of 320-grt sandpaper, I worked the edge of the epoxy until it lifted off a little bit. I grabbed that edge and pulled off small sheets that left a clean edge along the seam. This took far less time than straight sanding, and left a much cleaner finish. In the final picture below, you really can't see any evidence of epoxy peeking through.

more base
With the epoxy lines clean, I repaired some masking and performed my usual degreaser cleanse. Next, I set up for paint, laying down my air lines and mixing station, getting the supplies in place, etc. In the past, I did not get 100% ready, leaving things like lacquer thinner or a parts-cleaning brush in the garage. Inevitably I would have to open the garage door, letting all that stink into the house, just long enough to grab something. This time, I had my gun set up with the line drier, paint set out on a sheet of crap plywood, tarps on the ground, walls on the carport, etc before I even thought about mixing paint. Once I was set up, I took a break for food. Figure each coat takes about an hour, and I didn't want to be shooting hungry.

Shooting Base
Once fed, I wiped the car and the detached parts with a tack-cloth. I felt ready to go, but a little anxious after borking it the last time. I had the paint-correct activator this time though, so I was hopeful. Similar to the prior paint shoot, I mixed 20oz at a time, pouring most of the mixture into the hopper on top of the gun, leaving a little in the jar so it wouldn't drip out the air-hole at the top when I'm shooting at a sharp angle. Unlike the last time, I literally used a jar to mix in, versus a plastic measuring cup. The paint would stick to the plastic cup; it doesn't stick to glass. I pre-measured my mix lines (4oz for activator, 12oz on top of that for base), and simply poured in the activator to the first line and filled with color to the second. I hand shake the can of base for a few minutes before each session, and then shake it for a few seconds before each mix into the jar... because this has metal flake in it. I imagine, if this were just color (no flake), I wouldn't need to do that pre-jar shake. I want to make sure there's plenty of flake in each mini-batch.

hood base close-up
Because I failed to set up the gun correctly the last time, I was a little more sensitive this time. I had at least one coat still on the car, so I didn't need multiple coats everywhere, and I didn't have a full gallon left anyway. So, to set up the gun, I roughed-in the pressure by setting the pressure at the compressor to 30. I have read that there is some pressure loss down the lines, so rounding up a couple of pounds is better. I have a pressure regulator with a gauge at the gun plus the pressure control knob on the gun itself. I understand that necking down the pressure only at the paint-gun end of the hose will reduce the pressure, but the volume of air increases. So, by setting the pressure at the tank closer to your end-desired pressure, the volume will not meaningfully change when you lower the pressure at the gun by a few pounds. Anyway, with the pressure set, I hooked up my in-line drier, opened up the paint volume knob and started shooting test fans on one of the replacement hoods I got for ToyoTruck. In my last session, I used some cardboard. I don't know if this made a huge difference, but I figure test-shooting onto auto-steel is probably a better fan-test than paper.

Satisfied I was getting a fan that laid down without orange peel, spitting or thin spots, I set to shooting the arrayed parts (hood, tail gate and doors) and then the main shell. I had thought I had enough paint for 2 coats. I was wrong. When I thought I had enough for 2 coats, I shot the most important stuff first (omitting the door jams), and then did not have enough paint to get the door jams. So, after the weather seals are on, there may be a few spots in the door jams that don't have the coverage the rest of the car enjoys. Since I was out of paint, I just moved on. I figure I can get a rattle can of this paint (9mm metallic) from Eastwood if it really bothers me.

Shooting Clear
hood clear'd
I have read that letting your paint dry for up to 4 hours before applying clear coat is a good idea. Others have said you can shoot it as soon as the directions for the base say you could shoot another coat of base (like 15-20 minutes in my case). I decided that a little extra off-gassing / drying wouldn't hurt so long as I shot the clear coat within 24 hours of the base. Outside of 24 hours, the base needs a scuff for the clear to really adhere. I figured early Sunday afternoon was inside the 24 hour window, since it was now past 4PM. My other options were to shoot right away or wait a few hours and shoot after dark. I didn't like either of those, so I cleaned up the gun, and the work area.

Sunday morning started similar to Saturday afternoon. I already had the walls up and the tarps down. So, I just needed to set up the painting rig. I had chosen Eastwood's Low-VOC High Solids clear. The reviews were not as good as some of their other clear coats, but most of the complaints were about it's ability to flow out the gun. The advice was to include reducer, which I did. The standard mix for the clear is 4-parts clear to 1-part activator. I added about 1.5 parts reducer. Similar to my use of a jar for the paint to get my measurements consistent, I used a different jar for the clear. Otherwise, the process was the same.

rear clear, in the sun
The weather for both Saturday and Sunday was peculiar for the west-of-the-Cascades Pacific Northwest. The sky was overcast, which made painting much easier. When I shot a few weeks ago, it was very sunny. You would think all that light would make it easier to shoot, but it didn't. Seeing the fan and the paint lay down was much harder in all that light. The overcast skies created a flat light that allowed me to see the target and the paint (and clear) much easier. Weeks ago, I used a GunBudd to help me see. This time, I didn't need anything to see. I did, however, have to wait for the weather to warm up to 70*F. It's a really strange feeling, waiting for the air to get above 70* in August, but that's the world we're in, I guess.

front p-side clear'd
The clear laid down very well, and flowed out the gun without issue. I probably could have used a little less reducer, as I suffered a few drips and sags. Still, I was able to get 2 nice coats of clear before I ran out of reducer. As the clear dried, I became less and less concerned about the drips/sags and more pleased with the overall look. From the pictures, everything looks a little wavy, but I'm okay with that. Without the camera, I think it looks amazing and the difference in the way the color looks between sunlit and shadowed is remarkable. In the first clear picture of the hood above, you can see my elbow in the lower right corner reflecting off the hood. My arm is probably 5 feet away, and that's not a shadow (I'm actually facing west); that's the reflection of my arm. I think that describes how deep this paint can look once it's wet sanded, cut and buffed. Thinking of the imperfections, I know I can sand those drips down and the waves will sand flat. I have more clear, so I can re-shoot areas if I really need to. For now, I am going to let everything sit for a few days, and then start gingerly attaching the hood, rear lid and doors.

I don't know for sure what's next. Well, strip the masking, but maybe I'll clean the engine bay and then start re-installing the electrical stuff. Or do I do windows next? I don't know. I suppose the next logical step is to sort through the shed-room and figure out what I have and don't have. Let's not forget, when I inherited this project, it was a basket case. After all the painting, I still have boxes and piles of unlabeled parts. So, I guess the next step is to empty out the jigsaw puzzle pieces and start sorting.

That's it for today. Thanks, as always, for following along-

Thursday, August 18, 2022

Orange Peel

Brief post today. For the tl;dr folks, after I let the paint on Zed (1979 280ZX) cure, I looked at it more closely. I definitely did not have enough pressure at the gun, leading to the paint not atomizing well... resulting in some nice orange peel.. pretty much on everything. Today's post touches on that, and then finishes with the bumpers getting installed.

Before I start, today is Boo's birthday. Boo, you are amazing. I am so grateful we found each other, I simply can't express. Your support for my car projects, and tolerance for the corresponding messes has helped make these posts happen. Your embrace of a "Let's See" attitude has opened doors I would not have thought possible. You inspire me. Congratulations on another trip around the sun; I am looking forward to the next annual trip together again.

Sand Sand Sand
rear bumper installed
Why say it 3 times? Well, I spent 3 days sanding all the orange peel off Zed's exterior. After trying a few different grit combinations to get the orange peel off, I found wet sanding with 120 grit and following with 320 (also wet) removed the orange peel most effectively. This was not fast, however. I put in 3 6-hour days to get the orange peel gone. Fortunately, I had put 3 coats of base on, so I didn't burn through to primer very much. I still have almost an entire gallon of base, so when I have another full day available (maybe next weekend), I can shoot 2 new coats of base and then the clear.

Even after a wet sand, there is a residue. I washed everything with a mild no-residue-leaving car wash and the garden hose. With our warm dry weather, the puddles dried up quickly. I will still need to do my usual de-grease, tack-cloth routine, but I am starting out from a much better place than had I not washed it. 

Bumper Installs
front p-side
With the car sanded and clean, I decided to install the bumpers. If I learned anything from the side skirt installs it is that they will not go on effortlessly. Had I shot the pain perfectly, I would still probably have something to fix with regards to the bumpers after installing them. Unlike the side skirts, though, they were not nearly as non-compliant.

My method was similar. I started with a nice coating of contact cement on both the inside of the bumper and the steel bar it was attaching to. Ditto for the side panels. Once the cement was set up, I applied some of the clear epoxy on top of the cement along the top and face of the bumper bar. I then set the bumper in place. For the rear bumper, I re-used the M4 bolts to hold it in the right spot as the cement and epoxy set. I held the front bumper in place with a pair of long clamps just in front of the front wheels. To make sure the front held well, I spread a thin layer along the top seam, like I had with the side skirts. I know I know... this stuff is "sandable" (read: not really sandable), and I'll be scraping boogers before I can shoot the paint. I am willing to accept that, if the bumper holds firm. In the picture below, of the driver side, you can see the seam marked with a shiny line. That will need to be minimized for paint.

front d-side
The next morning, I tested the hold. I could lift the rear end of the car by holding onto the bottom of the rear bumper. That's a win. For the front, I removed the clamps, and pulled the bottom edges (near the tires) away from the car. The fender flexed a little bit, but the bumper did not budge. I will be scraping boogers, but it will hold.

Well, that's basically it for today. It has been a very labor-intense week for such a short post. That's how it goes some times, though: work for almost 40 hours and have little to show for it. If the weather holds ,and I can carve out the time, I hope to be shooting this weekend.

Thanks, as always, for following along-