Showing posts with label install. Show all posts

Tuesday, October 22, 2019

TDI install retrospective: Preparation

For those who have read this blog over the years, you will recall that I intended to put together posts about how I did the install of a TDI engine into the air-cooled bus. Now, 8+ years later, just about all of the quirks have been solved. So, I think I can actually start producing those posts.

TDI
So, you want to put a turbo-diesel into your bus. I think that's a great idea... so much so, that I did it. I enjoy 30+ miles-per-gallon, power to spare and I could burn 100% domestically created bio-diesel. So, whether you're looking for more power, better mileage, safety in case of an accident or for political / environmental reasons, putting a TDI into your bus is a super idea that will deliver on those goals. Before you break out your angle grinder and sell your old engine, you need to plan a little bit.

Cost and Payback Realities
First, some sobriety. This post contains the lion's share of the costs. They are big and almost all of them are up-front. $3500 for the engine, another $2100 for the transaxle, $400 for the adapter plate and clutch/pressure plate, and another few hundred for other bits. For most of us, this represents a significant outlay (lets say $7kUS). For some perspective, I ran some calculations in a spreadsheet. If we assume that the old engine got 14mpg and the new one gets 32mpg, how many miles would it take for this job to pay for itself? Gas prices are always moving around and when I started this project they were higher than they are now, but let's assume they are $3.30US for a US gallon. B20 has been steady at $2.99US per US gallon for a few years. So, when we smash all that together it will take 50k miles before this job pays for itself. That's a lot of festivals. When I first ran my justification, I was still making a car payment. So, I factored selling off that car into my logic, and that brought the payback down to about 20k miles, which I have not yet passed, so I guess I am still paying this project off. I liek to think that this project keeps me out of the bars, so I guess I could factor that in too. Your project; your choices.

Guideposts
When I did this conversion there were examples of Vanagon's getting swapped out, but there were no examples of an air-cooled type2 microbus getting a TDI. As a result, I did this with advice and wrenching from some online Vanagon converts and local friends, but without the benefit of someone else completing the job. I do NOT believe mine is the only operating example anymore. I'm not arrogant enough to believe that my efforts in any way influenced those other projects. This is just how I did it. Your mileage, as they say, will vary. I encourage you to look at the TDIClub, and TheSamba. Those were my 2 most fruitful forums. While they have their own personalities, they are both significantly rich in content.

Sourcing
ALH TDI on a home-made scoot
Still up for it? Okay! The first step in your planning is the acquisition of your new engine and the Bentley shop manual that corresponds to it. I went with an early-model ALH out of a 1998 VW Beetle. Any of the early ALH years would work, though the accelerator pedal on anything after the 1998 New Beetle is better than the 1998. Once you get past 2000, though, you will start encountering the interlock/immobilizer. This can be routed around with a Malone tune (See here). Depending on your goals, you may have intended on a tune anyway. I have definitely thought about it and now that the system operates as intended, I may treat Hapy to a tune one of these days. Once you get into more recent years (after 2004), the ability to use bio-diesel may become constrained. I have heard that the Pumpe Duse (PD) models are less tolerant of fuel anomalies, making B100 not-recommended for those engines. I could be mistaken, so I encourage you do your own research if you are going to use a Pumpe Duse or later model. When I did this, a 1998 engine was less than 10 years old and the PD was the "new fangled" one.

FastForward used to have a donor parts list on their website, but they don't anymore. So here is a list of things that I know I needed from the donor car. You need the...
 - fully dressed, as in all parts attached, engine with the overflow bottle (tho replacements are not too expensive) and all of the hoses, belts, etc
 - complete vacuum system, with the valves,vacuum lines and vacuum ball
 - fuel filter and fuel filter mount
 - passenger-side engine mount (I didn't need the dogbone mount, but you might)
 - dashpod and complete accelerator pedal with rheostat (cut off the pigtail leaving yourself a few inches of wire, you'll need that to wire it back up later. label well, it might be a while before you put this back together again)
 - in-car fuse-box and battery-top fuse-box
 - computer with both plugs. The smaller plug (which goes to engine management) is best uncut. The larger plug can be cut, but you must be very careful where. Any accidentally cut wire (like to the dashpod, eg) will create headaches and repairs later
 - starter. grab the pigtail that's plugged into it too
 - intercooler and all related pipes

There are pieces you can choose to include on top of this list. For example, if you are going to try to do cruise control, you will need the control arm from the cockpit, the speed sensor from the wheel and the brake sensor from the brake pedal. If you intend to use the dashpod for all gauges, you will need the speed sensor regardless. And, eventually, you will need to plan out how to get the right resistance range from your fuel level sender. I didn't do this, but I have thought about it. Do you want to try to get air conditioning running? I didn't but, if you do, you'll need that complete system (compressor/pump, hoses, the condenser on the radiator, etc) too.

I found a donor with a little over 50k miles on it with all of those accessories plus some stuff I didn't need, shipped from GA for around $3500. The price has probably come way down, but the miles have probably gone way up. You may need to rebuild or replace some expensive systems (turbo, head) so plan accordingly. If your donor engine is coming from a wrecked car, you will probably need a $80US Van Gogh bracket (available from DieselGeek) since most of the time this point in the engine block is weakened or broken in a front-end collision. You will need a $70US starter adapter so the TDI starter can fit into your bellhousing. You can find them here. I suggest getting the OEM plug unless it is in the bundle of wires from your donor as I suggested above.

Engine Preparation
Once you have the engine on hand, I strongly suggest you go through it. If you aren't an expert, employ one. I had my friend Justin, the local TDI guru, go through it and then he did a timing belt job on it. By go through it, I mean really go through it. Pull the turbo and check for play. Pull a valve looking for burn marks. Shine a light into a cylinder (or all). Pull the oil pan looking for metal bits. Unless you knew the engine before you got it. Hours spent now will save days (and possibly an engine replacement) later.

I removed the exhaust gas re-circulation (EGR) stuff, and installed a "race" pipe. These currently run for around $150US, though I'm pretty sure I paid much less than that. You can find them here.  Making changes like this are easier when the engine is on the ground versus in the bus. Depending upon your application, and emission needs, you may not be able to meet your target without the EGR. I know that with B20 my bus produces far less pollution than it did with the old engine, but threads like this one have me considering putting it back in. Since this uses coolant to reduce the temperature of the exhaust gasses re-entering your engine (or uses exhaust to heat your coolant, depending on your perspective), this could be an issue if you are concerned about keeping the engine/coolant temperatures down. Your experience may vary; the only wrong choice is the uninformed one.

At this point, I would encourage contacting Kennedy Engineering (KEP) for an adapter plate and stage 1 clutch. When I bought them, the conversion kit (included flywheel) was $400US. It could very well have doubled by now, but the Van Gogh and starter adapter are about what I paid, so who knows? I am unable to see prices on the KEP website. If you are going to go big, with new nozzles and a bigger turbo, you may want to step up to the stage 2 clutch. The clutch will be heavier than the gasser clutch regardless, so consider your left leg and the stress on your clutch cable when you choose. I have no regrets with my selection (Stage 1).

Transaxle
When I first did my conversion, I didn't have any extra scratch around to think about the transaxle. I used the stock one. The gearing, especially at higher desired speeds, is way off. After I had the bus moving for a couple of years, and finacially recovered a little bit from my divorce, I had a transaxle built by AA Transaxle in Seattle. Darryl built me a trasnaxle based on the "CM" code from a 1975 bus with a taller 4.86 ring/pinion (like the Vanagon’s have) that is good for the Diesels with taller 3rd and 4ths. Into that case, we installed 1.14 and .73 gears for 3rd and 4th respectively. At the time, the prices were $500US for the core plus $320US per gear set plus $895US for the full rebuild for a total of around $2100 including shipping.

Bus Preparation
hatch. note notch cut out of support
With a known-viable engine on your shop floor (or sitting on a cart / tire / stand / scoot / whatever), you're ready to go after the recipient. Remove the old engine and transmission as a unit. This is documented in the Bentley and the Idiot's Guide in far better detail than I could provide. I recall the significance of draining the gasoline out of the tank when I hit this point, knowing that it was the last time gasoline would be in there. You may have a similar moment of realization. Whatever your motivation, this is a special moment. Separate the engine and transmission. Remove the battery and the starter. These will join the engine in the will-sell-later pile. You won't need the voltage regulator, so that can also go into that pile. But, you will want to keep track of (read: label well) the wire that feeds power to the reverse switch as well as the power source that leads to the front of the bus from the starter. I suggest leaving the starter trigger wire with the plug on it so you can easily identify it later. Or, cut it off and label the remaining wire well.

With the engine and transmission set aside, remove the fuel tank (See Pulling the Fuel Tank). If you retain the stock TDI location for the vacuum pump and don't modify the outlet flange (I recommend both after pursuing alternative solutions), you will need to modify the fuel tank (See Fuel Tank Solved). Since you are shifting from gasoline to diesel, you will at the very least want to have your tank cleaned and lined. You may not have a firewall anymore, so you may want to consider cleaning and painting the fuel tank bay and putting some paint on the tank itself.

When I did this conversion, I cut a large access hatch from above the engine bay. You don't have to do that, but I think you'll find maintaining the engine, even checking the oil and coolant levels far easier. Whether you do or don't, you will need to cut out a short section (less than a foot) of the support that runs across the underside of that back deck. Otherwise, the intake manifold will hit it once you have the engine installed. You can see the section cut out in the picture above. I intended to stiffen it, but never got to it. I have loaded tons of stuff onto the back deck and have never stressed this "lid" to the point where I thought about it. Your bus; your choice.

TDI meet Transaxle
adapter on with studs still in
Once the TDI has the flywheel off, the adapter can be attached and the transmission connected. The adapter can only go on one way, and it goes on first. Then, the pilot bearing goes into the flywheel and it is attached to the block. Add the pressure plate and clutch. Remove all of the pins and studs from the adapter plate. Now, mate the transmission, twisting it so the output shaft slides in and then rotate the transmission to align to the holes. Then, set the pins and studs through. I tried lots of other ways, but this was the only consistent way, and I have done this multiple times. This way takes a few minutes. Leave the studs in, and you'll be at it all day.

I'll stop here for today.

Next, I'll go through the various systems and how they were solved. As the posts are produced and released, I'll return to this post and hyper-link them below, and cross-reference as best I can.

Fuel System
Physical Mounting
Vacuum System
Air, Inter-cooler and Exhaust
Primary Electrical
Cooling
Secondary Electrical
ECU, dashpod and Sensors

Tuesday, August 6, 2019

Making Hapy Sounds (Part 2)

Continuing on my post about putting some music into Hapy, today I will go through some if the fun of installing what I'm calling "version 1" of the fuller sound system into the microbus. At this point, I have a pile of components, a spool of speaker wire and a dream.

Front Speakers Physical Mounting
I really wanted to spare my door panels, but I could not figure out where the kick panels were supposed to go. So, I couldn't figure out how much space I had and where. I haven't had kick panels for years, and pictures on the interweb of them installed really didn't show how much backspace there was. Resigned, I went down the tried-and-true path of a door card installation. My cards were made of a thick MDF material rather than the waffle board that most cards are made of. I don't know if that's better or worse, it's just different. I believe the process would be the same regardless.

Since I am installing 5-1/4" speakers, the hole will be smaller than that. A quick look at the manufacturer's spec's tell me that I need a 4-1/2" diameter hole. We take a few measurements and determine that placing the center-point of the hole between 9 and 9-1/2 inches from the bottom of the door and 6 to 6-1/2 inches from the front. That would place the speaker entirely within the upside down trapezoid below the bottom of the window in the door. I picked 9-by-6 since that was easy to remember, and with a carpenters square marked the spot on the driver-side card. Then, I nabbed a compass from the kids school supplies, measured out a radius of 2-1/4" (radius = diameter/2) and marked the cut line on the card. Had I been less daring, I could have cut a piece of cardboard to match the shape of the lower door card and performed test-cuts on that until I had the location where I liked it. If you are using nice cards, I would encourage that.

I took the card, then, out of the bus, and tried to visualize how the hole would align with the trapezoid. It seemed right, so I set the card down, drilled a hole near the line and finished the hole cut-out with a hand drywall saw (it is straight and cuts as you push away rather than as you pull towards). Once cut, I cleaned the edge with a file. I have this knack of undercutting, leaving myself lots of edge cleaning, and this was another one of those. So, I had to file just to get the hole up to the line, and then clean it up. Once I was able to set the speaker in the hole, I test-fit the card. The hole was inside the trapezoid, but is was fairly front-ward as you can see in the picture to the right. I don't think it really matters so long as the hole is wholly inside the upside down trapezoid. I removed the card, set the speaker in and test fit again. Nothing speaker-related was touching anything other than the card. We had a winner. I transferred the hole placement onto the passenger door card, drilled, cut and shaped it until a speaker would fit and test fit the passenger side the same way.

They looked good. So, I checked to get the speaker top level, marked and started the mount holes. I set the speaker grill on and sent the screws through the grill and the speaker mount holes and on through the card until they were snug. I may swap out the screws for bolts with washers and locknuts (on the backside) in a future version. There's just something about depending upon the threads of a screw to hold speakers to a door card that just seems hinky.

Front Speaker Wiring
One of the reasons I didn't want to put speakers in the doors is the question of how to route the speaker wires. I've seen wiring jobs where the wires don't pass through the front edge of the door, rather they pass from between the card and the door, making a small loop of wire when the door shuts. I didn't want that. Fortunately, I had pulled the door light switches out of the A-pillars a few years ago to paint and never returned them (since they didn't do anything anyway). This put a square hole in the A-pillar. I didn't want to drill a hole in the door, and I didn't have to. There are vents along that edge. So, threading wire from the spool back from the front, the wires passed through the door light switch hole, up through a vent high in the front edge of the door, down the front channel in the door and below the support. I left myself about a foot of wire to which I attached the pigtail that came with the speakers. Then, it was a simple matter to plug the clips into the speakers and then re-install the door cards. The other end of the speaker wire was routed up over the air vents and dashboard supports, and routed over to the hole where the head unit usually would go, leaving them dangling.

Rear Speaker Physical Mounting
I loaded the 6x9 speaker boxes with 6x9 speakers, so the physical mounting was fairly routine, in that respect: wire the supplied wires in the box to the pigtails, plug the pigtails into the speakers, place the speakers in the hole, put on the grills, thread the screws through. Since the boxes are going to kind of float around for now, there isn't much else to do mounting-wise, though that may change as we drive around and discover what we need for locating them for sound as well as whether they need to be a-fixed for travel.

Rear Speaker Wiring
Back when I had run a bunch of wires from the rear of the bus, I bore a hole in the wall behind the drivers seat. I ran a pair of speaker wires through that hole back past the old fridge-turned-storage-cabinet (See From Fridge to Storage). From there, they ran along the floor with the other wires, up behind the air vents (and where the kick panels would be), over the dash supports to the general stereo area. I added some plugs to the wires leading to the speakers so they can be unplugged and the speakerbox can be plugged in. I set the speakers on the rock-n-roll bed and shifted to setting up the head unit.

As always seems to be the case, this got long again. To be fair, I was probably 4 or 5 hours into the work at this point, so it's not like I'm just spinning a big tale out of a tiny effort or anything. Anyway, I'll pick this up next week. Thanks as always, for following along-

Tuesday, October 23, 2018

MGB Exhaust Re-Do (Part 2)

Picking up where I left off, we have the MGB front end on jack-stands and the old exhaust sitting in a heap in the driveway. Today's post will be about getting the new exhaust installed. Recall, it is a ceramic-coated stainless steel Bell system. I left the packing plastic bags on the pipes as I handled them to protect the finish, removing the plastic as I installed them.

Setting The Scene
exhaust hammer example
from streettechmag.com
With break time over, we set to trying to install the new exhaust. The Bell system has 5 pieces: the header, a straight-ish pipe, the center resonator, another straight-ish pipe with a support bracket attached and then the tail muffler. They go on in that order. The hardest part, like with any car, is getting the header to fit around all of the various other things in the engine bay. I watch car shows on Velocity and some of those installs require hammering on the pipes to get them to fit. That would really suck. Spend all that money for a "bolt on" set of pipes and then have to dent the snot out of them to fit an otherwise stock engine and compartment. Doesn't seem right, but does explain the custom fabrications they do on some of those Velocity shows. Even then, it's usually because they're slamming a huge non-stock engine into a classic-ish car. For a built-for-stock engine, hammering dents into the pipes shouldn't be necessary. Anyway...

From Below?
For the MGB, this saga starts with getting the front end way up in the air. We had a good 18" of clearance and still couldn't feed the header up from below. Some internet posts I've read indicate this is super easy, but I suspect anyone who installed that way had a lift or a pit. We have neither so we switched to going in from above. That meant removing the bonnet.

From Above
attached for fitting the rest
of the pipes
The bonnet is held to the hinges with 2 bolts per side, but remove the hood prop first. Once the prop is off, one person holds the hood still from the front while another person (K2 in this case) loosens all the bolts, and removes one from each side. At this point, it would be wise to put a shop towel or something soft under each rear corner of the hood. Then, remove a final bolt from one hinge. Balance the hood on your shoulder and let it slide down onto the towel. Repeat with the other side and then each person grabs a side of the hood and walk it off the front. For fun, we set it (on pads) on top of the 280ZX hood. The MGB hood looks like a toy hood compared to the Zed hood. The MGB hood is at least 6 inches smaller all the way around.

center-mount bracket
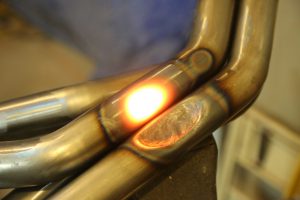
With the hood removed, you next loosen the driver side engine mount. The two nuts which hold the engine to the mount are the easiest to get to, and present the least necessary to separate the engine from the frame rail. With nuts safely stowed, place a wood block on a floor jack and slide it under the driver-side of the oil pan / engine block. Carefully lift the engine from below (setting the block of wood so the oil pan and other parts are not damaged) an inch or so. Once you feel considerable resistance to the lift, stop lifting. Now, have your helper fit a pry bar between the engine mount and the engine and then apply pressure to shift the engine slightly towards the passenger side. The engine will more roll anti-clockwise than slide left-to-right, but this creates enough space. Hold the header vertically, with the head-tips pointing across the top of the engine. Slide the header as far down into the largest space you can go before rotating the header so the head-tips point up and away from the firewall. On this particular header, there are pinch-welds along the sides of the collector. These pinch welds wanted to hang up on pretty much everything on the way down. With some gentle and some not-to-gentle persuasion, the header pushed past the space between the block, the steering column and the frame allowing us to wiggle it into the right spot near the head. At this point, the pry-bar leverage can be released and the floor jack released, letting engine rest back on the mount. We had to wrestle it a little bit, but it settled. Our header ended up with a couple minor scuffs, but no scratches.

To get everything else to align, K2 bolted the header onto the head. K2 was done for the day at this point, and the rest of the install was not going to be as straightforward, so I cut him loose.

Body Brackets
header from below
While K2 attached the header to the head for fitment / alignment, my focus was on the 2 mounting brackets. The center mount reuses the original body mount holes with a new steel and rubber mount that simply threaded in with new bolts (in the kit). The rear mount also reuses the original body mount holes. If yours are still in great condition, you could reuse them. With the body brackets on, I could start lining up the pipes, and get a feel for what went where.

The fourth pipe (second straight-ish) had a bracket that was a simple flat bar wrapped around the underside of the pipe with a round hole at each end. The center-mount kit provided a bolt, 4 large flat washers, 2 plastic sleeves, a bit of metal flashing with holes and some small nuts and bolts. There were no instructions, but you could tell that the bolt went through the holes in the flat bar. A flat washer went between the flat bar and anything else that touched it. Between the ends of the flat bar, on the bolt, went the plastic sleeves and the nut went on the end. Neat. With some careful bending of the flat bar with my channel-lock pliers, I was able to get the operation together. The bit of metal flashing was to wrap around the plastic sleeves and then bolt to the center-mount bracket I had just attached to the car.
second straight-ish pipe mounted

To get the fourth pipe and centermount to align and fit, all of the pipes between that mount and the header need to be in place. Start with getting the pipes in the rough spot you expect them to be. A straight-ish pipe (one that has a gentle bend or two) has those bends for a reason. Align them with the path of the original pipes. Once set in the right location, fit a pipe clamp between the pipes and then slide them together, wiggling the fit so they stay together and are in the right alignment. With careful use of a rubber mallet, I was then able to drive the various pipes together. Remember to set a pipe clamp at each junction before you start pounding things together or you won't have a way of clamping things together.

Rear Muffler
The final hurdle was figuring out the rear muffler mount. The old mount was a real hack job where a prior owner had taken a u-bolt that roughly fit the original body mount and threaded a nut on each end. So bad, but I really shouldn't judge. The original mount was almost German in it's over engineered solution. To the bracket is attached 2 rubber mounts pointing away from the exhaust pipe. To these rubber mounts, a hexagon bracket (with one leg removed) is attached, with the missing leg on the bottom. The missing leg has a pair of holes, one at each end, for attaching a pair of semi-circular clamps. These clamps hold the pipe in place. Unfortunately, they are sized such that if you put them on without any spacers (not included) they will either pinch the exhaust pipe because you tightened them too much or the lower clamp will fall off because you didn't tighten them enough... because you didn't want to pinch the pipe. To remedy, I found a pair of oversized nuts that would slip on, acting as spacers, so I could tighten everything down without pinching the pipe.

Header to Head
see the gap?
Once I had it all assembled front to back, I moved from back to front, tightening the mounts and pipe clamps. Once snug, I shifted to the very front to consider the mating of the manifolds to the head. The MGB came with a few types of exhaust, with 2 particular versions for the models before emissions standards became so tight (in 77) that the exhaust manifold needed to be redesigned. These 2 types have a different thickness of the material through which you send bolts to attach it to the head. The older one (#12H709) is thicker than the newer one (#12H3911). This is important because the intake and exhaust share studs and corresponding nuts. If the thickness of one manifold is not a match for the other, there is not a uniform amount of torque on the various manifolds, creating leaks. This applies to pretty much any combination of intake and exhaust, unless you stay completely original stock. Since the prior owner had replaced the dual carbs on my MGB with a side-draft Mikoni carb, and hacked together a home-grown exhaust, I was going to have to deal with this regardless.

When the header was attached for fitting the other pipes, I didn't look very closely. It didn't matter. With a closer look, you can see the washers were not sitting flush. Adding insult, only two of the thickness differences for the 4 shared studs were the same. To remedy, I grabbed some fender washers of varying thickness, and cut them in half (across the hole) to use as spacers. To hold the spacer in place during install, I used a very thin smear of the copper gasket maker I used on the header gasket. This plan worked great. In about 30 minutes I had spacers in place, and the header torqued down with washers sitting flush.

gap gone
Testing
All of this, nearly 2 full days of effort, lead up to the test fire. Of course, I had to re-assemble the air cleaner, and the hood is still off, but after verifying everything was back together, it was ready. I had been trickle-charging the battery, too, so I was pretty confident it was going to start right up. Fortunately, it did. It sounds great. It has a nice deep tone without being too loud. The biggest difference, I think, is that all of the growl sound comes from the rear of the car now. It must have had leaks before. With all of the rust, that's not a surprise. I wound the engine up to 3000RPM to get a sense of how it will sound on a power pull and it sounds pretty awesome. With the top down, the garage doors open and the rev counter around 3k, I still hit 90+ dB. So, it is no quieter... in the garage with the doors open. On the road, it is quieter in the seat, but I don't have dB numbers to prove it. Just my ears.

That's it for today. I had started reading about how to do automotive interiors (trimming) in preparation for doing the seats and cards on the MGB. I have parts on-order to complete the trunk and woofer box as well. Once those are complete "major operations" will have completed and I will be shifting focus onto the Zed... and then back to Hapy. Thanks, as always, for following along-

Tuesday, July 17, 2018

MGB - carpeting (part 2)

This is a continuation of the previous post about installing the carpets into the MGB. At this point, I've mapped all of the various pieces of carpet to where they go in the car and I've traced and then cut thick or thin insulation to go under the carpet for the respective sections. Now, it's time to play with spray epoxy.

Back to the Directions
For the install, I followed the directions for the order which carpet first, second, etc. For each piece of carpet, I had something to go under it (except the transmission tunnel). For each piece which directed gluing straight to steel, I would test fit the insulation, then test fit with insulation and carpet. If necessary, I would trim the insulation a little bit so it wasn't visible. Then, I'd spray epoxy onto the insulation and install it, holding it in-place for a 30-count or longer. Then, I'd test fit the carpet on top of the glued-down insulation, then epoxy it into place by spraying epoxy onto the carpet underside. Remember to let the epoxy set-up a little bit before slapping the things together. Wet won't hold; it needs to tack-up a little bit: spray the underside well away from the car, let it set up for 15-30 seconds and then apply in-place. If you, the reader, are looking at this for guidance, take care with the transmission tunnel carpet. I realized after mine was in that a shifter cover plate hadn't been put back in, so I needed to cut a small line in my carpet in front of the shifter to enable that re-install. Since it will live under a console, it doesn't really matter, but I really don't like cutting when I don't need to. Honestly, it is really hard to tell that the carpet was cut there now even without the console.

No Glue, But No Snaps
The carpets that sit on the floor under the persons in the car and the piece on the back deck are not glued in. Instead, they were held in place with snaps from the factory. Since I replaced my floors, many of the old snaps were gone. I had a decision to make: install the snaps or try something else. Knowing that the snaps had to be in exactly the right place for them to align with the snaps in the carpets, or there would be lumps in my brand new carpet, I decided to not install snaps. But, I needed something to hold the floor mat especially under the driver's feet. Otherwise, it could slide around under the pedals making for a dangerous driving condition. I found Velcro at Ace Hardware that was designed for wet conditions and it could hold up to 30 pounds. Since we just need to hold carpet, this felt like a good way to go. I cut sections out of the insulation, glued the Velcro to the underside of the carpet and corresponding spot on the floor. Now, the carpet holds in place, and retains it's original ability to be removed for cleaning and access to drain plugs. And no lumps.

Cutting Holes
In order to re-install seat belts and the seats, this brand new carpet needs to have holes cut into it. I found this a little hard to embrace at first. Since I was putting insulation under all of the various pieces, though, I could figure out exactly where the hole was supposed to go with something that wasn't carpet and then transfer that spot onto the carpet. This worked well for the sill carpets (that section from the ledge along the bottom of the door to the main floor) where the lower seat belt mount hole is, but greatly complicated an already difficult wheel arch. Fortunately, the transmission tunnel carpet had the holes pre-punched. This made aligning the carpet easier in that respect, but made the overall install of that carpet much more harrowing because everything had to line up perfectly.... with epoxy sprayed on it. Move quickly.

The last holes to put into the carpets are the holes for the bolts to hold the seat rails. In the MG, each seat is held in with 4 7/16" bolts. The carpets do not ship with the holes pre-punched, so you need to locate them yourself. Not all of these holes pop out the bottom; in fact, only one does. The front 2 pass into a cross-member and one of the rear ones does too, leaving just the one. I started with just the insulation down, and pushed a finish nail up through the one hole. This removed front-back and left-right sliding of the insulation while I located the other holes. These, I found in a more traditional way of folding back the insulation until I could locate the hole, and guestimated where it passed through the insulation. While some holes took more than one try, I located the holes with finish nails, leaving them in the insulation for transfer to the carpet. Taking the insulation to a table, I set the carpet on top of the insulation and pushed the finish nail through the carpet, marking the hole, and then put blue tape on top of the nail to hold the mark. With an exacto-blade, I cut a small "X" at each nail, testing the size with the seat-rail bolt so the hole was only as large as needed to be. With the bolts pushed through the holes in both the carpet and insulation, I could set the carpet in place and then put in the seats.

Seats In
Once the carpets were in, I put the seats back in. The seats were originally installed with a wood slat running under the steel rail to lift it up off the carpet a little bit. Not surprisingly, these wood slats were rotted away. Instead, I boosted the seat up off the carpet by putting a slightly over-sized nut under the seat rail where each of the bolts passed through to the floor: one per bolt. These 4 nuts created little stands for the seat rail so it sits just above the carpet. I expected this to be a challenge, between the low ceiling created by the convertible top, the small holes, getting a nut under the rail, juggling an old seat, etc, but it really wasn't. The blue tape gave me clear targets for the holes in the seat rails so I could get the seat in the right spot without the carpet moving. Then, one corner at a time, I lifted the rail, slid a nut under the rail and the the bolt through the rail, then the bolt and finally into the hole in the floor. I would lightly thread the bolt and then move on. I tightened the bolts snug as pair: front then rear.

Finishing
I finished out the rough-in by making a small cut in the transmission tunnel carpet and installing the shift plate. I followed my now-usual pattern of soaking the old plate in vinegar for a few days to get the rust off; then, cleaned primed and painted it. The install of the plate was simple: re-use the 3 Phillips screws at the front. I re-used the original shift boot after cleaning it up with some Meguiar's vinyl cleaner just to get the shifter together and looking fairly good. I'll be switching out the shifter boot with the rest of the interior panels and seat covers later. The boot is held down with a new black ring and chrome bolts. The ring and bolts were less than $10US, but that change greatly improved the finished look.

I installed new door rubber seals and the stamped-steel transoms (with new screws) to complete the effort. The ends of rubber seals are held in place with small chrome bits, and otherwise just press onto the lip which runs along the edge of the carpeted sills. The stamped-steel transoms are held on with 6 small screws, and after some polishing, look fairly decent for original pieces.

Now, it looks and sounds like a "real" car. When the doors are shut and windows up, the car purrs. When I stomp on the fast pedal, it has a little roar to it. I still need to put the center console in (for climate control) and it could use a radio, but the little car is about ready to be a daily driver.

Thanks, as always, for following along.

Monday, February 8, 2016

Flash gets sounds

Another installment in the Flash improvement saga. This ends the list of improvements to date. Since Thanksgiving, Flash has gotten his front end rebuilt (lower control arms, upgraded bushings, ball joints, tie-rods..), and new struts with new strut bearings and mounts. I replaced the rear shocks, swapped out his steelie 15" rims for 16" alloys with better rubber and in my last posting covered new seats and an oil change. Flash has been feeling the love.

Sounds Next
we butcher your wiring
My next improvement will be adding music. At some point over the last year, my son T was the primary owner/driver of Flash. He had made some money and wanted to improve his ride. I totally get and supported that, but the idiots at CarToys butchered the wiring. Rather than install the stereo with a basic $5 VW pigtail to leverage the existing harness, they cut it all up and direct-wired into Flash. A few months later, when we found T his A4, T had CarToys remove the stereo and install it into his A4. We saw how bad a job they had done. Don't have CarToys install a stereo for you. Or, if you do, bring them the pigtail available on Amazon for $5 so they don't cut your wires. Seriously, they make those pigtails for every make and model out there. Sure its cheap Chinese manufacturing, but it beats the hatchet-job the CarToys Clowns will do without it. The "free" install isn't free.

Old Radio? Older Radio?
sound machine
Since then, I've gotten a new plug from the junkyard and re-wired the harness. I picked up a stock radio at the junk yard too (since the incompetents at CarToys destroyed the old one when they removed it). After weeks of trying to get the unlock code, I gave up. It was quite the saga.
So, I called up the local VW dealer and asked for the unlock code. After a few days of run around, they asked for the serial number and a VIN for a VW to demonstrate I was an actual VW owner. At least that's what the internet and VW led me to believe. After trying the code they provided, the stereo locked out. I called them back, they told me that they needed the VIN for the radio-provider car.
Apparently, the dealer will give you the unlock code for a stereo if you can provide to them both the serial number from the side of the radio and the Vehicle Identification Number (VIN) for the car from which it came. It seems that their system is only capable of looking up an unlock code from the VIN. Uber-dumb. So, I;m not really sure why they ask for the serial code, but either way, I didn't have the VIN from the junkyard. NOTE TO OTHERS: if you're going to pluck a stock/original stereo from a VW/Audi built after the early 90's, get the VIN when you're there. Better yet, look for the owners manual and take the page with the unlock code on it. If the manual is there, the unlock code page probably is too.
I looked up the junkyard inventory system and found the 3 cars which were on the lot the day I pulled the stereo. I provided VW those three VIN's, but they decided that since I couldn't provide the single VIN, I must be a thief and told me not to call back. Jeez. Maybe the smog testing scandal isn't enough to drive business away. Thanks Herzog Meier.

New Radio
simple interface
Rather than continue down the path of trying to get a stock/original stereo to work, I hit the interweb and found a cheap new stereo: a Pioneer MVH-X380BT. It has AM/FM, Bluetooth and USB inputs, but no CD player. I don't use CD's. Heck, I've been driving without music for most of the last 3 years. It has a microphone for hands-free phone calls, which is becoming increasingly important after the office move. With the pigtail I'd purchased, installing was a lot easier than I'd expected. There was lots of chatter in the internet about how shallow this stereo sits in the radio hole compared to CD-equipped radios. It's true, it is shallow. That makes it a great candidate for smaller spaces, or locations that didn't usually have a stereo installed. Maybe a bus glove box, for example, or in the back somewhere. It does have a remote control....

Wiring the Microphone
wiring the radio harness
Like so many things, start with reading the manual. From the manual and the plug diagrams for the VW, I was able to label the wires on the two pigtails. Then it was a simple matter of matching. Once the harness bridge was built, I took the pile of parts and bits to the car.
To make room, I removed the little-stuff pocket/shelf in the center console under the vents. To route the microphone, I removed the plastic cover over the steering column (2 Phillips bolts from the underside) and the underdash (2 star-bolts, one each over the accelerator and brake pedals). Shining a flashlight into the stereo hole, I could see the pass-through. I simply threaded the microphone wire through the pass-through and then set the microphone. The mic delivered with a little clip, so I hooked that in the center of my dash, between the gauges. The wire ran under the steering column cover, along the underside of the dash through the hole with lots of extra wire to spare. I re-installed the panels.

Test
I tested everything by wiring it all up and placing a test phone call to Boo. She was making mince-meat turn-overs (yummy), but the call demonstrated the phone part was set up. The radio worked too. In order to install into the dash, I needed to unplug everything and then, using the included steel frame, set the hole for the stereo. The steel frame is the same width and height as the stereo, but only an inch and a half deep. It has many little tangs on it so it will fit in many types of openings. Set the frame in the hole such that the front lip is against the leading edge of the hole. Then, with a screwdriver, test various tangs until you can find a few that bend into holes around the stereo hole within the dash. These will hold the stereo in place. Test that you've secured it by pulling and pushing on the frame. Figure, you will be pushing and pulling the detachable face on and off thousands of times, so you want that frame solid.

Install
shows the steel frame
Once you're satisfied that the frame won't move, route the pigtail, antennae and phone wires through the frame and plug them in. If you're running a sub-woofer, I suppose you'd run that through too. set the radio into the frame, but don't slam it home yet. Conduct one more test of the radio to make sure you've got it. I found that my wrangling of the frame caused the little tangs that hold the stereo secured to the frame had been bent and had to bend them back. Getting the stereo to set right in the frame ended up being the only thing I had to do multiple times. Once you're ready to start setting the stereo into the frame, remove the face. Re-install the face after you have the stereo secured. Fire it up, set the clock and the station pre-sets. Enjoy :)

That's it for today. I was comprehensive on the install to show that it installing a stereo isn't hard. Anyone can do it. Don't take your prized vehicle to the CarToy Clowns. Do it yourself. Or, if you don't have time, get the pigtail and have the neighbor kid do it. S/He will do as good a job or better than CarToys will, and you keep the money local. Next time, I'll start a short series of posts about a trip to Lake Tahoe and Denver I took a few weeks ago. More travel is coming after that, so it might be a little while before I get back to Hapy the wonderbus. As always, thanks for following along-

Wednesday, May 13, 2015

Calling "glass"

It has been a very busy week or so. I have lots to cover, but today is just about getting the glass back in. My VW camperbus (like many) has 4 solid-pane windows: the windshield, the rear hatch and the 2 rear-most side windows. Some buses have a flip-out window on one side or the other in their rear-most side window spot. I used to too, on the left side, but found that it was the cause of a pretty bad leak. In fact, that leak caused some of the rust-through I was solving earlier. Anyway, on to the installs.

Seal to Glass
it's actually better if you put
pressure where the blade and
handle meet
If you troll around the internet, there are many articles explaining how to install a solid-pane window, but they usually miss something. The first thing you need to do is get the seal onto the glass. While this sounds obvious, it's not easy. You will be tempted to try water or glass cleaner to lubricate the edge. Don't do it. Use the glass cleaner to get the glass clean, especially along the edge, but both the seal and the glass should be dry. If it is lubricated to get on, it will be lubricated to slip off.

Next, take note of where the natural corners are in your seal and align them with the corners of your glass. Again, it seems obvious, but if you don't lay it out, you'll probably get partway along and realize the seal needs to rotate 90*. Ask me how I know :) Also note which side of the seal is the inside. The outer edge will have multiple lip/edges and the inner side will have a second slot in it.

I found that if I placed a putty knife blade against the glass, but at an angle towards the seal (which wasn't yet on the glass), I could part the seal enough to get it to sit on the glass. Then, I used various pressures with fingers or my knee to press the seal all the way on. Place pressure near the spot where the knife meets the handle, so the seal has the whole length of the blade to run to get parted and just seated on the glass (not where the picture over there shows). I found I was able to run 8-12" sections in one pop after a few experiments with pressure and angles. It is important to get the seal to seat all the way down. If you don't, it won't fit in the window hole and you'll be clowning with the seal again.

Rope Method
opens paint cans, threads rope
and opens a beer bottle when you're done
This is where most of the internet advice comes in: use a rope to seat the glass. Yep, that's the magic. Find 3/8" rope that is at least 1.5x longer than the circumference of the window. Thinner rope might work too, but not much thinner. Some advise against nylon rope and encourage only cotton. I used nylon and had no ill-effects, but the MS Glass folks (see below) used cotton. I have not seen much good advice for how to get the rope into the slot. I found the best tool was a paint-can opener. I slid it in and rotated it, and the seam opened right up. I set the rope in and slid the tool along while feeding rope in. Once I got a foot or so in, I doubled back and pressed the rope in with the same tool. I watched the MS Glass guys, and they used a plastic jump-rope handle (or a carefully trimmed caulk-tube tip) through which the rope was threaded. They simply slide the jump-rope handle along the seam, pressing the rope in as they went. Very clever! And very fast.

While setting the rope into the seam, make sure you create a loop outside of the seam on every side. This doesn't seem obvious when you're doing it, but on each side, somewhere near the middle, let some rope out of the slot, create a 6" loop and then re-start from the spot where you left, making a small overlap (less than an inch will do). This is very useful for later. Once you've made it all the way around, overlap the starting point by an inch or so. Now, with painters tape, tape the loops to the inside of the glass window. With the rope out of the way, you're ready to set the window in the hole.

Lubricants
note the four loops of rope:
one per side
Simple put: don't use them. If you can get the window to seat without lubricants, you're probably doing it wrong. I tried KY Jelly, water, soap... All they did was make a mess and make it all the easier for one side of the window to pop out of the hole while exerting pressure elsewhere. Like the Band says, "Don't Do It". All four of my solid-pane windows went in without lubricants. I was setting the windows into somewhat freshly painted holes, so they were effectively the most sticky possible, and they still went in.

Seating
This area also gets a light brushing on the interweb. Most advice is somewhat simple: set the window squarely in the hole. Honestly, that's about right. Don't set the top, bottom or any side any deeper than any other side at first. Since the upper half of the bus (where the window is going) is tilting away from you, the window also needs to be tilting away from you. If you set it upright, the bottom will be too deep. Once the window is set evenly around the entire edge, you can start working the sealed glass into the hole.

Pressure
hatch and rear-most left
windows in
The key here is to use little pressure at first, and work the inner edge of the seal by knuckling it towards the center of the glass while lightly pressing inward. Focusing on keeping the window square (no side too much deeper than any other), slowly work the window deeper into the hole. You will need to increase the amount of pressure force, but don't try banging on it. That will just create an opportunity for the sealed glass to pop out at the other end. If it isn't going in with medium pressure (maybe 50 pounds of force or so), pull it out and re-try seating. If you've tried this cycle a couple of times, go back to seal-to-glass and start all over again. Yes, I had to do this with the hatch window. For the left-side rearmost window, I had to seat and re-seat a few times.

Big Finish
windscreen installed
Once the seal is up against the lip, you're ready to pull the inner edge of the seal over the lip with the rope. From the inside, you should see one rope loop along each straight edge, each taped to the inside of the glass. Perfect. There is varying advice on where to start pulling, but, since most folks don't think to advise putting multiple loops (one per side), their further advice is limited. We have multiples, so we have options. For bowed windows, like the windshield, start with the sides. A little on each end, until both verticals have the seal over the lip. Then, do the upper corners and finally the lower corners. Why? We are doing the shortest distances first, and the distance between the upper corners is shorter, allowing the glass to flex and bow while we set the window. Next, work the ropes from the corners towards the center, moving a little at a time from each of the corners. You may need a helper friend to push on the glass from the outside.

MS Glass
Some of the advice above I discovered on my own. Some, I learned after I did my hatch and left-side rearmost window. While trying to get the seal on my windshield, it cracked, so I had to get a new one. Enter MS Glass. Since they do onsite installs, I had them do it, and that was where I got some of the rest of the advice. They do the one-loop-per-side, and did the steps in the "Big Finish" above. We both did the no lubricants, rope trick and seal-to-glass. They didn't use anything to part the seal as they got it onto the glass, but they do this stuff every day so they have Superman hands easily capable of forcing the seal on without tools. They were pretty amazing, and I'd totally use them again.

That's it for today. The bus has all of his window glass back in now, with new seals. Thanks for following along. More posts coming on all the other work that's been done. Onward!

Friday, May 8, 2015

Dash re-install

After getting a fourth, and presumably final, coat of high-gloss white paint on the upper third of the bus, I spent Sunday afternoon wrestling the dashboard back together. It was really just time consuming because it took 3 attempts. I failed to take any pictures, though. Apologies.

Dash Install, First Start
Following the standard practice of lightly threading all the participant bits together first, I started with the 3 screws on each end of the dashboard which are hidden when the doors are closed. In looking at the black cover plates, I considered that I failed to paint them, but kept going. Next, I attached the front vinyl pad complete with threading the nuts in only to realize that the dash top needs to be into place first. Off comes the vinyl pad. I paused at that point to consider none of the plastic pipes were in yet.

Venting
Before the dash can really get put back together, all of the plastic pipes need to be in place first. This isn't that hard, its just a case of matching. If the inner vent cover plates (near your knee, held on with 6 screws each) are in place, it is best to have them removed for freedom of movement. The end pipes slide right onto their circular dash vent counterparts. Picking the right from left is relatively simple: they only fit on their respective end. The center "Y" is actually harder. It looks like it could fit either way, but the upper end of the "Y" has a bend in it that wraps around the wiper arms. While having it in backwards could look right, once you try to put on the dash-top, you'll see that it doesn't actually fit that way. I also found that it was easy to set the base of the "Y" too deep. Once the dash top is in place, you'll have to fiddle with it anyway, so don't get too hung up on it.

Dash Install, Second Start
I got pretty well to the end of the first paragraph in the next section before realizing that the screw-clips that need to be along the windscreen lip were not in place. So, I did all of that install, and then had to undo it so I could get the clips in. The clips have an up side and a down side. The flat side faces up. The windscreen lip has 8 spots where there is a small indentation on the rear edge and a small hole just in front of it. Each clip needs to sit in the indentation with the clip hole aligned with the hole in the lip. If I'd taken a picture, this would be much more obvious. Anyway, once the clips are in place, you can move on to "Final Start" :-)

Hang the Fusebox
While fiddling with the dash top, I found myself moving the fusebox around, pushing it out of my way. In a flash, I popped the Bentley open and saw where the fusebox was supposed to go. With the dash top out, it was much easier to wrestle it into the right spot. Honestly, I'm not sure I could have gotten it into place with the dash top on. 2 screws later, I won't have the fusebox dangling by the vent cover anymore. It's been hanging there since I bought the bus over 10 years ago. Very satisfying. Simply looking at the driver seat will be all the nicer... and, of course, removing the stress on the wires could only be good. All told, it took me 10 minutes. Sweetness.

Dash Install, Final Start
Anyway... after all the vents are in place, we can re-start the dash install. The front screws are in loosely. Next, wrestle the dash top in. This sounds so easy, but you're managing a thin sheet of steel between the windscreen lip, the rear edge of the dashboard front and the 2 freshly-painted A-pillars. I found that setting the front lip in first worked best. Once in place, the rear edge wants to hang up on the rear edge. By setting a slotted screwdriver or putty knife between them, you can torque on the seam and the dash top falls into place. Wiggle the dash top until the holes in the dashboard front align with the holes in the dash top lip. Now, you can thread the vinyl pad in through the holes. Aren't you glad you did this without the glove box in place? Thread the 10mm nuts onto the vinyl pad bolts and leave them loose, but threaded onto the bolts pretty far. Check your alignment all around, including the front lip. Now, screw the front lip down. Once all of the fasteners are in, you can start torquing things down. I started with the screws on the ends on the dashboard, then the 10MM bolts and finished with the screws along the front lip. Last, pop the little plastic hats onto the screws along the front.

Oh Crap
After all the wrestling with the dash, I was pretty spent. I hit the garage door button and walked into the house. I heard distinct bang-bang-bang noises, but the boys had been running around with lacrosse sticks, so I didn't given it much thought... until the following night. Much earlier, I had set the dash top onto the rear deck of the bus to protect it while I painted the white areas. On Sunday, I popped the rear hatch to get to it for installation. It had been such a nice day, I had left the garage door and hatch open while I worked. So, when I closed the garage door, it bang-bang-banged the rear hatch as it closed, leaving multiple scratches on it. Good thing I used the $50 paint method :) A little sanding, a little painting and the scratches start to melt away. I need another coat of paint, but it will look like it never happened.

That's it for today. Sorry I didn't take pictures of the install along the way. I'd take it apart to take pictures after the fact, but it took me 3 attempts to install. Maybe if I had a little more time before Memorial Day... As always, thanks for following along.