Showing posts with label AA Transaxle. Show all posts

Wednesday, July 9, 2025

Hapy Engine-Transaxle Dropped

Around the concrete work, I ordered a replacement flywheel, clutch and pressure plate from Kennedy Engineering for Hapy (TDI-powered 1972 VW camperbus). The flywheel entered fabrication early last week, so I spent part of the Independence Day weekend dropping and separating the engine and transaxle not-in-a-shop for hopefully the last time. Today's post covers the drop and separation; it took 10 hours spread across 2 days.
 
How Did We Get Here
hockey player smile
I have been queuing this most recent engine drop for over a year. Recall all of the starter swaps I have made in hopes of solving the intermittent starting issue. And, I replaced the starter adapter hoping that was the issue. Nope and nope. The flywheel had suffered sufficient incomplete meshing of the starter gear with the flywheel's ring gear, chipping teeth and wearing down others. During my research, I learned that oftentimes (not always) engines will tend to stop running at the same spot in their rotation. So, if the circle is 360 degrees, the engine will stop most of the time at the same point. I know that seems counter-intuitive when you assume an engine is a well-balanced smooth machine, but the 4 cylinders and the 4 steps in the combustion cycle create a frequency, if you will, that for some engines means that when you kill power it will naturally stop at the same point. In those cases, you would think having a complete ring gear is unnecessary, right? I mean, if you only ever use 15 degrees of gear, why have 360? Ok, in re-reading this, obviously you need an entire gear for the starter to spin the engine. LOL.
 
I found on my flywheel there was one spot in particular which was especially bad and 3 other spots which looked like there was wear, but not so much that the starter was really having trouble. This would explain why all the other times I looked at the flywheel I could not see an issue. The starter was not on the really bad spot, just one of the not-so-great spots. When I was unable to get the engine to start on the first try, but I got the gear-on-gear sound, I think I was starting on one of those spots. Inevitably, the engine would eventually land on the really bad one, and the sound would change from gear-on-gear to gear-in-the-air. 
 
Continuing this nonsensical thread, the TDI engine's flywheel can only fit on the engine one way, based on the bolt pattern. If there were any way I could have retained the flywheel and simply removed and re-installed it so that the really bad spot was in one of the zones where the teeth are never facing the starter at dead-stop... I would have. I mean, this flywheel has lasted 15 years of starting issues and abuse and for the most part it's fine. Well, fine except for the 1 big chunk that's missing and some other kinda-worn spots.
 
Getting Down
So, we enter Saturday, July 5th, the traditional first day Pacific NorthWest summer, tools in hand, blues festival on the radio, ready to get after the engine drop. To prepare, I re-read the last engine drop I can remember doing on this bus: to swap the transaxle from the original 002 to the AA Transaxle (Seattle) 1975 CM 002 transaxle. I did that on Labor Day 2012 in my real estate agent's driveway (See Transaxle Transition). It took 1 day to get the engine/transaxle out and separated. It took 1-1/2 days to get the new transaxle mated and the whole operation installed. I figured I would have a similar path, but my real estate agent's driveway was flat and smooth. The square of concrete outside my tiny garage is neither flat nor smooth. Quite the opposite, actually, it slopes away from the garage slightly and it has massive deep cracks in it. Like 2 or 3 inches deep cracks where blocks of concrete are lower/higher than the section next to it. This makes moving an engine on a jack much harder.
 
air disconnected
High level, my plan was to not raise the bus, and to only remove that which was necessary to allow me to separate the transaxle from the engine (and the bus) so I could do a clutch service with a flywheel swap out. So, I chocked the front tires and got after it. I started with the easier stuff: disconnect the air side first (cold air/filter to intake, unplugging the AFM and a vacuum line, then removed the charged air from turbo to intercooler). Then, the 13mm nut/bolts on the exhaust side of the turbo and removed the exhaust. Since I did not have to really move the engine other than up and down, I chose to leave the coolant related systems alone other than disconnecting the overflow bottle to prevent tension on the hoses. I made the same decision wit the fueling system, and chose to only disconnect the large filter, again to eliminate potential tension on the fuel hose. Last thing on the engine was to disconnect the battery and the 12V exciter from the alternator.
 
Shifting to the transaxle, I set a small jack under the center of the ribs and started removing things. First, I removed the CV joints and stuffed the greasy bits into plastic bags held on with rubber bands. The clutch cable and the mount for the bowden tube were next. Once free, I disconnected the shifter at the front of the transaxle, the grounding strap near the front and finished with the nose mount. At this point, the only things connected to the engine/transaxle I needed to address were the rear engine mount and the main carrier mounts.
 
simple coolant solve
I located and set the engine cradle on the ATV jack and supported the engine while I removed the rear mount and the tower between the support bar and the mount. With the engine supported, I removed the 2 bolts which attach the top of the bellhousing to the main center carrier.
 
Well, Now Its Down
This was all I thought I had to do to drop the engine. When I read the old steps, this was how far I had to go. Since then, however, I added the rear sway bar and it was set such that removing and then re-installing the transaxle was going to be more difficult. I removed the 4 14mm nuts that held the middle of the bar to the frame and it swung down far enough for the transaxle nose to clear. But there was not enough room for the shifter linkage above the side-to-side main support to clear. The engine needed to move backwards a couple of inches. So, I removed the rear engine support bar. In retrospect, I realized that I had removed that bar last time too. Now, I could pull the engine far enough back to get the transaxle off of the engine, rotated and then onto the ground. Sitting on cardboard, I pulled the transaxle out the driver side. I regret not taking a picture of the inside of the bellhousing, but it had so many little metal flakes (from the flywheel). I shot the bellhousing with brake cleaner and then, after I had wrapped the cv-joint mount points with plastic film, I shot the whole transaxle with de-greaser. I hosed it off and let it dry in the sun. While I had the de-greaser out, I cleaned the rear engine support bar too.
 
Pressure Plate and Flywheel
jack on crack
Now, I was basically ready for a clutch job. The pressure plate came off with little fanfare. It looks like its in great shape. The clutch still has most of it's friction material, so in a pinch I could probably reuse them. I got new replacements for both, so I may retain them for an emergency. Honestly, after 12 years of running this clutch and still have that much friction material left, I figure I may not have to replace this clutch ever again. I did notice a couple of spots on the flywheel which had a slight blue-ish hue, though. That's usually a sign that the clutch got hot and sticky. Something to think about. Maybe going with the stage 1 clutch this time rather than the stock pre-1972 VW bus clutch was the right call after-all, and the old clutch/pressure plate are not worth keeping.
 
Last, I had to pull the flywheel. Fortunately, I have a flywheel lock for old VW's and since this is a 200mm flywheel designed to fit inside a 002 transaxle, the lock fit. I could not get good leverage lying on my back under the bus so I smacked a rubber mallet against the end of a ratchet to pop the torqued bolt. All 6 came out without too much trouble. Applying a torque wrench on install will be interesting. Because of how snug the flywheel mates to the engine output, I needed to work the flywheel off with a small prybar. Once on the ground, I could more clearly identify the really badly worn spot (pictured above), but the other spots did not look as bad. Perhaps, once I have the new one to compare, the damage on this flywheel will be more apparent.
 
Conclusion
no downhill roll please
That's as far I've been able to get. I am still waiting for the flywheel, clutch, pressure place, throw-out bearing, etc. It took me most of 2 days to get to this point, so I expect the re-install will be similarly extended from 1-1/2 days to maybe 3. It is interesting to see how an uneven surface and 12 years of personal aging can slow a process down. The sway bar and engine support bars each represented maybe an hour of extra work, so I can't attribute it to them. This is probably really about me getting slower and the work location making everything that little bit harder.
 
For those tracking on the shop construction, we may be falling onto their schedule as early as the end of next week. Fingers crossed, I may have a structure before I have Hapy back in one piece. 
 
Anyway, that's it for today. Thanks, as always, for following along- 

Saturday, November 1, 2014

300

Somehow, I've managed to work my way to 300 posts over the last 7 years.  Rather than a real-content post today, I'm going to reflect back kind of like when TV shows do a "best of" episode.  Frankly, I hate it when TV shows do that, and promptly switch the channel when they do, so my following that model is actually kinda funny.

0 - 100: The Start of Many Things
Ranging from January of 2007 to September of 2009, my first 100 posts ran the gamut of topics.  That's probably true of any cross-section.  In looking at what was happening with the bus, the blog starts with him running the original type4 engine, but I soon started the TDI work.  Early posts ranting on some old air-cooled vehicle abuses like removing the cooling system shifted to engine options and then to solving the install of a water-cooled plant into an air-cooled body.  Deciding on the engine was recorded on April 13th, 2007 (see Engine Decided) and a year later, the engine was still sitting on my garage floor, a failed first attempt on both the fuel tank relining and the engine mount had slowed me.  That winter was spent getting the engine and transaxle to mate for the first time (see first and second attempts).  I broke an adapter plate, and my spirit over that winter.  It took going on the road to see the Dead and starting the separation from my ex-wife to get the project going again in early 2009.  The first 100 posts ended with the new rear engine mount being fabricated, the starter adapter solved (see starter adapter corrected...), the vacuum completed (see what's that soft sucking sound) and the fuel fill set up.

101-200: Transitions
Starting in September of 2009, this block of 100 posts carried through late July of 2011.  I started this period sleeping in a spare room at my now ex-wife's house and ended this period completing a divorce and living in a townhouse apartment.  Still, the middle section of 100 posts started with the same urgency which the first 100 had at the end, in terms of bus work.  The fall of 2009 included the fuel tank (see Fuel Tank Solved) shape / vacuum pump issue, buttoning up the turbo, vacuum, starter, CV joints and moving the bus off the mud and onto concrete for winter work.  Over the Winter, the radiator/cooling was addressed (see Radiator test-fitted, shrouded and Installed) and the bus project really started to roll.  The hatch was finished, intake routed, electrical, clearing codes, finishing the coolant routing, primary electrical, etc.  By December of 2010, my ex- and I had decided to call it quits.  I spent January through March staying on my parent's couch trying to get the bus into a will-travel-under-own-power state before the divorce finalized.  I was able to get him running-ish, and had a muffler installed by Meineke (see Exhausted) during that working-remotely period.  By April, I had a townhouse-style apartment with a dedicated garage space and focused a considerable amount of free time into the bus' interior.  I swapped out the fridge for storage, applied more sound killer, installed an accessory battery and fuseblock (see fused) and ended the late July with installing a Riviera pop-top in place of the original ripped-up Westy top.

201 - 300: Moving
Picking up in late July of 2011, the final 300 posts carry us to today (early November 2014).  I started this period as a divorced father of 2 boys and an old bus, and I now conclude this period remarried father of 4 boys and an old bus.  We moved out of the townhouse apartment when they raised my rent past the point I could afford, and into Boo's condo.  From the condo, we moved into the house we've been in for 18 months now.  Frequency of posts dropped during that housing change and life settled into a very different pattern of family play versus self mechanic'ing.  This period, though, marks the time when the bus went from stationary project to daily driver.  In August, we camped in him for the first time in years (see One Small Step for Van).  Later that Fall, we hit the road to Eugene for Furthur but needed a tow home.  Like I've said before, the journey is the destination, and we had to pull the tank to get re-lined.

I returned the original engine harness to service, and struggled with coolant leaks while trying to keep him on the road.  I discovered a new love of snowboarding, and bonded with a new family at Mt. Hood.  The bus underwent more transformations as well.  He has a middle row bench seat (see Vanagon Seat Install, no longer has a grossly underused kitchenette (see Enter Summer, exist posting) and has a rebuilt jalousie window (see parts one and two).  I dropped his engine 3 times in this stretch of posts, twice having to separate the engine and transaxle.  Both of his bumpers have been hammered straight-ish and painted to an almost good-looking state (see front 1,2,3,4 and rear) and he now sports door cards as well as cards for most of the interior.  The ceiling doesn't sag anymore.  This past Summer, we had 3 flawless road trips to Nye Beack on the Oregon coast, Horning's Hideout and to the Black Sheep Family Reunion.

So, What's Next?
I guess that's always the question when you don't draw a map ahead of time.  I honestly don't know.  Frankly, I couldn't have drawn a map to this point and I wouldn't have ended up here if I'd tried to.  I look forward to many sights like the one below, simply driving the posted speed and enjoying the sights out the front windscreen.  As before and always, thanks for following along.


Monday, September 29, 2014

Transaxle Re-assembled

Last weekend, I got the transaxle put back together and back into the bus.  Fast sentence to write.  Lots of effort to do.  Today covers the first half of that 'effort to do': getting the transaxle ready.

Slinging Oil
slinger by hole in bell housing
where it's supposed to be attached
The bellhousing for the 002 and 091 transaxles are supposed to have this ringed collar around the input shaft to help guide the hypoid oil away from the input shaft seal and back towards the gears.  There are a few names for this bit, but the boards call it an "Oil Slinger".  According to the Bentley, this was supposed to be a non-repair item that was pressed into the bellhousing with a 4-ton press.  If it separates, you get a new bellhousing or re-press it in.  Well, the VW world has discovered that's not exactly right anymore.  Instead, you create a rough edge on the inner edge and along the rear (engine side) of the bellhousing.  I used a chisel and a file for this.  Then, rough up the lip and outside of the slinger near the lip.  Peanut butter the edge with JB Weld and press it into place by hand.  I treated the excess like caulking, and ran a gloved finger along the edges, pressing it in and making the edge clean.  Last, hold it firm with a simple weight and gravity.  Once its cured (18 hours), its ready.

Install Input Shaft Seal
roughed up edges
This was actually quite simple.  Lightly brush the inner and outer edge with hypoid oil.  Set into place by hand, and press it enough by hand so it sits still.  Find a short section of 3/4" PVC pipe (I used a 3/4" - 1/2" T from Home Depot).  With a rubber mallet, smack the seal until it seats flush with the face of the bellhousing.

Into One Piece
When the transaxle was built by AA Transaxle in Seattle, the bellhousing was sealed to the transaxle body with what looked like clear silicone caulking.  Not a fan.  I scraped all that out and instead ran hi-temp form-a-gasket along all of the mating surfaces.  Once it becomes tacky, set the 2 sides together and set the bolts in.  Rubber mallet the bellhousing into place and finger-tighten the bolts.  Following the jump-the-center torquing process, set them to 18ft-pounds (if memory serves. check the Bentley).

Topped Off and Ready
slinger with JB Weld
Before I put the bellhousing on, I made sure the oil drain plug could be loosened.  I had vaguely remembered that it was frozen in-place.  I was right.  After some hard torquing, I got the nut out.  I cleaned off the tiny metal filings off the attached magnetized rod, cleaned the threads and re-seated it.
Once the transaxle and bellhousing were one piece again, you need to give the form-a-gasket time to cure.  I gave it 24 hours and then opened up the fill hole.  It took all the gear oil I had on hand, and was still a touch low.  I'll need a fresh bottle to top it off before I take much of a test drive.  Remember, the tranny is full when oil spills out of the fill-hole when the tranny is on level ground.

That's it for today.  The tranny looks good, the input shaft has almost 0 wiggle to it and the seal / form-a-gasket are holding oil.  Hazah!

Wednesday, September 17, 2014

Engine Drop Thoughts

Over Labor Day weekend 2012, I dropped and re-installed the TDI engine so I could swap transaxles.  I had bought a newly rebuilt one from AA Transaxle in Seattle (See Transaxle Transition).  This Labor Day weekend (2014), I dropped the engine again to remove that transaxle so I could replace the input shaft seal.  In both cases, I leveraged the notes I made in 2011 when I removed and re-installed the fuel tank (see Engine Extraction).

In preparation for the drop, I re-read the notes and realized that I didn't explicitly state whether the bus had to be put on stands for the engine drop.  So, I thought I'd try it this time with the bus on the ground.  It can be done.  Once the engine is down, unless you're going to work on it right there, you still need to lift the bus to get the engine or transaxle out.  Admittedly, you only need to jack-up the passenger side so the transaxle can slide out, but still, its worth noting.  To get the engine out, it is a big hairy deal.

I am seriously considering changing the rear-end to have a removable valence like the early bay and the split-window buses.  Consider, I have a thick steel bar running across the rear from frame-to-frame, holding the engine.  This is creating increased stiffness at the rear, which (reportedly) was the motivation to eliminate the removable valence.  My thinking is that if I can remove the valence, I could lower and remove the engine/transaxle as one unit without having to lift the bus 3+ feet into the air or parking over a ditch (yes, I did that to install it the first time).

The transaxle is still on the ground in my garage, and the engine is still on the ground (on the ATV jack) under the bus.  I have pulled together all the bits and parts I need to fix the leak and re-install, and I hope to start some of that before the weekend.  For my own future reference, here are a couple fruitful notes on parts:

The pilot bearing for the KEP flywheel (all 200mm clutch adaptions): '99-'03 VW (Jetta, Golf, Beetle) 1.8 Turbo bearing
The stud / mounting bolts from the transaxle to the adapter are 3/8", standard (not fine) right-hand threaded.
The Circlip which holds the input shaft tight to the reverse gear is part number 004 311 317.

That's it for this time.  Hopefully, I'll be able to get under the bus tonight or tomorrow night to get the clutch/pressure plate off so I can seat the pilot bearing.  As always, thanks for following along-

Wednesday, September 10, 2014

Removing an Input Shaft Seal

I have a bigger post in the works for the engine drop, transaxle input shaft seal replacement, etc.  For now, I have the engine lowered onto an ATV jack, and the transaxle in pieces on my garage floor.  I removed the old input shaft seal in a unique way.  Everywhere I looked, the advice was to get a seal removal tool, hammer it into the rubber seal and pry away.  I did something else, and that's what I cover in today's post.

Identify the Seal as the Problem
After separating the engine from the transaxle, and before moving the transaxle into a clean location, look at the inside of your bellhousing.  Does it have a bunch of oil residue lining it?  Maybe a small pool of oil?  Dip your finger in it and sniff it.  Does it smell like your engine oil?  Does it look like engine oil?  Lighter color?  Maybe slightly different smell too?  Yep, you have a leaking input shaft seal.  Now, remove the throw-out bearing like everyone says.  If you have the sleeve behind it, remove that too, exposing the input shaft seal.  Look at the seal.  Wiggle the input shaft a little bit.  Does the seal cling to the shaft or do gaps appear?  Is the seal smooth or does it have a pinch in it?  Mine had 2 small pinches along the outer edge and the shaft did not cling to the seal.

Removing an Input Shaft Seal
This is the point where everyone else says to remove the seal the brute-force way.  For some transaxles (those without a seal housing), it may be the right method.  I took a different tack.  Remove the bellhousing.  Its held on with 13mm bolts.  3 on each side inside the bellhousing and 2 on the bottom.  With a rubber mallet, lightly smack the bellhousing to free it from the transaxle body.  Mine had been silicone sealed but the seal didn't hold up much.  Place the bellhousing engine-side down on top of a shop towel.  Pointing up, you will see the seal housing.  Smack it with the rubber mallet and out pops the input shaft seal.  Easy peasey.  EDIT: Through further research, I believe the housing should not separate from the bell housing.  If you were able to get your seal out this way, by lightly tapping on the housing (like I did), you have a new problem: how to get the "housing" (some call it an oil-slinger) re-attached to the bell housing so that it doesn't re-free itself.  I'll post a picture of what my driveshaft looks like after less than 2 thousand miles like this.  I am assuming it wasn't like this when I got the transaxle from AA. End EDIT.

New Seal, Torn Seal
I have been unable to successfully get a seal back into the transaxle, to the point where I tore the only replacement I had.  All of the advice on the interweb seems to exclude transaxles with a seal housing, making their "slip it over the input shaft and drive it in by alternating sides" unusable.  I have tried setting the housing first, but that hasn't worked.  I got close, though, using a 13mm socket to press the seal.  I made the mistake of trying a larger socket and tore the seal.  I need to hit Discount Import Parts (DIP) for another one.  Once I get the seal onto the housing and into the transaxle, I'll close the loop on how I did it.

That's it for today.  I picked up a pilot bearing and a replacement mounting stud for transaxle re-install at the local FLAPS during lunch today.  They didn't have a suitable input shaft seal.  Off to DIP when the next opportunity presents itself.  Thanks for following along, and Hapy Birthday, C!

Monday, July 14, 2014

Fun Family Functions

We all have family functions.  For lots of families, these are not exactly fun.  There are expectations and history that create stress.  We're pretty lucky.  My brothers, sisters, in-laws and parents all get along, for the most part.  In my last post, I mentioned the road trip to Nye Beach, but failed to mention that my younger brother and sister (as well as their families) and my parents were meeting us there.  I'll touch on some of the family fun today and wrap it up with home-garage stuff.

Who's Who
My sister, M, moved to Austin a few years back.  She and her husband, S, have since bought and sold a house, bought and performed construction on a second, had a couple of kids, etc.  They are very much Texans.  I hadn't seen their daughter (I) for a couple of years and had never met their 2-year-old (K3).  K3 is a pistol.  OMG, he is such a joy.  We played soccer, and laughed.  What a sweetie.

My brother, R, has been living in the greater Portland area since the late 90's, met and married a local (KG) and has a girl (A) and boy (N) of his own.  They are both very articulate for their ages, and can engage conversationally with adults with little difficulty.  A and I are great friends who Skype when they're apart.  Unfortunately, we're apart more than we'd all care for.  N and K3 became buddies too, though, playing toys together.  So, with that backdrop, we add 3 beach-side condo's and Newport's offerings.

Watching Whales, not the Temperature
low tide
Unlike the Oregon inland, once you cross the Coast Range, the temperature remains much closer to the 40*F-60*F range.  In Winter, while we're looking at snow temperatures, the coast rarely gets that cold (though the wind is brutal).  In Summer, we may be sweating 80*+ days while the coast is a mild 65*.  The 5 days we were in Newport were incredible weather-wise.  High's in the mid 70's and overnight lows in the 50's.

As the title suggests, we saw whales.  There's a pod of about 40 grey whales who live year round in the waters just off the coast between Newport and Lincoln City.  On 3 successive nights (July 2nd, 3rd and 4th) from the condo balcony we saw whales spouting at high tide.  The first night was particularly spectacular with multiple spouts blowing simultaneously and at least 5 different whale-back sightings over the course of about 30 minutes.  KG had been coming to this spot for over 30 years and had never seen whales.  Upon hearing this, we were all the more appreciative of the sight we'd witnessed.  Of course, we were so awe-struck, none of us thought to take a picture.  Drat!

Sand Castles and Sand Sliding
Below the balconies, was a beach of duned sand.  Apparently this was somewhat rare too, for the beach was usually flat.  Back from the highest tide's edge, the sand had been shifted by wind into what looked like a series of trenches with steep sides, but only a couple of feet tall.  These created effective, but sandy, wind blocks that we and others used for building beach fires.  With all of the boy energy being fed into air-soft guns, Boo and I expected them to use the trenches and play guns.  Surprisingly, they didn't.  They used the trenches as starting points for elaborate sand castles.  So, with garden shovels instead of toy guns in hand, all of the boys (K, K2, K3, T, C, and N) set to building things.  The bigger boys also discovered a steep bank of sand that stood over 30 feet high a little further north.  They would one by one jump from the top and do their best ski/board imitation down the bank.  Apparently, K2 was hitting 360's by the time they stopped for good.

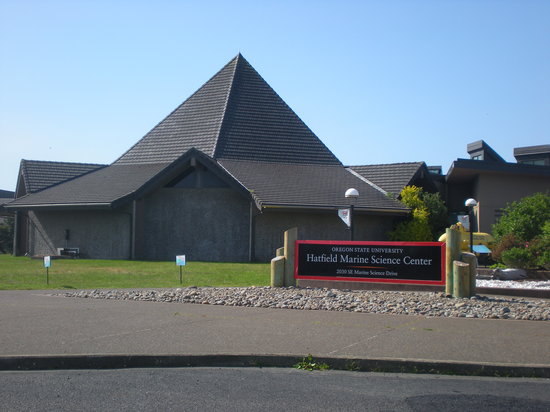
Hatfield Marine Science Center
HMSC
We spent a day at the Hatfield Marine Science Center too.  We all highly recommend it.  It is officially free (though donations strongly encouraged), and about 1/3 of the space is dedicated to interactive exhibits.  The remaining contains tanks of sea-life and presentations on waves, oceanography, climate change impacts, etc.  I hadn't been to the science center since NOAA moved in next door.  NOAA's influence can definitely be felt now, and its a good thing.  All of that research now has a available-to-the-public outlet at the Science Center.

Devil's Lake
In my last post, I mentioned the Devil's Lake day-trip.  Devil's Lake is a small lake (3 square miles) and seemed to be for boating than beach/swim access.  R & KG found a city park that had a boat launch, but more importantly a lake-beach and a huge playground to play in/on.  The younger kids had a blast.  It was fun, but it was after K and K2 had left.  This made T and C sad, and less active.  We truly have become a completely blended family when we don't feel complete because some of the boys aren't there.  I had heard that this was a family maturity state, but I hadn't seen it coming.  The boys are back together again after a week apart, and it really is a homecoming.


Home Garage
bulb on left has lost its dimple
After coffee Sunday morning, I wanted to find the oil leak and solve the persistent tail-light issue.  Starting with the tail light, I discovered that when I installed the battery I must have bumped the tail light assembly.  This bump flattened one of the dimples in the brake/running light dual-filament bulb.  So, the bulb wouldn't sit in the holder correctly, causing a short across the positive contacts of the bulb.  By swapping out the bulb, the problem went away.

The oil leak still escapes me.  I cleaned the underside of the bus engine with brake cleaner.  It seems like the oil is coming from the turbo-side of the engine, maybe from the low-pressure oil return?  Since the oil level isn't meaningfully dropping, I'm not convinced its the problem.  Next, I checked the oil level in the transaxle.  On the transaxle, "full" means the fluid level is just under the fill hole.  I opened the fill hole while the rear of bus was up on ramps and none dribbled out.  No bueno.  I shot in about 1/3 of a bottle before it started dribbling.  I think we have our oil source.  The trick is figuring out where it's coming out.  I don't see a source on the outside, and the clutch doesn't seem affected, so if it's coming out from the output shaft end, we haven't noticed it yet.  Curious.  I may need to drop the engine and separate the tranny and engine to be absolutely sure.  Since everything is running fine now, though, it will wait until camping season ends.  Of course, that's how adventures begin.

More next time...


Wednesday, October 3, 2012

Transition to the New Transmission

This should be brief today, but every time I say that it's long anyway. Hahaha... It's been a productive and fun few weeks, but I'll focus on bus stuff today, particularly on the test drives and changes I made.  Next time, I'll post on the current run of Furthur shows I hit this past weekend.  I think I left off with the transaxle in, but before any driving.  Let's start there...

Where's that Confounded Gear?
I figured when everything aligned on install that the shifting would be relatively close.  It was... Until it wasn't.  The initial drive away from MS's house was triumphant, but starting in second.  I couldn't find first.  Down the hill we went (Boo following in a chase car), and had to pull left onto a busy road at the bottom from a dead stop.  After fiddling a bit, I found 1st, moved through 2nd and 3rd to a cruising speed of 35mph at an engine speed in the mid 2000's.  Perfect.  The whole drive home followed a similar pattern of 1st gear going missing.  We hit a short stretch of freeway and I got up to 60mph on the entry ramp but near 3k on the tach, though.  I had some coolant leaking challenges that left the bus stationary while I thought on how to fix.

Wheeler Dealer
When I chose to watch something on tv that isn't sports or a movie, it's usually either Family Guy or this British show called Wheeler Dealers (on Velocity).  If you aren't familiar with the show, one host works the buy and sell end of the used car market while his partner fixes them up in between (Wiki Link).  It was while watching this show that I realized my mistakes with the cooling system.  They showed how they bled the air from the cooling system by getting the engine up to temperature, opening up the heater and then removing the cap from the overflow bottle.  The key is leaving the engine running during this process, and letting the air bubble up through the overflow bottle.  Keep adding coolant/water until it stops bubbling, and it stays at the full line.  After I did this, I stopped having coolant leak issues and odd pressurization happening.

Shift the Shifter
bubble wrapped 002 on my carpet
While I was solving the leak issue, I continued to test drive the bus, but the gear seeking got worse.  I decided that the limited-throw Skat shifter wasn't helping and it could actually have been harming the break-in of the transaxle. Fortunately, I'd only driven less than 20 miles, but I bought a replacement original gear shifter unit from Always VeeDub in Portland.  By following the instructions in the Bentley (hold the shifter between the seats near the floor and set the ball & pin first, then tilt the shifter upright while holding the base firm), the shifter set in within 15 minutes.  I was able to adjust the shift action somewhat, though I will need to do more.  Currently, I can find all gears consistently, though it does pop out of 2nd when I rev up and then pull my foot off the pedal.  When I get some time, I'll mess around with that some more.

Now, I have an old transaxle sitting in my living room, with a Scat short-throw shifter a-top it.  I'll probably sell the shifter, but I need to get rid of the transaxle.  It's a runnable gearbox, and a suitable rebuild candidate / core, so I should be able to find someone who can use it.  I have driven the bus to work every day this week, as well as to the Further shows in Troutdale all last weekend.  Lots of time grinning behind the wheel for sure.  That's it for today.  More next time.

Thursday, September 20, 2012

Transaxle Transition

I heard once that the most productive time in the US is between Labor Day and Thanksgiving Day.  Something like 40% of all work is performed in this period.  When I think about it, it makes sense.  Come Thanksgiving, the holidaze kicks in.  Shopping, vacations, etc through NewYears.  Then, the Winter blues take hold, and sun-seeking vacation get-aways.  Not that I take those, mind you.  Then there's Spring Break, Spring fever and then end-of-school Summer break.  Family vacations end at Labor Day, school starts, so no one is taking vacation, etc.  With this in mind, my work load is peaking, so I've been too distracted to get back to the blog.

Transaxle Arrives
starter adapter on new
I've already mentioned the gearing, etc. in another posting, and that I got it from AA Transaxle in Seattle. Daryl shipped it in a basic cardboard box wrapped in bubblewrap.  Crazy, but simple.  Since I'm living in a condo without a garage, I was in a bit of a spot for doing the work.  Boo had a funny idea of doing the work in my real estate agent's (we'll call him MS) driveway as a motivation to get a house solution.  So... we asked and that's where I did the transaxle swap.  Since I packed my storage space thinking it was only going to be a couple months, finding my tools and the ATV jack adapter was a fun adventure but I was ready to go leading into Labor Day weekend.

Out with the Old
Dropping the engine has become a bit of a predictable system now.  Disconnect the coolant, fuel, and support the engine with the adapter/ATV jack.  Disconnect the axles, lower electrical, exhaust and intake (with intercooler).  Last disconnect the rear engine support and bellhousing support bolts.  Lower the engine and transaxle as a unit.  Once on the ground, I removed the starter and the other 3 bolts between the engine and the transaxle.  Separating the 2 components was simplified with a furniture dolly (covered with a tarp) under the transaxle and simply pulling on the front mount.  The input shaft slide off of the clutch.  I pulled the transaxle into MS's garage, cleaned up my workspace and called it a Saturday.

Prepping the New
'72 stud on left
'75 stud on right
The nose (front) mount on a '75 transaxle is not identical to the nose mount on a '72.  Fortunately, the mounts attach to the transaxle the same way: 2 bolt holes.  The '72 has longer studs, though, so if you do the swap, the studs need to be swapped with the mounts.  The new transaxle was completely redone, but came without a throw-out bearing.  I know the one that was on the original 002 was relatively new, but I put on a new one anyway.  It made a racket during the initial tests at first, but its nice and quiet now.  Getting the wire clips from the throw-out bearing onto the arm takes a little willingness to get after it, but its much easier if you put a longer crescent wrench onto the clutch activation arm and press the bearing hanger away from the depths of the bellhousing.  Attaching the starter and adapter were straight-forward. That old fast-forward adapter needed the custom detailing to fit the '75 002 as well (I did this before.  There's a post in the archives).  I replaced the radiator fan switch, but I haven't seen it actually work yet.  Too paranoid; I hit the manual switch first.

Mating
When mating a transaxle to the engine, it is important to remember one key thing: remove the mounting studs first.  In reading this, it seems obvious, but when you're removing things, its easy to overlook.  After some sweaty attempts to get the transaxle on (input shaft aligning with the clutch), and a beer in the shade, I remembered.  They were easy to back out and slide back in through the ears of the bellhousing easily too.  Once the studs were out, the input shaft slid easily into the clutch and with a little twist of the transaxle, the stud holes were aligned.  Minutes later, the transaxle was torqued down, the starter was wired and the deal was ready for re-install.  I took the opportunity to get the engine harness buttoned down right, and put a new c-clip on the temperature sensor.

In with the New
new throw-out bearing
on input shaft
Classic instructions: install is the reverse.  hahaha... it was that instruction for the control arm replacement in the Type2.com library that started this blog all those years ago.  Raise the nose of the transaxle more aggressively than the engine.  The shifter needs to get over the rear beam.  If you planned ahead, and put the shifter cage on first, you'll appreciate it later.  I hadn't planned, and regretted it.  Once the shifter clears the beam, raise the engine with the ATV jack into place.  Test alignment with the bellhousing mounts, and when its aligned front-to-back, install the rear mounts.  Then install the nose mount, and then do the bellhousing mounts.  That takes a second to write, but many minutes to get done.  I packed the tranny-side of the CV joints, peanut-buttered grease into the valleys where the CV joints mount, and wrenched it together.  All the remaining electrical bits from underneath were all i had energy left for and I called it a Sunday.  Finish the job by reconnecting the coolant lines, fuel, electrical.  Install the intake and exhaust.  Fill with coolant and burp the system.
I've been having issues with that burping bit.  In fact, I spent Monday wrestling with coolant leak issues, and trying to get a replacement c-clip onto that coolant sensor again.  That thing has been killing me.  I think there's air trapped in my cooling system that's creating funky pressure issues and the weak point is the temp sensor.  So, that's where the coolant leaks out.

What to Do with the Old?
On Labor Day, I drove the bus home.  The coolant leak appeared to be resolved, and he drove unbelievably well.  The amount of pep even in the lower gears was fantastic.  We played it safe at first, taking city streets, but he was able to cruise at city speed limits in the low 2000's (RPM).  Just to see how he'd respond, I spun onto the freeway for one exit, and I got up to 55MPH on the onramp with RPM headroom.  Fantastic drive home.  Since then, I've returned my tools to storage, and I have the old transaxle... sitting on the floor of the bus.... making the bus smell like axle grease..  What to do with a viable 002 transaxle?  Sell it to a dune buggy guy?  Sell it to someone who wants a rebuild core?  Welcoming ideas.

Okay, so this was ridiculously long.  Once I add the pictures, this will be epic-long.  Sorry.  I could have done this over the course of multiple postings, but its been 2 weeks already anyway.

Friday, August 10, 2012

Vanagon Seat Install

Today starts my vacation, yet I'm getting one last post in before I go.  I wanted to give an update on both the Vanagon loveseat as well as the transaxle.  I've kinda wasted the afternoon, so I'll probably keep this short.

Love Seat
what goes with green/blue plaid,
grey, white, and blue?
Why, TAN of course!
Ok, maybe calling it a loveseat is a bit much.  Its a tan 2-seater bench seat from a brown Vanagon.  Once installed, I'll have a '79 Westy folding bed seat, front seats from a '74 and a bench seat from a Vanagon.  It will be a true franken-bus.  Sue me.  I'll be able to carry 5 people (plus me driving), and camp once we get there.  Try that with a stock VW bus.  Anyway, on to the progress report.  In order to fit the bench, I had to pull the stove/sink unit.  That cabinet now adorns my living room floor, but it makes ample room for the loveseat.  Once I made space, I aligned the rails with the seat by aligning the seat mount holes with the mounts within the rails.  I then duct-taped them together and put the whole operation into the bus.  With some wriggling, I set the spot front-to-back by lowering the folding bed and putting the bench up against it.  My thinking was that I may want or need to carry something long while also carrying some folks.  I was able to carry my entertainment center on that folded down section before.  Now I'll be able to bring 3 friends to help me move it.  Last time, I could only bring 1 friend... and he wasn't exactly thrilled at that prospect.

rear left rail location
westy fridge cabinet in
upper right corner
I marked up the wood floor with pencil so I knew where to put the rails and then pulled the seat out again.  Remove the rails from the seat and set the rails back in place.  I then set to measuring all over the place so I was sure that any hole I drilled in the floor wouldn't hit the radiator, the supports, the main front-to-back beams, the brake lines, etc.  I managed to miss everything important on my first try.  Hazah!  I drilled out 6 holes to 3/8" and wrenched bolts through.  From the underside, I lock-washered and nutted the bolts down. Last, I re-inserted the seat the "normal" way by sliding the seat onto the mounted rails.  Done.  All told, it took a few hours, but I move slow.

Transaxle
Well, we're behind schedule a little bit on the transaxle.  The CM code transaxle used the early gear sets and Daryl only had the later sets on hand.  With one of his guys out sick (or following a band around the country), he was behind schedule anyway, so this just put us a few more days out.  Unfortunately, those few days are probably the diffeence between having the new transaxle in time for the trip to Southern Oregon and not.  So, the bus may not go.  We'll see.  If the transaxle arrives tomorrow, there's still time.  I need a few days to do the work (see: I move slow) and we leave in the middle of next week.  Sigh.  So close and yet not quite close enough.
right edge of seat & slider

That's it for today.  The next time we go for a spin, we can carry the whole family.  We'll just be travelling at a max speed of 52MPH for now.  More next time and thanks for following along.

Saturday, August 4, 2012

One Slammy of a Sammie

A few years back, I worked at one of those Internet startup companies.  I had a lofty title and a pile of worthless stock options.  My situation was pretty common in the computer business at the time.  As Wall Street started to figure out that most of these companies were glorified Ponzi-schemes, the one I worked for strove to stay open by moving out of our fancy downtown digs in the emerging "Pearl District" to a zoning experiment in Beaverton called "the Round".  Originally intended for condos, the 4 story building was virtually vacant a full year after completing the bones.  No one wanted to live there.  So, they dubbed it "office space", and we moved in.  Of course, it was still the days of perception, so lots of customization was done to the space including open stairways and the like.  Well, it was still an open sewer compared to our last location, with a junkyard out one window and an abandoned building out another.  When contrasted to the bustle of downtown hip Portland, I was less than impressed.  Driven to find something remarkable, I would foray out at lunch.  One of my greatest finds is the subject of today's post.

Beaverton Sub Station
Front Entrance of
Beaverton Sub Station
Situated against the train line that runs through the center of downtown old Beaverton, is perhaps the best sub shop in the greater Portland area.  Sure, there's Kornblats if you want specialty sandwiches, but for a pure sub-shop experience, there is none better than Beaverton Sub Shop.  Chuck, the owner and main behind-the-counter-operator, hails from Chicago.  From the Cubs hat to the quality of the meat, he's all-Chicago.  He has a thing for trains, and his decor reflects that interest and the rail-side location with pictures and artifacts from railroading.  Even the menu has a train-car metaphor.  6" sandwiches average around $5 and foot longs are around $10.  The rolls are huge.  The dressings remind me of the subs I used to get at the deli as a kid growing up in New York.  Very Yummy.  From the day I found them as an employee at an Internet startup thru today, I try to make the Beaverton Sub Station a regular stop.


Bus middle-seat Update
Yesterday, I drove over to Always VW and picked up some mounting rails for the middle-row seat I got in Eugene a few weeks ago.  Not knowing how they originally installed, I was glad to be there watching it get removed from the donor vehicle.  4 bolts hold the seat to the rails, 4 bolts hold the rails to the body.  Simple simple.  I'm assuming that the Vanagon has a set of nuts welded into the body, and I won't have that in the bus, so I'll need a buddy (or careful vice-grip use) to get the rails bolted in safely.  If I can suffer today's heat, I'll be removing the sink/stove unit and start looking at seat placement.  If things go well, maybe I'll have the seats in by the end of tomorrow.


Transaxling
Daryl at AA Transaxle in Seattle is just completing the transaxle rebuild.  I've had a few questions about what I'm doing for gearing, etc, so I'll lay that out here.  First, we started with a '75-only (CM code) transaxle.  It has a stock 4.86 final drive (ring & pinion) like the Vanagons do.  We're leaving 1st and 2nd gear alone. For 3rd, we are using an aftermarket, hardened 1.14 and we're pairing that with a .73 4th from the same company/family.  This combination should provide the right power (HP) to torque curve intersections.  I intend to run my stock 14" rims and rubber through the Summer.  If money appears, I'll slap some larger (in diameter) tires on the 15" rims I have in storage.  I may just wait for Winter and slap 15" snows on instead.  We'll see.  Regardless, the transaxle should appear this week, leaving me next weekend to get it installed if I'm going to run it down to Ashland for our family reunion.  It feels tight, but do-able.  I just need a place to do it, and to dig through my storage facility to get some specialized tools... like the ATV-jack adapter I built.


That's it for today.  Time to drink some coffee and get to pulling that sink/stove unit. I'll update with some pictures. Posting from an iPad doesn't seem to support uploading photos. Grr...

Friday, July 27, 2012

Enter Summer, exit posting

Yes, I'm alive. Like so many folks in the Pacific NorthWest, once Summer weather arrived, I stopped using the computer when I wasn't working, and got to playing. I do have some personal and bus updates, though, so I'll bang that out before pouring myself a welcome-to-weekend mojito.

Housing
just making a point...
As much as the news folks talk about how "bad" the real estate market is value-wise for sellers, it is very hard to find a good deal as a buyer. When I moved out of my townhouse apartment in mid-March, I started looking for a house, agent and mortgage lender and all. Within a month, I had an offer on a house, but between the banks holding the mortgages getting in the way, that house is still unsold. My offer expired, and I restarted it, but in the few days between, someone else got into the bank's radar system and they're in first position now. Apparently banks think serially, and can only address one offer at a time.  Fun. It's a good thing other businesses don't operate that way.  So, I offered on another house. And another. And another. All told, I've laid offers on 5 or 6 houses now. Most of them still haven't been sold and my offers just expired along the way. I think I just may get this last one, though. I put an offer on it in late May. Yes, that's right, late May. I have been extending and re-extending on this one.  I've been told that I might expect an acceptance of my offer by the end of next week, or early August.  I'll post a picture when that happens, so until then, here's a generic "Bank Owned" sign.  Yeah, like that's gonna get you to place an offer on it.  Prepare for weeks of no contact from the selling bank, and make your offer expiration date something you can live with, yet recognizing that the bank will not get it together within 60 days of you popping an offer on it.

So, how much of the real estate market / housing problem is being created banks who can't get it together? Had this been a normal deal, I would have gotten an accept, decline or counter-offer within a few days. By the bank adding in the 10 extra weeks, it looks like the houses are staying on the market an extra 70 days. That makes the market look falsely bad, like you can't sell a house because it's still dropping in value. The truth is, the market is coming back, based on what I'm seeing in terms of buyer traffic, but with the banks extending the process by literally months, it paints a different picture. One the news folks continue to hawk on the nightly's.

Microbus slightly too micro
note the overhang
I've been trying to figure out a way to fit 6 passengers into the bus, so we can take the whole family in one car. Boo and I toyed with the idea of buying something just for this reason, but cars are just too dang expensive. I said, "with a small fraction that money, we could get the bus to do it."  So, while Boo drove my TDI Jetta to Montana with her 2 boys, I drove her car to Eugene to get a free (yes, $0) middle-row Vanagon bench seat. When I got it home, I did what anyone would do: try to fit it. Fail. From the edge of the Westfalia sink/stove unit to the edge of the sliding door is 39". The width of the benchseat with the cushions scrunched is closer to 42" (see overhang picture on the right). Add on 3-4 inches for the arms, and it totally won't fit.... with the sink/stove unit in place. I intend to pull the sink/stove to fit the bench seat, and build a new cabinet that's just 16" deep (or 7" less deep than the Westy one). Then, the seat will fit, and when removed at a campsite (or ski resort parking lot), the cabinet can be usable. I will probably forgo the stove, and only do a splash sink with a wide counter where we could use a Coleman portable stove instead.

Microbus to get macro-speed
upper frame width pushes
lower frame away from cabinet
Last, I finally have arranged for a new transaxle from AA Tansaxle in Seattle. Daryl and I have figured out the details, and he will be starting the construction on Monday. If all goes well, it will be crated for shipping by the following Friday. Then, I'll just need to find a spot to drop the existing engine/transaxle, remove the old tranny, attached the new one and re-install. (note to self: get a new throw-out bearing just in case) Dropping the engine/transaxle isn't hard, but mating a new transaxle while leaving the engine under the bus may be. Remember how far over to the side I needed to tilt the undressed, un-oiled, no coolant engine to get it under the rear valence? I wouldn't want to try that with the fluids in, nor with all the other parts attached. Better to just separate and mate under the belly of the bus. Lots of muscling ahead, I'm sure. I'll post pictures, etc.

That's it for now. With Summer in full swing, I doubt I'll be online too much. I'll try to get better about it. I have a big road trip to Ashland planned, if all goes well, maybe the bus will go too....