Showing posts with label sub. Show all posts

Tuesday, November 29, 2022

Fare Well, Nemo

Brief post today.

Nemo Departs
This past Spring/Summer, I thought I had sold Nemo (1997 Audi A4 Quattro) to our friend Garry. After repairing the driver rear bearing and replacing the axle with it, the power steering blew a hose and he lost interest. So, it came back. Truth be told, Nemo never left the driveway; Garry did the repair here. I figured I would do what was needed to get Nemo through smog and then figure out what to do. So, I repaired his exhaust, replaced the catalytic converter, downpipe and O2 sensor. I was ready to take him to Oregon DEQ when  the NewOldHouse purchase happened and so Nemo just kind of sat. Fast forward a few weeks and I get a text from Garry, now living in Idaho. His friend expressed interest. So, I shot some pictures and video with my phone and sent them on. 2 days later, he is here, with a friend, a truck and a tow-dolly. They crawled around on Nemo for a while, took him for a drive.... paid me cash and drove away with him. Just like that, the herd is thinned my one.

Mom Moves
With my Dad's rather sudden decline and then final departure early this month, my Mom lost the person who had eyes on her 24/7. Her health has been an issue for some time, so having her living alone in a somewhat basic assisted-living facility was no longer safe for her or the facility. So, she is moving to a stepped-care facility 4 blocks from here. That move is today (29-Nov). Since her space is significantly reducing, we will move her and her most treasured belongings to the new place. Everything else is moving here, so it can be gone through with heat and beverages and comfortable seating.

NewOldHouse Update
Since my CoViD battle ended, I have returned in earnest to the restoration of the NewOldHouse. When the flooring guys were here last Summer, they removed all of the 1/4-round. As they removed it, they clumped it by room and taped the clumps together. Unfortunately, some of that careful work was undone, and some of the 1/4-round went to the dump. What remains is semi-documented. I have been puzzling-out which pieces go where, re-marking them and then shooting them with BIN primer. Once dry, I set the pieces where they will be re-attached to the baseboard. Prior to priming, they get the nails removed and then a good cleaning. I have a small pile of un-matched pieces and a larger pile of not-yet-attempted pieces. I will be continuing this game next weekend.

Other than playing with 1/4-round, I resolved the canopy catastrophe, consolidating 2 damaged canopies into one viable one. You can see things are back to "normal" in the picture on the right, with the "Jerry" canopy restored. If you look closely, you can see stacks of 1/4-round under the canopy on the left (Phil). I have also cleaned, rust-converted and painted the heat vents. We decided that the original vents could be salvaged, and if they were painted a color that roughly matched the floor, they would sort of disappear into the wood floor. For the most part, this turned out to be correct, though I don't have a good picture to share.

The bathroom progress was temporarily halted by the discovery of the sub-floor damage. Boo crawled back under the house to see how extensive it was.. and it is really quite contained. There are 3 1x4 (sub-floor) boards that rest between the top of the beams and the wood floor which need to be replaced. But even then, the section that needs replacing is only between 2 beams, and the beams themselves are in great condition, showing no damage from the leak.

As part of the preparation for a bunch of mom's stuff appearing here, I tore down the living room stereo equipment and moved it out of the way. While this isn't terribly interesting stuff, it does further prove that life is either Tetris or Monopoly, and today it's Tetris.

With each passing day spent at NewOldHouse, it feels more and more ready for occupancy. Sure, we don't have a functioning bathroom yet, nor will we have a functioning kitchen for some time. Still, we believe that we will be moving into NewOldHouse by the end of January. I guess that's it for today. I know there isn't much car content these days; that is also true of my life, and I feel it. The sooner the house is ready, the sooner I will be back wrenching on Hapy. Thanks, as always, for following along-

Tuesday, March 19, 2019

Car that Goes Boom - Part 2

Continuing the fun from the last post about the amplifier install into Oliver. When we left off, we had selected an amplifier and an install location. I had concocted and fabricated brackets to support it, installed the amplifier and did some tests, both by sitting near it as well as a road run to verify the brackets held. Today, I will go through the wiring aspect and fire this thing up.

Wiring Rear
In the last post, I mentioned there are 2 methods for wiring signal to the amp. I used the pre-amp / RCA cables method. To achieve this, I first needed to find and label 6 RCA cables. I found a few old RCA cables from my A/V stash, but they were over a meter (4 feet) long. On each wire, I marked a (F)ront, (R)ear or (S)ub prefix and (Left) or (R)ight. I did this on both ends. Why? So no matter which end I was doing maintenance on (or replacing a component) I knew what the wiring was without having to jiggle wires or unhook the other thing to figure it out. On the amplifier end, I plugged the cables into flat 6-pin pigtails, keeping the F/R/S wires together. Next, I pulled the stereo out of the center console, and passed the RCA cables through. There are a few wires that need to be removed from the big plug in the back of the stereo, and the rest remain. Simply: all of the speaker wires need to be removed from the plug. Consider, the "signal-on" wire needs to be made available to the amplifier. I had not used it at this point, so I needed to add an extension so it would reach. With the RCA cables plugged into their correct holes in the stereo, the power, switched power, ground and "signal-on" wires connected, the stereo can get put back away. Last, I plugged the 6-pin plugs into their respective slots on the front of the amplifier, noting that "(F)ront" goes to channel 1/2, "(R)ear" goes to channel 3/4 and (S)ub goes to channel 5.

There is a 4-pin for the remote bass and "signal on" as well. The remote bass is a knob that I will install later. For now, it is tucked behind the center console near the driver side foot well, but it is wired. The signal on wire I had located was connected to this pigtail and heat-shrinked. To keep things clean, I zip tied the bundle of cables and wire together, and tucked them into protective wire wrap (like this) I picked up at Harbor Freight. The black wrap made the cables disappear. I routed the whole thing up and over the top of the amplifier before routing it behind the center console. This should keep the bundle out of the passenger's feet while still keeping the controls available for fingers.

Wiring to Speaker Box
clamped screwdriver as wire spool
Up until now, the wiring going to the rear of the car had run through the cockpit. I ran the 2 wires along the transmission tunnel on the passenger side. Now that I was adding another pair of wires, though, the cable had become too thick, and was making a lump under the carpet. So, I decided to route the speakers under the car. Again, leveraging protective speaker wrap (smaller diameter this time), I routed the wires for the 2 rear speakers plus the sub woofer to the front of the car through a wiring feed hole (mostly hidden by the sub box). I think it used to control the fuel pump because it has spade connectors in it. From there, the cable ran along the underside of the car with the other bundle of wires that run front-to-back all the way from the fuel pump to the starter.

Because of the location of the wiring hole in the trunk, I did not leave much slack in the wires back there. Instead, I considered ways I could get the wire bundle to stay up against the box. I decided to leave the cable wrapped almost all the way to the sub-woofer plug, and figure out how to tidy it more later. With the other ends of the wires for the speaker box hanging under the glove box, I was entering the final phase.

Wiring Front
$3 wire wrap protects
Out the back of the amplifier are 12 threaded-bolt wire mounts: +/- for both front (4), +/- for both rear (4), a pair for the sub (2), and one each for ground and power. Since I had done everything else so cleanly, I didn't like the idea of running a bundle of wires at the amplifier. For maintenance and ease of amplifier removal, I wanted something easier. Also, the only slam on this amp in the reviews was about these connections, so I wanted it to be set up once and then forgotten about. So, I got some multi-wire connectors from BritishWiring.com. With these connectors, it would almost look like it was part of the original MGB. Unfortunately, they don't sell any even numbered pins, so I used a 9-pin for the front/rear speakers and a 3-pin for the sub. I wired a few inches of wire from the amplifier to the male plugs (see the second picture from the top) and then wired the speakers and ground/power into the female plugs. That sentence was quick to write, but it took me a several hours of effort.

Wiring Power and Ground
Test fit - RCA cables too long
All I had left was the ground and power. I had intended to use the extra pin on the odd-numbered plugs. When I set out to do the wiring into the plug (see top picture) I quickly discovered that the 10 gauge power/ground wire needed for the amp were very different animals from the 14 gauge speaker wire I had in the rest of the plug. Quite simply: the 10 gauge was too thick to pin. So, I bought a 3rd 2-pin plug designed for a GM alternator from the local NAPA. It had male and female plugs on it, so I could cut it into two pieces and continue the plan. Similar to the other plugs, I put the male end on the amplifier side and wired the female end into the car. With a ring terminal on the black wire (ground), I leveraged the rear bolt from the amp mount. This was a solid ground, based on my connectivity and voltage tests. For the power, I ran a blue wire from the alternator, through a 10A bladed fuse and through the rubber-lined wiring hole in the firewall behind the glove box. This dropped the power supply nicely near the amp.

Once both were connected through to the plug, I was ready to plug everything in for a test. I think, ideally, it would have been better to wire the power into the battery, but the battery is behind the seats, so the wire run would have been longer, creating a greater likelihood of a short. I ran a couple connectivity tests to make sure everything was set to go, and then re-connected the ground on the battery.

Test Fire
I had already identified a couple of things that needed to be changed, but with everything hooked up I wanted to see if it worked before I started changing things. So.. in short, the speaker wires were moved from the head to the amp, the amp was wired with power and grounded, and the power-up signal from the head was routed into the amp remote switch. Everything should be set to go. With the battery still connected to a tender, I slapped the face back onto the head unit and turned it on. All the lights came on, but I couldn't hear anything. I turned the stereo way up and could barely hear sound, so I concluded the gains on the amp were too low. Second attempt: turn the stereo back down to single digits and turn up the gains. Now we have sound.

With Rush's "Spirit of the Radio" cranking, I set the various levels so Getty Lee's bass snapped and growled, Neil Peart's drums punched and Alex Lifeson's guitar sang. It sounds so good inside the cabin with the top up. Once I get out, the sound really doesn't travel outside of the car as much as I would have expected. Of course, once the top goes down, things will change. This leaves one last test: driving at speed with the top down. That will have to wait until Summer. In the meantime, I tried the classical station for a different sound signal and it sounded really good... but not as good as Rush did. There's just something about Rush. Maybe it's the punchy bass. Whatever it is, the next test will be an early Dead show, like, maybe, the Music Box from Feb 1968, and then a wall-of-sound show.

Thanks for following along. I still have to install the passenger seat into Oliver, and then I may start working on the interior door panels. Or, maybe, I'll just finish the trunk. I don't know. I'll see how I feel when I get to the garage.

Tuesday, January 15, 2019

Speaker Box Finished

After months of sporadic work, the speaker-box is finally finished. Today's post will go over the final few things I did to complete it.

Where Were We
test fit with rear panel in place
When I last posted on this thing, I closed the post with "...after a bunch of hours with the Dremel and hand planer, the wall mate-points are smooth enough where I think it will be hard to see how out-of-alignment they are once covered with carpet. That's what I'll do for next time... as well as get some wiring in, and the 6th side of the box attached... and then the edges planed.... ". I had 5 of the 6 sides attached and planed, baffles installed. I felt ready for the final side, carpet, and wiring.

One Wire
The route from the wire cups on the right side of the box (front-is-front, so the "right side" assumes the 6x9 speakers face forward and the 10-inch sub faces rear) to the left 6x9 speaker needed to go through a baffle. The other wires, for the sub and the right speaker, were not so constrained. So, I left those wires out until after the carpet was on. For the one, left, speaker, though, I drilled a hole through the baffle, threaded speaker wire through, and then routed it along the bottom seams to the wire cup. I glued it into place so it wouldn't flop around, nor create an internal vibration. My concern about a vibration may seem a little without basis, but I thought with a wire that was running the length of the box, it might find it's way against the sub woofer cone. Regardless, a few extra minutes and some wood glue was a very small cost. I filled the speaker wire drill-hole with glue on both sides as well.
papering for pattern

Rear Panel
With that one wire installed, the rear panel could go on. When I set the panel in place, I could see gaps that couldn't be resolved with wood screw force; I needed to plane the edges of the side panels. To get things flush, I started by setting the panel on, and marking the high points on the sides with a pencil, and then planing those areas down. I repeated this process a few times; each time taking less material between checks. I was not aiming for perfection, rather close enough to fit where I could make up the difference with torquing down with wood screws. Otherwise, I would have spent many hours clowning with perfection. As it was, I spend about an hour planing before spreading generous wood glue along the edges and setting the panel in place. I swiftly applied wood screws around the edges, using more screws on this panel than on the others to get it to set flat.

carpet pattern
I tested the seams with a flashlight, shining it from inside the box (hand through the sub-woofer hole) to confirm that the seal was good. To my surprise, it worked quite well. Maybe having a pilot hole every few inches isn't a totally bad idea. Once the glue had dried, I filled the holes with spackle, waited for it to dry, sanded it flush and repeated 2 more times to make sure the holes were smooth enough to not be noticeable through carpet. I probably over-revved on it a little bit, but I'd come this far, and spent so much time on it now, a few extra minutes was not going to make much difference.

At this point, I painted the outside of the box black. I wanted to make sure the box was sealed, though afterwards I was concerned that I might have made it harder to attach the carpet. My thought about painting was that if I jacked the carpet, any open spot would be black instead of raw MDF, so it would not be as obvious.

Carpet
carpet cemented
With all of the panels in place and all of the pilot holes filled, I was ready for carpet. I found some basic black trunk carpet online for about $8US for a 4-foot by 5-foot rectangle. This was about twice what I needed, but I bought extra with a plan to carpet the trunk of the MG with the same stuff eventually. So... how to carpet a box? Off hand, it sounds simple: you have 6 sides, so cut 6 pieces of carpet, glue them on. Yeah.. that creates 12 seams. I wasn't going to carpet the bottom, so it would have been 5 pieces of carpet and 8 seams, but still, that's way too many.

Instead, I mocked up a single piece of carpet that was shaped like a "T" using paper to construct a pattern (see pictures). Imagine the "T" upside down. That long side ran along the bottom edge of the rear and the two sides. The vertical part of the "T" wrapped over the top of the box and down the front. I cut the vertical part of the "T" wider by 1/2 an inch on each side so the edges of the top on the right and left sides would fold down and get covered by the side pieces when they wrapped around. This created 2 seams: one on each side along the top edge and down the front... and each seam was double-thick for a 1/2 an inch Once the box was installed into the trunk of the MG, you couldn't see them, and the seams are facing away from anything else in the trunk so the edges won't catch.

The carpet was attached to the box with DAP contact cement. This is nasty stuff, so I did this on my front porch under the overhang. Wear disposable clothes, and gloves because if the glue gets on, it doesn't come off. I followed the directions, thoroughly covering all 5 sides of the box (no carpet on the bottom, just black paint), as well as the inside of the carpet. Well, I did that best I could on carpet with a paintbrush. Using a glass tabletop as a guide for keeping the bottom edge flat and using my thumbs to mark where the sides were, I started applying the carpet to the rear of the box. Contact cement adheres on contact (hence, the name), so you really have one chance to get it right. I was able to get it lightly attached while checking the angles and had to adjust it once. After that, though, I started pressing it down into place, wrapping from the rear over the top to the front, leaving the sides flapping. Then, I brushed contact cement onto the little 1/2 inch flaps, waited a few minutes and then pressed the sides into place. This part of the assembly was probably the most nerve-wracking, knowing that misalignment during this process would make the whole thing look amateurish. Which, if I hadn't spent so much time on it, I would have been fine with, but now, I wanted it to look good.

Cut In
wire cups and 6x9's in
The contact cement needs at least 24 hours to cure. I waited a day for the stink to dissipate and then moved the box into the garage for a couple of days. Once I was confident that the cement was solid, I took an exacto knife and cut in the holes. I started with the wire cup holes, cutting across the diameter of the hole first and then laying the edge of the knife against the hole in the wood to direct the cut of the carpet. This worked very well, and allowed me to cut all of the holes without any mistakes.

Installs
With the holes exposed in the carpet, I was in the final stretch. I did the final wiring first: Laying out a length of wire for the sub and the right speaker, attaching wire ends and heat-shrinking. To these wires, I attached the wire cups, set the cups in the holes and then screwed them in place. The 6x9 speakers are held on with nuts, so the bolts which protrude from the box needed to be cut free first, but otherwise the wiring was straightforward and the speakers went in without issue. The sub-woofer had barely been out of it's box since I purchased it. It wired up and installed relatively easily, though. I needed to pilot the holes for the bolts through the carpet, and I did that by pushing a roofing nail through from the outside. Once bolted into place, I set the protective grill in place, and the box was done.

The construction could not be complete without installing and test-firing. So, I took the box out to Oliver and set it in place. It fit without difficulty, and the speaker wires easily reached the wire cups on the side. You can see the extra wire on the far side of the box in the picture here. There remains work ahead for wiring up an amp and wires for the sub, so I'll address the extra speaker wire then. In the meantime, I fired up the stereo (local metal station was joyously playing Ronny James Dio), and verified that all 4 speakers were running.

That's it for today. This post contains work effort that spanned a few weeks, completing New Years Day. I intend to paint the bottom of the box with some flex-seal so we can use the box outside, but that will wait a while. In the meantime, I'll be enjoying the sounds, and eventually getting an amplifier installed so I can power the sub.

Thanks, as always, for following along.

Tuesday, December 18, 2018

Even More on that Speaker Box

This speaker box has become quite the project. I swear, if I look back on the number of hours I've spent on this thing, it will rival the hours spent rebuilding the front end of the MGB. Anyway, more progress to update.

Baffling
testing only-angled idea
In my last post about the speaker box, I mentioned adding in some extra support along the edges. I'm sure it was helpful, but when I thought about how much air would be moving around the inside of the box, I got concerned about how the sub-woofer speaker would have air-influence over the 6x9's and vice-versa unless I created some kind of barrier between them. I had initially planned to do that, but this project has lingered on for months now, so I had almost abandoned it. I had some time and some left over materials, so I constructed a couple interior walls to isolate the 3 speakers from each other.

wiring cup
I initially thought about something simple: one wall per side that ran at an angle from the rear wall to the front wall. There's a dark picture to the right that shows what that would have looked like. This would have been easier, but consumed a lot of air space that probably should be available to the sub-woofer. To maximize the air space available to the sub-woofer, I changed to an an angled wall from the front face back parallel to the 6x9 speaker angle until it was clear of the rear of the 6x9 speaker magnet (this was about 3-1/2" long by just over 9-1/2" tall). I connected a wall from that point parallel to the rear/front walls to the side. This left little excess air-space for the 6x9, but the sub needs all the air volume I could bring it in this small box. As it is now, I am at the low-end of the air volume recommended by the manufacturer.

Cutting and Fitting
baffle glue drying
With the walls cut with an old-skool hand saw (I make crap-cuts with power tools), I shifted to test-fitting. The extra supports in the corners required cut-outs in the baffles. You can sort of see the square-ish cut outs in the corners in the picture on the right. The left-side baffle wall fit perfectly though the right side did not. From this, I discovered that some of my early work was not 100% square/perfect. So, some additional trimming was needed on the right side. Still, things looked good so I drilled one hole per baffle to hold the 2 pieces together and glued them.

To support the inner wall baffles, I took a couple small pieces of cut-off left-overs and placed a support along each of the inside of outer walls. I was able to rest the parallel-to-rear-wall baffle against this support to hold it straight as well as for an extra surface for glue.

Shaping
I had planned for 3 wire cups on the right side of the box. I bought these cups from Crutchfield, and used a hole-saw to mount them. The orientation of these cups becomes interesting when we consider the interior baffles I'd just built. I had 2 cups set side-by-side for the left and right 6x9 speakers and one below it for the sub. You can just make out the left-side hole in the picture below. This speaker cup orientation seemed intuitive. Once the baffle was set in place, wiring into the cups will be compromised. So, I had to pull out the Dremel again, and shave down a gentle curve behind 2 of the cups so there would not be any pressure on the wiring once all the various pieces were together.
smoothing the edges

With the baffles shaped, I glued them into the box. Once the glue had dried overnight, I assessed the gaps, and plugged them with wooden kabob skewers... and more glue. Basically, I determined the length of the gap, and cut a thin skewer to length. I then squeezed the skewer with pliers until it was thin enough to fit into the gap. With a thin slotted screwdriver, I pushed the filler material into the seam, and repeated until the gap was completely filled with wood and then slathered it with glue. I then ran a thin bead of glue along every seam to make sure the 5 sides and the baffles were sealed.

At this point, I decided to fix the misaligned outer edges with the Dremel and a hand planer. Ideally, it would have lined up perfectly. If I build another box, I'll take much more care to align just one hole per side for the screw, so the sides fit much better. I did that with the inner baffles, and they aligned far better. Anyway, after a bunch of hours with the Dremel and hand planer, the wall mate-points are smooth enough where I think it will be hard to see how out-of-alignment they are once covered with carpet. That's what I'll do for next time... as well as get some wiring in, and the 6th side of the box attached... and then the edges planed.... yeah, this project got a little out of hand. But it keeps me distracted without pulling a car off the road.

Thanks, as always, for following along.

Tuesday, December 4, 2018

More on that Speaker Box

I've continued to tinker on the box I started over the Summer (see MGB Gets Sound). Today's post covers some of the headway.

Sub Hole
I had about 2 hours of forecasted rain-break on a Saturday that also coincided with a reasonably good game of college football. So, I was torn, but I figured that I could do something on the box on the back patio and sort of keep track of the game through the sliding glass door. Yes, this sounds like a set up that ends with a board sticking out of said glass door, but actually, it all went relatively well. I started with measurements to find the exact center of the rear of the box. Centering on that with a compass, I drew a 9-inch diameter circle to cut. First, I set the panel on the box with the drawing side facing in, so I could check my spacing, and sure enough, that would have been a miss. Because of the bump in the center of the rear frame of the MGB, I have a corresponding bump in the box. To account for that, I need to slide the 9 inch hole towards the top by a half-inch or so. Another quick turn with the pencil, another upside-down check and I'm ready to cut.

way too many pilot holes around the
edge: don't do that
I drilled a pilot hole with a drill bit that was just larger than the saw blade. Then, I made the mistake of thinking that cutting the hole on a bias rather than at 90* was a good idea. Big picture, I may have retained a little more meat of the MDF, but it created a lot more fit challenges. Anyway, I cut the circle and test fit the subwoofer (still in the plastic bag to protect it from the dust). Yeah.. it fit through the top fine, but hung-up on the inner part of the circle because of that bias. To remedy, I attacked the inner lip with various tools: a file, the Dremel, sandpaper.. Eventually, the inner edge widened out and the sub fit. Word to the reader: don't cut on a bias; follow the directions from the sub-woofer manufacturer and trust that when they say the hole needs to be x in diameter, they mean both the top and bottom edges unless otherwise stated. With the sub capable of fitting in the box, I switched back over to the 6x9's.

Re-enforcement
The sub-woofer sites stress re-enforcing the edges of your box because of the force the speaker will exert upon it. I used some of the scrap MDF from the box construction to brace the corners. I've toyed with more bracing in the middle of the box. I may hold off and see how it performs before gluing the rear panel, and sealing my fate.

6x9 Fiddling
I had 2 things I needed to resolve with the 6x9's. First, the box needed threaded studs on the outside so the 6x9 could be attached and replaced from the outside. For this, I found some 1" long bolts that came with some kitchen drawer knobs. These are thin enough to easily fit through the mounting holes on the speakers, but don't protrude too far past the MDF edge to present fitting issues later. Best of all, I have 8 of them. So, I pulled one of the 6x9's from the rear firewall, test fit in the box holes, marking where the mount holes are and set it aside. A few quick runs with the drill, and I was threading the bolts through from the inside. I test mounted the speakers, and they will work great. I will need to be careful about carpeting, though, as the bolts really don't stick out very far. I may need to trim the carpet at the speaker edge rather than wrap through the hole. We'll see.

I then pulled the 6x9's out of the box and started test fitting the box into the trunk of the MGB. Post-assembly, the box is a smidgen taller than space would allow. Enter the Dremel again. I shaved down the front corners to fit under the fuel tank vent lines, and, after a couple hours of fiddling, I was able to get the box flush against the rear firewall. Once I had the box exactly where I liked it (dead center), I reached through with a Sharpie and marked where the 6x9's would need new cut-outs in the rear firewall. Recall that this firewall had been cut up pretty badly by the PO and I slapped together something to make it less crappy. Now, with these new holes, it is PO-level of crappy again. I'll need to do something eventually to make it nicer. Anyway, I cut along the Sharpie lines with my jig-saw. With the speakers back in the box, I set the box into the trunk against the firewall, wired up the speakers with the version 2 wires and tested the system.

We have sounds again. I spent most of a Saturday getting this far. I'll post next time on getting the rest ... or maybe just a little more headway... done. Thanks, as always, for following along-

Tuesday, September 4, 2018

MGB Gets Sound

Today's post starts my journey for sounds in the convertible. For my US readers, happy day-after-Labor-Day and welcome to the most productive period of the calendar year (which ends with Thanksgiving). I suspect my productivity with my project cars will be affected inversely, so my stream of posts may see some breaks along the way. On to the music-

Humble Beginnings

it was kinda like this upstairs...
Many years ago, I lived in a really sketchy area of Las Vegas. It was a 4-plex with 2 apartments up and two on the street level where our apartment was. We had bars on the windows, and crack vials greeting us every morning when we left through the heavy steel door, but the rent was cheap. And it was big. There were some folks living upstairs from us who decided to have a party with a punk band one night. As thick as the steel door was, the floors weren't, and we could clearly tell where the drummer was set up by watching the ceiling shake with his bass drum. As the clock ticked by, the band didn't let up, and the size of the crowd didn't seem to be shrinking either. By 3:AM, we had tried getting the attention of the renters upstairs, but our request to settle down was greeted with a middle finger. So, we went a different way. I took my bass cabinet, and set it on the coffee table, pointed at the ceiling underneath the center of the vibration. We routed the headphone jack from our stereo through an instrument patch cable into the bass cabinet input and played a version of "Passenger" that featured some HUGE Phil bombs (them be big blasts from the Grateful Dead bass man for those not in the know). By the second Phil bomb, the band had stopped. We had made our point... and I planted a seed in my brain for incredibly loud, but clean music. Could I do that in a car?

To Sub or Not To Sub
You gotta get that bass
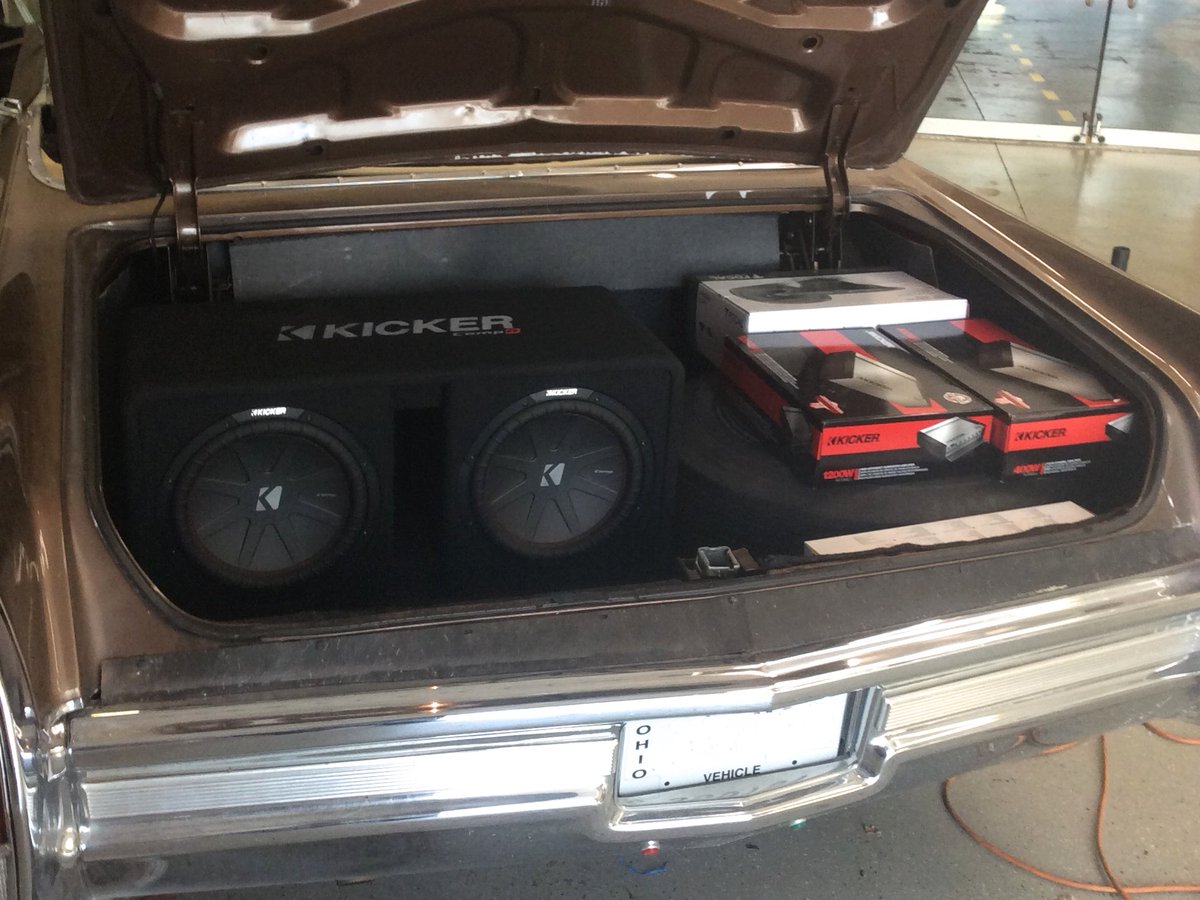
In thinking about sound in a convertible, you need to consider that the wind and road noise, even with the top up, is much louder than a tin-top. Once the top is down, the wind consumes sound. Of the various frequencies, the high-end cuts through, but the low and mid-range disappear. For a bass-lover, this creates a worst-case scenario: no lows. So, no Phil Bombs. For a larger convertible, like the caddy in the picture here, building in a sub-woofer is kind of a no-brainer. You gotta get that bass. With this little MGB, though, space is such a premium, how can a woofer get added and have it perform? We will start with a 10" sub, and then build a custom box.

Planning a Box
start with cardboard
There are a few free box configuration calculators on the internet, and some are very advanced (like this one), asking questions I don't understand. I stuck with something simple (this one): take the manufacturer's recommended enclosure space and build a box with that area in mind. The sub I'm looking at (JL Audio) requires .65 cubic feet of enclosed space, which is roughly 18" x 11" x 9". A box that big needs to go in the boot since the roadster has effectively no free space in the cabin. I figured that if I could keep it as tight against the trunk front wall (front-is-front), I could still manage a serviceable trunk.So, I started with a rectangle concept.

Apparently, directing your sub towards the rear creates the greatest decibels, so I incorporated that into the plan, pointing the sub towards the open trunk. I had intended to have 6x9 speakers in that area, though. From some older posts, you've probably seen the horizontal openings I left in that wall when I patched the PO hack-up. I wasn't able to duplicate that pattern while fitting a box because of the location of the gas tank vent lines. So, I modified the plan to include 6x9's mounted vertically to the front of the box. To allow for the sound to make it into the cabin effectively, I'll need to cut more of that wall.

I tried various plans, each with cardboard, cutting and shaping to fit into the trunk, between the hinges and under the gas vapor pipes. With each concept, I would test fit into the trunk and test the operation of the trunk lid, and consider how I was going to address the trunk light. When you think you have it, double check every measurement, and confirm the cardboard box sets as you envisioned. Then, buy a couple sheets of 2' x 4' 3/4" MDF, a bottle of carpenters glue, and some wood-screws that have at least an inch of thread and about an inch of no-thread closest to the head. The no-thread allows the screw to pull the sheets together while being tightened.

Build-a-Box
label the parts, directional arrows help
The actual cutting, drilling and glue/screwing together of a box sounds so simple. If you have good woodworking tools, it probably is. I have a circular saw, a hand drill and a jigsaw. Ideally, you would have a table saw a drill press and a band or scroll saw. The idea is the same, though with the hand tools it can take days versus hours. You've been warned. Anyway, take your confirmed measurements from the cardboard plan. With these outside dimensions, you need to account for the width of the MDF. Remove twice that width to account for it; and remove it from the shortest sides. For example, my box is wider than it is tall and taller than it is deep. So, for all dimensions which intersect with the sides, I removed 1-1/2 inches since this is the smallest piece. I also removed 1-1/2 inches from the long side. This way, the longest pieces don't have the visible seams. The research I did shows that this is the recommended way to do it. Double and triple check the measurements and mark which side of the line you want the saw blade to run against by marking an "X" on the waste side. Then start cutting. At the earliest opportunity, start test fitting pieces to each other, and then in the trunk.

way too many screws
Once everything is cut for size, test fit the whole box. Shave what needs to be shaved. Re-cut pieces if you need to. Then, plan your speaker hole(s). Since I don't have my sub-woofer in-hand yet, I did not cut or attach the rear side. I did plan for and cut the holes for the 6x9 speakers so they sit vertically, about 1/2" from the edges. Once they are front-mounted, there will be less than 3" protruding into the box, so I will add baffles around them, maximizing the area containing the sub. To assemble the box, pre-drill each mating side with 2 or 3 holes for the screws. Lay on the glue thick, set the pieces together and thread the screws in. The glue is really holding the sides together; the screws are really there for support so don't do as many as I did, it was way too much work and for no gain.. I assembled all sides except the rear and test fit against the trunk wall. The fit is just what I'd aimed for.

I stopped work on the box at this point so I could get a version one of a stereo installed. This also provided me time to pull together money for an amplifier and a sub-woofer. When I get back to it, I'll document it here.

Head Unit
the Sony MEX-M70BT
Regardless of whether I'm going to run a 5-channel amplifier or a 1-channel just for the sub, I need a stereo first. I looked at various units available on Crutchfield, but their site assumes that an MG can't fit a stereo that's deeper than about 4 inches. I tested that assumption with an old car stereo and it fit without issues. So, I ignored what Crutchfield said about fitment in the center console (I don't recommend ignoring them, they're pretty smart). Since this is a convertible, there is a higher probability of water getting near the unit. Also, there is the real problem with glare from sunlight. These are common problems with boat stereos, so I shifted my shopping to focus on boat stereos. This is when Crutchfield was very helpful; their reviews were critical. The JVC and Pioneer offerings were universally panned. The Sony (MEX-M70BT) had great reviews, plays all kinds of CD formats, includes hands-free Bluetooth phone call support, an iPhone app to control it -and- it is low-glare, marine, etc. All for under $120. Sold... to me by Crutchfield.

Version One
I wired both the always-on and switched power for the the stereo into an always-hot circuit, and set the stereo to auto-off 30 seconds after I remove the face. It's a convertible; I won't be leaving the face on it when I leave, but I don't want to drain the battery by leaving the ignition switched to run when I want to sit and listen to music somewhere. I can operate a power button regardless. I installed the 6x9's into the horizonal holes in the trunk wall, but ran wire long enough for me to plan an amp. I reused the existing front speakers, knowing that my 6-1/2" rounds will probably go into custom enclosures in the footwells... in a not-too-distant future version. This initial version was to get sounds into the convertible, while spending the least. With the stereo wired, speakers wired, antennae wired, it was ready to go, so I popped the positive cable back onto the battery and fired up the radio. Soundgarden always sounds good, but when playing through a new system, as the first song through that system, "Spoon Man" was just that much better.

That's it for today. I expect to get back to the speaker-box eventually. I think I'll be mounting the 6-1/2 inch speakers before that. I'm discovering that the driver door speaker was fried when I bought the car; now, I can hear it farting. Yuck, and... fade-to-rear. As always, thanks for following along-

Saturday, August 4, 2012

One Slammy of a Sammie

A few years back, I worked at one of those Internet startup companies.  I had a lofty title and a pile of worthless stock options.  My situation was pretty common in the computer business at the time.  As Wall Street started to figure out that most of these companies were glorified Ponzi-schemes, the one I worked for strove to stay open by moving out of our fancy downtown digs in the emerging "Pearl District" to a zoning experiment in Beaverton called "the Round".  Originally intended for condos, the 4 story building was virtually vacant a full year after completing the bones.  No one wanted to live there.  So, they dubbed it "office space", and we moved in.  Of course, it was still the days of perception, so lots of customization was done to the space including open stairways and the like.  Well, it was still an open sewer compared to our last location, with a junkyard out one window and an abandoned building out another.  When contrasted to the bustle of downtown hip Portland, I was less than impressed.  Driven to find something remarkable, I would foray out at lunch.  One of my greatest finds is the subject of today's post.

Beaverton Sub Station
Front Entrance of
Beaverton Sub Station
Situated against the train line that runs through the center of downtown old Beaverton, is perhaps the best sub shop in the greater Portland area.  Sure, there's Kornblats if you want specialty sandwiches, but for a pure sub-shop experience, there is none better than Beaverton Sub Shop.  Chuck, the owner and main behind-the-counter-operator, hails from Chicago.  From the Cubs hat to the quality of the meat, he's all-Chicago.  He has a thing for trains, and his decor reflects that interest and the rail-side location with pictures and artifacts from railroading.  Even the menu has a train-car metaphor.  6" sandwiches average around $5 and foot longs are around $10.  The rolls are huge.  The dressings remind me of the subs I used to get at the deli as a kid growing up in New York.  Very Yummy.  From the day I found them as an employee at an Internet startup thru today, I try to make the Beaverton Sub Station a regular stop.


Bus middle-seat Update
Yesterday, I drove over to Always VW and picked up some mounting rails for the middle-row seat I got in Eugene a few weeks ago.  Not knowing how they originally installed, I was glad to be there watching it get removed from the donor vehicle.  4 bolts hold the seat to the rails, 4 bolts hold the rails to the body.  Simple simple.  I'm assuming that the Vanagon has a set of nuts welded into the body, and I won't have that in the bus, so I'll need a buddy (or careful vice-grip use) to get the rails bolted in safely.  If I can suffer today's heat, I'll be removing the sink/stove unit and start looking at seat placement.  If things go well, maybe I'll have the seats in by the end of tomorrow.


Transaxling
Daryl at AA Transaxle in Seattle is just completing the transaxle rebuild.  I've had a few questions about what I'm doing for gearing, etc, so I'll lay that out here.  First, we started with a '75-only (CM code) transaxle.  It has a stock 4.86 final drive (ring & pinion) like the Vanagons do.  We're leaving 1st and 2nd gear alone. For 3rd, we are using an aftermarket, hardened 1.14 and we're pairing that with a .73 4th from the same company/family.  This combination should provide the right power (HP) to torque curve intersections.  I intend to run my stock 14" rims and rubber through the Summer.  If money appears, I'll slap some larger (in diameter) tires on the 15" rims I have in storage.  I may just wait for Winter and slap 15" snows on instead.  We'll see.  Regardless, the transaxle should appear this week, leaving me next weekend to get it installed if I'm going to run it down to Ashland for our family reunion.  It feels tight, but do-able.  I just need a place to do it, and to dig through my storage facility to get some specialized tools... like the ATV-jack adapter I built.


That's it for today.  Time to drink some coffee and get to pulling that sink/stove unit. I'll update with some pictures. Posting from an iPad doesn't seem to support uploading photos. Grr...