Showing posts with label middle seat. Show all posts

Tuesday, August 13, 2019

Making Hapy Sounds (Part 3)

continuing from the Part 2 post about getting music into Hapy the wonderbus. When we left off, we had front speakers installed and rear speakers floating around in their own little speakerboxes. The wiring for all speakers had been routed back behind the dash. For the front speakers, the work was mostly a finished product. The rear speakers, though, were still very much in an experimental phase. Today, we wire up the head unit and complete the work.

Head Unit Physical Mounting
You know how when you swap out a big car stereo (a double-din) for a smaller one (single-din) you usually install one of those plastic boxes in the extra hole? Well, I had one of those box/bin things in my garage, and it had been there for a few years. So, I figured I'd put it to use. Shortly before we left for 4Peaks, I stuffed it into the radio hole in Hapy. On the drive and while at 4Peaks, we loved the extra storage spot. On the drive, it was where we put our phones. While we slept, we put valuables there. So, I didn't want to remove it to put in a stereo. Honestly, it was jammed in there so hard, I'm not sure I could get it out without destroying it anyway. AND, there was nothing in that are to physically attach a stereo to anyway. The old DarkStar stereo was held on from the front. Modern stereos need something to attach a rectangular channel to, and there was nothing there in the bus to bolt it to. So, I popped it into the glovebox instead. It still needs a real mounting, but for version 1, it sits on top of the packing cardboard it shipped in. Will it bounce around? Maybe. Could I break the stereo because I didn't mount it properly? Absolutely. Blindly moving forward, I drilled a 3/4" hole into the driver-side of the box, near the back, to run wires. With the glove box closed, it looks like the bus doesn't have a stereo... like it hasn't for the 15 years I've owned it.

Head Unit Wiring
In retrospect, I could have started here. I am not going to Should on myself (see Don't Should on Yourself), but if I ever have a virgin stereo install to do again, I will. Consider: the 2 most important bits for a stereo install to be successful is for a solid ground and a reliable source of 12V power. One could just solve those 2 wires and confirm the stereo works and your power is good before you do anything else. Wise advice for a future me. Anyway, for a ground, I doubled-up on a o-ring-d ground that was screwed into the air vent box. I verified that ground was good with a continuity test back to the negative post on the battery. For power, I tapped into an always-on circuit but it did not have enough juice to power the stereo. The radio acted like it didn't have any power, though I could read 12V at the plug. So... let me back up and then I'll get back to this.

I wired ground first. Always do ground first. Then, I took the various speaker wires and mated them with their respective colored wires coming out of the stereo plug. I intend to swap these into something more like the plug in Oliver, but this is fine for version one. Last, I tapped into a 12V source, hiding the wire, etc. Then we test fire.... nothing. This is where ideally I would have run ground, and 12V to prove it will power up before doing anything else.
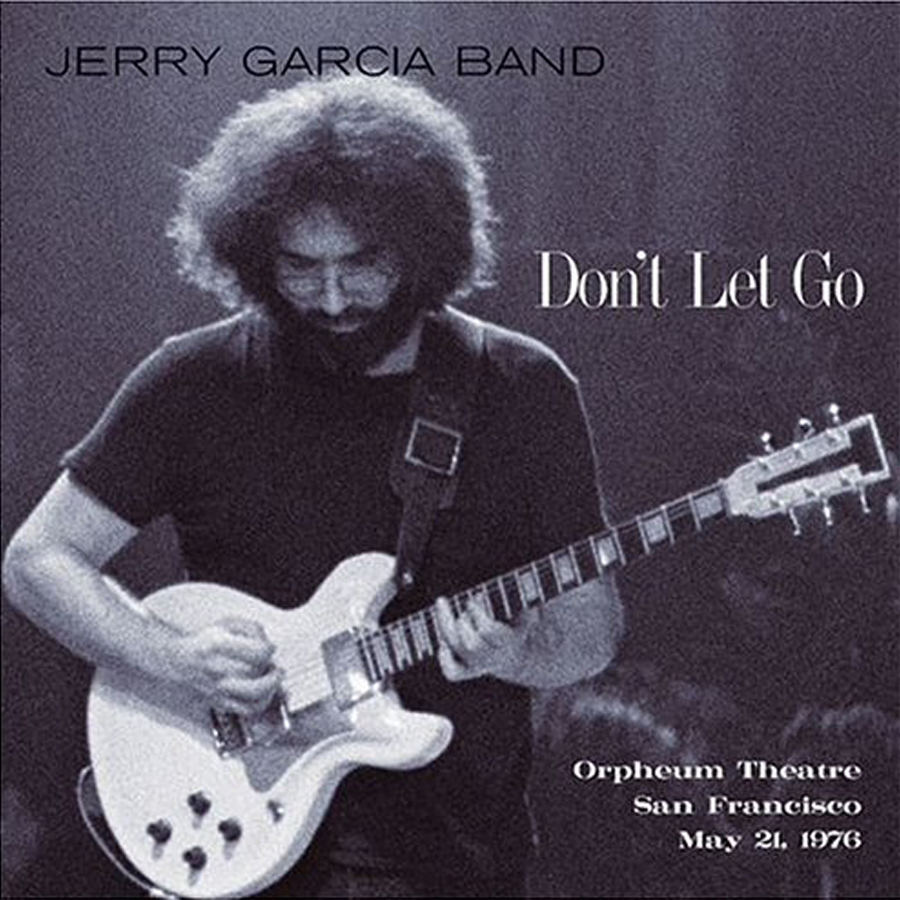
https://jerrygarcia.com/album/dont-let-go/
By now, it was getting late and I was getting tired and hungry. So, I ran a hot-lead from the luxury battery (our name for the deep cycle battery under the rock-n-roll bed that powers the lights and 12V sockets) to the back of the head unit strung across the lot couch, with a big coil bouncing between the front seats. It looked super-janky, but I needed to test whether the stereo would power up, and whether the speakers would respond. I plugged it in and heard the CD whir, so I knew I had power. So, I grabbed Boo and our copy of JGB's Don't Let Go CD for a test-listen before we both called it a day.

The smile produced by a JGB "Sugaree" is virtually a given, especially from the mid-70's era. That smile was compounded by hearing it coming from all around us in Hapy. "How loud does it get," Boo asked. She remembers our struggles to hear on the road as acutely as I do. Turning it louder and louder... it never distorted. Pure Jerry deliciousness pouring out of the speakers, hugging us with music until we were unable to talk over it. Yeah, that'll do.

12V Source Fixed
We shut things down, and I cleaned up my mess for the night. The following morning, I was back out there to run a 12V lead from the luxury fusebox to the stereo. This sounds simple, but it took quite some doing. I started at the glovebox, running a stiff 12ga wire through the hole and down behind the front "floor" vent. It runs below the TDI accelerator pedal (See Pedal on the Right) and under the rubber floor mat to the right edge of the driver seat pedestal. It runs along the right edge of that pedestal and under the old seat mounts for the 1972 Westy rear-facing seat, under slides for the lot-couch / middle-row seat and under the front edge of the rock-n-roll bed cabinet. It appears behind the cabinet near the corner by the refer-storage cabinet. I wired it into "fuse #12", protected with a 16amp fuse. I layered tape on top of the wire where it intersected with the lot couch slides to we don't accidentally catch that wire when putting the couch back in. That would be bad.

Once I had the new 12V supply line set, I re-tested. All good. I took the opportunity to tuck away some other errant wires up front. That's it for today. Version one is ready for some test drives and a festival or camping trip before we make any modifications or harden wiring to the rear. Thanks, as always, for following along-

Wednesday, June 3, 2015

Putting it to Bed

By now, most of the hard parts had been completed. Today's post covers the final bits and pieces, putting the project to bed, so to speak.

Rock 'n' Roll
bed, before
With the bare floor painted grey, the first of the last phase was getting the rock 'n' roll bed in. I'd pulled the contents out prior to its removal, but the bed is still pretty hard to move around by yourself. Still, with a mixture of dragging and heaving, I got the bed up and into place... without making the floor look too shabby in the process. Since the floor no longer had wood sheeting on top of it, getting the bed to align with the holes on the top of the engine bay wasn't quite as easy. It found it's home, though, and I was even able to get the little 2-bolt bit from the passenger tire well to slide home.

In the Light
Under the bed fits the auxiliary fuse box and battery. While in previous incarnations of this set up the battery powered a few different things, all it powers now are lights and 12V adapters. I already touched on some of this effort in an earlier post (see bump bump bump under "Cabin Lights"). Once locked in, I could move on to the refer cabinet.

bed, after
The Crunge
The fridge cabinet had previously just floated around, but I hadn't known that until removal day. Between removing the rear closet and the stove/sink, it held in place through simple inertia. There is supposed to be a bolt that threads into the fridge from the bed. That's now back in place and the cabinet is locked in tight. Between the fusebox and getting this cabinet in place, there were some wire-management issues too, but they're all well routed now, so no furniture is sitting on top of a wire. I still need to get the shore-power capable of charging the battery or simply feeding the lights and such, but that's something for another day.

Kashmir
middle seat in
We're getting near the end. I put in the rails for the middle row seat, following the holes and some blurry photos I took from the prior install. Without the wood floor in place, it seemed like the rails synch down tighter, but really, they were just lower, making the placement of the seat in the rails a little harder. After first just setting the rails in and finding that they were too close together for an easy fit, I took another tack. With the bolts in finger-tight, I tapped the rails as far apart as I could make them. Then, tightened them down for a fit. The seat slides in as easily as it used to (which isn't all that easy). I may need to Lithium grease the rails so the seat goes on easier.

In the middle picture, you can see that I've covered the rear driver-side window. I posted in "Whatcha Hiding?" about the screens I made a few screens to cover that window. As a final preparation, I painted the side that faces the inside of the bus with the same grey paint.

Well, that's really it for getting the bus back together. I was able to get it all done before the Memorial Day weekend so I'll post on that next time.

Saturday, August 17, 2013

Rack 'em, Snow Bum

Sure, I know its August.  Yep, most folks are taking vacations or at the least thinking about the sweltering heat.  Even here in usually-temperate Oregon, the humidity has been over 65% (which is downright humid for these parts in August).  Sweaty.  It reminds me of my old lawn-mowing days in upstate New York with 80%+ humidity, 80*+ temps.  To combat the weight of the dog-day heat, I think cool thoughts.  T and I will talk about the drop into the bowl on the Thunder run at Timberline or Ski Bowl's Lower Surprise trail.  It's funny how talking about losing an edge and cartwheeling downhill in deep powder can cool you off.  I spent yesterday afternoon in my 90* garage building a ski/board rack for the bus.  I'll detail that today.  Stay cool my friends.  2013-2014 Fusion season passes go on sale in less than 3 weeks (Sept 3rd!).

Starting with What?
thinking about it
The bus was a 1972 Westy when I first bought it.  It ran a 1700CC air-cooled non-original engine with a Weber 32/36 Progressive carb, 009 dizzy and a worthless heat-exchanger exhaust (65HP, 18mpg @best).  It had the original 1972 Westvalia interior and canvas bellowed pop-top.  Today, it runs a 1.9L TDI from a 1998 New Beetle (90+HP, 30mpg).  Inside, it has the rock-n-roll bed, rear closet and refer cabinet from a '79 Westy plus a middle row seat from a Vanagon.  Up top, it has a 1972 Riviera (straight up) poptop and bed.  That may sound crowded inside, and it can be.  Since I've been working on the engine, I have had the rear closet (left side with a front-facing door and cubicles at the rear) out of the bus and sitting in the garage.  This leaves the engine electronics, which sit in the spare wheel well, exposed.  I have a solution for that, but that's for another day.  Anyway, I started looking at the 14" gap between the left side wall and the middle row / rear seat, thinking.... "couldn't we put our ski stuff there?"....

Think, Measure, Think
aligning the rails
I started simply by setting a shoe box on top of the refer cabinet and putting my snowboard on top.  Surely I could make something work there.  I grabbed a set of skis and held them above.  "Yep, I should be able to make 3 racks, each holding either 2 boards or 2 sets of ski's," I thought.  The racks need to be far enough apart so snowboard bindings fit between them, but close enough together so our youngest ski's fit.  That last part proved too much, but he needs new planks anyway, so it should all work out.  Holding the ski's in the air, I made pencil marks on the wall to give me a sense as to where the rails should sit.
I wanted the rack to have some give, so I chose to connect the rails to the side supports with hinges rather than angle braces.  On the other end, I thumb-screwed eye-hooks so we could pull one-to-all of the racks upwards, suspended from another eye-hook in the ceiling by a length of chain.  I haven't completed that part yet.  Last, the equipment needs to stay put.  To address that, I replaced one hinge wood-screw on each rail with a eye-hook bolt run through to the bottom.  On each rail, a 12" bungee is attached from hinge eye-hook to rail-end eye-hook.  I am waiting for the arrival of some bath-tub tread material that I will apply to the rails to make it complete.
parts list

Material List
2 6' lengths of 1x3 cedar for the side supports and rails.
3 packs of 2" utility hinges (2 in each pack)
3 packs of #8-32 x 1-5/8" eye-bolts (2 in each pack)
3 packs of #208 Screw Eyes (2 in each pack) - for rail ends
1 pack of #206 Screw Eyes (2 in pack) - for ceiling
1 8-pack of mini bungee's
some #10 washers

Cuts and Drills
I started with a clean-up cuts on the ends of the cedar.  Lumber yards don't make perfect square cuts, so this is always a good idea.  I cut 2 24" long pieces for the supports and 6 12" long pieces for the rails.  I set one of the supports against the sidewall to consider rail placement.  To make it simple, I pressed the support against the headliner support.  I transferred the pencil marks on the wall to the support. Recognizing that we need 9" between each rail (our tallest binding was 4-1/2"), I lined up the rails 9" apart, adjusting the pencil marks.  Once I had a plan, I set the support back against the wall, held the rails up to see how it would feel.  Then, I pre-drilled the holes for the hinges (making one on each rail large enough for the eye-bolt) and assembled.  I also pre-drilled holes at the top and bottom for wall-mounting.

Installation
testing installation
Once the rack was put together, I wanted to see it in-place.  I discovered that the bottom rail was so low that I had to remove the eye-bolt so the hinge would open enough for me to access the mounting holes.  Hmm.. opportunity for model improvement.. I pre-drilled one hole in the wall and mounted the rack with a 1" sheet metal screw.  This held the rack in place so I could pre-drill the remaining holes without the rack slipping.
A test installation wouldn't be complete without filling it with snow equipment.  I put 2 boards (mine and T's) on the bottom rack, 2 sets of ski's (K's and C's) and Boo's set on the top rack.  K2 gets new-to-us ski's this year, so I left his off.  With the bungee's, the equipment sits well.  I will apply bathtub treads to help hold things in place, but it looks like the passengers will be comfortable and safe, and the equipment a-fixed.

That's it for today.  I still have some clean-up to do, but in just 4 hours this went from concept to installed.  We may use the racks as garage wall-mounts too.  Each one attaches with 4 screws.  Neat.  More next time, and thanks for following along-

Friday, August 10, 2012

Vanagon Seat Install

Today starts my vacation, yet I'm getting one last post in before I go.  I wanted to give an update on both the Vanagon loveseat as well as the transaxle.  I've kinda wasted the afternoon, so I'll probably keep this short.

Love Seat
what goes with green/blue plaid,
grey, white, and blue?
Why, TAN of course!
Ok, maybe calling it a loveseat is a bit much.  Its a tan 2-seater bench seat from a brown Vanagon.  Once installed, I'll have a '79 Westy folding bed seat, front seats from a '74 and a bench seat from a Vanagon.  It will be a true franken-bus.  Sue me.  I'll be able to carry 5 people (plus me driving), and camp once we get there.  Try that with a stock VW bus.  Anyway, on to the progress report.  In order to fit the bench, I had to pull the stove/sink unit.  That cabinet now adorns my living room floor, but it makes ample room for the loveseat.  Once I made space, I aligned the rails with the seat by aligning the seat mount holes with the mounts within the rails.  I then duct-taped them together and put the whole operation into the bus.  With some wriggling, I set the spot front-to-back by lowering the folding bed and putting the bench up against it.  My thinking was that I may want or need to carry something long while also carrying some folks.  I was able to carry my entertainment center on that folded down section before.  Now I'll be able to bring 3 friends to help me move it.  Last time, I could only bring 1 friend... and he wasn't exactly thrilled at that prospect.

rear left rail location
westy fridge cabinet in
upper right corner
I marked up the wood floor with pencil so I knew where to put the rails and then pulled the seat out again.  Remove the rails from the seat and set the rails back in place.  I then set to measuring all over the place so I was sure that any hole I drilled in the floor wouldn't hit the radiator, the supports, the main front-to-back beams, the brake lines, etc.  I managed to miss everything important on my first try.  Hazah!  I drilled out 6 holes to 3/8" and wrenched bolts through.  From the underside, I lock-washered and nutted the bolts down. Last, I re-inserted the seat the "normal" way by sliding the seat onto the mounted rails.  Done.  All told, it took a few hours, but I move slow.

Transaxle
Well, we're behind schedule a little bit on the transaxle.  The CM code transaxle used the early gear sets and Daryl only had the later sets on hand.  With one of his guys out sick (or following a band around the country), he was behind schedule anyway, so this just put us a few more days out.  Unfortunately, those few days are probably the diffeence between having the new transaxle in time for the trip to Southern Oregon and not.  So, the bus may not go.  We'll see.  If the transaxle arrives tomorrow, there's still time.  I need a few days to do the work (see: I move slow) and we leave in the middle of next week.  Sigh.  So close and yet not quite close enough.
right edge of seat & slider

That's it for today.  The next time we go for a spin, we can carry the whole family.  We'll just be travelling at a max speed of 52MPH for now.  More next time and thanks for following along.

Saturday, August 4, 2012

One Slammy of a Sammie

A few years back, I worked at one of those Internet startup companies.  I had a lofty title and a pile of worthless stock options.  My situation was pretty common in the computer business at the time.  As Wall Street started to figure out that most of these companies were glorified Ponzi-schemes, the one I worked for strove to stay open by moving out of our fancy downtown digs in the emerging "Pearl District" to a zoning experiment in Beaverton called "the Round".  Originally intended for condos, the 4 story building was virtually vacant a full year after completing the bones.  No one wanted to live there.  So, they dubbed it "office space", and we moved in.  Of course, it was still the days of perception, so lots of customization was done to the space including open stairways and the like.  Well, it was still an open sewer compared to our last location, with a junkyard out one window and an abandoned building out another.  When contrasted to the bustle of downtown hip Portland, I was less than impressed.  Driven to find something remarkable, I would foray out at lunch.  One of my greatest finds is the subject of today's post.

Beaverton Sub Station
Front Entrance of
Beaverton Sub Station
Situated against the train line that runs through the center of downtown old Beaverton, is perhaps the best sub shop in the greater Portland area.  Sure, there's Kornblats if you want specialty sandwiches, but for a pure sub-shop experience, there is none better than Beaverton Sub Shop.  Chuck, the owner and main behind-the-counter-operator, hails from Chicago.  From the Cubs hat to the quality of the meat, he's all-Chicago.  He has a thing for trains, and his decor reflects that interest and the rail-side location with pictures and artifacts from railroading.  Even the menu has a train-car metaphor.  6" sandwiches average around $5 and foot longs are around $10.  The rolls are huge.  The dressings remind me of the subs I used to get at the deli as a kid growing up in New York.  Very Yummy.  From the day I found them as an employee at an Internet startup thru today, I try to make the Beaverton Sub Station a regular stop.


Bus middle-seat Update
Yesterday, I drove over to Always VW and picked up some mounting rails for the middle-row seat I got in Eugene a few weeks ago.  Not knowing how they originally installed, I was glad to be there watching it get removed from the donor vehicle.  4 bolts hold the seat to the rails, 4 bolts hold the rails to the body.  Simple simple.  I'm assuming that the Vanagon has a set of nuts welded into the body, and I won't have that in the bus, so I'll need a buddy (or careful vice-grip use) to get the rails bolted in safely.  If I can suffer today's heat, I'll be removing the sink/stove unit and start looking at seat placement.  If things go well, maybe I'll have the seats in by the end of tomorrow.


Transaxling
Daryl at AA Transaxle in Seattle is just completing the transaxle rebuild.  I've had a few questions about what I'm doing for gearing, etc, so I'll lay that out here.  First, we started with a '75-only (CM code) transaxle.  It has a stock 4.86 final drive (ring & pinion) like the Vanagons do.  We're leaving 1st and 2nd gear alone. For 3rd, we are using an aftermarket, hardened 1.14 and we're pairing that with a .73 4th from the same company/family.  This combination should provide the right power (HP) to torque curve intersections.  I intend to run my stock 14" rims and rubber through the Summer.  If money appears, I'll slap some larger (in diameter) tires on the 15" rims I have in storage.  I may just wait for Winter and slap 15" snows on instead.  We'll see.  Regardless, the transaxle should appear this week, leaving me next weekend to get it installed if I'm going to run it down to Ashland for our family reunion.  It feels tight, but do-able.  I just need a place to do it, and to dig through my storage facility to get some specialized tools... like the ATV-jack adapter I built.


That's it for today.  Time to drink some coffee and get to pulling that sink/stove unit. I'll update with some pictures. Posting from an iPad doesn't seem to support uploading photos. Grr...

Friday, July 27, 2012

Enter Summer, exit posting

Yes, I'm alive. Like so many folks in the Pacific NorthWest, once Summer weather arrived, I stopped using the computer when I wasn't working, and got to playing. I do have some personal and bus updates, though, so I'll bang that out before pouring myself a welcome-to-weekend mojito.

Housing
just making a point...
As much as the news folks talk about how "bad" the real estate market is value-wise for sellers, it is very hard to find a good deal as a buyer. When I moved out of my townhouse apartment in mid-March, I started looking for a house, agent and mortgage lender and all. Within a month, I had an offer on a house, but between the banks holding the mortgages getting in the way, that house is still unsold. My offer expired, and I restarted it, but in the few days between, someone else got into the bank's radar system and they're in first position now. Apparently banks think serially, and can only address one offer at a time.  Fun. It's a good thing other businesses don't operate that way.  So, I offered on another house. And another. And another. All told, I've laid offers on 5 or 6 houses now. Most of them still haven't been sold and my offers just expired along the way. I think I just may get this last one, though. I put an offer on it in late May. Yes, that's right, late May. I have been extending and re-extending on this one.  I've been told that I might expect an acceptance of my offer by the end of next week, or early August.  I'll post a picture when that happens, so until then, here's a generic "Bank Owned" sign.  Yeah, like that's gonna get you to place an offer on it.  Prepare for weeks of no contact from the selling bank, and make your offer expiration date something you can live with, yet recognizing that the bank will not get it together within 60 days of you popping an offer on it.

So, how much of the real estate market / housing problem is being created banks who can't get it together? Had this been a normal deal, I would have gotten an accept, decline or counter-offer within a few days. By the bank adding in the 10 extra weeks, it looks like the houses are staying on the market an extra 70 days. That makes the market look falsely bad, like you can't sell a house because it's still dropping in value. The truth is, the market is coming back, based on what I'm seeing in terms of buyer traffic, but with the banks extending the process by literally months, it paints a different picture. One the news folks continue to hawk on the nightly's.

Microbus slightly too micro
note the overhang
I've been trying to figure out a way to fit 6 passengers into the bus, so we can take the whole family in one car. Boo and I toyed with the idea of buying something just for this reason, but cars are just too dang expensive. I said, "with a small fraction that money, we could get the bus to do it."  So, while Boo drove my TDI Jetta to Montana with her 2 boys, I drove her car to Eugene to get a free (yes, $0) middle-row Vanagon bench seat. When I got it home, I did what anyone would do: try to fit it. Fail. From the edge of the Westfalia sink/stove unit to the edge of the sliding door is 39". The width of the benchseat with the cushions scrunched is closer to 42" (see overhang picture on the right). Add on 3-4 inches for the arms, and it totally won't fit.... with the sink/stove unit in place. I intend to pull the sink/stove to fit the bench seat, and build a new cabinet that's just 16" deep (or 7" less deep than the Westy one). Then, the seat will fit, and when removed at a campsite (or ski resort parking lot), the cabinet can be usable. I will probably forgo the stove, and only do a splash sink with a wide counter where we could use a Coleman portable stove instead.

Microbus to get macro-speed
upper frame width pushes
lower frame away from cabinet
Last, I finally have arranged for a new transaxle from AA Tansaxle in Seattle. Daryl and I have figured out the details, and he will be starting the construction on Monday. If all goes well, it will be crated for shipping by the following Friday. Then, I'll just need to find a spot to drop the existing engine/transaxle, remove the old tranny, attached the new one and re-install. (note to self: get a new throw-out bearing just in case) Dropping the engine/transaxle isn't hard, but mating a new transaxle while leaving the engine under the bus may be. Remember how far over to the side I needed to tilt the undressed, un-oiled, no coolant engine to get it under the rear valence? I wouldn't want to try that with the fluids in, nor with all the other parts attached. Better to just separate and mate under the belly of the bus. Lots of muscling ahead, I'm sure. I'll post pictures, etc.

That's it for now. With Summer in full swing, I doubt I'll be online too much. I'll try to get better about it. I have a big road trip to Ashland planned, if all goes well, maybe the bus will go too....