Showing posts with label flash. Show all posts

Tuesday, March 8, 2022

ToyoTruck Saga Continues

Earlier, I posted about a new arrival to the fleet (a 2006 Toyota Tacoma XRunner) and the smash into a post that followed. Today's post is the next step in that saga. 
 
Where Were We
front assembled
We got a $5k repair estimate, but insurance wouldn't pay (because the agent screwed up). So, I ordered the parts, and set about doing the work myself. With supply issues, it took an incredible amount of time for everything to arrive and the largest part, the hood, arrived with a big dent in it. I successfully replaced the fender, the 6-piece bumper and the fender liner. The radio antenna was so corroded, it could not be removed, so I had to replace it as well. The hood scoop was also degraded, so I ordered another one of those. I ended the post while waiting for supply chains to support a new hood, as well as deliver the replacement passenger-side flare and the hood scoop.

Hood Gets Hammered
I decided I could no longer wait for parts while the new truck occupied my best work bay (read: prevented me from working on Hapy). Besides, there was no way to know how long it would be before a new dent-free hood would be available again. So, I decided that I would do my best to get the old hood straight enough to fit without putting pressure on the new fender nor passenger front headlight. I started with my angle grinder, removing the remaining paint from the dented area. The leading edge of the hood had been crumpled under, against a lateral bulge that rests just rearward of that edge, along the underside of the hood (see the picture on the right). Since the lip was forced against that bulge, I was unable to get a tool between the two.
the damage from the underside

I started with the stud welder and a slide hammer kit I got from Harbor Freight when I started working on Zed (1978 280ZX). With the 2mm tip and studs, I was able to slowly move the leading edge of the hood away from the lateral bulge. After about 30 minutes, and a dozen studs, the edge had pulled back far enough for me to fit a dull chisel against the leading edge. By moving the chisel up and down the lip, giving it a few smacks every few millimeters, I was able to further shift the edge away.

Once the edge had been moved about a finger-width from the bulge, I started shifting from the hammer/chisel on the lip to the stud welder / slide hammer on the top of the hood and back. My hope was that I could get some of the original hood contour back while I got the edge pulled. I spent about 90 minutes in total before I felt that it was close enough to set on the truck to see how close I was getting.

Old Hood Finish Up
time to try fitting
I was satisfied enough with the hammer work to move the windshield washer hoses and the seal. I figured that if I was as close as I'd hoped, I wouldn't want to remove the hood simply to put these bits on it. Like so many things, the first time always takes longer than any subsequent attempt. I had the bits moved in minutes. The hood set quickly as well. Some cars have a great deal of adjust-ability when the hood is mounted, but this truck does not. Yes, there is some, but not more than an inch left-to-right at the front edge. I did not need much to get the hood evenly spaced between the fenders, though.

Similar to the hood removal, I set the front of the hood on my old plastic tool box so I could get to the hinge bolts. Before I slammed the hood down, I checked the height between the headlight and the hood edge on both the driver and passenger sides to make sure I wouldn't break the light housing. I found that I had over compensated with my hammering, but only by 1 or 2mm. I started a recurring cycle of identifying where the gap was, opening the hood, adjusting, and re-closing the hood. After 4 or 5 of these cycles, I was satisfied that it was good enough for now.

finished enough
The stud-welder took it's toll on the hood, however. Some of the studs were welded on so well, that my efforts with the slide hammer resulted in a small hole in the hood. I own that, though: I believe that I held the trigger a touch too long on those studs, setting too strong of a weld. Some of the other studs would not come off no matter how hard I hammered them. I ultimately had to cut them off, but there were bits left behind. So, I pulled out the angle grinder again, and ground the dent-damaged areas of the hood smooth to the touch. I shot the polished metal with some rattle-can automotive primer and then some basic black Rustoleum. The final-for-now product is pictured on the right. That passenger flare will be installed when it arrives. I haven't decided about the scoop insert.

Weeks Later, It's Done
At this point, I felt done enough with this project. Yes, some part of what I put together will need to come back apart for painting and when the passenger side wheel flare arrives, I will attach it. One day, I hope to have a better hood, and when that day comes I need to install the scoop insert as well. Since I would like to have the whole truck painted, I may take it to Beaverton Auto Body and have them do it. We already have a somewhat dated estimate, but at least we know what ballpark they are in. Of course, with inflation these days plus all the extra parts expenses I incurred, a re-shoot could be prohibitively expensive. Expensive enough to bring that work right back to my driveway to be shot in my home-made "booth" later. Oddly enough, the extra parts (scoop insert, p-side flare, and antenna) plus a second and future $500 hood still will still be less in parts than the Beaverton Auto Parts bid. And that number includes a hood I can't use, and I have not tried to sell off any parts I got and did not actually need.

That's it for today. I will return to the hood when I get one, and otherwise I will be focusing on Hapy again. Thanks, as always, for following along-

Tuesday, March 1, 2022

Enter ToyoTruck

Super long post today, and I still didn't get the project all the way done in one post. I did get most of the way, though, and I'll wrap it up next time. For today, I'll hit some background first, and then get into the adventure with this new-to-us truck. Since this started on Christmas 2021 and today is the first of March 2022, clearly this has been quite a saga. At the rate this is progressing, it will be competed mid-Summer.

Background - the setup
example image
When C returned for winter break from University, he left his car ('09 Subie) on campus. He needed a car while he was home so he could get to work, but we have a significantly reduced the operable fleet (sold Flash, sold K'Lack). So, we borrowed-as-a-prelude-to-buy Boo's sister Rose's Toyota Tacoma X-Runner. I am referring it ToyoTruck for now, though the interweb folks often call these "taco's". I suspect it will get a better name when it presents iteself. Rose has an older Ford truck that is getting a new engine swapped in, so this Toyota was kind of extra anyway. Clearly, having extra cars around is a family thing for us, and with the rehab we plan on doing on this house, having a pickup readily available for supply runs will be valuable. Anyway, C arrived home a few days before Christmas, just in time for some radical winter weather. We got snow, and ice, and more snow, some sleet, and melting followed by freezing. It was a full-blown winter stew. We let C use Boo's '09 Audi A4 (all wheel drive, newer M&S tires, etc) while Boo drove ToyoTruck. ToyoTruck is rear-wheel drive with mostly-worn-down summer highway tires. That would have been fine if it weren't for the winter weather. With Boo's new schedule, she has to report by 7:AM, which means leaving well before dawn, and right about at the overnight low temperature. This lead to a Christmas morning (yes, she worked Christmas morning) sliding-on-the-ice scenario which ended with the truck smacking a pole. The passenger fender, the bumper cover, passenger headlight, passenger fog light, the leading corner of the hood and some assorted little bits all were affected by the very low speed impact. The damage seemed minimal enough that Boo continued on to work. It wasn't until the next day that we got to access the damage in the daylight.

How Does that Insurance Commercial Go Again?
after post-smack
In the daylight, it looked pretty twisted, but it is mostly surface damage. I took a bunch of pictures and we tried to get a claim going with our insurance company. Turns out that insurance goes with the car, not the driver, so we needed to use Rose's insurance. We learned this while we were getting bids (~$5k) on the work. This is where insurance got interesting: even though Rose told Allstate she wanted "full coverage" the agent pulled a massive boner and failed to include collision (pays for damage to your car). How that meets the definition of "full coverage", I don't know, but I swear this feels like one of their ads... where they say the competitor will leave you hanging with a tagline like "if you don't have Allstate...". It appears that the Allstate ad is actually self-describing. Maybe their ad should be more like "if you let our agents do it, you're gonna get screwed". So, to sum this up: we borrowed a truck, slid into a pole causing ~$5k worth of damage and there's no insurance to fix it. Happy Christmas.

Paulie: Bodyman
Fast Times Camaro
To resolve, I tried my best Spicoli imitation: "Relax, all right? My old man is a television repairman, he's got this ultimate set of tools. I can fix it." Of course, the next scene in that movie (Fast Times at Ridgemont High) has that car, unrepaired, but tagged with Ridgemont sucks / Lincoln rules spray-paint. Instead of that, I'm actually going to repair it. I took the itemized bid and ordered all of the parts the body shop said needed to be replaced from CarParts.com. This cost about $1300US delivered. The bid had the parts for around $2k, so we are already ahead in the game. I will simply remove and install the parts I received, and hope I discover nothing else is wrong. The labor for the body panel removal/replacement was $900US. So, if I can get the truck back into one piece, I will have saved over half the bid. At $900US, using my usual price for my labor ($50/hr for simple math), I break even at 18 hours. On its surface, I think I can get way under that. I had a great experience with CarParts.com, by the way. The bumper cover was wrapped in thick plastic wrap inside a huge box and the fender was made-in-Taiwan steel double-wrapped in custom cardboard protecting it plus packing material between the wrapped fender and the box sides. The packaging of the headlights was equally protective. Some of the shipping, however, was spotty. We can credit GLS for losing and then claiming delivery of almost half the order. Ultimately, they got the parts to me, 2 weeks after they said they were delivered. That final delivery was curious in that the box appeared without a text nor email update, though I had been set up for both. Sneakily done, GLS.
 
Finally, with all the parts I had ordered in my garage, I was ready to get started. I had finally gotten the 2016 Sprinter seats installed into Hapy (See Hapy Seating Part 2), so I could shuffle vehicles around. Hapy went back into the driveway and ToyoTruck moved under the canopy so I can work out of the rain.

Body Panel Removals
2 replacement bits in
I started by removing the front grill, fog lights and bumper cover. Then, I pulled the headlights and removed the fender, leaving the hood for last. The grill is held to the top of the radiator support with 3 Phillips screws across the top. Down below, the electrical plugs for the fog lights are simple tab-lock plugs. Since I am replacing the fog-lights with the bumper, I left the old lights in the old bumper. For reference, just press the tabs and they wiggle out. With the plugs out, the fog lights can push through the bumper (after pressing inwards on the plastic retaining tabs). The bumper cover is held on with plastic push-on tabs across the top as well as a few from underneath. These pop free with a slotted screwdriver. Since they are 15+ years old, they will often fail on removal. There are also a few 10mm screws as well, all from below. The ends of the bumper cover tie into the inner wheel well plastic, but eventually, once the last fastener is free, the bumper just wiggles free.

I next removed the under-headlight trim bits. There is a small plastic push-on thing, like the ones that held the bumper cover, on the inside that attaches the trim bit to the headlight, but the rest of it just clicks into place... or out of place. The headlights are held in place with long Phillips-head bolts from the top, and 2 more on the sides (one connects to the lower radiator support, the other through the side of the fender). The lights unplug, but if they are stubborn, the bulbs which are not the main beam twist out with a 90* twist. Then, the plug can be wrestled free. The last big thing to remove is the fender itself. There are obvious bolts from above, but there is one hidden in the door jam near the top and one from the outside just rear of the wheel well. Of course, before final removal, the inner wheel well needs to be removed, and the antenna needs to be dealt with.
 
super-glued tabs on the flare 


The Inevitable Annoying Bits
The antenna and the inner wheel well skin are the worst part of this parts exchange. The antenna had become heavily oxidized and corroded, completely freezing the top nut. I ultimately broke-off the lower antenna mast so I could continue and ordered a top-to-bottom replacement, adding another $140US to the parts costs. Even on my garage floor, I was unable to separate the antenna bit from the bent fender.

The plastic inner wheel well is held in place by ribbed plastic clips along the inner edge and in a couple spots in the middle. Along the outer edge of the fender, the fender, the inner wheel well and the outer faring (flare) are held together with Phillips/10mm screws. When the truck hit the pole, the 3 top mount points along the outer faring / flare all broke. I did not realize that until I was removing things. Rather than order a replacement ($130US plus delivery), I collected the mounting ears and super-glued them back onto the flare as shown in the picture. Once the superglue had set up, the tabs did not wiggle. Since they broke off so cleanly, I could see their original pitch. So, I simply matched that and held the tabs for a 15 count as the glue set.

With the big parts out of the way, we can see where the little bits that Beaverton Auto Body suggested replacing. There is a small plastic bit that looks like a tiny fist with the hole in it that is Phillips-screwed to the fender. This holds the edge of the bumper in the right spot relative to the fender. There are 2 long thin brackets which support the top and bottom of the bumper cover (and lower leading edge of the fender) which were definitely tweaked. The small triangular bit that attaches to the passenger-side front (front is front) of the radiator support, extends forward to the other end of the long thin bracket, had a subtle twist to it. All of these attach with 10mm bolts, and you can see them installed in the picture above captioned "2 replacement bits in". They are the ones with big white labels.

Start Re-Assembly
windshield washer lines pre-removal
I started with the small bits: the triangular bracket first, and then the support bracket on the passenger side. I decided that the driver side bracket was untouched by the accident, so replacement was unnecessary. I swapped out the driver-side headlight next, re-using the original under-headlight trim bit since it was undamaged. Then, I tackled the fender. It is surprising how much faster install can be when you know where the fasteners go. I started with the 2 most difficult: the one on the bottom, heading straight in from the outside, and the one from inside the door. The bottom bolt is really only difficult because of all the extra lower body trim that appears on the XRunner needs to be loosened and held out of the way. I fear that I will need to completely remove all of the panels on that side because of all the dirt and sand I found in there when I took it apart. That dirt/sand may prevent a clean, tight install. Anyway, with the hard bolts in, I ran the bolts in along the top edge and then the front pair into the new bracket. I am not thrilled with the gap along the hood, but I will concern myself with that once the new hood goes on. It is possible that the hood got tweaked beyond just the small dent in the front corner.

After the fender, I installed the passenger-side headlight and the replacement under-trim. Other than cannibalize plastic fasteners from the bent and broken old body panels, this was as far as I could get at this point. I ordered a set of plastic snap-fasteners, but they had not arrived yet. Also, I had not planned for the antenna, so I could not completely button-up the fender and wheel well anyway. Yes, I could have stopped the post here...

The Hood
only disconnect needed
I was able to source everything, except the hood, from CarParts.com. For the hood, I turned to eBay, and got burned with a hood that arrived with a dent. My cursory inspection upon delivery did not detect that the passenger side had a couple of bashes in it under the cardboard wrap. I had checked the other 3 sides, so lesson learned here: completely unwrap the entire thing before you sign. I didn't know the pair of dents were there until I went to install it after installing the inner wheel skin down below, sadly. So, if I want a clean hood, I will order, pay, wait for and move-bits onto a second hood. FFS. Of course, with the supply chain issues around the world, there is a very small set of these hoods in the western US. In fact, according to the local Toyota dealer, there aren't any.
 
Obviously, the hood is held to the truck by 2 large hinges. Additionally, the windshield washer nozzles are in the hood. There are a few other things to transfer to the new hood, so I simply disconnected the washer hose and removed the bolts to free the hood. Then, I set the old hood next to the new hood in my garage. Piece by piece, with the puppy (Tuukka) watching, I moved the washer nozzles, bits of hose, the sealing rubber bits and the front rubber feet. Those feet are pretty interesting: they are solid rubber and thread in. You set the height of the closed hood by turning them clock or anti-clock wise. Very clever design.
 
There is a sealing strip that runs along the rear edge of the hood, held on by little plastic fasteners. I was able to free them without damaging them by using a door panel removal tool. I expected the washer nozzles and hose to the the hard part, with the scoop insert to be a breeze. It was the opposite, with the hose retainer plastic bits and the washer nozzles popping off with only a little difficulty, but remaining intact for reuse. These bits are held in place by little plastic barbs that need to be pinched in for removal. I used a slotted screwdriver, working one side and then the other until each one was free.

Hood Scoop Insert
The hood scoop insert, however, has seen better days. The mounting studs all backed out of the scoop, rather than allow the nuts to back off the stud. The 2 front studs would not separate from the old hood at all, and last, during install into the new hood, it cracked. This plastic is over 15 years old, and based on the damaged paint on the top of the vehicle and the sand I found in the wheel liner, I think we can conclude that this truck lived at the beach for a while, getting salt water on it while driving on the wet sand. I suspect it was parked outside mostly, as well, further accelerating the aging of the exterior. I will accordingly reset expectations for any other exterior bits I touch going forward.

I ordered a replacement hood scoop insert (another $140US for parts), and started considering doing a complete respray of this thing once the damage has been resolved. Of course, with the way I have to keep buying parts, that respray may need to wait a while. Meanwhile, I was in a holding pattern waiting for parts... and I was looking for a hood, again. Yes, I could have stopped the post here as well.

The Bumper
dry-fitting the bumper
The bumper cover / assembly is actually 6 distinct plastic bits: the main bumper cover, of course, a decorative center piece below the grill, 2 end pieces and 2 lower valences (split in the middle). Of these parts, we damaged 3: the main cover, the passenger-side valence and passenger-side end. All of these parts are held together with these blue wedge-like plastic clips. I was able to salvage all but one (which disappeared), which tells us just how slow moving the crash was. While I waited for parts, I re-assembled the bumper bits, excluding the decorative center. I had thought that I could paint the bumper as an assembly, but, I realized that I would need to take it all apart to install the decorative bit anyway, so I will be taking this all apart to shoot it. Of course, I put all this together mentally after I had put the bumper together physically. LOLs.

Still, by having the bumper bits together, I could dry-fit the front end together. Also, this reduced a big pile of parts in my small garage, and it helped me understand what bits I could sell-off, and which I still needed. For example, I discovered that there are little rubber strips between the main bumper cover and both the lower valences and the end bits. In the upper dry-fit picture, you can see the old valences on the ground below. A keen eye could see the rubber seals on top. I will be re-claiming those rubber bits before I dispose of the broken plastic parts. As you can also see. I have not removed the protective film from the lights yet; no need to tempt fate.

More Parts Arrive...
dry-fitting with the grille
After another week of waiting, things I ordered during the tear-down / re-assembly started to appear on my doorstep. So, I got back to it, starting with the antenna.
 
The antenna arrives with a stretch of cable that's about 1/2 a meter long with a pair of mounting clips already attached. This cable passes through the side wall and the fire wall up behind the glove box, and then runs up into the A pillar where it plugs into another cable. This seems like a strange design, but it's how it is. To access everything, the glove box needs to come out and the passenger grab handle needs to come out. There are a couple of plastic retaining clips that need to be popped (the OEM replacement antenna arrives with new clips) and then it is ready for removal. I attached a string to the end of the antenna cable and pulled it out through the side wall. I moved the string from the old cable to the new and pulled the string, bringing the cable along the original path.
 
The plastic tabs were in the right spots, and they popped in. The one in the rear of the picture below was a little difficult, but only because it is in a hard-to-get-to spot. I found by getting the front edge of the clip (front is front) first, allowed me to put pressure on the rear edge with a slotted screwdriver, snapping it home. Once the cable was in, the panels were installed in the order I removed them. The leading edge of the A-pillar trim inserts into a slot on the edge of the dash (seen in picture below) while the upper end has a tab that also fits into a slot: idiot-proof. The grab handle only fits into the A-pillar trim one way, and, because of the tabs, the mounting bolts align without effort. Inside the fender, the cable has a rubber grommet to seal the pass-thru hole. The top of the lower mast is then passed up into the hole in the fender and the lower end is bolted to a mounting tab with a 10mm bolt. After all the wrestling with German over-engineering, I really like this Japanese design. I feel like the Tacoma was built with owner maintenance in mind. I finished up the antenna on top of the fender with the outer rubber bit and nut and then threaded on the upper mast.

The Inner Wheel Well
installing antenna
All I had left was the inner wheel well, but I didn't explain the assembly of the rest of the bumper. As I mentioned earlier, I assembled the bumper, but I needed the bits to mount it. This was a straight-forward matter of using the plastic snap-clips where they belonged, and using the 10mm screws where they belonged. Since I failed to take quality pictures during tear-down, this was not as smooth as it could have been. Still, it all went together, leaving the passenger side wheel well. I purchased a replacement inner skin because I saw that the original had been damaged in the accident. The new liner was an exact match, and fitting it was not as terrible as installing on the old Jettas, but it was pretty close. These plastic liner things are the absolute worst. I did the outer edge last, simply because this edge also held the flare in place and I felt trying to juggle 3 things which were not in any way attached was at least one too many. The inner edge was straightforward: set the plastic skin where it is supposed to be and slam the plastic bit through the holes. The challenge for me was getting the square holes in the skin to consistently align with the square holes in the under-body.

With the skin now held in place by a handful of plastic bits, the outer edge was easier. I started at rear bottom and worked my way up. Again, having pictures would have been helpful so I could confidently set the skin / fender / flare stack correctly. Absent that, I just considered where water would go. So, I put the inner skin "outside" the fender along the rear edge for the first 3 fasteners (block water kick-up from the tires from getting inside fender) and at a cut-out transitioned it "inside" (so water drips from above don't run under the inner skin). At this point, I attempted to mount the fender flare. The super glue repair I described above failed almost immediately, so I shifted to the hood.... at which point I discovered the dents and my progress halted again.
 
I am going to halt this post here, and pick it up in another one. This has gotten very long, matching the saga, and the truck is still not in one piece. And, again, I'm waiting for parts.

Thanks for following along and more next time-

Tuesday, July 13, 2021

Flash Departs

Quick post today. Unrelated to the usual car stuff, my older son, T, reported to the fire line this morning, starting his forest fire-fighting season almost a month earlier this year than last. Currently, the Bootleg fire on the Oregon-California border is 0% contained, has doubled in size over the last 48 hours, and threatens the main electricity transmission lines from Oregon power suppliers to California power consumers. That is just one of 8 fires south of Eugene, where he deploys. I feel both pride and concern for his well-being, knowing that he will be among the hundreds of fire fighters dedicated to containing the threat this summer. On to cars...

Zed Update
I do continue the body work on Zed, but there is little to highlight about it that I haven't already mentioned. My last post was about re-shooting the high-build primer. Since then, I sanded the shell and all of the various body parts with 320-grit. Once completed, I shop-vacuum'd all of the dust and then felt for wobbles for more another round of body filler. This time, I tried something a little different that I hadn't read online: chalk. I took a bar of chalk the kids used to use on the sidewalks and slide the flat edge along the body panels. Wherever the chalk would disappear, there was a small dent or crease/scratch that I had not found before. After going over all of the body panels, I found a couple dozen small imperfections. Considering how much I've worked on this car, I had hoped for better. Still, I persist. I expect I will get these fixed in a few Bondo cycles (read: until I'm satisfied) and then I will set up for urethane primer to seal everything. The body kit has still not arrived, so this saga has still a few chapters left in it.

When a Friend Asks for Help
The highlight around the Zed bodywork was the unexpected departure of Flash, my 2001 TDI Jetta. Since the pandemic started, Flash hasn't really seen much use. I work from home now (driving much less), and with the now mostly-operable fleet, he hasn't seen much action, sitting still while I go for spins in the bus or Nemo or Boo's new-to-her 2009 A4. A few weeks ago, Boo and I were at a family event. Our niece and significant other were detailing a hit-and-run incident they were subjected to, resulting in their commuter car getting totaled. Their other "car" is a big diesel truck needed for their construction business. While it is a great truck, the mileage sucks and it is a poor match for longer drives or A-to-B runs that do not include hauling stuff. So, Boo and I offered up Flash to them. They are familiar with and like diesels. They have a project VW Beetle, so understand VW's. In preparation, I re-installed the Panzer-plate (5 17mm bolts) that I had removed when I was planning to install it onto K'Lack, which is also on long-term loan / rent-to-buy to a family member. Turned out, K'Lack rides higher than Flash, and our niece's place has rougher roads, so Flash is the right place for the plate, since I only had one.

You Help Them
They were recently local, visiting in their big hauler pickup truck, and dropped by to collect Flash with a U-Haul flatbed car-hauler. Flash could absolutely have made the drive to their place, but they like riding together, and have the ability to tow, so why not? In classic Flash form, he pulled onto the trailer without incident. Because of the low front bumper, we needed to remove it so it would not get hung-up on the front of the trailer when Flash was backed off. There are 4 Torx bolts that hold it on at the nose, and, if your car is all in one piece, there are a few screws from the wheel wells. The front bumper cover went into the bed of the pickup, and we inched Flash forward the last little bit. The U-Haul flatbed car-hauler have straps to cinch the front wheels down, and they secured Flash into place. With the ramps set back into their respective slots, Flash was ready for his next adventure. He arrived at his new home without incident.

Actual ownership is blurry; this is a try-before exercise. Also, Flash will need to have his timing belt replaced in the next few months so he will be visiting our friend Justin before the rains return. Net-net, Flash is not completely gone, but it sure felt like it when I watched him trailer away.

The Zed body work continues, but it is not terribly photogenic nor are there any really new learnings coming from it. It is just a lot of hours of work. Accordingly, posts will continue to be sporadic until I shoot the urethane primer and get into the base color or the body kit shows up. Thanks, as always, for following along. 

Tuesday, April 13, 2021

Injector-Go-Round (Part 2)

Today, we continue and complete the efforts to get old used stock injectors from Hapy to work in Flash, and then brand new higher-performance injectors installed into Hapy. Fun with injectors starts.... now.

Injector-Go-Round
Now comes the fun part. With the wedged-nut extractor tool I mentioned in part 1 (See Injector-Go-Round Part 1), I pulled the injectors out of Hapy, Then, I pulled the old injectors out of Flash and installed Hapy's old injectors into Flash. That sentence took less than 10 seconds to type, and I feared it would take all weekend to do. It was actually fairly uneventful and quick. On Friday night, I set myself up by putting Hapy and Flash near one another, and then shooting the injectors where they enter the head with the trusty old Kroil penetrating oil. The next morning, I cleaned around the injector-to-head points, took my slap-together injector puller / slide hammer and all 8 injectors popped out with little effort. Seriously, each injector took fewer than 5 pops with the slide-hammer, and none of the "pops" had much force at all behind them. Honestly, I was being gentle because I didn't want the wedged nut to fall off the hammer. So, I held the slide between my index finger and my thumb and gently pop-pop-popped, moving the slide less than 4 inches each time with a flick of my wrist. I think the Kroil really helped, though I expect there will be some who bristle at the thought of letting some penetrating oil slip into the engine. 

I carefully arrayed the brackets, bolts and washers (excepting the one I lost) so I could re-install them in the same spots. In Hapy, I left the injectors loose, but still in their respective holes while I completed the extract on Flash, cleaned the holes and the head mating surface. Then, in one move, I pulled the injectors from Hapy, carried them across the driveway like a cat's cradle and set them into Flash's head. Ideally, I would have replaced the copper crush-washers on the injectors, but I didn't have replacements on hand, and this was the day I had to do this. *Dumb short-cut actually taking more time warning*

The install of the new-to-Flash injectors was fairly straightforward. Once the injectors were set in, I cleaned each bracket, rested it into place, and then lightly threaded the bolt through. Once I had all 4 in place, I threaded them down finger tight. I plugged in the 3rd-injector plug, set the glow-plug harness under the hard-lines and then re-connected the hard-lines to the tops of the injectors, but only barely threaded on. Once the lines are in the right spot, the compression fittings on the pump can be tightened down. Then, I wrenched down the brackets to around 10 foot-pounds (spec says ~15), snapped the glow-plug harness onto the glow-plugs and connected the return line to the injection pump.

Drift, Torque, Repeat
At this point, I test-cranked the engine to force air out of the hard-lines. There are a few ways to do this, of course, and the video I mentioned in part 1 is as good a way as any. He did the injectors in pairs while I did them one at a time, tightening the hardline at the injector end as each injector-to-hardline point spat out fuel. My one-at-a-time method moves from injector to injector based on the way they are connected to the injection pump: closest-to-the-ground one first, highest one last. My thinking is that any air in the pump will work its way up that way. By the time I was on the last injector, the engine was trying to fire.

I got that last line done, and Flash started right up. I could see some vapor puff-puff-puffing above the head, and could hear a "psst-psst-psst" noise, so I knew there was a leak. Boo helped me here, by jumping into the driver-seat and starting the engine while I looked and felt for the leak. It was around the #2 injector, but not at the hard-line mate point. It was around the injector near the head. Engine off, I grabbed a socket extension to use as a drift. I lightly smacked either side of the #2 injector bracket near the injector. Then, I re-torqued the bolt. I was surprised by how much more I could turn the bolt (like 3/4 a turn), so I repeated the process on the other 3, and continued to do this until the bolts torqued down at 15 ft-lbs and would not accept more after more drift-smacks.

This process worked very well. When we test fired it again, Flash started right up, made no funny noises (nor puffs of vaporized fuel) and ran strong during the test drive. The biggest indicator of our success was the near-immediate start the following morning and no cloud of smoke. He had been getting harder and harder to start in the morning. I now conclude that his old injectors were leaking (evidence of that was found upon their removal, as they leaked all over the paper shopping bag I set them on), and the fuel system needed to prime every morning, causing the long hard-start effort. I decided to change his oil immediately, while waiting for the delivery of the new injectors from KermaTDI.

Priming the Injection Pump
During the oil change, I discovered that the #2 injector had actually leaked at the head again during the test drive, and concluded that replacing the copper crush-washers (or injector seals) is not optional. I got a replacement set from the local parts store (not DIP, still bummed about that) and re-did the removal / install. This time, I did a pair of injectors at a time, starting with #1 and #2. Oddly enough, the injector pump lost it's prime in the few minutes the system was open this time. Half as many injectors, loosened the lines less and it still lost prime when it didn't the last time when I did all 4. Ah well; just shows that luck is a factor. With the MityVac, I applied vacuum on the low-pressure return side (no more than 7 pounds so the seals inside the pump were never in jeopardy, and more vacuum would not have tangibly sped the process) of the injection pump until fuel appeared in the MityVac collection cup. Then, I buttoned things up, cleared the hard-lines of air by cracking the connections one at a time (bottom to top, like above) until Flash started. Again, I see no puffs, but I did the #3 and #4 injector seals anyway. Fool me once. After letting Flash sit for a few days, he lost prime again.

So, I ran another round of MityVac priming and got him running. I let him sit an idle while I got a really close look at the injectors. I noticed that #1 had fuel appearing around the injector mount-point into the head. The #1 injector is unique in that it has a cap on one of the return bibs. That cap was leaking. I didn't have a real one, so I made one from low pressure hose and a bolt. This helped, so after letting Flash sit for a few days he would start, albeit roughly. Believing that the low-pressure return lines I moved from Hapy were no longer viable, I considered my options for replacement.

Hapy Injected
Once KermaTDI had the injectors set up, they FedEx'd them over with a new set of copper seals. They arrived mid-week, but with the dicey weather, I waited to until the weekend so I could have a nice big block of time. Hapy's head had been cleaned when the old ones were pulled and I had stuffed rags into the injector holes so it would stay clean. With the injectors in-hand, I could at least prepare them for install by removing the "T" fitting from Flash's old #3 injector, and moving the low-pressure return lines onto the replacement set. The kit from KermaTDI delivered with brand new low-pressure return lines so the set up of the injectors was that much easier. With the injectors set up, and a new weekend day, I followed the same process I did with Flash, except for skipping the test-start parts. I am having issues with Hapy's ECU, so this is as far as I could really get.

I'll describe the test-drive once I have Hapy buttoned back up. Between then and now, I need to get his ECU sorted but at least the exhaust is back on. There's never a shortage of things to do. Couldn't be Hapy-er.

Thanks, as always, for following along.

Tuesday, March 23, 2021

Injector-Go-Round (Part 1)

I got back outside and started playing on the TDI's (Hapy the camperbus and Flash the daily Jetta) as the weather has been somewhat hospitable, though not consistently so. Since Hapy is running so well (still no codes, accelerator responding as one would expect, etc.), I decided to step up his injectors and get that Malone Tune I had dreamed about for years. In contrast, Flash has been making a plume of black smoke when he starts in the morning (after a long start cycle), so I figured his injectors had gotten pretty clogged up. My thinking: I can upgrade Hapy's injectors and put his under-100k miles injectors onto Flash to extend his life. Today's post is about picking, and removing injectors. I'm still perfecting both Flash and Hapy injector installs, so I'll post part 2 on that once at least one of them is running right. Good times.

Injector Selector
PowerPlus 764
For the uninitiated, like me, the world of diesel injectors or nozzles is cloudy and the choices not clear. For one thing, the manufacturers all suffer with varying quality because of their efforts to get them constructed at lower costs. As is true with any market, there are always new players. Some new players build good stuff, but have little recognition. Others are simply trying to turn a dime and build garbage, but have flashy advertisements. Like I said, all markets are like this, but for a product about which you know little, how do you avoid overpaying or getting garbage? This is where your trusted vendors are so important. For TDI stuff, I go to KermaTDI and IDParts first and then some others like PartsPlace or TuneMyEuro to see what they are selling. When they are all selling the same subset of the market, you can be fairly sure those are the better quality-to-price. In many cases, your greatest gains from an injector upgrade require an ECU tune, a turbo upgrade, or both. Regardless, my research indicates that they need to be balanced / pressure checked / set-up or you will probably not get the performance you were expecting.

To help me through the maze, I worked with the folks at Malone Tuning and researched my 2 usual forums: TDIClub and VWVortex. There really is nothing better than true end-user feedback, but in most cases, the folks who replaced their injectors were going from clapped-out original stock injectors to something new, so, of course, they worked way better. And, they only did that one set ever, so they only had the old crappy ones to compare against. Still, the forums helped steer me where KermaTDI and TuneMyEuro were already taking me: Bozio injectors are the market leaders right now, but even they have quality issues. So, having them set up will best ensure a high-performing set. I decided to have mine set-up by our friends at KermaTDI since that brought with it better guarantees and some things are just best done as a unit.

DLC 1019
I spent considerable time toggling back and forth between the DLC1019 and the PowerPlus764. I ultimately went with the PP764, but, in retrospect, they are both great injector nozzles from everything I have read. Here is another write-up of the PP764. Both injectors appear to have the DLC protective coatings that extend the nozzle life against lower quality and low-sulfur fuel. Knowing that the quality of diesel fuel varies across the country, this is important. The PP764 also has hardened surfaces, etc. to extend its life relative to the stock injectors (the DLC1019 probably does as well), and have a higher upside in terms of HP potential with additional upgrades. Ultimately, the TDIClub seems to feel that the PP764 may produce more smoke, but more power than the 1019, but again, as in so many things, your mileage may vary, and with all the other variables at play, it is very hard to distinguish between these nozzles... except for which one can handle larger modifications: the PP764.

I had Kerma set them up at the lowest "pop" stage, so they are fairly tame, which parallels the stock-for-now turbo. I should be able to replace the original VNT-15 turbo with a stock-in-some-VW's VNT-17 and the PP764 injector set up can remain the same. The 1019 may not embrace the higher boost as well as the PP764. Again.. who really knows? This feels like a job for MotorTrend's Engine Masters, if they ever give a whiff about performance in otherwise not monster engines... and diesels in general.

Injector Removal
still from KermaTDI vid
I had a rain-free, beautiful Saturday morning, with a forecast for decent March weather (read: spotty rain) all weekend, so I had my opening. KermaTDI co-hosts a great video on YouTube for how to remove / replace the injectors which I mostly followed. So, I am not going to go through all those steps in great depth here. Instead, I will highlight what I found particularly interesting. In the video, the glow-plug harness was removed at the very beginning. It was easier to remove once the injector hard-lines were moved out of the way. Getting a good angle on the bottom compression fittings on the injector pump was difficult, but not impossible, especially during initial removal. With the hard-lines out of the way, for the Hapy removal, I then had to remove the vacuum ball and the bracket holding it to the head in order to get to the clips for the 3rd injector plug-wire. This bracket did not interfere with the plug in Flash, but his plug was very difficult to get out of the bracket. With that unplugged, I shifted to the injector-hold-down brackets. On Hapy, I lost concentration for a second and pulled the bolt out of the 4th injector bracket independent of the bracket, causing the dished washer to disappear into the engine bay. This momentary lapse cost me some time searching.

I never found that washer, but it was nowhere near the injector so I moved on. Finding a single replacement washer took some time, though. For posterity, it is either part number N0231312 or N0237314. With the brackets removed, the injectors would not budge (no surprise). So, I cleaned up around them as much as I could with brake cleaner and a slotted screwdriver, getting as much black gunk off as I could. I felt this would minimize the risk of that hard yuck falling into the open injector port once the injector came out. I applied a short burst of Kroil penetrating oil around each of the injector-to-head mating surfaces to help in the extraction.

Injector Removal Tool
no worky
The injector has a M14-1.5 thread where the hard line injector fitting attaches. Metalnerd makes a slide-hammer specific for removing this injector that threads right on. As of this writing, they cost around $45US. Back when I was working on the dents on Zed (the 1978 Datsun 280ZX), I got one of those stud welder / dent slide hammer kits from Harbor Freight. This kit includes a 2-pound slide hammer with a single thread-on attachment that is designed to grab onto one of those studs. The thread on the slide hammer is M14-2. Soooo close to the injector thread, but not. I would rather re-use a tool in-hand rather than buy another rare-use tool. So, I got 2 nuts from the hardware store (M14-1.5 and M14-2) and JB Weld'd them together. I would have Mig welded, but welder one I used on Oliver's floors has disappeared into the tool collective of Travis' friends and I didn't want to wait. Besides, I'm not sure welding these nuts would have been a slam-dunk anyway. Turned out, the JBWeld failed on the first injector, so my tool became just the one M14-1.5 nut: I force-wedged it onto the slide-hammer and threaded the other end into the injectors. Yes, this cross-threaded the nut at the slide-hammer end, but it served it's purpose.

I'm going to stop here, and pick up the actual removal and install experience in the next post. Like I said above, the removals were actually quite easy. Like so many things, destruction is easy; construction is hard.

Gramps Clutch
Unrelated, I mentioned the clutch replacement for Gramps (2-dot-slow Jetta 3) a few weeks back when I was considering what work to do next. K2 decided that he wanted to hire that out, so we called up Courtney over at MobilePdx. We have called on these guys a few times over the years when our workload was more than we wanted to handle at once, and they have never disappointed. He and his guys (Lou and Joe) knocked it out, replacing the clutch, flywheel (old clutch blue'd the friction surface), throw-out bearing, the throw-out bearing cover, etc. Before they started the tear-down, the engine got a de-greasing. Once everything was apart, they replaced the rear main seal on the engine. With everything clean, they were able to lubricate things (like the shift linkage), and confirm the oil leak was the rear main seal. All in, it was a ton of work, but Gramps is running like a champ again. And, he is no longer marking his spot every time he parks. Thanks MobilePDX!

Last, an early shout-out to my local-to-NW Oregon friends: Hapy turns 50 on 3-September-2021, so to celebrate, we will be camping at LL Stub Stewart State Park that weekend. If you have little else to do for US Labor Day weekend, we (Hapy, Boo and I) would love to see you.

Thanks, as always, for following along and I'll post again once at least one of the 2 injector beneficiaries is running right.

Tuesday, November 3, 2020

Bondo Sand Repeat

Back months ago, I said something like "you're never really ready for paint", and that's because we generally get in our own way. Today's meandering post is about how I am refusing to accept the prep and start shooting primer. Of course, the temperatures running below the recommended by the paint manufacturer isn't helping.

For those of you in the US, today is Election Day. While so many are focused on the Presidential race, there are many races and measures on the ballot that could impact your life more directly. I hope you took the time to vote, and are here reading this as an escape from election coverage. I know I look at my cars as an opportunity for respite, away from the challenges of every day life (or political bs). This blog is absolutely a part of that, and I'll leave it at that.

Bondo Zed
I had a whole post not too long ago about how I thought I was done with the body work on Zed only to do some more. Well, since then, I just can't let it go. I keep finding little things, and I can't let them go. So, I whip up another batch, apply, sand and recheck. I have lost track of how many cycles I have done, but I would like to think that I'm learning along the way. Since I don't know how well the hi-build primer is going to fix things, I may be overdoing things. Regardless, one of my motivators is my color choice for the finished product.

Color Thinking
silver Datsun 280ZX from wikipedia
I spent a few hours looking at pictures of 280ZX's, trying to land on a color. I entered the search with something in mind, but I wanted to see what these cars looked like in a finished state. I also recognized that the darker the paint color, and the higher the gloss, the more imperfections in the paint prep are visible. So, if you go with a dark dark black with a super high gloss so you could, potentially, see a clear reflection from feet away. The prep work needs to be perfect for a color and finish like that. At the other end of that spectrum, if you paint a low-sheen white or off-white, the little misses are not as obvious. I have found a dirty white car looks cleaner than a dirty black car too, but I digress. So, if your vehicle looks good in white or cream or light yellow and it's your first paint job (or you don't have a lot of time), the minor things may not be nearly as visible if you go with one of those colors. So, what do I mean by "minor things"?

Minor Misses
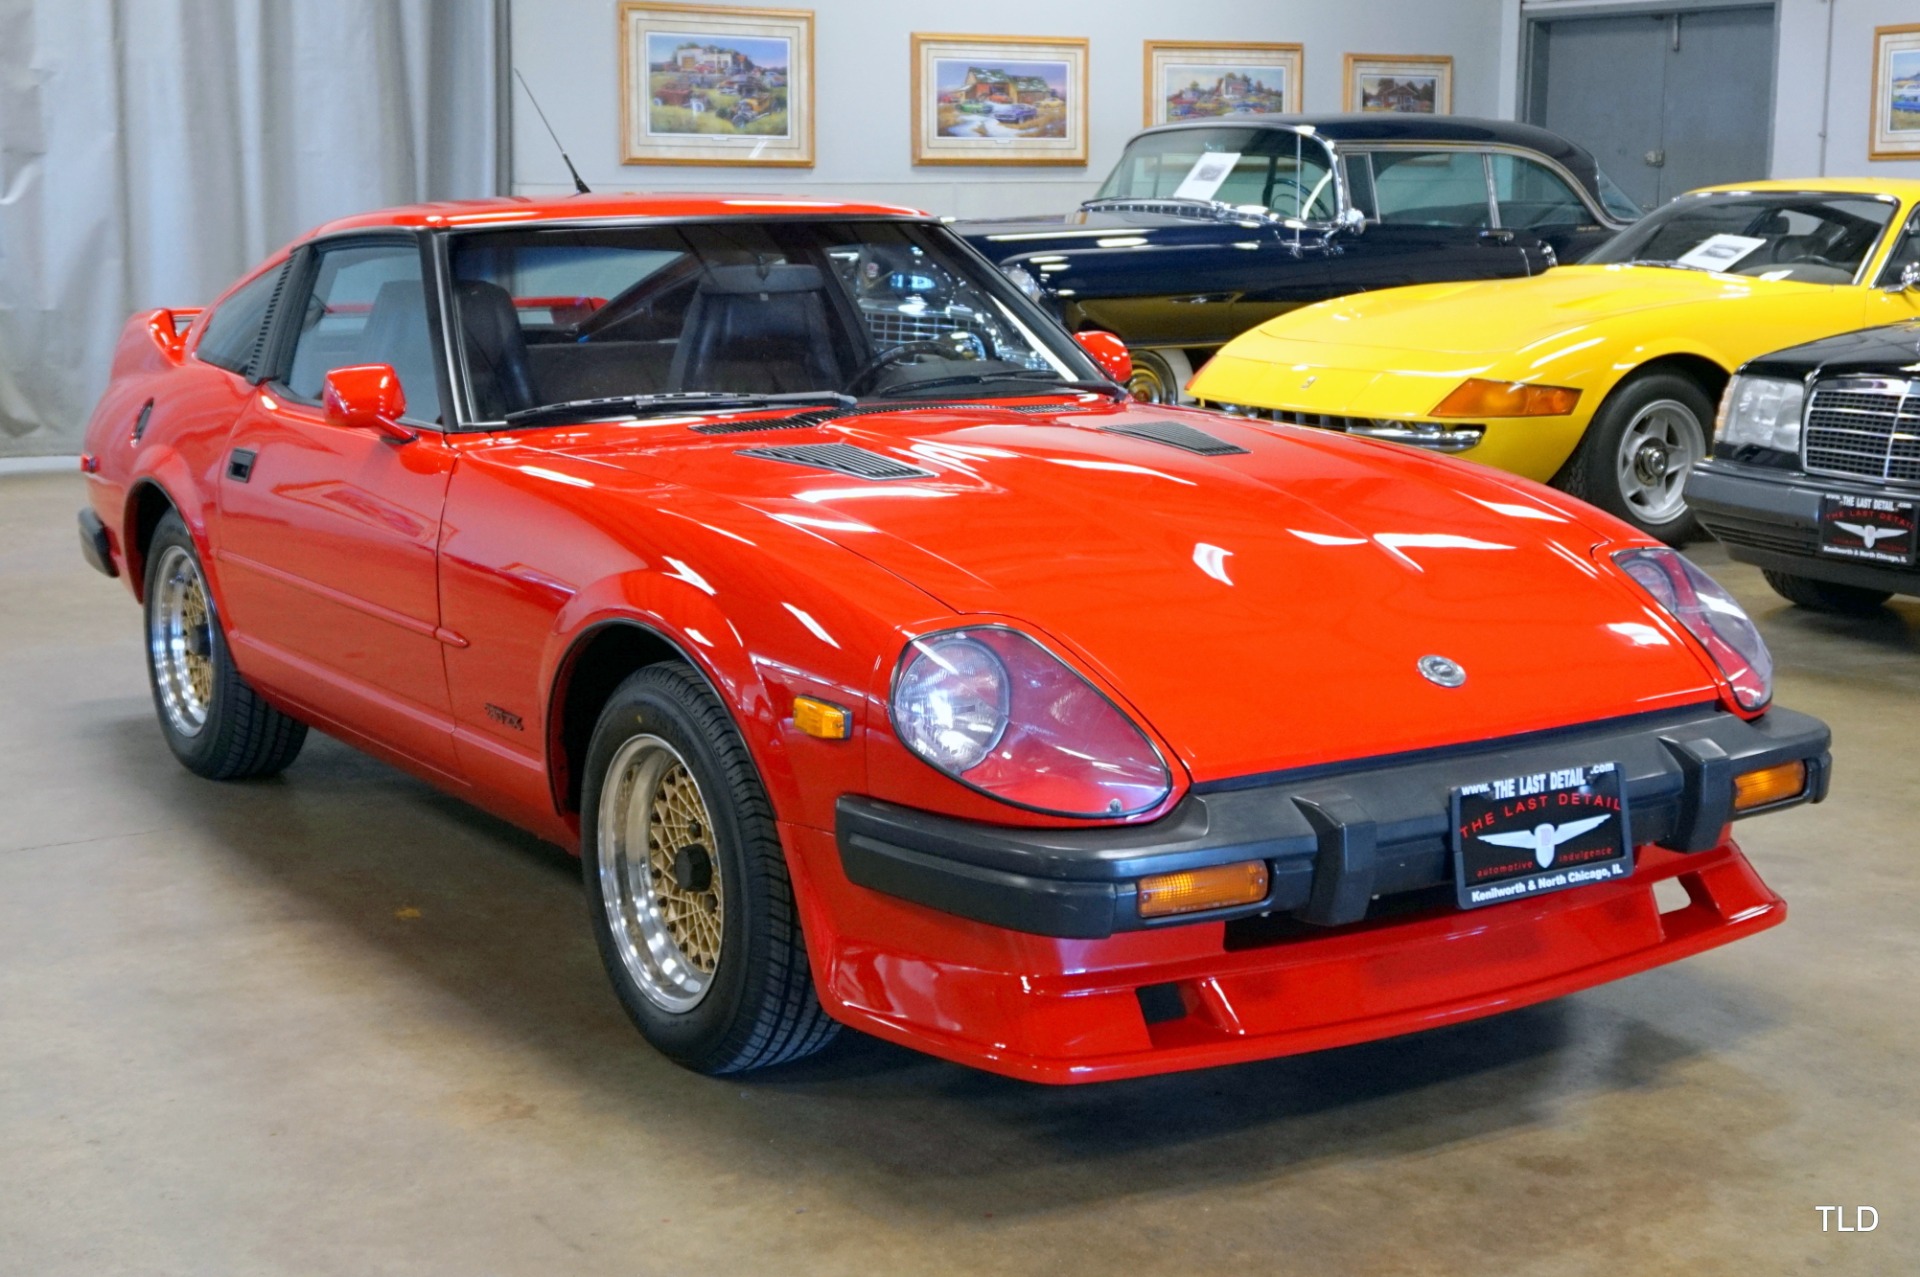
red Datsun 280ZX
all cars look good in red
The kinds of things I am finding during these last rounds with the Zed are varied. One example is larger, but very shallow indentations in an otherwise straight panel. For example, on the hood, there are multiple little sags in the metal that look almost like they appeared because a child sat on the hood and it depressed a little bit. If the hood was painted flat black, would it show? Probably not too much, but I have done my best to minimize those shallow sags. I have also found very small, but deep chips in the steel. They almost look like someone took a jeweler's screwdriver and stabbed the panel. Multiple times. These could have been filled by the hi-build 2k primer, but I fixed them with bondo instead just to be sure.

Ultimately, panel by panel, I would feel like the panel was done, so I would wipe it down with a towel. Then, I would go over it lightly with 400 grit to get the metal and the patches all the same degree of smooth, at the level pre-described by the paint manufacturer. Last, I would hold it up to the light at various angles, slide my bare hands over the entire panel, both quickly and super slow.. seeking something that felt wrong. Piece by piece I would accept a panel and set it aside. First, it was the 2 doors, then a fender, then the hood and finally that last fender. Ironically, the first area that I accepted was the main shell (rear quarters and tin top).

Zed Color
dark gray color sample
Eastwood intermix gray
All this time, I'm thinking about what color I want to shoot Zed. When C was doing the work, he was thinking flat-black. While I agree that some cars, possibly even a 280ZX, look great in flat black. I'm not sure I want to go that way for the entire car. Like I indicated above, I looked at lots of pictures, and, while there are lots of colors of 280ZX's out there, only a small handful of colors really look good. Of course, this is totally my opinion, and the shortlist is basically the color list that pretty much every car looks good in: Red, Dark Blue, Silver, Dark Gray and Black. Zed was silver when we got him, Flash is silver and KLack is silver, so pretty much silver is out. I intend to paint the lower 2/3 of Hapy a dark blue so that's out. High gloss black would show too many imperfections and it is well documented (though I can't find a link) that red cars are pulled over most often, so that leaves Dark Gray. This is sort of a compromise between Black and Silver, both of which look really good on a 280ZX. 

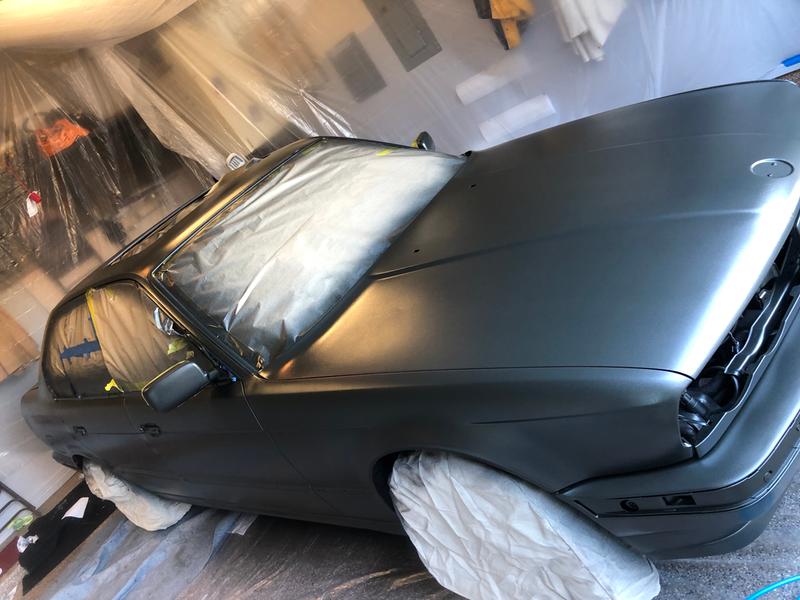
metallic gray color sample
Eastwood 9mm Gray
So, I take this idea to my resident style expert (Boo) who suggested that maybe a metallic flake would look better. We are looking at Eastwood's 9mm Gunmetal Gray Metallic -or- their GearHead Gray Intermix. We are going to need 2 gallons anyway, since I will be shooting inside the hood, some interior spots that don't get covered with plastic, etc. So, the cost ends up being about the same. Based on the photos, I tend to agree with her. The metallic flake looks like it creates more depth, and may be a little darker. What is hard to tell is which one will be more forgiving of my prep work. The picture on the right here is of a BMW 5-series shot with the Eastwood 9mm Gray. The owner had not yet color sanded nor clear-coated it, so it is a very honest image of what it looks like fresh from the gun. It looks a lot like the graphite metallic gray color I have seen on a 2019 or 2020 Mercedes.

I guess that's it for today. The primer shipping fiasco has finally come to a conclusion, with it's arrival during the cold snap. We are not expecting weather to be accommodating to spraying paint for much longer. So, while I may be ready for shooting primer, I may not actually have an opportunity to shoot it unless I figure out how to put sides and a non-flame heat source inside the car ports. Before then, I still have to metal etch the bare steel, wipe the whole thing down with degreaser and mineral sprits and, of course, complete the masking. So, there is still plenty to do before I'm ready to actually put primer in a gun and start shooting. Honestly, it could be Spring before priming actually happens.

Thanks, as always, for following along-

Tuesday, August 18, 2020

If You Love... Set It Free

Weird post today, but it IS car-related. Before I begin, today is the birthday of my lovely wife of 7.75 years. Boo, you are amazing, an inspiration and the love of my life. So glad we found each other, and we can enjoy this life together, laughing through the good times and leaning into each other through the hard times.

If You Love Someone (or something)
So, In my last post, I mentioned how T is leaving Eugene for music school in LA (well, Burbank, actually). Similar to my barely-escaped-disaster departure from southern Nevada when I was his age, he had to sell his car for money for that new life. So, he had to sell Nemo. But, in another twist for how to make money for music school, he got hired by a forest fire fighting crew.... and got sent into the bush. So, how does someone sell a car when they are nowhere near it? Consider too, that he is effectively homeless, having vacated the house, and crashing on a friend's couch when he's not fighting fires. The answer? Your dad buys it from you. Yeah, I'm a big frickin' softy, and I bought that A4.

Set It Free
The decision to buy it was actually the easy part. Then, we had to figure out how to get it from Eugene back to the corral. I say corral, because now I have an absolute embarrassment of riches in terms of cars. I mean, this is ridiculous. It's a good thing I have a long and somewhat hidden driveway or my neighbors would be rightfully wondering WTF is going on over here. It was almost like Nemo didn't want to be set free. He did everything he could to stymie our efforts. First, he got his passenger window smashed in... twice, and had the stereo and T's new forest-fire fighting boots stolen. Then, he popped the charged air hose off the intercooler, stranding T. Last, he started leaking oil, leaving spots everywhere, but also forcing regular pull-overs on the drive from Eugene to Beaverton to top off the oil. After an Odyssey worthy of epic poetry, T arrived with Nemo, packed with stuff we'll be holding for him until fire season ends. Oh, did I mention that part? Yeah... my once-viable-as-a-shop garage is now full of not-my-stuff.

If They Come Back
At this point, the expectation is that fire season will end or the start of school will arrive and T will come back to Beaverton for his stuff. That won't include Nemo. As for Nemo, I will be fixing the smashed window, and fixing the oil leak. I may have to do other things, but eventually I'll be selling him... I think. I don't know. Now that he's in the driveway, Boo thinks he looks pretty darn good. With the upgraded suspension, turbo and intercooler, it is a super-fun sled. T did the timing belt and the clutch as well as the master/slave clutch hydraulics and replaced the sunroof while he had it. I did the head gasket, and a few random things over the years, so we have gone through a lot of the expensive stuff already. So.... maybe we will jettison a different member of the fleet.

He/She/It is Yours
Which brings us to what am I going to do with all of these cars. While I may not be at "Rust Valley" level, for a suburban cul-de-sac, I kind of am. For posterity, this is what is currently in the corral:
Hapy - 1972 VW camperbus (TDI transplant from '98 Beetle, Riviera top, '79 westy bits)
Oliver - 1978 MGB (Mikoni side-draft carb, stainless header-back exhaust, new interior)
Zed - 1979 Datsun 280ZX (still in pieces, still not ready for paint)
K'Lack - 2004 VW Jetta Wagon TDI (Boo daily-driver car)
Flash - 2001 VW Jetta TDI (my car, tho with CoViD it hasn't seen tarmac since June)
unnamed - 2006 Subaru (C's car)
Nemo - 1997 A4 1.8T Quattro (up-rated suspension, turbo, intercooler)

Yeah, that's 7 cars. All in one suburban driveway. Again, like my complaints about having that house in Eugene, this is just too far into first-world problem for most folks, and I apologize for any who are offended. I'm a little offended. Like smelling myself after a particularly good hot sweat. Yuck. So, what's the shower in this metaphor? I think it is selling off or long-term lending out cars that we don't use, starting with Flash. Then, finish the Zed and sell it. Last, make a decision on Nemo.

If They Don't,
Years ago, I set out to get a $1000 car for each of my boys when they were entering high school. I figured that they could learn about cars and we would have something to work on together. In many ways, that was true. Psychologists believe that one great way to connect with your kids is to do something with them. While their hands are busy with whatever that something is, you talk about stuff. Before you know it. you're maintaining a relationship through the awful puberty high school years and maybe they learned something about cars. In all of those ways, this worked. I was wrong in one significant way, though: I thought that by putting this time into a car, they would love it more, and want to keep it, drive it carefully, etc. Nope. Instead, I just put my $1000 in a 0 percent-interest account for a few years, so I could spend that same $1000 later, to buy the car from them to finish.

They Never Were
Ultimately, they learned that ...having an unreliable car is a major pain in the butt. ...not having a car at all is preferable to breaking down on the side of the road and then having your window smashed in because you didn't get it towed soon enough. ...having a car in pieces in the garage for years at a time is not really the same as actually having a car. ...choosing between food and car parts is not a choice they want to make. So, C saved all his money for a reliable car that will require no more than routine maintenance. And T? He sold me Nemo and has decided that he won't have a car in Burbank.

That's it for today. As to the house in Eugene, Boo and I have finished the work down there. Our road trip got cancelled, so I will be shifting focus back onto cars. It is hard to imagine the rainy season approaching when it is 37*C (100*F) and clear skies, but I know my time is limited. So, even though I could probably thin the herd faster by getting Flash and Nemo ready first, I will probably focus on Zed so he can possibly have paint before the cold wet arrives in mid-October.

Thanks, as always for following along. I guess the break wasn't as long as I thought it would be. That's what happens when your life-partner works harder than you do, and you both are 100% focused on the same goals. More when there's more-

Tuesday, April 9, 2019

The Wagon Returns

Quick post today, I think. Before I start, Hapy 21st birthday to T. It has been an amazing ride, and you have grown into an incredible person. So hapy to have had you in my life, my friend.

Some Background
Late last fall, I remarked on how many cars we removed from our driveway in a short amount of time (See Herd Thinning). One of those cars, K's 2004 JettaWagon has returned. Back then, it had sat for almost 18 months because of transmission problems. He was collecting money to do a 5-speed swap, but that proved too elusive. Between the changing prices for a kit from folks on TDIClub to difficulty finding someone willing to do the job (much less at a reasonable price), he resolved to fixing the transmission and selling it. $1500US later, the transmission is better than new and one of the front axles has been replaced.

On the inside, the driver seat had lost some of the leather on the seat bottom cushion. Based on his conversation with an upholsterer, that was probably caused by a faulty seat-heater. This news gave me immediate pause, since I have just completed the seats in our beloved Oliver. I will just make sure that the seat-heaters are on an ignition-switched circuit so they shut off when the car does. Anyway, K had the driver seat re-upholstered in a fairly-close color match. It's not perfect, though, and both Boo and I can see the difference. Which wouldn't matter if we hadn't been the ones buying K's car.


Snow Flashback
You see... years ago, when Boo and I shared that old condo we hit the mountain a lot. Pretty much, if we had the boys, we were going to play in the snow. The condo was just too small for anything else with 4 boys. One of those night-ski nights was especially icy at SkiBowl. I wiped out trying to navigate off of the Lower Bowl run onto Low Road when I hit solid ice (See Holiday approacheth). I landed on my left elbow and even now, over 6 years later, it still doesn't feel quite right.

That same night, Boo came flying down Lower Reynolds and as she entered the "whoopdies" near the bottom she hit some ice and landed on her back and backside with her right arm reaching back, hurting her shoulder. Like my elbow, her shoulder still isn't right. It was so close to the holidays, but we wanted to have her shoulder checked out. By the time she could get on-schedule for an MRI, it was Christmas Eve, so we didn't exactly get the A team. I have long concluded that the initial scan and scan reading was not done well, but every subsequent discussion starts with a specialist saying "they didn't find anything on the MRI", not bothering to look at the results themselves. That's the American medical system at work. Anyway, since her shoulder acts up from time to time, driving a stick-shift in rush-hour bumper-to-bumper, rubber-banding traffic greatly aggravates it.

2dot0
For a short time, we had a nice Jetta sedan with an auto-tranny, but the hated 2-dot-slow engine See Welcome 2dot0). Boo drove that, and greatly appreciated the non-stick for her shoulder. She loves to drive a manual, mind you, just the hurt shoulder really took away a lot of that joy. Remember that I failed to recognize the state of the timing belt and it snapped days before we were scheduled to move (See Oh Snap). So, we sold the car pretty much for what I'd paid for it, leaving Boo back in a stick-shift car. Until now.


JettaWagon
When K started talking about selling his car, Boo and I talked about helping him out, and helping ourselves along the way. Flash has over 210k miles on him. His interior was a horrible mess when I bought him, and the body has taken a lot of abuse. The JettaWagon, on the other hand, had about 130k miles on it, and was in incredibly nice shape; much nicer shape than Flash was when I bought him. So, we bought it. Now, Boo has a auto-tranny TDI JettaWagon.

Like with any new acquisition, there were a few things that needed to be fixed. The battery in the remote is dying. The brake lights all fire up when the headlights are on. The leather seats don't match. That's it so far.

I replaced the single-filament bulbs that had been installed with dual filament ones and the brake/tail lights work properly now. I did note that in the book for bulbs at NAPA, they incorrectly reference a single filament bulb. So, this is probably common for DIY folks.

Anyway, rambling post today. More car content is being generated. Maybe, if the weather is willing, I'll be able to pull the cover off of Hapy and evaluate him for Summer fun. Thanks, as always, for following along-

Tuesday, January 29, 2019

Flash fixes

I realized that I hadn't posted on a collection of things that broke all around the same time on Flash, the Jetta, so today I'll cover what went wrong and what I did to fix them.

Snow Shoes Grow
With a plan to hit the mountain for a taste of snow over the Christmas holiday, I pulled out the snow tires I got for Flash last Thanksgiving (Nov 2017). I got them new off of craigslist for $400 already mounted on universal steel rims. I say universal because they fit the 2 standard VW 5-bolt patterns. In looking back on my old posts, I don't think I ever posted on this purchase. Anyway, they are i-Pike tires and hold firm in ice and snow like no tires I have ever owned. Since we were down to one car, I had to swap the tires after Boo got home from work, so, on the night of December 23rd I set to swapping out tires in some nasty weather. I found, however, that the brakes were in pretty shabby shape and needed to be done as soon as possible. I found some locally-sourced pads (Adaptive One brand) and on Christmas Eve I did a brake job before we left for the mountain.

Lights? Who Needs Lights?
The pads fit well, and have performed extremely well, considering I'd never heard of them, and I didn't go with one of the usual VW-friendly brands. If Discount Import was still on the West Side, I would have gotten pads there. Anyway, while I was digging around the driver front wheel, I noticed a light bulb dangling by a wire. I concluded that it had fallen out of it's holder on the front bumper on one of the many times the bumper got ripped off by a parking curb. Yes, this happens often, and apparently happens to anyone owning a Jetta MK4. The TDI engine is an engineering marvel; the body it was delivered in, however, is not. Anyway, I put the bulb into the little hole, and finished the brake job. When I went to take a test drive, though, the brakes were great... but I lost my dash lights. That is, I lost all of the lights on the dash except the idiot light telling me I needed to replace my brake pads. Suddenly that light was on now. Love you, Flash.

Mountain Fun
We drove to the mountain anyway, having no idea how fast we were going. While we were still near the city, this was not much of an issue. We just stayed with the speed of traffic. Once we got onto US26 east of Sandy, though, we were alone. So, I checked speed periodically with a flashlight. We arrived in Welches after the local grocery closed for the holiday, so we just hit the cabin for the night. Christmas morning, we (me, Boo and T) drove up to Timberline Lodge, and we rode snow until sunset. We drove down, again without the benefit of dash lights, but the traffic was so heavy it didn't matter. By the time we hit the Damascus turn-off, the traffic was so crazy it really didn't matter how fast we were going; someone else was going to come racing up from behind anyway.

Dash Light Fix
As you may have surmised, the cause of the dashlight failure was that otherwise uninteresting bulb I found hanging. A small section of bare wire had become exposed, probably when it was force-ably removed from the bumper. When any one of your running lights creates a short, it blows a fuse... which also routes 12V to the lights on your dashboard. Either side can cause this. I find it so hard to understand how a fuse box with so many fuses doesn't isolate the dashboard from the running lights. Engineering marvel. So, I taped up the bare wire, replaced the fuse and the dashboard lights returned.

Brake Warning Light Fix
When I did the brakes, I plugged in the sensor in the new pads. Apparently, the sensor doesn't work. Maybe there is not enough metal material in the pad to conduct electricity or maybe these AdaptiveOne pads are NOT that great. Regardless, I check the condition of my car often enough that an idiot light should not be necessary. So, I cut the wire from the "sensor" in the brake pad and removed it from the car. I stripped and spliced the two wires together and plugged it back in. Warning light off: but also will never light up. So, I will be sure to check my brakes when I switch over to regular tires in March, and may just add that check to my oil-change routine.

Wipers Not Wiping
No sooner were we back to having an operational car than the wipers stopped working. Seriously, I fixed the lights on a Sunday night and on Monday morning the wipers stopped working. If you turned them on, the wiper would move a few inches and then stop. You could hear the motor, and since they tried to move, but failed, I thought the problem was in the linkage between the wiper arms and the motor. While waiting for linkage to arrive, I applied Rain-X water repellent. That stuff is magic. The following morning, we were greeted by ice on our windows. While letting the car warm up, I set to scraping. The windscreen was the only glass to which I had applied the Rain-X, and it was also the window which was freed of ice the easiest. Also, as we drove down the road, the little bits of left-behind ice quickly melted and beaded away.

I'll post on the wiper repair and the other fix (reverse lights) next time. Both of those jobs have more tale to tell than I can put in one post. Thanks, as always, for following along-