Showing posts with label bus cover. Show all posts

Tuesday, October 13, 2020

Enter Rainman

In much the same way Metallica describes the arrival of Sandman, we in the great Pacific Northwest greet the seasonal rains. Today, I describe alternatives to prevent the rain putting a hard stop on all of our projects.

Tarp
We start with the most obvious water protection: the basic tarp. I tuck you in, keep you free from sin... til the (Rainman) he comes. A tarp thrown over your made-of-steel project works great if you are trying to hide it from the neighbors. The benefits end there, however. No matter how awesome-fantastic your tarp is, it will capture / trap / hold moisture.. against that made-of-steel project. Your best-case outcome is that you have lots of mold or moss growing under there come spring when the rains stop. Your worst-case scenario is your project acquired a new rusty patina or one or more of your seals leaked and now you have mildew inside or rust inside. In the end, I think throwing a tarp over your project is possibly worse than nothing at all. At least when it is uncovered you will feel motivated to do something about it. A tarp just hides the truth from you.... until you remove it. All winter you're sleeping with one eye open.

Car Cover
I got one of those fancy $200+US bus covers from BusDepot a few years ago. It worked great the first year or two. After that, the UV light or something caused it to not work so well anymore. Last year, when I pulled the cover off, there was moisture all over the inside of it, mold on the fiberglass poptop, and a slime on the rest of the bus. Yuck. I know my seals are good, so this year, he is going without a cover, and I'll just cycle the cabin furnace (See Parking Heater 1, 2, 3, 4, 5, final) more frequently to keep him dry inside. Recall from Seasonal Cleaning, I use a desiccant as well. In the end, a car cover is little more than a collection of tarps that have been sewn into the shape of your car. They may last a little longer than a single season, but for the price, it just makes more sense to invest in something more.

Instant Canopy / Sun Shade
So, we can't have some plastic sheet draped over a car for 7 months and expect the car to be better for it. Who knew? So, we try one of those $99 pop-up canopy things. These are great in the summer when you're working in an otherwise sunny spot. They go up in minutes and you can do it by yourself. Most excellent. Of course, they are only 10 feet square, so the only kind of vehicle that could completely fit underneath it would be a motorcycle. Not even Oliver, the MGB, or the old corvette pictured here can completely fit under one. But it's close. So, you move it around to create shade where you're working. Enter Rainman. These things cannot withstand rain. I mean 0 rain. They are not designed for water to run off the edges. If you look at the picture on the right, you can imagine this scene: it pools up along the lower edge, slowly stretching the top until you have these large pools of water suspended over your project. At $99, the structure is not terribly strong, so something bends and then another thing breaks and suddenly, you have gallons of water dropping onto your project all at once. And, your canopy is trash.

Farmer Market Canopy
How about an upgrade? The canopies that the vendors use at farmer's markets and music festivals, for example, are great. They can withstand some wind, and some rain. They come with detachable sides. So far so good, except they cost about 3x an instant canopy. Of course, they are also 10 feet square, so no normal car can fit inside, just like the $99 deal above. I got one of these a while back, and I am using it for now, while I await my next solution. I have removed the front clip (front fenders and hood) from Zed, so the rear 2/3 are covered by the canopy, and put a tarp (yes, I know they are not great) over the engine compartment. No pooling water. The wind doesn't seem to touch it. Still, the 10 feet deep part makes it fairly unusable for working on a car in the rain, unless you don't mind either having half of the car sticking out into the rain while you and one end are dry or having the other end nice and dry while you and the thing you're working on out in the rain. The latter of those seems silly, especially since you just spent $300US on a rain-capable covering.

Temporary Carport
My last effort to foil the Rainman is a Harbor Freight temporary carport. These are 20 feet long by 10 feet wide, have no sides, but appear to be able to withstand rain. I don't know about wind. The videos I have seen online are unclear since most of them show a carport that is mostly protected on the sides by trees and/or shrubs or by a more permanent structure like a shed, garage or house.

Unfortunately, getting one of these things is becoming quite an undertaking. It seems that every restaurant that wishes to remain viable during the rainy season has concluded that these are the best way to keep their patrons dry during the CoViD no-inside-seating thing. As a result, as soon as a truck arrives in the greater Portland area with some, they are gone. So, I went online and ordered from their website. In a normal world, delivery is about a week. In this modern dysfunctional dystopia, I can't get an estimated delivery date. Why? Between COViD and the wild/forest fires, FedEx has effectively ground to a halt in the Portland area. For example: I ordered primer for Zed in early September. It took 2 weeks for it to get to a Portland FedEx warehouse, and it has sat there since. I called FedEx and asked about it. The response? Forest fires. They could have said "sunspots" for as helpful as that was. We still have no idea when it will move out of the warehouse. I may have to take a Saturday and drive out to the airport to collect it in person.

Temporary Garage
Similar to the carport, this is a Harbor Freight item which costs more ($170US versus $120US), but it includes sides and a roll-up door. Based on what I can see in the videos, however, you can't assemble them without the sides, so that reduced flexibility turned me off to them. Recognizing that I could roll up the sides, I looked for them at the big Harbor Freight in Tigard, and they were out of them just like the carports. So, either the restaurants are getting desperate or lots of folks decided that it was time to fight off the Rainman this year. Or, maybe, the supply chain issues we are all experiencing with seemingly everything has hit Harbor Freight as well. Regardless, I will wait for FedEx to get their act together since I'm already into this solve with an order, and my packages will eventually all be at the airport, waiting. I suspect these garages are fairly good, though the reviews indicate that they are not as weather resistant as their carport brothers. Maybe the sides catch more air, causing the structure to fail.

Car Content
After the last post about Zed's Bondo (See Bondo Zed), I continued to perfect his body with cycles of Bondo aplication and sanding for another couple of weeks. I found a technique that worked very well for getting the patch fairly perfect: on my sanding block, I had an old 320 grit paper. I held some some 80-grit onto the sanding surface and sanded down until I got to where I wanted to evaluate it. I then set the 80-grit aside and did a quick cuff with the 320 already on the block. This got the Bondo as smooth as the body so I could check for dips without getting false feels from the rough Bondo. And, this allowed me to use one block with 2 different grits, speeding the process.

I guess that's it for today. I have some winterization for Hapy to do: pulling the luxury battery, removing the cushions and fabrics, etc. Of course, that's hardly post-worthy stuff. There are things that need doing on Nemo, the A4, and Oliver. I just need to create a workspace that will keep me and the projects out of the rain first. I helped T load out of one garage bay, leaving just a few of K's belongings blocking up Oliver's spot. When the carports arrive, I'll get those up and get the projects moving again. Until then, we sit and watch Rainman have his day. Thanks, as always, for following along-

Tuesday, May 15, 2018

Back to the Bus: Rad Swap (Part 2)

Continuing from an earlier posting, today I'll cover the assembly and install of a new Mishimoto all-aluminium radiator into the TDI-powered microbus.

Where Were We?
Old rad, for perspective
In the last post in this series, I removed the old radiator from the bus, destroying the wiring along the way. I removed the framing / bracketing that supported the radiator from the old one and cut off the fans. Now stripped bare, we can compare the new and old radiator. The outlets are the same distance apart. The holes that I used to hold the frame on were in the same spots... but... all the other bits for holding the radiator into a Jetta were flipped over. So, the original fan housing (and air conditioning condenser) would line-up, but it looks like the inlet and outlet are on the wrong side (driver-side versus passenger side). And, the temperature sensor that triggers the fans is now on the same side as the inlet/outlets. So, in a Jetta, this could be solved with different hoses. In the bus, this gets interesting.

Bracketing
Because of the reversal of the inlet/outlet, I realized that the front bar where I had 2 radiator mounts attached needed to get flipped over. I cut off the pop-rivets holding on the mounts, and re-set their location the same way I did it the first time: threading the mounts to the radiator... but wait a minute. The new radiator doesn't use screws. It is threaded for bolts. Neat. I found one bolt in my fastener bins that fit, took it to ACE and got 8 stainless steel hex-bolts that fit: M6 1.0 pitch.

installing fans
Once back from ACE, I threaded on the front mounts, lined up where they should connect to the bar and marked the spots. A quick-run with a 1/8" drill bit and the pop-riveter and the front bar was ready again. I then turned my attention to the fans

Fans
I looked at the pile of plastic and foam bits. I thought I could drill a hole through the original bottom-bit and thread a zip-tie through. Instead, I found fender washers that had a small enough hole to allow the zip-tie, but not large enough for the end to slide through. This would work! So, from the bottom, the zip-tie passed through a washer, a foam bit, the fan housing, the radiator, another foam bit and last a plastic zip-tie anchor. To be extra sure, it would all hold, I ran the zip-tie back through the fins and then through the zip-tie head on the bottom.

Cowling
adding cowling
With fans in place, I attached the mounts. The radiator was starting to get a little heavy. We're feeling almost done, until the flip-over design of the mounting points would stymie the work again. The cowling wasn't fitting anymore. The left and right (driver-side / passenger-side) needed to be reversed because of the angles (front pitched downward to catch some slipstream), but it wasn't quite that simple. After some head-scratching, this ended up being as easy as folding the cowling the opposite direction from what it had been. Then, it bolted right on. I concluded the prep by zip-tying the fan electrical leads to the cowling so they wouldn't be buffeted by the passing winds any longer.

Install
One it was in one piece, I took it back over to the bus and slid it under from the driver side. I hung the threaded carabiners onto the eye-hooks on the frame. Then, I put the front bar on the jack and lifted it into place. Once I was able to get the threaded carabiners onto their respective lengths of chain, I removed the jack and repeated the effort with the rear mounts, again doing the driver side first. I checked the movement, verifying that the radiator unit would swing back and forth, front to back and had some headroom to bounce up.

Wiring Re-wiring
install-ready. topside
Now that the new rad is physically mounted, I switched my focus to the electrical. The new radiator did not deliver with a fan switch, but it did have a threaded hole for one. I had ordered one years ago when I wanted to have the fans come on automatically. I just never got to it. So, I ran the threads on the switch with plumbers tape and threaded it into the hole (with the rubber gasket in place, of course). I still don't have the trust that the temperature-sensitive fan switch will work, so rather than wire that in, I stripped out all of the extraneous wiring and set up the switch on the dash to fire both radiator fans and the little motorcycle fan on the intercooler.

For my sake, I'm posting the circuit numbers from the relay:
30: 12V+ this is fused, but unswitched power so the fans can run with the key off
85: grounded
86: to the fans
87: trigger switch. One day the thermo fan switch will wire in here. For now, it's the dash switch

I cleaned up the wiring so it's nice and tidy with the relay zip-tied to the underside of the bus and out of sight. I may wire the fan switch into relay pin 87 just to see if it works. It might be interesting to wire those pins to a light on the dash so I can see what temperature they fire at... for a first step. If nothing else, I could use that as a temperature warning light.

Plumb and Fill
install-ready. underside
With the electrical solved, and the rain well settled in, I didn't want to give up. I was mostly under the bus anyway, and the bus cover provided additional rain-cover so I wasn't really getting too wet. Fortunately, water hadn't started running under me in growing puddles yet. So, with that motivation, I wriggled the longer hoses onto the 90* bends off the radiator and hose-clamped them really tight. It surprisingly took me no longer to do than it took to type. I went around to the back of the bus, pulled the cover up, opened the tail gate and filled the overflow bottle with G-40. This is a process, requiring filling up to the full line and then venting the air out of the lines with the little spigot I installed just below the thermostat. I continue this process until coolant/water mixture comes out the spigot. It took the gallon of G-40 and wanted more. So, I topped off with distilled water (about 1/2 a gallon).

I dodged to the front of the bus, confirmed the fans ran and then disconnected the battery, closed everything up and dashed inside. One day, I'll have a huge garage. Until then, I work in the rain.

I took Hapy out for a test drive, and I believe the swap is complete. I suspect one or more of the hose clamps will need tightening, but otherwise, I think it's ready. If this fancy super-radiator doesn't do the trick for keeping the temps down, I may need to route more air through it. That would mean either lowering it, routing some ducting from the front or both. Here's hoping the super-rad does the job.

Grilled
I made one last change to the set up after the test drive. I had a section of security fence lying around, so I cut a section, spray-painted with a couple of coats of semi-gloss black and slapped it on the front. This will prevent plastic bags and other garbage (that seems to be appearing on the roads in greater frequency) from getting sucked into the radiator, fouling it's ability to cool the engine. I had meant to do this with the original radiator install. Once I did it, I was surprised at how quickly it went from the cardboard package through the tin-snips and paint to install. In terms of actual effort, it was less than 30 minutes. I really should have done this earlier. The picture to the right shows it mid-install. The nut with washer on each lower corner have since been tightened down and there are zip-ties across the bottom as well as on the top corners holding it in place.

That's it for today. I would like to do something with Hapy's brakes before a real trip. I have rear wheel cylinders and I'd like to replace the lines between the master cylinder and the fill reservoir as well as all brake fluid. Maybe I'll get that done before 4Peaks. I hope so. Anyway, thanks, as always, for following along-

Tuesday, May 8, 2018

Back to the Bus: Rad Swap (Part 1)

It's been a long time coming, but today, I cover the removal of the under-belly mounted radiator in the TDI-powered bay-window bus. In a subsequent post, I'll cover the bracketing retrofit and install fun. First, some background.

Background
disconnected front chains
Last Summer Boo and I had three incidents with the bus getting too hot. We couldn't keep up with GratefulEd on the way home from 4Peaks (See 4Peaks 2017 Road Report). Then, we were stranded on the side of the road climbing the foothills on our way to Frog Lake (see Almost Frog Lake). Last, we barely scratched out a round trip into central Washington for Chinook Fest (See Chinook Fest 2017 Road Report). First, I thought it was because I let the coolant level get too low. Topping up with water didn't help. Then, I thought I had caused irreparable damage from using the wrong coolant, and did a complete flush and fill. It didn't fix the issue. On the drive home from Chinook Fest, I promised Hapy that I would replace his radiator before we took another drive. After emptying the bus of camping gear, I parked him and winterized him. He has sat with a Bus Depot bus-cover ever since.

Radiator - (almost) 9 Years Later
draining the coolant
I had to reach pretty far back into this blog to figure out when I originally installed the radiator. My earliest references to it date back to November of 2009, and I already had it in hand. If I remember correctly, I bought it used off of CL that summer for $40. It could have been the summer of 2008 or even that spring, I suppose. I just know that it was a nice warm dry day, and that definitely doesn't happen in November. Regardless, this used radiator from an early 90's Jetta gave us 6 years of service, but I believe it has served it's last trip. Looking back through the posts, I detailed location thoughts (here), how I constructed the frame/bracket (here and here), the cowling, test fitting and final fitting, the routing of the coolant lines, etc. I did not change the design with the new radiator, in fact, I reused everything except a few fasteners and zip-ties.
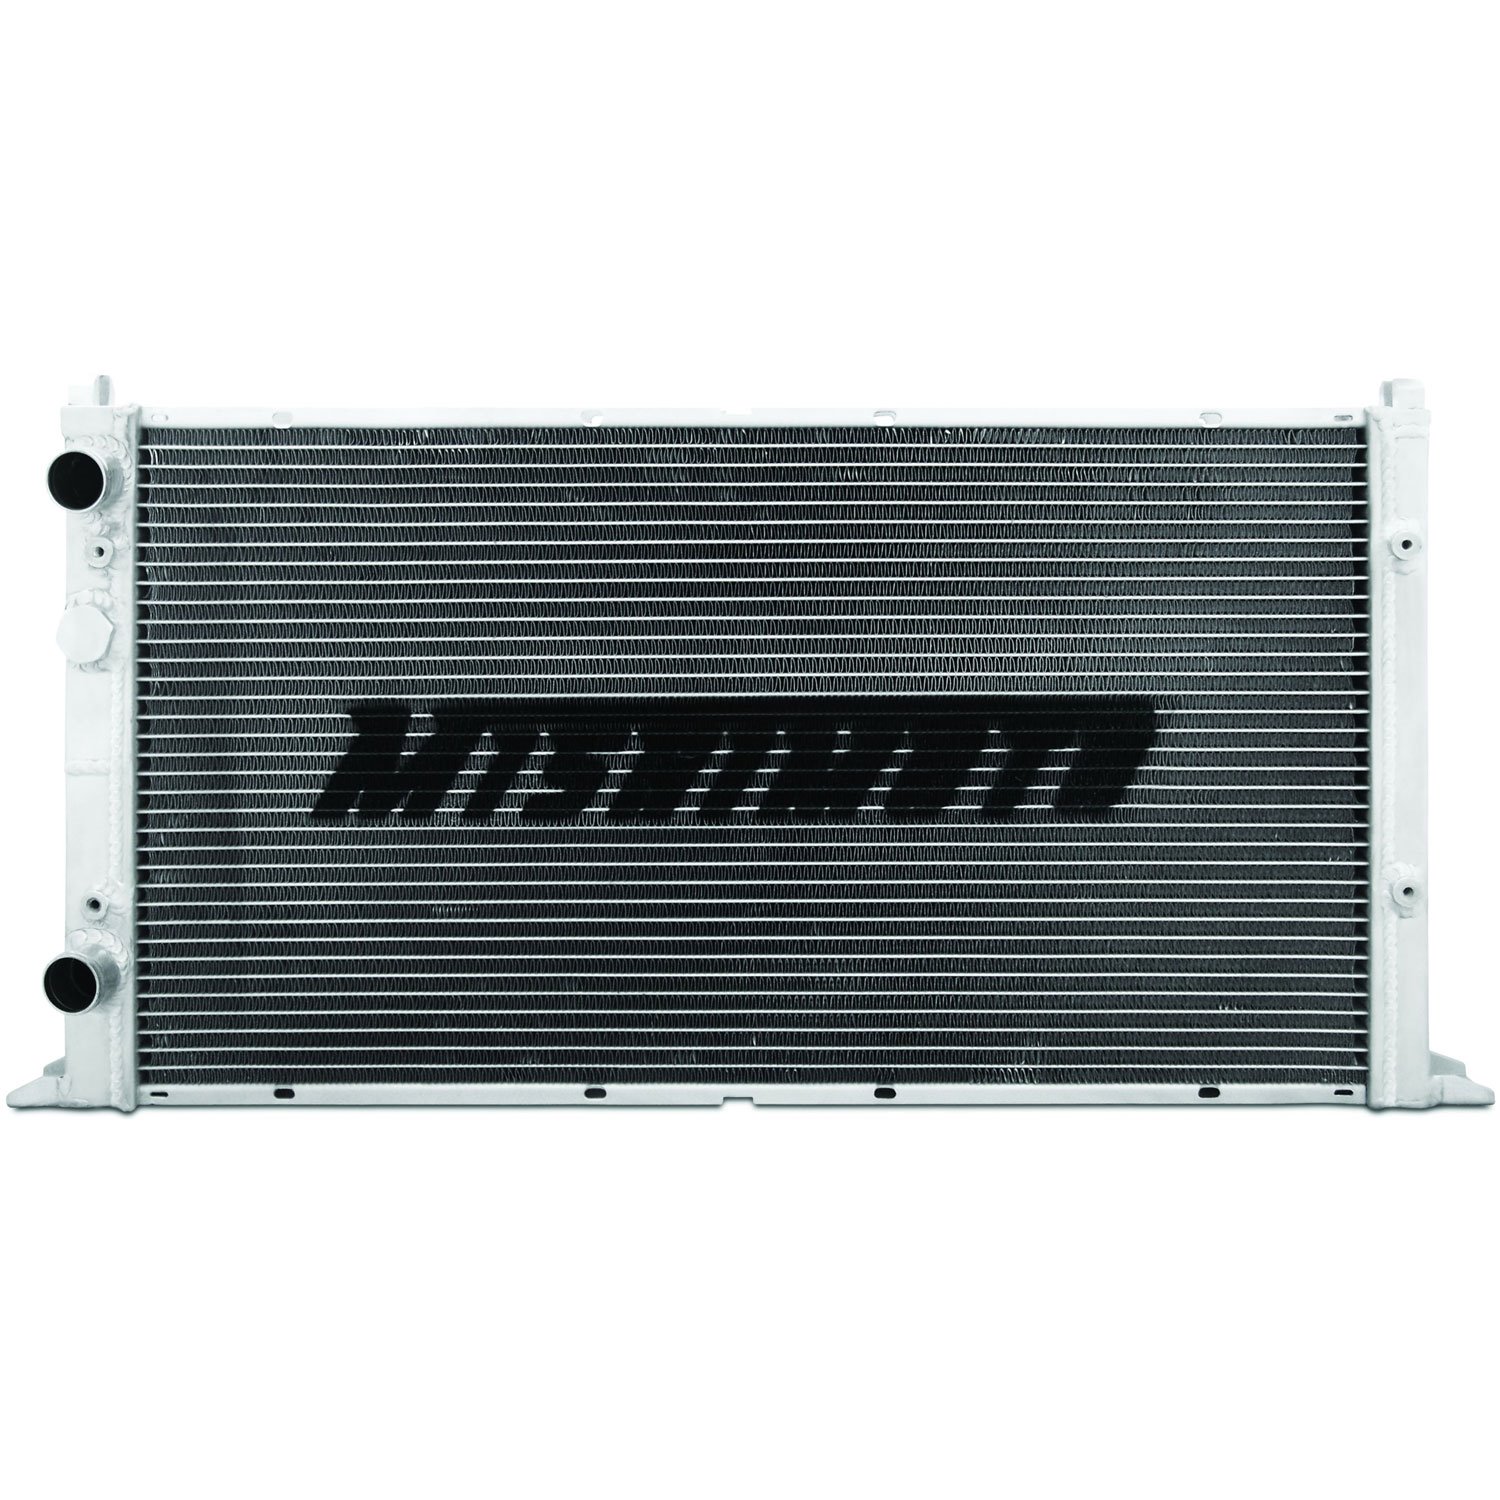
photo nabbed from JEGS,
where I bought mine

Meet the New Rad
I figured that if I was going to buy a replacement radiator, I had 2 options: direct exact replacement (aluminium single-pass core with plastic sides) or an upgraded (multi-pass) all-aluminium one. I considered that I can't say for sure that the original radiator was powerful enough to cool the TDI pushing the bread-loaf down an interstate. When I first did the swap, I babied the bus and I still had my eyes on the temperature gauge. I would really like to stop doing that, so I looked a little deeper into the all-aluminium ones which are supposed to have considerably better cooling capability.

The interweb can't decide if the all-aluminium models are any good. In the mixed reviews, most of the issues appear to be with drop-in fitment, not with performance once installed. Since my fittings are completely custom anyway, I was not deterred. The performance ratings are across-the-board positive, with some actual numbers demonstrating the quality. Of course, not all manufacturers are equal, so I looked to what online vendors sold. There are many radiators which appear to be only sold on eBarf by drop-shipping companies direct from China. That is, except for Mishimoto. The Mishimoto radiators are sold through Summit Racing, ECSTuning, JEGS and a few others. That was enough for me, and I ordered one that was supposed to "fit my vehicle" when I said it was a Jetta3.

It arrived in a very well packed box, designed for shipping and typical shipper mishandling. The extra thick cardboard protected it very well, and it looked so nice and shiny. It looks pretty much like the picture, actually, though instead of "MISHIMOTO" emblazoned across it, there's a big "M". Before I could get too excited, though, I needed to see how the mounts compared to the one I was removing... which meant I had to remove the old one first.

Removal
removing the cowling
and frame mounts
Like so many things, removing is so much easier than installing. I know some folks feel the opposite, but just about every project on this bus starts with an hour of removal followed by a couple of days of trying to get the "exact replacement" installed. This project was no different. Like any radiator removal, we start with draining the coolant. I have a large black catch-pan used just for this purpose, so I slid it under the bus, got myself under there with a slotted screwdriver and had the hoses off and draining within 5 minutes of walking out to the bus. Next, I unplugged the fans. This, unfortunately, was not completely clean. Some of the wires separated from their plug-ends, and the extra wiring for the fan switch complicated things. Last, I had not done a very clean job with the dash fan switch wire when I installed it, looping it around the radiator framing. I had to cut that wire. Grr.. present "me" is not thrilled with past "me". With the wiring in a heap, I kept moving.


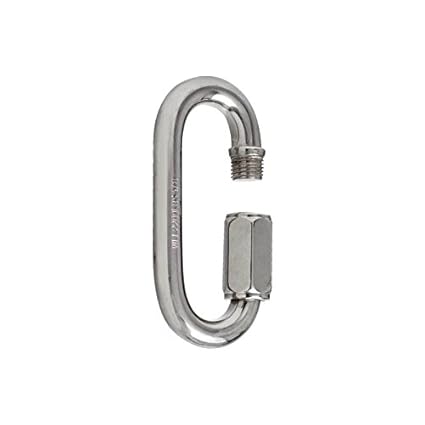
The radiator is suspended from the underside of the bus with chains: one on each corner. The top of the chain is attached to an eye-hook that is mounted to the frame just under the floor. The chain and eye hook are connected with a thread-closed carabiner. The same combination is at the bottom of the chain, with an eye hook at each corner and a threaded carabiner attached to it. In between is a short stretch (3 or 4 links) of high-test chain. To remove the radiator from the bus, I slid my orange floor jack under the front rail of the radiator frame and lifted the unit until there was sufficient slack in the chain for the bottom link to slide out from the threaded carabiner. Once free, I lowered the front down, and shifted to the driver-side rear corner and then last the passenger side (I was lying on the passenger side so this order kept things within my sight and reach). Once the radiator and frame were on the ground, I slid them to the driver side so I could pull it out, and took the whole operation into the garage.... just as the rain started.

Radiator Off-Frame
about to remove the fans
Once in the garage, I needed to get all the frame bits and the fans taken off the old radiator. The frame was held on with 10mm screws, 4 on each end  (2 top, 2 bottom). Once removed, the frame and cowling fell away.

Each fan was held on with 4 one-use-only custom zip-ties. On the bottom end was a plastic square that crudely fit into a spot on the bottom of the fan. Connected to that is a zip-tie-like plastic stick that fits through a foam bit, the radiator fins, another foam bit and then another plastic square that clicks along the zip-tie. This last bit is what holds the zip-tie tight. To remove, I cut the custom zip-tie off with wire-cutters, retaining all of the pieces. I had thought that I could drill a hole through the bottom plastic square, and re-use all the rest (except the zip-tie stick part) by using a basic zip-tie. I didn't drill or reuse that bottom plastic bit, but I'll get into that during the re-assembly.

Like so many of my topics, this is too big to fit into one post, so I'll continue this later on. At this point, the old radiator is completely removed and stripped bare. Thanks, as always, for following along,

Tuesday, October 3, 2017

Flappin Door

When we take our trips in Hapy, we always note something that needs to get fixed. Sometimes, we write those things down and eventually we get around to fixing them. Today, I touch on two little things that I fixed after we got back from Chinook Fest. I knew the rains were coming, and I wanted the cover on the bus before they arrived. That left me a couple of sunny hours, so I got after these two items.

Fuel Flap
Every time I fill up, I am reminded that when I prepped the bus for paint a few years ago, I pulled the little rubber bits out. Those little bits prevent the fuel filler flap from banging against the side of the bus when you close it. They also prevent the inevitable rattle from steel-on-steel, aggravated by a shaky diesel engine at idle. I can't really hear it over all the other things that rattle, but I was at Ace Hardware anyway, getting a random assortment of fasteners for the MGB and some other home stuff. The Ace in the Pearl District has one of the better spreads of random little things. Maybe they felt the competition from Winks back when they were on the west side.

Regardless, I found a couple of these little ribber bits intended for a US domestic car. For the $2 price, it was worth the risk. This is all the more true when I was unable to locate the "real" part on my usual websites. With a small slotted screw-driver, I pinched the rubber and slid it into the little hole. It took all of 5 minutes. I find it really funny how many of the little issues can be solved that quickly.

Driver Door Latch
When I bought this bus all those years ago, the door seals were shot. I bought replacements, and thought I was getting the "good" ones, based on what I had learned from the bus owners Yahoo email list. Either I bought the wrong ones or installed them incorrectly or both. Either way, the doors needed more effort to close than they should have. Fast forward to when I did the repaint, and I replaced the seals with the actually "good" ones, that are a little smaller than the not-as-good ones. The door seals much better, but years of banging the door shut had done it's damage.

The door became less and less responsive. First, if I locked the door with the key and then fiddled with the opening latch on the outside, it simply wouldn't open with the outside latch for a while. This lasted for a couple of years, but on our last trip, the door wouldn't open from the outside at all. From the inside, it would open, but it wouldn't stay latched consistently. Sometimes it would latch with a very calm closing and other times I had to slam it. Once, it popped open on me while driving. So, when we got home, I was driven to replace the latch. So, I contacted my friend Ken at TheBusCo, of course. He said he could sell me one, but I would probably get just as far simply cleaning and fixing mine, He was right. Thanks Ken! The procedure I followed is below.

Door Mechanism Remove
Open the door, raise the window all the way up.
Remove the door pull, window crank and finger guard around the inner door latch with a Phillips screwdriver.
Pull off the inner door skin and peel back the vapor barrier exposing the rear.
With a 10mm socket, remove the bolt holding the bottom of the rear window channel. You can get to it through the rectangular vent hole.
Remove the inner latch with the 10mm socket, and detach the metal door activator bar thing that runs back to the mechanism.
With a long flathead screwdriver, pull the activator bar out of the door mechanism.
Grab an Allen wrench and remove the outer door handle. My Allen's aren't size-marked, but it is a common wrench you'll find in your standard small set.
Rotate the door latch so that the "C" points down.
With a thick Phillips screwdriver, remove the 2 bolts that points rearward and the one that points inward which hold the latch mechanism to the door.
The latch mechanism should now be free to remove. Push the latch into the door and wiggle it downward. I had to press the window channel towards the outside to get the latch free.

Wait, What?
Once free, I noticed how filthy the latch was. I shot it with brake cleaner, worked the mechanism a few times and repeated until the latch worked without hesitation. Once it dried, I shot the pivot points with a WD-40 product to keep them lubricated. Everything worked great, but one bit of metal was bouncing around. Then, I noticed that the return spring for the outer latch was broken. This could be why the door wouldn't latch: the mechanism wouldn't close all the way. The right way to fix this would be to find the right spring and fit it into the mechanism like the original. Since it took me about 10 minutes to get the mechanism out, and I didn't have the spring, nor the time to go hunting through a hardware store to find one, I pulled a cursed PO move and went rogue. I grabbed a rubber band instead. Yeah, that's right. A rubber band. My thinking is that the rubber band could last a few years or it could last until next summer. Either way, I'll look for the spring, like I looked for the rubber bits for the fuel flap, and I'll do it right when I find it.

Reinstall
The reinstall is faster than the removal. Return the door latch so that the "C" points down and slide it up and into place. Thread the Phillips-head bolts in and attach the activation bar to the mechanism. Tighten the bolts enough for you to test the activation bar. Test that the latch springs open when the bar is pulled towards the front. Good? Awesome. Continuing, tighten those Phillips-head bolts, then re-attach the outer door handle. Hook the inner latch handle to the activation bar. Then, grab the 10mm socket, attach the inner handle and re-attach the window channel. The hard part is done. I tested the mechanism by rotating the latch, and working the different handles. Once I was satisfied, I lightly closed the door and it latched. Hazah! With a light tug on the outer handle, the door opened. Perfect!
Re-situate the vapor barrier and then fit the inner door skin. Re-attach the window crank, the finger guard and door pull with your Phillips screwdriver, and you're done!

That's it for today. I'll post back when the rubber band breaks, or when I replace it with a spring. Whichever comes first. Thanks, as always, for following along.

Saturday, October 17, 2009

tower finished, enter electrical

Today's post will cover our visit to the Oregon Historical Society's Native Oregonians exhibit, finishing the engine mount tower and some new discoveries on the electrical side. I usually do a couple of hours on Thursdays, but this Thursday I was totally beat, so I swapped this afternoon instead. Here's a picture of the bus with that fancy cover from BusDepot I mentioned in the last post. It has zippered doors for both front doors and on both sides for a slider (UK model has it on the other side). It works great so far. No musty smell, no water. Dandy.

Oregon Historical Society
I had a couple of hours today after returning from checking out the Oregon Historical Society's new Native Oregonians exhibit. The exhibit just opened, and there were native artists on-hand to talk about their work with museum visitors. It was very cool. We learned about how the ceremonial drums are made, and how cooking baskets are used. Of course, there was a large collection of bead work and costuming.

Finishing the Tower
When we got home from the Oregon Historical Society, I got to work on the engine mount tower that Hal has been working on. We agreed that I'd hit it with the grinder the next time I got some time. So, I ground down the "cap" that he welded on at the end of the day last Sunday. I filed on the insides of the uprights where they meet the top and bottom. Finally, I shot it with some blue paint. It should be ready for install tomorrow.

Drive-by-Wire
I mentioned that Hal and I got started on the drive-by-wire last week. I attached a couple of photos of the big resistor. The picture on the right is positioned as if you were looking down through the floor at the top of it. The picture on the left is how it will look from below. It is important to note that we removed more material than we had originally anticipated, so I'm not sure if there's enough left for drilling the holes for mounting. We may have to extend those small silver pieces so we have do. The thing pointing towards the top of the left-hand picture is the "rubber bit" that the accelerator pedal will connect to.

VSS - Vehicle Speed Sensor
I was fortunate enough to find a VSS manufacturer in the Netherlands that was willing to ship one to me here in the states. I got a model 391. Unfortunately, these sensors have the push-on connector and the 1972 VW Transporter has the screw-on kind. I'll be looking into replacing Hapy's speedo cable with one that has a push-on connector -or- figuring out a way of getting the screw-on bit to mate with the push-on VSS. The push-on connector was available in 1981 on the air-cooled vanagon, so it might fit the bus wheel and be long enough to get behind the dash. Time for research.

More after tomorrow's work with Hal. I'm not sure what we'll be working on, but we have the dog bone and the cooling system as well as electrical bits to deal with. I suspect we'll get the engine mount in, and then get the drive-by-wire isntalled. What comes next?