Showing posts with label wheel bearing. Show all posts

Tuesday, October 20, 2020

Car Ports and Car Noises

What a difference a week makes. In my last post, I mentioned that I had helped T moved some stuff out of the one garage bay. Since then, K got the rest of his stuff, so Oliver is back in the garage. Also, the 2 carports from Harbor Freight arrived. So, I quickly moved from all cars out in the open and no sheltered space to work to 3 cars under some kind of roof, creating all kinds of work space. So, today's brief post if about getting the car ports up, and some diagnosis into the noises coming from Nemo.

Car Port Assembly x2
400 sqft of not raining
I have a small 2-car garage. I underscore small because Oliver (1978 MGB) barely fits between the garage door and the walkway along the opposite wall. Considering the MGB is one of the shortest cars out there, I couldn't imagine parking a Caddy or one of those big pickup trucks. Simply put, it wouldn't fit. So, when I think about how I'm going to complete Zed (1979 280XZ) this winter, I shudder. It's way too small to shoot paint, and with the gas furnace in there, I couldn't paint while heating the house, so the plan unravels fairly quickly. So, I got a couple of those 10' x 20' car ports that Harbor Freight sells (~$120US each). My driveway has a slight tilt towards the garage, but it's otherwise fairly flat.

V between
While I would have preferred a purchase ship-to-store option, the harbor freight website doesn't offer that. Instead, they offer $7US to ship it by FedEx Ground. That sounds like a cost-loss on their part, especially for a pair of these car ports, but they arrived before the primer from Eastwood (which still hasn't arrived). The assembly is actually very easy. The instructions have only a handful of steps and the exploded drawing is not as bizarre as IKEA furniture. I used a rubber mallet to get the pipes to fit together quickly. I was able to get each one assembled in about 2 hours, measured from when I walked out my garage door with a full box to walking back in after set-up and recycling/throwing away the packaging.

I set one over the top of Zed, and the other right next to it. I would rather not have a 20' dripped seam between them, and pushed the posts right next to one another. I took the 8-inch-or-so hangdown from one, and flipped it up over the top of the neighboring car port. The other hangdown, I pulled across and clipped to the tie-down seam, which runs along the inside, above the bottom rail. Then, I forced the pipes together and cable-tied them. This created a small V shape of car port tarp between the rails, running all the way front-to-back. My plan is that this will direct the water down to the lower end of the carport. I think this will work except for those super-heavy rain events we get sometimes. We'll see.

A4 Front Clunk
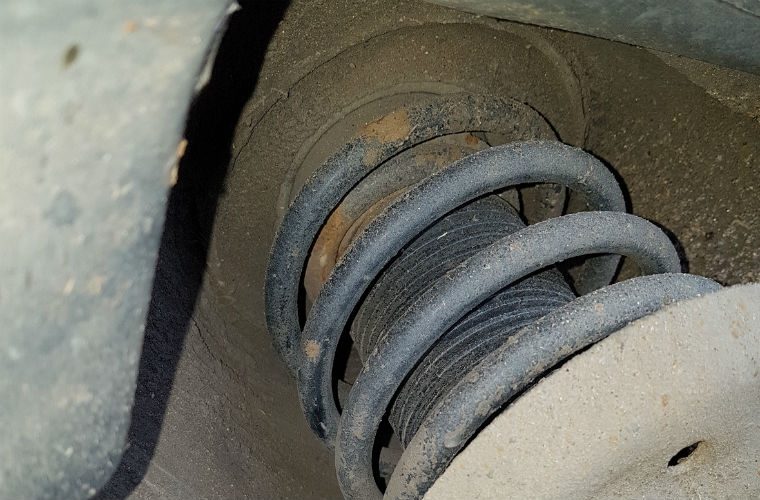
top of front strut, example
Now for some car content. After getting all the little things fixed on Nemo, I took him for a short test drive to see how he felt. He felt pretty good. Lots of boost, and plenty of power, but he made lots of noise. I could hear a clunk pretty much on every little bump. I figured it was the sway-bar bushings and replaced them: 13mm bolts hold the clamps on, and the bushing has a slit in it so you just need to remove the clamps, pull off the old bushing, slap on the new one and put the clamp back on. Times 2. The noise got a little better, but after pushing the fenders up and down, I believe the problem is in the strut-mount. From what I've read, after market struts that lower the front end (like Nemo has) put more pressure on the strut-mounts than the stock ones do, transferring some of the burden from the springs to the mounts to hold the front end up. This causes them to wear prematurely. So, I will be looking to replace those. Since I have a very healthy fear of strut springs, I will probably remove the struts and have new mounts installed by one of the shops around here. Better to pay with some hard earned cash than with some body damage.

A4 Rear Hum
Also on that test drive, I noticed that the rear end would make a humming noise once I got above about 30mph. I figured it was the wheel bearings, so I put the back end up on jackstands to confirm. The wheels had no play in them. None. Curious, I pulled it out of gear and spun the wheels, listening for noises (that would translate into a hum at speed). I heard clicking coming from the inner CV joints. So, that means at least removing one or both rear axles. Fun. Of course, with the AWD, I can't be 100% sure the bearings aren't bad. I may not have gotten the wheels spinning fast enough to make noise.

the diff oil fill, example
I intended to drain and fill the rear diff while the rear end was up in the air, but the fill plug is stripped. While I was under there, I got to see just how much caked on grease could remain attached to the outside of a differential without falling off. The answer: a LOT. I am really concerned about the health of this diff, and the whole rear-end, for that matter. Before I go any further with it, I will collect a second opinion. After that, I think it will have it's ass-end in the air for a while as I replace CV joints, and/or wheel bearings and fight off the fill plug so I can refresh the fluid. I'm not sure a 20+ year old 230k+ mile A4 is worth terribly much, but this is how we learn, and this could be a useful daily-driver for someone, maybe, eventually.

Well, that's it for today. I have not gotten back into the Zed paintwork since I put up the car ports. I really wanted to get Nemo road-able first. With the car ports up, I have more paint prep to do, and I need to figure out some sides for the car port space so I can heat and paint. Thanks, as always for following along-

Tuesday, May 7, 2019

Hammered Rims (part 1)

After many months of looking at Hapy under a big gray cover, I finally got to play with him a little bit. So, today's post is a triumphant return to posting about the bus. It got long, so it's been split into multiple posts.

Where Were We?
rear left tire
3 years ago, I replaced the 14-inch stock steel rims. The tires had not been replaced in 10 years, so they had become dangerous, and I did not want to get another set of tiny tires. Instead, I got a set of 16-inch rims for $200 from a Vanagon guy out the Portland Eastside. These are "aluminum" which I put in quotes because they aren't pure aluminum; they wouldn't be strong enough if they were pure aluminum. They are an alloy. Does that matter? Well, sort of. Pure aluminum wouldn't rust to my steel hubs. The alloys within the not-pure rims allows for that possibility. Enter today's fun. I wanted to check the brakes, knowing that the system needed a fluid refresh, the rear cylinders needed to be replaced and all of the other components needed a looking at.

Wheel Stuck
With brakes in mind, I cracked the torque on the passenger side rear wheel and got Hapy up on a jack stand. I loosened the nuts and grabbed the tire... it wouldn't budge. Hmm.. I tried a few leverage ideas. No luck. So, I tried some internet ideas that didn't work even after I shot the snot out of the mating points with PB Blaster and the Lucas Oil alternative (Tool Box Buddy).

Have the nuts loosely threaded onto the studs and....
1) swiftly drop the bus off a jack
In theory, this would "pop" the rust seal. This didn't work. It sounded dangerous in the first place, honestly, and I would not encourage this. Best case, the wheel comes free. Worst case, the wheel comes free and bends or defaces a stud. Then what?

2) rock the bus (your car) back and forth
This assumes that the bus/car is back on the ground with the nuts loosened. The idea is, you rock the car/bus side-to-side, not front to back. This didn't work, but I liked it better than roughly dropping the bus from a height.

3) drive the bus forward and back, slamming on the brakes
This idea had some controversy on the net. There were those pointing out that you should never drive around without your lug nuts tight. Having helped another person who had a wheel fall off when the nuts hadn't been tightened, I understand the fear. I tried it anyway. It didn't work.

4) drive the bus around in a figure 8 pattern
Like number 3 above, this has the same controversy. After this didn't work, I combined numbers 3 and 4 together, but that also didn't work.

5) drive the bus off curbs
Doesn't this feel like we're just getting into more and more dangerous ideas? What's next, drive the bus off a loading dock? Yeah, I drove it off the curb anyway, albeit slowly, like under 10mph. This didn't work either.

Hammering
So, then I started looking at even more aggressive ideas. Again, nuts loosely on so the rim doesn't completely fall off and start rolling away on you...

6) while holding a block of wood against the inside of the rim (you're under the car now), whack it with a 4# sledge hammer
I started with my hand way choked up on the handle so it was almost touching the hammerhead. It made no difference. I moved further and further out on the handle, and rotated the wheel so I made contact all the way around. No difference. By the end of this effort, I was holding the sledge at the end of the handle, using a full arm swing as I struck the rubber tire (wood got totally smashed anyway and I needed both hands to swing hammer). It was a great workout, and I could see the entire rim shudder, but it wouldn't give.

Since this seemed like the most probable option, I then started a daily routine of spraying with a penetrant (PB Blaster, LucasOil Tool Box Buddy) and then hammering. Meanwhile, I started looking at options for how I could cut the rims off, recognizing that I would need new rims and tires afterwards (so, signing up for $1000US of unplanned cost). Plus new rotors and drums, pads and shoes for another three hundred, now that they are all coated in oil. Neat.

Lets Get Crazy
7) wrecking bar
I tried putting a wrecking bar (looks like an old man's cane, but it's super strong steel) behind the rim, with the 90* bend against the drum. By pressing against the end of the bar, there's considerable leverage. Just pulling or pushing on the bar didn't work. Then, I tried hammering on the end of the bar with the 4# sledge. That didn't work either, but the way it bounced off the rim, it told me that was a bad idea. I could have hurt myself or the bus from the recoil. So, dear reader: don't hammer the bar.

8) put a tire jack between the frame and the rim
Yes, this sounds crazy, but I tried it anyway, after a week of daily application of penetrating oil. This didn't work either. Nor did more hammering, changing to a different penetrating oil (Kano Labs' Kroil)... gasp. pant pant pant.

9) trucker chain and a gear puller
This time, I grabbed some trucker's chain. If you haven't used or seen these, its about 20' long, super thick and has a hook on each end so you can make a loop and have it hook on itself. I used this chain with a come-along to move Hapy around the yard 10 years ago mid-engine swap at the old homestead. Anyway, I took this chain and weaved it around the mags: under over under over. Once pulled tight, I hooked it up so it was a closed loop. I used this chain as a grab-point for my 3-arm gear puller as you can see in the picture above. These pullers are supposed to be pretty strong, so I figured with some steady pull pressure, maybe the wheel would pop. Nope. Instead, I broke the gear puller. You can see one of the bolts sheared off in the picture here, circled in red.

Delayed Maintenance
The more I looked at ways to get after the rims, the more I realized how much delayed maintenance lay beyond them. I haven't ever serviced the wheel bearings. Yeah, that's really bad. I know the wheel cylinders for the rear brakes need replacing. The brake fluid is crazy old. The whole underside needs a lube job. Regardless of how this resolves for the rims, I have quite a bit of work ahead and camping season starts in like a month! Feeling the pressure, I switched gears again.

Give Up and Hire Someone
10) hire a mobile mechanic
I called up the MobilePDX guys. Courtney and company have pulled me out of a few jams with various cars. From removing the stripped lower control arm bolts on Flash to the no-start problem on the A4, they have been great. Courtney arrived with a massive sledge-hammer and set to working on the front passenger-side rim (protected with a thick piece of wood). After a few swings, he could tell that it wasn't going to happen. While the ring of the hammer-on-rim persisted in the air like a church bell, he advised I take it to a tire shop who have better tools and do this kind of thing every day.

11) tire shop
I decided that I wasn't enthusiastic about these rims anyway. They are 16", which for some cars would be small, but on the bus they look a little too matchbox-car-ish, especially the rear wheel. At least to me. More importantly, they are 7" (or maybe 7.5") wide so the footprint is fairly wide. This creates more stability, but also rolling resistance. The biggest issue is trying to turn the steering wheel when the bus isn't moving. That creates considerable pressure on a 50 year old worm/peg style steering box.

So, I bought a new set of 15" rims that are 6" wide that should fit, based on my calculations. Again, a bus rim needs to be 5x112 bolt pattern with a center bore of at least 67mm (new set has a centerbore of 73mm). The stock offset (ET) is 39, so the new rims need to be in that ballpark. These new ones are ET35, so with the increased width, these will fit in the wheel wells. Assuming everything goes as expected, I'll have them mount highway tires onto the rims, since we don't really go off road in this bus, and the highway tread should be quieter than an aggressive off-road tread would have been. If there's room, I may introduce a spacer between the rim and drum/rotor so future removal isn't nearly this much of a pain-in-the-ass. All this depends on the tire shop getting these rims off.

Once I get back from the tire shop with new shoes (and spacer decision made), I'll post a follow up. At this point, I am on the calendar at the local Firestone (no more Les Schwab for me) for next weekend. Thanks, as always for following along.

Wednesday, January 31, 2007

Installing torsion arms - Part III

If you’re following along from parts I and II, the bus is still in the air, but we’ve made some progress. The lower torsion arms and the sway bar are on. The ball joints are attached to the steering knuckles and the brake backing plates are on. If you were fortunate enough to have a handy friend around, and you were able to convince them to do step 8, or if you’re just going to re-use your bearings as they are, you can skip step 8. Like the other torsion arm posts, here's the reference picture. Lets get to it.

8) perform optional wheel bearing maintenance.
This is an optional step that I took, and I recommend others taking. At this point, you’re pretty deep into your front end, and if you’re like me, you don’t want to have it in so many pieces again anytime soon. The front wheel bearings are supposed to be re-packed with grease every 30,000 miles. Odds are pretty good that yours are overdue if you haven’t been keeping track.
Anyway, the outer bearing probably fell out when you pulled the hub off the spindle or when you separated the hub and rotor. If you’re putting in fresh new bearings, you’ll just want to find it so the neighborhood dog doesn’t choke on it later. If you’re planning on keeping the old bearings, you better track that outer bearing down. Judging the quality of old bearings is totally your call. Look for marks or obvious wear on the bearings or the races. If you’re not sure, use new ones or find someone that can qualify them for you.
Assuming you’re replacing with new bearings, the bearing races need to be driven out. Don’t waste time trying to get the grease seal for the inner bearing out by itself beforehand. I did, and in the end, I gave up and the seal popped out while I was driving out the bearing races. I was able to drive each race out of the hub with a simple hammer and chisel, hitting one side and then the other. If you’re like me, you’re probably not too comfortable banging on your vehicle. Once the race starts to move, you’ll see that you’re not hurting it and you will work with greater confidence. There are some good pictures on this page.
The bearings don’t come pre-greased, so you need to force grease into the bearings. Drive the new inner race into the hub until you hear the change in the way the metal-on-metal rings. Then plunk the well-greased inner bearings into the race. Replace the grease seal. Repeat for the inner race and bearings. Don’t use the hammer and chisel method to drive in the new races, use a large diameter socket.
Now, slobber grease inside the hub between the races. Press it deep into the hub, and keep pressing it in there until there’s only enough room to slip your finger through end to end. Now you’re ready for step 9 and you have 30,000 miles before you need to do it again.

9) put the hubs on the spindles.
It seemed like no matter how much grease I put inside the hubs, I could have put more. I got the hubs on the spindles, pulled the outer bearings, and shot more grease in there with a gun. I tightened the clamp nut down, then removed the hub and put it back on. This seemed to force the air pockets out so I could get a little more grease in. Torque the clamp nut down by rotating the hub while tightening the nut. There is no published ft-lb for the clamp nut, but the bolt in the clamp nut needs to be torqued down to 11-14 ft. lbs. This is important as the clamp nut and bolt are what prevents your wheel from falling off!

10) grease front end.
As long as the front end is in the air, and you've opened the torsion arms, you probably need more grease in there. I cranked a good 25 times on the gun on each fitting. This also gives you a chance to see if your fittings (aka zerks) are good. I needed to replace a couple, which might explain some of the front end noise I heard before the clunking started.

- Wipe down your tools, and change your gloves. This ends the greasy portion of the job. Reward yourself with a snack! -

12) Put rotors (brake disks) on.
This should be pretty straightforward. The rotor will only fit on the hub one way and it bolts on with 2 6mm allen head bolt. Torque to 14-18 ft. lbs.

13) attach brake calipers.
Carefully thread the brake hose through the holder that you put on in step 6. There’s a steel/brass ring that protects the rubber line from rubbing against the holder. Its this ring that needs to be in the holder. Check the reference picture at the top for orientation. Thread the 2 mounting bolts through. Depending on the year of the bus, the torque value changes. For the first 2 years of disk brakes (1971/2), torque to 72 ft lbs. For all other years (1973/9) torque the bolts to 116 ft lbs. using a 19mm socket.

14) brake pad retaining plates, pads, retaining clips, pins
If you have the pad backing plates, slip them in first. I don't have them, like most folks, and I haven't noticed anything unusual it. Some think these are a really big deal. I’ve heard these plates have an effect on how much your brakes squeal. If you have them, use them. BusDepot had them on back-order, so I didn't put them in during this step myself. But then, my brakes squeal in the morning, so maybe I should follow up on this myself. Anyway, press the pistons away from the disk with either your fingers or something non-metallic (like, wood, dude) and slide the brake pads in. If you got new ones, great! Don’t forget to make note of the mileage so you’ll know when you need to replace them again. Put in the release spring thing and drive the pins in with a framing hammer from the inside. Once the pins are in, you just have to drive the locking clips into the brake line holder. The clip is oriented correctly when the bend is on the upside (like a hill not like a valley). Hold it firm with a pair of needle-nose pliers and whack it with the side of your hammer.

15) put wheels back on.
Torque to no more than 94 ft lbs. You'll have to take the bus off the stands for the final torquing, but you're done with it in the air at this point anyway. Don't hook up the air tools to get these nuts on like they do at the tire shops. Oftentimes, they over-torque these nuts, and that just makes it impossible to get them off when you're roadside.

16) install upper snubbers.
Others have said to put the snubbers on much earlier in the process. You could, but its more work. Once the wheels are on the ground, the upper torsion arm rises off of the steel bar and the upper snubber can easily set into place. You have to get on your back and all, but slipping it between the torsion arm and the steel bar thing is easy. Slide the stop clips as far as you can, and drive them in with whatever is handy. I used the side of the head of my framing hammer and it worked dandy. You'll have to whack it, though, just wiggling with pliers won't cut it. If you didn't get new stop clips, you'll realize about now why you should have. I broke one at this point and had to wait for mine to ship from
Canada. Grrr..

17) install shock absorbers.
Slide the lower end on first, then push the bolt through on the upper mount. The nut for the upper mount goes behind, so you'll be working blind, but setting a vice-grip or crescent wrench onto the nut works for torquing. Use a 19mm socket for both upper and lower. Once the upper is torqued down (36 ft lbs), do the lower (18-25 ft lbs). I don't know why the torque settings are different, but the VW engineers must have had their reasons.

18) hubcaps, test drive.
Hammer on the hubcaps with a rubber mallet and take a test spin in a relatively confined area. Remember, you just had your steering completely changed, so the handling will be different, and potentially unpredictable. If the bus wants to go careening in one direction or another, and pointing the bus in the right direction is more of an effort than it used to be, take it (or have it towed) to an alignment shop, and get the alignment done. If you've followed the steps above, the only issue is with the eccentric bushing not pointing straight forward. Alignment shops have the right wrench to set the alignment. If you can't actually turn the wheels from stop to stop, check the brake lines to make sure that they are connected properly and not hanging up on something.
When I test drove mine around my neighborhood, and it was like taking victory laps. By the time I got to this point, everyone knew what I had been doing, and most of them had dropped by to lean and watch a bit. The test drive was like being in a one-bus parade with the waving and the shouting. Fortunately, everything worked as it was expected, and I got to the end of the parade route (my beer fridge) without any issues.

Almost 6 months after I’ve completed this work, Hapy's front end is still nice and smooth. I haven't had to take it in to get aligned either. I just drove through some really gusty conditions, and Hapy handled it very well.... better than I did. I should probably put those backing plates on and check the torque values on some things, though.

until next time ...