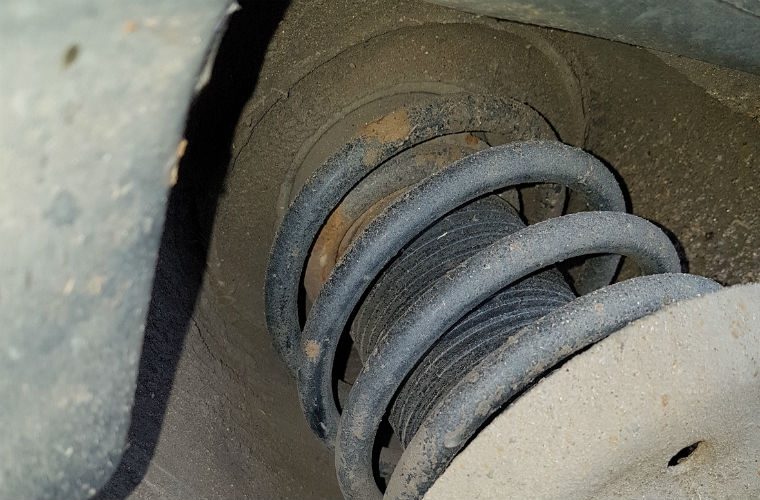
At some point after my trip to Boston, the clunking noise coming from the front end of my 2001 TDI Jetta (Flash) started to really get to me. I don't know if it was the weather changing or the car's growing desire to turn right, but I knew something was going sideways. Today's post covers that saga.
Rebuild Parts
 |
| from MetalMan Parts |
I trolled around the internet and found some good pub on this rebuilding kit from
MetalMan Parts. So, I hit the site, and made some decisions. First, I got the
fuller kit with the TT rear bushings. While that cost a little more, I figured this was a replacement I probably wouldn't be doing again. I also got new front struts (COFAP for comfort, recognizing the TT rear bushings will stiffen the ride) and new strut mounts. I had read good things about a 1" lift kit from
Evolution Import, and I got that too. A few days later both shipments had arrived.
Upon inspection, the MetalMan kit was pretty fantastic. Every fastener that needed to be removed had a replacement. They sent both sway-bar bushing sizes and replacement clamps. It looked great.
The Evolution Import kit wasn't as impressive, but it looked like what I expected from the instructions online. It was shiny and relatively simple. I ended up not putting the rear lift in, and the Jetta sits flat with out it.
Destroyed My Arms on My Arms
I set aside the weekend to install everything, with the recognition that I would need to take the strut assemblies somewhere to get the springs moved from the old set to the new set. I'd also need to get the alignment done somewhere. Otherwise, I felt I could do everything else. 9:AM Saturday morning, I pulled Hapy out of the garage bay where he'd been resting since our active Summer and put Flash in his place. By 11:AM, his was on stands, the Panzer plate was off and I had my plan of attack. I'd start with removing the control arms. Once the old ones were off, I could easily get at the sway bar bushings as well as get the struts out. The sway bar links came out with little trouble, but the 2 18mm bolts with point towards the rear were a little tight. I had to work them pretty hard, and I found my arms started to get sore. But that was nothing compared to the 2 bolts which fed up from below. I tried PB Blaster. I tried a propane torch. I tried this stuff from Amsoil called "toolbox helper". I went back to the torch. By late-afternoon, it was clear I wasn't going to get either of them off so I soaked them with the Amsoil stuff and let it sit overnight.
Sunday morning, I ate well, enjoyed coffee with Boo and then went back to the bolts. Within 30 minutes, I'd concluded that the soaking hadn't helped and I was stuck. My arms were really aching from the day before, so I started looking for options. Since the front end was in pieces, I couldn't easily take the car to someone to get the bolts off, so I hit craigslist for someone willing and able to do the work in my garage. I found a father-son team, and they were happy for the work.
MobilePDX
 |
| now that's a breaker bar |
MobilePDX is a father and son team who have worked on cars for years. Courtney is around my age (dirt is older, the internet is not) and has been wrenching on cars since he was a kid. They were organized, clean and left my garage in better shape than they found it. I'd originally intended to have them just get the 2 bolts off and swap the struts, but once they got going, it was just easier / faster to have them finish the job. They were able to get the passenger side bolt off with a breaker bar and youthful strength. The driver-side had to get ground down with an angle grinder. I'm not exactly sure how they got the bolt out after that. They followed my original plan from there, verifying my thinking... which is always nice.
Aw Nuts
After
MobilePDX got everything back together, they discovered that the front caliper bolts were not grabbing into the hubs. Upon inspection, the threaded holes weren't threaded anymore. Neat. The proper repair is to over-drill the holes and thread in a helicoil (or something similar). That is what Courtney said and the chat-rooms agree with him. Others have used an oversized bolt that is so widely available both on the internet and the FLAPS (friendly local auto parts store), I'm inclined to think it is becoming a widely endorsed solution as well. While I sort this out, Flash sits on jack-stands and I am driving Hapy every day.
Hapy Hapy Joy Joy
I'm sure if I look back into this blog, I have many references of going back to driving the bus after a period of not driving him and expressing the pure joy of driving the bus. It really is awesome. The smiles, waves and conversations happen as much in the wind and rain as they do in warm summer. That's pretty neat.
I have continued my experimenting with the shift-point, shifting now around 3400RPM. This allows for the engine speed (when dropped into gear) to still have some turbo influence. So, he's got even more zip than the old 1700 had from the bottom to the top.
I just put 10 gallons into the tank, and I got over 28mpg since the last fill. Since there's a lot of city driving in there, I think I could have a viable city/highway mix guess: 27 city / 33 highway. Pretty fantastic. It hasn't been all smooth sailing though.
Fix-It List
On an exceptionally cold morning, I discovered that the dash vents weren't quite aligned properly. When I went to fix it, I accidentally pulled the wiper electricals out of the switch. Turns out, that bundle of wires needs to go through the hitch in the center of the plastic "Y", not around it.
After fixing that in the parking lot at work, the heat is suitable for clearing the windscreen from mist or fog, but it smells like diesel exhaust. I need to locate a source for fresh air before I drive Hapy into real cold weather.
The fuel gauge needs to be replaced. I still don't know the actual capacity of the tank and guessing based on the mileage when I last filled isn't a reliable measure. Cold wet weather isn't the time to guess if you need fuel.
I didn't re-install the door seals after I painted the top 1/3 of the bus. This creates a pretty good breeze when travelling over 35mph. I need to install them. Of course, the old ones were pretty beat up, so I need to order another set.
The bus still has some rattles, and I think one of the door skins is the main culprit for most of it. Also, the other jalousie window is now making the noise the rebuilt one used to make. Perfect. Time to rebuild the other window.
Last, the brake warning light flickers at me. This usually happens when I remove or do something around the battery. Since I had to charge the battery before moving him out of the garage, this was self-inflicted. I think there's a fluid leak near the master cylinder, though, so I may have to do a fuller brake overhaul soon. Either way, I'd like so much for the flicker to go away, or just never happen.
That's it for today. Like usual, if I'm not posting, its because I'm working on one of the cars.... or traveling. Once the front brakes / hubs are solved, Flash will be driving again and I'll start knocking down the list above for Hapy. The good times never end. As always, thanks for following along, and please pray for snow. I'd really like to get some gravity testing in this winter and our farmers need the snow-pack for summer irrigation-