Showing posts with label power. Show all posts

Tuesday, September 8, 2020

A4-ward Progress

Apologies for the late publish. Not sure what happened; I'll chalk it up to user error. Anyway, a few weeks ago, I mentioned that in a charitable move, I bought Nemo (the 1997 A4 1.8Turbo) from T (See If You Love...). Today, I go through the fixes I have done to get Nemo ready for someone to proudly drive, while avoiding work on Zed, the 280ZX. In an earlier post (See Dust Dodging), I mentioned the replacement of the window and the front side marker. I did a few less obvious things that I'll cover today. Before I begin, Hapy belated Labor Day to my US readers. Traditionally, this is the start of the most productive period in our calendar year: from Labor Day to Thanksgiving. So, if you feel like you're working a ton over the next couple of months, it's probably because you are.

Oil Leaks
Old Volksies like to mark their spot with a little oil. Old buses and bugs do it. Now that Jettas and Passats have been around long enough, they do it too. It seems that VW's German brethren, Audi's, mark their spot as well. For Nemo, there are a few sources. I focused first on the leaking motor oil. I slid under the front end, and after having sat for a few days, the oil that had been flung up from below during a drive had dripped away, leaving fresh oil only where it was actually leaking out. There was a nice big droplet at the oil drain, so I checked the torque on that bolt. It was a little loose. Next, I could see fresh drops on the cross member under the oil filter. It was hand-loose. As in, I was able to twist it tighter with 2 fingers. I think we found our main culprit. With oil filter pliers, I tightened the filter snug.

The power steering rack has a leak, and before I do another steering rack removal and re-install, I am trying the Lucas Power Steering Stop Leak first. This has been leaking since T bought Nemo, and T had been managing the level regularly with just topping it off with regular fluid. I intend to eliminate the leak. The steering is still really good and tight, though I expect the upgraded suspension helps with the road grip and cornering on rails. I looked back through my blog and I can't believe that I never posted on the steering rack remove/replacement I did on Flash, maybe 4 years ago. I think my dislike of the banjo may have started with those banjo bolts. It was a really tough job, so I'm all the more puzzled that I didn't post on it. Weird.

Dented Front Fender
With increased confidence from my efforts on Zed, I wanted to tackle the dent in the passenger fender. I pulled the front side marker, following the process I described in Dust Dodging. Through the hole presented when the light was removed, I fed a pry-bar. I did NOT leverage against anything, I just pushed/pulled outward and the dent popped out. My efforts left a small convex ding, but it is much better than the cereal-bowl sized dent that was there.

Under-Dash Panel
this is from an auto-trans, but similar
With the outside looking fairly good, but needing a wash, I started looking at the interior. There are a few things that need improvement, but I'll really only get after a subset. I started with the under-dash panel. T had removed this panel to replace the clutch master cylinder and had not re-installed it yet. We had the panel, but lost the fasteners. I made-do with things I found in the garage. During the install, I discovered that the remote trunk opener button was faulty, so I will need to replace that. Otherwise, the install was about what you would expect. The panel should be held on with 3 bolts, 2 through the front and one from the side, near the fusebox. Threading the bolts from the front is a great opportunity to practice patience. Gravity is working against you, and you can't see where the bolt needs to go once the panel is in place, so breathe deep and expect it to take many attempts. Once bolted into place, these panels are supposed to have 2 pop-in covers which fit over the bolt holes. I only found one so I'll add one of those covers to the junk-yard list.

Passenger Sunshade
The last thing I got after in this car-fix session was the passenger-side sun-shade. This was sitting on the floor since T bought Nemo. It looks fairly simple to mount. The plastic hook-looking thing goes in with the hook facing towards the rear, and you press up and back until it rotates flat, leaving the mounting hole near the hole in the steel above. At least, that's the theory. The prior owner had replaced the headliner and when he did, he mis-routed the wire for the light on the mirror. Instead of routing the wire through the hole in the steel where the mirror "hook" goes, it was left just dangling below that steel. So, the options were: don't hook up the wires to run the lights, return the route of the wires so it passes it through the steel from above -or- hack something. I didn't want to not hook up the light. I tried to figure out how to re-run the wires, but it appeared to require removing a considerable section of headliner because of the shape of the steel ceiling, so that left me with some kind of hack.

I took my hacksaw (aptly named) to the sunshade housing that, when installed, disappears into the ceiling. I cut a channel for the wire to slide down, reducing the mount of wire that would be pressed between the plastic and the steel ceiling. This actually worked, and I apologize for not taking a picture. Hopefully, you can see the shape of the mount from the picture on the right, here. With the wire pushed into the channel, I plugged the wire into the plug hanging from the hole in the ceiling. I pushed the rest of the wire into the headliner, and then followed the "theory" I described above. It pressed into place with not nearly as much effort as I expected. Once rotated around, I threaded a bolt through, and the sunshade is not in-place and operable.

The other bits of the interior that need to be resolved include fixing the cover on the driver seat cushion, and replacing some of the brittle plastic bits. I may not get to those items, but I think I will try to get the AC working; it probably just needs a charge. The next most important thing to resolve is the trunk is stuck closed. I'll get after that the next time I choose to focus on Nemo.

Thanks, as always, for following along.

Tuesday, October 8, 2019

The Dog Days 333 (Part 2)

Continuing the story of the 333-mile loop we did in mid-August. In part 1, I explained the plan, and the longest leg of the trip, from home to just south of Florence. Today, I'll cover the journey from Florence to Newport, happenings at Newport and then the journey through Lincoln City and home again.

Florence
googleImage
I left off the last post with our departure from Honeyman State Park. We had a great time there, but it was approaching lunch time for most, and we had one rider who had skipped breakfast, so food was at the front of our minds. When we entered Florence on our way in a few nights earlier, we spotted a Dairy Queen, so we had a fail-safe. I wanted to see if there were better offerings before suffering the Brazier. Our patience was rewarded with an A and W car hop on the north end of Florence. We were fortunate to arrive just after someone else had left, so we could pull into a car-hop spot. I didn't think these things were still around, but not only is the place still standing, they still bring food out to you at your car on big platters that you can hang on your window. I wasn't sure that was a good idea with a nearly 50 year old bus, so we used the tray as a table inside it instead. They served the classic A/W root beer in heavy freezer-cold glass mugs, and the food arrived slightly wrapped in paper. Maybe it was because we hadn't eaten planned food in a week (no grocery store stops means you make up meals based on what you have, not from a plan) or maybe it was because we had worked a bit to get there, but those burgers and fries tasted fantastic. As we sat, we could better see just how busy they were. Inside the restaurant, there were no open tables and the line ran back to the door. Around the parking lot, there were no open spots, and there were motorists queued for the next open car-hop spot.

From Florence to Newport
looking South
Northward is just as amazing
Now fed, we could embark on the US-101 north to Newport. I hadn't driven this stretch of the US-101 in many years, but as much as other areas of Oregon have radically changed, this area is relatively static. The coastline is peppered with public beaches, but for the most part, the waterline is unreachable. The cliffs are too steep, or the terrain too rough for a road. Or, a path could be put in, but there's no place on the 101 to put a parking lot. As a result, there are long stretches of untouched coastline to enjoy out the window.

With all of the recreational vehicles on the road with us, there was little pressure to drive too terribly fast, making the drive all the more pleasant. The road is curvy, so even if the road had been empty, Hapy tips a little bit on corners anyway, so I wouldn't have been driving much faster than the current speed of traffic allowed. Hapy was running great. His temperatures would pop above 185*F for a quick second and then drop back down to 185*F as we climbed inclines or had to slow way down. Overall, though, his temperature issues of the past were quickly moving further into the back of my mind, as the scenery increasingly took over the front.

park, as it appears in googleImages
As I mentioned in the last post, we rented a house in Newport. Well, my sister Em did. We had her text the address to C, my navigator, so he could get us there. He had us take a left off of US-101 after we crossed the bay bridge into Newport and then he became confused. He asked me to pull over real quick and he asked a pedestrian "is there a skate park around here?". Hilarious. But, there was, and he had almost gotten us there. We were a block and a half away from it. We parked in front, nose pointing at the concrete bowls, and C jumped out, board in hand. K2 opened the slider, but remained on the lot couch while I wandered over to check it out.

Newport
725 NW High Street, Newport
This skate park looked like a combination of planned park and random construction. A few words from the older cat hanging out brought clarity: the city built it, and then the skaters added to it. For materials, they used whatever they could find plus concrete. Patio blocks? Check. Concrete slabs? Check. So.. that begs the followup question: how were the transitions? Well... you needed to plan for them. C worked the park, and while he did a car-load of locals arrived. Apparently, this was a super-hot day for Newport, so the locals would do a run and then pant in the limited shade. They all had an interesting style where they would look uncomfortable on their board, but then pop an amazing trick or fly out of the bowl and land it.. just to look unstable again after they had landed the trick and rolled a few feet. Maybe it was all of the home-made transitions. Regardless, I pulled up the address for the house, and it was about a half-mile away. We were early anyway, so C got his skate on. Once he was pouring sweat and ready to roll, we pointed south and within 10 minutes we were sitting across the street from the rental.

The rental was an odd, albeit large, 4 story house. The first floor was a separate apartment, but it was part of our rental. The upper 3 floors were, in order from bottom-to-top: more bedrooms with a bathroom, the main living space and a full-floor master bedroom. There was no yard, but there was a grassy park across the street with a big playground in it. It was perfect for the cousins, but no yard meant no tent for C and K2. Arrangements were resolved, and shifted each night as who was able to stay the night changed each day. Boo and I got a bed for one night, but honestly, we prefer Hapy so we stayed in the bus the other nights, and were grateful for it.

The family reunion was great. Boo and I had seen everyone within the last few years, but many family members hadn't seen each other in a very long time. For example, K2 had never met Chris, Rebecca's husband, and C hadn't seen him for close to 10 years. Lives get busy, and travel isn't the highest priority when there are colleges to pay for. Regardless, it was great to have that time, all in one place, for a few days so we could really re-connect.

Newport to Lincoln City
near Yachats
When it came time to leave, the plan was for the smaller, or more distant traveling families to pack and split, leaving the final walk-through for those who simply couldn't move fast. Boo and I were that last group, transporting the grandparents and teens. The plan didn't really work out that way, though, and we had all of the families all packing and leaving at about the same time. This made for a little extra chaos, but it also provided a little extra time to see each other. Ultimately, we were out by the appointed time, and the families went their separate ways... with Boo, K2 and the grandparents in K'Lack and me in Hapy with C, we headed north towards Lincoln City with hopes that this time Moe's wouldn't have a long line.

The drive to Lincoln City was as eventful as the drive from Florence to Newport. Hapy's temperatures stayed very level, he had plenty of power and the traffic didn't push faster than around 55mph anyway. We took the left to get to Moe's and could tell from the parking lot that things weren't looking very good. It was past noon, but still close enough to lunch time, even on a Wednesday, to create a crowd at Moe's. I found a spot near the door and C jumped out to find out how long the wait was... 40 minutes for a seating. Boo quick-conferred with the grandparents and we all decided to go to the McMenamin's Lighthouse Pub instead. Of course, McMenamin's isn't exactly known for fast service, but I figured that with the time to seat and then get food, we were still ahead versus Moe's.

Lincoln City no-start
After lunch, Hapy's now-typical 'starts the first time' didn't happen. I turned the key and nothing. I wiggled some wires behind the ignition switch and I could get the system to flip to "run", but "start" was still a no-go. Neat. With Boo, the grandparents, C and K2 watching, I simply pushed in the clutch, let off the brake, and roll-started by popping into reverse. Within a few seconds, I dropped into that 1200 rpm limp mode. Fun. I just puttered to an incline and roll-started him again. With concern about Hapy's limp mode issues and inability to start, we headed back to the US-101. He didn't drop into limp mode again, nor did we stop the engine again until we got home.

Homing
4!
We made one stop after Lincoln City. There was a pressing need for road-bev's and a restroom so at the north end of Dundee, we stopped at the Chevron. I stayed with Hapy as he idled and C dashed into the store for a couple drinks for us. Other than the no-start in Lincoln City, Hapy continued to run like a champ. It was a hot day, and he was staying nice and cool. He continued to have plenty of power as well, and he demonstrated both on the long uphill between Newburg and Sherwood. I described this climb, and it's significance in my recent post (See Now Water COOLed), but I'll stress it again. This is the ultimate test ground for the success of the cooling system. Hapy has struggled up this hill on the way home every time we've driven it. Part of that is because of the length and height of the incline, but part too is because by this point, he has run for multiple hours and is already plenty hot before we start. This time, though, his temperature peaked at 194*F as we took the hill in 4th gear. Boo and I parted ways in Sherwood. I took Roy Rogers into Beaverton and she continued on 99W into Portland to drop off the folks. Roy Rogers has gotten very built up now, making this less and less of a quality cut-through. I may need to work the maps for something more interesting for next festival season.

Anyway.... 4 successful round trips, To celebrate, here's a clip from Sesame Street back when the painter was still part of the show. Yeah, showing my age here a little bit, but I liked this guy, back when the Count was spooky, the parents didn't know about Mr. Snuffalupagus, etc. Once they started PC-ifying all that stuff, they took some of the special with it. Anyway, 4 successful 300+ mile trips, totaling over 1200 miles without the support of a towing company nor AAA. Hazah!

By the way, the starter no-op was solved once I emptied the back of the bus and disconnected / reconnected the wires going into the TDI ignition switch. Something shook loose on the drive. Another argument to spend time this winter getting after the electrical: solving the 1200rpm issue with the accelerator pedal, the occasional issues with the engine not starting and maybe even organizing some of that wiring in the tire well. Nah... that's crazy talk :)

That's it for today. Thanks, as always, for following along-

Tuesday, October 23, 2018

MGB Exhaust Re-Do (Part 2)

Picking up where I left off, we have the MGB front end on jack-stands and the old exhaust sitting in a heap in the driveway. Today's post will be about getting the new exhaust installed. Recall, it is a ceramic-coated stainless steel Bell system. I left the packing plastic bags on the pipes as I handled them to protect the finish, removing the plastic as I installed them.

Setting The Scene
exhaust hammer example
from streettechmag.com
With break time over, we set to trying to install the new exhaust. The Bell system has 5 pieces: the header, a straight-ish pipe, the center resonator, another straight-ish pipe with a support bracket attached and then the tail muffler. They go on in that order. The hardest part, like with any car, is getting the header to fit around all of the various other things in the engine bay. I watch car shows on Velocity and some of those installs require hammering on the pipes to get them to fit. That would really suck. Spend all that money for a "bolt on" set of pipes and then have to dent the snot out of them to fit an otherwise stock engine and compartment. Doesn't seem right, but does explain the custom fabrications they do on some of those Velocity shows. Even then, it's usually because they're slamming a huge non-stock engine into a classic-ish car. For a built-for-stock engine, hammering dents into the pipes shouldn't be necessary. Anyway...

From Below?
For the MGB, this saga starts with getting the front end way up in the air. We had a good 18" of clearance and still couldn't feed the header up from below. Some internet posts I've read indicate this is super easy, but I suspect anyone who installed that way had a lift or a pit. We have neither so we switched to going in from above. That meant removing the bonnet.

From Above
attached for fitting the rest
of the pipes
The bonnet is held to the hinges with 2 bolts per side, but remove the hood prop first. Once the prop is off, one person holds the hood still from the front while another person (K2 in this case) loosens all the bolts, and removes one from each side. At this point, it would be wise to put a shop towel or something soft under each rear corner of the hood. Then, remove a final bolt from one hinge. Balance the hood on your shoulder and let it slide down onto the towel. Repeat with the other side and then each person grabs a side of the hood and walk it off the front. For fun, we set it (on pads) on top of the 280ZX hood. The MGB hood looks like a toy hood compared to the Zed hood. The MGB hood is at least 6 inches smaller all the way around.

center-mount bracket
With the hood removed, you next loosen the driver side engine mount. The two nuts which hold the engine to the mount are the easiest to get to, and present the least necessary to separate the engine from the frame rail. With nuts safely stowed, place a wood block on a floor jack and slide it under the driver-side of the oil pan / engine block. Carefully lift the engine from below (setting the block of wood so the oil pan and other parts are not damaged) an inch or so. Once you feel considerable resistance to the lift, stop lifting. Now, have your helper fit a pry bar between the engine mount and the engine and then apply pressure to shift the engine slightly towards the passenger side. The engine will more roll anti-clockwise than slide left-to-right, but this creates enough space. Hold the header vertically, with the head-tips pointing across the top of the engine. Slide the header as far down into the largest space you can go before rotating the header so the head-tips point up and away from the firewall. On this particular header, there are pinch-welds along the sides of the collector. These pinch welds wanted to hang up on pretty much everything on the way down. With some gentle and some not-to-gentle persuasion, the header pushed past the space between the block, the steering column and the frame allowing us to wiggle it into the right spot near the head. At this point, the pry-bar leverage can be released and the floor jack released, letting engine rest back on the mount. We had to wrestle it a little bit, but it settled. Our header ended up with a couple minor scuffs, but no scratches.

To get everything else to align, K2 bolted the header onto the head. K2 was done for the day at this point, and the rest of the install was not going to be as straightforward, so I cut him loose.

Body Brackets
header from below
While K2 attached the header to the head for fitment / alignment, my focus was on the 2 mounting brackets. The center mount reuses the original body mount holes with a new steel and rubber mount that simply threaded in with new bolts (in the kit). The rear mount also reuses the original body mount holes. If yours are still in great condition, you could reuse them. With the body brackets on, I could start lining up the pipes, and get a feel for what went where.

The fourth pipe (second straight-ish) had a bracket that was a simple flat bar wrapped around the underside of the pipe with a round hole at each end. The center-mount kit provided a bolt, 4 large flat washers, 2 plastic sleeves, a bit of metal flashing with holes and some small nuts and bolts. There were no instructions, but you could tell that the bolt went through the holes in the flat bar. A flat washer went between the flat bar and anything else that touched it. Between the ends of the flat bar, on the bolt, went the plastic sleeves and the nut went on the end. Neat. With some careful bending of the flat bar with my channel-lock pliers, I was able to get the operation together. The bit of metal flashing was to wrap around the plastic sleeves and then bolt to the center-mount bracket I had just attached to the car.
second straight-ish pipe mounted

To get the fourth pipe and centermount to align and fit, all of the pipes between that mount and the header need to be in place. Start with getting the pipes in the rough spot you expect them to be. A straight-ish pipe (one that has a gentle bend or two) has those bends for a reason. Align them with the path of the original pipes. Once set in the right location, fit a pipe clamp between the pipes and then slide them together, wiggling the fit so they stay together and are in the right alignment. With careful use of a rubber mallet, I was then able to drive the various pipes together. Remember to set a pipe clamp at each junction before you start pounding things together or you won't have a way of clamping things together.

Rear Muffler
The final hurdle was figuring out the rear muffler mount. The old mount was a real hack job where a prior owner had taken a u-bolt that roughly fit the original body mount and threaded a nut on each end. So bad, but I really shouldn't judge. The original mount was almost German in it's over engineered solution. To the bracket is attached 2 rubber mounts pointing away from the exhaust pipe. To these rubber mounts, a hexagon bracket (with one leg removed) is attached, with the missing leg on the bottom. The missing leg has a pair of holes, one at each end, for attaching a pair of semi-circular clamps. These clamps hold the pipe in place. Unfortunately, they are sized such that if you put them on without any spacers (not included) they will either pinch the exhaust pipe because you tightened them too much or the lower clamp will fall off because you didn't tighten them enough... because you didn't want to pinch the pipe. To remedy, I found a pair of oversized nuts that would slip on, acting as spacers, so I could tighten everything down without pinching the pipe.

Header to Head
see the gap?
Once I had it all assembled front to back, I moved from back to front, tightening the mounts and pipe clamps. Once snug, I shifted to the very front to consider the mating of the manifolds to the head. The MGB came with a few types of exhaust, with 2 particular versions for the models before emissions standards became so tight (in 77) that the exhaust manifold needed to be redesigned. These 2 types have a different thickness of the material through which you send bolts to attach it to the head. The older one (#12H709) is thicker than the newer one (#12H3911). This is important because the intake and exhaust share studs and corresponding nuts. If the thickness of one manifold is not a match for the other, there is not a uniform amount of torque on the various manifolds, creating leaks. This applies to pretty much any combination of intake and exhaust, unless you stay completely original stock. Since the prior owner had replaced the dual carbs on my MGB with a side-draft Mikoni carb, and hacked together a home-grown exhaust, I was going to have to deal with this regardless.

When the header was attached for fitting the other pipes, I didn't look very closely. It didn't matter. With a closer look, you can see the washers were not sitting flush. Adding insult, only two of the thickness differences for the 4 shared studs were the same. To remedy, I grabbed some fender washers of varying thickness, and cut them in half (across the hole) to use as spacers. To hold the spacer in place during install, I used a very thin smear of the copper gasket maker I used on the header gasket. This plan worked great. In about 30 minutes I had spacers in place, and the header torqued down with washers sitting flush.

gap gone
Testing
All of this, nearly 2 full days of effort, lead up to the test fire. Of course, I had to re-assemble the air cleaner, and the hood is still off, but after verifying everything was back together, it was ready. I had been trickle-charging the battery, too, so I was pretty confident it was going to start right up. Fortunately, it did. It sounds great. It has a nice deep tone without being too loud. The biggest difference, I think, is that all of the growl sound comes from the rear of the car now. It must have had leaks before. With all of the rust, that's not a surprise. I wound the engine up to 3000RPM to get a sense of how it will sound on a power pull and it sounds pretty awesome. With the top down, the garage doors open and the rev counter around 3k, I still hit 90+ dB. So, it is no quieter... in the garage with the doors open. On the road, it is quieter in the seat, but I don't have dB numbers to prove it. Just my ears.

That's it for today. I had started reading about how to do automotive interiors (trimming) in preparation for doing the seats and cards on the MGB. I have parts on-order to complete the trunk and woofer box as well. Once those are complete "major operations" will have completed and I will be shifting focus onto the Zed... and then back to Hapy. Thanks, as always, for following along-

Tuesday, September 11, 2018

Deck Transformed

We have a brief break from the oppressive heat waves, so I attacked our deck. Today's post has little car content. I just wanted to post on this since it took so long, and therefore got in the way of generating car content. For those who still remember, my condolences to the families of the victims of the 9/11 attack.

Power Wash
post power-wash
This journey started with a basic powerwash. We knew that with the change in the weather, any remaining moss from the prior year will quickly grow back and make the deck as slippery as ice with the first rain. To avoid the moss quick return, we simply powerwash it. Boo bought one a few years ago, but I had the time, so I took a turn this year. Things to remember for next time: check that you have the blaster tip set to fan and not cone before pointing it at anything, and it's okay to start with a low power setting first, if you aren't sure. I didn't do any permanent damage to the deck, but a few boards got chopped a little bit by the cone on high pressure.

Once the deck was clean, we could see that lots of the stain had seen better days, and some decking was going to need some holes solved. We didn't want to lay out for a whole new deck surface, nor did we want new boards to look all new and shiny next to the really old ones, so we decided to reduce the footprint size and use some boards we removed as donor material to patch holes.

Pry Apart
mid-way thru pry-apart
So, the deck has seen better days. It was kind of neglected by the prior owner the last few years she lived there, and we haven't done anything to it since we moved in (See Move Again for that fun). Instead, the boys have used it to work on skateboarding antics. So, we have a few holes to go with some rotting boards. I got a 24" wrecking bar from HomeDespot and removed around 10 planks, including the 4 rows closest to the house. We decided that we could live without the first 2 rows and still have that edge of the deck place-foot on the patio. This took a little finesse to pull up a board in the middle of other boards without meaningfully damaging either. I found that placing the wedge-end between the boards, with the angle facing the one I intended to remove, and applying steady leverage, the nails would give a little bit. By repeating the process, the end would start to lift from the deck enough for the wedge to get underneath and then I could work down the plank, lifting it, with the nails still in it.

Put Back Together
mostly sanded
I collected all of the boards and removed the nails. During removal, I considered the condition of the board. A few were rotted from end to end. Others had a hole and a couple had both holes and rot spots. I selected boards which just had a hole from the skateboarding and cut them to fit the gaps created during removal. Because we were shortening the deck by 2 planks, I had more material than gaps, in theory. We really didn't want to use new wood, if it could be avoided, because we knew that the new boards would not blend as well. I ended up with enough material to fit the gaps, and had a few feet of left over viable wood. I could tell during the re-install, though, that I would need to replace more boards next year or the year after.

Sanding
Once the deck was gap-free, it was still an ugly red-ish gray deck. While I could have just painted it, I wanted it to look better, especially after I'd already put in around 8 hours on it. So, I grabbed my belt-sander and a stack of 100-grit belts. I would have used something with a more coarse grit, but I had 100, so I used 100. Plank by plank, I sanded the loose red off, and got down to where most of the board was its natural creamy color with some red streaks. This took 6 hours, and it's very dusty. Like any paint job, though, the top coat is a reflection of the work performed underneath. It was unpleasant work, and had me walking funny for 2 days, but the final result showed that effort.

Stain
I let the deck sit for a week after sanding it. In part, this was because I had a job to get to, part of it was because I could barely walk, much less crawl around and part of it was other distractions. Regardless, after a week of high temps and dry winds, the deck was ready to stain. So, we broom-swept it a couple of times and went over it with a leaf-blower a couple of times. Still, there was a thin film of dust, evidenced by the dust on our clothes after staining.

finished deck, drying
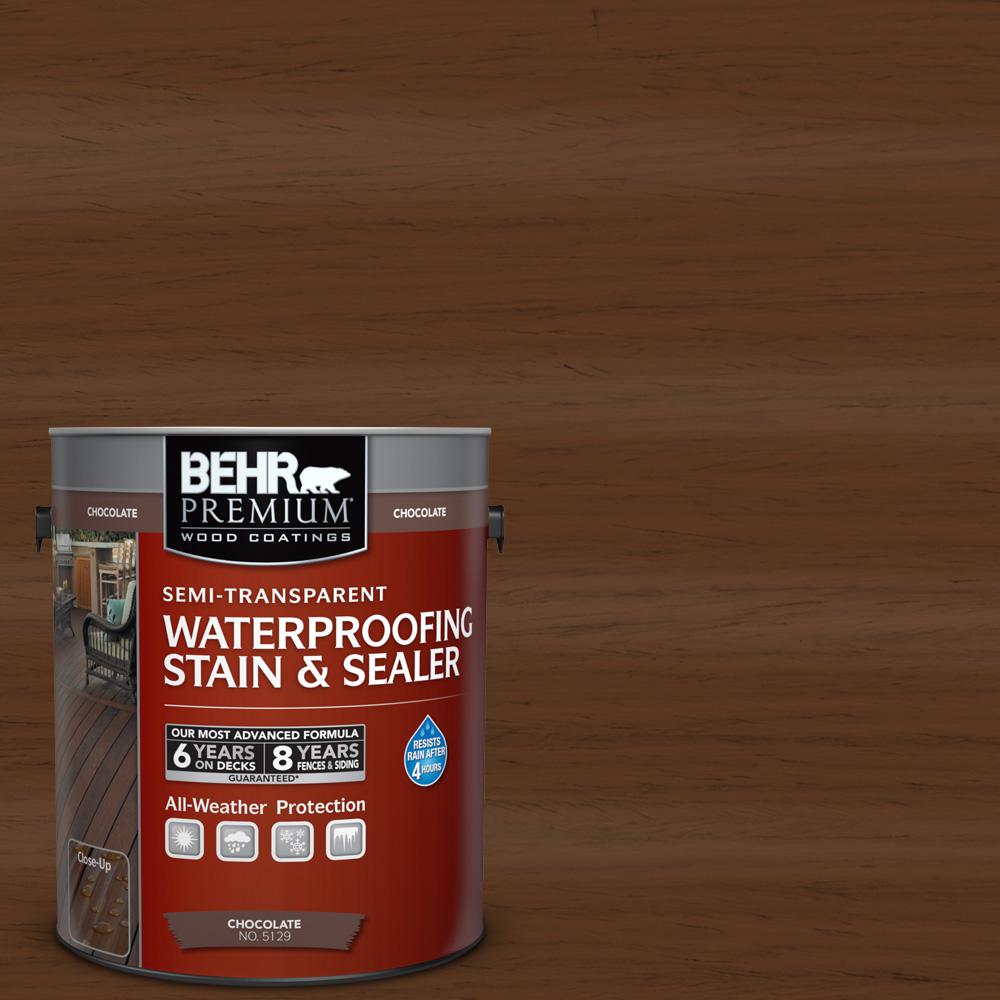
We started at the far end, working one plank at a time, and getting the hard-to-reach spots first. As best we could, we would finish a small area on a board with the brush stroke going from the unpainted into the painted area, eliminating brush-marks. With Boo and I working this part together, the deck was stained in 4 hours. This included the front facia, but like the rest of the job did not include the bench nor the fence. For future reference, we used semi-transparent "chocolate" stain (this stuff and referenced in the picture), and the deck required a full gallon, leaving about 1 cup in the bottom of the can for touch-up.

That's it for today. After staining in the heat, we spent the rest of the weekend relaxing... except for helping T with his A4. I'll probably post on that at some point. Anyway, thanks for following along, and there's more car/bus content coming.

Tuesday, February 6, 2018

New Year, New Tools

Over the course of the last 6 months or so, we've picked up some new skills and a couple new bigger shop tools to power them. Today's post goes over some.

Power-Washer
Boo power washing back deck
About a year ago, Boo wanted to power-wash our concrete. You read that right: she wanted to. She was not asking me to do it nor solve for it; she wanted to be the person doing the washing. She looked at renting one, and they run around $300 per day. On a whim, she looked at the Bi-Mart mailer, and they were selling them for, get this, $295. So, she went and got it, got a 2-gallon of gasoline and power washed the rear deck, the back patio, the front side walk and some of the driveway. She has since used it on the back patio again, and I'll be washing the siding when the weather warms back up. I've thought about how I could use this tool on the cars, but figured it would probably do more damage than anything. I've read about folks using a power washer to strip paint. I may experiment with that when I re-paint the bumpers on Hapy.

MIG
Set for floor, I think
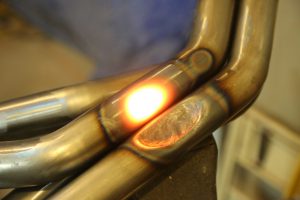
If you've been reading this blog, you know that over the Summer of 2017 (read: MGB - floor pans 1, 2, and 3), we played with a MIG. It all started when we discovered floor-rot in the MGB. To resolve, we borrowed a MIG from our good friend Travis. He is a welder by trade and has a few of them at his disposal. Truth-be-told, he'd rather have a TIG welder, but the MIG is so handy (or appropriate) for some jobs, that it will soon be back in his shop. We really had fun, and have used it on a few smaller things since the floors. While we don't expect to use it on the Z or again on the MGB, there's always a use for a welder. Once it goes back to Travis, I'll be adding it to my list of tools to add once i have space.

Soda Blaster
C wanted to get the paint off the Z. He started with a grinder. That's dirty, but dry. And loud. And slow. Then, he tried Airplane Paint Stripper. Still dirty, but wet. And nasty-stinky. But a little faster. We have watched videos and television shows on Velocity where the project car rolls in, gets taken apart and then "sent off to blasting". After the commercial, the car comes back completely stripped of paint and rust. Sometimes the body is in pretty good shape, but usually the blasting exposes all of the history: old dents which were "cave and paved", rust that ate through and interesting cheap body shop repairs. Seeing that magic, we figured we wanted to get some of that.

HF Soda Blaster
First, we looked at renting one. These run at $325US a day, and the only outfit around here is an hour across town. So, we could get up at 6:AM, pick it up at 7:AM, be home by 8:AM and then blast until 3:30 when we tear the machine down, pack it up and haul back over to the rental shop which closes promptly at 5:PM. Arriving after 5 means you pay an additional day. So for 7.5 hours, the rental runs at around $46.50 an hour, and that assumes you don't stop for lunch. AND, you need to buy your own soda (at $40US per 50# bag). Blasting an entire car would probably take 3 bags, so at this point, one fun day of soda blasting (plus 4 hours of combined travel time) is just under $450US.

When we bought the power washer, it was virtually the same thing as what we would have rented. Clearly, that was a good move. The soda blaster, however, is a little different. The fancy rental was almost 3 times what a Harbor Freight blaster cost ($135US), so we bought one, with a dead-man valve and some extra nozzles. And a 50# bag of large soda.

The nozzle on our blaster is really small, and while it does effectively remove paint or grime from metal, it is much slower than I expected. In doing research, I've learned that these are much slower than sand-blasting, and that's by design: the soda is much less harsh both on the environment and on the target material. We have decided that the soda blaster is probably best suited for sensitive areas where you can't get after the paint with a grinder. We may circle-back and try the power washer too, to see if we get better results in shorter time with that. One last concern is the need to properly treat the metal which was stripped by the soda. The soda changes the surface pH, which helps prevent rust, but also gets in the way of paint or primer adhering to it. There are a few different ways to solve for this, but first pressure wash the soda-blasted areas to get all of the residue off. Then, it is recommended to use something like HoldTight 102 to address the pH shift.

Capacity Reached
I've mentioned our limited space, and while it's a "first-world problem", it's still a problem. We are now leveraging a small garden shed for storing thing, like the power washer and the soda blaster. I think the acquisition of any new large tools will need to wait at least until we are down to one car in the garage. We may need to consider a larger shop somehow.

That's it for this week. Thanks as always for following along. I think I'll have made sufficient traction on one or more of the projects to be able to get back to posting on them.