Showing posts with label wash. Show all posts

Tuesday, June 4, 2019

Seasonal Cleaning

Okay, so this won't be a very exciting post, but it's how I spent a weekend. After pulling off the winter car-cover, I couldn't help but notice just how dirty Hapy got over the winter. You'd think, with a cover, he would look pretty much the way he was when the cover went on, but that's just not how it works.

Winter Plan
Moisture gets under that cover. To keep the inside of the bus healthy all winter, I pull the cushions out of the pop top and lay them on top of the seats. This prevents moisture from getting trapped between the cushions and the poptop, or between the cushions and the bed floor. I will usually pull out the extra foam bed mattress and thick blanket from the back deck too, and stow them inside the house. Then, the thin original pad gets partially stood up. Again, this is to keep moisture from getting trapped.
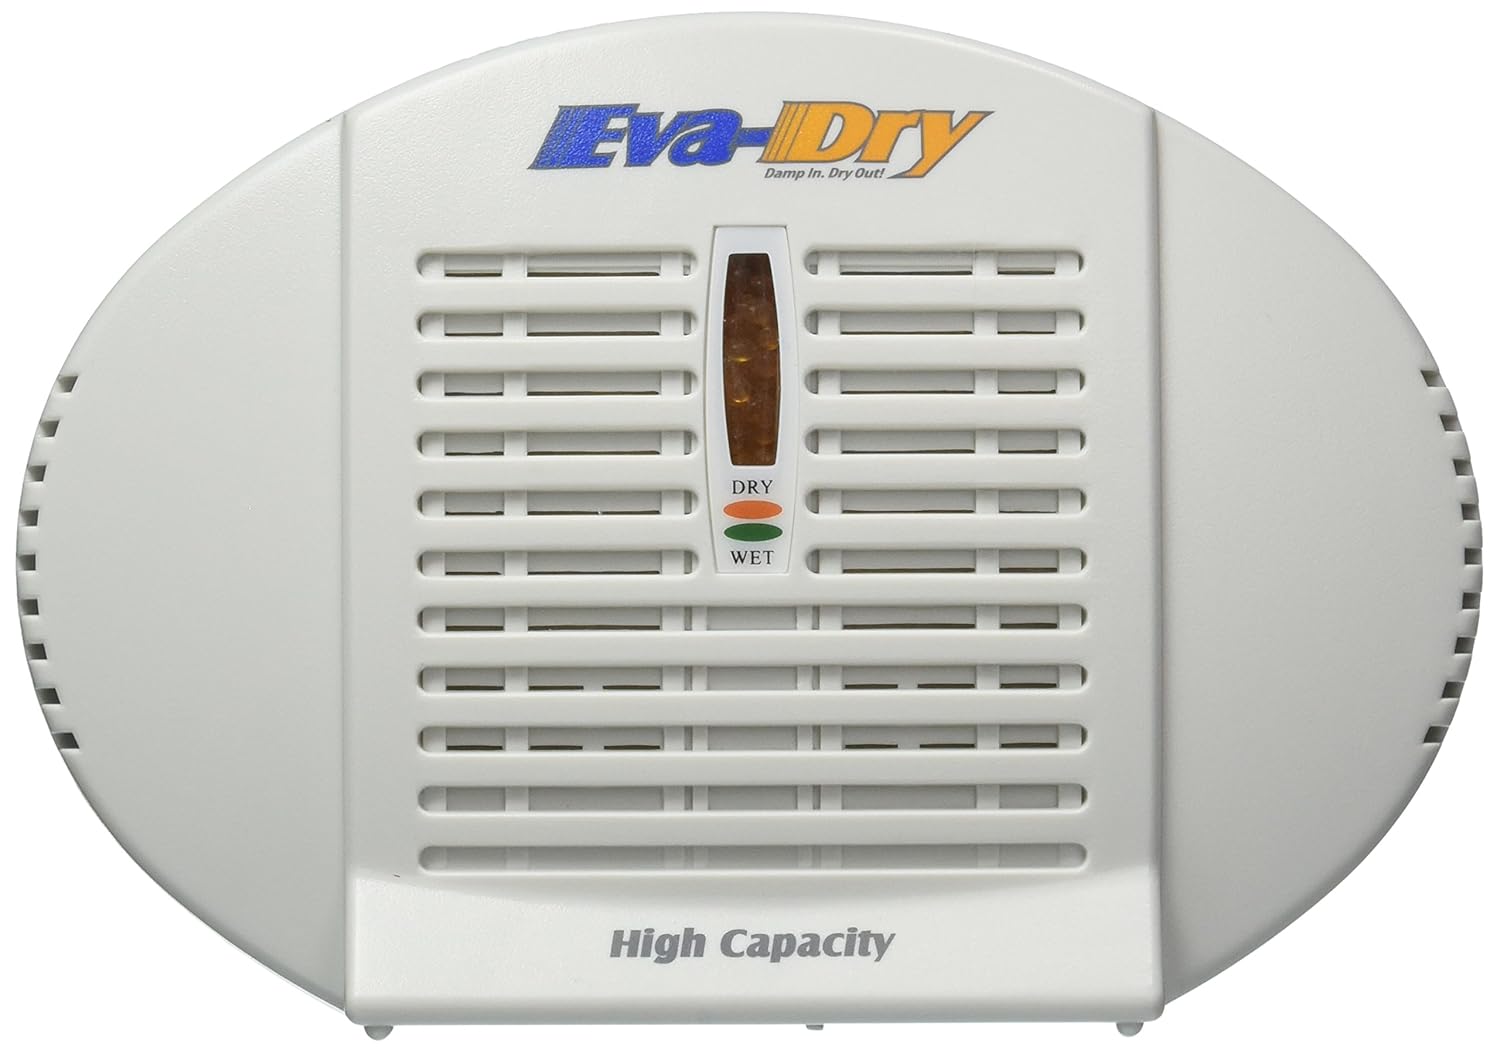
Last, I have a set of rechargeable desiccants I rotate in every couple of weeks. These Eva Dry things (I got a 4-pack of E-500's a few years ago) are pretty clever. You plug them in, and the moisture they collect steams out, turning the little dots from a purple color through pink to blue. It usually takes a few days for it to completely turn, but once that happens, I swap it out with one inside the bus, which I put in the center of the bus, on top of the seat-back of the middle row seat. If I rotate the driers often enough, and if I did the cushions correctly, everything inside is ready for a new season without a big mold effort first.

Spring to Action
The uncover effort starts with little ceremony. I simply wait until it looks like the rainy season is over and pull it off. It takes all of about 5 minutes to go from covering the bus to stowed in it's stuff bag. Next, I'll pop the top up, and check for leaks. Assuming I don't find any, I'll inspect the cushions looking for mildew or mold. As I clear the cushion, it goes back to it's designated spot. Once the inside is in order, I'll put the deep cycle battery on the charger overnight. This year, I was charging the battery while swapping out tires.

With the battery full, it's time for cleaning. As I've said before, television shows about cars do not do the amount of cleaning justice. Seriously. For every few minutes of wrenching time there are hours of cleaning. Otherwise, you're taking a dirty part off another dirty part and then sticking either that same dirty part back on, or installing a new one... on top of that grime. That's silly. So, you clean the parts before you disassemble, clean them when they're apart and then clean them again after they're put together. That's a LOT of cleaning. That only accounts for those parts. At some point, you need to do the typical car owner cleaning. With a bus that has a fiberglass top, "typical" cleaning isn't exactly typical.

Scrub -a- Dub
Every Spring, I clean the pop top outside. I'm not very tall, so I need a 6' ladder on top of the garden hose, a scrubby sponge and a tub of fiberglass shower cleanser. Yeah, that's right: bathroom cleanser. It is gel-coated fiberglass just like your fiberglass shower, so it's the best stuff for getting it clean on the first try. I simply hose off the top with the most powerful setting to get stuck-on stuff off of it. Then, I'll apply cleanser (I use Soft Scrub w/bleach) and scrub with the itchy side of the sponge. I'll work sections that can be easily and safely reached from the ladder. Then, hose that off, hose another section wet, move the ladder and repeat.

With the top cleaned, I switch to more standard car cleanser in a bucket with a car-wash sponge. Then, I wash the pop top again, but this time with the car wash. I think this helps the gel-coat, and it helps to carry away any leftover residue from the bathroom cleanser. Once the top is done, I raise it and then I work my way around the rest of the bus, getting him clean top to bottom. This way, I get the tin-top between the bellows and the drip-rail that is covered by the pop-top when it is down.

Now, with Hapy freshly cleaned, with new tires, and safe brakes as well as all the other fixes since last June's ignition fire debacle, he is ready for a Summer of travel and adventure. We start very soon with a trip to Eugene, followed by our annual trip to 4Peaks. Additionally, we have a camp at Honeyman State Park in August and a return to Eugene for String Cheese in September. We have some home repair plans for July, but I'm hoping we get a weekend away in there somewhere as well. Regardless, there will be many road reports and friends met along the way. Thanks, as always, for following along, and I hope our paths cross in person somewhere along the way.


Tuesday, September 11, 2018

Deck Transformed

We have a brief break from the oppressive heat waves, so I attacked our deck. Today's post has little car content. I just wanted to post on this since it took so long, and therefore got in the way of generating car content. For those who still remember, my condolences to the families of the victims of the 9/11 attack.

Power Wash
post power-wash
This journey started with a basic powerwash. We knew that with the change in the weather, any remaining moss from the prior year will quickly grow back and make the deck as slippery as ice with the first rain. To avoid the moss quick return, we simply powerwash it. Boo bought one a few years ago, but I had the time, so I took a turn this year. Things to remember for next time: check that you have the blaster tip set to fan and not cone before pointing it at anything, and it's okay to start with a low power setting first, if you aren't sure. I didn't do any permanent damage to the deck, but a few boards got chopped a little bit by the cone on high pressure.

Once the deck was clean, we could see that lots of the stain had seen better days, and some decking was going to need some holes solved. We didn't want to lay out for a whole new deck surface, nor did we want new boards to look all new and shiny next to the really old ones, so we decided to reduce the footprint size and use some boards we removed as donor material to patch holes.

Pry Apart
mid-way thru pry-apart
So, the deck has seen better days. It was kind of neglected by the prior owner the last few years she lived there, and we haven't done anything to it since we moved in (See Move Again for that fun). Instead, the boys have used it to work on skateboarding antics. So, we have a few holes to go with some rotting boards. I got a 24" wrecking bar from HomeDespot and removed around 10 planks, including the 4 rows closest to the house. We decided that we could live without the first 2 rows and still have that edge of the deck place-foot on the patio. This took a little finesse to pull up a board in the middle of other boards without meaningfully damaging either. I found that placing the wedge-end between the boards, with the angle facing the one I intended to remove, and applying steady leverage, the nails would give a little bit. By repeating the process, the end would start to lift from the deck enough for the wedge to get underneath and then I could work down the plank, lifting it, with the nails still in it.

Put Back Together
mostly sanded
I collected all of the boards and removed the nails. During removal, I considered the condition of the board. A few were rotted from end to end. Others had a hole and a couple had both holes and rot spots. I selected boards which just had a hole from the skateboarding and cut them to fit the gaps created during removal. Because we were shortening the deck by 2 planks, I had more material than gaps, in theory. We really didn't want to use new wood, if it could be avoided, because we knew that the new boards would not blend as well. I ended up with enough material to fit the gaps, and had a few feet of left over viable wood. I could tell during the re-install, though, that I would need to replace more boards next year or the year after.

Sanding
Once the deck was gap-free, it was still an ugly red-ish gray deck. While I could have just painted it, I wanted it to look better, especially after I'd already put in around 8 hours on it. So, I grabbed my belt-sander and a stack of 100-grit belts. I would have used something with a more coarse grit, but I had 100, so I used 100. Plank by plank, I sanded the loose red off, and got down to where most of the board was its natural creamy color with some red streaks. This took 6 hours, and it's very dusty. Like any paint job, though, the top coat is a reflection of the work performed underneath. It was unpleasant work, and had me walking funny for 2 days, but the final result showed that effort.

Stain
I let the deck sit for a week after sanding it. In part, this was because I had a job to get to, part of it was because I could barely walk, much less crawl around and part of it was other distractions. Regardless, after a week of high temps and dry winds, the deck was ready to stain. So, we broom-swept it a couple of times and went over it with a leaf-blower a couple of times. Still, there was a thin film of dust, evidenced by the dust on our clothes after staining.

finished deck, drying
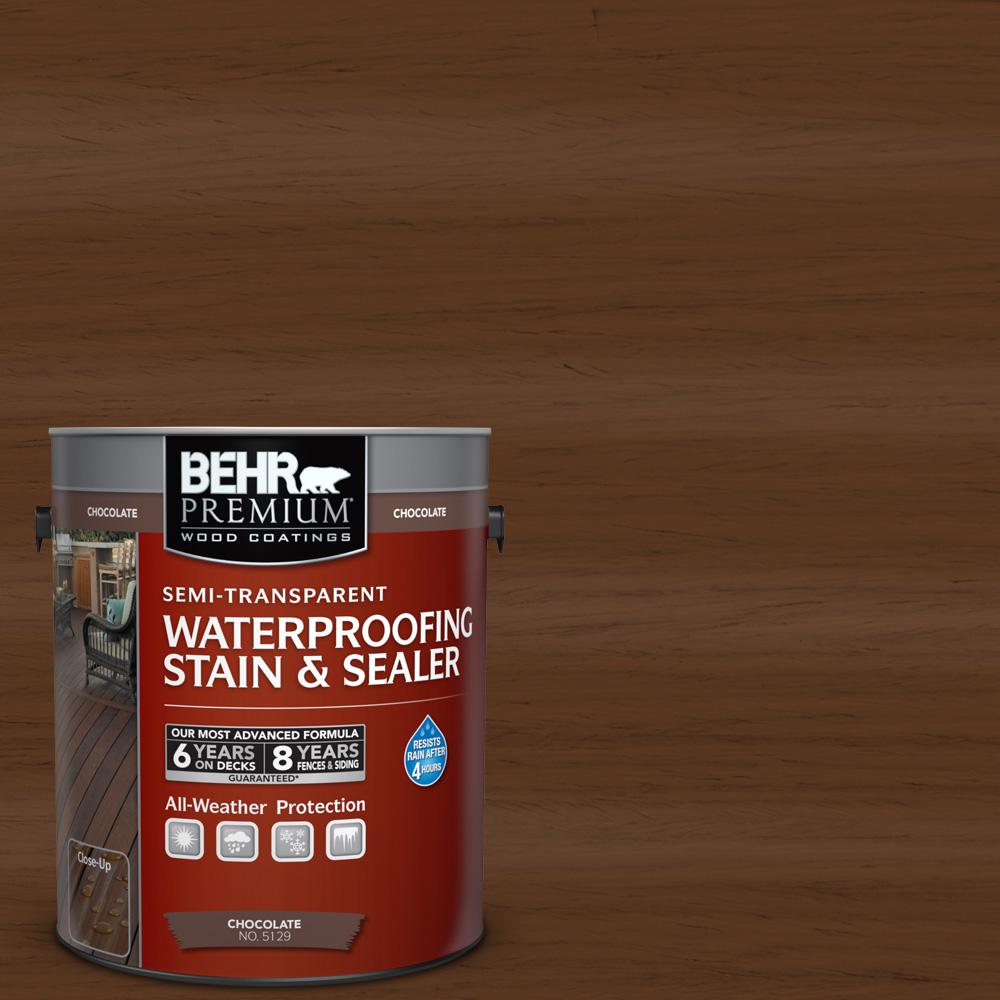
We started at the far end, working one plank at a time, and getting the hard-to-reach spots first. As best we could, we would finish a small area on a board with the brush stroke going from the unpainted into the painted area, eliminating brush-marks. With Boo and I working this part together, the deck was stained in 4 hours. This included the front facia, but like the rest of the job did not include the bench nor the fence. For future reference, we used semi-transparent "chocolate" stain (this stuff and referenced in the picture), and the deck required a full gallon, leaving about 1 cup in the bottom of the can for touch-up.

That's it for today. After staining in the heat, we spent the rest of the weekend relaxing... except for helping T with his A4. I'll probably post on that at some point. Anyway, thanks for following along, and there's more car/bus content coming.

Tuesday, February 6, 2018

New Year, New Tools

Over the course of the last 6 months or so, we've picked up some new skills and a couple new bigger shop tools to power them. Today's post goes over some.

Power-Washer
Boo power washing back deck
About a year ago, Boo wanted to power-wash our concrete. You read that right: she wanted to. She was not asking me to do it nor solve for it; she wanted to be the person doing the washing. She looked at renting one, and they run around $300 per day. On a whim, she looked at the Bi-Mart mailer, and they were selling them for, get this, $295. So, she went and got it, got a 2-gallon of gasoline and power washed the rear deck, the back patio, the front side walk and some of the driveway. She has since used it on the back patio again, and I'll be washing the siding when the weather warms back up. I've thought about how I could use this tool on the cars, but figured it would probably do more damage than anything. I've read about folks using a power washer to strip paint. I may experiment with that when I re-paint the bumpers on Hapy.

MIG
Set for floor, I think
If you've been reading this blog, you know that over the Summer of 2017 (read: MGB - floor pans 1, 2, and 3), we played with a MIG. It all started when we discovered floor-rot in the MGB. To resolve, we borrowed a MIG from our good friend Travis. He is a welder by trade and has a few of them at his disposal. Truth-be-told, he'd rather have a TIG welder, but the MIG is so handy (or appropriate) for some jobs, that it will soon be back in his shop. We really had fun, and have used it on a few smaller things since the floors. While we don't expect to use it on the Z or again on the MGB, there's always a use for a welder. Once it goes back to Travis, I'll be adding it to my list of tools to add once i have space.

Soda Blaster
C wanted to get the paint off the Z. He started with a grinder. That's dirty, but dry. And loud. And slow. Then, he tried Airplane Paint Stripper. Still dirty, but wet. And nasty-stinky. But a little faster. We have watched videos and television shows on Velocity where the project car rolls in, gets taken apart and then "sent off to blasting". After the commercial, the car comes back completely stripped of paint and rust. Sometimes the body is in pretty good shape, but usually the blasting exposes all of the history: old dents which were "cave and paved", rust that ate through and interesting cheap body shop repairs. Seeing that magic, we figured we wanted to get some of that.

HF Soda Blaster
First, we looked at renting one. These run at $325US a day, and the only outfit around here is an hour across town. So, we could get up at 6:AM, pick it up at 7:AM, be home by 8:AM and then blast until 3:30 when we tear the machine down, pack it up and haul back over to the rental shop which closes promptly at 5:PM. Arriving after 5 means you pay an additional day. So for 7.5 hours, the rental runs at around $46.50 an hour, and that assumes you don't stop for lunch. AND, you need to buy your own soda (at $40US per 50# bag). Blasting an entire car would probably take 3 bags, so at this point, one fun day of soda blasting (plus 4 hours of combined travel time) is just under $450US.

When we bought the power washer, it was virtually the same thing as what we would have rented. Clearly, that was a good move. The soda blaster, however, is a little different. The fancy rental was almost 3 times what a Harbor Freight blaster cost ($135US), so we bought one, with a dead-man valve and some extra nozzles. And a 50# bag of large soda.

The nozzle on our blaster is really small, and while it does effectively remove paint or grime from metal, it is much slower than I expected. In doing research, I've learned that these are much slower than sand-blasting, and that's by design: the soda is much less harsh both on the environment and on the target material. We have decided that the soda blaster is probably best suited for sensitive areas where you can't get after the paint with a grinder. We may circle-back and try the power washer too, to see if we get better results in shorter time with that. One last concern is the need to properly treat the metal which was stripped by the soda. The soda changes the surface pH, which helps prevent rust, but also gets in the way of paint or primer adhering to it. There are a few different ways to solve for this, but first pressure wash the soda-blasted areas to get all of the residue off. Then, it is recommended to use something like HoldTight 102 to address the pH shift.

Capacity Reached
I've mentioned our limited space, and while it's a "first-world problem", it's still a problem. We are now leveraging a small garden shed for storing thing, like the power washer and the soda blaster. I think the acquisition of any new large tools will need to wait at least until we are down to one car in the garage. We may need to consider a larger shop somehow.

That's it for this week. Thanks as always for following along. I think I'll have made sufficient traction on one or more of the projects to be able to get back to posting on them.

Monday, August 12, 2013

bum buh NAH!

In my last post, I talked about getting the coolant to stop dripping.  Today, I'll briefly cover the test flight.

Re-Assembly
rare August rain approaches
Sometimes, when you put a project back together, you almost know it isn't right.  The re-assembly seems to take a little longer, parts don't fit together as easily.  Its almost like the repair gods are trying to tell you "don't bother, you got it wrong", but we press on.  Other times, the re-assembly is flawless.  The hoses just line up, the parts simply click together.  The re-assembly of the bus after trying to fix the coolant leak ran the spectrum.  I got to where I couldn't trust the re-assembly ease as a barometer for when my repair was crap.  So, this time, when everything just fit (I didn't drop any fasteners, and the engine started on the first touch with the key, etc ), I didn't trust that nodding, "oh yeah" feeling.

Taking Flight
I didn't drive very far.  In fact, I didn't actually leave the neighborhood.  Amid cheers from the boys, I drove out the driveway, and down to the end of the street, turned around and backed back into the driveway.  All told, including just letting the engine idle, it took me 15 minutes or less.  The engine didn't get up to normal operating temperature, but in the past it didn't need to for the stream of coolant to appear behind the bus as I drove.  This time.. there wasn't a stream.  There were no well-spaced drips.  There was nothing but dry pavement... and more cheers.  This time from me.  "bum buh NAH!"  we have success!

Bath Time
afterbath
So, after so many months of not operating, the boys wanted to give Hapy a bath.  We played with the hose and some soapy water and then let Hapy sit in the sun drying for the afternoon.  All the windows were open, the pop-top open and they clambered around inside like they were half their current ages again.  There are few things like a microbus for a fort when you're a kid.

So that's really it for today.  I plan to drive Hapy to work a couple/few times this week (with the life-raft bike in the back just in case) to verify the cooling.  I'm very optimistic.  He hasn't been this dry since I first installed the engine with Justin's engine harness.  The boys are already talking about taking the bus to the mountain this winter.  Fortunes can turn that way, I guess.  I suppose I should start thinking about how we should carry skis and snowboards next :)