Showing posts with label insulation. Show all posts

Tuesday, January 30, 2024

NewOld Floored

It has been an unusual start of the year and as such I have not been posting much. Today's post is a quick update of the swirling chaos with NewOldHouse.

On the Level
finished floors
As we started to approach a return to getting the kitchen done, Boo and I realized that if the floors are not level then any cabinet install will be crooked. Then, when we get around to getting the house leveled, the cabinets would not be anymore. So, we had a foundation company come out. They added 2 beams and a bunch of house jacks to get the main house and the 1960's addition leveled. Prior to their work, I had to completely clean the crawlspace as they would not enter a space that had a suggestion of asbestos or rodent. To remedy, I added a 30-foot (10 meter) hose on old PigPen (shopvac). I set the PigPen outside and crawled around under the house for literally 3 hours vacuuming the entire vapor barrier and collecting other debris into a thick plastic garbage bag. The foundation guys were here for 2 days, and now the house is level. A couple of doors which didn't ever close right now close properly and when I sit on an office chair in one of the back bedrooms I no longer unintentionally drift across the floor.

Add Laundry
The prior owners had their laundry machines in the garage. When we moved in, we brought a set of stacked machines and set them next to the large concrete sink just outside the kitchen where the prior owners had theirs. This worked fine, but with where the sink was located relative to the garage door, placing machines near the sink effectively prevented the garage from storing a car. So, we removed the sink and built a small platform (in-process picture below, right) just outside the kitchen-to-garage door. With the machines on the platform, the full width of the garage door is available, so we can one day park a car out there. We hooked the machines back up to the original sink fixtures, routing the waste into a temporary waste-stack. We haven't decided how we are going to finish this space. We will probably frame in walls around the area where the machines are, complete with a ceiling, so they are at least visibly separated from the garage. Around while this was getting built, the garage door was fixed so it opens and closes again.

Kitchen Plumbing
laundry platform framed
We knew the kitchen install was coming, so we went searching for a plumber. The plumbing trade, like so many, are significantly stressed by the current labor environment. I suppose, a couple generations of convincing every high-school student that they need to go to college and not explore trades has not helped, but finding a plumber or electrician who can start the work reasonably soon is virtually impossible. It is reasonable to expect at least 2 months delay. When we contracted our plumber, we indicated that we were 100% flexible and they could send someone over as a schedule-filler even if our project had to be left part-done for weeks. Having this kind of flexibility proved to be a real winner: a plumber arrived the following day, mid-morning, having to leave a job where they weren't ready. 2 days later, our kitchen and attached laundry were rough-plumbed in, and the laundry machines were again operational.

NewOld Floor
Before we moved into this old farmhouse, we had the floors in most of the house redone. The kitchen was still in a semi-demo state, so that area was left alone. Once the demo was completed, and the furnace moved, the floors in the front half of the house could be addressed. Since we now lived here, we needed to further compress our living. So, for about 2 weeks (there was an ice storm in the middle that delayed the flooring work) we used a 10' by 10' space for living, dining and cooking... and the space also held our piano and refrigerator. Needless to say, it was some cramped living, like you couldn't turn around it was so tight. Seriously, you could walk in, but then had to back out.

The flooring guys were pretty magical. They sourced 2-1/4" rolled red-oak flooring matching what was already in place and then feathered it into the existing floor. They repaired in the hole where the furnace used to be, and added a clean crawlspace-access where I had cut the big hole to send the furnace. They spent 2 full days getting the floor installed, filled, stained and clear-coated. The finished floor looks like it was always that way.

Back Door
back door
Before the flooring guys could start, Boo and I needed an escape route. Their work was going to cover the front half of the house and our only egresses would be blocked. We had intended to add a back door eventually, but needing a means of getting in and out of the house moved it to the front of the list. For a hot minute we thought about climbing in and out of a bedroom window. Once the ice storm hit, we were grateful we did not go that route. We added a basic large-windowed (double paned) door that allows a considerable amount of light into a part of the house that had been rather dark. Outside the door, we added 3 steps down to an odd sidewalk that runs along the back of the house. Eventually, we will add a permeable patio back there, but for now, it's where Zed and Oliver are parked (on top of tarps and patio blocks, covered with fairly high-end car covers). The picture on the right, here, shows the after affect; there used to be a built-in bookcase where that door now sits.

All of this activity has been consuming most of our energy. Around these larger items, we had insulation blown into the attic space and I have had to make a few adjustments to the heat distribution as the power of the fan has blown off a connection or 2. I also moved the thermostat so it passes up inside a wall and is attached in it's permanent location opposite the front door. 

Next, the kitchen install work starts with some wall insulation, drywall, and electrical followed by cabinet installs and some appliances. At this rate, we could be making meals in the new space by Easter. 

Thanks, as always, for following along-

Tuesday, December 12, 2023

Completing the Furnace Conditioned Air

In my last HVAC/furnace post, I had described the conditioned air plenum, and my efforts to create and then attach one. Today, I get on with the rest of the "conditioned air" venting. As before, I call it that so there's no confusion between the venting that has the output from the furnace and the venting that is the cold-air return side that feeds the furnace.

Rectangular Vent Prep
long arm
Recall that the crawlspace in this house had been infested with rodents. I mean it was bad. We had it emptied of rubbish and insulation by a team who seemed borderline hazmat. The work was disgusting, that team was amazing. They replaced some, but not all, of the circular vents with insulated flexible venting, but left the larger rectangular trunk lines. Perhaps they thought those vents were clear and clean or maybe they just wanted to complete the job (not that I blame them). Those vents were unobstructed, but far from clean. I had intended to clean them in-place with a microfiber cloth on an extendable pole. Once I got to really looking at them, I knew this was simply not going to be sufficient, and chose to ignore the fact that these vents were used last winter. Yuck.

ga-ross
To remedy, I dismantled them, and hauled them piece by piece out of the crawlspace into the backyard. Using the highest pressure setting on my hose-end sprayer, I jetted off the worst of the caked on filth, inside and out. Then, with a scrub brush and dish-soap, I cleaned each piece inside and out. Once rinsed, they were set aside to dry and I took one of my most-needed showers ever. The insides are clean, but I noticed a very slight brown staining. I concluded that it's probably from many years of people smoking tobacco in the house. I considered spray-painting all of the inside surfaces, but decided that the off-gassing of the paint was worse than whatever caused a stain (but was now gone). I did, however, spray paint bits of the outside of the venting which had rust or remnants of the old fabric (asbestos-imbedded?) tape which was removed by the hazmat guys.

Rectangular Vent Install
cleaned
Once cleaned, partially painted and moved back into the crawlspace, I was ready to start installing. I started at the furnace and worked by way out. First were the bits that connect the plenum to the rectangular vents. These are angled and change shape from one end to the other, converting whatever size hole you had in the plenum to the size of the vent. I found that by bending the lip wide open, the piece fit easily, and then just fold the lip back against the inside of the plenum. With high-end foil tape, I sealed the seams from inside the plenum.

I read about and considered using a brush-on goop to seal the seams but decided that painting goop while army-crawling around a filthy crawlspace just did not sound like a great idea. Consider too, the goop seals as well as tape, for the most part, and it's effectiveness is directly tied to user application. So, again, lying prone (or supine) with a brush of goop sounds like errors would abound. Taping is hard enough when you're lying down.

Once the 2 main bits were connected to the plenum, I first did a 90* turn bit on the smaller distribution arm (8 x 12 rather than 8 x 18) and then shifted to completing the larger arm. This took many hours, even though there were only 4 sections. For each section, I would wrestle the rectangle into the connectors on the end of the one prior. I used another section of HVAC to hold the far end up while I fastened the new piece to the old with sheet metal screws. Then, I suspended the far end from the floor with nylon webbing stapled to the floor joists above. Once free-standing, I sealed the seams with that high-end foil tape and then wrapped the vent with (R8) foil-wrapped closed cell HVAC insulation. I expected the venting to take a little while, but did not anticipate that the insulation step would take maybe twice as long as the venting assembly. I took care to seal up the insulation seams, but the time was consumed by, again, lying down and wrestling large rectangular insulation panels, trying to wrap them around a rectangular vent which had circular vents jutting out of it. I don't know if having the insulation sealed up tight matters much in the grand scheme, but I made sure they were relatively well sealed anyway. I spent probably 8 hours in total getting the larger arm assembled and insulated.

original round vent
Before I moved to the smaller arm, I attached the round vents to the larger arm. I had initially intended to remove the original remaining round vents, believing they were not up to snuff. While I was assembling the larger arm, I looked at the 2 remaining larger circular vents (picture on the right shows what condition they were in) and while there is some dust and more brownish stain, there is no rodent evidence. What I did not expect was just how close the rectangular venting is to it's original location. The round outlets on the rectangular vents are a few inches off center and less than a foot away from the original. So, I placed a short stretch of insulated flexi-venting between, taping both the inner hose and the outer insulation wrap at both ends. I did not capture a close-up picture of that, but I found that these sections were so short that it was actually easier to remove the inner sleeve from the insulation, attach it to both ends and then wrap the flexy-hose with the insulation jacket afterwards.

Smaller Arm
When I changed the vents around on the larger arm, I inadvertently removed the vent intended for the bathroom. I will re-integrate that later. The bathroom floor vent has not been connected since we first got the house. Recall above where I described where I made the cut in the plenum, I removed another vent access, which was direct-connected there, to the bedroom. Since it was not part of the air design plan for either arm, adding it to one or the other could upset the pressure for the other destinations. Since the bigger arm distributes to the west side of the house and the smaller arm goes east, I decided to tie it into the east (smaller) arm simply because that's the side of the house the bedroom is on. As it stands, the smaller arm only had 2 destinations (the kitchen and one main living space) so I felt adding a 3rd there would be less intrusive than adding a 5th destination to the larger arm. Also, I considered that the kitchen is an uninsulated space, cordoned off from the rest of the house with plastic. I decided to connect the bedroom to the used-to-be-kitchen vent in the smaller arm. When the kitchen is ready for a vent, I'll cut a hole and tie it in or I will move the bedroom connection back to the plenum.

short arm completed
The smaller arm took less time, and other than threading new stretches of flex-hose from the arm to the vents, it was a reflection of the larger arm work. Each arm-piece-to-arm-piece connection was metal-screwed in multiple spots, foil-taped and suspended with webbing. The entire arm was insulated with the R8 closed cell stuff, each circular connection was double-taped (inner tube and insulation jacket). The only real anomaly was with one rectangular-to-circular connector not aligning between the floor joists because of the furnace move. To remedy, I simply flipped it upside down (see picture on the right) so it is on the bottom instead of the top. I'm sure some HVAC person somewhere doesn't like this, but it fits, and it's sealed. All told, building the large arm took a weekend while attaching the circular vents to it and doing the entire smaller arm took a second weekend.

At this point, it had grown dark on a Sunday afternoon/evening. So, I picked up my tools and supplies and put everything away. With some scrap paper and a pen, I started contemplating the cold-air supply side. I will start that work next, but I think getting the "conditioned air" / distribution part completed was a significant milestone. Sure, I still need the gas hooked up, the exhaust re-assembled and suspended, the cold air return I just mentioned, the trigger wiring done and, last, the electrical (and walk thru by our electrician / HVAC guy). Yes, that is a lot, but I feel like the largest, hardest part is now behind me. I know... "famous last words".

Thanks, as always, for following along-

Tuesday, September 20, 2022

Creepy Crawly Space

Today's post covers NewOld house getting the crawlspace treatment. Sorry I don't have any / many pictures to accompany this post. I find crawlspaces super creepy and this one was possibly the worst I could have seen. Some things cannot be unseen and I feared that if I saw the before picture, I would not be able to live in the house after it was done. Silly? Maybe. I tried to take some shots through the rodent-block-out grills.

Before I begin.... the guys working under there were in full bunny suits and anytime anyone was inside the house s/he was wearing at least a dust mask if not a full respirator. Dust from rodent waste can cause all kinds of lung issues. Please wear a dust mask when clearing out possible rodent areas.

What Is Crawlspace?
crawlspace entry
For folks who have a full basement, have a house built on a slab or live in an apartment, this may be a foreign concept. Many houses are built with a small not-a-basement. This crawlspace acts sort of like a basement in that ducting lives there, and through the use of vents or vent-covers you can control the air flow under the house. Unlike a basement or a slab, a crawlspace usually does not have a concrete floor, reducing the cost of construction. There is, of course, a foundation around the outside and often there are pillars at key points supporting main joists. Instead of the concrete floor, it is dirt or gravel or a combination of both. Even in a brand new construction house, there will be some level of trash under there from sub-contractors throwing things under there. Regardless of the trash aspect, there should be a vapor barrier laying on the ground between the gravel/dirt/construction trash and the crawlspace. This is not any old plastic. It is super thick and dark (usually black) to prevent any light to get through it from above and any moisture to get through from below. It needs to completely cover the ground from foundation to foundation, or moisture will still be able to enter.

When we got the house we currently live in, we had to have the crawlspace addressed before we could move in. Some water had appeared under there, creating a smell. The water, vapor barrier and the old insulation was removed. A new barrier was installed. We contracted that out while I rolled paint on most of the living spaces. Over the next 6 years, water never returned. We concluded the root cause was a clogged downspout that got unclogged after the water pooled in the crawlspace. It may have been caused by a sump-pump failing, but we haven't had water issues since. So, that's probably not it.

Top 20 Worst
blurry "after" picture
Fast-forward to NewOld house, the semi-abandoned 1948 farm house Boo bought a couple blocks away. From the work we had done on our current home, we figured the crawlspace in NewOld house needed to get done. Just peeking into a crawlspace vent showed debris, and it smelled really bad. Like, OMG-I-almost-need-to-puke bad. Boo called a few places and found a company who could come out on relatively short notice. These guys are staffed to respond to emergency jobs (think floods fires, etc) so having a more consistent job to which they can send a crew between disasters works out well for all of us. We save a little cabbage (though this is still super expensive) and they keep their crews working. Their estimator visited, crawled around and shared that while we did not make his top 10 ever, we were in his top 20 and he has been estimating jobs for 30 years. We're big winners!

This house, it appeared, was not built with maintenance of the crawlspace in mind. There were 2 different main floor joists that were about 6 inches off the ground. This does not pose an issue for the health of the beams nor the house, but it does prevent a person from sliding underneath to do work in the crawlspace without some doing. As you can see from the after pictures, there is not much room under there beyond those 2 beams. Since it was not designed for maintenance, you can probably guess how much happened since 1948: almost 0. Someone got under there in the last 20 years and put insulation between the floor joists. Otherwise, it did not look like anyone has done anything other than put garbage under there since the house was built.

Rotating Crews
The company and their teams were true to their word about getting it done and sending different crews to complete it. Consisting of 2-person crews, we had different folks working 4 different work days spread out over a week. Their process was straight-forward: access an area, remove all of the insulation, garbage, air ducts and vapor barrier. Then, spray anti-microbial / anti-fungal everywhere, restore the vapor barrier, and, last, the air ducts. Once an area was done, they would access another. Unlike the estimator, every one of the crew workers admitted that this was possibly the worst they have ever seen. More winning.

Gross Ducts
new duct, new barrier
Before the crews really got going, Boo and I pulled the nails holding the floor vents to the floor and pushed them down into the crawlspace. We talked to the crawlspace guys and we all agreed that if the ducting was getting replaced (due to rodent infestation), the vents needed some care or replacement as well. We were able to save some of them: while well masked, they got a dry scrub, a scrub-wash with Mr. Clean and then shot with black Rustoleum inside and out. Any residual odor after the cleaning would be captured in the paint, we figured. Even still, some of the vents could not be saved. So, we hit Home Despot and picked up 2 each of the 3 varieties of floor vent so the new ducting could attach to new vents. Many of the vents were left disconnected, however, so we will be getting under there ourselves to complete the fitting of the heat/air system.

The job itself seemed quite miserable, even if the temps were mild and they were in cleanroom suits complete with full face shield ventilator masks. To help offset, Boo brought the crew beverages and we repeatedly expressed our thanks. The rubbish they found was extensive, including rodent remains, rodent-soaked insulation, standard household garbage... the works. Each day after a crew left, the house smelled that little bit better. 

New Vents No Smell
The original vents were in disrepair (I know, shocking, right?) and needed some repairs before the job was finished. 2 of the vents needed new framing, and they all needed better grills. This last series of steps took place on their final day. After they pulled the remaining garbage and left the scene, the house no longer smelled like animals and rodents had been living there for years. I would not say it smelled fresh, though. Those large vapor barriers are made with virgin plastic, so they have to off-gas for a day or so. And, the anti-microbial/bacterial is sort of bleach-like smelling. Still, it is significantly improved over dead rodents and animal waste and we were now one step closer to the point where we didn't need to open the house up and run exhaust fans every day. 

That's it for today. Thanks for following along, and if you have an odd smell in your house that you have not been able to identify, maybe it's time you had your crawlspace inspected.

Tuesday, March 2, 2021

MGB Interior Panels - Part 2

Today, I continue on Oliver's (the MGB) interior because the weather remained a preventative from getting to the cars outside. Darn, have to work in the semi-heated garage.

High-Level Door Card
black door now out of place
By now, the door cards were looking completely out of place, as the only remaining all-black panels. These are a little more complicated than the front kick and rear quarter panels. First, there is a top padded section which holds the top of the door card in place. The padded section is held on by 4 screws (2 each front and rear) and is wrapped with black vinyl. The interior kit delivers with a section of cream-colored vinyl to replace it. Additionally complicating things, there are the window crank, and the door latch pull and lock. In my case, I removed the armrests shortly after buying Oliver, but there is the old blown speaker. Last, each door card is held to the door with 13 plastic clips. Since these are original 1978 plastic, I suggest having replacements on hand. The interior kit did not include these, but they are, like $0.50 each or less online.
 
I didn't take a picture of the driver card before I started, so here's a picture of the passenger side, from the open driver door. I leave that towel on the driver seat so I don't accidentally get grease or anything on there while I work on him. You may also notice I have omitted the center console. I think the interior looks less complicated this way and the console acts like a little wall between the driver and passenger, which neither Boo nor I liked. Either way, there's no place to put a beverage. I may solve for that one day.
 
Padded Section Reuse
after polishing
I considered re-covering the padded section along the top, but after removing it (4 Phillips screws), I decided not to. First, the wood inside the padding is starting to fail (see picture below). It's not totally bad, but bad enough to warrant replacing eventually. I figured that if I used the cream on that now, I would not have it when I replaced the wood. Second, the black vinyl, while also not perfect, could get cleaned up with some leather cleaner. Last, I already had a cream and black contracting interior so retaining the black long the top would help underscore that. Ultimately, I believe retaining the black just for that contrast reason was plenty of justification. I think it looks really good.

So, I cleaned the rust off the chrome ends with some Goof-Off, and polished the vinyl with leather cleaner. The window felt was fairly worm out, so I removed it with a slotted screw-driver. Rather than use a staple gun to install the new one, I used 5/8 inch #18 brads. When installing these, you will notice that the chrome/felt does not go all the way from the front rubber seal (sealing the flip-out window) to the rear-most point on the window. I taped the felt to the padded section with painter tape and held the unit against the door, shifting the felt side to side until it was where I liked it. Then, I sent half a dozen brads in to hold it firm.
 
Removing Rusted On Window Crank
backside of padded section
As easy as it was to remove the padded section, removing the window crank was the opposite. The Phillips head screw had fully rusted to the mechanism. I applied Kroil and let it set, but it couldn't effectively penetrate past the window crank. I had to resort to my set of "easy out's". I find these are neither easy, nor do they really get the stuck bolt out (could be user-error), but in this case they did what I needed. After stepping up the drill bit size a few times, the head of the bolt fell off and the window crank handle could be removed. Once out of the way, I just needed to pull the plastic retainers from around the door handle and the door card came right off. I removed the remainder of the bolt from the window crank with a big set of lock-pliers. While I had the Kroil in-hand, I lubricated the various moving parts of the window: the window control joints and the spring. Surprisingly, this reduced some of the clank-clank-clank noise when the window is raised and lowered.
 
Outer Scraper
torn down
The last bit of demo was removing the old outer scraper. This is that supposed-to-be pliable rubber that presses against the outside of your window, stripping off water, mist or fog when you roll down the window. More importantly, it reduces rain water from running to trickling into your door. My scrapers were hard and chipped, so they needed replacing. They are held to the inside of the door with 7 rivets. I set a slotted screw-driver blade against the rivet and smacked the handle with a hammer. The rivets pop right off, but the bits fall inside your door. Once free, the new scraper lines right up with the original holes, though on the very end there are a few different mounting holes, probably for use on different models. I needed to open the holes a little bit with a rat-tail file in order for the new rivet to easily fit through.

To mount, I set all of the rivets through the scraper and loosely set them into the holes in the door. With my riveter, I started on the ends, working my way towards the center. With each rivet, I would make sure that the rubber set up on top of the door, and did not disappear underneath / inside. I found that I had to press the riveter and the scraper hard against the door when pulling the trigger. With the scraper riveted in place, I checked the window action.
 
Noise Muffler
window crank and spring
With the scraper in, I cleaned up the inside of the door first with the shop-vac and then with spray cleaner. With the door cavity relatively clean, I applied some noise deadener. I realize this is a convertible, so there will always be noise. The door application is really about making the door sound solid when it closes rather than tiny and clanky. It doesn't take much to make a difference. I have read that as little as 50% steel coverage is sufficient. I am not sure I even got that much covered, though the door has a satisfying, solid "chunk" when it closes now. I ran a 4-inch tall strip from the outer rear view mirror to the door handle above the belt line (inside the door cavity, of course, but against the outer skin). Below, there are 2 front-to-back channels to which I applied 1-inch strips from the window regulator to the rear edge of the window. Below the channels, I applied a rectangle along the lower rear section. I found that the spring clank-clank-clank could be felt most on the steel directly beneath it on the inner skin, so I put a 4-inch square inside the door cavity on that section of steel. All sections were pressed down with the little roller application tool for a solid bond.
 
Plastic Sheeting
Originally, these doors had a vapor barrier. This door, however, did not, except for the small sections around the door handle and window crank. So, I made one out of a kitchen garbage bag. If I had thicker-mil plastic, I would have used that, but these bags are hard to cut, so I don't expect this to fail. I cut the bag so I could completely cover the door, and taped it in place with painter tape. With a Sharpie, I marked where I wanted the vapor barrier and then cut along the line. Since my furnace is in my garage, my options for adhesive were limited. I would have used spray adhesive or the brush-able epoxy, but both need ventilation and are explosive hazards. So, instead, I used Elmers Wood Glue. Yes, that's right: wood glue. It took longer to dry, but it held the plastic firm during the panel install. While it dried, I cut holes for the door latch and the window crank. I have found that applying adhesive on vertical angles creates a path for water droplets to follow if/when it gets between the plastic and the steel. On other words, don't apply adhesive straight across: it will only trap moisture against the door.

Panel Install
home-made vapor barrier
I could feel the end approaching. With the holes cut in the sheet, it was time to prepare the panel with the 13 clips. The card has 13 very obvious spots for the clips. They are shaped like a classic 2-ball snowman: large circle on top of a smaller circle. The clip slips into the larger circle and is then pressed into the smaller one. I could have re-used some of the clips from the original door, but after over 40 years, I was not sure they would not break during install, or shortly thereafter. With the clips in, the hole for the window crank needs to be cut next. Similar to the rear-quarter panels, the door card shows exactly where the hole needs to be. Unlike the holes for the rear quarter panel, though, the window crank hole needs to be cut almost all the way out to the hard-board edged circle. Also, the leather/vinyl has a padded backing that needs to be cut through.

I decided to not include the arm rest / door pull and I am not putting speakers back into the doors so this one hole was the only one I needed to cut. This greatly simplifies the look of the door card (see picture below), and even with the extra bounce from the thicker card, I can pull the door firmly shut simply from pulling on the padded section. The card did arrive with indications for both the arm rest and the speaker mounting locations, though.

With the hole cut and the clips in, I was ready to press it in. I started by aligning the bottom clips with the holes along the bottom of the door. Then, I clicked in the clip nearest the rear view mirror and then worked my way around, snapping the card into place. I trimmed and cleaned up the hole for the window crank (I had cut too conservatively beforehand) and then installed the crank. I again tested the window action.

Padded Section Install
so pretty
Last, the padded top goes back on. The new cards are more stiff and thicker than the ones that were just removed. It will be some time before these new cards settle in, and the original screws for the padded section were not long enough to bridge the gap, initially. So, I found a screw in my drawers that matched the thickness of the original screws, but was about 3/4-inch long. I set it aside for a moment and attached the front-edge of the padded section with the original (smaller pair) screws. I left them plenty loose so I could adjust and then grabbed that long screw. I sent it through the lower of the 2 holes in the rear mount and tightened until I could send one of the original rear screws into the door and have it grab. I checked the alignment and then snugged that original bolt. I pulled the long screw and sent the other original rear screw in. Last, I tightened the front mount screws.

Feeling quite satisfied, I shut the door... and it bounced back open. Ah yes, the cards are thicker. I closed the door hard and it held. I figure it will take some time for the rubber in the weather-seal and the door card to come to terms with one another. To help speed that, I will leave the door shut tight. Of course, the not-dry-nor-warm weather outside will help that door stay shut for a while.

Well, that's it for today. I need to do the other door, of course, but with the passenger door so close to the shelves in the garage, it will wait. Until then, well, I'll have to find other things to fix on the fleet. Like the clutch on Gramps, the rear wheel bearings on Nemo or maybe something I haven't discovered yet. We will see. As always, thanks for following along-

******

surround bits
UPDATE: I did the passenger door this past weekend (5-June), following these instructions. I had 2 additional observations. First, the replacement inner door felt scraper is about 1/2" shorter than the original. The missing 1/2" on my original did not have any felt left, and it was the section closest to the door handle, up against the chrome end. Second, I omitted the last step in the instruction above regarding the 2-piece plastic rounded-cornered rectangle that goes around the inner door pull. These are thin, and could be damaged upon removal. Fortunately, my old vinyl cards were not holding on too tightly, and they removed with ease. The top part slid right off, simply by pulling up. Once removed, the bottom came out easily.

Installing the Plastic Inner Door Pull Surround
I found the install to be much more difficult. The new vinyl has much more grip than the old vinyl. Also, the card wants to be flat, so there is natural pressure away from the curvature of the door. The plastic bits had 4 little bumps (one on each short side and 2 along the longer side) that need to get under the door pull. After multiple failed attempts, I found success. Starting with the bottom piece, I got the plastic wet. I set the 2 short sides on either side, below the pull, and while pressing against the card with one hand, pressed upwards on the corresponding corner of the surround. I moved from side to side, moving it a little at a time until the bottom edge clicked in.

halfway there
The top piece was harder to manage, in part because my card has a piping strip that runs right along the spot where the plastic bit needs to sit in order to install it using the same method. So, again, I got it wet (reducing friction) and rather than start at the uppermost corner, I lowered the plastic piece so it was just below the piping, with the leading edges on either side of the surround. This placed pressure on the piece, and this is where an original piece could break. With one hand pushing the card against the door, I pressed the little bump under the inner door pull. This was a little scary, but once the second side snapped in, I followed a similar effort of sliding it down a little bit at a time on either side. Eventually, the top and bottom pieces meet, and the cards are complete.

Again, thanks for following along. I hope this last bit helps you out. I found following these instructions really helped me out when I went after the second door.

Tuesday, July 10, 2018

MGB - carpeting (part 1)

Today's post covers getting the carpets into the little British car. Like so many of my posts, this got a little long, so I'm going to cut it into 2 pieces. At least there are lots of pictures this time.

How Did We Get Here
With a top now keeping out the elements, I was ready to install the carpet I had intended to install over a year ago. Recall Winter before last... I had a willing volunteer in K2 wanting to help on the little car. I was up to my elbows in front-end rebuild and couldn't fit a second pair of hands into what I was doing. I thought he could pull the front seats and the carpets (so we could replace them) while I finished the front end. The seller said that the floors were good but just the carpets needed to be replaced. At the time of purchase, I couldn't really see the floors because of shadows or whatever. So, when K2 pulled the carpets out and we saw a rust hole, it lead to a lost Summer of driving the roadster. Instead, we spent weekends cutting and prepping the floors, had a welding party and sealed in the floors. We added paint and noise reducer. Now, we were ready to lay some carpet, so I ordered "standard" set of carpets (versus the expensive wool or deep-pile ones on the market).

Noise and Temperature Containment First
In my years of working on the bus, there has been a steady drumbeat of containing noise. Driving an empty bus is like sitting in a metal shed through a thunderstorm. Its crazy loud. Lots of MG owners like the loud, so what I did at this point may not sit well with them. I don't care. It's my car, so I'll do what I please.

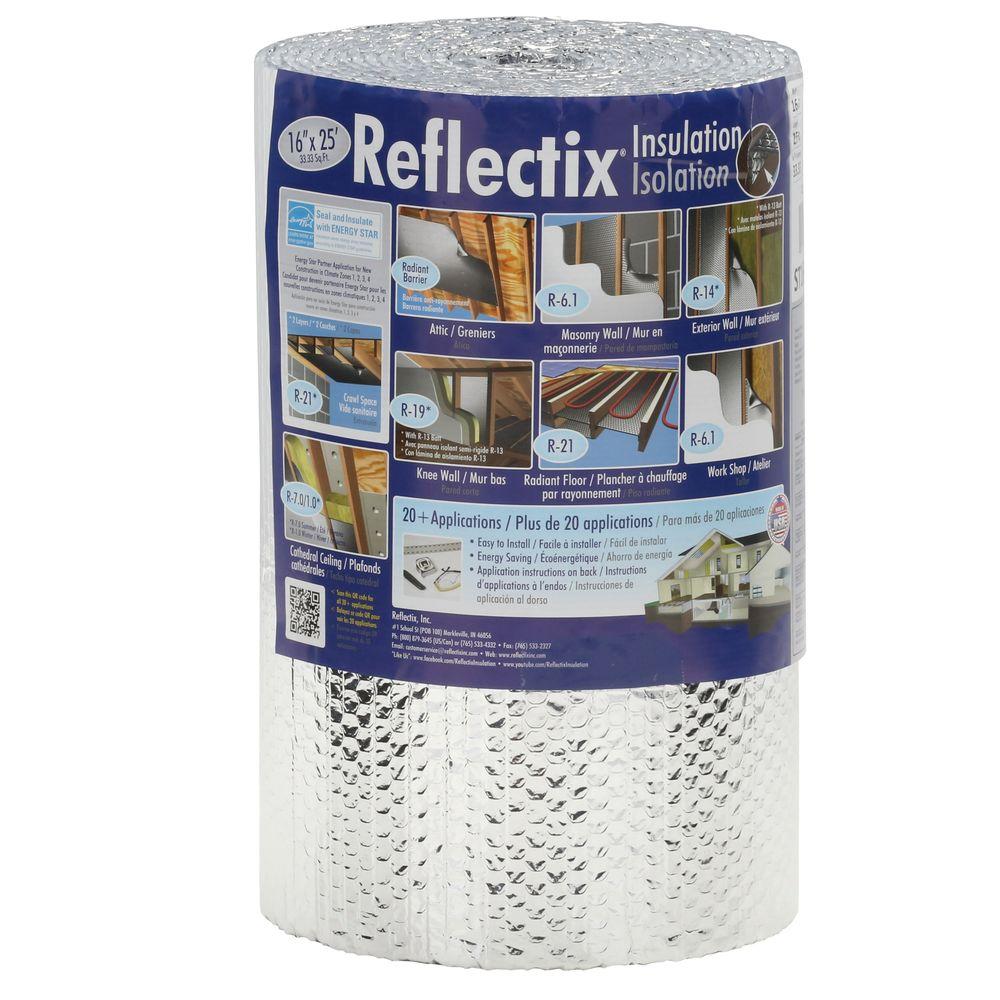
I know from driving this car around that the heat from the engine bay and exhaust heat up the interior, even without a top. While this might be nice in the winter, it's not so great in mid-Summer. To reduce heat, I chose to put closed cell foil-sided insulation (like this) behind the carpet sections in the footwells as well as under the driver and passenger seats. This should reduce both heat and noise. But I didn't stop there.

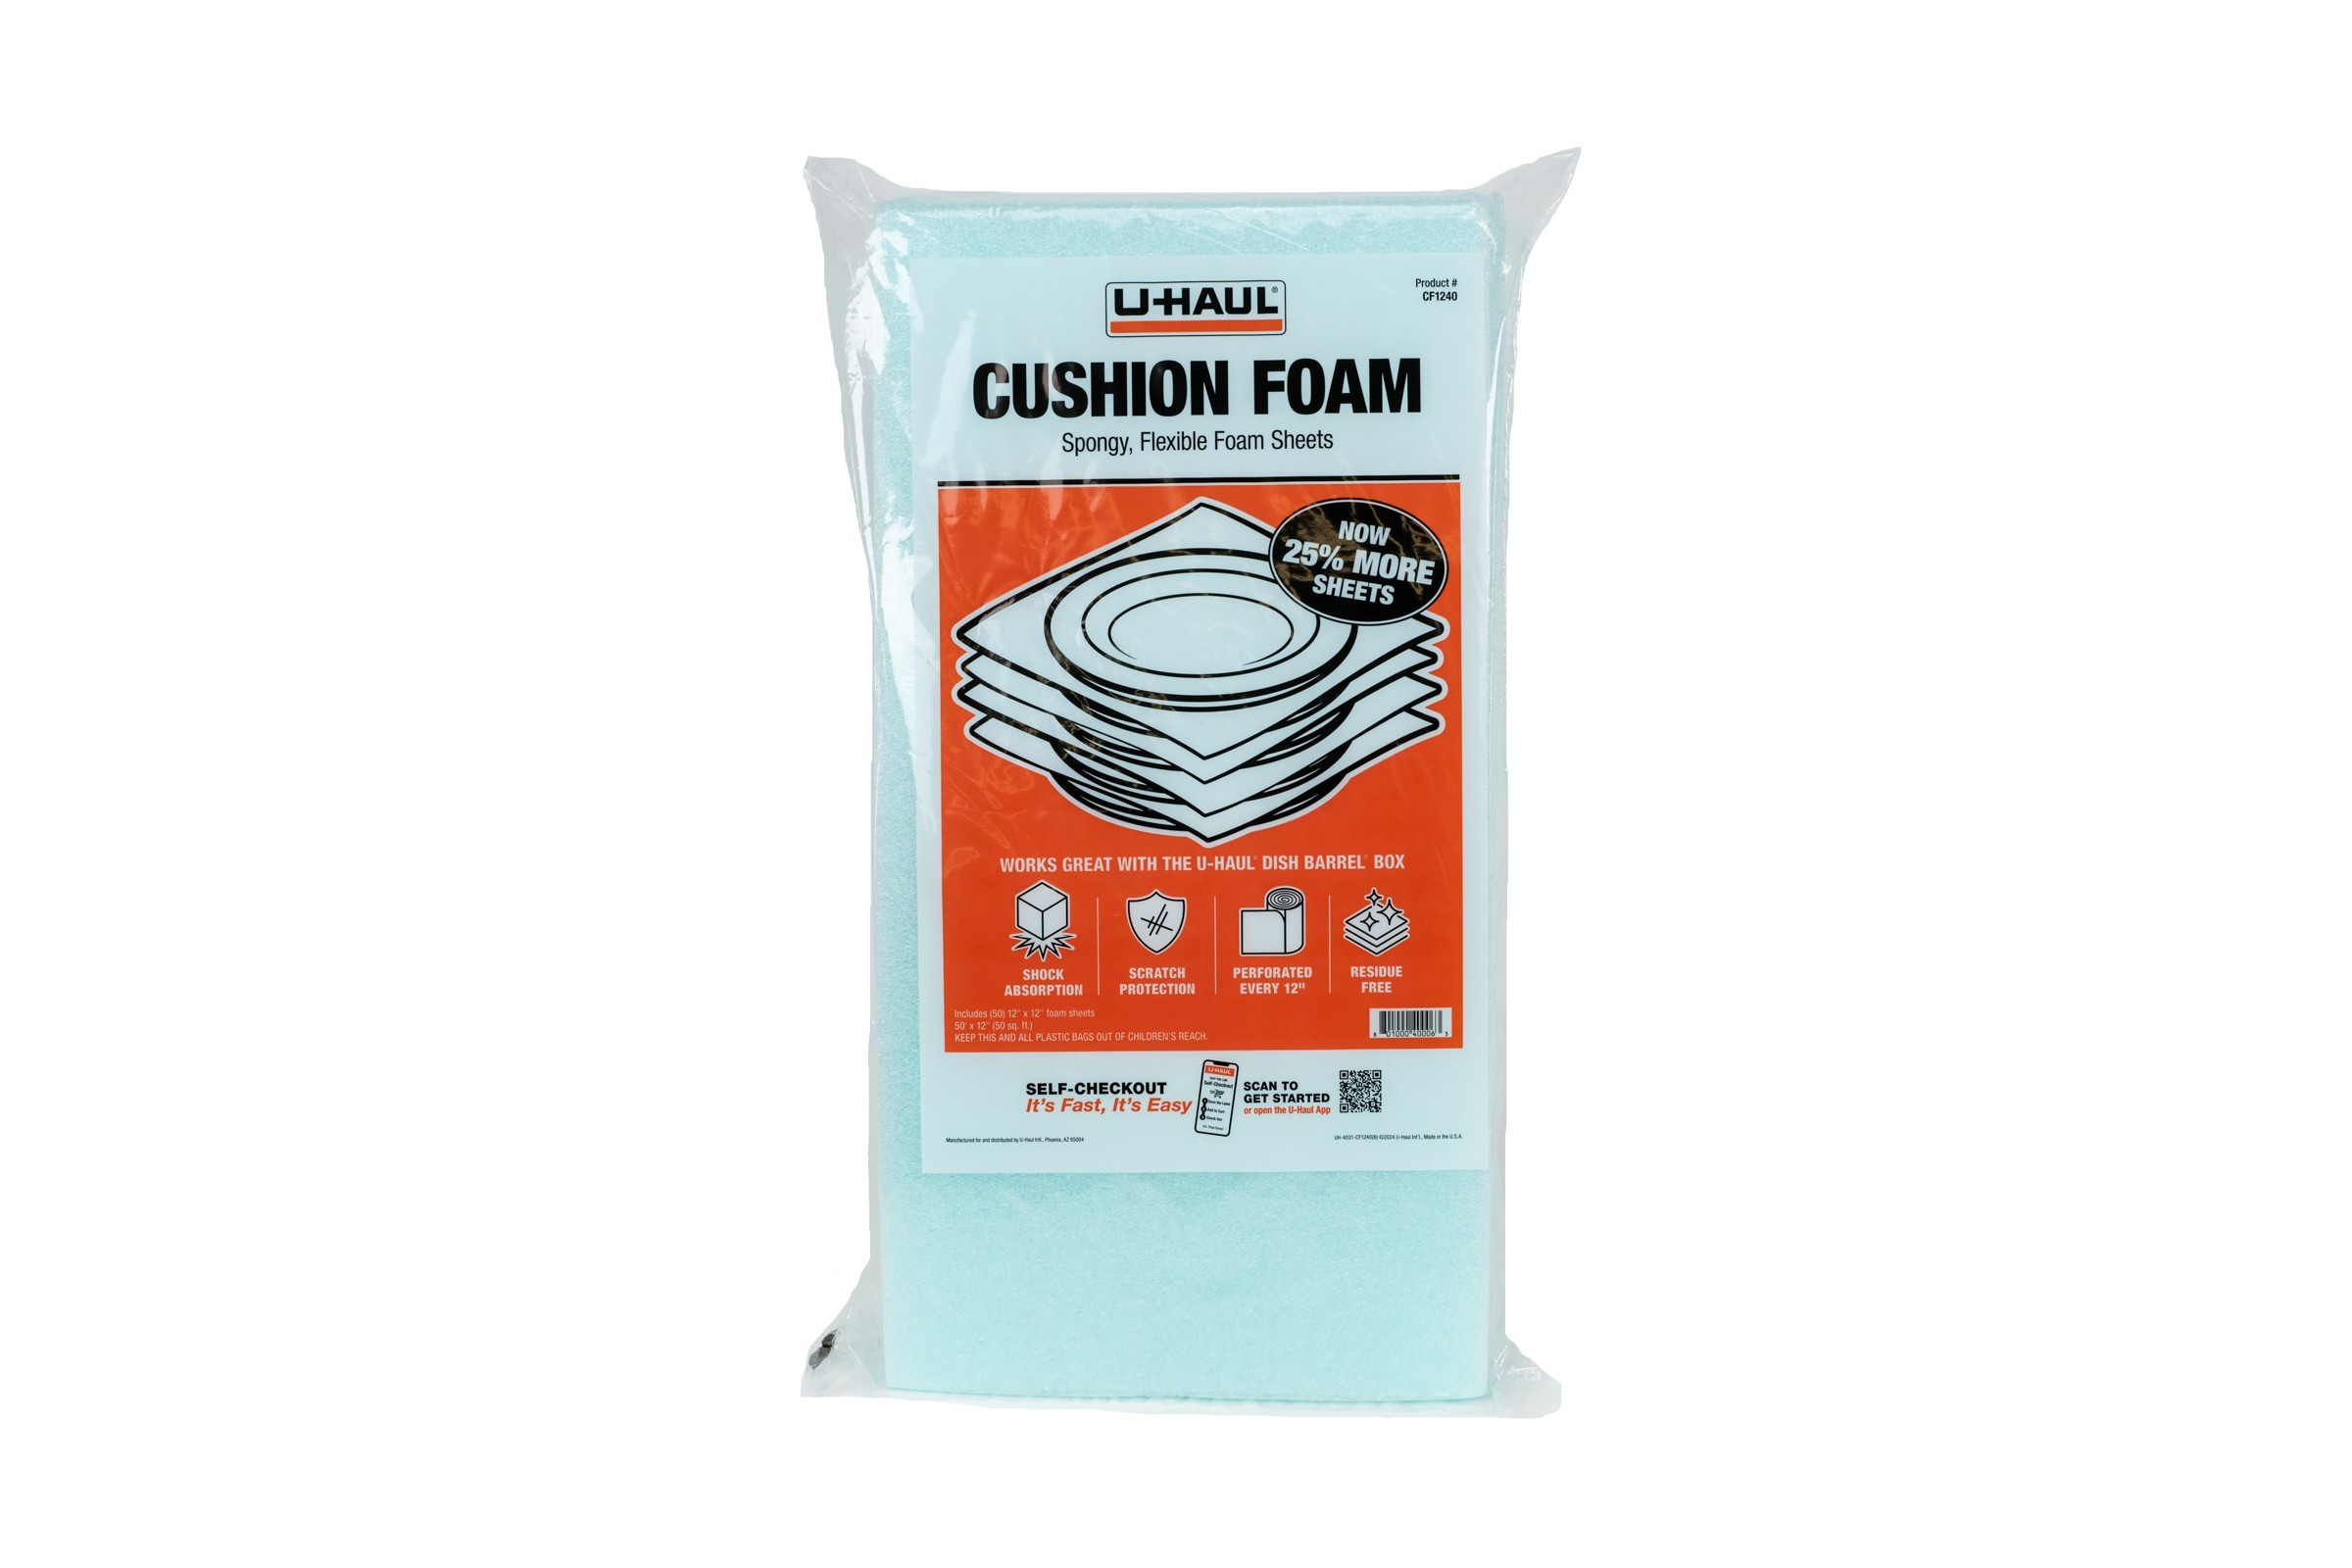
Except for the carpet over the rear shelf and the carpet on the main floor, the carpet is supposed to be glued directly to the steel. This includes the very front of the footwells, the sills, the rear wheel arches, etc. As I said earlier, I put that closed cell foil-backed insulation in the footwells and under the floor carpets. I wanted to add some additional soft to the other carpeted areas both for noise and for carpet depth when touched. The foil-sided insulation was too thick in the other areas, and I wasn't looking for temperature containment anyway, so I got some 3/32" closed-cell packing sheets from UHaul (like this). You wouldn't think it would make much of a difference, but simply tapping the steel with and without the foam was significantly different. These sheets are closed foam, so they don't absorb water and are very malleable.

Whether I was using the foil-backed or the UHaul foam, I used the carpet piece as a guide, traced it onto the planned under-layment and then cut with sharp shears. In some cases, I further trimmed the insulation to it wouldn't be visible after carpet was on top of it. I put some form of insulation under every piece of carpet except the transmission tunnel. I know the tunnel gets warm and I didn't know how the packing foam was going to perform with the heat. I wasn't sure how the carpet would appear on top of the foil-backed insulation, and whether the console would sit properly on top of it. Since that is the most visible section of carpet, and I'm not sure if I'm even going to install the full center console, I installed that section of carpet as directed: directly on top of the steel.

That's it for this part of the post. As you can see from the picture below, the cat continues to prove that he's a real shop-kitty, getting into whatever project we have going on. Of course, his help comes in the form of bringing work to a complete stop, but he's a cat. That's about all you can expect. Well, he could sit down right in the middle of the work; yes, he does that too. Thanks for following along, and I'll finish this up next time-


Sunday, November 3, 2013

Steering a Shed

So, as the weather starts to feel more like winter, thoughts of playing in the snow start to happen more often.  Today's post is more musings of getting the bus snow-worthy.  First, adjusting the steering-

Point, Re-point & Hope (not shoot)
When I drive the Jetta, the steering is tight.  So responsive.  I could drive with one finger on my left hand, leaving my right free to change stations on the radio or change gears.  In the bus, the steering has been, shall we say, a little more active.  With a 40+ year old system (and the fact that the technology is at least as many years old), it has gotten progressively looser.  On the drive back from Eugene, Boo commented on how active the driving was.  So, yesterday, we looked into what was going on.

Diagnose, and Re-Diagnose
steering box adjustment screw
center bottom of pic
Recall that this whole blog started because I couldn't find instructions for re-assembling my front end other than "install is the reverse" at the end of a tear-down procedure.  Knowing that the ball joints were good, I feared other gremlins in the mix.  So, with Boo behind the wheel and me on my back under the front end, we diagnosed the steering system.  There was no unexpected movement with any of the links, so, that means its the steering box.  The 68-72 steering box is no longer available (NLA) new, and even some of the parts to rebuild it aren't made anymore.  The best hope is to find a quality rebuild ($400+ plus core deposit) or take a plunge into adapting a 73-79 TRW box.  Hmm.. Turns out, there's an adjustment screw on that box.  The Bentley manual describes a relatively simple 2-person process for adjusting the box.  Simply put, if there's no resistance as you pass through the center-point of your wheel range (and all other system components come back "ok"), the box is loose and needs adjusting.  Verify that it's mounted to the body.  Seems obvious, but if its not torqued down, that could be the problem.  For the adjustment, shoot the adjustment screw and locknut with PB Blaster.  Loosen the locknut (19mm), turn the screw a 1/4 turn (to the right) and re-lock it.  Re-test.  After doing this a few times, and even adjusting it to the left a few times, you'll get a feel for how the steering wheel responds as it moves from post to post.  There should be slight resistance through the centerpoint of the turn.  If you think you have it, take a short controlled, low-speed test-drive.  Move the wheel from post to post as part of the drive (take 3-point turns; that's what I did).  It might take a few tries.  If you can't get it right, you may have missed another participant part of the system that needs to be addressed.

Leaky Injector
When the bus couldn't start the other day, I noticed a small dark wet mark underneath it.  Knowing that it hadn't been run in a few weeks, I knew there were few things that could account for a still-wet mark.  Any pressure in the coolant system would have vented within a few minutes after shutting off the engine.  Same goes for oil pressure.  That left the fuel system.  Sure enough, the dark mark was being made by fuel leaking from the injector closest to the rear of the bus and picking up oil as it was pulled by gravity.  Simply loosening the hard line and re-torquing it, we well as re-setting the low-pressure return lines should have solved that.  I'll be looking for leaks after work tomorrow.

Winter Approach-eth
jalousie pic from German Supply
So, driving the old bus in winter is like driving around in your old steel shed.  Drafty and cold.  With the new coolant-powered heat, there's real defrosting and heat at the drivers feet, but that does little for everyone else.  The jalousie (jealous) windows are especially horrible for passengers in Winter.  There are rebuilding kits where all of the rubber and felt can be replaced.  I need to do that.  The bus lacks door cards and an inner wall on the driver's side.  Those need to be resolved too.  Then there's the accessory battery to run the lights, no radio, etc.  I do have studded snow tires, though.  I have decided to pull the bus out of operation (once the steering is solved) so I can put in cards and rebuild the 2 windows.

So, I guess that means there will be a few more construction posts before there are any pictures from SkiBowl through my bus windscreen.  Thanks for following along.


Sunday, November 11, 2012

Weather Whether Whatever

Yep, its been a month.  I really don't know where the time goes.  When I look at my calendar for that past month, its been all over the place, so I can't point to one thing as my time killer.  I think its simply working too much.  I have had some time playing with the bus.  Boo and I hit the mountain for the first time yesterday, so I'll hit both of those today.

Whether Weather
When I first pulled the electronics together for the bus, I positioned the throttle unit (resistor pack that sends desired speed to computer) under the floor.  This area is protected by a square-ish pan with a couple of silver-dollar-sized machined holes that is supposed to be held on with 6 6mm bolts.  My bus being 40 years old, and having had multiple owners clowning on it, those bolt holes are not dependable.  For example, when I drove to the Futhur show I could hear the pan rattling in the wind.  Yikes.  Now, add the incessant rain we experience in the Pacific NorthWest and the sensitive electronics contained within.  Clearly, the bus was not ready for Fall, Winter and Spring.
First, I closed the machined holes with noise-reduction material.  This reduced the ambient noise as well. On top of that, I glued-in thin closed cell insulation for more noise containment.  I then ran 3/8" window insulation along the lip of the pan.  These 2 efforts solved the water problem, but I still had to get the pan attached to the bus such that the insulation would compress.  Since the bolts were rattling around the holes, I went to Home Despot and bought a handful of every bolt size from 6M to 8M in both metric and US sizes.  None of them worked.  So, I switched it up to thick (size 16) sheet metal screws, and sent one through the front-center and one through the rear-center.  The pan sealed right down and compressed the insulation.  Nice.  I tested the edges with a thin screwdriver, and I was unable to press past the insulation.  Problem seemingly solved.

I apologize for my lack of pictures.  The belly pan work was performed without the benefit of adequate light, so there were limited opportunities for taking pictures then either.  It looks like the drizzle has finally ended, so I'm going to head outside and address the turbo outlet that seems to loosen almost every time I drive the bus.  Once that's done, I just need to solve for the rear cabinet and protecting the electronics hidden underneath it.  Then, the bus will be ready for taking the family to the mountain regardless of the weather.

from 2011-2012 season a-top Palmer
Sister Hood
If you've read this blog long enough to have read entries from last Winter, you're already pretty well aware of my love of snow.  Season lift tickets went on sale a few weeks ago, and I outfitted the family with passes.  Of course, the kids keep growing, so 5 out of 6 of us got new boots (even me; mine were shot), and we spent last weekend at Next Adventure getting extra snow pants, a jacket or 2, etc.  As I write this, I'm starting to figure out where my month went... anyway, Boo and I took a test-flight to Timberline yesterday in my Jetta (bus may go next time).  T-line always has the glacier to slide on.  They call it the Palmer Snow Field; I call it the Palmer Ice Sheet, but either there was snow on Thursday, and it hadn't warmed above freezing since.  As we drove through Government Camp, all the trees had a light snow-dusting on them.  SkiBowl has a couple of inches and even Summit has some.
The road to Timberline was snow covered, but sanded.  We realized our chains were still in storage, so the slight drifts we experienced had us a little on edge.  Still, we made it to the parking lot unscathed.  It was cold.  I mean cold cold.  Almost 0*F cold.  And a wind.  Take the cold and the wind, add that you're suspended in a chair 30' above the ground (and above the tree-line) and finally add that this was out test-run and we both inevitably forgot something.  We couldn't stay very long.  We got 2 runs in and called it a successful test.

That's it for today.  I hope to have the bus winter-ready by ThxGiving so we can take the bus to Timberline for White Friday.  It would really make my season if I could bring my 2 favorite things together.

Saturday, June 11, 2011

scattered and dashing

I've been kinda zig-zagging on this project lately, but at least I've been tacking in the right general direction. Its another weekend day without the boys, so I've been trying to get a bunch of different things done all at once. None of them are necessarily finished, but I'm making some headway. I'll hit the highlights.

Clutchy
After some additional poking around the 'net, and remembering the condition of my bowden tube from when I replaced my clutch cable (that's a story I don't think I shared, actually), I think my clutch troubles are a bad bowden tube. So, I got one at Discount Import Parts here in Beaverton. I didn't feel like sliding under the bus today, so I focused on other stuff. I know, I know. I can't put it off forever, but the interior stuff is more fun.

Carpet
I rough-measured everywhere I figured I was planning to put carpeting. With these numbers, I should be able to tell how many square feet I need. Like everything on these old cars, every project gets bigger than originally planned. I did resolve to a color scheme, though, that will mirror my plan for the outside. These old bus's have a 2-tone tradition with the upper 1/3 white and the lower 2/3 under the belt-line being something else. I'm going with a nice dark blue. To mirror this, I'm putting a door-outdoor carpeting on the interior up to the belt-line. At the belt line and above, I'm going with a beach-sand colored carpet. White wouldn't look white for very long, and the sand color should visually soften things a little bit. It should soften noise a lot.

Insulation rip-out continues
I focused on getting the passenger side to the same place as the driver side within the main cabin. This meant removing the interior walls next to the bench seat and removing the interior wall on the slider. This was messy. I didn't take the bed (bench seat) out, but it was not installed when the walls were first put in. Nothing broke, but the cleanup of the loose insulation was a pain. Nothing the shop-vac couldn't solve tho. Just like the driver-side, after I got the last scraps of insulation out, I shot the cavity with rubberized undercoating. It was still drying this evening, so I'll lay the reflecty-flashy insulation in tomorrow.

15A Inlet revert
Last, I attacked the power inlet. I never really liked the solution I had before. When I removed the original 1972 power inlet a few years ago, the socket broke. Rather than try to repair it, I tried to make the 1979 power inlet work. It didn't quite fit in the same hole, but it worked well enough. Now that I have everything open again, I've decided to fix the old inlet, and sell off the 1979 inlet. This meant separating the broken plastic socket from the steel. After hitting the rivets with a 1/8" drill, I was able to rough-fit the new socket. The old inlet was tired and rusty looking. I mean, it looked bad. I hit it with Naval Jelly, and some 240 grit sandpaper, and it cleaned up pretty nicely. Knowing that I plan to paint the top 1/3 white (as well as the pop top and bumpers), I figured painting the inlet white would tie it in nicely. It certainly looks better. It will need another cuff-down with 240 grit and a light mist-coat of white to be done, but it sure looks close. Unfortunately, when I removed this inlet 5 years ago, I misplaced the body panel that fits around the inlet to help make a better body seal. I put out feelers for a replacement, but I haven't landed one yet. Since this effectively stops me from re-installing the kitchen, I guess I'll have to go back to the clutch and engine wiring stuff now.

That's it for today. I'll be putting in a few hours tomorrow before my nephew's birthday party, and then its another fun-filled work week..... and a Stanley Cup game on Monday. I probably won't get much done before Wednesday, if even then. Gotta maximize these weekend opportunities.

pictures-
top: inlet after brushing it off, removing old (all scratched up) warning sticker
middle: inlet after cleaning and Naval Jelly
bottom: inlet (and inlet door bits) drying in their new white coats

Monday, June 6, 2011

More sound killing

Sorry I didn't get back to the final bit about Memorial Day weekend. I covered most of it in the last 2 posts. Today, I'll focus on additional sound dampening, but this time without the batting. There are 2 different kinds of noise we need to deal with, and I'm looking at reducing both of them but without killing my budget in the process.

Vibration Noise
I think the stuff I bought all those years ago was called Dynamat. I blew about $200 on vibration deadener, betwen this stuff and the McMaster-Carr rubber sheets. The "Dynamat" is basically a sticky asphalty black tar with a shiny foil side. The sticky side comes protected with a wax paper which peels off as you stick it. The general concept of Dynamat (or Brown Bread or any of these contact noise dampeners) is to convert the vibration into heat, reducing the noise. For it to be effective, it needs to seal with the metal as completely as possible, so really work it in when you lay it down. On the websites that I visited at the time, the manufacturers and the sound installer experts all said you only really needed to cover about 50% of the exposed steel to notice a meaningful reduction. More often than not, no sooner was this said than the poster/manufacturer shows their install, and they used 2 layers of the stuff on every square inch of metal. What gives?

I guess it all comes down to what you're trying to do. Personally, I want to be able to drive down the freeway without feeling like I'm sitting inside a jet engine. Or a diesel engine. Or any engine.
Others (like those posters I mentioned) are trying to get to an acoustic nirvana where all you can hear is the slight whistle of the road.... until your 2000watt stereo kicks in. Okay, I'll admit, I want to hear some music when I drive. One of the reasons I'm doing the TDI conversion is because driving with one ear listening for an engine failure is tiring. And its boring for your passengers who plainly don't understand the tonal changes of an air cooled engine. Pooh on them, but I guess I'm one of them now. I kinda want to hear some Jerry when I'm driving around sometimes. Anyway, on to what I did with the Dynamat I found.

First, I double-checked the exposed wall where I removed the old insulation. This was before I shot it with the rubberized under-coating. This "check" was basically light rapping on the metal with my knuckles to hear for a rattley clang. I had put Dynamat over about 2/3 of the exposed sheet metal before I'd insulated before. The knocking produced an acceptable thunk-thunk, so I left it and moved on to the rear end.

When I drove this beast to and from the muffler shop (and to/from the tow-trailer), it was loud. I mean real loud. Like "I think there's an airplane landing behind me" loud. I looked at the rear engine hatch. Dynamatted. Rear cargo access? Dynamatted (but only on the large sections of sheet metal). Top-side engine hatch? Nada. Ah ha! I covered it almost completely with Dynamat. Each time I test-closed the hatch the "chunk" became more certain and the "clatter" disappeared. Now, I can drop the lid from about 6" up and it slams shut. Then, I attacked the last 4" of rear deck from inside the engine compartment. And then the short stretch between the spare wheel well and the left side of the top-hatch opening, test knocking along the way. This should meaningfully reduce vibration noise.

Ambient Noise
So, with a well adjusted clutch, a new engine mount and a warmed up engine, how much vibration noise is getting produced compared to the racket of a 100+ HP diesel engine? My guess? Not much. So, how do we reduce the ambient noise? Well, think about your house. In the rooms with the hardwood floors or tile, everything's loud. In your carpeted rooms, its a lot quieter. This simple case explains how we can address ambient noise in a bus: carpet the bugger. We can reduce noise with a vehicular version of a carpet pad first - closed cell insulation. You can buy 1/4" reflective insulation at Home Depot or Lowes that works great for this. I can't remember how much I paid for a roll, but I don't think it was more than $20. It covers a large area. I put some of this same roll under the floor of my bus years ago (between the 2 layers of thin plywood), and it definitely helped noise-wise. I still have a bunch left. I put some in the wall where the old batting insulation was. I'll be putting more behind every spot where I put carpet: walls, ceiling, doors.

This simple step should reduce more noise than the dynamat does. Why? The dynamat enthusiasts mostly are driving cars which have little ambient noise. They have nice foam headliners and plastic interior parts which absorb sound. The 1972 VW Bus has a wood ceiling and steel walls. No wonder it sounds like I'm launching a Mars probe when I'm driving! Once the dynamat is in, followed by closed cell insulation, topped with carpet, it could be a conversational volume in there. We'll see...

More next time,

pictures:
top: top-side engine hatch with dynamat applied.
middle: behind the stove/sink unit closed-cell reflector insulation installed
bottom: behind refer/storage unit closed-cell reflector insulation installed

Monday, May 30, 2011

tear it up

As I hoped, I was able to hit it hard this weekend. I mean hit... it... hard. Some 3-day weekends can be a mis-spent Saturday and then 2 Sundays - nothing gets done, and you laze around. This wasn't one of them. This was more like a Saturday sandwich with a mini-Sunday in the middle. I did too much to cover in one post, so I'll spread it out over a couple.

So I said how the battery was dead on Friday. After slow-cha
rging (2A setting) all night, it was still half-dead, so I let it be and switched to
othe
r things.
Now, first on the list was adjusting the clutch. Of course, that slid right off the list for the weekend. hahaha... so much for priorities. Well, hear me out now... I figured I couldn't really get the electrical done until I straightened up the wires I ran from back to front. That meant pulling the driver-side cabinets out, but first, I had to empty it of all the parts I jammed in there for the move. Yeah, when I said I didn't unpack the garage, that included the bus. So, anyway, I yanked all the crap out and then set to pulling the stove/sink unit and the refer out.


Interior Removal
The late-70's units are not held in by much. I kinda forgot from when I installed it. There are 2 Phillip's head screws behind the driver's seat passing through the partition into the stove/sink cabinet.
One of the screws that holds the top on the refer feeds through into the side of the stove/sink cabinet. The only other thing holding it down (other than weight and gravity) is a bolt through the floor inside the left cabinet door near the hinge. Now, out the backside there's the gray water vent and down through the floor there's the waste-water outlet. Of course, if the propane and city water are hooked up, they're in the way too. The only way to remove the cabinet and not break or scratch things is to slightly tilt it forward so the vent clears and then lift it straight up. Its heavy, so get a friend to help you or you'll feel it the next day - like I did :)

The refer is held down by even less. Like the stove/sink, nothing is holding it to the side.
There's at least one (may be 2) screws again from the refer going into the rear closet. Like the sink/stove, if you're gonna remove it (and not the bed first) without scratching it, you need to lift it straight up. It's heavier than it looks with the fridge stuff in there. Then, the fun started.

Insulation Rip-Out
Behind the cabinets I had put in some cellulose-based insulation. Not a good plan. That stuff absorbs water and can foster mold. Surprisingly, after 4 years of nearly constant rain, and very little fresh air to dry the bus out, the insulation was not in any way compromised. I don't think it even got damp, much less wet. Still, I plan of keeping this thing, and I don't want to take chances.
So, I pulled it all out, scraped the fuzz off the interior and shop-vac'd. The little bits I couldn't get off had to be dealt with. I still had a can of rubberized undercoating, so I shot the walls with that.

That was Saturday. I'll post the rest of the weekend at some point this week. It's a short week, though. I've got the boys tomorrow night (yes!), and I'll be watching the Bruin/Canucks Stanley Cup Final game 1 on Wednesday (stop by if you're local. should be a great game). Before we know it, the weekend will be here again.

pictures:
top - after refer removed, insulation taken out
upper middle - after sink/stove tipped onto its front, insulation taken out
lower middle - after interior shot with rubberized undercoating
bottom - after interior shot with rubberized undercoating

Monday, April 11, 2011

after many weeks, Hapy speaks

I uncovered and moved Hapy out of the driveway yesterday. This was a tiny, yet monumental event. It represents the first time he's been legally parked on the street in over 3 years. To me legal means: registered, tagged and capable of movement under its own power.

This also represents the beginning of the end of my days living in Lake Oswego. Its been 8.5 years, and a new chapter opens on Tuesday - tomorrow - for I get the keys to my new residence then. I am not as melancholy as I expected to be today. Maybe it will hit me on Saturday after I move the items we've negotiated. Maybe it will hit when I next pick up the boys and I don't actually enter the old house. I don't know how or when, but I'm pretty certain the grieving process hasn't concluded yet.

Once I do get re-located, though, there is a rather sizable list of things I need to deal with. Of course, there are the usual just-moved-in things, like getting paper products, cleaning stuff, fill-in furniture, etc. More importantly, though, is the establishment of a new life rhythm. The material matters will resolve themselves; its the spiritual groove that will be more interesting. And then there's the bus work. I think I will find that putting effort onto the bus could act as a 'security blanket', of sorts, helping me bridge from my former life to me new one. I guess its a good thing I have so much left to do :) I'll detail below the stuff I'll be focusing on for the short term. Camping season doesn't really get fully going around here until Independence Day, so I have more time than my East Coast friends do.

Bus Fix-It Punch List:
- clutch cable adjustment. may require new bowden tube or adding spacers.
- OBDII plug at driver seat. should just require a single wire. necessary for coolant temp monitoring during test flights
- engine harness replacement. borrowed harness doesn't have oil pressure sensor wired in. Not good for regular driving.
---- could start test flights at this point ----
- interior cleanup. strip interior (behind front seats), deep clean, re-insulate / noise baffling
- pop top replacement. remove westy top, install Riviera top w/bed, etc.
- secondary battery re-install. with the new engine, the old set-up doesn't work. This step will include re-routing lots of secondary systems (radio, interior lights, eg) to the secondary battery.
- finish water supply install. exterior shore-water inlet was never added.
- propane system install. the stove is there, but none of the propane (tank, lines) is. This will include integrating the "extend-a-stay" system.

That looks like a lot. That's cuz it is. I probably won't get it all done, but I'll do it in that order, with some of the lower priority items fitting into the bare-interior period. Thanks for following along, and I'll post once I'm moved in with pictures of moving day :)

pictures:
top - C at the edge of the Willamette River looking for cool rocks
bottom - me at the set break at Dark Star Orchestra a couple of weeks ago at the Crystal. Yes, that's a crying splittie t-shirt.