Showing posts with label injector. Show all posts

Tuesday, April 20, 2021

Malone Tuning Stage 2

Today, I wrap up the saga of the bigger injector nozzles and the Malone Tune in the VW bus. And, finally take Hapy for a drive. But first, for my mj-friendly readers, Hapy 420; celebrate safely :) Before I get flamed, yes, I know 420 did not stem from a date. It came from a time-of-day, but that does not change the fact that people celebrate pot on the 20th of April. It does, however, explain why some folks celebrate 4:20 in the afternoon with their personal favorite intoxicant.

Also, please note that the fine people at blogger have notified their users that "After July 2021, your feed will still continue to work, but the automated emails to your subscribers will no longer be supported." So, if you are relying upon an email to let you know that there is a new post on one of your favorite blogs, this will no longer function starting in August.

On to chipping Hapy's TDI computer...

Malone Tuning
In the TDI world, and increasingly outside of it, Malone Tuning is kind of the hallmark for getting your ECU "chipped". For those who wish to get more out of their engine, there is a tune for practically any set up and performance target. Malone has a few tunes below the "stage 2" that I selected, which either maximize power with a completely stock set up or adjust settings for best economy. I decided that I wanted larger injectors so I could get a little more oomph, so the stage 2 is the better choice. I do not have any plans to upsize my turbo, but if I did, this tune would support it.

On the turbo, I am running a stock VNT-15. The easiest upgrade would be to find and install a VNT-17. These appear on some cars stock. The advantage of the 17 is that it can create more boost (in pounds per square inch or PSI), because everything is bigger. The downside is the turbo lag (delay in the arrival of the power) is increased, moving the powerband up the RPM's. Since the sound and vibration of the bus increases with the RPM as well, I generally try to stay below 3500RPM. The VNT-15 turbo starts to kick in around 1800, but isn't really all-there until closer to 2200. So, right now, my total band for power is around 1300RPM (2200-3500). Adding a bigger turbo will reduce that or push my top-end higher to compensate which would make for a more noisy / shaking experience. It is for this reason that I am not really considering a turbo swap. The $1000US for a turbo is, of course, a factor too. Besides, we haven't seen how bigger nozzles and a tune will affect things yet!

Ship Ship Ship Ship
projected HP and torque
increases from stage 2
The actual purchasing of a Malone tune is through "Tunezilla". For someone with a super-early TDI like mine, it is not a simple download of software, though. A pair of chips need to be swapped out. This can be done by their shop, who does this every day, or they will send you the chips to do it yourself. I decided to have them do it, and sent my ECU off to them. Less than a week later, it was back in my hands, having traveled through customs twice (Malone is in BC, Canada) and their shop. Unfortunately, FedEx international shipping was a little rough with the package and after some highly responsive tech support from Malone to diagnose, I had to send it back. Malone determined that a handful of the solder joints broke free during shipping, causing the ECU to not power up.

The symptoms were consistent: apply switched 12V power and nothing happened. No messages on the "K" line thru the OBD-II plug to my little reader, no check engine light, no glow-plug light, but there was power at and past relay 109. So, there was some power moving through the ECU (relay 109 is triggered by the ECU), just not all of it.

I sent it back and they turned it around in 2 days, finding and fixing the loose soldier joints. They super-packed it with extra puff, so we would not have a solder fail repeat. Again, about a week after I sent it to them, it was back in my hands. An aside: when I sent it the first time, FedEx said they were not delivering to that address, so I went through UPS. UPS cost twice as much. The second time I sent it, FedEx was delivering there again. So weird.

Holy Head Snap
Hapy says "lets play"
Anyway, this time when I plugged it in, I had an entirely different experience. I turned the key to "RUN" and heard the familiar "snap snap" of the relays and the dash-pod waking up. I turned the key to start and Hapy fired up immediately (bum-bum broom). He rough idled for a few seconds and then settled down at 900RPM. I cleared the codes (per Malone instructions) and then played with the go pedal. Oh, this is gonna be fun. The new injectors don't leak at all, and the pump retains prime after being left idle for days. Bigger nozzles, stage 2 tune, wrapped exhaust, oil temp and pressure gauging, fresh wiring from front to back, including a new, custom fuse/relay box, the fat-plug harness surgery... All I needed was a test drive and Hapy could be ready to rumble.

Not so fast. It would be irresponsible to put that much new power on the road without verifying the brakes. So, before I got my "go" on, I adjusted the rear drum brakes, checked the lining on the front and confirmed I had full fluid. I switched out the system to DOT4 a couple of years ago, so the fact that he has been sitting most of the time since did not concern me as much as DOT3 would have. DOT3 absorbs moisture (bad for your fluid life) over time while DOT4 does not.

dyno curve compare
stock -v- stage 2
So.. with brakes adjusted, and all the stuff I said a paragraph ago now complete, I'm ready to test drive. We have been blessed with pleasant (20*C / upper 60*'s F) high temperatures so far this April, with many sunny skies. This makes for some perfect conditions for a test drive. While I only did the usual lap for my test, it was amazing. Somewhere along the way when I worked on the original bus dash I failed to re-connect the speedometer cable, but otherwise, everything worked very well and the brakes responded strong. As I turned onto the main road, I quickly moved through 1st and 2nd gear. When I put it in third, I really put my foot into it. I didn't floor it, but I put it pressed it pretty far down. The turbo spun up and I lost traction in my drive tires: I was burning rubber in 3rd gear, rolling at around 25mph. That'll do. Hahaha. I don't think I'll need to do anything more performance-wise, though I may replace the exhaust pipe if that will reduce exhaust gas temperature (EGT) or if the wrap destroys it. When I got back home, I felt the rear tires; they were warm, but not hot. Same goes for the rear drums. Then, I checked the wrapped exhaust which was also warm, but easily touchable.

With a consistent accelerator pedal (no more 1200 limp mode) and better visibility into the engine health, Hapy is pretty much ready for some road-tripping this Summer. Now that CoViD-19 vaccines are becoming more widespread and plentiful, Hapy's system-ready status could not arrive soon enough.

That's it for now. As I go, another reminder that Hapy turns 50 on 3-September-2021 and we will be celebrating it at LL Stub State Park. If you have nothing else to do Labor Day weekend, there are some great hiking, horse and bike trails there as well as our little birthday.
Thanks, as always, for following along--

Tuesday, April 13, 2021

Injector-Go-Round (Part 2)

Today, we continue and complete the efforts to get old used stock injectors from Hapy to work in Flash, and then brand new higher-performance injectors installed into Hapy. Fun with injectors starts.... now.

Injector-Go-Round
Now comes the fun part. With the wedged-nut extractor tool I mentioned in part 1 (See Injector-Go-Round Part 1), I pulled the injectors out of Hapy, Then, I pulled the old injectors out of Flash and installed Hapy's old injectors into Flash. That sentence took less than 10 seconds to type, and I feared it would take all weekend to do. It was actually fairly uneventful and quick. On Friday night, I set myself up by putting Hapy and Flash near one another, and then shooting the injectors where they enter the head with the trusty old Kroil penetrating oil. The next morning, I cleaned around the injector-to-head points, took my slap-together injector puller / slide hammer and all 8 injectors popped out with little effort. Seriously, each injector took fewer than 5 pops with the slide-hammer, and none of the "pops" had much force at all behind them. Honestly, I was being gentle because I didn't want the wedged nut to fall off the hammer. So, I held the slide between my index finger and my thumb and gently pop-pop-popped, moving the slide less than 4 inches each time with a flick of my wrist. I think the Kroil really helped, though I expect there will be some who bristle at the thought of letting some penetrating oil slip into the engine. 

I carefully arrayed the brackets, bolts and washers (excepting the one I lost) so I could re-install them in the same spots. In Hapy, I left the injectors loose, but still in their respective holes while I completed the extract on Flash, cleaned the holes and the head mating surface. Then, in one move, I pulled the injectors from Hapy, carried them across the driveway like a cat's cradle and set them into Flash's head. Ideally, I would have replaced the copper crush-washers on the injectors, but I didn't have replacements on hand, and this was the day I had to do this. *Dumb short-cut actually taking more time warning*

The install of the new-to-Flash injectors was fairly straightforward. Once the injectors were set in, I cleaned each bracket, rested it into place, and then lightly threaded the bolt through. Once I had all 4 in place, I threaded them down finger tight. I plugged in the 3rd-injector plug, set the glow-plug harness under the hard-lines and then re-connected the hard-lines to the tops of the injectors, but only barely threaded on. Once the lines are in the right spot, the compression fittings on the pump can be tightened down. Then, I wrenched down the brackets to around 10 foot-pounds (spec says ~15), snapped the glow-plug harness onto the glow-plugs and connected the return line to the injection pump.

Drift, Torque, Repeat
At this point, I test-cranked the engine to force air out of the hard-lines. There are a few ways to do this, of course, and the video I mentioned in part 1 is as good a way as any. He did the injectors in pairs while I did them one at a time, tightening the hardline at the injector end as each injector-to-hardline point spat out fuel. My one-at-a-time method moves from injector to injector based on the way they are connected to the injection pump: closest-to-the-ground one first, highest one last. My thinking is that any air in the pump will work its way up that way. By the time I was on the last injector, the engine was trying to fire.

I got that last line done, and Flash started right up. I could see some vapor puff-puff-puffing above the head, and could hear a "psst-psst-psst" noise, so I knew there was a leak. Boo helped me here, by jumping into the driver-seat and starting the engine while I looked and felt for the leak. It was around the #2 injector, but not at the hard-line mate point. It was around the injector near the head. Engine off, I grabbed a socket extension to use as a drift. I lightly smacked either side of the #2 injector bracket near the injector. Then, I re-torqued the bolt. I was surprised by how much more I could turn the bolt (like 3/4 a turn), so I repeated the process on the other 3, and continued to do this until the bolts torqued down at 15 ft-lbs and would not accept more after more drift-smacks.

This process worked very well. When we test fired it again, Flash started right up, made no funny noises (nor puffs of vaporized fuel) and ran strong during the test drive. The biggest indicator of our success was the near-immediate start the following morning and no cloud of smoke. He had been getting harder and harder to start in the morning. I now conclude that his old injectors were leaking (evidence of that was found upon their removal, as they leaked all over the paper shopping bag I set them on), and the fuel system needed to prime every morning, causing the long hard-start effort. I decided to change his oil immediately, while waiting for the delivery of the new injectors from KermaTDI.

Priming the Injection Pump
During the oil change, I discovered that the #2 injector had actually leaked at the head again during the test drive, and concluded that replacing the copper crush-washers (or injector seals) is not optional. I got a replacement set from the local parts store (not DIP, still bummed about that) and re-did the removal / install. This time, I did a pair of injectors at a time, starting with #1 and #2. Oddly enough, the injector pump lost it's prime in the few minutes the system was open this time. Half as many injectors, loosened the lines less and it still lost prime when it didn't the last time when I did all 4. Ah well; just shows that luck is a factor. With the MityVac, I applied vacuum on the low-pressure return side (no more than 7 pounds so the seals inside the pump were never in jeopardy, and more vacuum would not have tangibly sped the process) of the injection pump until fuel appeared in the MityVac collection cup. Then, I buttoned things up, cleared the hard-lines of air by cracking the connections one at a time (bottom to top, like above) until Flash started. Again, I see no puffs, but I did the #3 and #4 injector seals anyway. Fool me once. After letting Flash sit for a few days, he lost prime again.

So, I ran another round of MityVac priming and got him running. I let him sit an idle while I got a really close look at the injectors. I noticed that #1 had fuel appearing around the injector mount-point into the head. The #1 injector is unique in that it has a cap on one of the return bibs. That cap was leaking. I didn't have a real one, so I made one from low pressure hose and a bolt. This helped, so after letting Flash sit for a few days he would start, albeit roughly. Believing that the low-pressure return lines I moved from Hapy were no longer viable, I considered my options for replacement.

Hapy Injected
Once KermaTDI had the injectors set up, they FedEx'd them over with a new set of copper seals. They arrived mid-week, but with the dicey weather, I waited to until the weekend so I could have a nice big block of time. Hapy's head had been cleaned when the old ones were pulled and I had stuffed rags into the injector holes so it would stay clean. With the injectors in-hand, I could at least prepare them for install by removing the "T" fitting from Flash's old #3 injector, and moving the low-pressure return lines onto the replacement set. The kit from KermaTDI delivered with brand new low-pressure return lines so the set up of the injectors was that much easier. With the injectors set up, and a new weekend day, I followed the same process I did with Flash, except for skipping the test-start parts. I am having issues with Hapy's ECU, so this is as far as I could really get.

I'll describe the test-drive once I have Hapy buttoned back up. Between then and now, I need to get his ECU sorted but at least the exhaust is back on. There's never a shortage of things to do. Couldn't be Hapy-er.

Thanks, as always, for following along.

Tuesday, March 23, 2021

Injector-Go-Round (Part 1)

I got back outside and started playing on the TDI's (Hapy the camperbus and Flash the daily Jetta) as the weather has been somewhat hospitable, though not consistently so. Since Hapy is running so well (still no codes, accelerator responding as one would expect, etc.), I decided to step up his injectors and get that Malone Tune I had dreamed about for years. In contrast, Flash has been making a plume of black smoke when he starts in the morning (after a long start cycle), so I figured his injectors had gotten pretty clogged up. My thinking: I can upgrade Hapy's injectors and put his under-100k miles injectors onto Flash to extend his life. Today's post is about picking, and removing injectors. I'm still perfecting both Flash and Hapy injector installs, so I'll post part 2 on that once at least one of them is running right. Good times.

Injector Selector
PowerPlus 764
For the uninitiated, like me, the world of diesel injectors or nozzles is cloudy and the choices not clear. For one thing, the manufacturers all suffer with varying quality because of their efforts to get them constructed at lower costs. As is true with any market, there are always new players. Some new players build good stuff, but have little recognition. Others are simply trying to turn a dime and build garbage, but have flashy advertisements. Like I said, all markets are like this, but for a product about which you know little, how do you avoid overpaying or getting garbage? This is where your trusted vendors are so important. For TDI stuff, I go to KermaTDI and IDParts first and then some others like PartsPlace or TuneMyEuro to see what they are selling. When they are all selling the same subset of the market, you can be fairly sure those are the better quality-to-price. In many cases, your greatest gains from an injector upgrade require an ECU tune, a turbo upgrade, or both. Regardless, my research indicates that they need to be balanced / pressure checked / set-up or you will probably not get the performance you were expecting.

To help me through the maze, I worked with the folks at Malone Tuning and researched my 2 usual forums: TDIClub and VWVortex. There really is nothing better than true end-user feedback, but in most cases, the folks who replaced their injectors were going from clapped-out original stock injectors to something new, so, of course, they worked way better. And, they only did that one set ever, so they only had the old crappy ones to compare against. Still, the forums helped steer me where KermaTDI and TuneMyEuro were already taking me: Bozio injectors are the market leaders right now, but even they have quality issues. So, having them set up will best ensure a high-performing set. I decided to have mine set-up by our friends at KermaTDI since that brought with it better guarantees and some things are just best done as a unit.

DLC 1019
I spent considerable time toggling back and forth between the DLC1019 and the PowerPlus764. I ultimately went with the PP764, but, in retrospect, they are both great injector nozzles from everything I have read. Here is another write-up of the PP764. Both injectors appear to have the DLC protective coatings that extend the nozzle life against lower quality and low-sulfur fuel. Knowing that the quality of diesel fuel varies across the country, this is important. The PP764 also has hardened surfaces, etc. to extend its life relative to the stock injectors (the DLC1019 probably does as well), and have a higher upside in terms of HP potential with additional upgrades. Ultimately, the TDIClub seems to feel that the PP764 may produce more smoke, but more power than the 1019, but again, as in so many things, your mileage may vary, and with all the other variables at play, it is very hard to distinguish between these nozzles... except for which one can handle larger modifications: the PP764.

I had Kerma set them up at the lowest "pop" stage, so they are fairly tame, which parallels the stock-for-now turbo. I should be able to replace the original VNT-15 turbo with a stock-in-some-VW's VNT-17 and the PP764 injector set up can remain the same. The 1019 may not embrace the higher boost as well as the PP764. Again.. who really knows? This feels like a job for MotorTrend's Engine Masters, if they ever give a whiff about performance in otherwise not monster engines... and diesels in general.

Injector Removal
still from KermaTDI vid
I had a rain-free, beautiful Saturday morning, with a forecast for decent March weather (read: spotty rain) all weekend, so I had my opening. KermaTDI co-hosts a great video on YouTube for how to remove / replace the injectors which I mostly followed. So, I am not going to go through all those steps in great depth here. Instead, I will highlight what I found particularly interesting. In the video, the glow-plug harness was removed at the very beginning. It was easier to remove once the injector hard-lines were moved out of the way. Getting a good angle on the bottom compression fittings on the injector pump was difficult, but not impossible, especially during initial removal. With the hard-lines out of the way, for the Hapy removal, I then had to remove the vacuum ball and the bracket holding it to the head in order to get to the clips for the 3rd injector plug-wire. This bracket did not interfere with the plug in Flash, but his plug was very difficult to get out of the bracket. With that unplugged, I shifted to the injector-hold-down brackets. On Hapy, I lost concentration for a second and pulled the bolt out of the 4th injector bracket independent of the bracket, causing the dished washer to disappear into the engine bay. This momentary lapse cost me some time searching.

I never found that washer, but it was nowhere near the injector so I moved on. Finding a single replacement washer took some time, though. For posterity, it is either part number N0231312 or N0237314. With the brackets removed, the injectors would not budge (no surprise). So, I cleaned up around them as much as I could with brake cleaner and a slotted screwdriver, getting as much black gunk off as I could. I felt this would minimize the risk of that hard yuck falling into the open injector port once the injector came out. I applied a short burst of Kroil penetrating oil around each of the injector-to-head mating surfaces to help in the extraction.

Injector Removal Tool
no worky
The injector has a M14-1.5 thread where the hard line injector fitting attaches. Metalnerd makes a slide-hammer specific for removing this injector that threads right on. As of this writing, they cost around $45US. Back when I was working on the dents on Zed (the 1978 Datsun 280ZX), I got one of those stud welder / dent slide hammer kits from Harbor Freight. This kit includes a 2-pound slide hammer with a single thread-on attachment that is designed to grab onto one of those studs. The thread on the slide hammer is M14-2. Soooo close to the injector thread, but not. I would rather re-use a tool in-hand rather than buy another rare-use tool. So, I got 2 nuts from the hardware store (M14-1.5 and M14-2) and JB Weld'd them together. I would have Mig welded, but welder one I used on Oliver's floors has disappeared into the tool collective of Travis' friends and I didn't want to wait. Besides, I'm not sure welding these nuts would have been a slam-dunk anyway. Turned out, the JBWeld failed on the first injector, so my tool became just the one M14-1.5 nut: I force-wedged it onto the slide-hammer and threaded the other end into the injectors. Yes, this cross-threaded the nut at the slide-hammer end, but it served it's purpose.

I'm going to stop here, and pick up the actual removal and install experience in the next post. Like I said above, the removals were actually quite easy. Like so many things, destruction is easy; construction is hard.

Gramps Clutch
Unrelated, I mentioned the clutch replacement for Gramps (2-dot-slow Jetta 3) a few weeks back when I was considering what work to do next. K2 decided that he wanted to hire that out, so we called up Courtney over at MobilePdx. We have called on these guys a few times over the years when our workload was more than we wanted to handle at once, and they have never disappointed. He and his guys (Lou and Joe) knocked it out, replacing the clutch, flywheel (old clutch blue'd the friction surface), throw-out bearing, the throw-out bearing cover, etc. Before they started the tear-down, the engine got a de-greasing. Once everything was apart, they replaced the rear main seal on the engine. With everything clean, they were able to lubricate things (like the shift linkage), and confirm the oil leak was the rear main seal. All in, it was a ton of work, but Gramps is running like a champ again. And, he is no longer marking his spot every time he parks. Thanks MobilePDX!

Last, an early shout-out to my local-to-NW Oregon friends: Hapy turns 50 on 3-September-2021, so to celebrate, we will be camping at LL Stub Stewart State Park that weekend. If you have little else to do for US Labor Day weekend, we (Hapy, Boo and I) would love to see you.

Thanks, as always, for following along and I'll post again once at least one of the 2 injector beneficiaries is running right.

Wednesday, March 1, 2017

Running on Empty

Following the new pedal install, I took a few victory laps. I took each of the kids who were still living with me on small trips to demonstrate the new-found speed. In every  case, we would howl with laughter as I stomped on the accelerator and Hapy leaped to life. Hapy became my daily driver for the rest of the Summer, and I was having so much fun I forgot about one kinda sorta really important thing: the fuel gauge still doesn't work.

That Dreaded Feeling
pretty day to run out of fuel
You know that moment. The engine misses just once, and your conscious mind doesn't even register it. But your sub-conscious does. In that moment, your sub-conscious screams, awakens your conscious mind and you think to yourself "I wonder when I last put fuel in the tank". That was me on a mid-October morning as I was making my way to work in the AM northbound rush on 170th approaching the light-rail crossing. Then it skipped again. I threw Hapy into neutral, and hoped the traffic gods would permit me to not break down straddling the crossing. They did. Turns out the traffic gods found it to be more funny for me to run dry in the intersection between 170th and Baseline.

When Push Comes To Shove
For those who don't know that intersection, it is in an area of northwest Beaverton where growth has been exploding. As is the case elsewhere, infrastructure lags construction booms, so these are heavily-traffic'd 2-lane roads. I popped on the flashers, and started pushing. As I started to cut across a lane, I noticed that Hapy was moving much easier than I thought he should be almost like he was rolling downhill and then noted that a fellow motorist had put his car in the dirt and had joined my morning workout. We got Hapy along the curb on Walker facing east just barely outside the white sideline. In typical Oregon fashion, there were no horns sounded nor obscene gestures but there were many dirty looks... until we were off the road then passing motorists returned to smiling and waving at the little microbus.

Diagnosis
in a weird twist, the power grid failed too
The verification process for running out of fuel is especially easy if you have one of those $1 clear plastic pre-filters. I put one in to extend the life of the stock TDI filter, so this was easy. Empy clear filter means I ran the tank dry. Neat. At this point, the guy who helped push went even further beyond normal and offered to drive my to a gas station. Being a diesel (and diesel isn't sold at over 1/2 the stations here), this was a more generous offer than I think he realized. I explained the situation, but he wouldn't relent, so I jumped into his mini Toyota pickup and we sped off to the Fred Meyer on 152nd.

Can't Prime
For many cars, getting a car to run after you've run it dry is somewhat obvious: you put fuel in the tank and keep the key turned to run while the fuel pump fills the lines. Or, you just sit on the starter and the mechanical fuel pump plus engine draw get it started. I've actually had success getting Hapy started this way before. Not this time. I could not get the fuel system to prime from the key. For what seems to be far too often an experience, I had to get Hapy towed home. Now, I thought I had already posted the process for how to get your fuel lines re-primed after running dry, but a search didn't bring one up. So... I guess that's today's post. Note that picture of the intersection. It was mid-morning (post-rush) and the powergrid in the surrounding area had gone down too. The signals weren't working and I snapped a picture at a rare moment when there was virtually no one around. For the most part, there were long lines going in every direction, but I digress...

Fuel First
This is obvious, but its still the first step. Grab your yellow oh-shit can. In Oregon, it must be yellow for diesel or the station attendants get wigged. I'm pretty sure its the law, kinda like you're not allowed to pump your own gasoline here, but you can pump diesel. Weird. Anyway, get it filled with a couple gallons of diesel and dump it into the tank. This should be the easy part. In my case, I spilled a bunch down the side of the bus, but that's a "me" issue.

Mity-Vac
not my engine. I swiped the image from the 'net
Next, pop the hood and find the stock (not clear) fuel filter. The rubber line that leaves the filter and heads for the supply side of the injection pump (IP) is your target. In the picture on the right, I circled it in red. Disconnect that hose at the IP (the light grey thing right next to the red circle) and attach it to the reservoir end of the mity-vac. Apply vacuum until fuel starts to appear in the reservoir. You should be able to watch the fuel first fill the clear filter and then you need to work the stock fuel filter full. Since you ran your tank dry, it is possible that there's crap in your fuel filter. If you have one of those cheapo clear filters, this is a $1 problem and takes a couple minutes to resolve. Generally speaking, if you ran dry and you have one of these, just spend the $1 and move on. If you don't have one, now is a good time to consider adding one. Once the reservoir is getting fuel, re-connect it to the IP.

Hard Lines
At this point, you have fuel in the system from the tank through to the IP. In some cases, this could be all you need to do. Have a partner jump behind the wheel and try starting (obey the glow plug idiot light). After about 15 seconds of cranking, if it doesn't start, your hard lines are not priming. Bummer. Grab a spanner (can't remember the size) and crack open the connection between the hard line and each injector while your friend hangs out in your driver seat. In the picture above, I circled the injector -to- hardline connections in blue. When you have them loose, have your partner crank the engine. One by one, each loose injector connection will bubble first air, then fuel. Once you have fuel at your first injector, your partner can stop cranking. Tighten that connection with your spanner and have your partner crank again. Like before, once the second injector connection is bubbling fuel, your partner can stop cranking, you tighten the connection and move on. By your last injector, the engine will be running.

Now make sure you have torqued the lines down according to spec. If you don't, and just tighten them enough to stop the leaking, you will lose prime again and have to do this all over again the next time you come out to start the engine. That's what happened to me....

That's it for today. It's been a busy last few months, so I've got lots of stories to tell. Not many about driving the bus, sadly, with the weather as rough as it's been in the Pacific NorthWest this winter, but there's a bunch going on. Thanks for tuning in-

Saturday, January 25, 2014

Flash Lives again

Well, that was interesting.  Two days after that last post, Flash the Jetta broke.  I'll cover that today, more than anything else.

Putter... sputter... sput
It's funny.  I was looking back on a posting from about a year ago (How Diesel Gets Expensive) when Flash stopped working because of a dangerously low coolant level which led to rebuilding injectors, the IP and a timing belt change.  Back then, the driver of the Jetta was my step-son, and oddly enough when Flash suddenly stopped running on Allen Blvd, it was him again, but again, not his fault.  For the third time in a year, I had to have the Jetta towed home.  Enter a plug for AAA.

Attempts to start the engine were not fruitful.  I checked for codes, and got a P1248 (Injection Start Control Deviation).  Concluding there was a fuel delivery problem, I checked the case relief valve in the IP first.  Since the pump was just done, I didn't expect anything unusual, and it was all together like it should have been.  Sometimes, those valves get gummed up and slip out so the pump can't create pressure.  Not the problem.  Then, I swapped out the fuel filter.  After priming the lines and the filter, it still wouldn't start.  I concluded the timing of the IP was off, like the code was saying.  Enter Justin.

Diagnosis Negative
Justin stopped by mid-week after a regular workday to just peek into the situation.  Inside a minute, he spotted a flash of copper/bronze behind the timing belt tensioner, telling him that the tensioner was trash.  Concerns about the timing were spot on, but the timing of the IP was the least of our immediate concerns; one of the valves could have been struck by a piston, turning my TDI engine into a paperweight.  We got the valve cover off, and after a careful inspection, Justin concluded the valve train and pistons were probably okay.  Still, we needed to do a timing belt job.  He ran that through today.

Belt and Suspenders
Turns out the effort to pull off the old belt, replace the tensioner and put a new belt on is pretty much the same as doing a complete job.  So, while Justin started tearing down Flash, I went digging through my deep files to see what parts were replaced when Johnny did the belt as part of the IP swap-out.  I remember the receipt had all kinds of tings on it, but I never found it.  I did find the receipt for when I got towed into Bay City (Bay City Blues).  Ha.  So, in the interest of being safe, Justin and I agreed that a complete timing belt change was the best plan.  As Justin removed rollers and the coolant pump, it became increasing clear that we'd made the right decision.  Even though we only put 10k miles on the belt, an incorrectly installed belt will prematurely wear the parts it touches.  In a few hours, the belt was on, the timing was set and we'd taken a test drive to set it in.  Flash Lives.

Daily Driving
The broken Flash created a force to try driving Hapy to work.  After suffering a dead battery on the attempt on the first day, he responded very well every day after that.  I even ran errands in him one day this week.  He's been starting right up, idling a little high on the colder days, but settling down into the low 900's for idle after a few minutes.  It has been a great pleasure.  I do need to adjust the shifter a little to left to improve the gear selection in/out of 1st and 2nd.  I hope to find time to do that Sunday (tomorrow).

I think that's it for today.  We now have more working cars than drivers for the first time in months.  So, as I look forward to Monday, I have to make a decision about which TDI to drive to work.  Ha!  Thanks for following along, and for those who like the pictures, I'm sorry I didn't take any photos of Justin's labors.  I'll take pictures of the removed parts and update this posting later.

Sunday, November 3, 2013

Steering a Shed

So, as the weather starts to feel more like winter, thoughts of playing in the snow start to happen more often.  Today's post is more musings of getting the bus snow-worthy.  First, adjusting the steering-

Point, Re-point & Hope (not shoot)
When I drive the Jetta, the steering is tight.  So responsive.  I could drive with one finger on my left hand, leaving my right free to change stations on the radio or change gears.  In the bus, the steering has been, shall we say, a little more active.  With a 40+ year old system (and the fact that the technology is at least as many years old), it has gotten progressively looser.  On the drive back from Eugene, Boo commented on how active the driving was.  So, yesterday, we looked into what was going on.

Diagnose, and Re-Diagnose
steering box adjustment screw
center bottom of pic
Recall that this whole blog started because I couldn't find instructions for re-assembling my front end other than "install is the reverse" at the end of a tear-down procedure.  Knowing that the ball joints were good, I feared other gremlins in the mix.  So, with Boo behind the wheel and me on my back under the front end, we diagnosed the steering system.  There was no unexpected movement with any of the links, so, that means its the steering box.  The 68-72 steering box is no longer available (NLA) new, and even some of the parts to rebuild it aren't made anymore.  The best hope is to find a quality rebuild ($400+ plus core deposit) or take a plunge into adapting a 73-79 TRW box.  Hmm.. Turns out, there's an adjustment screw on that box.  The Bentley manual describes a relatively simple 2-person process for adjusting the box.  Simply put, if there's no resistance as you pass through the center-point of your wheel range (and all other system components come back "ok"), the box is loose and needs adjusting.  Verify that it's mounted to the body.  Seems obvious, but if its not torqued down, that could be the problem.  For the adjustment, shoot the adjustment screw and locknut with PB Blaster.  Loosen the locknut (19mm), turn the screw a 1/4 turn (to the right) and re-lock it.  Re-test.  After doing this a few times, and even adjusting it to the left a few times, you'll get a feel for how the steering wheel responds as it moves from post to post.  There should be slight resistance through the centerpoint of the turn.  If you think you have it, take a short controlled, low-speed test-drive.  Move the wheel from post to post as part of the drive (take 3-point turns; that's what I did).  It might take a few tries.  If you can't get it right, you may have missed another participant part of the system that needs to be addressed.

Leaky Injector
When the bus couldn't start the other day, I noticed a small dark wet mark underneath it.  Knowing that it hadn't been run in a few weeks, I knew there were few things that could account for a still-wet mark.  Any pressure in the coolant system would have vented within a few minutes after shutting off the engine.  Same goes for oil pressure.  That left the fuel system.  Sure enough, the dark mark was being made by fuel leaking from the injector closest to the rear of the bus and picking up oil as it was pulled by gravity.  Simply loosening the hard line and re-torquing it, we well as re-setting the low-pressure return lines should have solved that.  I'll be looking for leaks after work tomorrow.

Winter Approach-eth
jalousie pic from German Supply
So, driving the old bus in winter is like driving around in your old steel shed.  Drafty and cold.  With the new coolant-powered heat, there's real defrosting and heat at the drivers feet, but that does little for everyone else.  The jalousie (jealous) windows are especially horrible for passengers in Winter.  There are rebuilding kits where all of the rubber and felt can be replaced.  I need to do that.  The bus lacks door cards and an inner wall on the driver's side.  Those need to be resolved too.  Then there's the accessory battery to run the lights, no radio, etc.  I do have studded snow tires, though.  I have decided to pull the bus out of operation (once the steering is solved) so I can put in cards and rebuild the 2 windows.

So, I guess that means there will be a few more construction posts before there are any pictures from SkiBowl through my bus windscreen.  Thanks for following along.


Sunday, February 10, 2013

How Diesel Gets Expensive

No, I'm not going to talk about the geo-political influences on fuel prices, or about the cost of additives or start a flame about US government underwriting of our fuel-driven economy.  Oops, maybe I just did.  I'm talking about how even with a low cost of ownership, sometimes, you still have to fork out a bunch of cash to keep your old diesel-burner on the road.  I'm having one of those realizations now.

Cost per Mile
Car-heads talk about cost-per-mile when referring to their cars.  Its an "easy" way to compare your '85 Toyota pickup to your friend's '06 Nissan Skyline.  I quote easy because everyone needs to calculate it the same way, and that's not easy to do.  In concept, you take everything you spend on the car and divide that by the miles.  Simple.  Cost per mile.  If you have a black car and you live in a dusty climate, you probably wash that car all the time.  That should be part of your calculation, arguably, but if you wash it yourself at home, how do you price the water you use?  This is were it gets blurry, but this is all one long digression.  I call out the cost per mile because that was one of the key reasons I bought the Jetta TDI in the first place.  Promises of 50 mpg, and running at a low cost to 250k miles rang in my head.  So, 8 years ago I bought Flash, a 2000 Jetta TDI.  Since then, I've spent little, and drove him tons.  Its been a very low cost per mile, not that I bothered calculating it.  I might after this...

Drip Drip Drip
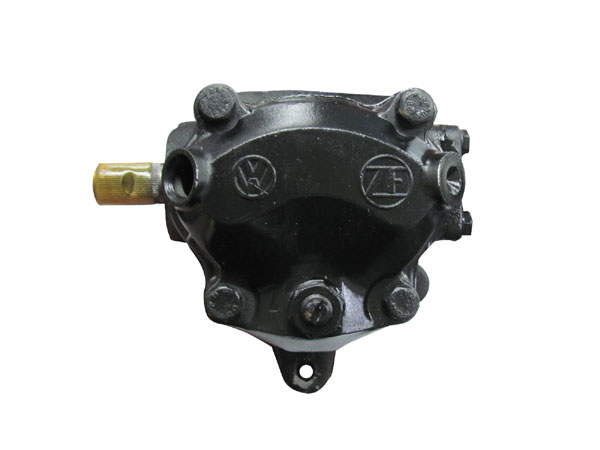
TDI Injection Pump.
re-man: $1000
Since moving in with, and then marrying Boo, Flash has been driven more by others than by me.  This has left me a little blind to the steady deterioration of things.  A few weeks ago, I noticed that there was a diesel fuel smell and a corresponding leak near the injection pump (IP).  "Well, that's not good," I thought, and looked up some solutions.  The TDIClub had a many postings on this issue, and there are even YouTube videos of guys doing in-situ re-gasketing of an injection pump.  "wow, that's neat".  Of course, no garage, tools in storage and an ever-watchful home-owners association at the condo complex had my hands tied.  My job had me really busy, and I wasn't driving him, so I wasn't thinking about the problem every day.  Boo (the regular driver) started complaining of headaches and I didn't immediately realize that it was fumes from the leak that was causing them.  She hasn't driven him in a few days and the headaches seem to have passed, so I think we may have found cause.  It wasn't until K drove him and told me after that the temperature warning light had started flashing and a buzzer was going off that I remembered Flash was ill.  Simple rule: when your idiot lights start to flash and warning buzzers go off, pull over and turn the engine off.

So that's the Sound of Money Pouring out of my Wallet
Diesel Injector
Set of 4: $1000
The temp flashing red and buzzer mean the coolant bottle is empty, threatening the consistent cooling of your engine.  Basically, the water level is low enough that your head is no longer getting cooled.  Badness will ensue.  I filled the bottle, started the engine, and filled it again.  And again.  Yikes, he was low.  Wile the engine was running, I could see drips under the engine, so I scheduled time with Boo's mechanic.  Justin (my friend and TDI guru) is working on other things these days, so I went another direction.  Johnny is a good man, knows diesels (knows gassers better), and wants my car to last a long time, just like I do.  He works on Boo's car, Boo's mom's and friends' cars too, so he's a good egg.  He looked Flash over, and concluded that the diesel leak at the injector pump lead to the premature aging of the coolant line that runs beneath it, eventually putting a hole in the line.  Others are similarly threatened.  Cost for the hose: $200 (w/labor, new coolant, etc), but solving the leaking IP was another story.  He conferred with a fellow VW mechanic and they agreed that at over 150k miles on the original IP, it was probably at its end-state.  Removing the IP includes removing the timing belt, so our simple hose leak had now blossomed into a $1.2k or more job (as we're doing a timing belt replacement now, too).  The IP was sent to Diesel Fuel Injection Service for a look-see.  The important steel bits inside were all okay, but they are going to re-man it anyway with Viton (Bio-Diesel tolerant) seals moving it to better-than-new condition.  Before Johnny sent it to them, we talked about verifying the health of the injectors too.  Why bother getting the pump right, if your injectors are fouled.... Yep, 3 of the 4 were bad or really bad, and the 4th one was leaky.  Neat.  Add another $600 to the job to get all four rebuilt with good German Bosch pintles and other bits.

(Not) Bringing it Home
Added to the costs of the work are things like living without a car for almost 2 weeks.  Yes, that's right.  The IP and injectors need to be rebuilt, and that kind of craftsmanship can't be rushed.  Some of the parts need to be sourced from the East Coast, etc.  So, added to the trauma of not having a car are little things like looking for a rental, bumming rides, cancelling events and asking your MIL to borrow her car.  Its been a de-lightful week.  Flash will be back next Saturday, and his throttle response should be better than it was the day I bought him (used).  Johnny is going to clean-up and match my glowplugs to rid a code, wrapping up the work for around $2200.  Considering a re-man IP runs $1k and new injectors do too, a timing belt job usually runs over $600 and the original hose leak is getting done, its a more-than-fair deal.  Still hurts like mad, though.  Consider that the front end still clunks, and I'm pretty sure the struts need replacing, but that will have to wait until after taxes.  Sigh.  How long til Summer?

Remember: Get and Use Stanadyne in your semi-modern (pre-2006) diesel engine'd cars and trucks.  Since the US pumps have low-sulfer fuel in them, older systems require lubrication through a fuel additive.  Omitting a lubricant will shorten the life of your system, and you will have a $2k problem to solve.  Just like I did.

Monday, January 9, 2012

Return to Service

Rather than spend the weekend playing in the snow with Boo, we both spent our respective weekends in the valley.  Today's post will be more technical than usual, since I spent all weekend on the bus.  Consider yourself warned :)

Glow Plugging Away
The glow plug is a mystery to non-diesel folks.  I know it was to me, when I first got into diesels.  I figured it was just a diesel version of a spark plug with some fancy lingo around it to confuse people.  Actually, it is core to the difference between a diesel and gas engine.  A gas engine depends on a spark to create a small explosion in the combustion chamber (by setting the vapor on fire), creating force to drive the piston down, and create movement.  A diesel engine depends on compression for this function.  This sounds a little strange to the newly inducted, I know.  Now, gas engines need compression too, but not nearly as much.  In fact, when you start losing compression in a gas engine, you suffer "blow-by", but the engine will still run, while you slowly start polluting your oil with un-burnt gasoline.  An early indicator is a smell of burnt oil (rings going bad) or your dipstick smelling like gas. Once a diesel engine's compression falls too low, or should I say once the pressure created within the combustion chamber falls below a certain level, the engine won't fire at all.  So, enter some chemistry....

Pressure is a function of temperature and the vapor contents.  The presence of water in air, for example, reduces the vapor's ability to compress.  A low temperature of the vapor increases its ability to compress, or should I say decreases the amount of pressure created within a cylinder.  If the temperature remains sufficiently high and constant, pressure is equally high and consistent for a static vapor make-up (atomized diesel fuel, cooking oil, bio-diesel, eg).

glow plug image borrowed from
autoengines4842.blogspot.com
This is where the glow plugs fit into this picture.  They are little combustion chamber warmers, but hardy enough to withstand the pressure and heat of an active engine. Once the ambient temperature falls below about 40*F, the pressure created within the combustion chamber is insufficient to create an ample burn for the engine to run consistently.  As the temperature drops from there, the engine becomes, eventually, inoperable.  The glow plugs create the heat necessary to warm the chamber so the engine can start and run until the combustion warms the chambers directly.  Then, they shut off.

With this "science" in mind, we can better understand why it was so important for me to get the borrowed harness (without a glow plug circuit) replaced with a fully functioning harness.  I completed that in my last post.  On Saturday, I discovered that 3 out of 4 plugs in my engine were bad.  I had lots of old plugs, but only one good one, so I popped it in and hoped for the best.  Since it was over 40* in my garage, I wasn't too worried about the plugs.  Turns out I was right, though starting on the mountain may be interesting if I don't have 4 operable plugs.

Okay, So Why Won't It Start?
Aside from pressure, a diesel engine needs something pressure-combustible within the vapor.  As I indicated earlier, this ranges from diesel fuel, home heating oil, bio-diesel and vegetable cooking oil.  I've heard of other alternatives, but I'd stay with those 4 (and home heating oil only if you aren't afraid of getting ticketed in the US - its a road tax aversion thing).  So, I have temperature, I have compression, so I must be missing the fuel.  Since I had the entire system open, I probably failed to get all the air out of the fuel system.  I attack this in 3 steps: priming the lines to/from the filter, priming the pump, and priming the injectors.

Priming the Lines
With a Mity-Vac, simply apply vacuum to the fuel line that runs from the big fuel filter to the Injection Pump (IP).  Block the return line from the pump to the filter.  The filter is large and holds a considerable amount of fuel, so you can find yourself second-guessing whether you have it right.  I have a small clear filter between the tank and the main filter so I can see fuel enter and move through.  This little $1 filter extends the life of the spendy stock filter too, so I encourage others doing this too.  Once you have fuel collecting at the Mity-Vac bottle, connect the IP feed line back to the IP and start priming the pump.

Priming the Pump
IP image borrowed from
Dieselgeek.com
At the pump, remove the little return line which comes from the injectors.  Apply vacuum with your Mity-Vac to that little nipple until fuel collects in the bottle.  Do this carefully, with low-pressure vacuum.  You don't want to damage any pump innards (read: rubber seals) by applying too much vacuum at once.  I found keeping it under 5 pounds was sufficient.  Once you have fuel in the bottle, re-connect all the lines and move on to priming the injectors.

Prime the Injectors
Now, you have fuel at the pump and the pump is full of fuel.  All that's left is making sure there's no air in the hard and return lines between the injectors and the IP.  With a wrench, loosen the nut at the end of the hardlines where they connect to the injector.  Do this for all 4.  I completely loosened mine, but just "cracking" it should suffice.  Now, start cranking the engine.  Keep cranking until you see diesel fuel start to pop out of the loosened injector connections.  Once all 4 are popping, you're air-free.  Tighten it all back down and the engine will start.  Mine did.

I took a test drive over to Boo's house to prove out all of my handiwork.  This is a few miles, including a highway on-ramp/off-ramp and some city-ish traffic driving.  The new tires felt fine, and I couldn't even hear the noise of the studs over the racket of the engine and rattling windows.  The bus drove well, reached 185* and effectively leveled off there.  The heat works (though the defroster air was a little funky), and I think we're back in business.  I need to top-off the coolant, and double-check the oil, but I think the bus is now "back in service".  Now, to plan the first trip to the mountain, and the next "real" road trip: Dark Star Orchestra...

As always, thanks for following along, and I'll post more as there's more to post about...