Showing posts with label crawl. Show all posts

Tuesday, September 26, 2023

Down in the Hole

Today's post is continuing the fun with the furnace. We took a weekend off for a family wedding and all the events around it. So, when we returned, we had a hole cut in the floor, a dozen 5-gallon buckets worth of dirt removed from beneath it, and the furnace slid over to the edge of the hole.

Chimney Cleared
placed for now
Before Boo and I got after moving the furnace, we felt that getting the chimney liner removed and the blockage between the floors removed needed to happen first. Also, by keeping the furnace out of the way, the chimney folks would have the most space available. We hired a father son team (DGC Chimney Service) to do the dirty business we were unable to complete ourselves. This also created an opportunity to have this chimney inspected and repaired, if necessary. They started by removing the aluminum sleeve out the top of the chimney. It is in re-usable shape, so we just need to add about 8 feet to it and re-feed it down the chimney to vent the new furnace location. Once it was out, they cleared the mortar plug that had been placed between the floors and then swept out the remaining soot. After an inspection and read-out, they were done. All-in, they were here for 2 hours.

lowered
During the read-out, they shared that the top 2 courses of the chimney needed to be repaired. These are not structural, so they insisted a homeowner could do it. Otherwise, the chimney is in incredibly good shape. The age of this house pre-dates the building code requiring the terra-cotta tile liner. Prior to that code change, masons would apply a thin layer of mortar by hand inside the chimney as it was being constructed. Once complete, there would be an uninterrupted skin from bottom to top. While cohesive, this was a great liner of a chimney. Unfortunately, this mortar is more sensitive to the acidic emissions which pass through a chimney. When the residue on the mortar skin is met with rainwater, the mortar is slowly eaten away. So, ordinarily a house this old would have some areas of the mortar liner, especially nearest the top, compromised. That is not the case here, so somehow we're lucky. Perhaps the chimney was cleaned annually. Regardless, I need to repair the top 2 courses and re-introduce a liner down through to the crawlspace.

Furnace Lowered
rotated 90*
With DGC's work complete, Boo and I could return to moving the furnace. As I mentioned, it was on the edge of the hole in the floor and I had dug out a bunch of dirt below. To keep things clean, we set out a blue tarp over the dug-out hole. Then, we wrapped the furnace with a pair of load straps, tying the ends so the furnace had 2 long canvas straps around it. Boo and I used those straps as handles, shifting the furnace first over and then through the hole in the floor. The hole was cut exactly right for the size of the furnace, but it di not account for the machine screw heads sticking out from the sides. So, the furnace would hang up on the screwheads on the floor joists. We encouraged the furnace to pass with a booted foot and once the screwheads passed the top edge they dug into the joist just enough to prevent the furnace from falling through. A couple of centimeters after the top edge of the furnace passed the bottom of the floor joist, the furnace rested on the blue tarp.

Once on the ground, Boo ducked through the hole where the furnace used to be and returned the furnace from the crawlspace. Then, as I lifted up on the straps, Boo pulled the bottom edge towards her, tilting the top away. The furnace rotated on it's horizontal axis until it had turned 90*. At this point, I climbed down behind the furnace and Boo and I wrapped it with a moving blanket. Then, as Boo pulled, I pushed the furnace over the plastic vapor barrier over to the base of the chimney (to be fair, Boo pulled more than I pushed). We left the furnace like that, wrapped in a moving blanket, and not quite where it's going, but fairly close.

More Vent Fun
insulation stripped
With the furnace somewhat settled, I took a closer look at the rectangular vent/ducting we had taken down for the furnace removal. It looked awful. The ducts had been wrapped with open-cell pink fiberglass insulation. On surface, that sounds like a great idea, but this crawlspace had been inhabited by rodents. So, the fiberglass was, uh.. let's just say guh-nasty, gross, disgusting. Wearing a respirator (of course), I removed the insulation from the larger run and carefully swept up the droppings and dust into a plastic garbage bag and removed the bags from the crawlspace. The other duct needs to have a similar treatment, but the one which was stripped of insulation now looks brand new. We had feared that they would need to be replaced, but now, we will simply clean the insides with a vacuum and long-handled brush. Of course, with the furnace re-location, the venting will need some re-orientation, but we may be able to escape with only a few small pieces rather than a full vent replacement.

This is where we're at. For Pacific Northwesterners, you are well aware of how our weather has shifted from summer to autumn-ish over the past few weeks. Overnight low temperatures have dropped into single-digit C (below 50*F) and daytime highs are barely breaking 20C (68*F). Not having an operational furnace nor a meaningful alternative heat source may very well become an issue before we get the furnace operational, based solely on the speed at which we have gotten to this point. Fear is the ultimate motivator; we will have heat this winter. It will be interesting to see if we have heat by Halloween, though.

Thanks, as always, for following along-

Tuesday, September 12, 2023

Digging a Hole Where the Furnace Gets In

Kindly forgive the Beatles song stretch. Today is a brief post covering a considerable amount of sweat and effort: getting the furnace moved into the crawlspace.

Can You Dig It?
dig hole
In my last post, we cut a hole in the old kitchen floor just inside the door to the garage. The hole is one floor joist wide, allowing the most narrow dimension of the furnace (~11cm or just over 14inches) to pass through. We decided that the height (depth?) of the other side of the hole would be the largest of the 2 remaining dimensions of the furnace. We could have used the next-smallest. We figured that whichever dimension remained would need to be available between the bottom of the floor joist and the ground. Since the plastic-sheet covered dirt floor was 2 feet (60cm) +/- from the bottom of the joist, we would need to dig. The furnace has one side that's about 28-1/2 inches (72cm) and it stands 33-1/2 (85cm) tall in it's original alignment. Our choice was to dig down 4 inches or so for the size of the hole or dig down almost a foot (25cm plus wiggle room). I suppose the mount of dirt to move is the same, its just a question of depth versus width. Still, it just seemed like digging shallow and wide felt like less dirt.

With the hole cut in the floor, I grabbed a 5 gallon bucket and the post-hole digger. I filled a bucket, hauled it up and outside and spread the dirt around a low spot on our lawn. I did that at least a dozen times. Once the main rectangle was dug, I considered that once the furnace was in the hole, we needed to tip it one way or the other to get it flat so it could slide around. So, the edge of the rectangle that faced towards the furnace final destination was cut down on an angle so we could pull that bottom edge up and away from the hole. I figured that if I had 28 inches from the bottom of the hole to the top of the dirt as measured from the inner edge of that floor joist, it could effectively hinge. By the nature of how this tip, though, that front edge will come up between the joists and not have an issue. It wasn't until after completing the dig, that I pieced that together and determined that I dug out more than I needed to. Ultimately, it is better to have too much room than not enough.

Venting Some Venting
venting set aside
With direct access into the crawlspace, Boo and I looked towards the location where the furnace would ultimately reside. Our view was impeded by supply venting routed all over. There are 2 main runs, heading in opposite directions: one towards the hole we just dug and the other going away. From these main trunk vents, the smaller round vents are attached. Where the 2 main runs come together is a large box (plenum?) where the conditioned air leaves the furnace and enters the system. All of this stuff needed to get shifted out of the way before we could bring the furnace down.

We started with the vent that ran from the box towards the hole. This system is old, and held together mostly by faith and tape. Boo removed the tape at the box, and the vent detached easily. She cut down the cloth webbing that suspended the vent from the floor joists and the whole thing dropped to the floor. She slid it to the side. I followed suit, removing the vent running the other way by the same steps. This left the big box.

the box
The box was simply hung from the floor by a lip that was less than 1/2". I lifted the edge of the lip with a bladed screwdriver, pressing the lip up and inward while sliding the screwdriver along the edge. The lip simply folded under the floor. Once the final side of the box's lip was so treated, the box fell to the floor of the crawlspace. I was (and still am) amazed that a heat system constructed in the late 1940's was held together without any fasteners. I removed the connectors attached to the box that allowed the vents to connect and then lifted the box out through the hole.

Sooty
blocked with soot
The last thing I tried to complete before lowering the furnace was removing all the soot from the clear-out. I foolishly thought that I could dig out the soot that was at the clear out down in the crawlspace. Well, it looked like the clear out had maybe never been cleared out. I was able to remove a full trashbag of soot and was unable to reach any further up into the chimney. Looking down from above (through the original oil? wood? coal? furnace-to-chimney access, I could tell there was at least another foot of solid soot I could not reach. So, Boo and I decided that we would bring in a professional. Many years ago, I had used British Brush to clean and repair chimneys at various houses. Well, they are out of business so we hit Yelp / the Yellow pages and solicited bids. In the end, we have some chimney repair from when the furnace was in the dining room, probably a new liner from the cap to the clear-out and then a safe connection to which we can attach the furnace. My biggest concern about this whole furnace move was to safely manage the exhaust and not accidentally create a CO or CO2 issue inside the house. Having a professional will help.

This is where we are left off. We have the venting removed, the furnace freed, an access hatch built and the hole dug for moving the furnace. We decided to leave everything just like this until after the chimney folks do their thing so they have the greatest mobility. We have some family events coming up, so the work needed to come to a stand-still anyway. We will pick this up after that.

As always, thanks for following along-

Tuesday, September 5, 2023

Kitchen Trap Door

In my last few posts, I have been walking through the slow process of kitchen and furnace demo. Today, our destruction continues with the creation of a hole in the kitchen floor, which will become a crawlspace access. Let's start with the obvious questions: why, how large and where. Before I begin, for my US readers, Happy first day after Labor Day; so starts the most productive period of the year (until ThanksGiving in late November). If you feel like you're working "so much more than", that's because you are. Now, where were we? Oh, yeah, cutting a hole.

Why
its a hole
Recall, this is a 1948 farmhouse. This house pre-dates most modern design like an inside access to the crawlspace. Instead, there are large openings around the outside of the foundation, which are blocked off with framed wire rectangles (to keep critters out). So, when under-house maintenance is needed, one of the frames is pulled off the house and the worker-person crawls under. When it is nice outside, this is clumsy, but not terrible. Add in rain, snow, cold and/or wind and this quickly becomes much less pleasant. Consider, between readying tools and parts in the rain near the crawlspace access, you will be fairly wet before you slide under the house... into the dry dust and dirt. Being wet, that dust and dirt clings to you. Yeay. Having an ongoing internal access would address this, but honestly, if a furnace could fit through the existing foundation opening, we would not have taken on the scope increase. Whether we were to buy a new electric furnace or reuse our existing furnace, the hole is too small to fit a furnace that is large enough for the home size.

How Large
So, answering the question "why" above, I shift to "where", with an eye on "how big". I took measurements of the in-hand gas furnace, and I swear the designer had standard US housing standards in mind when they considered the size. The most narrow side is just over 14 inches wide. Standard framing width is 16 inches-on-center, so the just over 14 inches wide will just slide between. The floor joists in this house are standard width (I was shocked, honestly), so the furnace can fit between. The next most-narrow side is around 27 inches. This is important for install as well, but this next-shortest side drove us to the size and shape of the hole. In short, the hole needs to be at least 14 inches by 27 for the furnace to slide through.

Where
stripped clean
I touched on where we were thinking about putting the access in my last post. Since we have not fully decided where things would go in the kitchen, cabinets and appliances -wise, we had to make some informed guesses. We recognize that the smart place to put food storage (fridge and pantry) is close to the door where you bring groceries into the house. So, we figured the if we set the trapdoor inside the door to the garage, the limit to how far into the room it can go will be constrained by the space consumed by food storage. Knowing the width of the pantry (sitting in the garage, waiting for install) is 24 inches and a standard-sized US fridge is 33 inches, we can measure off the not-moving-chimney towards the door to the garage, and mark where the closest edge of the fridge will be.

Along the adjacent wall (the wall with the door in/out of the garage), we intend to put cabinets with a sink. Similar to the pantry cabinet, we know the width of that standard-depth cabinet (82 inches). By marking that off on the floor, we could see that there was about a foot and a half between the end of the cabinet and the start of the door frame, leaving ample space for garbage/recycling bins by the door. For this purpose, though, it gave us a large space where the hole could go.

With these parameters, we needed to know where the joists and beams were so we could cut a hole that met the various needs. To get exact locations, someone had to go under the floor.

Mark Your Spots
old access
Boo has a very healthy sensitivity to rodent waste and what the dust that waste creates can do to your lungs. Because of that healthy sensitivity, she has always taken on the role of under-house-slider, wearing a full respirator. For this task, it was no different. She took a flashlight, a measuring tape and a cordless drill with her. Shouting to each other through the floor to arrive at an approximate location, Boo sent the drill through 6 different locations to indicate for us where the joists were. Beyond the drilling the holes, Boo had a clear understanding of what barriers or hurdles exists beyond the joists. It was with that info plus the drilled holes we were able to plan the rectangular cut.

Cut Once.... Or Twice
Based off of the holes, we drew an initial rectangle. I opened up the holes with a larger bit so the jigsaw would fit and then cut the lines. Once we had the initial hole, Boo and I got to thinking, did some more measuring and more talking. It was at this point that we realized that the furnace could fit between the joists. Could we have figured this out earlier? Maybe. Sometimes, you need to see things in real-time before you have a flash of realization. Once we could see where the cabinets and fridge were going, we could see where we could re-shape the hole parallel to the door to the garage. The furnace would fit and we would not have to cut and frame-fix any joists. So, we measured and cut another small section of flooring out, reshaping the hole.

Furnace Prep
While this was going on, I removed all the bits that were attached around the furnace, to get it's dimensions down to the size of the outer frame. This included removing the stove-stack out the top, the gas line from the side and the emergency electric shut off box. With these gone, the furnace is actually the measured dimensions, allowing it to pass between the joists. In my last post, I walked through our logic to try to reuse our in-hand furnace. We are continuing with that thinking, as you have probably surmised from how we approached the size of the hole. While Boo was under the house, she crawled over to the chimney and confirmed there is a soot clean-out. So, with that variable solved, we could commit to reusing the furnace whole hog.

A hole in the floor just inside a regularly used door is very unsafe. As you can see in the first image, we temporarily covered the hole with some waste from the first cut. Once the furnace is through the hole, we will nail-down some plywood until the flooring company can fit us into their schedule. At least the visible floor in the kitchen is getting replaced; we don't know about the rest of it. Regardless, this trapdoor will persist, and while the extra cut will create some subfloor repair by the flooring company, this access will be an incredible upgrade long-term while creating a means of moving the furnace where we want it. That's next.... and a future post.

Thanks, as always, for following along-

Tuesday, November 8, 2022

Who'll Stop the Rain

Short answer: no one. Today's post is about managing around that unstoppable rain that appears every autumn in the Pacific Northwest.

Before I begin, my parents have been experiencing health issues and appear to be entering their last chapter with us. My musings here have not included them much, but my son T and I moved them here 12 or 15 years ago from the Boston area. They have been a consistent presence in our lives ever since, especially for Boo. Their recent health decline started almost immediately after we signed the paperwork on the NewOldHouse. Accordingly, our time has been split between tending to them and the NewOldHouse projects. Boo and I have also hosted various family members who travel into town for well-wishing and visiting the folks. If you were wondering why we were moving so slowly, these factors are certainly part of it. In truth, the time spent doing something on the house is a welcome respite from the near-constant gravity we feel as we watch their final days approach. We welcome your prayers (in whatever form that takes for you), and encourage you to connect with your elders, or your youngers, if even just for a few minutes.
 
UPDATE.... I wrote this entry on Thursday (3-November), and my dad's health took a nosedive almost immediately afterwards. My family members who are not local rushed to Oregon on Friday, and we said our final goodbye to my dad on Saturday (5-November). A week earlier, Dad and I were sitting around talking to T about his life in LA. Time really can be unpredictable. 
 
On to dodging the rain-

Garage Coveting
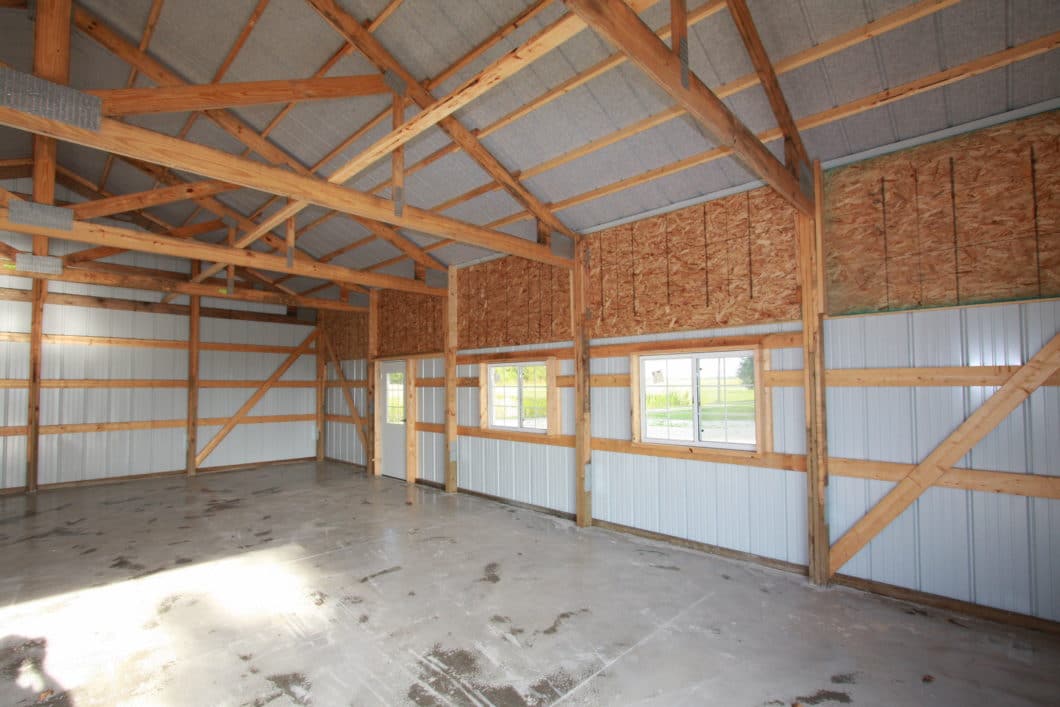
one can dream
I have been working on a fleet of cars without a meaningful garage, much less a shop, pretty much since I started this blog. The house we have been in for the last 6 years, much like the house we were in for the 3 years before that, has a basic 2-car garage. Prior to that, we were in a condo with no garage at all. Unlike the last house, this 2-car garage really is too small to fit a car any larger than an English compact (Mini, MG, eg). So, the only car that has been parked in the garage for a meaningful duration has been Oliver, the 1978 MGB. For a short stretch, Zed, the 1979 280ZX sat in the other bay. Zed is wider than Oliver, and that other bay is where all of my shelving of parts and tools was, so actually working on anything became impossible. So, I worked on cars in the driveway, and when it rained, I worked in the rain. When it was 95* with a blasting sun, I set up a small shade, but generally worked in the heat. So, a couple of years ago, we got those canopies for the driveway. These were absolutely heaven-sent, allowing me to clown on cars out of the worst of the weather extremes nearly year-round.

NewOldHouse has an original, attached, single-car garage with the original door. That door alone, is pretty cool in that it has cables and pulleys connecting to a large counter-weight to help you open and close the door. Regardless of the cool factor, only one car can fit, and after asking Boo to park in the rain for 9 years while I took up the indoor spots and the canopied area, that one garage spot needs to be hers for the next 9 years. Or longer.

Sheds and Canopies
the "fourth" canopy
The NewOldHouse came with 2 chicken shacks, that I mentioned last time. One of them will hold my parts and tools. The sheds lock, and at 8 feet wide by 12 feet deep, plus nearly 10 feet tall at the peak, they are large sheds. Some of the tool-shed floor needs repair, but that's a weekend day of work. Otherwise, it's clean enough, and after I shoot the interior with Kilz and then basic white paint, it will feel like an entirely different space.

But, what about the cars? I have too many of them, yes, but I still need to keep them in fairly good shape, and not let them rust out from below nor get rained on all winter. To remedy, I started by moving the 2 canopies around and behind NewOldHouse. Under the one closest to the house, I parked Zed. The one next to it is dedicated to the car I am working on other than Zed. For now, that will be Nemo, I think, to get the passenger window regulator replaced, the power steering working and maybe add a stereo. To compliment these 2 canopies, I bought 2 more ($140US each at Harbor Freight), and assembled them nose-to-rear adjacent to the side of the first 2. The furthest of these canopies is now 40 feet from the house, and will protect Oliver from the rain. For a floor, we got gray tarps, again, from Harbor Freight. These will act like a vapor barrier, keeping the wet ground from encouraging rust from below. Because rain doesn't come straight down, I will need to get out there with a squeegee after rain storms to keep the water from pooling under things.

The fourth canopy (between the old and new canopy) is set up outside the shed, and will be my staging ground for parts from the old garage. I expect to spend a few weekends this winter simply going through parts, sorting them by vehicle and purpose so I can find things more easily. After getting that tool cabinet (See $50 Tool Chest), and sorting my tools, I was stunned by how much faster I was able to work simply because I could find the tool I needed so much faster. I figure if I can do the same for my parts, I could see a similar improvement.

At some point, these canopies will correlate to work bays. Rather than number them, and accidentally create some kind of priority or pecking order, I have named them after my Grateful Dead heroes: Jerry, Phil, Pigpen and Bob, from nearest the house to furthest from.

Downspouts and Diverters
spider legs, right
I mentioned the foundation vents being below grade, and some of my efforts to resolve for water getting into the crawlspace (basically digging out around them) in my Vehicular Paperwork post. Part of the below-grade problem is the location of the downspouts and the fact that they, like so much of the rest of the house, are original to 1948. Back then, houses did not have their downspouts connected to a central sewer system; they simply dumped water on the ground next to your foundation. If the ground is higher than the vent, then that water dumps into your crawlspace or basement. Neat. To remedy, Boo and I got a few box-style diverters (like this) which have a square catch bin that you set under the downspout. Attached to the side of the catch bin is a 8-foot long, 2-inch diameter flexible hose that you route away from your house. We did this for the downspouts which dumped near a vent. For the remaining downspouts, we used old-skool technology: a simple u-channel style diverter (like this) that you set on the ground under the downspout and the water runs down the u-channel to the other end, moving the contact point of water-to-dirt 2 feet or so further away from your foundation.

new canopies
We tried a few other things before landing on these solutions. We tried digging ditches for the water to follow. It wouldn't. Then, we tried flexible hosing attached to the end of the downspouts. Those worked, sort of, but we needed to gang a few together to get the water far enough away from the vents. And, they were white, so from a distance, it looked like the house had grown spider legs.

The day after we installed the linked diverters, we got almost 1/2 an inch of rain. While the rain was its most intense, we were at the house, and looked at how the diverters performed. They handled the volume easily, routing the water well away from the house. The below-grade foundation vents remained completely dry. While I still intend to do something to protect those vents from water entry, I don't feel like that is an emergency any longer.

That's it for today. Thanks, as always, for following along-

Tuesday, October 18, 2022

Vehicular Paperwork

We continue on NewOldHouse, of course, but there is little interesting to talk about. We have been preparing the interior for paint, and the exterior for the inevitable arrival of autumn rains. I'll describe some of these efforts, but today I renewed the license plates for Hapy, and I thought that might be more interesting. Yeah, like the difference between watching paint dry and watching grass grow....

Prepare for Paint
As with anything paint-related, it is all in the prep work. We started with laying paper on the refinished wood floors and then checking for nails, screws, picture mounts and holes in the walls. Before we got after repairing the holes, the walls and ceilings were washed and rinsed. Then, we solved the holes with spackle. Next, we masked the windows and caulked seams. After removing the light fixtures, I masked those, and the exposed electrical outlets and switches. This took all of 30 seconds to type, but it has taken many days. On the right, here, is the only picture I've taken inside in a while. This is not a terribly informative picture, but is what is.

Prepare for Rain
The seasonal rains are arguably late this year. I usually reference Columbus / Indigenous Peoples' Day as the normal start of rainy season in Northwestern Oregon. Today, it is still sunny and dry. This will not last and we have some things to solve quickly.

First, NewOldHouse has 4 foundation vents which are below grade (meaning the garden dirt is above the bottom of the vent). Recall we had the crawlspace cleared of debris and the vapor barrier replaced. These below-grade vents will allow water to drain into the crawlspace, upsetting that clean and dry space. To remedy, I started by digging out around the vents down a few inches below the concrete lip. I will add a sheet of clear Lexan to the outside to cover the bottom half of the vent opening and seal it with clear caulk. Unfortunately, some of the existing grates are not small enough to prevent mice from getting through... though they fortunately aren't. So, enter Orkin to chase the buggers and replace the grates. Fortunately, they solved all of the other possible access points when they diagnosed the problem; they just ran out of tight-mesh grate stuff. So, once Orkin solves for those grates, I will apply the Lexan to keep any water potential away.

Other than keeping rain out of the house, I needed to set up the carports so Zed stays dry. Recall, Zed still does not have glass installed, so weather can get right in. The car ports are easy to dis-assemble and reassemble, so moving them and getting them set up was not hard. I have discovered, though, that the plastic sheeting is not hardy enough to withstand year-over-year sun and rain battering. They are starting to split, so I will need to replace them more-than-likely before this winter reaches it's end. Still, for now, they are up and the one closest to the NewOldHouse is ready for Zed. Since Zed is not yet a driver, I may be towing him over with the lawn tractor Boo bought from the prior owner. I expect a full comedy of errors that will result in a future post. This picture on the right shows a few things. First, that post is from the carport and that boot is Boo crawling under the house through one of the foundation grates. This one is pretty much at ground level, so I may create a little berm at it's leading edge to keep water from trickling in. That grate is the only entry to the crawlspace.

Vehicle Registration
Now, for what I intended to write about: renewing the registration for Hapy. As has been well documented, I have a few cars. Only one of them is from before 1974 when motor vehicle emission testing became a thing. So, Hapy doesn't need a smog test, but like everyone else, we need to renew his plate stickers every other year. This year is that year. So, I went to OregonDMV.com to renew him and noted that my fee is based on his projected mpg, based on model year, etc. Apparently, the 1972 VW camperbus was expected to get 19mpg or lower. My fee was then driven off of that fact. truth-be-told, I was not getting 19mpg before I started the engine swap, so their assignment was fairly accurate. Curious to see if my fee would be measurably better if my mpg was better, I went looking for their schedule. It turned out that the better your mileage, the more you pay. I suppose this is to offset the loss in tax they get from you when you buy fuel. That just proves that the man will get you coming or going; either way they are gonna get theirs. I had thought about doing the paperwork to tell the state that Hapy was running 30+ mpg on diesel, but I have to pay a fee for that too. And then, I would be paying and extra $30 to register him every 2 years from then on. Clearly, there is a counter-incentive to be transparent.

Another thing worth noting is how low the fee is for car rental companies. They can register almost 2 cars to our one. That hardly seems fair. We individuals need transportation sometimes, for life conditions outside our control. Car rental companies are buying and renting out cars as a business, and the person renting the car is paying the fuel taxes when s/he fills up. I suppose the rental car companies get the sweetheart deal because they can influence our representation in Salem better than we individuals can. Anyway, enough soapbox, it just seems like we are underwriting the rental car companies in the form of a corporate handout. Must be nice.

I meant to publish this last week, and time got away from me. We had a bunch of adventures over this past weekend. I will write them up for sharing in the next few days. thanks, as always, for following along-

Tuesday, September 20, 2022

Creepy Crawly Space

Today's post covers NewOld house getting the crawlspace treatment. Sorry I don't have any / many pictures to accompany this post. I find crawlspaces super creepy and this one was possibly the worst I could have seen. Some things cannot be unseen and I feared that if I saw the before picture, I would not be able to live in the house after it was done. Silly? Maybe. I tried to take some shots through the rodent-block-out grills.

Before I begin.... the guys working under there were in full bunny suits and anytime anyone was inside the house s/he was wearing at least a dust mask if not a full respirator. Dust from rodent waste can cause all kinds of lung issues. Please wear a dust mask when clearing out possible rodent areas.

What Is Crawlspace?
crawlspace entry
For folks who have a full basement, have a house built on a slab or live in an apartment, this may be a foreign concept. Many houses are built with a small not-a-basement. This crawlspace acts sort of like a basement in that ducting lives there, and through the use of vents or vent-covers you can control the air flow under the house. Unlike a basement or a slab, a crawlspace usually does not have a concrete floor, reducing the cost of construction. There is, of course, a foundation around the outside and often there are pillars at key points supporting main joists. Instead of the concrete floor, it is dirt or gravel or a combination of both. Even in a brand new construction house, there will be some level of trash under there from sub-contractors throwing things under there. Regardless of the trash aspect, there should be a vapor barrier laying on the ground between the gravel/dirt/construction trash and the crawlspace. This is not any old plastic. It is super thick and dark (usually black) to prevent any light to get through it from above and any moisture to get through from below. It needs to completely cover the ground from foundation to foundation, or moisture will still be able to enter.

When we got the house we currently live in, we had to have the crawlspace addressed before we could move in. Some water had appeared under there, creating a smell. The water, vapor barrier and the old insulation was removed. A new barrier was installed. We contracted that out while I rolled paint on most of the living spaces. Over the next 6 years, water never returned. We concluded the root cause was a clogged downspout that got unclogged after the water pooled in the crawlspace. It may have been caused by a sump-pump failing, but we haven't had water issues since. So, that's probably not it.

Top 20 Worst
blurry "after" picture
Fast-forward to NewOld house, the semi-abandoned 1948 farm house Boo bought a couple blocks away. From the work we had done on our current home, we figured the crawlspace in NewOld house needed to get done. Just peeking into a crawlspace vent showed debris, and it smelled really bad. Like, OMG-I-almost-need-to-puke bad. Boo called a few places and found a company who could come out on relatively short notice. These guys are staffed to respond to emergency jobs (think floods fires, etc) so having a more consistent job to which they can send a crew between disasters works out well for all of us. We save a little cabbage (though this is still super expensive) and they keep their crews working. Their estimator visited, crawled around and shared that while we did not make his top 10 ever, we were in his top 20 and he has been estimating jobs for 30 years. We're big winners!

This house, it appeared, was not built with maintenance of the crawlspace in mind. There were 2 different main floor joists that were about 6 inches off the ground. This does not pose an issue for the health of the beams nor the house, but it does prevent a person from sliding underneath to do work in the crawlspace without some doing. As you can see from the after pictures, there is not much room under there beyond those 2 beams. Since it was not designed for maintenance, you can probably guess how much happened since 1948: almost 0. Someone got under there in the last 20 years and put insulation between the floor joists. Otherwise, it did not look like anyone has done anything other than put garbage under there since the house was built.

Rotating Crews
The company and their teams were true to their word about getting it done and sending different crews to complete it. Consisting of 2-person crews, we had different folks working 4 different work days spread out over a week. Their process was straight-forward: access an area, remove all of the insulation, garbage, air ducts and vapor barrier. Then, spray anti-microbial / anti-fungal everywhere, restore the vapor barrier, and, last, the air ducts. Once an area was done, they would access another. Unlike the estimator, every one of the crew workers admitted that this was possibly the worst they have ever seen. More winning.

Gross Ducts
new duct, new barrier
Before the crews really got going, Boo and I pulled the nails holding the floor vents to the floor and pushed them down into the crawlspace. We talked to the crawlspace guys and we all agreed that if the ducting was getting replaced (due to rodent infestation), the vents needed some care or replacement as well. We were able to save some of them: while well masked, they got a dry scrub, a scrub-wash with Mr. Clean and then shot with black Rustoleum inside and out. Any residual odor after the cleaning would be captured in the paint, we figured. Even still, some of the vents could not be saved. So, we hit Home Despot and picked up 2 each of the 3 varieties of floor vent so the new ducting could attach to new vents. Many of the vents were left disconnected, however, so we will be getting under there ourselves to complete the fitting of the heat/air system.

The job itself seemed quite miserable, even if the temps were mild and they were in cleanroom suits complete with full face shield ventilator masks. To help offset, Boo brought the crew beverages and we repeatedly expressed our thanks. The rubbish they found was extensive, including rodent remains, rodent-soaked insulation, standard household garbage... the works. Each day after a crew left, the house smelled that little bit better. 

New Vents No Smell
The original vents were in disrepair (I know, shocking, right?) and needed some repairs before the job was finished. 2 of the vents needed new framing, and they all needed better grills. This last series of steps took place on their final day. After they pulled the remaining garbage and left the scene, the house no longer smelled like animals and rodents had been living there for years. I would not say it smelled fresh, though. Those large vapor barriers are made with virgin plastic, so they have to off-gas for a day or so. And, the anti-microbial/bacterial is sort of bleach-like smelling. Still, it is significantly improved over dead rodents and animal waste and we were now one step closer to the point where we didn't need to open the house up and run exhaust fans every day. 

That's it for today. Thanks for following along, and if you have an odd smell in your house that you have not been able to identify, maybe it's time you had your crawlspace inspected.