Showing posts with label noise. Show all posts

Tuesday, July 16, 2024

Door Cards

Today I will be picking up where I left off regarding the doors. As I described in my last post, the front doors now open, close and lock like a real car. No slamming, not funny jiggling of the handle, etc. Just open, close and lock. Well, the passenger door lock is different from the driver, but I'll swap that out once I find all my parts. Anyway, since I had to remove the cards to fix the doors, I thought I would take the opportunity to improve them.

Door Cards As-Was
foamed card installed
With operational doors, I got to thinking about how to get the door cards to hold to their respective doors. The Arizona gentleman who ran the business creating and selling these ABS door cards was looking to sell off the business a couple of years ago, so I imagine that has happened by now. He had a mixture of molly-based fasteners delivered with the cards. Either the fastener was a screw that dug into the molly which was pushed through the card into the original mounting hole or it was a push-to-hold plastic bit. Regardless, the molly's did not hold in all of the original mounting holes on my bus (YMMV). This could have been poor implementation on my part, something particular about Hapy or just less-than-ideal engineering on the fasteners. It doesn't really matter; for Hapy, they did not work. When combined with the slamming doors, the door cards would rattle and Hapy had a very junky vibe. Now that the doors no longer need to slam shut, improving the cards adherence to the doors will help un-jalopy Hapy that little bit more.

Door Cards, Mounting Upgrade
broken M4 riv-nut bit
To remedy the floppy door cards, I tried a more permanent solution: Riv-nuts and bolts. The plan: into each original mounting hole in the door, I attach a riv-nut (it's a nut that is applied with a rivet gun, basically), and then send a bolt through a washer and then the card, into the riv-nut. Such a simple plan, and while a little time-consuming, it was easy to do. Of course, I found that not all of the original holes were the same size. To fix, I used some as large as an M6 or as small as an M4. I think this is why the supplied molly-based fasteners did not work as well: the M6-sized holes were simply too big for the molly and they fell out. As shown in the picture here, too much pressure with the riveting tool and you can break it. Once I had all of the riv-nuts set, I shifted to the cards themselves.

Noise Abatement Revisit
setting riv-nut
While I had the door cards out of the bus for repairs, I applied a thin noise-absorbing closed-cell foam to the 3 cards. This material was among the things I got a few years ago when I did the sound deadening effort, and it's application to the door cards was part of that plan. At the time, the research I did (See Hapy Noises - Part 2) indicated that multiple attack vectors would bring the best result: Constrained Layered Dampener, an open cell sound deadener like Jute Thermal and then Mass Loaded Vinyl. These all really address reducing the impact of external (and mechanical) noises transferring into the cabin. Any noises or sound that make it into the cabin which are not absorbed by the seats are prone to bouncing around. I placed some larger acoustic panels (these) under the upper bunk, in the slot where the original sunroof used to go. I believe they are helping absorb some ambient sound. I also covered the ceiling with Mega Zorbe to address the sound reflection and ambient sound absorption. In the picture on the right, here, you can see the MegaZorbe applied to the inside of the outer door skin. 

Based on the tests I did at the end of the effort, the only real gains as-measured were in the "around town" (under 40mph) zone. Decibels at idle or on the highway appeared about the same. In practice, however, using a less complex "measure" like how loud we have to run the stereo to hear it on the highway, it is definitely quieter. An even less precise indicator is how loud we need to speak to each other to have a conversation: barely louder than we talk at home, which is quiet (no yelling house) where we used to have to almost yell without the stereo on. So, I am setting aside the scientific evidence and embracing the anecdotal: this implementation of the sound abatement absolutely and significantly improved our road tripping experience. I may take more readings because the numbers I took before continue to bother me.

Door Cards, Reflective Sound Absorption Added
applying the foam
So, with all that context, I decided to press forward on my original plan to apply the thin foam sheets to the hard plastic cards. I started with the cards along the sleeping deck, running from the rear hatch forward along both sides under the windows to the rear of the rock-n-roll bed (1 foot tall by about 4 feet long). I started here for 2 reasons: it was very easy and the plastic cards were jarring-cold when bare skin pressed against them while sleeping. The foam definitely improved that.

For the slider and front doors, I simply traced the door shape on the peel-off paper side of the peel-n-stick foam and cut along the line with scissors. I aligned the cut along the card and peel-stuck them down, working from one corner, down along one side and then across. I will be applying carpet later, but felt that the foam might help reduce the reflected sound while also providing a cushion under the carpet.

With the foam applied to the cards, I considered the game of "which bolt fits" for each mounting point. I could have just started trying bolts, but that felt like an exercise in frustration. So, instead, I grabbed some painters tape and marked to the outside of each hole (where the card would not cover) which bolt size to use. I set the front door cards in place using the door pull to hold the card in the right spot. Then, I simply sent bolts through a black vinyl washer and then the card into the door. Once mounted, I removed the tape. Easy-peasy. If you do this, I suggest that you do the corners first, and only threaded enough to hold. Then, skip around the card, and have all of them like that before you start tightening. Then, again, start with the corners and pay close attention to the bottom edge near the vent. These ABS cards fit perfectly, but the one hole near the bottom align the trailing edge of the door did not line up for me and I had to skip it. YMMV, of course.

slider door foamed
The door card kit included panels for the wall under the driver-side jealous window and for the partitions behind the front seats. I have yet to do those cards, but I am holding off on doing those until I am ready to fast-follow with carpet. The foam is not as scratch-resilient as the hard plastic, and those cards take the brunt of the abuse when camping or music gear is loaded, unloaded and in-motion. So, I will apply the foam and the carpet at the same time. All of that will happen at some point in the future. As it is right now, there is that little bit less noise reflection happening and when bare skin touches the side of the sleeping area, it no longer triggers a shuddering wake up. We are taking the win.

---

That's it for today. Thanks, as always, for following along-

Tuesday, April 19, 2022

Noise Control Continues

With Summer tour dates heating up, and our favorite festivals appearing to be taking the Summer off, I was lacking an out-of-town overnight show to really kick this effort into high gear. Well... Phil Lesh and Friends have announced Pacific NorthWest tour dates, hitting 2 of my all-time favorite outdoor venues: the Cuthbert in Eugene, OR and the Marymoor in Redmond, WA. Phil played these 2 venues back-to-back with Further in 2013 (See Tale of 2 Trips), so I conclude that these are his favorite NW outdoor venues too. Anyway, June 11 and 12, Phil will be at the Cuthbert and Marymoor respectively, and so will we. With that, we have some serious motivation to have Hapy buttoned up by the end of May. In that spirit, I finally got after the big sections of the floor, so today's post is all about that. 

Tear Down
starting the Jute
I accept that maybe I have been finding ways to delay the full-blown interior tear down. I messed with electrical (See Ceiling Wiring Rough In), built a replacement shelf (See New Cab Shelf), even messed around with the stereo (I will post on that once it reaches completion). At some point, I was going to have to remove the lot couch and the rock-n-roll bed so I could get after the floor underneath them. The lot couch removes easily enough, but the sliders also needed to come out so I could get the complete floor. Back when I first installed these runners, I mounted the runners with 17mm bolts. I added nuts underneath. I initially just loosened the runners and forced the Jute underneath. I later decided to completely remove the runners so I could get a seamless heavy vinyl sheet down.

My implementation of the rock-n-roll bed is held to the floor by a pair of Phillips screws holding a pair of arms to the rear deck, a 17mm bolt underneath, a pair of small nuts on a metal bracket mounted on the passenger side rear wheel well and a single 13mm bolt through to the fridge cabinet. The electrical bits, however, add to the complexity. I have my luxury fuse box under there, so I had to tear down what was left of that. Plus, the original Westfalia electrical includes the cables routing city power into the rectifier (110 to 12V converter) that's buried inside a wood box and running to the outlet on the front face of the bed. The box is held down with 2 Phillips screws and the outlet box is held by 4 Phillips screws. With the electrical separated from the bed, and the bed detached from the floor, I removed the cushions to manage the unit better. Each of the 2 cushions are held to the bed with 4 long Phillips bolts on each end (so, that's 16 bolts).
cabin Jute mostly complete

I would have completely removed the fridge cabinet, but the mounting of the furnace was so difficult, I did not want to revisit that. Just being disconnected from the rock-n-roll bed loosened it enough for me to fit materials an inch or so underneath it.

Constrained Layered Dampener (CLD)
I have probably posted enough on this material. Still, I applied on the now exposed floor areas. Parts of the floor had already gotten a light treatment in the little valleys, so on top of that I applied larger squares of CLD as well. I still have about a third of the box of ResoNix, with a plan to use some inside the sliding door. I have used some of the Noico around as well. For example, the walk-through partitions behind the front seats each got a large splat of Noico. I do not know if I will be keeping those partitions long term, so I did not want to spend the expensive CLD on those panels. Still, the Noico definitely helped reduce the clatter heard when I tap on the partitions with the roller. Of course, the whole floor and the rock-n-roll bed needed a thorough cleaning, starting with a shop-vac and ending with cleansers. 

Heat Wave Jute
MLV over engine
I was so excited to finally get to the Jute. I has felt like forever since I ordered this stuff and started working on noise containment. I started with a rectangle on top of the engine access hatch, with an extra couple of inches all the way around. I pulled the computer cover, and Jute'd the rest of the rear deck, and then moved forward. I fit a segment under the rear edge of the fridge cabinet, and doubled up over the front side of the rear driver wheel well. I pierced the Jute for the seat belts and a grounding screw, and set another piece of Jute up to the lot-couch rear slider and continued my way forward, covering the entire floor with rectangles. My method was to define as large a section as I could easily manage and then measure that out on the material. I marked the line with a sharpie and then traced the line with a box-cutter to start the cut. I made a second pass with a pair of scissors. I tried first with just the scissors, but the thickness of the material and 2 foil-faces were too much even for my best pair. As I set shapes down, the bus got progressively quieter. Without a radio, and just ambient neighborhood noise, there was not a dramatic change, it just felt more and more quiet. Very neat. One last observation about the Heat Wave: the foil top and bottom are electrically conductive. So, I would discourage use anywhere near open circuitry or be sure to insulate. For example, I took a section of excess MLV produced below and have it resting between the foil and the spare tire well where the engine computer and fuse box live. No sparky.

Lot Couch Rails
I had loosened the rails enough to force-fit some of the Heat Wave jute underneath, but decided that getting the MLV under the rails would be worthwhile. This meant removing the rails entirely. I had forgotten that when I first installed these rails, I ran bolts from above and nutted from below. Three of the 4 nuts were hidden by the radiator, so getting in there to free them was an all-morning exercise. Still, the nuts came free, the bolts pulled out and the rails were set aside. I took this opportunity to clean under the rails as well as install 4 riv-nuts into the old holes, so I would not have to go under the bus and reach around the radiator to deal with the rails again. That riv-nut kit is definitely paying dividends.

Mass Loaded Vinyl (MLV)
MLV continues
MLV is heavy; my goodness, it is heavy (1 pound per square foot). I found that the sound inside the bus actually brightened a little bit as I set it on top of the Jute, though. The Jute, in contrast, was simply amazing in how much quieter the bus seemed as I added it to the floor.  While I can't measure the impact of the MLV independently of the rest of what I am doing, I do wonder if the additional weight will translate into a corresponding reduction in noise. The SecondSkin web site has a noise transfer reduction table for the MLV that defines the reduction as anywhere from 14dB to 37dB, depending on frequency, with higher frequency blocked more than lower. We'll see. The actual absorption by the Heat Wave was noticeable. The table on the SecondSkin page for Heat Wave (in coefficient rather than dB) demonstrates very little in terms of dB drop below 500Hz: below 500Hz < 3dB, 1k: 7db, 2k: 14dB, 4k:19dB. So, the very high end will be controlled well and the low end not so much. I arrived at these numbers courtesy of the formulas on this blog post, converting the coefficients published by SecondSkin.

Anyway, the MLV delivers in a roll 54" wide. The bus is around 60-1/2" wide so rather than solve for a strip along one side, I laid a section 54" long front-to-back, covering the engine compartment and on down the rear wall behind the rock-n-roll bed. After cutting contours for the narrowing of the rear of the bus, I pierced the MLV for the seat belts and installed them. This took a considerable amount of time, mostly because of the challenges of getting the seat belt mounts in place. I continued with the next sheet of MLV, covering the mid-floor past the lot-couch rail mounting points (see picture above, right).

Re-Assembly
bed and rails in
I chose at this point to re-install the rock-n-roll bed. Unlike the seat belt mounts, locating and piercing for the bed mounts was much easier for some reason. With the bed in place, I pieced holes for the lot-couch rails and installed them. To make a more firm mount to the floor, I added a nut between the rail and the floor for the bolt to pass through. These nuts act like a 3/8" riser through the Jute material. I confirmed the width of the rails (12") and then torqued the bolts. Then, I put the lot couch back in. The couch slid in more easily than it used to. I think the rails were slightly below the lip of the sliding door before, creating some friction/resistance. With the little risers, the couch slides right in. The interior is pretty much the way I started the weekend. Yes, from the start to end of this post, it was 2 full-for-me (6+ hours) days of work, and some uncovered sections remain.

On a random mid-week afternoon, I added an additional strip inside the rock-n-roll bed where the 2 larger sections meet as well as a small piece inside the fridge cabinet. Last, the area just in front of the fridge cabinet shown in the picture above was addressed. So, from the seat partition rear-wards is pretty much done. That leaves the cab still to do. All of the seams need to be taped as well, but that should be much easier once the rest of the Heat Wave and MLV have been laid out.

In case you were wondering, that reflective material in the wall behind the fridge is foil-backed "RV insulation" that I had put in there years ago. It actually does reduce the temperature inside the bus a little bit, or it did when I first installed it. Since it does not fill the cavity, I will probably just leave it and put the Mega Zorbe or Jute right on top if it. There is the old Q-Quiet vibration absorber on those panels as well, and I will just leave that be. I am running out of material, and this project has taken quite a bit of time already.

That's it for today. Thanks, as always, for following along-

Tuesday, February 8, 2022

Hapy Noises - Part 2

Today's post continues the thinking-through-my-fingers on noise containment in Hapy, the 1972 camper microbus powered by a turbo diesel engine from a 1998 VW Beetle. This time, we look at the layers of noise control which appear on top of the vibration dampener I mentioned in part 1 (See Hapy Noises - Part 1). Then, I cover some decibel collection I did so we have a starting point for measuring success or failure of the various layers.

Sound Absorb
Second Skin Heat Wave (Jute)
With the Constrained Layered Dampener (CLD) chosen, I wanted to add noise absorption stuff as well. In my research, I arrived at 5 different product types that could help. There are plenty of other choices, but I think by combining these, I will achieve my noise control goal. These act differently and have different strengths, so some are better in different locations and some are best used together.

Jute Thermal - absorbs sound, but is really more for temperature containment. This is similar to old-skool car insulation, but it is lightweight, and actually does absorb some noise. I intend to put this (HeatWave) over the engine compartment, under the rock-n-roll bed (on the floor) through the main cabin, under the front seats and to the front kick panels. It will act as a 3/8" thick carpet pad while keeping road noise and heat down. The Heat Wave product is designed to resist mold, etc, so even here in the rainy Pacific North West, it is safe for use. Of course, getting it soaking wet is not advised, so some thought about where it should be placed is suggested.

Second Skin MLV
MLV (Mass Loaded Vinyl) - blocks the transfer of airborne sound. Some products have integrated foam to absorb sound as well. These sheets are heavy for their size, and folks have expressed difficulty in getting them to hang vertically (like on a wall) or horizontally (on a ceiling, eg) permanently. I intend to use this stuff (Luxury Liner) from tailgate to toe-kick: under the seats, the rock-n-roll bed and the entire floor on top of the jute. By having the jute layer in-between, the MLV is more effective. The audio guys use this stuff behind their door cards too, but I'm not sure I'll have the money nor patience for that. The luxury liner is 1/8" thick, so, anywhere this goes on top of the Jute, the carpet will effectively have 1/2" of pad, which would be a little thick anywhere people are walking around, but the MLV will effectively stiffen the underfoot feel. It won't feel like you're walking on a 1/2" cloud. Using it under the seats will be fine, provided it doesn't interfere with the operation of the seat. This stuff is super important for noise containment; the audio experts / competitors swear by this stuff. I am toying with the idea of creating a "box" of this stuff inside the engine compartment to really cut down on the transfer of the engine-din. I'm not sure how that would all work. Again, thinking thru fingers.

Second Skin Mega Zorbe
Acoustic Foam - There are literally hundreds of different acoustical foam in all kinds of contents, shapes and sizes. Most are not all-weather-safe, and some are rather thick, so the options for smaller spaces where water or humidity might appear reduce that list from hundreds down to tens. That's still a big list. I plan to use this stuff (Mega Zorbe) in the doors, walls and in the ceilings. Of the materials, this is the most expensive, but it may be the most effective in dropping the overall noise. It is 1/2" thick, so anywhere it goes it could make it's presence known, so I can't use it on the door cards, for example, but it can go into every body cavity. There is definitely 1/2" between the wood drop ceiling and the steel, so even after that wood is removed, we would not lose headroom by adding the Mega Zorbe to the ceiling. Omitting the wood drop ceiling removes a sound reflecting surface I would otherwise need to deal with as well.

Open Cell Foam - I will be putting something on the door cards. I may use an open-cell foam product. Second Skin doesn't offer anything, but that's because there really isn't a product that will meaningfully absorb sound that's less than 1/2" thick (aside from the jute) and they are in the sound control business. I want something that will soften-to-touch and maybe reduce some of the sound reflection. For that, any old thin foam would do, because pretty much any soft surface that's, like, 1/8" thick will reduce the sound reflection. Or so they tell me. I will probably order something from McMaster-Carr (like this) or foam by-the-yard (like this) from FoamMart unless I can find something from an automotive fabric place. Regardless, any time we use open-cell foam, it is best to put a moisture barrier material between the foam and fabric (like this) to protect the foam from moisture as well as protect the fabric from rubbing against the foam. I haven't decided if/how I will address the hard cabinet sides. They might get the foam/fabric treatment just like the cards.

Closed-Cell Foam  - Similar to the open-cell foam in terms of flexibility and possible uses, but closed-cell foam is not permeable, so water can't get into it, damaging it. Closed-cell foams are usually stiffer and do not absorb sound as well. I may use closed-cell foam for the door cards instead of open-cell, if I can find something that acts like an open-cell, but is water-resistant (like this Volara or this Ensolite). There are closed-cell products designed for placement between your plastic bits and the steel. I had thought about getting some for between the cards and the body. I still may, but the rough cost of this effort is already a bit nutty and I can always do that later. For now, whatever foam I put on the door cards (under whatever fabric I put on there) may simply wrap around to the backside. Hopefully, that will contain the card-to-body rattle. Of course, I may just omit foam and fabric on the cards if money and time are not available.
 
Noise (dB) Level Tooling
Before we do any of this great stuff, I want to know where we are starting, so we can measure and celebrate the gains. My sitting-in-seat frame of reference for noise: I needed to run my stereo at 25 or above to be able to hear it at all over the noise of driving down the highway on the way back from Hapy's birthday (See Hapy Turns 50). I had the volume at 30 for loud-enough-to-sing-along (but not entirely taking over) volume. That is not at all scientific. So, in the Fall of 2021, I set aside the new driver seat install, took Hapy for a spin with the old seat and recorded these values for future comparison. My "tooling" was a free iPhone application called "Decibel Meter". I chose it because the free version allowed me to save many recordings, complete with graphs, for looking back upon. I was also able to email myself 5 minutes worth of detailed data. None of the other apps which also have a reasonable scale for the dB provide those features for free. I tried a few apps I won't name which had completely inaccurate dB readings. I used "Decibel X" as my control for comparing other apps. Decibel X is great, and very accurate, but you can't record more than 1 session, nor share anything without a hefty fee. I would have used it for my tests, but I would have needed another person in the bus, watching the meter, writing things down. That's silly.

I thought about buying a measuring tool for better sampling. I decided that I was already uneasy about investing a considerable amount into solving the problem, and chose not to spend more on a measuring device. Having better calibrated results, and more accurate frequency levels would have been great. The issue is that a decent point-in-time tool (Extech 407730) is at least $80US. An OSHA-qualified tool (REED Instruments R8050) is closer to $200US without data logging, while a fully functional tool (like Extech 407750, or REED Instruments R8080) can be over $300US. Plus, you need an additional device to periodically calibrate the instrument (for another $100US or more). I'm sure these devices are better than my free iPhone app, but I need that cabbage to cancel the noise first. Having said all that, if this sound control thing is a fun project, I may get a good tool so I can better measure before and after on future car projects. The trick will be finding one that is reasonably priced, accurate, can be easily re-calibrated and has a logging function so I can collect 30+ minutes of data without having to write things down as we go.

Noise (dB) Level Tests
For the test, I idled in the front driveway, and then took our usual route to the highway (OR217) from home, and drove a loop (OR217 - US26 - Murray Blvd) back home. This got multiple samples of idling, around town and byways. I only got one real highway sample, but I think it was long enough. I got up over 65mph for a short stretch, long enough to collect a sample.

Decibels from that long test are below. One important observation throughout all of the tests: the dominant frequency of the noise appeared at the very bottom of the spectrum. This could be a reflection of the tool not reading frequency well, or my noise problem is 95% below 100Hz. Some comparisons on my couch between the 2 apps indicated that Decibel Meter reads Hz low when compared to Decibel X. Neat. I chose to ignore the Hz, and accept that I can only really measure overall dB. On to the dB readings! In all cases, the value moved around within a range as well as had an overall peak:

dB test as a graphic
Sitting at idle (900 RPM): 60dB
Around town (less than 40mph): 65dB +/- 5dB. 75dB peak
On the byways (above 40 but under 55): 65dB +/- 10dB
Highway speeds: 70dB +/- 10db, 83dB peak
Over the course of the 30 minute test, noise was consistently between the mid 60's to mid-70's with spikes up into the mid-80's.

For fun, I compared against Boo's 2009 Audi A4 (GoRo) on my old standard test-drive loop, and then ran Hapy on that same test loop. This loop does not include a highway, but it does include idling, a residential street and a 4-lane "by-way". The Audi ran from the upper 40's to the lower 60's. Hapy on the same loop was in the low 60's up into the lower 70's, topping at 75dB.

Noise (dB) Level Test Thoughts
In simple comparison, GoRo was in the lower 50's most of the time and Hapy was 10dB louder or more. "10" seems like a small number, but I consider these 2 things: First, the range for both vehicles remained within about a 10dB span with Hapy's quietest/lowest readings starting at the loudest/highest for GoRo. Second, a modern refrigerator or a moderate rain is 50dB and hearing damage starts at 85dB, so a 10dB difference in this range is actually huge. I think it is kind of like 10* difference in Celsius: 23*C (73*F for US folks reference), is totally comfortable, like a conversational 60dB. But 33*C (91*F) is intrusive-hot, like a running vacuum cleaner 70dB. Another 10*C (43C or almost 110*F) is quite uncomfortable in practically all climates, like listening to a whistling kettle (80dB) for an extended period of time would be. For some real-life decibel level references, I found this link to be especially fruitful. Last, I think it is worth noting that the highway was much louder. My usual shift point is around 3200 RPM, and I cruised the freeway around there as well. So, maybe the noise gets much louder above 3k RPM -OR- the increased speed leads to more noise (wind or tire). I can't know for sure without more tests, but I think resolving the highway noise will be my biggest challenge. It would be the greatest reward for longer trips, if I can solve it.

EDIT: I added the image just above  on the right on 2022-Mar-29. I sourced it from a research paper about the dominant frequencies produced by a 3-cylinder diesel engine. While this may not be an exact match for a 4-cylinder TDI, I think we can draw sufficient parallels to lead us to focus on frequencies above 250Hz, but especially around 1k. Based on the material sheets for the items described above, all of these should make a meaningful impact on containing the noise.

That's it for today. I have more planning to do, and things to purchase. If all goes as I hope, the noise control efforts will start soon. My goal is for Hapy's entire noise range to drop by at least 5dB on the test loop and for the mid-80's highway peaks to drop by at least 10dB.

Thanks, as always, for following along-

Tuesday, February 1, 2022

Hapy Noises - Part 1

Today, I share my thinking around how to reduce the din when driving Hapy. He's a 50 year old bus. He runs a turbo-diesel engine. How quiet do we want to be? Or should I say how quietly do you want to spend? Or, maybe, how quiet do I really think this can get? I am actually taking this on, slowly, over the course of the winter and spring with hopes of a more comfortable drive experience when camping season really open up. For now, I will just put my think into words because what's a car person to do when s/he can't work on their cars? Thinks about them. Like so many posts, this got really long. So, I split this up. Today's post will cover controlling the resonation effect with constrained layered dampener material.

Before I begin, Hapy Groundhogs Day. Regardless of what the critter in PA does, it will always be 6 more weeks before the Spring Equinox. Here in the Pacific NW, it will rain until then. With expectations set, let's go.

Constrained Layered what?
Other places do a better job of explaining this. For our purposes, a Constrained Layered Dampener (CLD) reduces vibration by transferring that vibration into heat, which then dissipates. These materials have 3 basic components: the adhere layer, the butyl layer and a foil layer. The adhere layer is obvious: it is the super-sticky that gets the CLD to stick to the metal that vibrates. The foil layer is also sort of obvious: this is the top layer that you see when it's done. The butyl layer is the key: this is the science part that accepts the vibration from the adhere side and the vibration-resistance from the foil side. The butyl does the work of trying to get the vibration to stay put by equalizing between the two layers. The better the quality of the butyl layer, the more effective it will be per square inch. Again, there are better explanations out there, but that is a basic high-level summary.

Noico / FatMat / Hushmat / Kilmat
When I did the work on Oliver (1978 MGB), I used the Noico noise deadener stuff sold via Azn. I had read around the web that it was pretty good stuff, but when you are reading about what amateurs did on forums, it quickly becomes an echo chamber. Many forums dedicated to home-wrenching have posts that ask about one or more of the products listed above. Since most folks only ever use one on that one car, and aren't doing it professionally, the general consensus on Noico is "it's good". For the most part, the testing I have seen put all of these (Noico, FatMat, Hushmat, Kilmat, etc) in the same mediocre category. They sorta work, but you need a lot of it for it to get anything out of it.

Slamming Amazon side-bar.... Azn is excellent at hyping a mediocre product; this happened with Noico. We, as consumers, are led to believe that the marketplace will decide, and if people give positive reviews of something, it's probably fairly good. This works for products or services with which we all are somewhat familiar. Want advice on a TV or a phone? The market will weed out the garbage eventually. The issue is created when someone buys an inferior product about which they know little in a product market about which they also know little. Their experience goes from sucky before it arrived to perceived slightly-less-sucky. So, they think the product is fantastic, because they think life got better. What they may not realize is that they really did not make their life that much better, if at all, for the money they spent. They invested a small amount of money (like $2 per square foot for Noico) and a bunch of time, and when the noise in their car seemed reduced, they figured it was the product. Maybe it was. Maybe it was simply from removing the panels, cleaning a bunch and putting them back on. Most likely, the reduction was not as great as it could have been had they used a genuinely good product. The misperception is then influenced by the amplification of the echo chamber and the desire to not be taken advantage of, so a belief that the product was good is formed. And, the feedback loop continues.

In the convertible, I didn't know any better and, frankly, it doesn't really matter. It is a convertible running a carburetor and an aftermarket header; it will be loud when driving around. That's actually part of the fun: put your foot in it and it goes "waaah!". I put the Noico in the doors and now they have a nice "chunk" noise when they close. Same goes for the trunk. I think the overall din from the drive train is lessened because of the full-floor (both cabin and trunk) install I did plus the liquid rubber liner, the insulation and thick carpet. Exactly how much the Noico helped is unclear. For Hapy, I have way more noise control opportunity. It is not a convertible, and there may be 4 times as much steel panel to resonate-control. I had put something on some of the panels years ago (like the old brown bread, delivered in a roll, smelled bad), so it is not completely bare. I don't think that stuff was terribly effective, but it was what was available 15 years ago.

DynaMat, Second Skin and ResoNix
For learning about quality, viable noise control, I hit the car audio forums. I figured that if they were using something that helped them win car stereo competitions, it would probably do a good enough job lowering the noise in Hapy from incredible racket to tolerable. At least, they would know which lower-price options were actually worth using. In my research, I also engaged with Second Skin audio, and will use their stuff above the CLD (constrained layered dampener), which I will detail in another post. For vibration noise control, though, I am using ResoNix CLD. This stuff is super expensive, compared to Noico, but only a few cents per square foot more than the Second Skin stuff. DynaMat usually appears at the bottom of this higher-quality group, by the way. Based on the testing evidence on the ResoNix site and in the audio forums, the ResoNix stuff is really next-level. In the end, I will need to apply far less material than Noico, which means less work and less weight, while enjoying better vibration noise containment.

Install How
Install for any of these products is simple: clean the area to practically food-grade clean, measure and cut to fit with scissors, pull the backing paper and press it in place. Then, with an installation roller, roll around on the foil to get any air bubbles out and to ensure a quality adhere. Don't damage the foil; I can't emphasize that enough. Also, if the surface isn't clean, the product will not adhere as well, defeating the purpose. The amount of CLD you use is directly related to the product you are using, though the larger the uncut piece of CLD you use the better it will work. Meaning, if you use a bunch of small pieces over a section of metal, it will be far less effective as compared to one single piece. The strength of the CLD effectiveness comes from the foil topper preventing the panel from moving. This forces the vibration energy to change shape into heat energy as the Butyl tries to adhere to the metal yet retain it's shape as defined by the foil topper. If the sheets are tiny or if there are tears in it, there is less constraining, so more room for the metal to move, and much less of the vibration is converted to heat energy.

I found 2 different types of rollers on the market. The one in the image below has a completely smooth roller for foil-contact. While it may lose traction on super-smooth foil, it will probably not accidentally tear the foil. I say "may" and "probably" because I bought the other kind that has ridges running across the roller surface. That kind of roller can tear the foil, but it definitely does not slip. Ask me how I know :) Buyer beware, and if you get the same kind I did, mind you don't get too zealous with it or you may apply splits into the foil.

Coverage
Something like Noico will require nearly 100% coverage to get anywhere near the same amount of dampening as 25% of something high end. Under-apply and the vibration noise may just lower in frequency, not the full resonance so the vibration does not actually get resolved. So, you will think it's better, but you just lowered the note. If you watch car shows on Speed/Velocity/MotorTrend, you will see that those guys cover 100% of the interior and trunk (though they never broadcast the application. No sparks = bored producers). If you have the money, and haven't a worry about weight, I imagine doing the entire car, covering every square inch like that, provides maximum vibration reduction. There are diminishing returns though. Some small areas hardly vibrate / amplify car noise at all because they are small or have multiple connection points and can be skipped. The key to maximizing your product application / minimizing cost is to focus on the large flat sections first. Whether material should be multi-layered is a frequent question. The common understanding, demonstrated with some testing, is that layering product is money and cost ineffective without much return. That doesn't stop folks from doing it. Your project, your choice. I would suggest what the high-end manufacturers say: if you are willing to buy multiple layers of less expensive stuff, why not buy the good stuff for the same price and far less work/weight?

When I apply CLD, I can't help but tap on the area with the roller handle before and after I apply it so I can hear the difference. Before, it sounds tinny, after, it has more bass. Is this a reflection of what the vibration effect will be? Oh, heck no; I just can't help doing it. It feels like you're doing something. The only real tell is after you're done and you go for a drive. With Hapy's diesel engine running, we will get a fairly good idea without actually getting out on the road. My hope is that after I have finished, driving Hapy will no longer feel like you're operating a diesel generator inside an old leaky steel shed during a wind storm.... like it does now.

Liquid Deadener
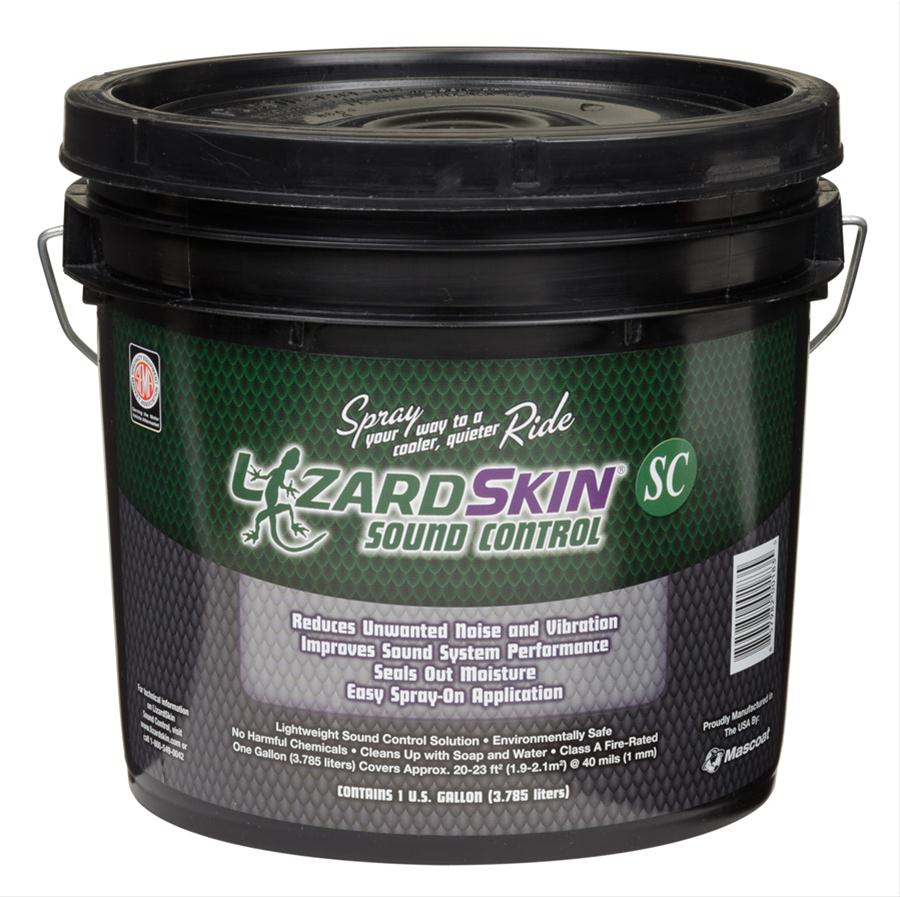
One last thing on deadening: there are liquids that deaden too. These fall under the Liquid Applied Sound Deadener (LASD) umbrella. Second Skin sells "Spectrum" (see here), but there are others, like LizardSkin, dBSkin and QuietCoat. Since these products target the same thing as the CLD does, I thought I would mention it here. Based on the studies and the science of the CLD, I am not convinced the liquid works as well. The product websites don't specifically say how effective they are in decibel reduction terms, but for hard to reach spots where getting a sheet of CLD is not practical -OR- for exterior areas like the under body or wheel wells, this may be better than nothing. Or, this could just be fancy marketing of what amounts to liquid asphalt painted onto your car, reducing noise like a cheaper CLD does simply by being a thick coating. For the coverage, the liquids are much more expensive per square too. Still, I am going to try Lizard Skin in the spots I can't reasonably get to with CLD (wheel wells) because I want to try it out. I may hit between the belly pans and the floor, since I can't get in there with anything other than an undercoating nozzle. If it does little for the noise, but it helps retard the rust, it would still be worth doing, IMHO.

Next time, I get into different materials for subsequent layers, as well as some decibel readings for a "before" image to compare against after I add some of this stuff. Thanks, as always, for following along-

Tuesday, March 2, 2021

MGB Interior Panels - Part 2

Today, I continue on Oliver's (the MGB) interior because the weather remained a preventative from getting to the cars outside. Darn, have to work in the semi-heated garage.

High-Level Door Card
black door now out of place
By now, the door cards were looking completely out of place, as the only remaining all-black panels. These are a little more complicated than the front kick and rear quarter panels. First, there is a top padded section which holds the top of the door card in place. The padded section is held on by 4 screws (2 each front and rear) and is wrapped with black vinyl. The interior kit delivers with a section of cream-colored vinyl to replace it. Additionally complicating things, there are the window crank, and the door latch pull and lock. In my case, I removed the armrests shortly after buying Oliver, but there is the old blown speaker. Last, each door card is held to the door with 13 plastic clips. Since these are original 1978 plastic, I suggest having replacements on hand. The interior kit did not include these, but they are, like $0.50 each or less online.
 
I didn't take a picture of the driver card before I started, so here's a picture of the passenger side, from the open driver door. I leave that towel on the driver seat so I don't accidentally get grease or anything on there while I work on him. You may also notice I have omitted the center console. I think the interior looks less complicated this way and the console acts like a little wall between the driver and passenger, which neither Boo nor I liked. Either way, there's no place to put a beverage. I may solve for that one day.
 
Padded Section Reuse
after polishing
I considered re-covering the padded section along the top, but after removing it (4 Phillips screws), I decided not to. First, the wood inside the padding is starting to fail (see picture below). It's not totally bad, but bad enough to warrant replacing eventually. I figured that if I used the cream on that now, I would not have it when I replaced the wood. Second, the black vinyl, while also not perfect, could get cleaned up with some leather cleaner. Last, I already had a cream and black contracting interior so retaining the black long the top would help underscore that. Ultimately, I believe retaining the black just for that contrast reason was plenty of justification. I think it looks really good.

So, I cleaned the rust off the chrome ends with some Goof-Off, and polished the vinyl with leather cleaner. The window felt was fairly worm out, so I removed it with a slotted screw-driver. Rather than use a staple gun to install the new one, I used 5/8 inch #18 brads. When installing these, you will notice that the chrome/felt does not go all the way from the front rubber seal (sealing the flip-out window) to the rear-most point on the window. I taped the felt to the padded section with painter tape and held the unit against the door, shifting the felt side to side until it was where I liked it. Then, I sent half a dozen brads in to hold it firm.
 
Removing Rusted On Window Crank
backside of padded section
As easy as it was to remove the padded section, removing the window crank was the opposite. The Phillips head screw had fully rusted to the mechanism. I applied Kroil and let it set, but it couldn't effectively penetrate past the window crank. I had to resort to my set of "easy out's". I find these are neither easy, nor do they really get the stuck bolt out (could be user-error), but in this case they did what I needed. After stepping up the drill bit size a few times, the head of the bolt fell off and the window crank handle could be removed. Once out of the way, I just needed to pull the plastic retainers from around the door handle and the door card came right off. I removed the remainder of the bolt from the window crank with a big set of lock-pliers. While I had the Kroil in-hand, I lubricated the various moving parts of the window: the window control joints and the spring. Surprisingly, this reduced some of the clank-clank-clank noise when the window is raised and lowered.
 
Outer Scraper
torn down
The last bit of demo was removing the old outer scraper. This is that supposed-to-be pliable rubber that presses against the outside of your window, stripping off water, mist or fog when you roll down the window. More importantly, it reduces rain water from running to trickling into your door. My scrapers were hard and chipped, so they needed replacing. They are held to the inside of the door with 7 rivets. I set a slotted screw-driver blade against the rivet and smacked the handle with a hammer. The rivets pop right off, but the bits fall inside your door. Once free, the new scraper lines right up with the original holes, though on the very end there are a few different mounting holes, probably for use on different models. I needed to open the holes a little bit with a rat-tail file in order for the new rivet to easily fit through.

To mount, I set all of the rivets through the scraper and loosely set them into the holes in the door. With my riveter, I started on the ends, working my way towards the center. With each rivet, I would make sure that the rubber set up on top of the door, and did not disappear underneath / inside. I found that I had to press the riveter and the scraper hard against the door when pulling the trigger. With the scraper riveted in place, I checked the window action.
 
Noise Muffler
window crank and spring
With the scraper in, I cleaned up the inside of the door first with the shop-vac and then with spray cleaner. With the door cavity relatively clean, I applied some noise deadener. I realize this is a convertible, so there will always be noise. The door application is really about making the door sound solid when it closes rather than tiny and clanky. It doesn't take much to make a difference. I have read that as little as 50% steel coverage is sufficient. I am not sure I even got that much covered, though the door has a satisfying, solid "chunk" when it closes now. I ran a 4-inch tall strip from the outer rear view mirror to the door handle above the belt line (inside the door cavity, of course, but against the outer skin). Below, there are 2 front-to-back channels to which I applied 1-inch strips from the window regulator to the rear edge of the window. Below the channels, I applied a rectangle along the lower rear section. I found that the spring clank-clank-clank could be felt most on the steel directly beneath it on the inner skin, so I put a 4-inch square inside the door cavity on that section of steel. All sections were pressed down with the little roller application tool for a solid bond.
 
Plastic Sheeting
Originally, these doors had a vapor barrier. This door, however, did not, except for the small sections around the door handle and window crank. So, I made one out of a kitchen garbage bag. If I had thicker-mil plastic, I would have used that, but these bags are hard to cut, so I don't expect this to fail. I cut the bag so I could completely cover the door, and taped it in place with painter tape. With a Sharpie, I marked where I wanted the vapor barrier and then cut along the line. Since my furnace is in my garage, my options for adhesive were limited. I would have used spray adhesive or the brush-able epoxy, but both need ventilation and are explosive hazards. So, instead, I used Elmers Wood Glue. Yes, that's right: wood glue. It took longer to dry, but it held the plastic firm during the panel install. While it dried, I cut holes for the door latch and the window crank. I have found that applying adhesive on vertical angles creates a path for water droplets to follow if/when it gets between the plastic and the steel. On other words, don't apply adhesive straight across: it will only trap moisture against the door.

Panel Install
home-made vapor barrier
I could feel the end approaching. With the holes cut in the sheet, it was time to prepare the panel with the 13 clips. The card has 13 very obvious spots for the clips. They are shaped like a classic 2-ball snowman: large circle on top of a smaller circle. The clip slips into the larger circle and is then pressed into the smaller one. I could have re-used some of the clips from the original door, but after over 40 years, I was not sure they would not break during install, or shortly thereafter. With the clips in, the hole for the window crank needs to be cut next. Similar to the rear-quarter panels, the door card shows exactly where the hole needs to be. Unlike the holes for the rear quarter panel, though, the window crank hole needs to be cut almost all the way out to the hard-board edged circle. Also, the leather/vinyl has a padded backing that needs to be cut through.

I decided to not include the arm rest / door pull and I am not putting speakers back into the doors so this one hole was the only one I needed to cut. This greatly simplifies the look of the door card (see picture below), and even with the extra bounce from the thicker card, I can pull the door firmly shut simply from pulling on the padded section. The card did arrive with indications for both the arm rest and the speaker mounting locations, though.

With the hole cut and the clips in, I was ready to press it in. I started by aligning the bottom clips with the holes along the bottom of the door. Then, I clicked in the clip nearest the rear view mirror and then worked my way around, snapping the card into place. I trimmed and cleaned up the hole for the window crank (I had cut too conservatively beforehand) and then installed the crank. I again tested the window action.

Padded Section Install
so pretty
Last, the padded top goes back on. The new cards are more stiff and thicker than the ones that were just removed. It will be some time before these new cards settle in, and the original screws for the padded section were not long enough to bridge the gap, initially. So, I found a screw in my drawers that matched the thickness of the original screws, but was about 3/4-inch long. I set it aside for a moment and attached the front-edge of the padded section with the original (smaller pair) screws. I left them plenty loose so I could adjust and then grabbed that long screw. I sent it through the lower of the 2 holes in the rear mount and tightened until I could send one of the original rear screws into the door and have it grab. I checked the alignment and then snugged that original bolt. I pulled the long screw and sent the other original rear screw in. Last, I tightened the front mount screws.

Feeling quite satisfied, I shut the door... and it bounced back open. Ah yes, the cards are thicker. I closed the door hard and it held. I figure it will take some time for the rubber in the weather-seal and the door card to come to terms with one another. To help speed that, I will leave the door shut tight. Of course, the not-dry-nor-warm weather outside will help that door stay shut for a while.

Well, that's it for today. I need to do the other door, of course, but with the passenger door so close to the shelves in the garage, it will wait. Until then, well, I'll have to find other things to fix on the fleet. Like the clutch on Gramps, the rear wheel bearings on Nemo or maybe something I haven't discovered yet. We will see. As always, thanks for following along-

******

surround bits
UPDATE: I did the passenger door this past weekend (5-June), following these instructions. I had 2 additional observations. First, the replacement inner door felt scraper is about 1/2" shorter than the original. The missing 1/2" on my original did not have any felt left, and it was the section closest to the door handle, up against the chrome end. Second, I omitted the last step in the instruction above regarding the 2-piece plastic rounded-cornered rectangle that goes around the inner door pull. These are thin, and could be damaged upon removal. Fortunately, my old vinyl cards were not holding on too tightly, and they removed with ease. The top part slid right off, simply by pulling up. Once removed, the bottom came out easily.

Installing the Plastic Inner Door Pull Surround
I found the install to be much more difficult. The new vinyl has much more grip than the old vinyl. Also, the card wants to be flat, so there is natural pressure away from the curvature of the door. The plastic bits had 4 little bumps (one on each short side and 2 along the longer side) that need to get under the door pull. After multiple failed attempts, I found success. Starting with the bottom piece, I got the plastic wet. I set the 2 short sides on either side, below the pull, and while pressing against the card with one hand, pressed upwards on the corresponding corner of the surround. I moved from side to side, moving it a little at a time until the bottom edge clicked in.

halfway there
The top piece was harder to manage, in part because my card has a piping strip that runs right along the spot where the plastic bit needs to sit in order to install it using the same method. So, again, I got it wet (reducing friction) and rather than start at the uppermost corner, I lowered the plastic piece so it was just below the piping, with the leading edges on either side of the surround. This placed pressure on the piece, and this is where an original piece could break. With one hand pushing the card against the door, I pressed the little bump under the inner door pull. This was a little scary, but once the second side snapped in, I followed a similar effort of sliding it down a little bit at a time on either side. Eventually, the top and bottom pieces meet, and the cards are complete.

Again, thanks for following along. I hope this last bit helps you out. I found following these instructions really helped me out when I went after the second door.

Tuesday, July 23, 2019

Love on the Bus

Short post today, describing a day spent just doing little things on the bus in the middle of festival season.

Oil
When we got back from 4Peaks, we had a small electrical issue, that was solved in all of 5 minutes with a replacement 8amp fuse. With that quick satisfaction of a minor issue, I wanted more. Since we had driven through the desert and I wasn't really sure when I last changed his oil, I did that. Changing the oil on this engine is so easy. 15mm drain plug loosens easily and sits less than 2 inches above the drain pan, so there's virtually no mess. I remove the fill cap so it drains faster. While the last drips are coming out, I remove and replace the oil filter. This can get messy, but I have found that pulling the filter straight up with one hand while the other, wrapped in a single-use plastic grocery bag, grabs the bottom, you can contain all of the oil. This works best if you raise the filter and let it drip into the holder for a minute before you grab with the other hand. Replace both the upper and lower o-rings. You should have gotten both with the filter, unless you went super cheap, and why would you go cheap on an oil filter?

Rust
floor, when first uncovered
While hanging out in the camp zone with GratefulEd, we talked buses of course, and the topic of rust came up. He usually does some level of rust search-and-destroy every other year. Based on that model, I'm due. So, I removed the lot couch and the foam mats off the floor in the middle of the bus, and attacked the surface rust I found there. Years ago, I had cleaned up rust here after removing some il-planned noise absorption matting. The matting did not stick well, and trapped more moisture than noise. So, this time, I cleaned, sanded and re-cleaned the floor. I applied 2 coats of rust converter on the entire floor. Once cured, I applied rubberized undercoating. This should remove the threat of rust from above. This leaves the threat of rust from below, however, and this model of bus has the 2 welded-in belly pans. So, I will need to get creative in solving for that. Then, of course, there is the radiator under the center section. I will need to lower it to get after the rust potential there, but that will need to wait until October, when camping/festival season is over. I walked the bus a little bit, making note of where there was a wisp of rust either as a stain or as a bubble under the paint. There is quite a bit to look at, but none of it really terrible. It's just in lots of spots. More opportunity to love on Hapy while not taking him off the road.
Noise
after rust converter and undercoating
With the foam off the floor, I could really hear the echo coming off the steel floor. Rapping on floor with my knuckle was like knocking on the sidewall of a steel shed (clang-clang-clang). Yikes, that's just awful. No wonder my ears rang after the drive home from 4Peaks. So, I grabbed the 80mm Noico that I used on Oliver, the '78 MGB, and cut thin strips to set in the little ribs in the floor. Once all of the rib-divots had Noico applied and worked in with the roller tool, I placed 3 larger sheets down on top above the center section (effectively over the radiator). I figured the fans could be creating more vibration so having a little extra there couldn't hurt. Once rolled snug with the roller tool, I tested with my knuckles again. The clang-clang-clang wasn't as pronounced, but these sheets are not designed to lessen that kind of noise; they are designed to muffle vibrations. So, the real test is when the fans turn on and the engine is running at 2800 rpm. Noise reduction folks have said that only 25-50% of a surface area needs to be covered with these vibration things to have a noticeable impact. I covered over 50%, so, in theory, this should make a difference. Resigned to seeing how it felt when I next drove, I put the foam back down and the lot couch back in. There was no visible evidence that I had done anything, but it seemed like Hapy was sitting taller, like he was Hapy he got some love. Yes, I know that sounds silly.

When I was done with the oil, I remembered that I had an engine cover for the TDI engine in Flash that I took off years ago. I don't remember why I took it off, nor why I left it off, but there it was leaning against the wall on top of my shop bench. I think I had planned to use it in Hapy for years, but figured I needed to cut it to fit, so I just left it there. Well, today I was just puttering anyway, so I gave it a test fit. Wouldn't you know, it slipped right on. Now, the bracket which holds the vacuum ball had the cover mount cut off, so I can only hold it in place with 2 bolts (and I only had one). After pawing through a box of random fasteners, I found a M6 bolt that was 30mm long. Perfect. So, now the engine has a cover. Since I don't look at it hardly ever, the cover shouldn't be an access issue, but it should contain a little bit of the noise. We'll see.

That's really all I have today. I'm working on a new piece of furniture for when-camped, but it is still in the design stage. Until then, more shows and camping awaits!

Tuesday, July 10, 2018

MGB - carpeting (part 1)

Today's post covers getting the carpets into the little British car. Like so many of my posts, this got a little long, so I'm going to cut it into 2 pieces. At least there are lots of pictures this time.

How Did We Get Here
With a top now keeping out the elements, I was ready to install the carpet I had intended to install over a year ago. Recall Winter before last... I had a willing volunteer in K2 wanting to help on the little car. I was up to my elbows in front-end rebuild and couldn't fit a second pair of hands into what I was doing. I thought he could pull the front seats and the carpets (so we could replace them) while I finished the front end. The seller said that the floors were good but just the carpets needed to be replaced. At the time of purchase, I couldn't really see the floors because of shadows or whatever. So, when K2 pulled the carpets out and we saw a rust hole, it lead to a lost Summer of driving the roadster. Instead, we spent weekends cutting and prepping the floors, had a welding party and sealed in the floors. We added paint and noise reducer. Now, we were ready to lay some carpet, so I ordered "standard" set of carpets (versus the expensive wool or deep-pile ones on the market).

Noise and Temperature Containment First
In my years of working on the bus, there has been a steady drumbeat of containing noise. Driving an empty bus is like sitting in a metal shed through a thunderstorm. Its crazy loud. Lots of MG owners like the loud, so what I did at this point may not sit well with them. I don't care. It's my car, so I'll do what I please.

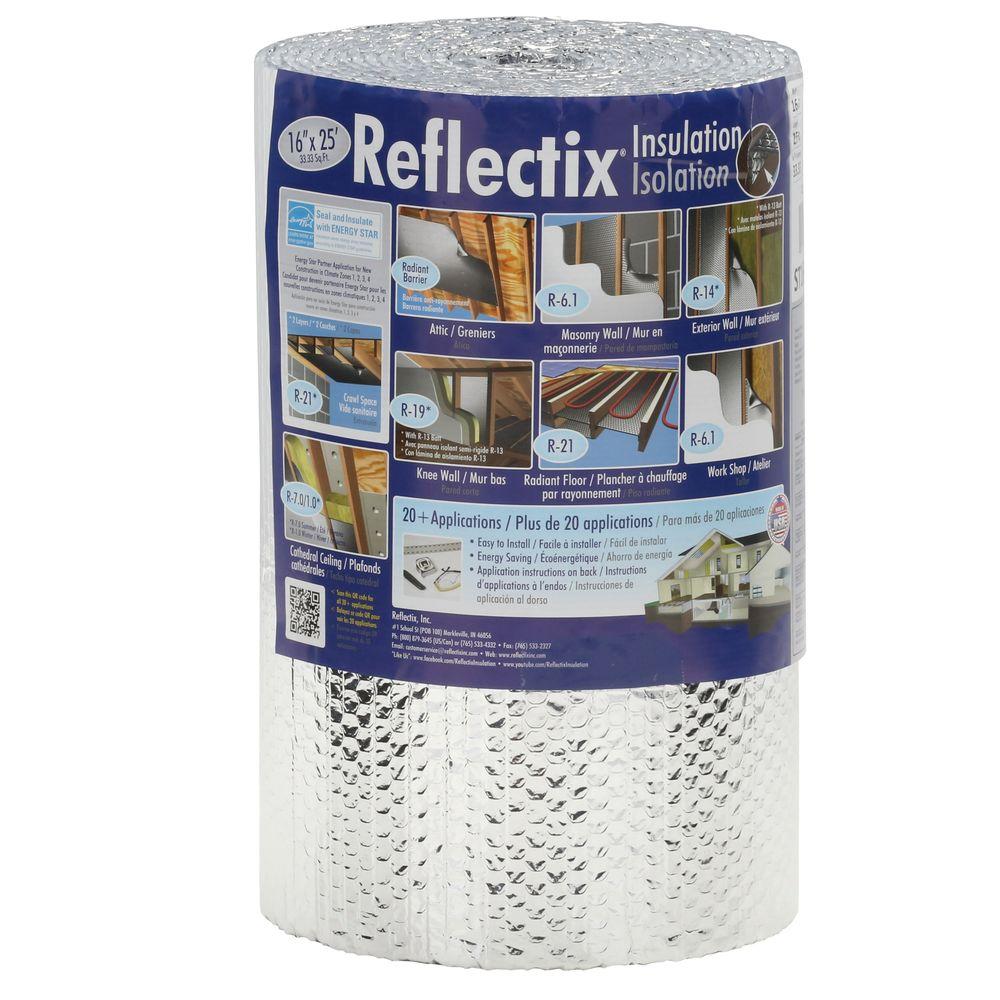
I know from driving this car around that the heat from the engine bay and exhaust heat up the interior, even without a top. While this might be nice in the winter, it's not so great in mid-Summer. To reduce heat, I chose to put closed cell foil-sided insulation (like this) behind the carpet sections in the footwells as well as under the driver and passenger seats. This should reduce both heat and noise. But I didn't stop there.

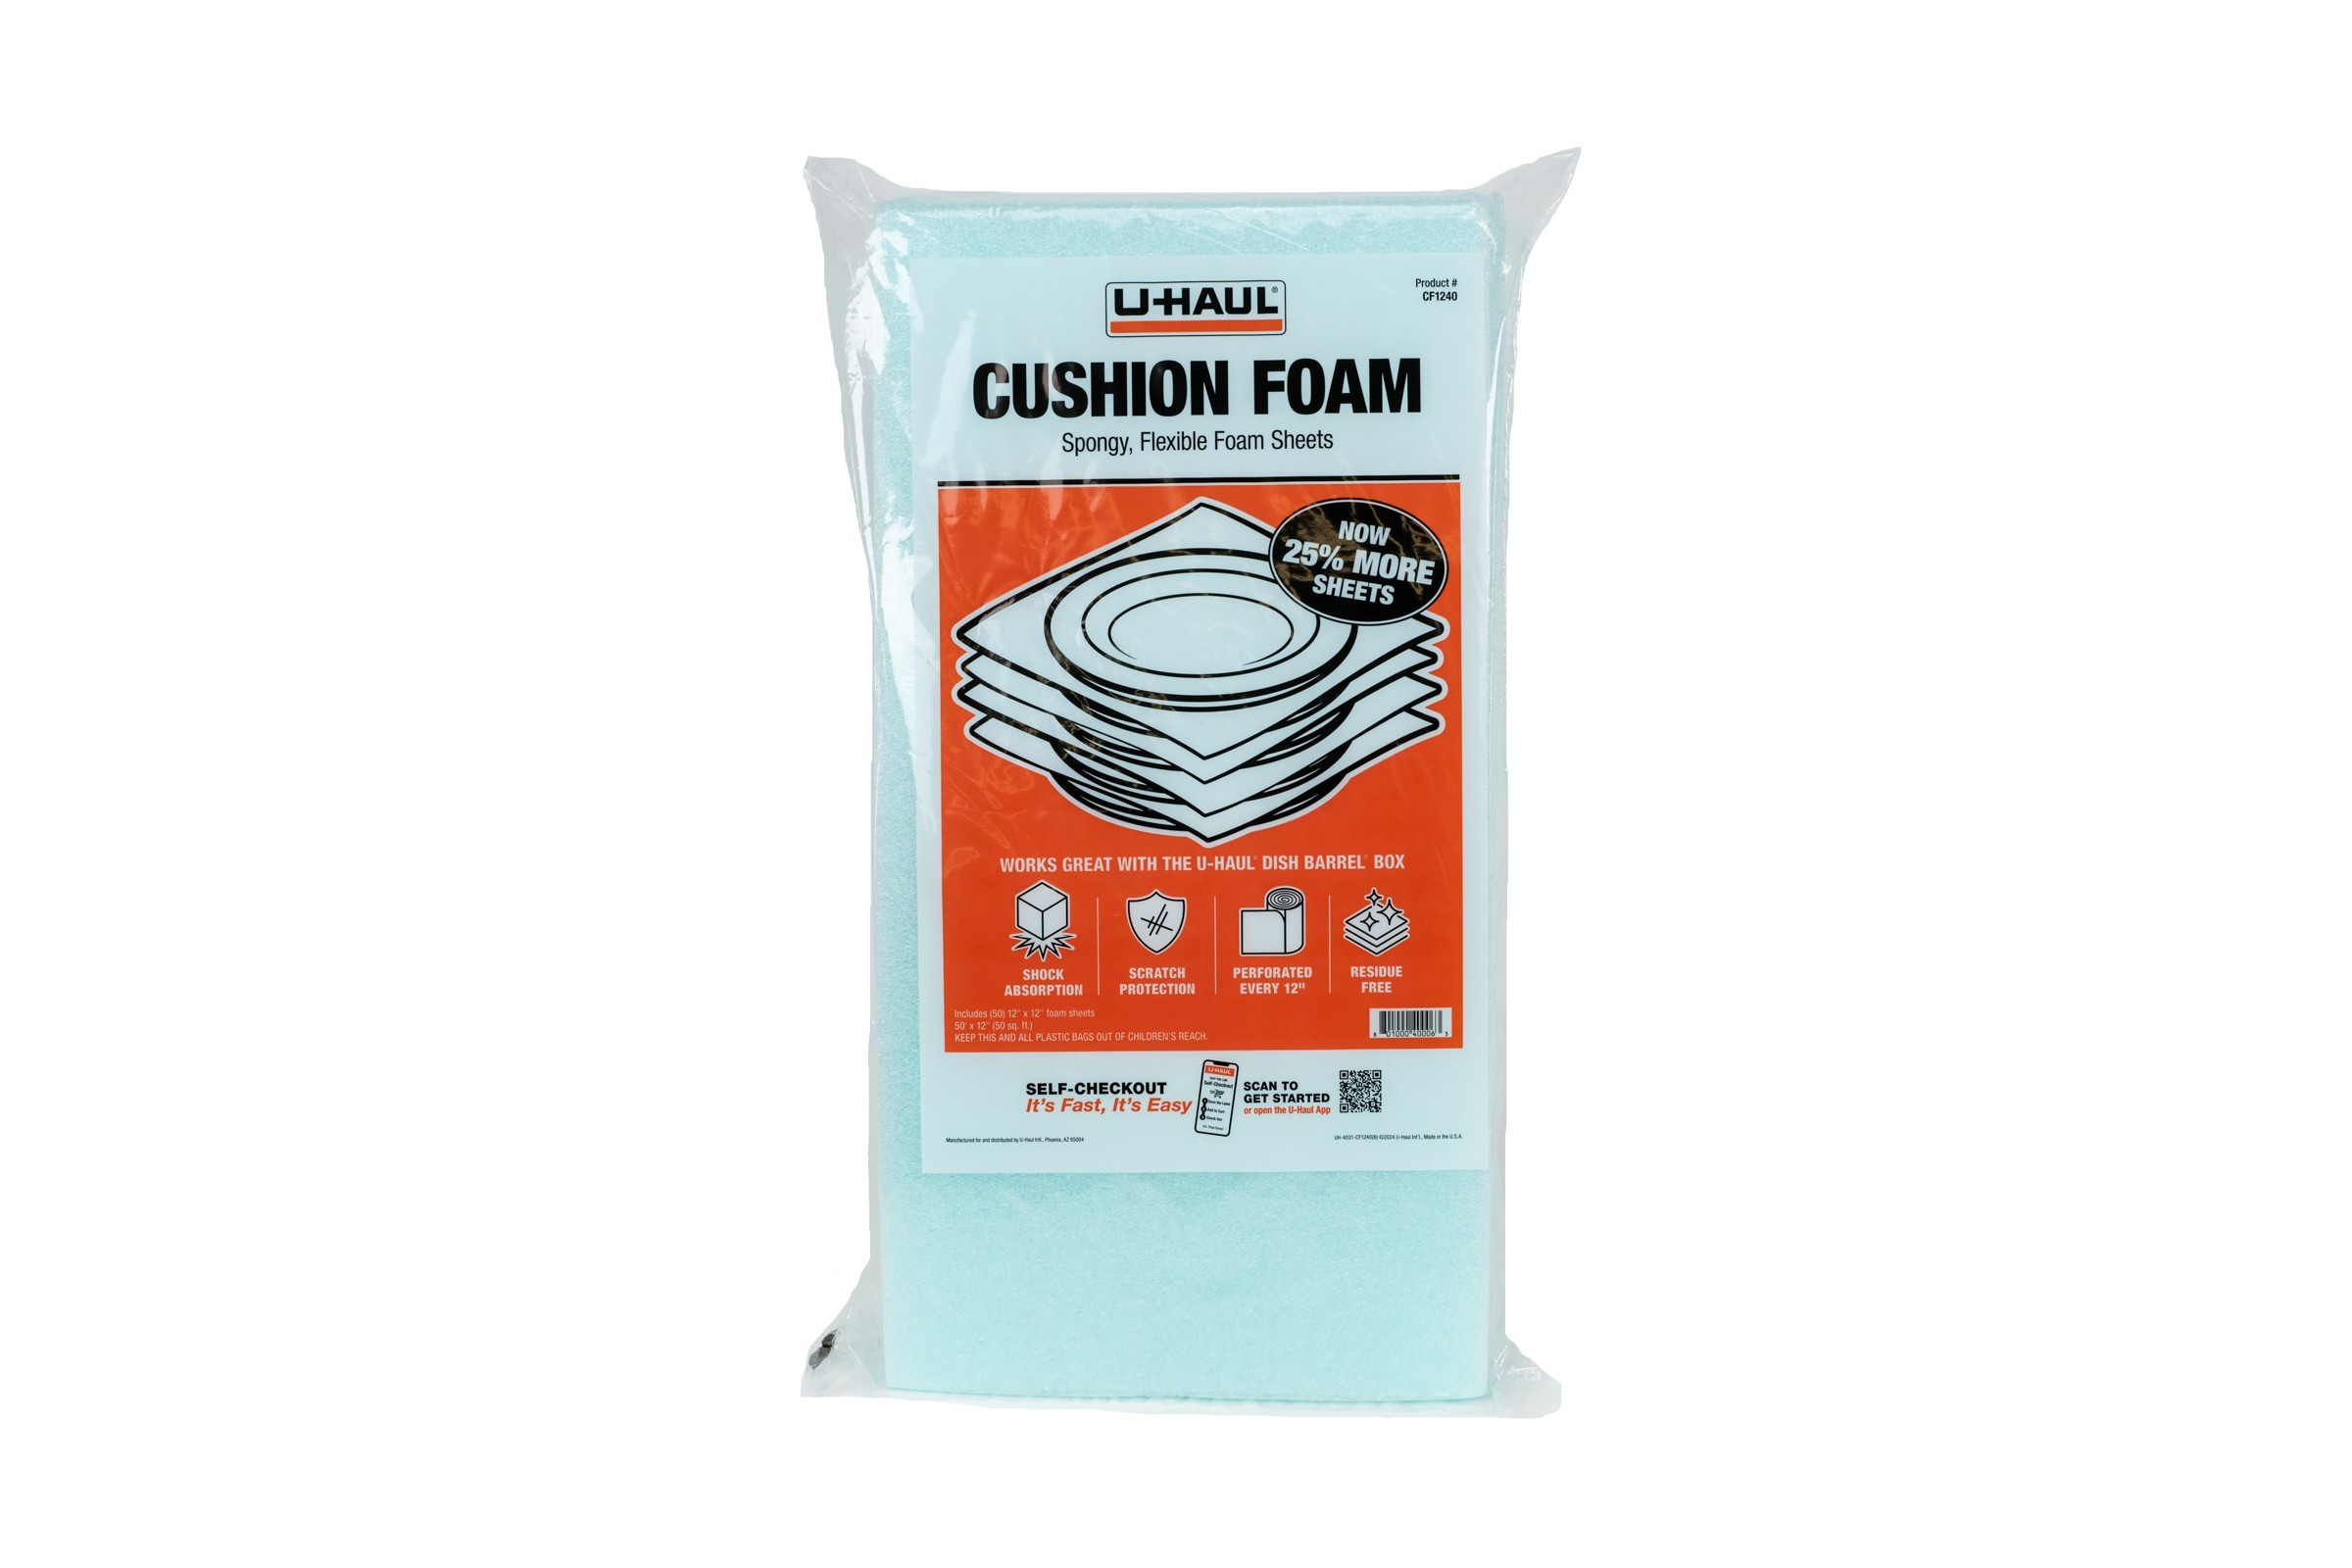
Except for the carpet over the rear shelf and the carpet on the main floor, the carpet is supposed to be glued directly to the steel. This includes the very front of the footwells, the sills, the rear wheel arches, etc. As I said earlier, I put that closed cell foil-backed insulation in the footwells and under the floor carpets. I wanted to add some additional soft to the other carpeted areas both for noise and for carpet depth when touched. The foil-sided insulation was too thick in the other areas, and I wasn't looking for temperature containment anyway, so I got some 3/32" closed-cell packing sheets from UHaul (like this). You wouldn't think it would make much of a difference, but simply tapping the steel with and without the foam was significantly different. These sheets are closed foam, so they don't absorb water and are very malleable.

Whether I was using the foil-backed or the UHaul foam, I used the carpet piece as a guide, traced it onto the planned under-layment and then cut with sharp shears. In some cases, I further trimmed the insulation to it wouldn't be visible after carpet was on top of it. I put some form of insulation under every piece of carpet except the transmission tunnel. I know the tunnel gets warm and I didn't know how the packing foam was going to perform with the heat. I wasn't sure how the carpet would appear on top of the foil-backed insulation, and whether the console would sit properly on top of it. Since that is the most visible section of carpet, and I'm not sure if I'm even going to install the full center console, I installed that section of carpet as directed: directly on top of the steel.

That's it for this part of the post. As you can see from the picture below, the cat continues to prove that he's a real shop-kitty, getting into whatever project we have going on. Of course, his help comes in the form of bringing work to a complete stop, but he's a cat. That's about all you can expect. Well, he could sit down right in the middle of the work; yes, he does that too. Thanks for following along, and I'll finish this up next time-