Showing posts with label furnace. Show all posts

Tuesday, January 9, 2024

Furnace Finished

Today's post covers the final steps of completing the furnace in the NewOldHouse. In my last post, we had cut the hole for the intake and lined it with venting. Our no-longer-an-HVAC-guy electrician was coming over to test the system so I needed to solve a couple of things first. Like the exhaust venting.

Exhausted
operational furnace
When I disassembled the furnace last summer, I saved all of the exhaust venting. I figured I could reuse all of it and but whatever pieces I needed after that. When I did my test fit to confirm the angle (minimum is 1/4" per foot or 1" per 4 feet, I did 1" per 3 feet so better than minimum), I determined that I had more than enough pieces, but did not end-to-end assemble it. These double-walled vents are built to twist-lock and they only assemble one way, indicated by the arrow on the sticker on the side. They are kind of like big-boy Tinkertoys. The sections which can turn are an engineering marvel. They can be twisted into all kinds of off-set shapes or simple angles to get the venting to go where you need it to. My needs were simple, however. From the top of the furnace, I turned it 45* towards the chimney, ran a straight segment and then another 45* angle to head straight into the chimney clear-out hole and the liner contained within. I had retained the collar that threads onto the liner and rests in the brick and I had retained the connector at the end of the vent that abuts the collar, and it tightened down with a set screw. I had expected a couple of hours, and assembly of the chimney was less than an hour.

Using stainless steel pipe-hanger strapping, I suspended the chimney from the floor joists in 3 spots, all closer to the chimney than the furnace. I recalled from my angle testing that I needed the exhaust to enter the chimney near the highest point in the hole. So, I started there, pressing the vent up against the hole, and then worked towards the furnace from there. I used screws instead of nails so the straps could not work their way loose from vibration. Before crawling out claiming victory, I grabbed the cloth webbed strapping that I used to suspend the HVAC and supported the gas line from the floor in a similar fashion. Like the exhaust vent, I do not want the gas line to shake itself loose, potentially creating a leak. I chose to use the fabric webbing instead of the stainless because I thought steel-on-steel could either create a spark or slowly cut into the pipe. Cloth don't cut. Content, I contacted our electrician to test things.

Furnace Active
suspending the vent
Our electrician connected the thermostat to the control wire (which was just run out through the big hole in the floor) to test the system. He knew the state of the gas line, the electrical, etc, so I wanted him to run the test. Besides, I wanted a final review of the work too. The review was quick and positive, so he started a test.... shazam (not boom) we have central heat. While the cold air side of the furnace is just an open plenum reaching into the crawlspace, the test was successful. We ran the system for a bit while he checked for leaks and CO. Everything came back perfect, so we just let the furnace run and bring the temperature of the house up from 58*F to 68*F (14.5C to 20C). The following weekend, I returned to the cold air intake.

Return to the Return
With the furnace operational, I could get back to the intake with a little bit of time flexibility. I had the start of the intake from the floor side and I had the plenum jutting out from the intake side of the furnace. I just needed to connect them. I started with what I thought would be the hardest part: the sides from the plenum to the intake. In retrospect, I probably should have started with the floor of the floor-side to keep it square, but it's done now so who cares. Because the furnace is not 100% square to the house, the sides were not exactly the same length. I cut them the same though, so the south side is a little longer, jutting into the floor-side box by an inch or so. Regardless, the installs for the 2 sides were the same: I set the plenum side into the S-clamp, screwed in 2 sheet metal screws and then attached the other end with another pair of sheet metal screws. I shifted to the top and bottoms next.

Because the floor-side is not aligned with the plenum, the top and bottom were parallelogram shaped, with the ends measuring 20" and the sides at a angle around 45*. Again, because the sides were not exactly the same length, one cardboard template did not suffice. In the interest of conserving materials, the top was completed with multiple smaller sections and then seam-taped. The bottom, however, is one shaped piece added after the floor of the rectangle intake was in place.

Last, I got to the rectangle at the bottom of the intake box I built earlier. For this "floor", I cut another piece of sheeting 23 inches long by 16 inches wide and cut 1/2" notches out of each corner. 3 edges were then bent 90*, leaving the edge facing the furnace flat. I set the floor in from below, sealing the seams with tape, before shifting to the bottom of the intake-to-plenum connector.
 
Filtered
I had intended to get clever with brackets and such to hold the filter in place. I abandoned that simply because I ran out of give-a-shit by now and simply wanted filtered air. Since the south-side ran long into the airbox, that provided material to hold the upper corner of the filter. Using a filter to guide the shaping, I bent the overhang into a tang to hold the filter. The other corners simply stay put, and the 16 x 20 opening is perfectly covered with the filter.

where we started
We have been running the furnace since the filter was added and the air in the house is steadily getting less dusty. After all the work that's been done around here, the dust has been considerable. We have run a small portable filter, but it has not been as effective.

Well, that's the end of this epic effort. For a timeline, the furnace was disassembled in August and moved in September, the chimney repaired and lined in early October. The crawlspace patio was dug out, graveled and patio-blocked in late October; a stand attached and the furnace secured in early November. Air distribution was disassembled, cleaned, reassembled and insulated from mid November to early December. Everything else was crammed into the following 2 weeks. This job was quoted to me for $10kUS. If I paid myself $100US per hour, I still would have paid the HVAC company more for this.
 
This effort took place around a music festival, a family wedding, multiple holidays, kitchen planning, prepping and seeding a lawn, gigs, jams, love and life, and of course, my band (shameless plug: Sunkicks) recording, tracking and mixing an EP (release date 2024-Feb-2). Life is full. I expect there will be more construction posts, but Hapy needs some work done so I expect there will be a post or 2 on that, once I get to it. Thanks for following along-

Tuesday, January 2, 2024

Planning the Intake

Today, I further document the efforts to put heat into this old farmhouse. First, Hapy New Year. I absolutely recognize that it is past Winter Solstice and we have not had central heat since last spring. We have been getting by with small oil-based space heaters, as opposed to the ones with bright orange electrical coils and blower fans. Except for the sub-freezing cold snaps or windy days, the space heaters have been up to the challenge. On those sub-freezing days and nights, we have closed off sections of the house and hung blankets over doorways, etc. It has been an adventure. A couple of weeks ago, we had that which had once been thin gross cellulose insulation in the attic removed. So, what little heat that grot held in was now escaping to atmosphere. If being cold were not enough of a motivator before, it just went up another notch

In my last post, I could see the finish line. The furnace had been moved, mounted on a stand and angle-confirmed for safe exhaust. The conditioned air side had nee disassembled, cleaned, re-assembled and insulated. The gas line had been reconfigured to feed the furnace, with a "T" fitting so we could tap into it for the stove later. The electrical had been completed to the furnace, with an integrated worker-safety switch. The thermostat control cable had been wired into the furnace. So, what remained? Connecting the thermostat to the control cable, the exhaust vent and a cold air return. I started with the cold air intake, but shifted midway once I concluded that we could get the furnace running for a short time without a cold air return, drawing air mostly from the crawlspace.

Best Laid Plans
completed box
My original plan for the cold air intake was, again, to reuse as much of the HVAC stuff that I had removed from the furnace as I could, and add what was needed. When I looked at the pieces above the plenum, though, I decided they were not up to snuff. Whoever built that intake restricted the airflow considerably. Consider that the plenum is 16x20. The intake grate and filter are also 16x20. In between, they built a 90* turn using a 15x15 box. No wonder the furnace made so much noise when it was running; it was begging for more air. Simple math: 16x20 = 320 square inches. 15x15 = 225 or over 30% smaller. When discussing this with our electrician, he indicated that the restriction was probably not as bad as I thought. I never sought to be an HVAC expert; I just want heat and a quiet running system.

My plan was to install the original intake-side plenum and simply reverse it back on top of itself and then route over to the hole in the floor where the furnace used to sit. In theory, this was a great idea. There's an old Yogi Berra quote about theory and practice (In theory there is no difference between theory and practice - in practice there is). I think it applies here. The intake plenum was nearly as big as the conditioned-side plenum, and once attached it took up more than 50% of the space between the floor joists above and the vapor barrier on the ground. There would be no doubling-back on itself. For a moment I thought about having it turn on it's side, but that would route it where the exhaust vent is. We can't have both things in the exact same space.

I could route the cold air intake around the chimney and under the main beam of the house twice to leverage the existing hole where the furnace was. I started to take measurements and discovered that the space between the bottom of the beam and the top of the concrete curb underneath where the furnace used to be... was a little over 12 inches. I can't run a 16x20 rectangle through the 12" space. I could neck it down, but that would decrease air flow, create noise and potentially shorten the life of the fan since the reduction would be, like 25% (16 to 12). We have already suffered a 30% reduction before, and all of the downsides with it. Now, I could create a pass-thru that's like 12 x 26 so we don't restrict air flow, but when I took a minute and considered how long that intake would be, I figured it was time for a new course.

Before I got too wrapped up in the next step, I installed the intake plenum, sheet-metal screws, tape and all and then suspended it from the floor joists with webbing. With the plenum in a fixed location, I could take some measurements and make some plans.

New Plan, New Hole
simple floor grate
I started by determining where the joists were and marked them on the floor above. Since the joists are 16" on-center apart, the usable gap between the joists is about 15". While obviously that is less than 16, it is greater than 12, so I could put a hole anywhere without touching a joist and the neck-down would be significantly better than running it in a big circle around the chimney in the crawlspace. I also figured that the shorter the intake, the fewer opportunities for leaks. Consider that the area of the house above the furnace is our emerging kitchen. We had been making plans accommodating an intake along one wall, making an allowance for a space without a cabinet for that intake. Now that the intake will no longer reuse that big hole, we can reconsider the cabinet plan there, and have that floor fully repaired by our flooring guy (Thomas).

Both Boo and I have lived in older houses before and we both recall having air intakes in random places in the floor. For whatever reason, they seem to usually appear in hallways, so you get to walk on them a lot. Since there doesn't appear to be much reasoning other than have them centrally located, We are going to make the intake run as short as possible, setting the intake alongside the chimney. This will allow for a simple 90* turn at the end of the plenum straight up to the floor. I will add a little bit of ducting to align between the floor joists, but it will be quite short.

Cutting a hole in a perfectly good floor is hard to bring myself to doing. I ultimately asked our general contractor to do it. I figured he could get the cut straight and along the top of the joists on his first try. In the picture on the right, here, you can see the floor grate I got on Etsy from a guy (Doug) who hand makes these in Minnesota. Big fan of Etsy's handmade stuff.

Return
building the box
With the hole cut, I had a clear target for building the rest of the cold air return. My plan was to have a simple straight down, 90* bend to the plenum. At the point where the venting turns, the air filter sits and it is replaced from above, after removing the air return grate. To help hold the air filter in place, I planned to add a small rib an inch to the plenum side of the 90* bend. Last, I added a flip-down tab above the filter so that after the filter was set in, the tab would rotate down to hold it in place. Back to that Yogi Berra quote, the reality, however, was not simply applied theory. I mean the applied Yogi Berra theory would be there's no difference between what you plan and what you build until you start building. In that spirit, I got after it with a stack of 24" by 36" HVAC sheeting.

I started with a simple box that lined the sides of the joists down to the level where the plenum was. The top of the plenum is about 1 inch below the floor joists, so the box was little more than a 3-sided rectangle. With one sheet, I bent the side furthest from the furnace into a wide U, with the center section 22" across. I pre-drilled holes to connect additional pieces and screwed it into the floor joist level with the top of the joist. Adjacent to the shorter sections of the "U", I added 10-1/2" and 12-1/2" sides (also 24" long). The wider of the 2 sides was bent 90* for the final 2-1/2", and that short stretch runs along the furnace-facing side, reducing the aperture from 22" to 20" to align with the size of the plenum. I left an extra 1/2" of HVAC sheeting so I had something to connect the next pieces to. Along that 4th edge, I ran an 8-1/2" strip of HVAC, covering the floor joist plus an inch. That last half-inch was angle bent rear and upwards to provide something to attach to. Once I got this far, I shifted gears over to the exhaust vent so we could get the furnace tested while our electrician was available.

I am going to stop here since things got moving really quickly around the electrician's visit. Thanks, as always, for following along-

Thursday, December 28, 2023

Dashing Thru the Smoke

After returning Hapy to service, I have not driven him much. As has been true for most of the time we have been together, he doesn't have heat. So it's like driving in an ice fishing shed... which probably brings some appeal to some folks, but it's not my favorite. Still, if I had to get somewhere and I could get there without using freeways, I would and have drive(n) Hapy. Why not freeways? This time of year, as I am sure you have noticed, drivers are especially distracted and others are driving specially, uh... nasty. This old bus needs more braking space than modern cars but other drivers don't always recognize that. When you add those factors together, it is tough sledding in the bus. Add in wet or slick roads and it gets scary. Regular roads are bad enough, but freeway speeds are too scary in the winter for me and the bus. With this backdrop, I start today's post.

Smoked Again
can you spot the loose wire?
A few years ago, on the return drive from 4Peaks, we were greeted with smoke billowing out from under the dash (See 4Peaks 2018 - Road Report). Somehow the ignition sub-harness had fried, leaving us stranded, riding home on a flatbed again. There's a song lyric in there somewhere. Anyway, I fixed that once and then again in a not-to-my-best-liking way with now 2 keys to operate the bus: one to unlock the steering and one to start/run the engine. This is working well enough so I leave it alone.

The other night, I had to drive out to Hillsboro for a final recording session with the band I'm playing in (shameless plug: Sunkicks), and Boo had not returned from work. So, I pressed Hapy into service. With the new starter and better glow-plugs, he fired right up and hummed like he was ready for some fun. It was damp out, so the lack of heat meant drying the inside of the windscreen with a towel, but for the ride out, it only needed that one wipe down. Even the driver door closed without too much trouble. It was like Hapy was really trying his best to show he was a real car and could be used reliably. We stopped for some home repair parts at the big box home repair store and he started right up afterwards. Again, "I'm a real car".

After the recording session concluded, the temperature had continued to drop, while the moisture held steady so the interior glass was quite foggy. Hapy fired right up and I flipped on the running lights while I refamiliarized myself with the controls in the dark. I thought I had the switch for the fans in my hand, but it was actually the headlight control... I turned hard it to the right (the fan control switch has always been a little resistant), and rather than turn on the fans, I caused something to ground, causing a wire to release it's smoke. When I saw the smoke, I turned the switch back left (anti-clockwise) but the damage had been done. All that was left was to figure out how widespread it was, and to apologize to Hapy; this wasn't his fault, it was all mine. The smoke was pretty bad though, considering the windows were closed, the bus wasn't moving and the fan wasn't on. The next day, my throat was still sore from it. When I opened the driver window, it must have looked like a scene from Fast Times at Ridgemont High with the billowing smoke rolling out.

dripping blue
Starting with the positive... the engine was still running. The cooling fans were on and could be turned on and off. The defogger (doesn't defrost, hardly de-fogs) fan could be turned on and off. As to the negative, the driving lights were out, I think the tail lights were out and there was an annoying buzzer like a seatbelt warning was on. When I flipped the turn signal or hazards, the front lights flashed correctly and the buzzing went away. I was still sitting, idling in front of my bandmate's house, so I decided that I would just drive home and deal with it later.

The drive home was quite uneventful other than the constant buzz noise and concern that drivers behind me could not see us nor tell when we were braking. When I got home, the engine and fans shut off without issue. It was too late and too dark to diagnose, but my hunch was that it's the wire that sends a signal to the running lights.

Wire Still a Puzzler
A few days later, when I could go out to the bus in daylight, I went out and removed the headlight switch from the dash. I could see one of the wires had become detached, but I was unable to see any truly fried wires. Puzzled, I plugged the wire into the open pin on the back of the switch, and tried the lights. Yep, headlights still turn on, dash lights still turn on.... running lights turn on. All of them, including the tail lights. So, I pulled on the hazard switch. Dash directionals flash, front directionals flash, rear directionals flash. At this point, I don't know what's fried, but the engine starts and runs, the cooling fans fire, the dash lights, switches and gauges work and all the lights work. In the middle picture, just above, there's a light blue orb thing on the lower left side of the image. That is a blue drip that I cannot account for, but I think something melted and that's the result. Neat.

I think it is time for me to determine which of the original circuits no longer need to be served and at the very least remove the fuses. After the cleanup I did in the back for running the engine, I think it would be wise to plan to do something very similar up front. I mean, in the end, the only things the "main" fuse box is running now are the dash, and the lights. That's like, 4 fuses tops? Regardless, this exercise should lead me to the smoked wire and reduce the electrical gremlins.

Furnace Update
furnace control board
Our electrician is semi-retired. He used to run a HVAC company and has installed literally hundreds of furnaces before focusing on general residential electrical instead. Now, as he is slowly divesting of his electrical business, he has observed my work on our furnace. In a fit of holiday fever (he swore off furnace work years ago), he popped by for a couple of hours, got the gas line hooked up and leak tested as well as the 110V electrical feed completed, with a worker shut-off switch. He even got most of the exhaust venting put in. He hit a wall when he was unable to connect the control cable because the access screws are hidden behind a panel that you can't get to once the first piece of exhaust venting is attached to the furnace. That's some poor design.

Still, I saw the furnace project as 7 big individual efforts: demo/move/mount, conditioned air distribution, cold air return, gas, electric, exhaust vent and the thermostat/control cable. I had completed the first 2. He knocked down 2 more (gas and electric) and set me up to get the next 2: thermostat control and exhaust vent. Once I have that done, he will confirm things, and test the system. Then, I just need to get the cold air to pull from inside the house and we have a complete system. For testing purposes, I may simply smack a filter on the plenum.

Since I started this thread, I caught a cold, celebrated Christmas and installed the thermostat control cable. As I indicated, I had to remove the exhaust venting all the way to the firebox before I could remove the panel which covers the control board. I ran a new wire from beneath the furnace (where the old one entered) and connected the control wires. Before putting everything back together, I took the opportunity to spray the snot out of the control board with a can of computer-cleaning compressed air. I figured that panel won't be coming off anytime soon, so may as well get the board as clean as I can. After that, it was simple replacing that which was removed, re-using the same fasteners.

That's about where things are today. Hapy appears operational, and I will be test driving him here in the next couple of days. The furnace is almost ready to test. I need to complete the assembly of the exhaust vent and properly suspend it from the floor to retain the correct exit angle, but I think that is a couple of hours effort at most.

Thanks as always, for following along. Have a peaceful, pleasant, hapy new year-

Tuesday, December 12, 2023

Completing the Furnace Conditioned Air

In my last HVAC/furnace post, I had described the conditioned air plenum, and my efforts to create and then attach one. Today, I get on with the rest of the "conditioned air" venting. As before, I call it that so there's no confusion between the venting that has the output from the furnace and the venting that is the cold-air return side that feeds the furnace.

Rectangular Vent Prep
long arm
Recall that the crawlspace in this house had been infested with rodents. I mean it was bad. We had it emptied of rubbish and insulation by a team who seemed borderline hazmat. The work was disgusting, that team was amazing. They replaced some, but not all, of the circular vents with insulated flexible venting, but left the larger rectangular trunk lines. Perhaps they thought those vents were clear and clean or maybe they just wanted to complete the job (not that I blame them). Those vents were unobstructed, but far from clean. I had intended to clean them in-place with a microfiber cloth on an extendable pole. Once I got to really looking at them, I knew this was simply not going to be sufficient, and chose to ignore the fact that these vents were used last winter. Yuck.

ga-ross
To remedy, I dismantled them, and hauled them piece by piece out of the crawlspace into the backyard. Using the highest pressure setting on my hose-end sprayer, I jetted off the worst of the caked on filth, inside and out. Then, with a scrub brush and dish-soap, I cleaned each piece inside and out. Once rinsed, they were set aside to dry and I took one of my most-needed showers ever. The insides are clean, but I noticed a very slight brown staining. I concluded that it's probably from many years of people smoking tobacco in the house. I considered spray-painting all of the inside surfaces, but decided that the off-gassing of the paint was worse than whatever caused a stain (but was now gone). I did, however, spray paint bits of the outside of the venting which had rust or remnants of the old fabric (asbestos-imbedded?) tape which was removed by the hazmat guys.

Rectangular Vent Install
cleaned
Once cleaned, partially painted and moved back into the crawlspace, I was ready to start installing. I started at the furnace and worked by way out. First were the bits that connect the plenum to the rectangular vents. These are angled and change shape from one end to the other, converting whatever size hole you had in the plenum to the size of the vent. I found that by bending the lip wide open, the piece fit easily, and then just fold the lip back against the inside of the plenum. With high-end foil tape, I sealed the seams from inside the plenum.

I read about and considered using a brush-on goop to seal the seams but decided that painting goop while army-crawling around a filthy crawlspace just did not sound like a great idea. Consider too, the goop seals as well as tape, for the most part, and it's effectiveness is directly tied to user application. So, again, lying prone (or supine) with a brush of goop sounds like errors would abound. Taping is hard enough when you're lying down.

Once the 2 main bits were connected to the plenum, I first did a 90* turn bit on the smaller distribution arm (8 x 12 rather than 8 x 18) and then shifted to completing the larger arm. This took many hours, even though there were only 4 sections. For each section, I would wrestle the rectangle into the connectors on the end of the one prior. I used another section of HVAC to hold the far end up while I fastened the new piece to the old with sheet metal screws. Then, I suspended the far end from the floor with nylon webbing stapled to the floor joists above. Once free-standing, I sealed the seams with that high-end foil tape and then wrapped the vent with (R8) foil-wrapped closed cell HVAC insulation. I expected the venting to take a little while, but did not anticipate that the insulation step would take maybe twice as long as the venting assembly. I took care to seal up the insulation seams, but the time was consumed by, again, lying down and wrestling large rectangular insulation panels, trying to wrap them around a rectangular vent which had circular vents jutting out of it. I don't know if having the insulation sealed up tight matters much in the grand scheme, but I made sure they were relatively well sealed anyway. I spent probably 8 hours in total getting the larger arm assembled and insulated.

original round vent
Before I moved to the smaller arm, I attached the round vents to the larger arm. I had initially intended to remove the original remaining round vents, believing they were not up to snuff. While I was assembling the larger arm, I looked at the 2 remaining larger circular vents (picture on the right shows what condition they were in) and while there is some dust and more brownish stain, there is no rodent evidence. What I did not expect was just how close the rectangular venting is to it's original location. The round outlets on the rectangular vents are a few inches off center and less than a foot away from the original. So, I placed a short stretch of insulated flexi-venting between, taping both the inner hose and the outer insulation wrap at both ends. I did not capture a close-up picture of that, but I found that these sections were so short that it was actually easier to remove the inner sleeve from the insulation, attach it to both ends and then wrap the flexy-hose with the insulation jacket afterwards.

Smaller Arm
When I changed the vents around on the larger arm, I inadvertently removed the vent intended for the bathroom. I will re-integrate that later. The bathroom floor vent has not been connected since we first got the house. Recall above where I described where I made the cut in the plenum, I removed another vent access, which was direct-connected there, to the bedroom. Since it was not part of the air design plan for either arm, adding it to one or the other could upset the pressure for the other destinations. Since the bigger arm distributes to the west side of the house and the smaller arm goes east, I decided to tie it into the east (smaller) arm simply because that's the side of the house the bedroom is on. As it stands, the smaller arm only had 2 destinations (the kitchen and one main living space) so I felt adding a 3rd there would be less intrusive than adding a 5th destination to the larger arm. Also, I considered that the kitchen is an uninsulated space, cordoned off from the rest of the house with plastic. I decided to connect the bedroom to the used-to-be-kitchen vent in the smaller arm. When the kitchen is ready for a vent, I'll cut a hole and tie it in or I will move the bedroom connection back to the plenum.

short arm completed
The smaller arm took less time, and other than threading new stretches of flex-hose from the arm to the vents, it was a reflection of the larger arm work. Each arm-piece-to-arm-piece connection was metal-screwed in multiple spots, foil-taped and suspended with webbing. The entire arm was insulated with the R8 closed cell stuff, each circular connection was double-taped (inner tube and insulation jacket). The only real anomaly was with one rectangular-to-circular connector not aligning between the floor joists because of the furnace move. To remedy, I simply flipped it upside down (see picture on the right) so it is on the bottom instead of the top. I'm sure some HVAC person somewhere doesn't like this, but it fits, and it's sealed. All told, building the large arm took a weekend while attaching the circular vents to it and doing the entire smaller arm took a second weekend.

At this point, it had grown dark on a Sunday afternoon/evening. So, I picked up my tools and supplies and put everything away. With some scrap paper and a pen, I started contemplating the cold-air supply side. I will start that work next, but I think getting the "conditioned air" / distribution part completed was a significant milestone. Sure, I still need the gas hooked up, the exhaust re-assembled and suspended, the cold air return I just mentioned, the trigger wiring done and, last, the electrical (and walk thru by our electrician / HVAC guy). Yes, that is a lot, but I feel like the largest, hardest part is now behind me. I know... "famous last words".

Thanks, as always, for following along-

Tuesday, December 5, 2023

Starting to Solve for the Furnace Conditioned Air

If it feels like this furnace saga is unending, it definitely feels that way on my end. Every passing day, the weather gets colder, but I will not short-cut this work. It being correct is too important for health and safety. I do want to stress that our electrician, Gary, owned an HVAC company and did hundreds of furnace installs. He consulted on the plan and will be reviewing my work / confirming everything when he connects the electrical at the end. So, we keep going. Honestly, the hardest part is putting on cold clothes in a cold house to get into an even colder (and, frankly, filthy) crawlspace.

Anyway, today, I am focusing on what I refer to as the "conditioned" air. This is the air that is leaving the furnace, presumably warmer, but on those days we are only running the fan, it will just be filtered. For simplicity, and since this was the way I did it, we are working from the furnace exit to the floor vents. Sadly nothing was as easy as it seemed in my head, resulting in this expanding to cover many weekends. This is just the first part of it.

Furnace Mounted
checking pitch
Before I shift to the new topic, I had a couple of final things I needed to do with the furnace: confirm the pitch and attaching it to the stand. To confirm the pitch, I found a straight bit of hard plastic tubing that was over a meter long. At exactly 1 yard (36 inches or 3 feet), I attached a 1 inch thick piece of scrap wood. Recall the minimum pitch for the exhaust from a furnace installed on it's side is 1/4 inch of rise per foot (or 1 inch of rise per 4 feet). I figured that if I made sure my work was at 1 inch per 3 feet I would have exceeded the minimum and have some wiggle room for the furnace or the ground shifting. I set the plastic tube jig on top of the furnace and set the level on top of that. Bubble between the lines? Yes, so somewhere along the way between my level crawlspace patio and the top of my furnace the world tilted. Glad it pitched the right way for me. I had planned to shim the exhaust-exiting end. Do I want to know why it shifted? Yes, but I think because the furnace is offset rearward (you can see the stand in the lower right corner of the picture), the weight of the burner is causing the tilt.

Feeling fortunate, I grabbed a longer run of that plastic tubing to simulate the exhaust from the furnace to the chimney and set the jig on that. We have good angles, though I will need to add a brace near the chimney end to make sure it doesn't relax downward over time because the exhaust needs to enter the chimney near the top of the hole. To make sure the rest of my efforts don't cause the furnace to move, I sent sheet metal screws through the now-bottom of the furnace into the stand so it is fixed-in-place. I re-checked the pitch, and it is still 1 inch for 3 feet even after sending screws through. On to the conditioned air!

Plenum Pablum
building a plenum
The first thing the conditioned air enters is a box called a "plenum". It acts as a singular junction box for all of the conditioned air, but it does more than that. Consider what happens when your furnace kicks on. The fan starts and very quickly air pressure increases at the furnace outlet. To cushion the system from that large pressure increase, there is the big box (plenum). Secondarily, this box allows the air to flow smoothly and evenly into the ducts. If the box is too small, or nonexistent, the air would not enter all of the vents evenly, leaving some spaces with too much airflow and others getting an old microbus heating system experience (virtually nothing). I am over-simplifying it as there are air dynamics about back pressure from the branch lines, etc. that I really don't understand.

The original plenum to this house was just that. The original plenum, as in it was the plenum when the heat source was something other than gas, we believe. I think it may have been coal based on the soot we have found and then oil since there's an old oil-tank shed in the back of the house. Still, airflow is airflow and if the thing that is pushing the air is heated by coal or wood or geo-thermal fanciness, and the venting beyond the plenum is the same, I would expect the plenum should be relatively the same. Of course, 15 years after the house was built they added 2 rooms to the back, so maybe the plenum has been the wrong size since. I suppose, this could be a recently-added bit, but none of the other metal venting looks remotely new.

furnace entry
The plenum was almost a meter tall and about 2 feet square. From my research, this is excessive, but was unable to arrive at a clear answer as to what size it should be, like with a calculator or simple rubric. The most basic advice seemed to be "make it a little bigger than the outlet of your furnace". I am fairly sure that would lead you to a too-small plenum and poor circulation impacts, but I defer to experts. Regardless, I took all of this and decided that I needed the plenum to fit in the space I had, so if it was smaller, well... we'll just deal with it and worst case I'll make another one later. I simply built what would fit in the space without digging again. 

Plenum Fab-lum?
So, what did I do? The original plenum had the air enter from above and then it routed air sideways out 2 rectangular vents and one round one. In order to keep the orientation of the rectangular outlets, I needed the top covered and a new entry added on one of the other "horizontal" sides. In order for the 1-meter-tall plenum to fit into my not-quite2-feet-high crawlspace, I needed to shorten it too. So, I measured and then cut (with the death wheel) 9 inches down from the top in each of the 4 corners. Then, I folded the sides in like a cardboard box. With a hammer and dolly, I squared the newly folded lines. Content with the shape, I drilled and then pop-riveted the new top in place (upper image). Last, I sealed all of the edges with high-end foil tape.

Plenum added
So, I have a box, but no entry for the furnace. Onto the side which had a circle-vent, I applied blue tape and then measured the dimensions of the furnace exit. Half an inch inside this rectangle I marked the actual cut line. That extra 1/2" will be the lip which will press against the exit "flange" on the furnace. I cut the hole with the death wheel, turned the lip with some pliers and cleaned up the fold with the hammer and dolly again. The circle-vent used to feed the bathroom, which does not currently have a vent. If we re-introduce a vent into that bathroom, I can re-integrate it into the system.

I lowered this new plenum into the crawlspace, army-crawled it past the furnace and attached it to the furnace. It barely fits between the ground and the floor joists, but it does and it did not disturb the angle of the furnace. Once it was in place and the edges sealed, I was ready to look back at the main trunk / vent lines (the big rectangular ones).

As often happens when I get to posting about something, this got very long. This feels like a logical transition point so, I am going to stop here, and pick it up next time. Thanks, as always, for following along-

Tuesday, November 7, 2023

Setting the Furnace

Continuing the fun with the furnace today. It being October, of course we had another issue with Hapy not starting so I'll touch on that as well. EDIT: oops. Didn't post on Hapy. Next time, I swear!

Plan and Plan Again
today's end-state
Recall our plan to move the furnace into the crawlspace. We had the work bid by a furnace company and they quoted us $12kUS; we recognized that as a "go away" price and chose to do it ourselves. My biggest considerations are around the combustion exhaust, so I spent some time researching this. According to multiple sources, an 80% efficient furnace needs a double-walled exhaust (check) and it must have an upward pitch of no less than .25" per foot. I thought that was fairly flat, so checked other sources. From this data point, I collected others, like how far from the ground is the bottom/top of the exhaust pipe heading into the chimney, where the exhaust exists the furnace, etc. With these numbers in mind, I set to planning where to set the furnace.

planning a hole
Initially, I planned to put it directly beneath where it had previously been. This would have changed the routing of the conditioned air, gas line, cold intake and exhaust the least. Unfortunately, this would have put the furnace right against a main beam running the width of the house, making seasonal maintenance impossible. Additionally, that spot under the furnace had an unexpected rectangular concrete curb that was smaller than the space we needed cleared. So, the furnace is going to be adjacent to that curb'd rectangle, but because the distance to the chimney is around 3 feet, and I would like an angle of assent that is greater than the minimum, the furnace will need to be almost on the ground. So, a plan that wound have suspended the furnace from the floor joists will be replaced with a plan that has the furnace a-fixed to the ground instead.

Dig Another Hole
hole dug
Obviously, I am not going to simply set the furnace on the vapor barrier on the ground. Beyond the fact that there are safety issues, the furnace needs to be up off the ground height-wise to get the exhaust angle I want and to minimize both the conditioned air and gas line routing. Instead, I decided to dig a foundation and set the furnace on a stand. That sounds so simple until you get down to trying to dig a hole when the headroom between the dirt and the bottom of the floor joists is less than 2 feet. Starting with my tools, I had a 5 gallon bucket for removing dirt, a small-bladed shovel with a broken-off handle, a crescent-moon scraper thing and a 4-prong hoe. I cut 3 sides of a rectangle into the vapor barrier with scissors and peeled it away, leaving a 2 foot by 3 foot rectangle of rough dirt. With the tools I mentioned, I removed probably 60 gallons of dirt, leaving a 2 foot by 3 foot hole nearly a foot deep. This took almost 3 hours since the whole thing was done on my belly.

gravelling
After taking a break for a few days, I returned and repaired the vapor barrier with thick black garbage bags. Along the cut edges, I made sure the plastic overlapped more than a handful of inches, and I lined the hole with sufficient slack so the additional layers of material would not cause gaps to form. Once satisfied, I added a 1/2 yard of gravel and moved it flat with a garden rake and then my gloved hands. On top of the gravel, I set 6 1-foot-square patio blocks. For each block, I made sure it was flat, and then flat to the adjacent block. As you can imagine for each block, this required multiple install-remove-install cycles and then additional ones to get the overall 6-block space flat. Between the gravel and the blocks, I probably spent 2 hours getting it level. This crawlspace patio will serve as a foundation for a stand upon which the furnace will rest.

Rack It
crawlspace patio
I initially thought I would simply use a pair of hot water heater stands for the furnace. I figured, they could withstand the weight of a full hot water heater so they could definitely hold a 70# furnace. I priced them but the cost and availability was not good. While searching, I found air conditioner stands designed to hold up to 400#. While local availability was again nil, the price was the same as for one hot water heater stand, and they are height adjustable. The rack I ordered was lost in shipping, so I switched the plan again. This time, I ordered a non-adjustable storage rack capable of holding 1000#. While I won't need anything that strong, this rack is also 2 foot by 3 foot in dimensions so it will fit into the hole, and potentially support the furnace better. When the rack arrived, I took the pieces into the crawlspace to consider my options. The rack is only "adjustable" by cutting legs to the height I need them to be. So.. adjust once, really.

prepping the legs
Accordingly, I wanted to be sure of my height, so I considered the exhaust run from where I expected the furnace to be over to the chimney. By suspending a long exhaust run, I could consider the angle of assent and the final destination for that edge of the furnace. From this, I could measure and math to the needed length for the furnace stand legs. You may notice from the pictures that I needed to move a couple of the blocks around too. Once satisfied, I took the rack back out from the crawlspace and cut the legs. Since the stand is really just unbraced legs, I added angle-irons at the bottom so I could mount the stand to the patio block. I then took the pieces to the crawlspace and re-assembled the stand. I set the stand where I planned, marked the holes on the patio blocks and took the stand apart again. Now, I could drill holes and mount the legs to the blocks. With the legs attached to the patio block, but not torqued down, I could set the stand top on, and then torque the concrete screws. I checked level along the way, pleased that all of this amateur work is level. Last, I bolted the legs to the top, using blue locktite so they would not work themselves loose from furnace vibration.

With the rack assembled, I was ready to move the furnace onto the stand. The gas line and the electrical will both enter the furnace from the bottom, and these will need to be routed so the "front" cover can be removed for seasonal servicing. The electrical entry has some wiggle room, but the gas line does not. I needed to account for these as I considered where on the stand the furnace would be placed. The stand is more than large enough to account for that adjustment and the space beneath it has ample room to run gas and electric.

rack installed
The furnace is heavy and the ceiling in the crawlspace is limited. I had feared that pushing and lifting it would be quite the undertaking for me (Boo had to work). My fears were not warranted, it turned out. To prevent the furnace from getting scratched up, I left in place the moving blanket in which we had moved it around under the house. This also reduced the friction as I moved it around. I set the furnace rear-ward of center on the stand, further from the chimney. This aligned with where I had expected it to go, mostly, leaving me with an exhaust run of around 3 feet along the plane, with a slight diagonal turn in it.. when I install it. The picture at the top of the post shows how it is right now, and no, the end furthest away is not touching the ground; it just kinda looks that way.

Exhausting
Once the furnace was in, I spent some time rough-assembling the exhaust. This consisted of taking the old exhaust down to it's most basic pieces and assembling a path that had the correct angles and took a slightly indirect route so I could route the cold air intake without interference. Once roughed-in, I took it back apart so I could easily get to the other side of the furnace. I have a great deal of "conditioned" air work to do, and having the fuller access will make that work easier.

This has gotten super long, and it has covered a few weeks of work. I was able to get another few hours in, but I'll couple that with whatever I get done next weekend into my next post. The calendar says 7-November, so, clearly, the weather is starting to get cold. We were fairly motivated when the daily high temperatures dropped into Autumn temps. We are getting overnight lows below freezing now, so there is no lack of motivation nor pressure. Still, I want to do it right and have a safe space once it is completed. Since I am doing it mostly by myself, it will only go so fast. At this point, I hope to have an operational furnace by the Winter Solstice.

Thanks, as always, for following along-

Tuesday, October 17, 2023

Chimney Repaired

In my last post about the NewOldHouse work, I described the efforts by the chimney guys. Today, I get after repairing the chimney and then sending a liner down through. I didn't take pictures when I was up on the roof, nor did I appear to get any after I removed all the failed-mortar ones. Oh well, there are a couple shots after the chimney after mortaring.

Out with the Bad
liner in, cap placed
This was actually very straight-forward and simple. With a framing hammer and an empty 5 gallon bucket, I climbed onto the roof. I set the ladder into an inner turn of the roof line so it could set against the gutter in the corner. This made getting on/off the ladder easier. It's funny how fglat a roof looks from the ground and how not-flat it feels once you're on it. Anyway, I carried the bucket and hammer over to the chimney to see what the chimney guys described. Sure enough, the mortar holding the bricks together at the top of the chimney was failing. After initially thinking I would just remove the loose bricks and clean them up on the ground, I fell into a different pattern.

As I removed each brick, I smacked the mortar that still clung to the brick with the hammer, directing the crumble into the 5 gallon bucket. Once the brick was unwilling to release any more mortar, I set it on the roof and moved on to the next one. Once the top course was clear, I swept the crumbling mortar into the bucket. I repeated this process for the 2nd course and found that the corner facing south west had additional loose bricks, so I took 3 or 4 out of the 3rd course and 2 out of the 4th course. Once they were all cleaned of mortar (and in some cases what looked like silicone), I swept up the roof into the bucket and climbed off the roof.

In with the Good
The next time I was able to get on the roof was the following weekend. Fortunately, even after the cold and wet weather initially arrives, we will often get some nice weather patches before the cold wet really sets in for the winter. This week and weekend were like that. So, leveraging a 5 gallon bucket as the means of mixing and transporting mixed mortar, I returned to the chimney work.

joiner for brick mortaring
The instructions on the bag and on the internet agreed that for 17 bricks, I needed to mix up 1/2 of a 80# bag of type N mortar. I had almost half of the mortar left when I was finished, so I think everyone overestimates how much product is wasted or lost in the process. Anyway, I put about a quart of water in the bottom of a clean 5 gallon bucket and then added around half the bag of mortar in. On top of that, I added water and mixed with a drill-attached mixer I got at harbor freight for mixing paint. It worked perfectly, getting the mortar evenly mixed. To test the water:mortar concentration, I learned that if you can scoop some onto a trowel and hold it vertically... and the mortar doesn't slide off... it's right. If it slides off, it's too loose. On my first go, it was too loose so I added some more mortar and mixed again. This time, it held to the trowel. Winner! Next, the mortar needs to rest for 10 minutes before use, so I set up the ladder and hauled tools up to the roof. The bucket of mixed mortar was last. This is some heavy stuff, so I pushed it up rung-by-rung ahead of me.

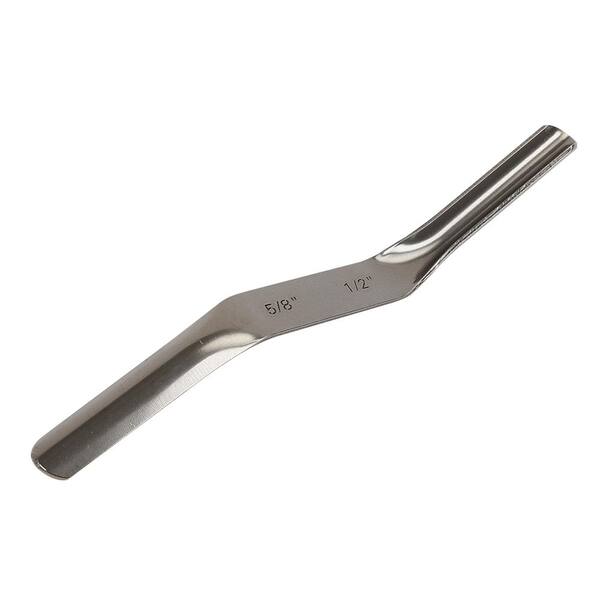
Once on the roof, I set to learning how to mortar bricks by doing. I'd watched a few videos, so I knew the basics, and after a few bricks, I actually got the hang of it. My process was to slap a blob down first, then butter the adjoining short end before setting the brick in place. I then pressed it down, squeezing a little of the mortar out the sides, but eliminating air pockets in the process. Then, I would peanut butter spread mortar along the outer and inner seams. Last, I would use the brick joiner tool (image above until HomeDepot changes the URL) to clean up the outer seam. Using this process, I set 17 bricks in just under 2 hours (the use-life of mortar is 2 hours after the 10 minute rest period).

Liner In
mortar fixed, no cap
With the chimney repaired on Saturday, I returned on Sunday to confirm the work. Things looked great, so I shifted to installing the chimney liner. I ordered a replacement liner to run the full length. I could have found a short section and abutted it to the end of the original liner, but finding a 3 meter (9 foot) length was a challenge. So, I removed the original liner from the cap and attached the new liner in it's place. The new liner arrived all compressed so I had to stretch it to the needed length. I set it on the ground alongside the old one and measured another 10 feet beyond that point. I then stretched out the new liner to that 10 foot point.

I hauled this bundle up onto the roof and slowly passed the liner down through the chimney until it hit bottom. Boo had been my on-the-roof witness (strongly advise you have a partner around when you are on the roof. One good wind and you could be on the ground. Without someone there, that could be life-altering... or -ending). At this point, though, we needed someone in the crawlspace so she got down in there. We lifted the liner up a touch so she could grab hold and then she simply pulled it through the hole. As she pulled, I pushed down on the chimney cap, until the ap was settled and the liner jutted out from the chimney by about 6 inches. Once the cap settled onto the chimney top, I could apply construction adhesive and fix the cap to the chimney. I chose to leave it until the furnace work is complete, though, in case we need to move things. Down in the crawlspace, Boo added the stiff adapter tube to the end of the flexible liner, reflecting the original install, and providing a firm surface to attach the furnace exhaust / flue.

I chose not to do anything more with the liner at this point, preferring to let the furnace work dictate where and when the liner would be cut in the crawlspace. I expect it will be cut similarly to how it was before: right at the chimney wall where a transition to a hard exhaust will appear. With the chimney  and liner solved, all of the outside work is complete. Next, I will be cleaning up the other rectangular ducting and then we can start to fix the furnace either to the ground or suspended from the floor joists.

That's it for now. Thanks, as always, for following along-

Tuesday, September 26, 2023

Down in the Hole

Today's post is continuing the fun with the furnace. We took a weekend off for a family wedding and all the events around it. So, when we returned, we had a hole cut in the floor, a dozen 5-gallon buckets worth of dirt removed from beneath it, and the furnace slid over to the edge of the hole.

Chimney Cleared
placed for now
Before Boo and I got after moving the furnace, we felt that getting the chimney liner removed and the blockage between the floors removed needed to happen first. Also, by keeping the furnace out of the way, the chimney folks would have the most space available. We hired a father son team (DGC Chimney Service) to do the dirty business we were unable to complete ourselves. This also created an opportunity to have this chimney inspected and repaired, if necessary. They started by removing the aluminum sleeve out the top of the chimney. It is in re-usable shape, so we just need to add about 8 feet to it and re-feed it down the chimney to vent the new furnace location. Once it was out, they cleared the mortar plug that had been placed between the floors and then swept out the remaining soot. After an inspection and read-out, they were done. All-in, they were here for 2 hours.

lowered
During the read-out, they shared that the top 2 courses of the chimney needed to be repaired. These are not structural, so they insisted a homeowner could do it. Otherwise, the chimney is in incredibly good shape. The age of this house pre-dates the building code requiring the terra-cotta tile liner. Prior to that code change, masons would apply a thin layer of mortar by hand inside the chimney as it was being constructed. Once complete, there would be an uninterrupted skin from bottom to top. While cohesive, this was a great liner of a chimney. Unfortunately, this mortar is more sensitive to the acidic emissions which pass through a chimney. When the residue on the mortar skin is met with rainwater, the mortar is slowly eaten away. So, ordinarily a house this old would have some areas of the mortar liner, especially nearest the top, compromised. That is not the case here, so somehow we're lucky. Perhaps the chimney was cleaned annually. Regardless, I need to repair the top 2 courses and re-introduce a liner down through to the crawlspace.

Furnace Lowered
rotated 90*
With DGC's work complete, Boo and I could return to moving the furnace. As I mentioned, it was on the edge of the hole in the floor and I had dug out a bunch of dirt below. To keep things clean, we set out a blue tarp over the dug-out hole. Then, we wrapped the furnace with a pair of load straps, tying the ends so the furnace had 2 long canvas straps around it. Boo and I used those straps as handles, shifting the furnace first over and then through the hole in the floor. The hole was cut exactly right for the size of the furnace, but it di not account for the machine screw heads sticking out from the sides. So, the furnace would hang up on the screwheads on the floor joists. We encouraged the furnace to pass with a booted foot and once the screwheads passed the top edge they dug into the joist just enough to prevent the furnace from falling through. A couple of centimeters after the top edge of the furnace passed the bottom of the floor joist, the furnace rested on the blue tarp.

Once on the ground, Boo ducked through the hole where the furnace used to be and returned the furnace from the crawlspace. Then, as I lifted up on the straps, Boo pulled the bottom edge towards her, tilting the top away. The furnace rotated on it's horizontal axis until it had turned 90*. At this point, I climbed down behind the furnace and Boo and I wrapped it with a moving blanket. Then, as Boo pulled, I pushed the furnace over the plastic vapor barrier over to the base of the chimney (to be fair, Boo pulled more than I pushed). We left the furnace like that, wrapped in a moving blanket, and not quite where it's going, but fairly close.

More Vent Fun
insulation stripped
With the furnace somewhat settled, I took a closer look at the rectangular vent/ducting we had taken down for the furnace removal. It looked awful. The ducts had been wrapped with open-cell pink fiberglass insulation. On surface, that sounds like a great idea, but this crawlspace had been inhabited by rodents. So, the fiberglass was, uh.. let's just say guh-nasty, gross, disgusting. Wearing a respirator (of course), I removed the insulation from the larger run and carefully swept up the droppings and dust into a plastic garbage bag and removed the bags from the crawlspace. The other duct needs to have a similar treatment, but the one which was stripped of insulation now looks brand new. We had feared that they would need to be replaced, but now, we will simply clean the insides with a vacuum and long-handled brush. Of course, with the furnace re-location, the venting will need some re-orientation, but we may be able to escape with only a few small pieces rather than a full vent replacement.

This is where we're at. For Pacific Northwesterners, you are well aware of how our weather has shifted from summer to autumn-ish over the past few weeks. Overnight low temperatures have dropped into single-digit C (below 50*F) and daytime highs are barely breaking 20C (68*F). Not having an operational furnace nor a meaningful alternative heat source may very well become an issue before we get the furnace operational, based solely on the speed at which we have gotten to this point. Fear is the ultimate motivator; we will have heat this winter. It will be interesting to see if we have heat by Halloween, though.

Thanks, as always, for following along-

Tuesday, September 12, 2023

Digging a Hole Where the Furnace Gets In

Kindly forgive the Beatles song stretch. Today is a brief post covering a considerable amount of sweat and effort: getting the furnace moved into the crawlspace.

Can You Dig It?
dig hole
In my last post, we cut a hole in the old kitchen floor just inside the door to the garage. The hole is one floor joist wide, allowing the most narrow dimension of the furnace (~11cm or just over 14inches) to pass through. We decided that the height (depth?) of the other side of the hole would be the largest of the 2 remaining dimensions of the furnace. We could have used the next-smallest. We figured that whichever dimension remained would need to be available between the bottom of the floor joist and the ground. Since the plastic-sheet covered dirt floor was 2 feet (60cm) +/- from the bottom of the joist, we would need to dig. The furnace has one side that's about 28-1/2 inches (72cm) and it stands 33-1/2 (85cm) tall in it's original alignment. Our choice was to dig down 4 inches or so for the size of the hole or dig down almost a foot (25cm plus wiggle room). I suppose the mount of dirt to move is the same, its just a question of depth versus width. Still, it just seemed like digging shallow and wide felt like less dirt.

With the hole cut in the floor, I grabbed a 5 gallon bucket and the post-hole digger. I filled a bucket, hauled it up and outside and spread the dirt around a low spot on our lawn. I did that at least a dozen times. Once the main rectangle was dug, I considered that once the furnace was in the hole, we needed to tip it one way or the other to get it flat so it could slide around. So, the edge of the rectangle that faced towards the furnace final destination was cut down on an angle so we could pull that bottom edge up and away from the hole. I figured that if I had 28 inches from the bottom of the hole to the top of the dirt as measured from the inner edge of that floor joist, it could effectively hinge. By the nature of how this tip, though, that front edge will come up between the joists and not have an issue. It wasn't until after completing the dig, that I pieced that together and determined that I dug out more than I needed to. Ultimately, it is better to have too much room than not enough.

Venting Some Venting
venting set aside
With direct access into the crawlspace, Boo and I looked towards the location where the furnace would ultimately reside. Our view was impeded by supply venting routed all over. There are 2 main runs, heading in opposite directions: one towards the hole we just dug and the other going away. From these main trunk vents, the smaller round vents are attached. Where the 2 main runs come together is a large box (plenum?) where the conditioned air leaves the furnace and enters the system. All of this stuff needed to get shifted out of the way before we could bring the furnace down.

We started with the vent that ran from the box towards the hole. This system is old, and held together mostly by faith and tape. Boo removed the tape at the box, and the vent detached easily. She cut down the cloth webbing that suspended the vent from the floor joists and the whole thing dropped to the floor. She slid it to the side. I followed suit, removing the vent running the other way by the same steps. This left the big box.

the box
The box was simply hung from the floor by a lip that was less than 1/2". I lifted the edge of the lip with a bladed screwdriver, pressing the lip up and inward while sliding the screwdriver along the edge. The lip simply folded under the floor. Once the final side of the box's lip was so treated, the box fell to the floor of the crawlspace. I was (and still am) amazed that a heat system constructed in the late 1940's was held together without any fasteners. I removed the connectors attached to the box that allowed the vents to connect and then lifted the box out through the hole.

Sooty
blocked with soot
The last thing I tried to complete before lowering the furnace was removing all the soot from the clear-out. I foolishly thought that I could dig out the soot that was at the clear out down in the crawlspace. Well, it looked like the clear out had maybe never been cleared out. I was able to remove a full trashbag of soot and was unable to reach any further up into the chimney. Looking down from above (through the original oil? wood? coal? furnace-to-chimney access, I could tell there was at least another foot of solid soot I could not reach. So, Boo and I decided that we would bring in a professional. Many years ago, I had used British Brush to clean and repair chimneys at various houses. Well, they are out of business so we hit Yelp / the Yellow pages and solicited bids. In the end, we have some chimney repair from when the furnace was in the dining room, probably a new liner from the cap to the clear-out and then a safe connection to which we can attach the furnace. My biggest concern about this whole furnace move was to safely manage the exhaust and not accidentally create a CO or CO2 issue inside the house. Having a professional will help.

This is where we are left off. We have the venting removed, the furnace freed, an access hatch built and the hole dug for moving the furnace. We decided to leave everything just like this until after the chimney folks do their thing so they have the greatest mobility. We have some family events coming up, so the work needed to come to a stand-still anyway. We will pick this up after that.

As always, thanks for following along-