Showing posts with label water. Show all posts

Thursday, May 22, 2025

Building a Shop - Execution Planning

I get that the topic of building a shop/garage may not be terribly applicable to many folks. There are whole chat rooms and websites dedicated to the topic, so what do I know. I accept that for most people you probably only ever build one, if that. So, for those who are thinking about it, maybe these posts are useful since I am a total noob documenting what I am learning as I go. There wasn't much to take pictures of so I included a shot I took from the roof of the house we rented in Mexico and one of Nina, showing the license plate registration year.
 
Survey?
sunset in Mexico
I mentioned in the last post about permitting that I talked to a senior inspector and he indicated that having clarity in the property line was important for a swift inspection prior to pouring concrete. I started pricing a general survey of the "back 50" and the numbers I was getting were disturbing: high 4 figures to find and mark the monuments (corner medallion perched atop a 3' long iron bar driven into the ground) and lines. I discovered that one of the guys I bang around on guitars with is a surveyor. He hit the county website and identified when the monuments were installed (1950) according to county records. Since this is the back of a few different peoples' properties, one would presume they had not been disturbed. So, he lent to us one of his metal detectors to find the iron bars.
 
When he offered a detector, I had a mental image of a speedo-wearing dude walking around the beach with one of those things with a big disc at the end of a stick, getting waved across the sand as he shuffled past, plucking up lost jewelry. Yeah, that's not a surveyor's detector. A surveyor's detector is purely magnetic, and only registers iron. So, since most of the fences around that part of the yard are wood, I was able to find most of the markers very quickly. The marker in the southwest corner, however, was buried by whoever put the wooden fence in, and that fence intersects an old cyclone fence made back when they had higher grade steel than the ones built today. So, that fence made the readings a little less clear, but I felt confident of what I identified as the corner pin.
 
For each marker that I found, I took one of the many white 10x20 canopy posts I have from the failed canopies and drove it over/around the marker. From these markers we could determine measurements. I could also assess the neighbor's fences and determined that the fence installers who buried the monuments also did not follow a straight line and the fence bows into our property by a couple of inches. Is what is, but it challenged our stringing a line between the posts. I was able to find monuments along all 3 of the sides of the back 50, however, so we can determine the positions for the excavation.
 
Concrete Bids
Nina
I also mentioned at the end of the prior post that we were soliciting bids for the concrete. I was not happy with the 3 bids we had, so I hit Yelp, looking for another one. Yelp has that little checkbox asking to include others, and I hit that too. After clicking send, I had second thoughts, full of visions of getting overwhelmed with spam, my phone blowing up, etc. Those were unfounded, though. I did find myself juggling 6 more concrete companies, but this allowed me to get far more competitive bids. All but one company made a site visit and had a conversation about the work, the distance from the street, and options for various aspects of the work. Including excavation, it will still run us in the neighborhood of $15k, though, so our vision of a concrete slab with a steel building sitting on it has a growing price tag approaching $40k... and it doesn't have a garage door nor lights nor gutters and downspouts yet. I did not account for any of the costs other than the building when I started this. I am learning that while the building is the largest single cost, it might only represent half of the overall cost once complete.
 
Ultimately, we went with one of the companies who did a site visit, and the company was on the lower end of the bid spectrum. Their bid was so competitive, we decided to have them do the excavation as well. We had intended to have our friend Glenn do the machine work while we helped with site lines, laser-level depth determination, etc. When I shared the bid with Glenn, he was very direct: have them do it.
 
Excavation Planning
future shop location
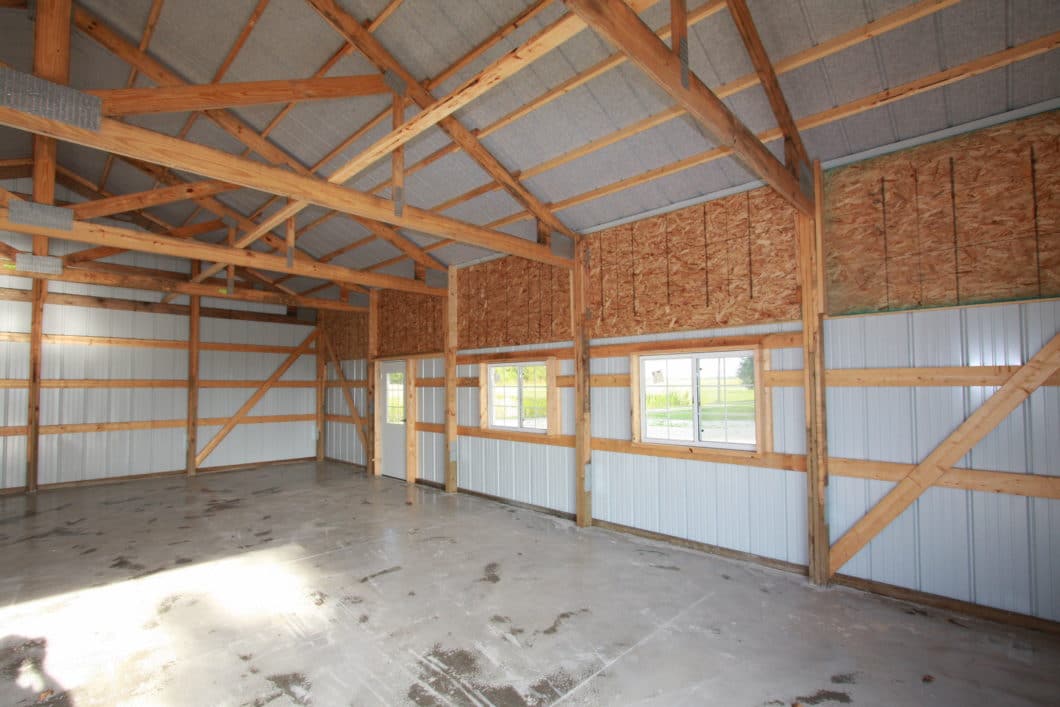
Even though we are hiring out the dig, there are a few things we need to have sorted before the machine shows up. The pitch of the site is only a few inches from west to east, but when the spec for the footer is 1 foot and for the floor to be 4 inches of concrete atop 4 inches of compacted gravel, a few inches makes a big difference. Since we get lots of rain here (newsflash: it rains in western Oregon), we felt it was very important for the floor to be above grade by at least an inch at the most uphill point, or the western edge. This meant that the soil at the most downhill only really needed excavation for the gravel, leaving most of the concrete above grade. Since I will be hauling / pushing inoperable vehicles into that garage, we elected to set aside a meaningful pile of extracted dirt for leveling in front of the garage after the concrete sets. I recognize that I will probably need to pour a concrete ramp eventually, but that is not on the permitted plan. At this point, we talked about digging a little bit extra on the west (highest) edge so after the concrete is in I could put in a french drain, routed over to the downspout plumbing and on to the storm outflow.
 
storm outflow site
The storm outflow also needed some thought. Recall, the storm outflow was required by Clean Water Services so storm water run-off from the roof doesn't become a water management problem for our (slightly) down-grade neighbors. The minimum size for a storm outflow is 4 feet by 8 feet by 18 inches deep, and they get larger as your building footprint grows. I don't know the rate of growth, but our 720 square foot building is still well below that threshold, so we get a minimum. Regardless of its size, it needs to be at least 15 feet (5 meters) from any neighboring property line. I had added it to my site drawing at the point closest to the southeast corner, 15 feet away from the lines. When I went to that location, I decided that it was too close to the large black walnut tree and digging there could damage the roots. So, we moved it 3 meters north, further into the property. This is still well within the property line proximity specification, and I will learn if the inspector cares about the storm outflow location accuracy regarding the site drawing or not when s/he/they inspect the site. In the image on the right, the outflow is marked with yellow tape. This is the new location. The tree in the right rear of the picture is the black walnut I am trying to protect.
 
Wrapping Up
We will be signing the agreement before the weekend, and with a gap in the concrete contractor's schedule, the excavation could start next week. This weekend, in order to make room, I will be pushing Nina (new-to-me yard-find 1964 VW Beetle, in the image above) out of the path to the build site and whatever else is necessary to make the job site as accessible as possible. Before you ask, no those are not US-spec tail lights, they are the euro-spec tail-lights with the yellow turn signal section. There are a few not-original-spec or missing-original items on this car, like the bumpers, but that's part of the discovery fun.
 
Boo and I are stunned that this is happening so quickly. If he hadn't had a gap in his schedule, we would probably be looking at 3 or 4 weeks. Those were the timelines I was getting from the other contractors and those schedules were filling. It seems that when the rain stops, pouring concrete is a nearly round-the-clock business, until it starts raining again. I recall the painting business was the same way back in the day when I did that.
 
After the job site is accessible, I will be trying to get Hapy to start again, with a 4th starter replacement. This time, I got a new Valeo starter as directed by TDI guru and great guy Justin. I hope this one will last longer than a few hours. For everyone's knowledge, I tried and got burned by...
(1) a rebuilt Bosch starter from a reputable online vendor, 
(2) a brand new "SEG" starter, apparently a rebrand of a good starter manufacturing company, from a different reputable online vendor and then 
(3) I had my original VW starter rebuilt by a highly regarded alternator and starter rebuilder in Portland's east side who has now retired.
All 3 failed within a few hours of installing. Since I used to be able to move Hapy around the driveway just by using his starter (yeah, I know. Don't do that kids), this is not a case of "it's Hapy's fault". No, there are just that many poorly built starters and these TDI engines need reliable hi-torque.
 
Thanks, as always, for following along.

Tuesday, May 6, 2025

Building a Shop - Permits

In my last post which was my first in, like, 6 months, I mentioned that I had been working on getting a 2 car garage / shop built on the back of this property. Today, I will go through some of the steps and offer them up in an order that would be the path of quickest completion versus the order in which I took them which was "taken as discovered". It is probably important to point out that this is for Unincorporated Washington County in Oregon. If you are legally within city limits, you will probably have their permitting department to work with. Regardless, I suspect many of these same steps will be needed, though the specifics may differ a little bit.

Where to Begin
The first step, of course, is to decide what you want, but the very next step will be figuring out if you are allowed to do that in your space. For example, we originally wanted a much larger building. In retrospect, it really would have been overwhelming the space, but anyway, we start with finding out what the zoning will allow from the interactive map at the county website (link here). From the map, there are a few useful links, including the "District Overlay" which includes your zoning and setback (how far from property lines the structure can be) requirements. If you click on the little "additional information" blue text, the information rectangle on the left unfolds to show the lot size in square feet at the bottom with a "Shape.STArea()" label. For overall building size, you need to consult building code 430-1.1B (link here). Using the lot area size and the % allowed from the code, you arrive at the size building you can add to your lot. We arrived at 800 square feet, and planned for a 24' x 30' relatively standard oversized 2-car garage.

Build or Buy
While not exactly part of the getting-a-permit process, this decision definitely influences all of your future steps. You could order plans and have a structure built either by you or by a contractor. If you go the contractor route, you may still need to do the permits. I thought about going the stick-built route and concluded that there would be much more permitting and inspecting if I did. Instead, I ordered a pre-fab steel building that is assembled on-site by the manufacturer. At the time of the order, they provide engineering plans for permitting purposes that have your building's specifics already included. Since our shop/garage is a standard size and shape, special engineering was not needed. We did request for extra strength to be added to the roof so we would have the long-term option of adding solar panels. The current canopy is prohibitive right now, but not all of the trees creating that shade are healthy, so the situation may change. Better to have the stronger roof and not need it, I figured.

Draw Your Site Plan
Because of when and how I did my plan, I literally had to do this 4 times. I started with a screen grab of my site map from the county website that included the map scale, pasting it into MS Paint. For my final site map, I then stretched the image so it nearly filled an 11x17 tabloid piece of paper - set landscape (so 17" side wide, 11" tall). I pasted a sanitized version to the left, here. Include all measurements and the reference numbers as well as a short description of anything which might create confusion. The planners need to see the setbacks, zoning "R" number and the height of the building. The Site Plan must be in landscape form saved as a PDF to be accepted.

Water Planning
Next, we have to consult with 2 different departments within the greater permitting group at the county: Grading and Clean Water Services. The first group (Grading) considers whether your planned structure meets zoning code, whether you need a grading permit and how you are managing stormwater. As an output from their review, I needed to add a stormwater outfall to catch the downspouts to my site plan. This is required for basically every structure which requires a permit in Washington County now, and the outfall location guidelines are more restrictive than the building. For example, the building can be 5 feet from a side property line, but the stormwater outfall cannot be within 15 feet of any line.

Next, we consult with Clean Water Services. They consider your water sourcing, water waste and erosion implications. Since this is a garage without plan to build a bathroom, water sourcing and water waste were not a concern. Erosion control during construction, however, was of interest. This lot is virtually flat, with a slight west-to-east pitch. So, Clean Water Services indicated that we need to have those long hay bale/tube things (called "straw wattle") running along the eastern fence to prevent any erosion or water runoff to impact the neighbors during construction.

It is important to note that the soil CANNOT be disturbed prior to sign off from Clean Water Services. This includes stump grinding, but obviously also includes use of any moderately heavy equipment or excavation. I had been told that the permit was only needed for the building and not the flat-work. This is absolutely false. If you start preparing the ground for concrete before Clean Water Services issues their permit, things will be much more difficult and you will be on the permit folks radar for the rest of your project.

File Permit Request
In an ideal process, you would not even file for a permit until you have had consultations and site plan modifications to reflect those consultations. I was not following ideal, but I didn't know I needed those things until the permit process started and I was informed. Now you know better than I did. Anyway, filing for a permit to start is easy: go to the website, fill in the one-page form and pay the initial fee (there are multiple fees with more later). The process will start and you will learn all the forms you need to create including a checklist which identifies the things above.

I used the provided checklist to make sure I had everything before I started uploading documents and then uploaded them in a big bunch. Again, I did this 4 times. There are 2 folders, one for documents and one for plans. While I don't know for sure, the impression I got from my fumbling and re-uploading was that the engineers look at the "plans" folder and the process/zoning people look at the documents folder. With that perspective, I put the document index (numbered 001 per their instructions) into both folders. I also put the site plan into both folders, though I wasn't sure at the time whether that was a good idea, once I received my approval from Grading (meets zone and water management requirements) I concluded it was probably not a bad idea. I included the email from Grading indicating that a Grading permit was not required (adhere to the numbering scheme for all uploads), thinking that if I could provide every relevant scrap there would be fewer hang-ups and delays.

On the engineering side, because it is a pre-fab, mass-engineered building, I thought I could simply upload what was sent to me as-is. That was not correct. The engineering plans need to be individual pages, with their own 0-leading numbers, identified individually on the page index, and each saved as an individual PDF.

If you mess something up, the permitting system will be updated by the person handling that portion of the permit and mark the task incomplete and give you some indication of what is wrong. I found that the closer I was to having it right, the more detailed the "what's wrong" statement was. Like, when I just uploaded the engineering plans as one big PDF all I got was essentially "plans not meet convention" or something. Not terribly helpful, but I guess I figured it out because...

Current State
In March, I got the permit approval, pending paying the final fees. I think overall I paid close to $2k just in permit fees for a building without electrical nor plumbing. Since these are mass-engineered plans, I did not expect an issue, especially since the wind and snow load specifications are clearly on the front page. Also, since we requested the roof to be able to support more-than-typical weight, the extra support throughout the building should more than meet code. Once I understood what they were asking for, most of my work was actually at the front end, drawing the site plan and including all the little detail bits about the property that they need to triangulate into their various systems.

To prepare for the next steps, Boo got us 3 of those 25-foot-long straw wattles. It should be worth noting that these things, once abundant in the big home improvement stores, are for the most part no longer sold there. I say that because no one stocks them except Lowes and they charge 4x what they used to cost. We found them at United Rentals for the used-to-be-typical price of $30 each. Lowes is charging $120. Seriously. Bite me, Lowes; this is exactly why I never shop there. I set the wattles in place last weekend. Next, I will get Clean Water Services to come back and approve us for soil disturbance. Then the stump grinding will start, followed by excavation.
 
We have 2 concrete bids and we are waiting on a third. The first 2 were so different price-wise, I think Foundations First (the outrageously high one) was just giving us a go-away price. Once we have the 3rd bid we will start the excavation.
 
Closing Thoughts
I spoke with the county about inspections. I mean, what's the point of a permit if they don't circle back on the work, and the detail about when to contact for inspections was unclear. After talking to a senior inspector, I learned that for a pre-fab building without water nor electrical I need 2 inspections: one right before the concrete is poured ("a 106") and the "final" after the metal building is in place (but prior to any wall coverings). I do understand now why oftentimes folks will hire someone to do the whole thing, including the interactions with the county. There are so many details, it is easy to miss one and if you miss the wrong one, like getting the property surveyed before you start digging, you may have to at least suspend the work and at worst do it over again.
 
Obligatory car content
Hapy - currently not running. I believe I messed up the IP seal replacement and after replacing his starter multiple times he still won't start
Oliver - sits covered and untouched. I think I will be selling him next Spring (or earlier if someone offers)
Zed - sits covered and untouched. I pulled the cover this weekend looking for my feeler gauges and got me all excited to work on him again
Nina - did I mention that a 1964 VW Beetle fell into my lap? Yeah, so named after Nina Simone cuz it was built the same month as one of her albums dropped (can't find the reference I used to determine that), this car has not been licensed since the late 90's. Total yard find. Lots of work ahead to get it road-ready
ToyoTruck - daily driver, running like a champ. Still needs to get painted after the body repair a few years ago
Astra - Boo's daily driver, this Saturn just runs. Change the oil on schedule, and otherwise point and shoot

I know it has been a while. Work has been consuming most of my focus since my team lost a couple of my peers to lateral moves within the company. The back-fills have been slow to get up to speed. So, I have been doing the work of at least 2 people since November. Is what is. Thanks for tuning back in. I don't know when I'll have time to post, much less do stuff that's post-worthy. I started this one in February. LOL.

Tuesday, February 13, 2024

NewOld Kitchen progresses

Quick check-in post today on the state of the kitchen. Most of this work is being done by others while I work my 9-5 and then Boo and I clean up or move stuff around on the evenings and weekends. The construction has been moving at an incredible pace after so many months of seemingly slow-go. To be fair, I was only really getting after it on weekends versus a crew working multiple days. So, it's probably not fair to me to compare. On the personal side, my band's EP (find detail here) released on Groundhog's Day (2-Feb) and my sister came to visit for the following week. 

Where Were We
current state
Once the floors were finished, we could get moving forward on the kitchen. Consider, we have been living without a kitchen for about a year. Instead of a kitchen, it has been a version of an efficiency apartment where we have a fridge, but only a crockpot, a single burner hot plate, a microwave and a hot pot for making food. I suspect most folks, at least Americans, would have lived on take-out food. Had this project only lasted a few weeks, we might have gone that route. Into our 12th month like this, however, yeah, we could not afford that. After the plumbing work I described last time was completed, our electrical rough-in was done by our friend Gary.

Electrical Started
For electrical, we simply focused on the "sink wall", making sure we had juice where we needed it for the dishwasher and disposal, as well as some over-counter outlets. Last, he ran a line for task lighting over the sink. Since that initial work, he returned to run the 220V for the wall oven and the 110V for the fridge. He will return to run lines for the stove and some additional outlets.

Drywall and Cabinet Set
rough plumbing done
With the electric on the "sink wall" done, Ray, our general contractor was able to get the drywall repairs completed. This included some of the rough bits around the new rear door, the holes for the old furnace location, the false beam where I removed that wall and everywhere else in the main kitchen space. Once drywalled, mudded and sanded, they primed and then painted. Once dry, the "sink wall" cabinet was cut down to fit the dishwasher, and both were set in place. They continued by installing the pantry cabinet and fridge, and then the cooktop peninsula. The cooktop peninsula, similar to the sink wall cabinet, was cut down to fit our space. Again, most folks design and buy cabinets to fit the space. We bought and are customizing. Considering the cost of new cabinetry, both in terms of dollars and environmental impact, this path is far less expensive on both counts.

So we could get a sense of the workability of the space, Ray cut down some 3/4" plywood for countertops and pin-nailed them into place. The cabinets along the once-furnace-wall have not been cut down and installed yet but already it feels like there is considerable space to work in. We have not had a kitchen in a while, so it is more pronounced for us, but visitors have made similar observations: for what looked like a really small space from outside, it is looking like it will be very functional with lots of counter space. Boo and I have been calling it the TARDIS-effect. Dr. Who fans unite.

Water and Gas
setting pantry depth
For the water rough-in, the plumber did everything he could that did not require a permit. From that point forward, the work is either mine to complete, or I need to get permits and farm it out. Boo and I decided to split the difference: I do the work, but have the gas plumbing inspected by the gas company. Fortunately, the water is quite simple these days: shut off the main, release the pressure (dumping water down the drain) and do the work. In terms of the work, there are shark-bite valves that are no-solder connections. I simply cut off the closed nipple on the end of the pipe and attached the shark-bite around the pipe. It really is that simple. Once the valves were on, we could re-pressurize the system and check for leaks. Seriously, it was that easy; I have no idea why that part of the plumbing needs a permit while the pipes in the walls don't. 

For the gas line, we ran 3/4" pipe from the "T" near the furnace over to the peninsula in the crawlspace, but did not connect it. Instead, where the union will be, we capped it off. At the peninsula, we necked down the 3/4" pipe to 1/2" per standard to pass through the floor. Above the floor, we added a pressure gauge. All of the joints were coated with pipe-dope, of course. We applied air-pressure into the pipe run (from cap near the "T" to the pressure gauge) to 15 psi to verify there were no leaks. As of the publishing of this post, the pressure is still holding at 15 psi. We did all this so we could document it with pictures for the gas company inspector. We do not have the inspection scheduled yet, but after 5 days of holding 15psi, I think we have demonstrated we are good. I expect to finish the gas line next weekend.

what's next
That's as far as we've gotten in the last couple of weeks. It has been a whirlwind of activity, though. Next up will be the construction of a cabinet to hold the wall oven, installing the oven into that and then installing the cabinets along that wall. We have not made any decisions about upper cabinets in the main work area. At this point, however, we are considering leaving the walls without upper cabinets nor open shelving. We have a cabinet we call "the Archie" that we expect to install next to the oven cabinet (on the all in the picture on the right, here). It is possible that it will be the only upper cabinet. Again, we'll see how it evolves.

Thanks, as always, for following along. Hapy broke his speedometer cable a couple of days ago, so I will be posting on that replacement as soon as I've completed that.

Tuesday, November 29, 2022

Fare Well, Nemo

Brief post today.

Nemo Departs
This past Spring/Summer, I thought I had sold Nemo (1997 Audi A4 Quattro) to our friend Garry. After repairing the driver rear bearing and replacing the axle with it, the power steering blew a hose and he lost interest. So, it came back. Truth be told, Nemo never left the driveway; Garry did the repair here. I figured I would do what was needed to get Nemo through smog and then figure out what to do. So, I repaired his exhaust, replaced the catalytic converter, downpipe and O2 sensor. I was ready to take him to Oregon DEQ when  the NewOldHouse purchase happened and so Nemo just kind of sat. Fast forward a few weeks and I get a text from Garry, now living in Idaho. His friend expressed interest. So, I shot some pictures and video with my phone and sent them on. 2 days later, he is here, with a friend, a truck and a tow-dolly. They crawled around on Nemo for a while, took him for a drive.... paid me cash and drove away with him. Just like that, the herd is thinned my one.

Mom Moves
With my Dad's rather sudden decline and then final departure early this month, my Mom lost the person who had eyes on her 24/7. Her health has been an issue for some time, so having her living alone in a somewhat basic assisted-living facility was no longer safe for her or the facility. So, she is moving to a stepped-care facility 4 blocks from here. That move is today (29-Nov). Since her space is significantly reducing, we will move her and her most treasured belongings to the new place. Everything else is moving here, so it can be gone through with heat and beverages and comfortable seating.

NewOldHouse Update
Since my CoViD battle ended, I have returned in earnest to the restoration of the NewOldHouse. When the flooring guys were here last Summer, they removed all of the 1/4-round. As they removed it, they clumped it by room and taped the clumps together. Unfortunately, some of that careful work was undone, and some of the 1/4-round went to the dump. What remains is semi-documented. I have been puzzling-out which pieces go where, re-marking them and then shooting them with BIN primer. Once dry, I set the pieces where they will be re-attached to the baseboard. Prior to priming, they get the nails removed and then a good cleaning. I have a small pile of un-matched pieces and a larger pile of not-yet-attempted pieces. I will be continuing this game next weekend.

Other than playing with 1/4-round, I resolved the canopy catastrophe, consolidating 2 damaged canopies into one viable one. You can see things are back to "normal" in the picture on the right, with the "Jerry" canopy restored. If you look closely, you can see stacks of 1/4-round under the canopy on the left (Phil). I have also cleaned, rust-converted and painted the heat vents. We decided that the original vents could be salvaged, and if they were painted a color that roughly matched the floor, they would sort of disappear into the wood floor. For the most part, this turned out to be correct, though I don't have a good picture to share.

The bathroom progress was temporarily halted by the discovery of the sub-floor damage. Boo crawled back under the house to see how extensive it was.. and it is really quite contained. There are 3 1x4 (sub-floor) boards that rest between the top of the beams and the wood floor which need to be replaced. But even then, the section that needs replacing is only between 2 beams, and the beams themselves are in great condition, showing no damage from the leak.

As part of the preparation for a bunch of mom's stuff appearing here, I tore down the living room stereo equipment and moved it out of the way. While this isn't terribly interesting stuff, it does further prove that life is either Tetris or Monopoly, and today it's Tetris.

With each passing day spent at NewOldHouse, it feels more and more ready for occupancy. Sure, we don't have a functioning bathroom yet, nor will we have a functioning kitchen for some time. Still, we believe that we will be moving into NewOldHouse by the end of January. I guess that's it for today. I know there isn't much car content these days; that is also true of my life, and I feel it. The sooner the house is ready, the sooner I will be back wrenching on Hapy. Thanks, as always, for following along-

Tuesday, November 8, 2022

Who'll Stop the Rain

Short answer: no one. Today's post is about managing around that unstoppable rain that appears every autumn in the Pacific Northwest.

Before I begin, my parents have been experiencing health issues and appear to be entering their last chapter with us. My musings here have not included them much, but my son T and I moved them here 12 or 15 years ago from the Boston area. They have been a consistent presence in our lives ever since, especially for Boo. Their recent health decline started almost immediately after we signed the paperwork on the NewOldHouse. Accordingly, our time has been split between tending to them and the NewOldHouse projects. Boo and I have also hosted various family members who travel into town for well-wishing and visiting the folks. If you were wondering why we were moving so slowly, these factors are certainly part of it. In truth, the time spent doing something on the house is a welcome respite from the near-constant gravity we feel as we watch their final days approach. We welcome your prayers (in whatever form that takes for you), and encourage you to connect with your elders, or your youngers, if even just for a few minutes.
 
UPDATE.... I wrote this entry on Thursday (3-November), and my dad's health took a nosedive almost immediately afterwards. My family members who are not local rushed to Oregon on Friday, and we said our final goodbye to my dad on Saturday (5-November). A week earlier, Dad and I were sitting around talking to T about his life in LA. Time really can be unpredictable. 
 
On to dodging the rain-

Garage Coveting
one can dream
I have been working on a fleet of cars without a meaningful garage, much less a shop, pretty much since I started this blog. The house we have been in for the last 6 years, much like the house we were in for the 3 years before that, has a basic 2-car garage. Prior to that, we were in a condo with no garage at all. Unlike the last house, this 2-car garage really is too small to fit a car any larger than an English compact (Mini, MG, eg). So, the only car that has been parked in the garage for a meaningful duration has been Oliver, the 1978 MGB. For a short stretch, Zed, the 1979 280ZX sat in the other bay. Zed is wider than Oliver, and that other bay is where all of my shelving of parts and tools was, so actually working on anything became impossible. So, I worked on cars in the driveway, and when it rained, I worked in the rain. When it was 95* with a blasting sun, I set up a small shade, but generally worked in the heat. So, a couple of years ago, we got those canopies for the driveway. These were absolutely heaven-sent, allowing me to clown on cars out of the worst of the weather extremes nearly year-round.

NewOldHouse has an original, attached, single-car garage with the original door. That door alone, is pretty cool in that it has cables and pulleys connecting to a large counter-weight to help you open and close the door. Regardless of the cool factor, only one car can fit, and after asking Boo to park in the rain for 9 years while I took up the indoor spots and the canopied area, that one garage spot needs to be hers for the next 9 years. Or longer.

Sheds and Canopies
the "fourth" canopy
The NewOldHouse came with 2 chicken shacks, that I mentioned last time. One of them will hold my parts and tools. The sheds lock, and at 8 feet wide by 12 feet deep, plus nearly 10 feet tall at the peak, they are large sheds. Some of the tool-shed floor needs repair, but that's a weekend day of work. Otherwise, it's clean enough, and after I shoot the interior with Kilz and then basic white paint, it will feel like an entirely different space.

But, what about the cars? I have too many of them, yes, but I still need to keep them in fairly good shape, and not let them rust out from below nor get rained on all winter. To remedy, I started by moving the 2 canopies around and behind NewOldHouse. Under the one closest to the house, I parked Zed. The one next to it is dedicated to the car I am working on other than Zed. For now, that will be Nemo, I think, to get the passenger window regulator replaced, the power steering working and maybe add a stereo. To compliment these 2 canopies, I bought 2 more ($140US each at Harbor Freight), and assembled them nose-to-rear adjacent to the side of the first 2. The furthest of these canopies is now 40 feet from the house, and will protect Oliver from the rain. For a floor, we got gray tarps, again, from Harbor Freight. These will act like a vapor barrier, keeping the wet ground from encouraging rust from below. Because rain doesn't come straight down, I will need to get out there with a squeegee after rain storms to keep the water from pooling under things.

The fourth canopy (between the old and new canopy) is set up outside the shed, and will be my staging ground for parts from the old garage. I expect to spend a few weekends this winter simply going through parts, sorting them by vehicle and purpose so I can find things more easily. After getting that tool cabinet (See $50 Tool Chest), and sorting my tools, I was stunned by how much faster I was able to work simply because I could find the tool I needed so much faster. I figure if I can do the same for my parts, I could see a similar improvement.

At some point, these canopies will correlate to work bays. Rather than number them, and accidentally create some kind of priority or pecking order, I have named them after my Grateful Dead heroes: Jerry, Phil, Pigpen and Bob, from nearest the house to furthest from.

Downspouts and Diverters
spider legs, right
I mentioned the foundation vents being below grade, and some of my efforts to resolve for water getting into the crawlspace (basically digging out around them) in my Vehicular Paperwork post. Part of the below-grade problem is the location of the downspouts and the fact that they, like so much of the rest of the house, are original to 1948. Back then, houses did not have their downspouts connected to a central sewer system; they simply dumped water on the ground next to your foundation. If the ground is higher than the vent, then that water dumps into your crawlspace or basement. Neat. To remedy, Boo and I got a few box-style diverters (like this) which have a square catch bin that you set under the downspout. Attached to the side of the catch bin is a 8-foot long, 2-inch diameter flexible hose that you route away from your house. We did this for the downspouts which dumped near a vent. For the remaining downspouts, we used old-skool technology: a simple u-channel style diverter (like this) that you set on the ground under the downspout and the water runs down the u-channel to the other end, moving the contact point of water-to-dirt 2 feet or so further away from your foundation.

new canopies
We tried a few other things before landing on these solutions. We tried digging ditches for the water to follow. It wouldn't. Then, we tried flexible hosing attached to the end of the downspouts. Those worked, sort of, but we needed to gang a few together to get the water far enough away from the vents. And, they were white, so from a distance, it looked like the house had grown spider legs.

The day after we installed the linked diverters, we got almost 1/2 an inch of rain. While the rain was its most intense, we were at the house, and looked at how the diverters performed. They handled the volume easily, routing the water well away from the house. The below-grade foundation vents remained completely dry. While I still intend to do something to protect those vents from water entry, I don't feel like that is an emergency any longer.

That's it for today. Thanks, as always, for following along-

Tuesday, September 27, 2022

Floors and Door

Today, I am continuing the ongoing efforts on the NewOld house, that farmhouse around the way that Boo bought. Similar to the Creepy Crawl Space, we hired for skill for the floors. So, this post is really just before and after shots. We also replaced the front door. Something that relatively insignificant didn't really warrant it's own post, so I tacked it onto the end of this one.

Clean
cleaning
I regret that I do not have pictures of the floor before we got the house. We saw them and they were scary. Once the place was fully vacated, we could see what we were up against. There were historic pet stains. There was water damage. There were sticky spots, discoloration, kitty litter dust and general filth throughout. So, while Boo was cleaning the kitchen and bathroom for the second time (the first was while I was power-washing the outside), I took a first run at mopping the floors. I found that I was able to rinse the mop two or three times before the water was gray and needing changing. So, I started nearest the water source to shorten my trips. I spent a few hours doing this, and never really got the water to stay mostly clear for more than a few rounds with the mop.

Once the overall mopping appeared to be becoming fruitless, Boo switched to focusing on the worst spots first. This improved the spaces, but, again, there was a lot of floor, and simply getting them cleaner was not going to make them good enough. We needed them to be sanded and clear-coated. This is not a skill I have, nor is it one I want to learn on a floor I intend to see every day. So, we hired the guy who did the floors in the house we're currently in.

Sand and Stain
sanded
Thomas and his crew arrived on a Monday. By the middle of the afternoon, all of the quarter round was removed, the plastic was up to seal off the kitchen and half of the floors had already been sanded. It really makes sense to pay for others' expertise on some things, and, in my opinion, this is one of them. They hit the main floors with an upright belt sander, and did the tighter areas by hand. Once sanded, they vacuumed the entire floor and them applied a thin veneer of putty to fill the imperfections and fill the seams between the boards. The next day, the putty was dry, so they hit the floor with a sander again, vacuumed again and then applied a stain. Why a stain? Well, even after sanding there were some stains that just would not come out. Some of the animal waste and water stains were too deep. By using a uniform darker stain, those inconsistencies disappeared. Our current house is very dark in the winter, so we were really hoping to not have dark floors, but the alternative would be an inconsistent "distressed" look which might look interesting, but may not appeal long term.

Cleared
stained
After letting the stain sit for 2 days, they returned to apply the high gloss clear coat. This is applied with what looks like a long, thin, flat mop. The resulting coating stands up to animal claws, dragged furniture, etc.. all within reason, and has a brilliant shine to it. Boo and I were not thrilled with a darker stain, bit the high gloss may help offset the darkness.

Close the Front Door
When we acquired the house, it was apparent that someone busted the deadbolt on the original / existing front door. The door frame was damaged to the point where a good shove with your shoulder would open the locked door. The existing door was effectively a "contractor grade" door intended to be the door during construction that is later replaced with a fancy door. Back when I painted houses, the reason for this was obvious: we sub-contractors banged into everything, especially if it was nice. It's not like we looked for that stuff, it was just always right in the way.. like the front door. So, one of the last things done before handing the house over to the owners is to hang the fancy front door. Unless they didn't buy one, in which case the construction door remained. Such is the case here. 

Anyway, We hit the Habitat for Humanity rebuilding center and bought a replacement pre-hung used solid wood front door for $65US. It is not perfect in that it does not close perfectly, but it will keep the bad guys out when locked, and it hangs level so it will not swing open or shut without someone moving it. The upper leading corner (the end with the handle, not the hinge) and lower leading corner do not sit all the way into the frame, so we will need some thin foam in the door jam to keep the wind out. Or we may need to fiddle with the middle section so that sits deeper in the frame to help seal the edges. Regardless, it is a much nicer looking door and it locks.

That's it for today. Thanks, as always, for following along-

Tuesday, April 3, 2018

Bye Jaws, Hello A4

Our stable of cars has had a small change. Today's post covers that, and the fun a new car brought with it.

Bye Jaws
Jaws
I didn't really post much about the '87 Jeep Cherokee, except during a complaint about having too many cars (See Oh Clutch). Jaws was T's daily driver, transporting him back and forth from home to Reno Nevada and back multiple times, back and forth to Sacramento, the mountain and his job for over a year. He poured plenty of money and love into that Cherokee. Brakes and oil, like any other car, of course were changed. He also replaced the clutch, and I replaced the rear window. He installed a bluetooth stereo and other creature comforts. In the end, though, he didn't want to put any more money into it, and at over 330k miles, I can't say I blame him. Within a couple days of posting on craigslist, he had multiple respondents and he sold it off.

Our A4 History
T's first car was an A4. It was a 2.7L non-turbo, but he loved it from the day he bought it (See Gotta Keep Moving). The guy he bought it from was the original owner and he babied it. Unfortunately, the timing belt needed to be done (see Planning Winter Break), but that wasn't obvious until much later. He got a stereo earlier and had it butchered by Car Toys (see Flash Gets Sounds), but moved it into the A4. Ultimately, he decided he wanted something different, and traded it for a Subaru. The guy with the subbie said he was an Audi guy, but ultimately, the trade may not have been a very good deal for either of them. We saw the A4 back on craigslist a few months later with a blown engine, so we guessed that the "Audi guy" didn't heed the warnings about doing the timing belt immediately. The Subbie got broken into in Reno and totalled by the insurance company so neither car fared especially well. T did learn some things through the ownership of both cars, so, maybe it wasn't all bad.

Hello A4
the 2.7L at purchase
This brings us to the newest member of the herd. Once Jaws was gone, T drove Dude (our 2000 Saturn) to work while he saved up some money. He wanted a black A4 again. He found one without having to look for too long. Same make/model/year as his old one, but the new one has a 1.8L turbo and a deep brown leather interior. So nice. T is the third owner, and while it has higher miles than the last one (225k), it has lots of fancy bits like an upgraded suspension and a bigger exhaust. It needed a timing belt done, had a really bad coolant leak from the pump and has a leaking power steering system. Of the issues, the timing belt and cooling pump were most immediate. T bought it and had it delivered on a wrecker on a Friday night. T and I attacked the coolant pump and timing belt the following morning.

Timing Belt Discoveries
We shied away from the 2.7 timing belt job a couple years ago because it was a dual-overhead cam. Keeping everything aligned and getting the belt on correctly with 3 gears (2 cams, plus crank) felt too big. Yeah, we got a-scared and begged off. T wanted a different car anyway, or so he thought. Anyway, one cam felt do-able.

We followed internet directions, but there were things that we discovered that were unexpected. For instance, I was really surprised how easily everything came apart. Seriously, after working on VW's, I expected the Audi to be equally difficult with a gazillion different fastener types and weird tools needed. Nope. We needed a big Allen key for the large serpentine gear on the end of the crankshaft and Torx for getting the front radiator / core support and a few other things off. Otherwise, it was pretty common hex nut/bolts. The internet directions were spot-on. I'll find and share the link. We suffered no rust, but there were a couple fasteners that were torqued on so tight, we needed to solve for a breaker bar. For example, those Allen bolts holding the serpentine belt gear. We took the pipe that is used on the floor jack and slid it around the Allen key. That allowed for a smooth application of force, and the bolts released without stripping.

Zoom Zoom
After a Saturday of pulling it apart and starting to put it back together, we spent a few hours on Sunday finishing the put-together. To be fair, T did almost all of the work while I continued the tear-down of the donorZed. Still, the timing belt parts fit cleanly, and after flushing the cooling system we were ready to test fire. It started right up. Seriously, it started like it hadn't sat for 6 months and then gotten towed and a timing belt service. The aftermarket exhaust gives it a nice low growl. So, after a very short test drive where a charged-air hose popped off, the rest of the front end was put together and T took a longer, more spirited test run. In his words... "that thing can pull!" Clearly, he likes the turbo. It's his first turbo, and now that he's felt it, he probably won't ever willingly go back to naturally aspirated.

Well, that's it for today. T did discover that the sunroof is not operating correctly. With the rainy weather not going away and 2 cars already occupying the garage, we'll be tackling that soon. Outside... in the sprinkles. Neat. Oh.. and there's a coolant leaking from somewhere. Ahh.. the joy of new-to-you cars.

Thanks, as always, for following along-

Tuesday, January 30, 2018

One of the Many Joys of Home Ownership

Taking a short and unexpected break from fixing cars, today's post is a distraction. Sorry I missed a post last week. I spent the week flat on my back fighting off one of the worst colds I've ever suffered. The story below didn't contribute to either contracting nor prolonging that cold.

Basics
If you were to break down the core requirements for a dwelling, and then prioritize them, what order would they fall into? I'd start with shelter from rain and wind: roof and walls. After that, one could argue that everything else is nice-to-have, especially in more rustic parts of the world. In the non-rural areas of the States (like most countries), things like running water and some form of temperature control are assumed. Hot water even. How about a not-dirt floor? Sure, that sounds modern.

On top of these basics, lots of folks are trying to layer in "smart" technologies so they can turn on lights or set the thermostat from their phone when they aren't home. Sounds cool, but after the whizz-bang wears off, do people actually use that stuff? I don't know. I'm pretty sure the excitement wears off in a few weeks and pretty soon you've forgotten the password.

Heat Wave without Water
Anyway, when one of these basic systems fail, you realize just how precarious and fragile your security bubble is. Last Summer, we awoke to a failed water heater. It failed in glorious fashion, leaking water all over the garage floor, trashing cardboard boxes, carpet and anything non-metal as it went. It did create an opportunity to clean the garage, of course. And we took it. More importantly, it reminded us of the fragility I mentioned. Since it was July, and one of the hottest stretches of the Summer, lacking a shower had an extra burden to it. Additionally, I couldn't figure out how to fix any of the plumbing so that there was water pressure  even just cold so we were without water for a few days. Again, it was Summer, and we had kids enjoying Summer break, so there were many trips to the corner store to bridge the gap. I installed a new water heater, and we were back to normal in a few days. Looking back through my posts, it was such a non-event, it didn't make it into even an opening or closing comment, much less garner an entire posting.

6 Inches
This brings us to our latest reminder of our fragility. It was the end of the calendar year, and my extended family had retreated to the mountains. T had gone out of town and C had to work, so we had a couple of friends minding the house (more specifically, minding the cat who was really minding the house). C had a few hours on Friday before he had to work, so he stopped over to grind some paint off the rear driver quarter panel. As I mentioned earlier (See: Z - Work that Body), we had moved the ZX project into the garage. C, expressing concern over getting dust everywhere, pushed the ZX into the driveway to grind the paint. When he was finished and had to get off to work, he tried to push the ZX back into the garage. With the slight uphill into the garage, though, he couldn't. So, he fired up the engine to move it in ... but accidentally put it in a little too far... pushing the big red rolling tool cabinet into the water heater... which pushed the water heater into the pipes behind it. It moved about 6 inches. Those 6 inches started an avalanche of trouble.

Above the water heater, the feed line burst, sending a thin stream of water over the top of the water heater and on top of the rolling tool cabinet. At the bottom of the water heater, the gas line split, venting natural gas into the garage. The couple minding the cat turned off valves and called the gas company, but before long the fire trucks arrived, cherries flashing. Fire fighters kicked everyone out of the house. The gas company closed and locked the meter. The cat-minders were let back into the house after the fumes cleared, but by then it was after 6. On Friday, December 29th and freezing temperatures were forecast. With no water. And no heat. And no one available to fix anything until the following Tuesday... if you're lucky.

Cold Snap without Water... or Gas
Fortunately, one of our cat-minders is a handyman. He was able to re-establish our cold water (so the restrooms were functioning) and repair the gas lines. With a few space heaters and a portable Coleman stove they were able to mind the cat until we got home. You see, the gas company won't turn the gas on until someone licensed performs a leak-down test on the repair, then they will inspect it. Only after that will they turn the gas back on. I understand their conservative approach, but when the temps are below freezing, the process could really use a fast lane.

Boo and I got home on Jan1, and were met by the cat-minding couple. We surveyed the damage, expressed our appreciation for keeping both the cat and the house safe... and for helping C through a rough time. Then, we started reaching out to a contractor we know to get everything back to normal again. He, like so many folks immediately after NewYears were groggily getting back to work. He was available to connect with us on Wednesday. He surveyed the work done by the handyman, thought it looked pretty good and started calling for the gas company to come take a look.

We learned that indeed the gas company won't turn on your gas until a leak down test is performed, but that was not even the half of it. Before the gas company will talk to you, you need the gas lines inspected by the city. The city won't inspect non-permitted work (even if, or maybe especially if, it's done by a home owner). So, step one: get $167 down to city hall and get a work permit. Then, schedule an inspection. We were fortunate and we got inspected on Wednesday evening. While waiting, we ran the leak-down test and pressure-tested the hot water heater (both passed). The inspector was one of those who felt the need to find things wrong, and he cited a bunch of things to be changed even though the repairs simply exchanged broken pipes with a not-broken pipes. So, Thursday was spent making all kinds of additional changes involving 2x4's so the inspector could return Friday morning, which he did. He approved the work, and switched our "red tag" on the meter to green (meaning the gas company was allowed to turn the gas back on, pending their inspection). Then, the contractor was allowed to hook up the water heater and try to get NW Natural to turn us back on. The NW Natural inspector arrived shortly before 5 on Friday, approved all of the work, making comments about the age and condition of things, and then turned everything back on. Unlike the city inspector, there is no requirement for us to do anything the gas company guy said, so we probably won't. As it stood at this point, those 6 inches cost us about $1000US with about half of it because of things the city inspector added. At least we didn't need to replace the water heater.

Normal?
By Friday night, things were back to normal. T had returned from out of town and grabbed a shower. We had the heat cranking to raise the base temperatures of the no-space-heater spaces, and our little bubble was starting to reform. As we sat down to dinner, we realized that we hadn't had the TV on for almost the entire stretch we didn't have heat or hot water. It seemed as though our having to glamp in our house shifted us to a different mindset. We had access to other modern amenities, like the internet and cable television; we just didn't use them. Instead, we sat in the hot tub and talked, or focused on basics like getting clean with an electric kettle and a dishpan. As the days of suffering fade into the past, it was just as interesting to see our old use patterns return as if they had never left. It does make me wonder how much of our daily behaviors really stem from independent thought versus rote actions we've honed over time. Perhaps, if the environment changes enough, the rote behaviors don't come into play.

Well, that's all I have this week. We are back to normal. The garage was an absolute mess afterwards, so I spent the following weekend cleaning things up. The progress on the list of car projects has ground to a halt, pending the no-gas and clean-up, so there may be a short pause in postings while I get some blog-worthy things done. The missing post from last week was purely sickness related, so there could be more ahead. Sorry.

Thanks, as always, for following along. More soon-


Sunday, August 17, 2014

Welcome 2dot0

While searching for parts for Flash (the TDI Jetta recently wrecked by T), I found a perfect parts candidate.  Or is it more?  The one on Craigslist was a year younger, but had 192k miles on it.  A gasser with a 2-dot-slow engine, it was the GLS model with a tan leather interior and a bruise-free white exterior.  The biggest drawback: the owner believed he had blown the engine, and had left it untouched since mid-February.  Today's posting is the adventure we had with this listing / car.  Found on Thursday, I wanted to get there right away, which meant driving up the next day.

Oregon -to- Washington Friday Afternoon Traffic
First things first, the parts-car-candidate was living on the far North East corner of Vancouver, Washington.  Since I live in central Beaverton, that represented a 40 minute drive without traffic.  On Friday afternoon in the Summer, it can take considerably more time.  Like almost 3 hours one-way.  Fortunately, I drove Dude (2000 +/- Saturn) and his A/C was working fine.  Still, 3 hours of bumper-to-bumper rubber-banding traffic is hard on a clutch leg.  When I got there, the owner's wife had chosen to happy-hour with her friends, so the owner wasn't really able to focus attention on what we were doing as he had to manage little kids.  Turns out, she hadn't signed the title so it didn't matter if he wanted to do the deal or not; he couldn't.  So, after agreeing I wanted it and that he'd hold it for the weekend, I set back home into the reducing rush-hour traffic.

Haul it Home, Eventually
I got up the next morning (Saturday) and called AAA to see if I could get a tow from Vancouver.  After I was assured that the wait time would be around 30 minutes, and to call back when I was with the victim, I set off back to Vancouver.  Unlike the afternoon before, the drive this time took 40 minutes, even with a detour down Columbia Blvd. to avoid a 2-lane wreck just south of the Interstate Bridge.  I re-contacted AAA at the car and was given a 45 minute expectation.  Perfect.  The owner and I exchanged pleasantries, money and forms, then pushed the car into the street.  I climbed into Dude to wait for the tow truck.  And wait.  And wait.  After an hour, I contacted AAA to see what was going on. and I was given a revised time of another 75 minutes.  Crap.  The alternative: hire another tow company and hope AAA would reimburse it.  By the time the tow truck arrived, I had sat in front of the old owner's house for 3 hours.  I gave the tow guy directions, explained my need for food, and we set off separately.

I only stopped for about 15 minutes to eat, but that was enough of a head start for the tow truck to get to my house, drop the car and leave.  Boo was there to catch it, fortunately.  She and I pushed 2dot0 into the garage so I could consider it's engine's health.

2dot0
The prior owner had told the tale of how the car had fallen into its current state.  It seems that the early February snow storm I mentioned in Front Bumper (part 2) played a major part in 2dot0's demise.  He had driven to the community college for class and had been wrestling for traction in the snow when a large white cloud of smoke came out from under the hood.  He quickly wheeled into a parking spot and killed the engine.  He figured the engine was seized and had the car towed home after the snow cleared.  Because of the weather, getting that tow was a long wait; way worse than mine.  He was unable to get the engine to hold water, so he gave up on it, bought a different car and listed it to make room in his driveway.

$40 Later
That's where we come in on Sunday.  I did the same thing he had been doing: pour a little tap water into the overflow bottle and see if/where it comes out: slightly behind the front driver's wheel.  With a bare hand feeling for where dry meets wet, I was reminded of my diagnosing issues with the cooling leaks on Hapy.  That was the moment I realized it was the same coolant flange which had stymied me with the bus for a year.  Off to O'Reilly's Boo and I went to get a replacement flange and G12 coolant.  On removal, we could see that the old flange had split at the collar almost halfway around the underside.  I put on the new flange, topped off with tap-water to verify the leak, and presto! no leak.  Now the real test: try turning it over.  It started right up, but it blew lots of smoke.  I feared a failing head putting oil into the combustion chamber.  Still, we pulled 2dot0 out of the garage and I took a test drive around the neighborhood. It ran very well.  Brakes grabbed a little bit, but the steering was sure.  The engine had some pep (for a non-turbo 2.0) and the smoke went away.

Get Legal
On Monday, 2 days after having the car hauled home with a "blown engine", Boo and I went out to dinner in 2dot0.  The following Friday (after getting insurance), I drained the water and filled the cooling system with G12 coolant and distilled water.  Then, embraced more risk with a drive down the highway to the DEQ.  We passed, though I hadn't filled the system entirely with coolant and the temp ran high on the way home.  We didn't overheat, though, and we found a shade-tree under which I was able to top-off the system safely.
This past Friday, I ran the paperwork through DMV and got Oregon plates.  Between DEQ, DMV and the parts at O'Reilly, I spent over half of what I spent on the car.  For any other purchase, that would sound really bad, but this was a $500 car.

Now what?
So, now we have another car in the stable.  The question is, "what do we do with it?".  With such a high-mile engine, top-end work is inevitable.  Maybe bottom-end too.  We decided that since it hadn't had the benefit of many miles of trust-building, it will be my 2-miles-to-work car when the weather turns rainy.  T will continue to drive the dependable TDI (Flash), and we returned Joan (really large SUV) to Boo's ex-husband.

That's it for today.  I'd heard of folks getting a really great deal on a car, but after buying and selling over 10 cars, I'd never had that kind of luck.  Until now.  The stories are real.  Since I was looking for a parts car, getting a working car wasn't on the radar, but that's what I got.  I'll post next time on how we resolved the parts we needed to get Flash looking better.

Tuesday, April 22, 2014

Timing your Purchase

A friend of mine asked me about getting a VW bus this past week.  I thought I'd do a little post about what advice I gave.  T and I spent Saturday playing in the snow on Mt Hood, so I'll write a little about that too.

Spring in the Air, Snow on the Mountain
This has been one of the weirdest ski/snow seasons I can remember in the Pacific NorthWest.  We had virtually no ride-able snow until after the Winter Solstice.  SkiBowl wasn't officially open until well after New Years Eve (and they've been closed since the first weekend in April).  After a lame early and mid-season, the late season snow has really been coming on strong.  I'd seen that Timberline had been getting consistent snowfall last week, so after hosting a family friend from Australia and helicopter-parenting C to an 8:AM lacrosse game, T and I spent Saturday on the mountain.  The roads were wet from the steady rain, SkiBowl looked like late Spring and the Summit ski area looked like a spring meadow.  Our expectations for sliding were quite low.  As we ascended Timberline Highway, though, the rain slowly gave way to wintery-mix and then a steady snow.  The parking lots were nearly empty, but the falling snow wasn't sticking... to the asphalt.  It was definitely sticking to the slopes.

The smaller terrain parks on Thunder and Walt's Way had been taken down, leaving just the jumps.  So, while the high-fliers and hard-core terrain riders played on the big stuff fed by the Stormin' Norman lift, T and I had Thunder and Walt's Way to ourselves.  Neither of us had been on the snow much since his concussion, so it was really nice to just feel the snow under our feet and hang out together again.  As the day wore on, the snow got better, and the jumps less scary.  By the last run, we were both getting air (T doing tricks, me mid-air panicking) and sticking landings consistently.  It was a great day to play in the snow.

Pick One
As I mentioned at the start, I was asked about buying a VW camperbus.  I obviously love the idea.  There are 4 viable used models to choose from: splitty (T1), bay-window (T2-called "bays"), vanagon  (T3) and eurovan (T4, T5).  They all have their upsides and downsides.  Splitties look neat, but they are the most under-powered and probably the most rusty.  They can be very spendy as collector cars since they fell out of production in 1967.  Bays were sold from 1968-1979 in the US and were the most widely built/sold around the globe.  They were manufactured through 2013 in Brasil, making part availability unequaled.  Of the 4 styles, these are probably the least expensive.  The vanagon (1980-1990) is probably the most roomy, or at least it feels the most roomy, and is more powerful than most bays.  Called water-leakers by many, the early cooling systems are prone to rusting and failing.  Still, the Synchro (all-wheel-drive version) is really cool, and the camping portion of the vanagon is well done when compared to the bay (especially the early bays).  The Eurovan (T4 1990-2003, T5 2003-current) doesn't feel like you're driving a bus, but the interiors are very nice.  It could be the most reliable on the day of purchase, but also the most expensive to maintain, and it still feels like a standard mini-van behind the wheel.

When to Buy, When to Sell
Once you've chosen a target vehicle make/model, the next most important step is deciding when to buy it.  While this may not seem terribly important, it very much is.  You could considerably overpay if your timing is wrong.  I'm kind of a used-car market geek, trolling craigslist and eBay alot, and I've noticed distinct patterns.  We are entering the worst time of year to buy a car.  Car dealers hold "dad's and grad's" sales, so you'd think there would be excess inventory they are selling off.  In reality, there are lots of buyers in the market heading into Summer, and the car lots are trying to get those shoppers.  Who doesn't want a new-to-them car to play with all Summer?  Lesson to shopper: wait.  Wait until July when the price spike starts to pass.  As Summer wears on, prices drop until they bottom out in October.  By then, anyone who wants to get rid of a car before Winter is willing to take a loss rather than store it.  What remains after mid-October are cars held by sellers who think their car is worth more than it is, or very unusual cars which hold their value, but are only interesting to a niche market.  Over the Winter, the supply is thin so prices stay somewhat stable; not at late-Summer deal prices, but not as high as late-Spring either.  By March, prices start to climb again.  So, if you want to buy a bus, wait until the end of the Summer when the last guy who had that dream has decided he doesn't want to deal with it over the Winter.  Deal for you, and they found a new loyal owner.

That's it for today.  Sorry I didn't have any pictures of us playing in the snow.  We were too focused on enjoying the conditions to record how good it was.  Seriously, there's still snow in them thar hills.  Go play while you still can!

Tuesday, April 1, 2014

Thinking while Dinking

I unexpectedly had Sunday available to putter on the bus.  Boo was supposed to work, but suddenly didn't have a shift.  So, after a visit to the gym (I really need to do that more), I opened the garage door, turned on some tunes and pondered the bus.  Sometimes, you need to just be with your project to have an epiphany.  I had a flash of brilliance that (hopefully) could solve the wet-weather challenges for good.

Cutting Cards
I decided that a free afternoon shouldn't count in my build versus buy math since the afternoon was free.  So, I pulled out the Dremel and cut another door card.  Okay, back up.  First, I took the first door card I did and started trying to hang it on the passenger door.  I found little things that needed to get adjusted.  The grab handle holes weren't big enough.  Then the inner latch surround thing didn't fit.  Last, I realized that the holes for the door clips weren't there.  That was kinda fun, actually.  I took the ratty old door card and laid it on top of the new one.  I set those on top of a fresh piece of MDF.  Once lined up, I grabbed my drill with a 3/8" bit and bored straight through the door clip holes in the ratty door card into the new one and the MDF underneath.  Perfect.  I pulled the ratty card off the stack and traced the other holes and around the edge.  30 minutes with the Dremel later, I had a duplicate of the new card.

I still need to do a little sanding around the edges to make it a really nice fit.  The holes line up well and the grab handle, window winder and inner latch all mount correctly now.  Its just a little 100%-ing around the edges.

Hanging the Plastic Curtain
Originally, the early VW's had a "vapor barrier" between the door card and the steel door.  This was because no matter how good your seals were, water would seep inside the door, and could slowly rot the MDF/cardboard cards.  Most VW's have had these plastic sheets ripped out by stereo installers or confused mechanics, and their door cards have accordingly suffered.  I have tried a few different things over the years to get a plastic sheet to stay in place, but spray adhesives, contact cement and gorilla glue don't work.  Or they work too well.  Ultimately, I've just driven around without door cards while waiting for the answer to appear.  I found a posting on a website where a guy used that blue poster tack stuff (called BlueTac), and said it worked great.  I'll be trying it myself: a thin line of that sticky stuff all along the edge, taking care to avoid the door card mounting holes.  It occurred to me that this might be the solution I've been looking for with the belly pan too.

The belly pan, if you don't remember, is really a mechanical protection against rocks and such.  I've been trying to also use it as a splash-guard to keep the pedal electronics dry.  I'm going to try using the BlueTac solution with a sheet of plastic.  Figure, if I can protect a door card, I should be able to protect the electronics the same way: simple sheet of plastic held in-place with BlueTac.  I should also be able to cover the uppers, making the small sub-floor water-safe.  Neat.

That's it for today.  I bought some 3M-verson of BlueTac at Office Depot yesterday so I'll try the plastic thing this week.  Until then, here's another picture from the door card development effort.
3/8" drill bit fits perfectly in the mounting holes