Showing posts with label air filter. Show all posts

Tuesday, March 15, 2022

VW Bus Cold Air Intake

Back when Hapy was getting regular long summer drives, I noticed that the engine bay would get pretty warm. Recall back to the Newberry trip report for example. So, I put together a cold air intake concept to drop the temp going into the turbo inlet. I really do not expect to notice much of a performance difference. While I understand a cold air intake can reduce intake temps, and improve engine performance by a handful of HP, I just don't think what I did will have that kind of impact. Still, it was fun to do.

For someone running the original engine, with the engine tins and surrounding foam in place, this modification makes absolutely no sense. The tins already effectively separate the hot side of the engine from the air intake. If you have lost your tins (or foam), and for some reason cannot replace them -or- you are running a modified engine where tins cannot be fitted, something like this might work for you too to keep the hot side from meaningfully impacting your intake air temperature. This whole bit is triggering memories of that old Burger King advertisement about keeping the hot side hot and the cool side cool.
 
Before I begin, today marks the Ides of March. I am not really sure how to recommend ways to celebrate that. Pay off your debts? Enjoy a celebration picnic with revelry and drinking? Wander out of town in an animal skin? Perhaps we can all just hope Putin will suffer Caesar's fate this day for the inhumanity he is visiting upon our Ukrainian friends. Whatever transpires, in a couple days, it will be St. Patrick's Day. So, I will just get some rest to prepare for that. Hopefully, we can tip a drink within 2 meters of dear friends to celebrate a post-pandemic Spring.

Orientation Thoughts
On topic, consider the VW bay window bus engine bay from the rear hatch (picture on the right is of a '68). Most to the rear on the left is an otherwise unused battery tray. Some folks (like late-bay Westy-drivers) have a luxury battery there to power the fridge when shore-power is not available. On Hapy, there are just a lot of wires, so it's actually not much to look at. The spare tire well hangs down towards the front, meeting the rear tire well. Above to the rear there is a tall open area that eventually reaches the finned ear behind the rear window. Running along the bottom edge, front-to-rear, there is a small lip or perhaps a pinch weld that's about half an inch tall. My thought: wall this in, and create a pass-through for my engine intake, isolating it from the heat generator (engine exhaust and the turbo). Keep the cool side cool.

Parts
My go-to for all things metal fabrication these days (at least for air movement) is HVAC flashing, and this is no exception: I started with some basic 20ga HVAC flashing that I had lying around ($0). Onto the air intake, I need to add a 90* turn ($14US from siliconeintakes.com) so the air filter which used to sit next to the rear end of the spare tire well can instead go into the new cavity. The last piece is pipe flashing (like this) which cost me about $18US to provide safe passage for the aluminum pipe through the HVAC. The air cleaner needs to fit through the hole left in the basic wall when the pipe flashing is removed, so getting one large enough for this purpose was important. I had some HVAC flashing lying around, but at the time I did this, a 4 foot by 3 foot sheet (common size) would have run about $20US. A smaller sheet would cost a little less, but not much. So, all-in this would cost around $50US plus your time.

Cleanup
paper model
I learned along the way that this wall idea is not as straight-forward as it looked. As I started trying to model with a large sheet of brown paper, I realized there were some wiring clean-up items left undone. I tidied up the wiring a little bit, and strung as much as I could into the upper rear corner where the fuel vent line passes into the new cavity, securing them together (and to the vent line) with a cable/zip-tie. Below this bundle of wires, at the rear-most bottom, a couple of wires need to pass as well, so that makes 2 gaps to manage. The front-to-back T-12 cable (See the Chasing the Hapy Electrical Gremlins posts for context) routes into the engine bay where the flat rear meets the upward angle of the rear tire well, so that's a third gap to seal. Last, the stock TDI engine management cable routes into the engine bay from under the center-point of the spare tire well, so that's 4 gaps. Had I planned for this when I did the wiring, I could have potentially cut this list in half, or even reduced it to one. I preferred to not revisit the electrical again this winter, after last winter's adventure. So, I made 4 distinct gaps for wires to pass through. I numbered them in the image of the paper model on the right, here.

Model with Paper
With the wiring bundled, I could start working on the wall... with a model. I started with brown packing paper. These days, so many things ship with large sheets of brown paper as the padding, and that stuff is nice and thick, and sometimes wide enough for things like this. It is also 100% recyclable (unlike the bubble wrap), so I'm doubly a fan. Anyway, I started with a basic measurement: 22 inches deep by 16 inches tall. Of course, I discovered that the hole is not square, and the 22 inch measurement is correct from the bottom of the rear wall to the point where the engine bay curves towards the fuel tank. The top is more than 24 inches from rear to top of fuel-tank compartment. Also, the section is not flat: the bottom curves slightly inwards while the top remains straight.
 
cardboard model 1
Then Cardboard
After a few rounds of test-fit, measure/cut and some added painter tape for strength, or for adding material for sizing, I arrived at an approximate paper model. I transferred the paper model to cardboard with a pencil using some tracing and some angle-square. Consider: the rear wall makes a 90* angle with both the top and the bottom, and (I thought) the rear wall is straight. The top run is straight, though I chose to cut some of the area away which would have been pressed against the spare tire well. I made this choice for 2 reasons: first, the vacuum control valves are mounted there, and I did not want to move them. Second, having a sheet of metal against metal like that would have created rattle noise I would have to solve. With my outline and wire bundle cut-outs defined, I cut the line with a razor blade and cleaned up the edges with scissors.

test-fitting a model
With this stiffer model, I performed another few rounds of test-fit, measure/cut until the cardboard wall completely covered the gap, the wire bundles easily fit through their respective gaps and the edges of the wall were clearly in a place where I could envision mounting. The final cardboard model, in-place in the picture on the right, also eliminated a large triangular shape from the lower front corner which would otherwise have set against the driver-side wheel well. Similar to the cut out from the spare tire well, having a large metal-to-metal contact area would create a vibration-noise opportunity. Looking back, this cardboard wall looked at least as good, if not better than, the final metal wall.

Then Model with Cardboard Again
The front and bottom have a lip I can easily attach to. The top and rear will need some kind thought and some creative drilling. One additional consideration: on the rear pillar, there are grounding points which cannot be disturbed. I decided to add a small tab on either side (above and below) to hold the new wall to the rear. The top will mount directly to the spare tire well for the front 2/3rds. The rearmost section of the top, will not get any treatment at all. I thought about it, and decided that there were already enough planned fastener points to hold the wall stable without adding another hole in the cabin floor. I transferred the cardboard model to another sheet of cardboard after a few repeated fit-attempts. I want to make sure the HVAC, when cut, will fit correctly. Last, I modeled mounting tabs with scrap cardboard and more blue painters tape so I would have them in the right place and the right size when I cut the HVAC. The picture above was taken before I added the mounting tabs to the model.

Plan the Intake Pass-Thru
note imperfect rear line
With the cardboard wall in place, that side of the engine bay looked considerably better... well, it hid what looked bad, anyway. Motivated, I planned the intake route based on the placement of the new 90* aluminum intake pipe. I made a rough cut in that general area of the cardboard wall and put it back in. The 90* pipe is too long on both ends. I needed to remove about 4 inches from the end that juts into the cavity, so there would be room for the air filter (7" tall from rubber grommet to chrome top) without it touching the side of the bus. The filter housing allows for up to 2 inches of pipe before it bottoms out, so there is some wiggle room for my cut on that end. Similarly, the engine-intake end of the 90* pipe needs to be shortened. Again, the silicone collar that attaches the new pipe to the air flow meter on the end of the intake allows for a couple of inches of play. I did not make the actual cuts to the pipe at this point, though.
 
The intake looked about right, so I added in the pipe flashing. I drew the edge of the flashing on the cardboard and then drew another set of lines 3/4-inch to the interior of the tracings. I cut the smaller square out of the cardboard, making a square that was about 6-1/2 inches per side. I tested that I could pass the air filter through that hole. Otherwise, maintenance of the air filter would require removing the entire wall. It fit, but barely, leaving about a quarter of an inch on each side (the widest part of the filter is 6-inch diameter).

Adjustments
HVAC test fit
I transferred the last model above to a sheet of HVAC, but I did not fit properly and had to do another round of cardboard before I was able to get a good HVAC design. The big barrier for me was the location of the vacuum valves (so probably not an issue for anyone else). Ultimately, I removed the valves that were no longer being used (anti-shudder and EGR), and moved the turbo controller to the rear mount. This freed up the front edge of the spare tire well. The second issue will appear for everyone who tries this: I thought that the rear inner wall was perpendicular to the floor and ceiling. It is not. Consider, the contour of the rear of the bus has a slight curve; the inner skin does as well. The picture just above on the right shows the deviation from pure vertical / 90* angle. That picture also shows on the bottom rear corner that the body panels do not have clean 90* transitions either. I cut off that little tab in future efforts. With these considerations, the models were working: showing me how to get to a viable wall.
 
Assemble
prepping the wall
For the second time, I transferred my cardboard model to HVAC flashing, complete with marks for mounting tabs. I cut the HVAC with my tin-snips, and formed the wire pass-thru's with pliers. For clarity, I marked the outline of the hole and then cut crossing lines through the center of that marked area. I folded the triangular bits of HVAC back upon itself to create the opening while also avoiding a sharp edge where the wire bundles would pass. With a hammer and dolly, I smashed the fold-back flat. By doubling the material at the openings, the wall was effectively stiffened; I had not anticipated, but will definitely appreciate that. For the upper rear wire pass-thru, I left a tang or tab nearest the rear wall that I could bend back into place, so the rear edge of gap #1 (visible in the pictures of the installed cardboard model) could get covered up once the wall was in place. Once I drilled the mounting holes in the tabs I set the wall in-place, marked the holes on the bus and drilled them out.

Pipe Flashing
wall installed
At this point, I considered how I would attach the pipe flashing to the HVAC. First, I transferred the square-ish hole from the cardboard model to the HVAC, and cut it. I need to be able to remove this section so I can clean the air filter. I drilled out 4 holes in the pipe flashing, one each per side, where the rubber had dimples for that purpose. I set the pipe flashing in place and marked the HVAC. These spots were within the folded-back HVAC, making the area thick enough to tap. Sweet! So, with a M4 (.75 thread-pitch) tap, I tapped the 4 holes in the HVAC. Into these threaded holes, I sent bolts from the cold-air side with thread-lock so these bolts will act like studs for the pipe flashing. The picture above on the right shows the studs through the HVAC.

Finishing
cold air intake
I moved the wall into place and secured it to the side of the bus with sheet metal screws. I had thought about tapping the holes and using bolts instead. The holes were too hard to access with a tap and I don't think this wall will be coming out with much frequency anyway. Even so, removing some sheet metal screws is not hard. With the wall in, I re-checked my measurements for cutting the aluminum pipe. Once verified with the permanent position of the pass-thru, I cut the pipe down. I pushed the shortened 90* aluminum pipe through the rubber collar and attached the air filter. I sent the air filter into the cavity, and maneuvered the not-filter-end of the 90* pipe through a connecting silicone collar to the rest of the intake. I set the pipe flashing against the HVAC and threaded on the 4 9mm nuts.
 
When I maintain the air filter, the process will be the same as this initial install: remove 4 nuts, loosen the hose clamp and remove the cold air intake assembly. After I clean the air filter, I would re-install by fitting the flashing atop the studs, finger on the nuts, get the pipes connected and then cinch down the nuts.

final install
Now, Hapy has a cold air intake, and the left side of the engine bay is no longer a complete visual downer. Instead, we have a nice clean wall and the engine will get colder air than it used to. This wall does have some small gaps, of course, so the air will not be as cool as it could have been. Perhaps I will circle back later with something on top of the wall to better seal the edges and pass-thru's. Longer term, I may apply a thermal layer onto the engine-bay side to help reduce temperatures even more. The picture on the right, here, shows it in its current (final) state, though a keen eye will see that I had not yet plugged in the AFM (air flow meter) when I took the picture.
 
This took quite a while to actually complete, having started before the 2021 winter holidays. I had other things going on, and this was a lower priority for sure. Also, there were multiple modeling cycles as I figured out the unique puzzles added to the driver side of the engine compartment from adding a TDI (and related vacuum control valves) to the mix.

That's it for today. Thanks, as always, for following along-

Tuesday, October 5, 2021

Resolving the Stammer

In the 2 major trips I took this Summer (2021), my road reports focused mostly Hapy's handling, the wind and the traffic or road conditions. I mentioned, sort of in passing, about the engine stumbling or stammering, having an error code thrown, and the occasional blanket of smoke. Today's post covers how I resolved this condition.

I should call out that the last trip of the season (for Hapy's birthday) did not include a code being thrown. He struggled into the headwind on the way there, but cruised with a tailwind on the way back. In neither direction did he throw a code nor dump smoke, but there were bumbles. So, I did this maintenance so the next trip would not be wanting for power.

P1550
Let's start with the code that was getting thrown: P1550. This indicates: Solenoid Valve for Boost Pressure Control (N75) - Control Deviation. in short, the thing that controls the turbo is not behaving consistently. So, the turbo is dumping boost to protect the engine. The result is a loss in power, sometimes a considerable loss. When I first noted the stumbling engine, I assumed it was fuel related. I replaced the clear fuel filter, because it had some stuff in it, but while that may have helped with consistent fuel delivery, it did not meaningfully address the engine stammering.

As I reflect back on the drives, we should have had WAY more power. I just got bigger nozzles and had the computer chipped. We should have been flying down OR-22, limited solely by the completely soft setting on the adjustable shocks. Instead, I was back to climbing hills in 3rd. It didn't register while we were driving, but it is now. Since we were sporadically getting a P1550 code, the turbo was sometimes dumping boost on the ground.... and creating a nice smoke blanket in the process.

Vacuum Lines First
stock hoses
Throwing parts at a problem is one way to solve it. Most people don't like resolving that way, though. When you have vacuum issues, which a P1550 error code usually means, there are some parts you kind of need to throw at it. If you only want to change the one thing that's wrong, you need to check all of the vacuum lines and appliances (turbo wastegate, N75, N18, EGR, ASV, vacuum ball, brake line, etc) and replace the one that is not holding pressure. The least expensive solution is to disconnect and re-connect all of the hoses. Sometimes they work themselves loose, and when you put things back together again, they just work. While cheapest and least guaranteed, this is also the least satisfying path.

If your vacuum lines are over 10 years old, like the ones on Hapy are, then you are due for replacing the lines anyway. Many of Hapy's hoses removed with little effort, almost falling off. Others were brittle and baked on and some others looked like they could have been replaced a couple of years ago. My hoses were following the stock pattern, but the other 2 valves (for Exhaust Gas Recirculation - EGR and Anti-Shudder Valve - ASV) were just blocked off. So, I switched to the simplified version (image below, courtesy of DaveLinger of TDIClub), leaving the unused valves in-place and wired, but without a vacuum source. This should reduce the opportunities for vacuum leaks to appear in the future.

There are kits on the 'net for a couple of meters of 3mm hose and a couple of meters of 5mm hose. The 5mm is for the line from the N75 to the bottom of the turbo and from the N75 to the air cleaner. The rest on Hapy are 3mm, but from looking at the diagram, I would expect that the line from the "T" to the N18 should also be 5mm. All of the lines I removed from Hapy were 3mm: I didn't have any 5mm when I did these 10 years ago. I am sure the VW engineers used the bigger diameter hose for a reason, though, so I installed 5mm hose to/from the N75. Anyway, replace one hose at a time, cutting the old hose off by slicing along the plastic nipple (to avoid breaking it). This will cost, like $30US, in hoses and in about an hour your hoses will be good as new. Possibly better. P1550 possibly fixed.

Brake Booster Line
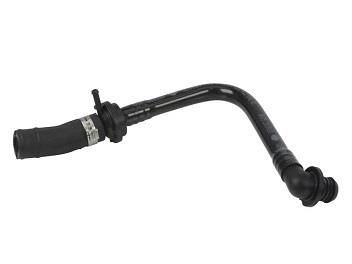
So, you still have a code or lack of power? Next, I would replace that big vacuum line from the vacuum pump to the power brake. These age and crack like the others, but the replacement is not in the hose kits. For another $30US, you can replace this. I was about at this point when I kinda remembered that my brakes were not as responsive, and I had to push harder to get the bus to stop. Sometimes. I had thought it was weight-related and even hit a trucker scale on the way beck from 4Peaks to see if I was especially heavy (4400 pounds, btw). I wasn't. Perhaps I was stopping with only partial vacuum boost or even power boost free. Hoping the power booster on the brake was not the cause, I continued down the path of parts I had on hand. My hose was original, and while there was a little cracking at the vacuum-pump end, it looked pretty good. Still.. you can't tell if a hose is failing by looking at it. Glad I replaced it.

Replace the N75
no EGR, no ASV
Last "inexpensive" thing to look at is the N75. I put quotes around it because it is still $70US. I suppose the vacuum ball or the little grey/white check valve could be the issue and these are fairly inexpensive. If you are still getting the p1550 after all the replacements above and the N75, you may have an issue with the wastegate actuator, or your brake booster. Remember the booster failure on Oliver, the MGB? For reference, here are the links for the finding and the fixing posts. 

Replacing the N75 is usually as easy as replacing the hoses. 3 hoses and a 2-pin plug-on-a-cable connect to it. It is held to the firewall with a couple 10mm bolts. I ordered both the hose kit and the brake booster line as well as a N75 when I attacked this problem. Since my engine is a first-year ALH, the 2-pin plug is different from most others, so the N75 on-market does not direct swap in. The plug needs to be re-wired or the pins pushed out of the old / into the new. I left the N75 in my supply heap and just did the lines. I figured that if I need to cut some wires or play with the pins, I want to be sure that it will actually solve a problem, rather than just create work. I had to remove the air intake to get to the vacuum lines so I cleaned the air filter while it was in-hand.

Test Drive
With the vacuum lines replaced and simplified, I was ready to see if the stammering issue had resolved. Prior to doing this work, I was still driving Hapy around as my "daily" driver (quoted because with the pandemic I don't actually drive everyday. Maybe I should say my "weekly" driver), and I was still getting sporadic stammering issues. So, I figured if I could just drive to my favorite burrito place (Taqueria El Gordo) without a stammer, I'd have solved the problem, and gotten dinner. I say that because it is just far enough away for the stammering to appear. Even if it didn't solve, I would still have a killer burrito. It was on a drive to Gordo's that I could easily re-create the stammer problem within a short trip, so I figured it was a decent test-track.

What's that saying about "the best laid plans"? Well, instead of going to the burrito place, Boo and I drove right past it and out to Cornelius (west of Hillsboro) to see some live music. Hapy suffered no stammering, and he had plenty of power. I didn't really put my foot into it, but he popped off the stop lines well. At no point on the drive there and back did he stammer, nor lay down smoke. I am calling this solved: failing vacuum lines. 

That's it for today. Thanks, as always, for following along-

Friday, June 30, 2017

4Peaks 2017 Road Report

So I understand that this blog is supposed to be about my bus and my travels in him. And I realize that the last bunch of posts have had nothing to do with the bus. I'm taking a break from the MGB front end rebuild set of posts to hit a couple bus-related ones (pause for applause). For starters, I'm starting with a classic road report, detailing our annual trip to Bend for the 4Peaks music festival with our good friend Grateful Ed in his trusty '73 VW Riviera Poptop, Belle.

Not Really Prepped
In prior years, I've used a local music festival as a way to knock the kinks out of the systems before taking the 4-hour drive to Bend for 4Peaks. Since the Hootenanny isn't held anymore, I don't have that built-in system. So, my road-ready testing isn't quite as, uh.. exhaustive. I made sure Hapy could start, he was clean and empty of not-camping stuff. I verified his oil and coolant levels were right. He was ready enough to drive around town, I figured. I did replace the front door seals, though. I remembered from the year before how cold the bus was on the drive because the seals were gone. I bought the really nice grey ones through CIP1, replacing the black Brasil-sourced ones I had been wrestling with for years.

Tank Fill
About a week before we were supposed to leave, I fired up Hapy and drove to the corner fueling station to fill it up. I took Boo and K2 with me, and thought I'd show off just how much better Hapy's off-the-line acceleration is. Well... he wasn't as snappy as he was before I ran him out of fuel, but he left the stop line pretty quickly. We got to the gas station, and got the diesel flowing while I washed the windshield a couple of times. Once filled, I turned the key... and nothing. I figured I did something electrical, so we pushed the bus into a parking space. Boo and K2 walked home for another car to give me a jump while I started diagnosing things. I was fully stymied until Boo got back and we started with her at the wheel trying the key while I wiggled wires and re-set relays. I went to the battery and was messing with the thick cables and Hapy started acting like he had the right voltages. During my efforts, I moved the battery ever-so-slightly forward, and then Hapy fired right up like nothing happened. I remembered that the battery sliding back into the rear tail light housing causes this problem for some reason. Grr.. I really need to solve that permanently.

After that, Hapy drove great the rest of the week. I didn't try to show off his acceleration again, nor did I really stress him, but I got him up to temperature, and puttered around town.

Drive There
The night before we left, Boo accepted a new job. In order to keep things moving forward, she needed to fill out a bunch of paperwork and take a pee test before we left town. So, we fit all that around our exit. We had initially intended to meet Ed at his place south of Portland around 10AM, but we ended up leaving closer to 11:30. We were still well out of heavy traffic periods and headed south on I-5 towards Salem. With Belle leading, Hapy drove great. His temps stayed down, and it wasn't long before we had turned onto OR-22 heading east off the plain and into the forest. Belle was driving without windshield wipers, but the Rain-X was pushing the sprinkles out of Ed's line of sight. We visited the Maples Rest Area in Gates, checked Belle's oil and took a brief break. It was after we passed through Idanha that Hapy started to have speed issues. I wasn't able to get the throttle to respond on hills. While it wasn't a huge deal, it started to weigh on me as we worked our way up and down and up and down through the Cascades and over the Santiam Pass on US20. Still, the drive was beautiful and the new front door seals really held out the cold draft and rain. The little heater produced a little heat, so while Boo had a blanket on her lap, I was perfectly comfortable in little more than a jerga.

We hit Sisters before 3, and we were feeling really good about our progress. For the first time I can remember, we made it from end-to-end through Sisters without coming to a complete stop.

The venue for 4Peaks was moved this year. Until this year, it was held in Tumalo, NorthWest of Bend at the Rockin A Ranch. This year, it was held South and East of Bend at Stevenson's Ranch so we had an extra 10 miles or so to travel, but through the city. We stopped at a gas station near the ranch for Ed to fill Belle with petrol and I got ice.

I'll have a separate post about the festival entry, the location, the scene, the people, the music, etc. Suffice to say, it was awesome. We drew the conclusion that the sluggish accelerator pedal was because of gunk getting into the fuel filter when I ran the bus out of fuel. Not having a spare fuel filter (bad bus owner), nor access to a parts store meant I was driving home with a restrictor in my fuel system.

Getting Home
We didn't really want to leave, but Ed had to be at work on Monday, and the festival, though open longer than past years, still closed at 4. And, of course, we had a 4 hour drive home to do. While the weather on the way out was a test of our buses against wind and rain, the drive home was a test against a summer solstice sun and desert heat. We left the festival around noon and hit a filling station before doing anything else. Since we had traveled over 200 miles since the no-start fill a week before, I concluded I would need fuel before leaving civilization and entering the central Oregon desert. I bought just over 6-1/2 gallons, recording 32mpg on the drive out plus the around-town driving the week before. Ed joked about how you can't burn too much fuel if you can't get it to your engine. Good one, Ed.

We had decided before we left for the festival that we would drive home a different way to change the scenery. After the sluggish hills on the way out, we thought that driving US26 through Government Camp might not have as many ups and downs as US20. We hadn't considered that the US26 route left us in the desert for far longer, and that the temperatures were in the 90's compared to the 50's on the way out. This created a different stress... on the cooling system.

Hot Stop Hot Again
The drive north on US97 was steady going. Redmond had some traffic, but Metolius and Madras were mostly unpopulated. Actually, when I consider how large an event is coming to Madras for the total eclipse in August, the town appeared largely for sale. Many store fronts and undeveloped lots had for sale signs on them. That's not a very positive statement for the health of Madras. It is in Madras that we left the US97 for the US26 and our flat uneventful drive changed. The road out of Madras starts with a long uphill pull. Hapy didn't have that lack of acceleration, but his temperatures started to climb. When he reached 195* I pulled over and let him cool back down. More hills, more desert heat and more altitude meant that his temps would rise again, and again. I started letting his temps run up to 202* before pulling over to cool him down. Each time, Ed would pull over with us, or somewhere ahead of us so we could continue our carabus. That is, until finally, we had to let Ed go while we let Hapy cool way down. Boo and I had a roadside picnic in the middle of the Warm Springs Reservation and Hapy's temperature dropped down into the low 170's. Still, it didn't take long before we were climbing again, and his temps were high again. All told, we stopped 6 or 7 times including the picnic stop between Madras and Government Camp.

SkiBowl
I've mentioned SkiBowl a number of times. I love playing in the snow there. After such a hard climb up the east side of Mt. Hood, Boo and I decided Hapy needed a longer rest, and we could use a beer so we stopped at SkiBowl West. The bar (Beer Stube) isn't open during non-ski season, but the cafe is, and they sell beer in cans, so we split a tallboy on the back porch. As we sat, we could see that there is still snow at the top of upper bowl, even though it was over 85* at the lodge. SkiBowl is in the process of switching over from winter to summer sports, where they leverage their ski lifts to enable mountain bikers the ultimate: a lift to the top so you only have to ride downhill. Although it was Sunday, we only saw 2 cyclists the entire time we were there. We will be back, with as many boys as we can muster, to play on that hill. That's just too fun.

Home At Last
The drive from SkiBowl on home was completely non-eventful. The accelerator was responsive and the engine temp never climbed above 192*. I don't know if it was the desert, the higher altitudes or what, but once back on the west side of the Cascades, Hapy drove like a champ. We drove US26 to OR212 through Boring and then connected with I-205 around to I-5 and finally onto OR217 home. He even handled the interstate traffic easily. Still, I need to look at the coolant. I think the coolant / distilled water mixture is off, and that caused the radiator to be unable to manage the engine heat.

I haven't filled up since we got home, and I know I need to soon. Overall, Hapy was great. As a camping vessel, he was a pleasure. I'll get into that in another post, but simply as transportation I know I need to do a better job of getting him ready before taking him out of round-town puttering or he'll leave me stranded. And it will be completely my fault.

That's it for this time. Thanks, as always, for following along. I'll post about the festival, and a new bus-change I did to improve the camping experience soon.

Sunday, October 12, 2014

Back Together, Test Drive

In my last posts, I covered the hazardous re-assembly of the engine-to-transaxle and the install of the combined unit at 15*.  Today, completes that journey.  In order to do the re-assembly as quickly as possible, I tried doing it a little differently.  I usually do system by system.  This time, I did it based on where I was and did everything I could before I moved.  I'm not sure I'll do that again, but it was interesting.  I cleaned every part with brake cleaner before installing it.  It made a world of difference, and I'll do that every time now.  Handling a clean part is just so much better than the oily, greasy alternative.

Lower Right Rear
Starting below the right side of the engine, there are a few things to do, starting with the CV joint.  I place a jack under the lower shock-absorber mount and lift until the tire just barely leaves the ground.  Then, with 6 new Allen-head bolts (one striped last time), attach the CV joint to the side of the transaxle and drop the tire back onto the ground.  At the front of the transaxle on the right side, is the ground strap.  It requires a 13mm socket.  Install the starter.  It requires a 17mm socket (need to verify) for the 2 bolts plus a 13mm for the B+ cable from the battery.  Plug in the trigger signal wire to the starter.  Connect the B+ wire to the Atlernator and plug in the sensor wires.  Double check all the other visible sensor wires (like on the cooling system) are plugged in.  Last, zip-tie the cooling pipes up out of the way from the axle.

Rear
Put in the rear support bar.  Don't forget to put the rear bumper mounts back in when you do the bar; they use the same bolts.  Install the support tower and the rear engine-frame mount.  If you get this far and the mount isn't lining up, check the support bar install.  If the mount and tower are on different angles, you probably mated the engine to the transaxle at something other than 15*.  Go back one posting :)  Once the rear mount is in, hook up the exhaust.  The muffler pipe has a hook that fits onto the rubber mount which is hanging off the right side of the rear support bar.  Once hanging, it should fit with enough room to maneuver the rest of the pipe without it hitting the ground nor the bus and no jacking required.

The exhaust-to-turbo mating has a gasket and 3 13mm nut/bolts.  One mount is a stud coming out of the turbo.  Because of the design, at least one of the 13mm needs to be tightened with a wrench instead of a socket.  Next comes the intake system.  Start with the non-charged air pipe from the air cleaner to the turbo.  This is held on with 10mm bolts, and most of the work is from above rather than through the rear hatch.  Next, the charged-air plumbing with the intercooler is most easily installed as a unit.  Slide the turbo-end on first, then set the intercooler and complete the system to the intake last.  The pipe clamps are a combination of slotted-screwdriver and 10mm socket.  The intercooler is held in place with bailing wire (yes, bailing wire) looped between the mounting hole on the intercooler and the open loop in the engine mount attached to the engine.  This allows for the vibration of the entire system to resonate as one.  Route the vacuum to the turbo and snap it into the channels on the plastic tubes.

Lower Left Rear
Shifting back under the bus, repeat the CV joint process for the left side.  Verify what's been done thus far from the new perspective: the turbo plumbing, the air system, the vacuum.  Hook up the bowden tube and the clutch cable to the clutch activation arm.  If you run out of adjustment threads, you need some head-washers (I used 4) between the bowden tube and the mount it slides into.  That mount is held on with 2 13mm bolts.

Lower Middle
Mount the nose of the transaxle.  Plug in the reverse wires for the reverse light switch.  Don't brain yourself on the radiator.  Thread the short hollow tube to connect the gear selector at the front of the transaxle to the long gear shift tube coming from the front of the bus.  Zip-tie the tube into place.  I'm sure that last line will upset some purists (as if the whole project hasn't already), but the original bolt/nut solution falls out; the zip-tie doesn't.

From Above
There's little left now.  Mount the coolant overflow bottle, verifing the top coolant line runs where it's suppoed to.  Plug the sensor into the bottle.  Note the coolant level, and come back and check again if its not spot-on.  Verify the vacuum bulb is set and tight.  Put the fuel filter into it's mount and tighten it down, making sure that the lines run properly.  I have a cheap $1 clear filter in front of the spendy stock filter to extend its life, but it also shows me that fuel is getting that far.  I check that for a fuel level at this point.

All Over
Last, the battery is hooked back up.  Before that, all of the electrical connections, including all sensor plugs should be double checked.  This is where the "do everything you can see" model falls apart.  By doing it one system at a time, you know everything was done.  By working zonally, you don't really know for sure without checking system by system.  At that point, you may as well have just done it that way.

Testing
This is the part everyone wants to jump to: grabbing the keys and giving a test fire.  The first time I tried this time around, I got nothing: I'd failed to hook up the battery.  Once resolved, he started right up.  I applied the clutch and shifted through the gears.  Nice and smooth.  Seatbelt on, and on the road to test.  There was less noise than I remembered.  The gears shifted easily up through 3rd (never got to  4th), and the bus felt peppy.  Overall, it was a great, albeit short, drive.  I declare the bus road-worthy again.  By the way, there wasn't a single drop of oil on the transaxle nor engine after the test drive and cool-down.  Success!

Thanks for following along.  Next time, I look at the ceiling of the bus and/or knocking the dents out of and painting the rear bumper.

Sunday, November 14, 2010

heat placed, intercooler displaced

My time availability hasn't meaningfully improved since the last post. Somewhere I heard that the US is most productive (in GDP terms?) between Labor Day and Christmas. I can say that work has been distracting, but it wouldn't be fair to say that was the cause. Anyway, I have found a few hours here and there to get banging on the bus. I'll cover the highlights.

Heater Core Placed
After looking at putting the heater core inside the bus in a few locations, and trying to fit it under the floor of the cab, I have placed it in the alternate battery spot (under the spare wheel well). This location is already a little busy, with the intercooler and air filter as well as a bunch of wiring. So, this wasn't easy to get going. It still needs to be mounted. When I was working on the intercooler placement last Summer (or the Summer before..) I cut a section of tin out of the left side. To get the heater working in that space, I needed to cut the rest out of the way. The coolant lines will run from the left side of the engine, under the spare wheel well and along the body, curling back towards the right to the heater core. For a core, I'm using an old Vanagon rear-heater unit with a snorkel attached to it. The snorkel is still getting firmed up, but the mock-up worked well. Anyway, the snorkel will connect to a 4" diameter insulated flex-pipe that runs under the bus (over the axle) around the radiator to the original air line at the middle/front. Switching the fans and controlling the flow of coolant into the heater still needs to be devised.

Intercooler Displacement
Fitting the heater demonstrated that the intercooler was just in the wrong spot. As it was, getting in and out of the engine compartment on the left side was virtually impossible with it placed where it was. I found myself removing it frequently to do pretty much anything on the left side. Since the turbo an the intake are on the left side, the intercooler will stay on that side, but I'll be dropping it lower, down into the slipstream and rotating it flatter so access is much easier. Ultimately, it will operate much like the radiator does - with a puller fan placed underneath it.

Air Filter hassles
Another challenge on the left side is getting the air cleaner space to do its thing. I had something pulled together "well enough", but it wasn't game-ready. I'll need a 45* bend (another part to buy) to stitch into the set up, as the stock flex-tube is just too long to be effective. This became more obvious as the coolant lines and the flexi-hose for the heated air were introduced. Once the 45* bend arrives (still to be ordered), I'll be able to finish this off much more cleanly.

Exhaust Reroute
With the move of the heater into the engine compartment, and, more importantly, the insulated flexi-hose, the route of the exhaust has to move. The route from the turbo has been unchanged from stock, so it ran straight to the left out behind the rear tire. That was not ideal anyway, when we think about the "fresh" air we would want entering the heat system, or an open window when sitting at a red light. I was assuming I would need a custom run anyway, and now there's no question. The exhaust will route straight down, instead, and curve back to the rear along the bottom edge of the engine block. I will mock-up something so I can account for it while placing the intercooler. I don't want either the intercooler nor the engine to pick up heat from the exhaust as it passes. This will get interesting.

As you can see, things are getting more challenging, but I'm glad I'm finding these issues now rather than after a Summer of camping fun while winterizing. I'm going to focus on finishing the heat and the air filter completed first. Once they are done, I'll work on the exhaust and intercooler at the same time. I didn't mention that I did get the temperature sensor replaced, but with the different systems opened up, I can't test the engine. My plans for a holiday-season test flight may have to be pushed out. We'll see. Thanks for following along, and I'll post some pictures of this stuff when I'm on my other computer.

Sunday, August 29, 2010

... and we're back

I may have mentioned in my last post that I was going to be traveling for a bit, so I wouldn't be getting much done on the bus. We've returned from our 10-day visit to Milwaukee, Wisconsin with many memories, experiences and additional pounds around the middle. I'll touch on different aspects of our trip over the next few posts while I get back to work, and back to getting the bus running. This time, I'll focus on frozen custard while my taste comparisons are still fresh.

Frozen Custard
When I think of Milwaukee, the first thing I think of (after the smiling, loving faces of my wife's family) is the frozen custard. Folks in the Pacific North West don't have access to this special cold treat, and I have had a hard time explaining it. The closest I've come is this: think of the step from sherbet to ice cream, now take that same step in depth and creamy-ness and you're in custard. Very rich, very creamy, very yummy.
There are many different variants of frozen custard, and it seems to differ regionally. For example, Illinois custard isn't quite as rich, and is more "ice cream -like", according to a custard vendor I've had the opportunity to talk to Even within the city of Milwaukee, though, there are definite differences. We tried 4 different vendors, but did not coordinate a taste-off of all of them in the same place at the same time. The next time we go, though, we definitely will. Maybe there will be a few additional contestants too. :)

Kopps
Kopps is the hands-down best frozen custard experience. They have 2 daily flavors (like mint chip or strawberry), and the usual vanilla and chocolate. I take my taste comparisons seriously, so I'll only rate them based on the chocolate/vanilla. Kopps chocolate is the creamiest and richest, and flat-out tastiest. Their vanilla is good, but not as good as Leon's vanilla. They have a nice water feature around which you and other patrons can sit to enjoy a giant burger, fries, onion rings or just a custard. 4 stars.

Leon's
Leon's takes a close second to Kopps for their custard, but 3rd in ambiance behind Gillie's. Leon's vanilla is probably the best of the bunch, but their chocolate was over-chocolated. It almost had a Nestle-Quik thing happening to it. Maybe the kids like that better, but I like a nice balance. Leon's is the location that was the basis for "Big Al's" on the TV show Happy Days, so it deserves a nod for that. There is no seating, and the parking runs almost right into the order windows, making safety a question for the patrons (especially children who run all over the place once the word "custard" is uttered). I didn't try their sandwiches, but T had a sloppy-joe from them and liked it. "not as good as Kopps," he says.

Gillie's
Gillies chocolate was better than Leon's, but not quite as good as Kopps. Their vanilla was better than Kopps, but not quite as good as Leon's, so they fall into third. They have seating and a nice parking situation, though. I didn't try the food from the grille, and we didn't have their custard fresh - we picked it up on our way home, popped it into the freezer and ate it the next day. It held up well, but I think it may have affected our enjoyment. Custard is always best fresh :) Gillie's is the "original" custard stand Milwaukee, and their patronage has definitely held up. We were there around 9:30 on a Thursday evening, and they were hoppin'.

Culver's
Culver's was definitely the worst. It was not much better than Dairy Queen, so it really wasn't custard. The food was mediocre and the service was lack-luster. We visited the Culver's in the Delles, so the service should have been extrodinary (the Delles being a major tourism spot in central Wisconsin). Still, we left disappointed.

We visited those 4 stores at least once during our 10 days in Wisconsin. Of them, we repeatedly visited Kopps, trying their daily flavors as well as burgers, onion rings, fries, malted shakes, etc. We really couldn't say enough good things about Kopps. The service is great, the choices favorable and the outdoor dining area the best of the 4.

That's all for this one. I wrote this on the plane home, so I haven't been able to work on the bus yet. I plan to get the wiring to the starter first and then R&R the starter. I figure if I can get the starter to spin from the driver's seat, then the R&R should be easy. Doing it the other way seems harder to test. I'll be spending my Sunday worknig on this stuff, and may have new info by the time this is posted.
More next time -

--Added--
The starter wiring has been resolved, and the starter has been removed and re-installed. I have the air intake and filter installed, so all that remains on that bit is the vacuum nipple (which I need to get from the store). I will be attempting my first engine start after I post this. The next post will include pictures / explanation of the air filter, and more detail on what I did this morning.

Wednesday, August 11, 2010

Code Free

My friend (and TDI Mechanical Guru) Justin visited last night, and we made some progress on the VAG-COM codes. We had a minor discovery with the accelerator pedal controller as well, but overall, it was a very positive few hours. That "red ball" project has moved on, and work has settled a bit. We'll see how long that lasts....

Code Free
Justin arrived before I got home from work, ready to get the bus running. He confirmed that seeing the mileage on the dashpod was a significant step, and was able to get his VAG-COM reading application on his laptop to communicate with the engine computer. He brought a 99.5 Jetta harness with him - the complete harness for the entire car. We picked through the harness and noted a single 2-plug connector that hooked the smaller engine harness with the other engine-ish harness. Connecting this did not relieve any codes, but it reminded us of the research I mentioned in the last post about all of the codes appearing on elements contained within that same harness. We took his 99.5 harness and hooked it into my engine, leaving the glow-plugs disconnected, to test this theory. VAG-COM was unable to find any error codes / faults. For the time being, I'll be leaving the 99.5 harness in-place and removing my 98 harness. I'll find the bad connectivity wire and fix it off-line. Meanwhile, this resolution brought us to the edge of being able to start the engine.

Clutch Pedal switch
For some reason that I really don't understand, VW included a switch on the clutch pedal to prevent anyone from being able to start their car with the clutch out. I suppose there were complaints about this, or maybe this is one of those Ralph Nader safety things, but I think its pretty stupid. Accidentally trying to start it in gear has its own notification system: that uncomfortable lurch followed by not starting. Anyway, this switch needs to be depressed to allow the starter to get the signal to start. In the early TDI (ALH model), the switch runs through the comfort system, which I tore out. The only signal that matters, though, is a single signal from that system to the #3 relay (number 185 printed on the top) which is the starter lockout relay. That relay takes start-switched power (50b) and routes it to the starter solenoid when 12V are applied to the relay switch from the comfort system wire. Since the send-side of the relay only has 12V when the ignition is turned to "start", the relay, the comfort system, and the clutch pedal switch are not needed... in my application. We jumpered across the relay, and got around the clutch switch problem.

Still NOT Starter-ing
After we got around the clutch pedal switch, the starter still wouldn't turn. To rule out a bad starter, we sent a test wire directly from the solenoid to the battery and proved that the motor turned. Unfortunately, we discovered that the spacer that I introduced between the adapter and the starter caused the teeth on the starter to fail to reach the flywheel. I will be removing the starter, removing the spacer and re-installing the starter. Figure 30 minutes, but unfortunate that it stood in the way. Also, this indicated that the wire running from the relay to the starter solenoid had a break in it. I will need to cut up the wiring zip-ties and find the continuity break. Since there are 2 splices, it shouldn't take long to find which splice failed.

Throttled
Our last discovery was that the direct connection of the bus accelerator pedal to the throttle switch was pre-loading the throttle signal. This means that even without a foot on the pedal, the computer thought we were trying to be at about 35% (not 0%). This is because the old pedal needs some kind of pull from the old carburetor to keep the pedal upright. I will add some space between the throttle switch and the pedal and add a return spring to provide that pressure. That shouldn't take me very long, once I find a return spring.

That's it for today. There was a lot of progress, and the outlook is very bright. I won't be able to put much time in over the next few weeks for travel reasons, but I know what I have in front of me. First, fix the starter signal, R&R the starter and prove the starter can turn the motor. Then, fix the accelerator pedal bit. Once I have that, I'll re-focus on the air cleaner (AMSOIL) and air-source for the vacuum and then look for the break in the engine harness so I can give Justin's back to him. As always, thanks for following along and enjoy the rest of your summer-

TDI-FEST: Portland, OR Labor Day Weekend

Friday, May 28, 2010

Filtered Air and Twisted Pair

It has been a pretty chaotic week. To begin with, we are foster-parenting a 6 month old mama cat and her 2 2-week-old kittens. They arrived on Monday or Tuesday. I have been discussing an employment opportunity (after 3.5 years of contracting) with a potential employer. My Mother-in-law flew home after a 2+ week visit. The on-again / off-again band I play in is prepping for our first gig in a year with semi-regular rehearsals. Of course, there is the work schedule / helicopter parenting stuff and, finally, bus stuff to do. There's only so much I can cover in a single post, and this chaos might explain why my postings have been so far apart (and short on pictures) this month. Let's start with the fostering...

Calico Vent
There is s new shelter in Lake Oswego that takes animals that are pregnant and farms them out to foster homes after birthing while the little ones grow. Once the babies are at adoptable ages, the fostering ends and they are all adopted out. Great program. We got the call that there was a mama cat and 2 kittens, so my wife and boys dashed over to get them. We are housing them in the tub-shower in our main first-floor bathroom. Now, everyone is sharing the small upstairs bathroom for showers, etc. Let's call that 'an opportunity to bring the family closer'.

That first night we had the cats, mama cat got freaked out by something. That next morning she was a-top the shower-door and would not come down. We figured she would calm on her own and went about our business. Instead, she pulled the floor register off the floor and crawled into our heating system. It took almost 24 hours to coax her back out. It was feeding the kittens baby formula that got her out, actually. Once she heard those little cries, she popped out of the heat duct and my wife grabbed her. We thought we had the register secured, but about an hour later mama cat tried to get one of the kittens out of the tub(and, presumably down the heat duct), and we heard her. Now, there's a big heavy box on that register... and the cat family has adjusted very well. They even purr now.

Filtered Air
I have spent a considerable part of my free web-time these last couple of weeks trying to figure out my air filter need. I have to filter the air, obviously, but the filter unit needs to fit the MAP (Mass Air Pressure) sensor and it needs a vacuum system nipple so the vacuum system gets clean air too. After looking at the after-market stuff (spendy), Donaldson (also spendy) and stock air boxes, I found my solution. craigslist. Its a wonderful thing for getting rid of unused bikes or getting car parts for next-to-nothing. I looked at LKQ for their asking price on a used VW air box, and they wanted $60. eBarf? $40 plus shipping (of at least $20). craigslist? $10, with a filter cartidge in it (probably needs to be replaced), an extra MAP sensor still attached, and the snow-snorkel still on it. I haven't test-fitted it yet, but it looks like it should fit where the auxillary battery usually goes in the bay window westy.

Twisted Pairs
While watching some mindless television last night (30 Rock), I started making the extension for the accelerator pedal switch plug. To get the length, I had my son T work with me. This represents the first time he has worked on the bus with me in some time, so it was pretty special for me. First, I walked him through the conversion, showing him the different sub-systems and explaining what each one is for. I grabbed a spool of 18 AWG wire, took the end and handed him the spool. While he metted out the wire, I slid under the bus and ran it from the spare wheel well to the accelerator pedal switch. We only need about 14'. Since the 18 AWG came in 15' long spools, I decided an extra foot wouldn't hurt anything. I left the one stretch of wire in-place as a placement guide for later. With 5 20 AWG wires and 1 18 AWG wire, I cut and bound together (with short pieces of electrical tape) the accelerator rheostat cable bundle. Next time I have an hour in front of the tube, I'll do the brake switch cable bundle. Once I have the cables wired into the main harness with the plugs on the ends I'll tape the length with cloth tape (so it looks like the stock harnesses) and then zip-tie it into the path I marked.

Riviera Top
One last bit of news - I started getting the Riviera poptop stuff from my friend Toby. He was nice enough to store it this long, but he needs the space now. I got most of the small stuff and Gr8fulEd will be helping me get the big stuff with his father's pickup truck next week. Fortunately, Ed has a '73 Riviera, so I'll have a template (of sorts) for installing the top, when I can get to it, and can get Ed over with his bus. I don't expect to have time for that until July, but I might surprise myself if I can get this electrical knocked out quickly enough. In the meantime, there is space in front of the bus (under an overhang) where the top can sit while I prepare for it.

I don't expect to get to the bus this weekend, but I hope to be able to hit it on Monday. If I can get a few hours without rain, I should be able to get the fuse block done and get the the main harness wrapped up. If things go well, maybe I can look into the radiator fan circuit too, or even the aux battery. You gotta set a stretch goal, I figure :) . At the very least, I'll take some pictures of the stuff I posted about and back-upload pictures.

edit: added pictures
pictures-
top: mama kitty Tinkerbell (6 mo's old) and Pip (about 3 weeks old)
bottom: wire bundle for accelerator and brake switches