Showing posts with label ground. Show all posts

Tuesday, March 10, 2026

Hapy Drives Again

It has been a long 18+ months without having a member of our family kicking around with us. But, Hapy is one injection-pump re-seal away from daily-driver status. Today, I'll go through the last little things. Again, my regrets for not taking many pictures. I have been away from fixing and blogging so I have fallen out of the habit of snapping a picture while I'm doing the doing. Also, I got hit by whatever flu thing that's been going around and was flat-backin bed-ridden for the last 3 weeks.

Clutch Adjustment
post-test drive
I touched on this at the end of my last post. I had to add an extra small spacer at the end of the Bowden tube as well as on the very end adjuster. To be fair, I really didn't need the one on the adjuster, but I would would not have much adjustment thread left if I hadn't. I ordered a replacement clutch cable and when it arrives, I will keep it under the rock-n-roll bed until I get to replacing it. I expect I will replace that cable relatively soon, but I want some fun drives before I take him off the road again, even to do something that I could do (and have done) on the roadside.
 
The standard adjustment advice is to shift the tension on the cable as felt by your foot on the pedal such that there is no engagement until the pedal has moved a good inch down towards the floor. This prevents premature wear on the clutch and/or throwout bearing. You don't want the throwout bearing riding on the clutch spindles all the time. That's noisy and introduces premature wear. What I did not recall from prior clownings on the cable was that the arm protruding from the transaxle would have so much play in it before the throw-out bearing touched the pressure plate at all. I recall it practically resting on the pressure plate, but my memory is not reliable. Anyway, I felt that the arm needed to press against the spring a little bit to get the adjustment correct. As I think on it now, that spring being engaged is what holds the clutch pedal all the way up so it's right. It just felt foreign. Honestly, it has been so long since I worked on Hapy, lots of this work has felt unusual.
 
Tail Light Show
Bowden Tube pic from theSamba
The tail lights were acting really strange prior to my first intended test drive after getting the clutch sorted. I start assessing the lights rather simply: run the hazards first. Since no other systems are involved, the blinkers ought to all light up together and turn off together. The left (driver) side was lighting up opposite from the others. When I added in simple running lights (still no key in ignition), the tail lights were a light show of blinking. I had initially thought that I did something funny with the reverse switch, but that is a simple dumb switch that allows 12V through when the transaxle is in reverse. So, I ruled that out. I concluded that the ground for the light fixture was poor, weak or virtually non-existent, causing the 12V to seek a ground though alternative paths of other not-illuminated lights, causing them to light up.
 
Getting into the Cavity 
The left (driver) side tail light is hidden behind a panel I added to offer colder air to the engine (See VW Bus Cold Air Intake). I had forgotten how much of the ugly TDI wiring was also hidden back there when I removed the panel. Anyway, first, I disconnected the cold air pipe at the last rubber coupling before the turn into the hidden cavity under the spare tire well. Then, I removed the 4 nuts holding the pipe flashing, and removed the air filter "assembly". While this was out of the bus, I thoroughly cleaned the air filter and shop-vac'd the cavity. With the air filter out of the way, I removed most of the screws holding the panel in place with a slotted screwdriver and bent the panel out of the way to access the tail light assembly.
 
Grounding
left side panel under spare
Immediately after sticking my head and a small flashlight into the space, I spotted a ground that had fallen off the grounding tab on the rear next to the light assembly. I popped that back onto the ground tab and tested the lights. There was no noticeable impact, but those grounds were probably used by something, so some other issue just got resolved.

I decided to add a ground directly from the metal back-plate of the tail light assembly to the unused grounding tab next to the one I had just resolved. I added what I call a "chair" tab splitter (because it looks kinda like a chair), that turns one tab into 2, to the grounding tab on the rear of the tail light. I re-attached the existing ground to one side of the "chair" and added a short brown wire to the other side, connecting it to the unused tab on the rear body. I then retested, and the crazy light show was over, and the left tail lights were much brighter. So much so, that I decided to add a ground the right side tail light, in hopes of balancing the lights.
 
The right (passenger) side is much easier to access on Hapy, but probably harder for anyone without a cold air intake cavity thing because the battery makes things tight. Unlike the left side, I disconnected the light fixture from the bus and hung it out the rear while I worked. I basically did the same thing as I did on the left/driver side: chair splitter, used an unused nearby grounding tab. Once reassembled, the left side did not see as significant an improvement, but I think the original grounding wire is shared between the lights so the right side was already getting benefit from what I did on the left side before I started messing with it, I just hadn't noticed during the left-side test.
 
Test Drive
At this point, I felt that I was safe enough to travel on a shared street. So, I backed out of the shop, down the lane-way and out to the street. He easily went into 1st gear and away we went. I did not have the little UltraGauge plugged in, choosing instead to use my senses to vibe the test loop. Hapy ran great. Power on demand at my foot, easily shifting from gear to gear, and getting into 4th but only barely before dropping back down. He still popped out of second when I quick-decelerated, but it was not as immediate and on a light decelerate he stayed in gear. So, there's some improvement there; I did not expect any. The exhaust was much quieter; I think some of my "wow this bus is loud" that drove to all the sound containment may have been at least in part from the broken exhaust-to-muffler joint. Facepalm.
 
The drive was not without its issues, tho. While the cooling fan and intercooler fans both came on by the manual switch, the intercooler fan was louder than I remembered. This could in part be because I couldn't hear it over the exhaust. Also, the noise of the turbo through the right cooling "ear" (behind the rear-most right side window) was unexpectedly loud. Again, this could have been masked by the louder exhaust and isn't really a bad thing. In a way, it's kinda cool and I can't hear it from inside the bus. Its only when walking around it did I hear any of these things and none of these are deal-breakers or send-him-to-the-shop things. I did notice that the dual-gauge I installed during the CoViD lockdown was acting funny (See Oil Temperature and Pressure). The pressure rose to the top and never came down and the temperature basically sat just off the bottom. I figured either the wires fell off on one end or the sender went bad.
 
Fixing Oil Gauge
left nut missing
Having the UltraGauge is great, but I really prefer just using the simple dual oil gauge. I can see if the temp is getting too high without a digital readout changing every few seconds. In fact, I have a VDO coolant temp gauge in my stuff somewhere that I have thought about adding into the dashpod and then I really wouldn't need the UltraGauge anymore. Anyway, solving the dual-gauge was fairly straightforward, starting with the engine-end. I figured that I did lots of moving things around, so simply disconnecting and re-connecting those wires to the sender would remove that variable. One quick peek, and clearly that was the problem: one of the M4 knurled nuts had shaken it's way loose and completely fell off. I ordered a set of 5 (the smallest set I could find not on amazon, and it still cost, like $15US). When I installed, I put some blue locktite on there so these don't shake off either. I was very grateful to not have to open the dash.
 
Diesel Leak Persists
catching the leak
Two years ago, when Hapy first started having hard-start issues, it was a fuel leak coming from his injection pump. Back then, there was literally fuel flying all over the engine bay. I spent time getting the top-end of the pump sealed, and that resolved the flying fuel and most of the hard-to-start issues, but it was during those months that I ground down the ring gear, putting us on the last 18 month trajectory. Also, I continued to lose prime in the pump, but without visible leaks. Now, I can see the pump dripping on the ground. So, the seal between the body and the head appears to be the problem, and its getting worse. I ordered a replacement deluxe kit from DieselGeek. Rather than do that seal myself, I have asked our old friend Justin (OldPoopie) to do it for a couple of reasons. First, he does these all the time, but more importantly, he has the computer bits to really get the timing spot-on. I expect that once the pump has been re-sealed and the timing set, Hapy will be a monster.
 
Well, that's it for today. Justin is super busy, so it will be a month or so before he can get hands on Hapy. In the meantime, I will be shifting focus onto doors for the shop, we have some house projects to chase and maybe I will be getting my hands on Oliver, the 1978 MGB. It feels like nice weather is not too far away, and taking the MG on a picnic run with Boo would be awfully sweet. Thanks, as always, for following along- 

Thursday, October 9, 2025

Hapy Home

This is almost a car post. Today, I get Hapy put enough together to move and then get him into the shop with his 2 brothers (Zed and Oliver) and sister (Nina).
 
Where Were We
Early in the Summer, like every Summer, I had big plans. Big plans. I was going to have my shop built and get Hapy fixed and then take all kinds of trips and such in him. Well, like so many prior seasons, my plans ran up against time and energy limits. It seems like every Spring I say "yes" to many things, forgetting that Summer is at-best 10 nice weekends here in the Pacific Northwest. We usually celebrate Independence Day wearing knit hats (still cold when it finally gets dark enough for fireworks) and some years Labor Day sees rain. That is the most extreme. Those with kids see summer's end around Labor day, but weather-wise, it is usually nice in September. So, to me, a "normal" Summer for nice weather planning runs from mid-July until mid- or late-September. 10 weekends. Maybe 12 in a good year. I committed 3 weekends to musical performances, had weekend family events in Eugene, Montana, Idaho and then in Seattle over Labor Day (7 weekends total). Just like that I'm down to 3 or 4 weekends for projects, cars and fun. In full transparency, we cancelled the Montana and Idaho obligations. I filled those weekends with digging trenches and laying french drain pipe, executing a storm water management plan I didn't have when the summer started. Still, when I look at the calendar through that lens, I now understand why Hapy sat in pieces. I am also kind of amazed that we got as much done, and not that surprised that we did not really do many "fun things" as we do other years.
 
sloped and cracked driveway
So, recall over Independence Day, I dropped Hapy's engine and tran-saxle so I could replace the chewed up flywheel (See Hapy Engine-Transaxle Dropped). When the new flywheel arrived, I popped it, on torqued it, set the clutch and bolted on the pressure plate. Once torqued, I struggled to get the trans-axle to mate with the engine. This was because of the few reasons, I think. First, the driveway is not flat, it is pitched away from the garage door, so getting everything level was more of a challenge. Then, the driveway is crumbling and heaved with large 1"+ drop-cracks in it. These cracks were larger than the wheels on the ATV jack I use to move and position the engine. So, once the engine was down and a wheel dropped into one of the cracks, I was no longer able to maneuver it front-back nor left-right. I could tilt it and raise-lower it. Even with those conditions, I got close, but the trans-axle fell off the smaller jack I had it perched on while attempting to mate. It landed on the driver-side output flange, popping it off the trans-axle entirely.
 
At this point, I was too frustrated to approach Hapy for a while, so I focused on getting the shop done. I decided that moving broken cars in the mud and rain was more objectionable than fixing Hapy in the rain one more time. If it came to that. I tried to find a mechanic to look at the trans-axle and re-assemble it. Instead, the D and M Automotive Service agreed to look at it and tell me how to fix it because he was convinced it wasn't beyond my skills and he had a 4-6 week backlog already. He was trying to close his shop for the weekend and subsequent vacation, but he took the time to show me exactly what I needed to do and fronted me the small bits needed to do the job. I still owe him $10 for those (facepalm). So, with instructions in mind and the required bits in hand, I headed home... and left the job undone ever since.
 
Prep to Move
Staying on the get-the-cars-outta-the-rain course, Boo and I agreed that getting Hapy into the shop was a necessary step before I try to re-assemble him again. The probability of failing again simply because of the driveway was too great. Before I begin, consider that the rear engine mount, the tower and the cross bar were out and on the ground. The engine was sitting on the ATV jack, but effectively on the ground. The boosted air circuit, fuel system and cooling systems were loosely hanging in the engine bay. Underneath, the axles were hanging from the wheel-end CV joints and the rear sway bar was detached. Hapy was nowhere ready to move a few inches much less 30+ meters (100'?) back into the shop.
 
in the lane way
I started with the rear engine supports by raising the engine up and connecting the rear cross bar. To this, I attached the tower (after de-greasing it) and then added the mount to the engine. The bolt holes in the engine bracket for the mounts were stubborn and I had to shoot the passenger-side hole with a tap before the bolt would travel the full distance. Last, I wrestled the mount holes over the tower holes and bolted the engine home. With the rear of the engine set, I considered how to suspend the flywheel end. I believe that when the full drive train is in, the upper trans-axle mounts are responsible for most of the support. These are on the trans-axle, of course, so I was concerned for how to hold the engine still during a move. I used ratcheting load straps, suspended from the body-side of the trans-axle mount and under the flywheel, slipping the strap between the flywheel and the engine so it would not slip off.
 
I used another ratching strap to suspend the axles. I finger-tightened the 4 front bolts of the rear sway bar, rather than nut them all the way down. Neither of these shade-tree hacks ended up being a problem for the move. Last, I suspended from the engine any partly-connected bits and removed all the loose fasteners and charged air hoses. Hapy was enough one-piece to move to the shop. We will see if any fasteners fell off when I get to re-assembly (LOLs). Visually, it looked good and walking the route afterwards I found no bolts, nuts or washers.
 
Homed
Hapy had been parked with his rear-end pointing south in front of the house. We needed his nose to be pointing south in the shop in order for his rear end to be pointing towards the big door (north). I wanted this orientation so I had the largest work area behind the engine as I could arrange. This meant we needed to turn him around before we sent him down the lane way. Boo and I went full old-skool. With her behind the steering wheel, I pulled the tire chocks and pushed the rear of the bus like the dickens down to the street. With a dog-walker stopping the one passing car for us, we kept Hapy rolling out the driveway and slightly up the street before I ran out of ability to push against gravity. Boo let Hapy roll backwards downhill just past the end of the lane way and over to the shoulder. I hooked up the trucker chain to Hapy's front frame and the other end to the ToyoTruck tow hitch. Then, we hauled Hapy all the way to the edge of the gravel before I had to peel away from the driveway in the truck. Because Hapy is heavier than both Oliver and Nina, I was concerned about the strain on the come-along. I moved Hapy about 6 inches and then decided to hold off and give it a think. I am not 100% sure of the load capacity of the come-along and I was uncomfortable with the amount of strain I put on it just for the 6 inches I got. That was Sunday afternoon. 
 
On Tuesday, Bill, our tree guy, arrived with a couple of employees to remove the failing cherry tree just south of the shop. Since Hapy was sitting in the lane-way, it was blocking the best path to the tree and the best path through which he and his guys could haul the pieces of the cherry tree to the chipper. So, in about 2 minutes the 4 of us pushed Hapy up into the shop. Shazam, Hapy is home. While I reeled from the gravity of what had just happened, Bill's guys backed the chipper to where Hapy had been sitting and got to work on the cherry tree. I still need to wiggle the rear end of Hapy west a little bit, probably remove the tow bar from the front of Nina, shove her further south and then shove Hapy further south as well to create more space near his rear end... but.. he's home.
 
---
 
Well, this ends the shop construction odyssey, at least until Boo and I find the cabbage to purchase doors. When we have solved for that and the final inspection has completed, I will accumulate all of the various costs and post the actual rounded numbers. If I had to guess, the structure was ~$25k, the concrete was around $15k, the permits around $2k, gravel, stone and french drain stuff was probably another $3k. So, my approximate running cost is around $45k, lacking doors. I will need to integrate a winch of some kind for moving broken cars and I still want to add a $5k lift. I don't know where that money will be coming from and I feel like I have already spent more than I intended to on the shop already.
 
Thanks, as always, for following along. Saving this mid-century farmhouse will always present me with projects, but once the weather shifts, I think my attention will as well... back to wrenching on cars.

Thursday, October 2, 2025

Building a Shop - Vehicle Egress

Today, I finish the gravel work and move cars into the shop/barn/garage. I should point out that where the last post ended was where I took some time off from the work and went to Seattle for the weekend. We visited the zoo and went to my grand-niece's first birthday party. Very fun. With Labor Day well behind us, Pacific Northwesterners know that we are now in the short days before the seasonal rains return for the duration. With this is mind, I have been spending whatever energy and muscles I can on getting the broken cars moved into shop before it hits. We have been experiencing overnight lows in the upper 40's and gloomy clouds every day. Some nights have brought rains, giving us all a strong prod to finish out outdoor projects. This past week, we have had rain every day, so I am very glad I was able to get this work done in time.
 
Picking Stones
egress complete
The north east corner of the building is over a foot above the ground and the earth slowly climbs nearly 6 inches moving westward to the northwest corner. If you look at the picture at the top of my last post, you can see how significant the drop is. Since this is where the big doorway is and where cars and trucks will come and go, a 7 to 12+ inch lip is more than most cars and trucks can manage. So, I need a smooth egress. To describe the intended pitch of the ramp, I laid a 10 foot long 2" pipe pointing north from the north east corner (you can see it in the pictures). We had a small pile of rock-wall rocks intended for the storm outfall, so over the course of a day and a half, I moved all of them over to the north edge of the garage/barn/shop. Yes, I know. I need to settle on what I'm calling it. It looks like a barn to me, but it's going to be my shop, so we'll call it a "shop" for now. Anyway, a bunch of big rocks really only showed me how much more I was going to need.
 
Boo went to a couple of rock places on the west side, but no one had softball to volleyball sized crushed stone. The few sources we could find had larger crushed rock for a very high price (pushing $1k for a couple yards). It was the wrong size and way wrong price, tho. So, I hit craigslist and found a guy giving away broken up concrete from a patio demo. Well, the concrete guys used broken up concrete under the concrete they poured and the inspector really liked it. So, if it's good enough for a foundation for a building that's getting inspected, it is good enough to go under a gravel drive up to the shop.
 
before broken concrete
Boo and I drove over to Saint Johns the day the bridge was closed for an over-turned truck (just lucky, I guess) and proceeded to overfill the truck weight-wise with broken up concrete. I had been checking the squat of the truck with my foot, shoving it between the top of the rear tire and the wheel well, and it was fine until the last barrow of concrete. We did not realize how bad it was until we could see the tire nearly pancaked and the truck mostly riding on the bump-stops. Yes, I know this is not good for the long-term health of a suspension; I'll not do this again. We decided we had all day to get home, rolled over to the 76 station around the corner and aired up the tires to 45 pounds (tire listed max is 51). This moved the rims up off the sidewalls and the sidewalls up off the ground as well. Because the bridge was out, traffic getting across the river was a mess anyway, so we were not slowing anyone down. We took our time, but found that the bumps in the road became unnoticeable above 20mph, so I kept our speed just above that as much as I could.
 
Stacking and Shifting 
Once home, Boo flagged me all the way back down the lane-way so the truck's rear bumper was nearly where the concrete bits needed to go. I spent a couple hours moving concrete from the truck bed to the egress, stacking some, wedging others so there was the beginnings of an angle from the dirt to the shop entryway. The picture below right shows what I mean.
 
with broken concrete
Once the broken concrete was gone, Boo headed out to get another 1/2 yard of gravel dumped into the truck bed. I gave my self a break from moving the gravel and instead set the line for where the driveway would be and where it would not be. I marked it with some logs, pointing mostly north from the edge of the step where it meets the big garage doorway. To add clarity, I moved a bunch of foundation digging spill (read: dirt and rocks) from the eastern elevation around to the front of the step. The picture at the top kind of shows the effect: the step will disappear into just a gravel landing with it's north exposure being dirt, wood chips or grass. We have not decided on which yet. With some clarity to the driveway edge, I could return to moving the 3/4=1-1/2 drainage gravel, this time on top of the concrete pieces. Before I got very far, Boo returned. We backed the truck all the way back and I spread that gravel on top of the concrete bits before spreading the last of the original drainage gravel I had piled closer to the house.
 
after much gravel
But we still need more. So Boo went to Cedar Mill Gravel and got another load and then another and another until we had a smooth egress from the northern-most french drain to the edge of the shop. Ordinarily, one would rent a compacter and really bang that gravel down so it was super-firm. I had told Clean Water Services that I was not going to have a compacted gravel driveway. They indicated that to them a compacted driveway was considered "impermeable" and would count against my total "paved area" of my property. Since I was already near the limits, we will go with not-machine-compacted gravel. Instead, I firmed it up by cycling between some hand-packing and light watering. During the multiple moves of the ToyoTruck, I noticed that the tire marks were still noticeable, but the truck did not lose any traction. We will see how well this works for cars, or cars hauled by garden tractor soon enough.Water does not pool at all, though, filtering straight through. So, to me, that's permeable, meeting the expectation set with Clean Water Services.
 
Foundation Details
When I had the foundation done, I planned for a few things ahead of time. I know that one day I will want a loft, for example, for storing larger items like bumpers, fenders, seats, etc. So, I had footings dug down prior to the pour so I have them ready for supporting posts. I also planned for a scissoring lift that would disappear into the floor when not in use. Yeah, that sounds really fancy, but when I looked into 2- or 4-post lifts, they are where they are, taking up space all the time, whether in use or not. I really don't expect to use the lift all that often, and certainly don't expect to leave a car suspended for long periods of time (Yeah, we will probably laugh about this assumption later), so why would I want the lift footprint to always be present? I intend to get an Amgo XL-9F, but the cost of this shop already has given me pause and that lift is another $5kUS (or more) today. I don't have that kind of money these days. With the way the economy, inflation and tariffs are going, I frankly don't know when I will. Still, I had the foundation prepared for a lift install. So, I have 2 large rectangular holes in the concrete ready for a lift, one of which you can see in this picture on the right.
 
I need to do more than simply "cover" the holes, though. The purpose of the hidden lift is that I can drive anywhere in the shop. In other words, I can drive over the top of the lift like there isn't one there when it is not in use. So, I need to be able to drive over the holes while I save up for the lift. I located the lift such that there would be just enough space to get a car around it on either side when it is in use. So, I could technically drive a car up and into the shop and not have to drive where the lift would be, but I would rather not have the standing risk of driving into a big hole.

Cap the Lift Holes
I had a large collection of drainage pieces to return to Home Despot anyway, so I headed there for lumber to build covers for the holes. The amount I got back for the drainage stuff almost completely covered the cost of the lumber, and it would have completely covered it if we hadn't cut one of the pieces wrong, forcing the purchase of another $50US sheet of outdoor grade 1/2" plywood. I had the Home Despot folks cut the sheets so I knew the cuts were straight, and so the chemicals in the "outdoor grade" didn't prematurely wear down my circular saw blade. I have all the scrap from the cuts so we have the start of some outdoor counters or something.
 
Once back in the shop, the assembly was fairly easy. I set the 2x6 boards down into the extended runs on either side and set a piece of plywood on top. Drilled a few holes, sent through some fasteners and repeated for the other hole. Just like that, the shop floor is effectively whole and flat-ish. I do NOT believe the outdoor grade 1/2" plywood resting on top of 2x6 outdoor grade lumber less than 2 feet apart will be able to support a car passing over it. I thought about adding cross supports, etc, but ultimately, I was just very careful about moving cars around the holes. At this point, they will be effective in preventing persons and dogs from accidentally falling into the holes, but nothing heavier than, say, a 200#. If I get a wild hair, I may add some cross supports to extend their use a little bit.

Moving Cars
Zed and Oliver home'd
With the shop ready enough for storing vehicles, I took last Friday (26-Sep) off work and started moving cars which have not moved in a while, starting with Zed, the 1978 Datsun 280ZX. He hasn't moved since I moved him here in November of 2022 (See Zed Moves), so I dealt with things like locked-up wheels, a dead battery, etc. Ultimately, I was unable to get him to start nor easily roll. The engine turned, but did not catch. I think it is a fuel delivery issue. I jacked up and verified that each wheel could turn freely so I snatched him from behind with the ToyoTruck and a trucker's chain. Once I got him out of the sunken holes his tires had been in, I was able to roll him down the slight slope to the lane-way. About this time I took a break and moved the stacks of tires I had stored under tire covers near the cars, moving them into the southeast corner of the shop. Returning to Zed, I moved the truckers chain to the lawn tractor and, with Boo behind Zed's steering wheel, we hauled him to the edge of the gravel where the tractor lost traction. We switched back to ToyoTruck,hauling Zed up the gravel drive into the shop, and sending the truck just out the opening at the far south end. We eventually got ToyoTruck out through some creative Tetris and then pushed Zed into the far southeast corner, lightly touching the stacks of tires. With the one car in place, and taking almost the entire day to get there, I hoped the others would be easier.
 
Oliver (1978 MGB) started and moved around last Fall (See MGB Carb Circle Back), so I had higher expectations for him. I slapped the battery charger on him before calling it a day. The next morning (Saturday), I was unable to get him started. There was plenty of charge and even with fresh gas in the tank, the fuel pump didn't change tone. I applied vacuum to the fuel line at the carb to get fuel up to it, but it still would not start. Again, the pump didn't change tone so I think the pump may be faulty, failing to deliver the pressure needed for the carb. Regardless, I was not going to fix Oliver, I needed to move him. So, again with Boo behind the wheel, we pushed him down into the lane-way and again hauled him to the edge of the gravel with the lawn tractor. This time, we did not use the ToyoTruck to haul him up the driveway. Instead, I used a come-along. Earlier in the week, I had looked at buying a winch at Harbor Freight and by mid-day Saturday I started regretting not buying one. With the come-along, I could move Oliver 4 feet at a time before chocking a wheel, resetting the cables and moving another 4 feet. His final spot is the northeast corner, near the big door opening. With the tires in front of Zed, Oliver just barely stuck out of the west end of the shop. So, I moved the tires over by the southwest corner and shoved Zed and Oliver the extra meter south. By now, it was early afternoon so Boo and I grabbed lunch and made the decision to keep pressing forward rather than punt on moving Nina to Sunday.
 
Nina (1965 VW Beetle) has a stuck engine so I already expected to have to haul her. Of the 3, she was the lightest, and we followed the same pattern: Boo and I pushed her into the lane-way, Boo behind the wheel, me on the lawn tractor, we hauled Nina to the edge of the gravel. Then, she was come-along'd into the shop. Once on the concrete, she was an easy slide next to Zed. While Nina is our newest acquisition, both Boo and I are really enamored with her. We are both very much looking forward to getting her working again. The rain did not appear on Sunday, so Boo and I did all the yard-related work we needed to do before the rains arrived.
 
---
 
Monday, the rains started and it has been intermittent rain ever since. The weatherpersons indicate that the rains are supposed to end by the end of the week with clear weather returning for almost a week. At this time of year, that's fairly rare but I'll take it. I still have gutters to clean and Hapy to move. I have been monitoring the ground around the shop and there is absolutely no standing water anywhere.I will accept that as positive news about the quality of my french drain install. If nothing else, I can recognize that no water is impacting my neighbors from my shop install, and ultimately, that's what most concerns Clean Water Services. Regardless, I am greatly looking forward to solving the various won't run issues on Oliver and Zed, but Hapy is first. I very much want to have him whole and driving again.

Thanks, as always, for following along- 

Thursday, September 18, 2025

Building a Shop - Steel Building Erected

First, my apologies for how infrequent my posts have been. The team I work on lost a team member to a promotion and the replacement has not been very successful. As a result, I have been doing the job of 2 people since the start of the year. This removed pretty much all of my slack time at work so lots of things have fallen by the wayside. Take, for example, Hapy, the 1972 VW Camperbus sitting in my driveway. The transaxle is still out, the engine is still on the ground and he has been that way for weeks. Anyway, this is where we are.
 
Oregon Carports
I will start with a call out to the fine folks who I worked with to get the building in the first place. From start-to finish, everyone connected with Oregon Carports and their parent company US Steel Buildings were great to work with. All communications were prompt, email did not sit unanswered for more than a couple of hours and honestly they spent more time waiting for me than I did for them. We arranged build-day around their other jobs, but the crew arrived within 15 minutes of our intended start time (early afternoon 15-July) even though they were driving from California. A 3 person crew arrived in a crew cab truck hauling a long trailer. They backed into the lane-way along the eastern fence and immediately got after it.
 
We had our fair share of hot days this Summer and this stretch of days was no exception. By 5PM it was over 100*F (38*C), but they were not relenting. I supplied them with ice and water from the fridge and encouraged them to not push too hard. They pushed hard anyway. They left around 7PM and were back the following morning by 7AM. They pushed through and completed the building by dark on the 16th. They did not want to spend another night at a hotel in Oregon and instead pushed towards home when they were done.
 
facing North from inside
In transparency, we did a complete walk-through and before I could spot things, the job lead was pointing things out to his crew to resolve. We had originally designed the building to have a person-door on the front, but when they were doing the work I didn't like the design. So, after a quick call with Oregon Carports, the door was removed, my invoice adjusted and we moved on. Very easy.
 
Rain Water Management
With the building in place, my next challenge was around managing storm water when the rains inevitably return. I had received a coupon for those gutters you don't need to clean, so I had them come over and sell me. To my surprise, they could not design a gutter system that would work. It turns out that the design of the building, or should I say the design of the steel framing of the building does not leave anything near the roof line to attach a gutter that could have any kind of warranty. Sure, they could slap some gutters up there, but if ice forms, or if there is a heavy downpour filling the gutters, there was not enough strength behind the soffits to support and the gutters would fail... and then fall. So.. I needed a new plan.
 
Building Final Inspection
trenching
While musing over the gutters, I thought we were ready to have a final inspection and be done with the county. I was mistaken. I scheduled the inspection and while the building construction passed, he could not pass the job as final. The building did not have any doors, and had large openings where they would eventually go. I explained that we plan to have doors, but everything is so expensive lately, those plans are on hold for a while. He indicated that the building needs doors and the people door on the north face will need a landing or step since the building was a little over 7 inches above grade at that point. He assured me that once the doors were on, final inspection would be a quick confirmation. Meanwhile, the permit stays active and open without penalty. The reasoning around the doors is that the building has certain specs around wind resistance and those numbers do not hold up when it lacks doors / is not sealed. The inspector had no interest in gutters. They were never on the plan, and the plan was approved without them, so that tracks. It just seemed odd.
  
Trenching
I figured that if I could not catch the rain at the roof's edge with a gutter system, I would dig trenches along the eastern and western sides of the building, and install french drains to manage it. That sentence took about 15 seconds to type and the better part of 3 weeks to execute. I started with taking lots of measurements to determine how deep I would need to go, and made 2 sets of plans. Plan 1 was to route the water from the eastern and western edges back to the rear of the building and then into a storm outflow I had dug out when the foundation was done. This plan would have required the southwest corner to be dug down nearly 2 feet to account for the ground pitching from southwest to northeast.

installing pipe
Plan 2 was to dig the trenches towards the front of the building, cut across the future vehicle egress and into an abandoned well on the property about 40 feet away from the northern edge of the building. While this plan involved more linear feet of trench and more pipe, the trenches would not need to be nearly as deep, digging down no more than 9 inches from end to end. I decided plan 2 made more sense, and proceeded to trench 30 feet along each side, 24 feet across the northern edge and then another 40 feet from the north east corner diagonally across the future driveway to the abandoned well.
 
Drain Pipe 
Into these trenches, I laid french drainpipe wrapped with filter sock. The trenches along the sides of the building got the less expensive flexible pipe. These pipes cannot withstand much weight, but being right along the building, I would not expect them to. Across the northern front of the building and across the driveway, I used the hard pipe which is designed to handle considerably more weight. Still, these pipes were 6 inches below grade, so weight would be somewhat distributed. The last 20 feet between the driveway and the well, I used flexible standard pipe (not french drain) as this passed through a garden area. Practically all of the rest of the pipe was french drain wrapped in filter sock. I added a drain clean out in the northeast corner.
 
Grading and Graveling 
graveling
With the pipe down, I could see that there were some spots along the building where water could slip past the pipe and run away from the drainage system. To remedy, I used fill dirt from the foundation dig to build up the downhill areas from the drain pipes. As I layered in silty clay, I watered it in so it would not wash away during the first rain (it didn't). Satisfied, I ordered 4 yards of 3/4=1-1/4 drainage gravel delivered into the laneway, about 75 feet from the building. With a shovel and a wheelbarrow, I filled the building-adjacent trenches and the small valleys I dug along the trenches, creating a gravel stripe about half a meter wide.
 
One Small Step
steppin up
With the trenches done and filled in at least as far as the front of the building, I started after the step or landing that the inspector required. I looked up the code and the step needed to be at least 1 meter square (width of the door, square). I decided to make it bigger, running from the corner of the building to the edge of where the driveway egress would start, and then make it the required 3 feet deep. I used some outdoor grade 1 by 8 we had lying around with a couple of 2 by 4's for corner re-enforcement and drove it into the ground. After checking level and stuffing some rocks underneath to hold it level, I put a layer of melon-sized rock on the bottom and filled it with some of the drainage gravel I had.
 
---
 
This is getting long, so I'll stop here. I will say that the work on shop/barn/building/garage has been my sole focus this summer. So, almost no car work has happened at all after the grand dismantling of Hapy over Independence Day weekend. I did spend a different weekend replacing the oil pan in my niece's Jetta TDI after she drove over a tree stump, but that's just being an uncle. It took a weekend because I had to go get the car from the middle of the woods where it was left, drained of oil, so yeah, it actually took a weekend. I will go into more detail on Hapy's flywheel replacement effort once it reaches a Hapy conclusion.
 
Thanks, as always, for following along. 

Wednesday, June 25, 2025

Building a Shop - 106 Inspections and Concrete

Has it really only been a week? Between the daily news feeds, routines, managing brush and this construction project, days really just zip by. Today (24-June-2025), we got the concrete poured, but we had some inspection adventures along the way.
  
Inspection One
I brushed on the finishing of the rebar in my last post. The guys completed the work on Monday, June 16. In between were a few partial days around other projects to get the rebar set up and to dig out the trench and set in the PVC pipe for the lift controls. Feeling we were ready, I scheduled an inspection for Wednesday, June 18. Since this was the day before a US holiday (Juneteenth), my scheduled inspection was met with multiple other projects trying to get their inspections done before the weekend AND multiple inspectors deciding to call off, extending their respective weekends by another day. The result? The inspector was pissed before he got there, which is never a good set up for an easy inspection. We did not pass for 4 reasons:
  1. rebar lying directly on the compacted gravel, not physically suspended 2" above
  2. overlaps of rebar were not a minimum of 20"
  3. rebar in footings supported by rebar driven directly into the ground 
  4. type of PVC used (white, not grey) for the controls is not rated as electrical conduit

The rebar lying on the compacted gravel, while a fair observation, may not have been entirely fair. I have learned that it is a fairly common practice to lift the rebar as the concrete is poured. I am sure the inspector was right to point it out, remaining within the letter of the regulations. Ultimately, I want / need a floor that will not fail, so now that I've bashed him for not being fair, I'm good with it. I mean, even if the concrete pour-er does lift the rebar as they go, how do they decide how high and keep it relatively consistent? And then, when the concrete is super wet, what is to stop it from floating back down to the bottom anyway? So.. physically suspended makes sense.

Once the inspector explained that the overlap is what creates the strength at the transitions, I understood the 20" minimum overlap. This is especially important in the footings which will be supporting the weight of the building. Then, there's the rebar driven straight into the ground. The inspector felt that this would encourage premature rusting of the rebar as water would be in direct contact with the rebar beneath the concrete and rust would then leach up into the rebar within the concrete, eroding it's strength.
 
The last item about the PVC was 100% my fault. I watched numerous videos by homeowners installing their own lift in their existing garage floor and they used basic white PVC. The PVC is intended to house the hydraulic hoses for the lift plus the low voltage emergency shut off. Because the shotoff is electric, the PVC has to be rated for electrical conduit, which the white PVC is not. So, Wednesday night, I ran off to HomeDepot and got about 7 meters (20 feet) of 2" grey PVC conduit and a corresponding grey 90* bend.
 
Solving For Inspection One
wrong copper wire on left
On the afternoon of Juneteenth, Vai and his crew arrived, dressed for a barbecue, carrying bags of little concrete blocks. While a couple of his guys dug out the white pvc (under and around the rebar) and installed the grey, the other guys were removing the vertical supports and suspending the rebar on top of the little concrete blocks. In less than an hour, they had resolved all of the things that the inspector identified and then left for their family barbecue.
 
One last item that the inspector wrote down, but did not fail me for, was a suggestion to install an "Ufer". The inspector recognized that since I had something that required an electrical conduit, at some point I would need a good electrical ground. While an Ufer is becoming more common, most electrical installations are grounded with two 2 meters long grounding bars driven into the ground 10 feet or more from each other. An Ufer uses the rebar in the foundation as a ground and is an accepted grounding practice, provided the Ufer is tied into the foundation rebar at at least 3 points and the segment tied to the foundation rebar is at least 12 inches long. When I was getting the grey PVC, I got a 2 meter section of thick copper grounding wire for this purpose. I later discovered this was the wrong material.
 
Inspection Two
west footing cleared
I scheduled a follow-up inspection for Friday, June 20th and we had the same inspector we entertained on Wednesday. He knew exactly what he was looking for, so he went straight to the trouble spots. Rebar suspended above the gravel? Check. Overlaps at least 20 inches? Check. No rebar driven into the ground? Check. Grey PVC? Check. Ufer? Not quite. The inspector indicated that the Ufer needs to be rebar and that the grounding wire from the panel to the Ufer is the material that I was using. Doh! Kindly, he indicated that if I did the replacement with rebar and sent him a picture, we would get the approval for the grounding Ufer. He also pointed out that we had too much dirt in the bottom of the western footing. Again, he said if I fixed it and sent a picture of it cleared, we would get approved.
 
I found a section of rebar in the construction rubbish that had a 90* bend in it, was 14 inches long to one side of the bend and about 4 inches on the other. Basically, it was perfect for this purpose, so I tied it into the foundation rebar at 4 points, pointing the short end straight up, about 18" south of the northeast corner of the foundation. So no one tripped over it, I spray-painted it orange. Last, with a hand-held digger and a plastic cup, I cleared the western footing of debris. I sent pictures of these things (along the right side, here), and we got approved.

Concrete Pour
orange Ufer
With the approval in hand, we looked at calendars and weather projections. We wanted to pour on Friday, but we had a strong feeling (that was warranted) that we were going to get hit by rain. It rained on and off all day and the here and there all weekend, so we were right to delay.. to Tuesday, June 24th. The concrete pump arrived at 8, Vai's crew appeared shortly thereafter and the concrete truck arrived around 930. Vai's crew wanted to confirm the placement of the lift forms and they firmed them up with some cross-bracing against the exterior forms so they would not move during the pour. Then, they solved for what I had been referring to as "the wings" on the lift forms. In the drawing, there are 2" wide by 4-1/2" deep by 9" long channels that jut out from the front and rear of the main lift recess. These are for the supports for the ends of the lift when it is all the way down. Frankly, they look like tripping or tool-losing hazards for when the lift is up, so I may create some fills for when the lift is up. To create the 8 recesses, we combined a 2x6 (actual size 1-1/2 by 5-1/2) to an old fence board (3/4 by 5-1/2), cut into 9" sections and then rough-screwed onto the forms. While the wood bits are slightly wider and deeper than required, I felt that was a better situation for the arms to descend into than slots which were either too narrow or too short. If it becomes a thing, I will solve for it then.
 
gettin after it
Once the forms were ready, they started pumping concrete and in about an hour the footings, and floor were poured. I went out to pay the concrete truck and Vai's guys were finishing the last of the floor with barrows of concrete. Somewhere along the way, one of his guys rotated the Ufer into the concrete, so we fished that out. While it's no longer orange.. it's more concrete color.. I am glad I asked about it. This serves as a reminder to check everything as you go. While they are the experts, you ultimately own it. Government inspection is to make sure no one gets hurt and it's structurally sound. Any small error that doesn't get into inspection territory is yours to verify. Anyway, Vai's crew stayed for a few hours floating it smooth and monitoring the concrete. The result at the end of pour-day is pictured at the top. Now, we wait for it to cure and then we can move forward with the steel building on top of it.
 
Wrap Up 
That's it for today. I don't have any car content as I honestly have not had any time to play on the cars this past week. Around managing the concrete work, Boo and I have been clearing brush around the tool sheds and weeds along the eastern and southern sides of the new shop space. I am still waiting for the new flywheel and clutch/pressure plate from Kennedy. I hope to have them in time for Independence Day weekend so I can do the engine-trans R&R over those 3 days.
 
As always, thanks for following along-

Thursday, December 28, 2023

Dashing Thru the Smoke

After returning Hapy to service, I have not driven him much. As has been true for most of the time we have been together, he doesn't have heat. So it's like driving in an ice fishing shed... which probably brings some appeal to some folks, but it's not my favorite. Still, if I had to get somewhere and I could get there without using freeways, I would and have drive(n) Hapy. Why not freeways? This time of year, as I am sure you have noticed, drivers are especially distracted and others are driving specially, uh... nasty. This old bus needs more braking space than modern cars but other drivers don't always recognize that. When you add those factors together, it is tough sledding in the bus. Add in wet or slick roads and it gets scary. Regular roads are bad enough, but freeway speeds are too scary in the winter for me and the bus. With this backdrop, I start today's post.

Smoked Again
can you spot the loose wire?
A few years ago, on the return drive from 4Peaks, we were greeted with smoke billowing out from under the dash (See 4Peaks 2018 - Road Report). Somehow the ignition sub-harness had fried, leaving us stranded, riding home on a flatbed again. There's a song lyric in there somewhere. Anyway, I fixed that once and then again in a not-to-my-best-liking way with now 2 keys to operate the bus: one to unlock the steering and one to start/run the engine. This is working well enough so I leave it alone.

The other night, I had to drive out to Hillsboro for a final recording session with the band I'm playing in (shameless plug: Sunkicks), and Boo had not returned from work. So, I pressed Hapy into service. With the new starter and better glow-plugs, he fired right up and hummed like he was ready for some fun. It was damp out, so the lack of heat meant drying the inside of the windscreen with a towel, but for the ride out, it only needed that one wipe down. Even the driver door closed without too much trouble. It was like Hapy was really trying his best to show he was a real car and could be used reliably. We stopped for some home repair parts at the big box home repair store and he started right up afterwards. Again, "I'm a real car".

After the recording session concluded, the temperature had continued to drop, while the moisture held steady so the interior glass was quite foggy. Hapy fired right up and I flipped on the running lights while I refamiliarized myself with the controls in the dark. I thought I had the switch for the fans in my hand, but it was actually the headlight control... I turned hard it to the right (the fan control switch has always been a little resistant), and rather than turn on the fans, I caused something to ground, causing a wire to release it's smoke. When I saw the smoke, I turned the switch back left (anti-clockwise) but the damage had been done. All that was left was to figure out how widespread it was, and to apologize to Hapy; this wasn't his fault, it was all mine. The smoke was pretty bad though, considering the windows were closed, the bus wasn't moving and the fan wasn't on. The next day, my throat was still sore from it. When I opened the driver window, it must have looked like a scene from Fast Times at Ridgemont High with the billowing smoke rolling out.

dripping blue
Starting with the positive... the engine was still running. The cooling fans were on and could be turned on and off. The defogger (doesn't defrost, hardly de-fogs) fan could be turned on and off. As to the negative, the driving lights were out, I think the tail lights were out and there was an annoying buzzer like a seatbelt warning was on. When I flipped the turn signal or hazards, the front lights flashed correctly and the buzzing went away. I was still sitting, idling in front of my bandmate's house, so I decided that I would just drive home and deal with it later.

The drive home was quite uneventful other than the constant buzz noise and concern that drivers behind me could not see us nor tell when we were braking. When I got home, the engine and fans shut off without issue. It was too late and too dark to diagnose, but my hunch was that it's the wire that sends a signal to the running lights.

Wire Still a Puzzler
A few days later, when I could go out to the bus in daylight, I went out and removed the headlight switch from the dash. I could see one of the wires had become detached, but I was unable to see any truly fried wires. Puzzled, I plugged the wire into the open pin on the back of the switch, and tried the lights. Yep, headlights still turn on, dash lights still turn on.... running lights turn on. All of them, including the tail lights. So, I pulled on the hazard switch. Dash directionals flash, front directionals flash, rear directionals flash. At this point, I don't know what's fried, but the engine starts and runs, the cooling fans fire, the dash lights, switches and gauges work and all the lights work. In the middle picture, just above, there's a light blue orb thing on the lower left side of the image. That is a blue drip that I cannot account for, but I think something melted and that's the result. Neat.

I think it is time for me to determine which of the original circuits no longer need to be served and at the very least remove the fuses. After the cleanup I did in the back for running the engine, I think it would be wise to plan to do something very similar up front. I mean, in the end, the only things the "main" fuse box is running now are the dash, and the lights. That's like, 4 fuses tops? Regardless, this exercise should lead me to the smoked wire and reduce the electrical gremlins.

Furnace Update
furnace control board
Our electrician is semi-retired. He used to run a HVAC company and has installed literally hundreds of furnaces before focusing on general residential electrical instead. Now, as he is slowly divesting of his electrical business, he has observed my work on our furnace. In a fit of holiday fever (he swore off furnace work years ago), he popped by for a couple of hours, got the gas line hooked up and leak tested as well as the 110V electrical feed completed, with a worker shut-off switch. He even got most of the exhaust venting put in. He hit a wall when he was unable to connect the control cable because the access screws are hidden behind a panel that you can't get to once the first piece of exhaust venting is attached to the furnace. That's some poor design.

Still, I saw the furnace project as 7 big individual efforts: demo/move/mount, conditioned air distribution, cold air return, gas, electric, exhaust vent and the thermostat/control cable. I had completed the first 2. He knocked down 2 more (gas and electric) and set me up to get the next 2: thermostat control and exhaust vent. Once I have that done, he will confirm things, and test the system. Then, I just need to get the cold air to pull from inside the house and we have a complete system. For testing purposes, I may simply smack a filter on the plenum.

Since I started this thread, I caught a cold, celebrated Christmas and installed the thermostat control cable. As I indicated, I had to remove the exhaust venting all the way to the firebox before I could remove the panel which covers the control board. I ran a new wire from beneath the furnace (where the old one entered) and connected the control wires. Before putting everything back together, I took the opportunity to spray the snot out of the control board with a can of computer-cleaning compressed air. I figured that panel won't be coming off anytime soon, so may as well get the board as clean as I can. After that, it was simple replacing that which was removed, re-using the same fasteners.

That's about where things are today. Hapy appears operational, and I will be test driving him here in the next couple of days. The furnace is almost ready to test. I need to complete the assembly of the exhaust vent and properly suspend it from the floor to retain the correct exit angle, but I think that is a couple of hours effort at most.

Thanks as always, for following along. Have a peaceful, pleasant, hapy new year-

Tuesday, August 13, 2019

Making Hapy Sounds (Part 3)

continuing from the Part 2 post about getting music into Hapy the wonderbus. When we left off, we had front speakers installed and rear speakers floating around in their own little speakerboxes. The wiring for all speakers had been routed back behind the dash. For the front speakers, the work was mostly a finished product. The rear speakers, though, were still very much in an experimental phase. Today, we wire up the head unit and complete the work.

Head Unit Physical Mounting
You know how when you swap out a big car stereo (a double-din) for a smaller one (single-din) you usually install one of those plastic boxes in the extra hole? Well, I had one of those box/bin things in my garage, and it had been there for a few years. So, I figured I'd put it to use. Shortly before we left for 4Peaks, I stuffed it into the radio hole in Hapy. On the drive and while at 4Peaks, we loved the extra storage spot. On the drive, it was where we put our phones. While we slept, we put valuables there. So, I didn't want to remove it to put in a stereo. Honestly, it was jammed in there so hard, I'm not sure I could get it out without destroying it anyway. AND, there was nothing in that are to physically attach a stereo to anyway. The old DarkStar stereo was held on from the front. Modern stereos need something to attach a rectangular channel to, and there was nothing there in the bus to bolt it to. So, I popped it into the glovebox instead. It still needs a real mounting, but for version 1, it sits on top of the packing cardboard it shipped in. Will it bounce around? Maybe. Could I break the stereo because I didn't mount it properly? Absolutely. Blindly moving forward, I drilled a 3/4" hole into the driver-side of the box, near the back, to run wires. With the glove box closed, it looks like the bus doesn't have a stereo... like it hasn't for the 15 years I've owned it.

Head Unit Wiring
In retrospect, I could have started here. I am not going to Should on myself (see Don't Should on Yourself), but if I ever have a virgin stereo install to do again, I will. Consider: the 2 most important bits for a stereo install to be successful is for a solid ground and a reliable source of 12V power. One could just solve those 2 wires and confirm the stereo works and your power is good before you do anything else. Wise advice for a future me. Anyway, for a ground, I doubled-up on a o-ring-d ground that was screwed into the air vent box. I verified that ground was good with a continuity test back to the negative post on the battery. For power, I tapped into an always-on circuit but it did not have enough juice to power the stereo. The radio acted like it didn't have any power, though I could read 12V at the plug. So... let me back up and then I'll get back to this.

I wired ground first. Always do ground first. Then, I took the various speaker wires and mated them with their respective colored wires coming out of the stereo plug. I intend to swap these into something more like the plug in Oliver, but this is fine for version one. Last, I tapped into a 12V source, hiding the wire, etc. Then we test fire.... nothing. This is where ideally I would have run ground, and 12V to prove it will power up before doing anything else.

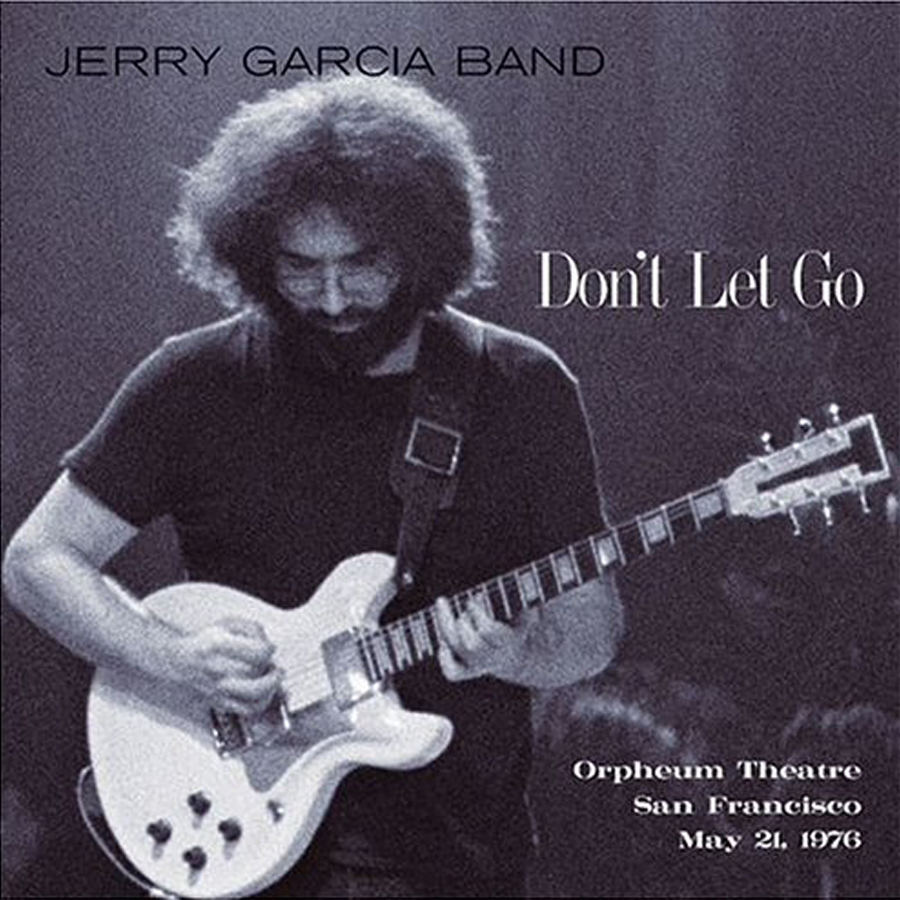
https://jerrygarcia.com/album/dont-let-go/
By now, it was getting late and I was getting tired and hungry. So, I ran a hot-lead from the luxury battery (our name for the deep cycle battery under the rock-n-roll bed that powers the lights and 12V sockets) to the back of the head unit strung across the lot couch, with a big coil bouncing between the front seats. It looked super-janky, but I needed to test whether the stereo would power up, and whether the speakers would respond. I plugged it in and heard the CD whir, so I knew I had power. So, I grabbed Boo and our copy of JGB's Don't Let Go CD for a test-listen before we both called it a day.

The smile produced by a JGB "Sugaree" is virtually a given, especially from the mid-70's era. That smile was compounded by hearing it coming from all around us in Hapy. "How loud does it get," Boo asked. She remembers our struggles to hear on the road as acutely as I do. Turning it louder and louder... it never distorted. Pure Jerry deliciousness pouring out of the speakers, hugging us with music until we were unable to talk over it. Yeah, that'll do.

12V Source Fixed
We shut things down, and I cleaned up my mess for the night. The following morning, I was back out there to run a 12V lead from the luxury fusebox to the stereo. This sounds simple, but it took quite some doing. I started at the glovebox, running a stiff 12ga wire through the hole and down behind the front "floor" vent. It runs below the TDI accelerator pedal (See Pedal on the Right) and under the rubber floor mat to the right edge of the driver seat pedestal. It runs along the right edge of that pedestal and under the old seat mounts for the 1972 Westy rear-facing seat, under slides for the lot-couch / middle-row seat and under the front edge of the rock-n-roll bed cabinet. It appears behind the cabinet near the corner by the refer-storage cabinet. I wired it into "fuse #12", protected with a 16amp fuse. I layered tape on top of the wire where it intersected with the lot couch slides to we don't accidentally catch that wire when putting the couch back in. That would be bad.

Once I had the new 12V supply line set, I re-tested. All good. I took the opportunity to tuck away some other errant wires up front. That's it for today. Version one is ready for some test drives and a festival or camping trip before we make any modifications or harden wiring to the rear. Thanks, as always, for following along-