Showing posts with label dry. Show all posts

Tuesday, November 15, 2022

If It Doesn't Move, Paint It (Final)

After weeks of spackle, caulk and masking, we were finally ready to shoot the interior of NewOldHouse. We would have arrived here earlier had we not digressed outdoors, but when the rains come, you need to have already gotten your wet/dry solved, or you will be doing it in the rain while everything gets wet. Anyway, today's post covers the final adventure in paint, and a few other things that happened along the way because.. of course.

Just as I completed the work described in this post, I tested positive for CoViD. I am living proof that living a hermit lifestyle is not a guarantee that you won't get CoViD. I have been going to a pizza place in Hillsboro for an open jam on Wednesdays as my only outing, so at least I know where it happened. I've been down nearly 10 days with it now, so progress on cars, the house, even my job is, obviously, halted. Good times.

The Walls Came Down
thar's a furnace in thar
For some reason, when the prior owners installed the gas furnace, they put it into the main living space. I thought it was because of the proximity to the chimney, but from the garage, there is a straight path to the chimney as well, and popping an exhaust through the roof would not have been that difficult. Instead, they put it into the dining area, and then... built walls around it. The new walls were, probably, a foot away from the furnace while the furnace was located 6 inches or so from the original wall. We couldn't figure out the thinking, but we didn't like the furnace location, nor the walls. With a plan to eventually move the furnace into the garage, I tore down the walls around it.

I took the time to remove the baseboards, the door trim, door frames and the doors. I removed the trim nails and collected these reusable bits onto the garage rafters. I then went after the drywall with a rubber mallet. I didn't want to make a huge mess, I just wanted the walls down. So, I loosened the drywall from behind and then pulled sections off with gloved hands. The refuse went out to the dump pile, and I turned to the framing. This was fun. I smacked the inner wall framing a couple of times with the long-handle sledge until the bottom came free. Then, I wrenched the 2x4 back and forth to remove it from the upper. One by one the inner pieces were removed, leaving the corner and the door frames. For the door frame-framing (the 2x4's that create the rough door opening to which the door frame is attached), I removed the header first, and then the side pieces could remove in a similar fashion to the middle framing bits. Then, I took out the corner. Again, this was simply smashing with a sledge and prying with a wrecking bar until they gave way. Most of the corner came out in one large section. The ends nearest the original walls were next, and the top plate came down with those, leaving the footer. the footers were set into the original hardwood floor with 3-inch-long nails. To get to those, I carved out the top of the 2x4 with a screwdriver and then leveraged the top of the nail enough to fit the wrecking bar underneath. Some subtle pressure later and the nails were out, and the footer was out. The space seemed much larger.
 
More Masking
walls? what walls?
With the furnace now exposed, I could paint those original walls, but I did not want paint on the furnace or the nicely finished original wood floors around it. So, I spent a couple of hours with paper, plastic and tape covering everything except the venting on the front of the furnace and the exhaust to the chimney. I left those for actual paint-time because I want to keep running the furnace until then.  I know that the exhaust would meld or burn anything I wrapped it with and the front of the furnace needs to be open when in service. On paint day, I turned the furnace off for the shoot, and covered the exhaust with film, the front of the furnace with a sheet of waste cardboard.

Prime Time
Nemo at NewOldHouse
After the walls were washed and I had checked and rechecked that everything had been masked, I had considered priming everything. I decided that it was probably excessive, especially considering how clean the walls were once Boo was done with them. Still, there were some stains, so we got some some Kilz2 to cover them. The Kilz2 does not cover odors, and there were still some remaining cat smells. So, I thought about getting some original oil-based Kilz and shooting the lower 3 feet of all the walls to try to contain that. Again, overkill. I concluded that the cat urine smell was probably not in the plaster, it is probably coming from that space between the hardwood floor and the baseboards. So, I decided that after we stripped the masking out, I would shoot that space with some enzyme-based cleaner (like this).

While I did not prime everything, I did prime the popcorn ceilings in the "new addition" bedrooms (built in early 60's) out of concern for how much paint they would suck up. I shot the stains as well as the original pink paint that appeared where I removed the walls around the furnace, and the area in one of the addition bedrooms where a shelving unit had been removed. Most of these areas were reachable without having to move the sprayer. I needed to move it once, from the rear of the house to where the furnace is. Before I cleaned up the equipment and put everything away, though, I took the operation out to the now-clean future tool/parts shed and shot that entire interior with the Kilz2. It was bare wood, and I figured painting it white would help illuminate the space once filled with shelves and some lighting. The shed has a high shelf/storage area so unlike my spray adventures so far, I needed to work from a ladder to hit the shelf and ceiling well. Even still, this spray was fast, and since I had started early in the day, I felt confident that I could get most of the interior spray done.

Shooting for Good... Enough
tool shed primed
Our original plan was to buy really good white exterior paint. At $300US per 5 gallons, we changed our minds, and bought generic indoor/outdoor eggshell white paint. The house is still white, but we may need to paint again sooner. So what? There is quite a bit of siding that needs replacing, so little harm done. Fast-forward a few weeks and Boo and I got to a similar conversation about the interior paint. I painted our current house interior with an eggshell "Brazilian Tan", which is beautiful, but the house was already dark and even though the Brazilian Tan was lighter than the paint it went on top of, it's still pretty dark in there. Even in the summer. NewOldHouse is not in perma-shade like the current place it, but we decided we want it to be super bright.

We talked about painting the walls with some color, but the main rooms have coved ceilings, making it difficult to draw a line where the colored wall would meet a white ceiling. Many older houses have a picture rail that will draw that line for you. Since we don't, and we were not sure what to do color-wise AND draw-the-line-wise, we went with.... generic indoor/outdoor eggshell white paint. Sound familiar? Yep, it's the exact same paint. Why keep all these tins of touch-up paint when you can keep only one? LOL. I'm sure this paint will be acting as a primer for the next coat (that has a color), it's just a question of when. For now, white walls go with any decor... well... they will go with ours anyway.

Paint On!
furthest room shot
With the stains and popcorn ceilings primed, I switched over from the Kilz2 to the eggshell and grabbed a quick bite. My time shooting Zed taught me that once you start, you really can't stop unless there is a clear line where the painting can stop. I also remembered that ventilation is super important, so I set a box fan in the open front door (blowing out), and had the kitchen windows wide open. I wasn't sure how long the Kilz2 had been drying on the ceilings in the back bedrooms, so I started with the shed. This gave Boo the most time remaining to clean whatever walls or ceilings we had not yet cleaned. By doing the shed first, I also took advantage of the little daylight Oregon has at this time of year. The shed painted like it primed, though I fogged (light passes at a greater distance) some of the wood panels after I completed the shoot, trying to get consistent coverage. In the end, most of the walls will be covered with shelves, so the handiwork won't really show, but I have a hard time half-assing things.

Once the tool shed was painted, I moved the sprayer into the furthest new-addition bedroom, and shot it completely. I started with the closet and then the ceiling. Then, I shot the window frames and finally the walls and baseboard, working my way towards the doorway. This kept the paint hose from hitting freshly painted walls or trim, and the sprayer in one spot for the duration of that room. Once the rest of the room was done, I moved the sprayer into the next bedroom and shot the doorway and the door. Last, I cracked the large window to let some fresh air in.
 
front living room shot
I sprayed the next bedroom following the same pattern: closet, ceiling, window frames, walls and baseboards. Again, I backed my way out of the room, moved the sprayer and then shot the doorway and the door. I continued this pattern, backing down the rear hallway, shooting the ceiling, then walls before moving the sprayer into the one original bedroom. Unlike the other 2 bedrooms, I decided that shooting the window frames early effectively restricted the amount of light I had to work with. So, I shot the window frame after I did the baseboards. Similar to the other rooms, though, I left the space around the doorway for after I moved the sprayer, and shot that area last. After cracking the window, I hit the hallway, turned off the furnace, removed the thermostat and then shot the hallway, avoiding the cold air intake.
 
At this point, it was past 430PM, so twilight was setting in. Without meaningful light, my shoot was done for the day. So, I popped the thermostat back in, turned the furnace on and cleaned up the sprayer for the night.
 
Second Verse, Same as the First
main room, start of day 2
When I returned the following morning, I walked the area which needed to be painted. The furnace was not 100% covered yet and in the middle of the main space Boo and I had set out all of the built-in drawers and the pieces of my desk to get painted with the rest of the house. Navigating these items while shooting the ceiling was not a good idea. So, I moved the drawers, desk cabinets and shelving into the front bedroom to get shot. Next, I looked at the ceilings; we had not quite finished washing all of it, so I TSP'd a section. Last, the doorway into the partially demolished kitchen was unimpeded. Everything that had been setting in the main room for our workday comforts (camping chairs, snack cooler, etc) were in the kitchen too. So, I added overlapping plastic sheeting over the doorway, so overspray would not blow onto our creature comforts.

Ready for another shoot, I donned the old white overalls, wrapped my head with a white T-shirt, set up the sprayer and got after it. I started with the walls around the furnace, so I could unmask and re-start it at the earliest moment. I moved through the space anti-clockwise, shooting the eating nook first, then the main living space and finally the den-like area directly rear of the living room. Satisfied, I moved the sprayer into the front hall and shot the drawers, etc set up in the front bedroom, completing the spray. End-to-end, it was probably around 6 hours of shooting plus a few hours of cleaning / prep on the second shoot day.
 
Clean Your Tools
main living space complete
To clean the sprayer, I put about 2 gallons of water into a clean 5 gallon bucket. Before I dropped the sprayer pickup tune into it, I hosed the pickup tube off with the garden hose. Now somewhat clean, I put the pickup tube into the water and the priming hose back into the paint. I primed the machine until water was coming out the priming hose, and then I shifted that hose into a recently emptied 5 gallon now-slop bucket. I continued to prime until the priming hose was running clear. Then, I switched over to "sprayer" from "prime" and did the same thing: shot into the paint (reversed the tip) until it started to get watery, then switched over to the slop bucket. Once the gun was shooting mostly clear, I shut things down, released the pressure and took the pieces into the garage sink for cleaning. Since most of the paint was already run out, cleaning with running water and soap was relatively quick. Paint needs warm air, so I set the furnace to run the fan all night and I left the box fan running as well, to help speed the drying.
 
Strip, Lights
further room done
Boo and I returned the following day and started pulling the masking off. For me, the most important thing was that we didn't have many thin or bare spots. I only found one 2-foot by 3-foot bare spot on one ceiling, and I decided to fix it with a flat-nap roller rather than pull out the sprayer. Otherwise, the coverage looked good. Sure, there were some heavy spots, and I attribute that to the hard-to-see from lack of light. Regardless, we pulled the paper and film from the windows, light fixtures and floors, rolling it into a big puffy pile as we went. We discovered some spots where the tape did not hold, allowing for paint to get on the floors, but overall, the finished product looks really good. Once the paper was up, I cleaned each light fixture and mounted it, with bulbs.

This was a huge milestone. With the interior of both the house and the tool/parts shed painted, we can start moving non-essential things (like Nemo, the Audi A4 B5) over to the NewOldHouse. Nemo drove over with no issues, by the way. We need to source, paint, measure, cut and install 1-inch quarter round pretty much everywhere the new painted baseboard approaches the wood floor, though. If you look at these couple of pictures, you can see the gap. I expect we will be doing the 1/4-round a room at a time so it doesn't become a huge undertaking. Of course, at one room at a time, it could take quite a while to complete. Once we do it, I'll post on how we went after it.
 
Because moving is really only interesting to the person who is moving, I won't post on it. If something else happens that might actually be interesting, I'll post on it. Otherwise, until after the move, thanks, as always, for following along-

Tuesday, October 4, 2022

If It Doesn't Move, Paint It (Part 1)

Our youngest son, K2, started his service in the Navy recently, so I am borrowing from an old armed forces adage for today's title. Following seas, K2. On topic, Boo and I are continuing on our NewOldHouse journey, and today's post is about preparing for paint. I say preparing because we haven't gotten to the actual painting part yet. Maybe next week? Who knows, but I'll post part 2 when it happens.

Interior Cleaning
I have mentioned a few times just how grody the NewOldHouse is, or was. After the crawlspace was cleared of rubbish and new vapor barrier installed, things were decidedly better. Then, the floors were cleaned, sanded, stained and sealed. More better. Next for the interior (excepting the kitchen and bathroom), is painting the walls and ceiling. I used to paint houses for a living, so I know how to do this, but before we could paint, we wanted to clean and clear the space. This starts with protecting the floors with paper and plastic so the nice new floors are not damaged. Then, we removed all of the electric outlet and switch covers. Those steps are fast. Next, we started washing the walls and ceiling with TSP (or some similar cleanser). Since this house was so gross, we went with the more industrial TSP rather than something weaker. YMMV. Regardless of what you use, it takes a long time to mop walls and ceilings.

Exterior Scraping
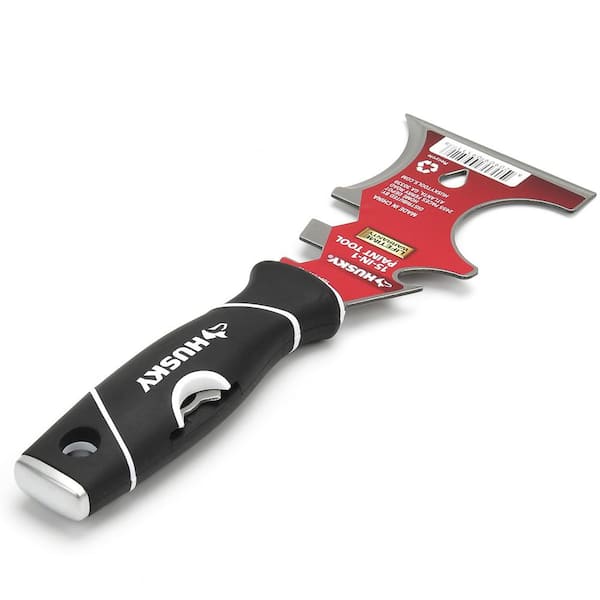
After all that inside-focus, I felt the weather change looming. I have written about this feeling before, and how it effectively drove the effort to get Zed painted before mid-Summer. Well, here we are in autumn and we have a beater-house with peeling 30+ year old paint on it. I hit it hard with the power washer, and thought that would have loosened the paint. I did remove some, but there was more remaining than I expected. I focused on the front and sides for my first weekend of scraping, and after about 10 hours, I had those 3 sides mostly scraped. I did the rear over the course of a few week-day evenings that following week and finished everything the following weekend. I used 2 tools: first what I call a "5-way" that has a sharp-ish blade perpendicular to the handle that is bluff on one end and pointy on the other. I used this tool to pick at paint bubbles and splits to try to lift the paint. If I could, I would grab the edge with a gloved hand and pull the paint off. Regardless, once I got what I could in an area with the 5-way, I would use an old-skool scraper. A classic paint scraper has a handle that's about a foot long with a rectangle on the end in which sits a 2-sided scraping bar. That bar will grab paint edges, peeling or chipping it away -or- it will grind down a paint edge, if it is holding to the siding. The end result is the loose paint comes off and the transition from not-painted to painted is smoothed. Once paint is applied, these transitions are far less visible afterwards. This is strenuous work, however. After spending 2 weekends pushing scrapers, I load up on Monday with ibuprofen for recovery.

5-way on steroids
I found that some areas would have a great deal scraped off, like in the picture on the above right. Other areas, the paint adhered very well. A neighbor offered that the paint came off in areas where moisture could appear from behind, like an uninsulated garage wall (image above is a garage outer wall). I found, too, that the walls which were hit by significant direct sunlight peeled more. In the picture, the top 2 runs of siding were almost perfect; I could not remove paint without more severe steps. This part of the siding is sun-protected by the roofline. The siding further away in the picture is shaded by a large tree. I guess that's one more advantage to surrounding your house with trees: paint lasts longer.

Delaying Exterior Repairs
When you get close enough to your siding to scrape it, you really see every imperfection. Regardless, I knew I had another day of driving nails and shooting caulk before I can cover windows and doors with plastic for shooting paint. I also found some failing areas that will need more attention. I expect that I will get the siding good enough and paint-shot to protect the house this year and will repair wood areas next year, and hand-brush the repairs as I go. The alternative could push the whole painting effort into the rain, and that changes the paint material choices since you can't paint water-based paint in the rain and expect a decent result. The soffits have some rot and the roofers did not clean above the soffits before installing the new roof, so there is work there. I will not get to this due to time constraints. I also found at least one lower window sill with some rot damage (see image on the right). Again, I do not have the time to fully resolve, so I will protect the damage as best I can with a plan to perform more major repairs when the weather changes (or when I can afford to pay someone else to do it).

I was able to walk the outside with a box of nails and a framing hammer, however. I re-set every nail that I could see, to get the siding to sit as tight as it could with the existing fasteners. When I could still hear a hollow thump when I struck the siding with the handle of the hammer, I sent in another nail. I repeated this until the thumps were solid. I also replaced all of the missing corner pieces as I went. 

Next, I will caulk the windows and doors, and eventually get to hanging plastic and shooting paint. Fortunately, the weather forecast is holding for the next week. So, I figure I will spend a few after-work evenings caulking this week, and if all goes well, next weekend I will mask and paint.

Thanks, as always, for following along. I know this isn't car content. Once the house is done enough for move-in, I will be getting to car projects again. All good things in all good time-

Wednesday, August 3, 2022

Painting Zed

It has been a very busy couple of weeks. I had taken a block of days off work for a camping trip in Hapy, but with Boo's arm, that was not going to happen, So, instead of a road trip and corresponding post, today I will cover what I DID do those days: take several major steps forward on getting paint on Zed, the 1979 Datsun 280ZX. Apologies for the late post. I finished painting yesterday, and I am back to work today. So, while this is a day and a half late, there's a lot to cover.

Priming Body Kit 
end state
Recall the last post about Zed, I was fitting and wrestling with the fiberglass body kit. I got the gaps set, and panels attached with bolts. I described the effort on the rear bumper and the side skirts, but did not detail the front bumper. While it did not seat as well as the rear, it was not as much trouble as the side skirts either. Similar to how I filled the gaps on the skirts and rear bumper, I matched the height to the side skirts and then set the spread on the front bumper. Similar to the others, I shot cooking oil into the gap, cleaned the fiberglass, applied Bondo, removed the bumper and sanded the Bondo smooth. After sanding, I repeated the process a couple of times to get the front bumper to sit as well as the rear. Once the seams were as good enough, I set the panels on that old blue tarp with the replacement driver fender, and shot them with the black urethane primer I used on the rest of the body. That was day one of my vacation.

Sanding Party
Ah yes. The fun of sanding. The more you prime, the more you get to sand. I had the 5 panels, and they sanded down smooth with 320 grit, eventually. I discovered, however, that if I started with 120 grit and did just a quick pass on the panel before shifting to the 320 the finish was as good or better, but it took far less time and material.

final priming shoot
Of course, I re-sanded the rest of the body too. Why? Well, I got a little overspray from the priming onto the passenger side of the main shell. Since the doors, hood and tail gate were still on, the tiny dried paint bits made a difference. There was a slight sandpaper edge on the whole car. It only took an hour or so, to sand it back smooth but it all adds up. Next time, I'll cover things with an extra tarp.

Next, I prepared for paint by removing the hood, doors and rear tail gate. I arrayed them on the blue tarp with their less-likely-to-be-seen sides up. My plan was to paint these areas first and then paint the flip sides when I shot the rest of the car. This plan was a good one in that I got to learn the feel for my new paint gun (Atom x27). As before, I disassembled and cleaned that gun with lacquer thinner and then re-assembled with a "larger" 1.4mm tip. I quote larger because 1.4 aint so big. This was where my day 2 ended.

First Spray with Color
hood underside shot
I am continuing to use Eastwood paint material, and chose a base-coat / clear coat urethane combination. For color, I am shooting "9mm" grey. The paint has very small metallic flake on a medium grey base that appears to have a touch of olive green in it. The olive green sub-color is not apparent in online images, but it does appear after it has been applied.

This first day of shooting was focused on body parts that mostly won't be seen: the insides of the fenders, the side skirts, the bumpers, the insides of the doors, the underside of the hood, the inside of the rear deck lid, the radiator supports, around the engine bay, the hidden parts of the headlight buckets and the door jams. The first coat laid down extremely well in the over 33C (92*F) heat. When I shot the second coat, however, I could not see the material hit the panels very well. Between wrestling with my glasses, which were fogging up from my sweat, to sweat droplets on my glasses, all aggravated by my lack of direct light on the panel.... lead to a dry-spray effect on most of the panels. The under side of the rear deck lid and radiator support were mostly spared, but the others had varying effects. So, the next morning, I chose to sand the bumpers, door jams, and door-insides planning to re-shoot them when I did the rest of the car.

In the background of the rest of the pictures, you will see that Boo and I added side walls to the Harbor Freight car ports. I ordered 2 8' x 20' walls from TentAndTable. They attach with clips, and, because they are 20 feet long, they can be used in different configurations around the 20' x 20' covered space we have. After the end of my final day of shooting paint, we shortened them to 10' long on the sides to allow air flow (after the surfaces flash-dried) to let the fumes out. These walls did a great job of keeping the light and temperature consistent while also preventing dust and bugs from drifting in.

Side Skirt Install Fun
pop rivetted
Before I could do the rest of the painting, I wanted the side skirts installed. Of course, that meant that the fenders were re-installed first. I mounted the headlight buckets to the fenders, and installed the fenders with M6 bolts. The side skirts had been held in place during the Bondo cycles with M4 bolts through the panels into the side of the car. I did not want to repeat that for the finished work.

I had hoped that the epoxy would hold well enough that I could remove the bolts and the panels would hold in-place just from the strength of the epoxy. I was not so lucky. Both the contact cement I used for carpeting the speaker box and the clear goop stuff that delivered with the panels failed. So, I cleared the goop and tried again with the goop and then, once the goop had set up, I replaced the bolts with pop-rivets. Of course, once the side skirts were on, the fenders are now effectively fixed-in-place. I applied small spots of Bondo a-top the pop rivets and sanded them smooth. Last, I cleaned up the goop along the top edges. The goop label said it was sand-able and paint-able. If by "sand-able" they mean that you can apply sandpaper to it, then, yeah, it's sand-able. It does not powder down, though; it sanded off in big boogers instead. Cleaning the goop took an hour just by itself. Grr.. But, the side skirts are in. With a gloved hand, I wiped primer on the spots I had put Bondo or otherwise sanded down to fiberglass. The next morning, I cuffed the primer down and after one more dance around the car with 320 grit, we're ready to shoot. I did not take a picture of the finished skirting, but the pop-rivet and booger repair is unnoticeable in the final finish. They look completely straight and flat.

Paint Prep 
no boogers, no rivets
Before I could shoot, I had to set up the space and then prepare the panels. For set up, I started by flipping over the hood and rear deck lid. I considered how the paint might flop on the panels, and considered that the hood is effectively flat, relative to the ground, and the rear deck lid is fairly close to flat. The doors, however, hang vertically. I don't have a means of holding a 20# door in the air vertically, but I do have saw horses. I hung the doors on one side of a saw horse, attaching it to the horse with bailing wire. This way, the door is as close to vertical as I can manage, allowing the paint to arrive on the panel in the correct orientation, and for the paint to cure that way as well. I don't know if it matters with this paint, but I figured it didn't hurt to take the extra step.

On shoot day, I have found that I follow a very similar path. If I know that I have touched the car with anything other than a gloved hand, I clean with de-greaser. Either way, I sweep the painting area clean and then vacuum every panel. Last, I pass over every square inch with a tack-cloth to get every speck of dust that might have attached itself to the panels.

arrayed for the shoot
Once the car and panels were wiped down, I set up the paint gun with an inline desiccant from Harbor Freight followed by a pressure controller. I added an air-system quick-release to the inlet side of the desiccant so I could move without the hose attached. With the gun set, and the panels placed, I was ready to mix paint.

By the time I got to this point, we were entering the heat of the day (2:PM), after the end of a heat wave peaking at 39C (102*F). On this day, at this time, it was 27C (80*F) so I set up with medium speed catalyst rather than the fast-dry I used a few days earlier.
 
Main Shooting
When I researched the root causes of dry-spray, I believed the problem was that I was not sending enough material out the gun. In retrospect, I think I was unable to see well enough, and moved too fast, or did not overlap my fan well enough. Regardless, when I set out to shoot this time, I opened up the mixture so more material would pass out of the gun. This, unfortunately, caused orange peel that I was unable to sufficiently account for during the second coat. Unlike the painting session 2 days earlier, this time, I was running the GunBudd, shining light directly on the work. I decided to turn up the pressure and apply a third coat. This time, the orange peel was reduced significantly, but it was not eliminated. Since this is metallic paint (albeit tiny flecks), the recommendation is to not sand, lest the flakes are disturbed. C and Boo said that they really liked the texture, that it looks bold and "badass". I'm not so sure.

unfortunate orange peel
Frustrated at my mishap, I decided to just get after the clear coat anyway. At this point, however, I discovered that I had just used the catalyst designated for the clear coat, consuming almost all of it. I determined that the catalyst I used was fine for paint, but the paint catalyst was NOT fine for clear. So, I could not shoot clear coat until I had more catalyst. Getting catalyst from Eastwood will definitely push me outside the 24 hour re-spray-without-sanding window so I will have to at least sand a little bit for the clear to adhere. Since I have to sand a "key", I think my mistakenly using the clear-coat catalyst creates a new opportunity: I can sand down the remaining orange peel and then shoot another layer of base before switching over to clear coat. The extra coat of base should address any flake flakiness. Of course, I have to wait for FedEx, but I can start sanding while I await the catalyst's arrival. Yeay.

At this point, we have color on every panel. There is orange peel, but I think there is enough paint build to allow me to lightly remove enough of the peel without burning through. Then, I can shoot another coat of base and top it with 3 coats of clear.

Thanks, as always, for following along. I'll post on the finished job once it's done-