Showing posts with label CLD. Show all posts

Tuesday, July 16, 2024

Door Cards

Today I will be picking up where I left off regarding the doors. As I described in my last post, the front doors now open, close and lock like a real car. No slamming, not funny jiggling of the handle, etc. Just open, close and lock. Well, the passenger door lock is different from the driver, but I'll swap that out once I find all my parts. Anyway, since I had to remove the cards to fix the doors, I thought I would take the opportunity to improve them.

Door Cards As-Was
foamed card installed
With operational doors, I got to thinking about how to get the door cards to hold to their respective doors. The Arizona gentleman who ran the business creating and selling these ABS door cards was looking to sell off the business a couple of years ago, so I imagine that has happened by now. He had a mixture of molly-based fasteners delivered with the cards. Either the fastener was a screw that dug into the molly which was pushed through the card into the original mounting hole or it was a push-to-hold plastic bit. Regardless, the molly's did not hold in all of the original mounting holes on my bus (YMMV). This could have been poor implementation on my part, something particular about Hapy or just less-than-ideal engineering on the fasteners. It doesn't really matter; for Hapy, they did not work. When combined with the slamming doors, the door cards would rattle and Hapy had a very junky vibe. Now that the doors no longer need to slam shut, improving the cards adherence to the doors will help un-jalopy Hapy that little bit more.

Door Cards, Mounting Upgrade
broken M4 riv-nut bit
To remedy the floppy door cards, I tried a more permanent solution: Riv-nuts and bolts. The plan: into each original mounting hole in the door, I attach a riv-nut (it's a nut that is applied with a rivet gun, basically), and then send a bolt through a washer and then the card, into the riv-nut. Such a simple plan, and while a little time-consuming, it was easy to do. Of course, I found that not all of the original holes were the same size. To fix, I used some as large as an M6 or as small as an M4. I think this is why the supplied molly-based fasteners did not work as well: the M6-sized holes were simply too big for the molly and they fell out. As shown in the picture here, too much pressure with the riveting tool and you can break it. Once I had all of the riv-nuts set, I shifted to the cards themselves.

Noise Abatement Revisit
setting riv-nut
While I had the door cards out of the bus for repairs, I applied a thin noise-absorbing closed-cell foam to the 3 cards. This material was among the things I got a few years ago when I did the sound deadening effort, and it's application to the door cards was part of that plan. At the time, the research I did (See Hapy Noises - Part 2) indicated that multiple attack vectors would bring the best result: Constrained Layered Dampener, an open cell sound deadener like Jute Thermal and then Mass Loaded Vinyl. These all really address reducing the impact of external (and mechanical) noises transferring into the cabin. Any noises or sound that make it into the cabin which are not absorbed by the seats are prone to bouncing around. I placed some larger acoustic panels (these) under the upper bunk, in the slot where the original sunroof used to go. I believe they are helping absorb some ambient sound. I also covered the ceiling with Mega Zorbe to address the sound reflection and ambient sound absorption. In the picture on the right, here, you can see the MegaZorbe applied to the inside of the outer door skin. 

Based on the tests I did at the end of the effort, the only real gains as-measured were in the "around town" (under 40mph) zone. Decibels at idle or on the highway appeared about the same. In practice, however, using a less complex "measure" like how loud we have to run the stereo to hear it on the highway, it is definitely quieter. An even less precise indicator is how loud we need to speak to each other to have a conversation: barely louder than we talk at home, which is quiet (no yelling house) where we used to have to almost yell without the stereo on. So, I am setting aside the scientific evidence and embracing the anecdotal: this implementation of the sound abatement absolutely and significantly improved our road tripping experience. I may take more readings because the numbers I took before continue to bother me.

Door Cards, Reflective Sound Absorption Added
applying the foam
So, with all that context, I decided to press forward on my original plan to apply the thin foam sheets to the hard plastic cards. I started with the cards along the sleeping deck, running from the rear hatch forward along both sides under the windows to the rear of the rock-n-roll bed (1 foot tall by about 4 feet long). I started here for 2 reasons: it was very easy and the plastic cards were jarring-cold when bare skin pressed against them while sleeping. The foam definitely improved that.

For the slider and front doors, I simply traced the door shape on the peel-off paper side of the peel-n-stick foam and cut along the line with scissors. I aligned the cut along the card and peel-stuck them down, working from one corner, down along one side and then across. I will be applying carpet later, but felt that the foam might help reduce the reflected sound while also providing a cushion under the carpet.

With the foam applied to the cards, I considered the game of "which bolt fits" for each mounting point. I could have just started trying bolts, but that felt like an exercise in frustration. So, instead, I grabbed some painters tape and marked to the outside of each hole (where the card would not cover) which bolt size to use. I set the front door cards in place using the door pull to hold the card in the right spot. Then, I simply sent bolts through a black vinyl washer and then the card into the door. Once mounted, I removed the tape. Easy-peasy. If you do this, I suggest that you do the corners first, and only threaded enough to hold. Then, skip around the card, and have all of them like that before you start tightening. Then, again, start with the corners and pay close attention to the bottom edge near the vent. These ABS cards fit perfectly, but the one hole near the bottom align the trailing edge of the door did not line up for me and I had to skip it. YMMV, of course.

slider door foamed
The door card kit included panels for the wall under the driver-side jealous window and for the partitions behind the front seats. I have yet to do those cards, but I am holding off on doing those until I am ready to fast-follow with carpet. The foam is not as scratch-resilient as the hard plastic, and those cards take the brunt of the abuse when camping or music gear is loaded, unloaded and in-motion. So, I will apply the foam and the carpet at the same time. All of that will happen at some point in the future. As it is right now, there is that little bit less noise reflection happening and when bare skin touches the side of the sleeping area, it no longer triggers a shuddering wake up. We are taking the win.

---

That's it for today. Thanks, as always, for following along-

Tuesday, April 26, 2022

Hapy Cab Gets Quiet

In my last post about noise containment, I posted about getting the main living area floor noise controlled with Heat Wave Jute and MLV. Before that, I posted about the application of the constrained layered dampener (CLD) on the ceiling and easily-accessed exposed steel (See Noise Control Update). There has been a lot of foundational work and many posts leading up to this next step. I removed the drop ceiling. I ran the rough electrical for the luxury items like accessory plugs, dome lights, etc (See Ceiling Wiring Rough In). I found and resolved holes from the old Westfalia pop-top. I removed the old shelf, designed and installed a new one (See New Cab Shelf). So finally, today, I will focus on getting the cab area practically noise controlled.
 
Cab Floor Prep
cab floor, nose quieted
Many years ago, I applied something CLD-like to the floor of the cab after addressing the rust with naval jelly and rust encapsulator (see Rust Never Sleeps). That post was so long ago, it pre-dated my now-common efforts to identify the products I am using, but I am fairly sure it was B-Quiet. Regardless, the stuff available in 2007 may not be as effective as the stuff available now. I suspect the old B-Quiet has since been reformulated to have more Butyl and less asphalt. So, I started working on removing that old stuff. It did not want to let go, and in some cases it left a sticky mess behind. I found that I was most effective at removing it when I cut 2" squares into the foil topper and removed a square at a time. For the spots where tacky goop remained, simple scraping worked a little, running the grinder was ineffective, and multiple passes of Goof-Off was moderately effective. After multiple rounds with Goof-Off, scraping was much more effective, and I was able to get most of the asphalt-y sticky off the floor. Still, the effort to remove that old stuff took most of a weekend.

With the old stuff gone I discovered that I needed to address rust in the floor again. Long ago, I abandoned Naval Jelly to get rid of rust, believing that it just is not as effective as the converters currently on the market. Perhaps, it was user error, but I followed the instructions. Anyway, this floor had been worked on with the Naval Jelly before I changed and it showed. I like Eastwood stuff, after trying and abandoning others. It is a simple spray-on product that I then spread around with a gloved hand to make sure it gets everywhere. It dries with a thin shell that could be painted on top of, but Eastwood recommends their encapsulator (of course) on top. I thought about adding another layer of paint, but decided it was unnecessary and left the floor "top coated" with the black Rust Encapsulator.

Cab Floor Noise Contain
Once the cab floor was rust treated, I applied some fresh CLD. Even the Noico was an improvement on what was there before. Before I started, the floor still had a fairly noticeable "ting" when smacked with the roller. Perhaps part of the reason the B-Quiet was not as effective was because it was trying to adhere to rust, not to steel and converted rust. Similar to the cab ceiling, I did the larger panels with the ResoNix, and did a few smaller areas with some leftover Noico. I had not previously applied anything to the walk-through, but that got CLD this time.

I used the rubber mat as a template for the next 2 layers: Heat Wave Jute and the Mass Loaded Vinyl (MLV). I under-sized the front edge so the kick panel/card that runs along that leading edge can seat against the floor later. Then, I did the walk-though floor with Heat Wave and MLV, following its basic rectangle shape.
 
Cab Doors Contained
door Mega Zorbe'd
The amount of prep work needed in the doors was not as extreme as the floor, but there were some needed steps. There was some surface rust down along the bottom and in the spots where the different metal bits intersect. After the rust was addressed and some Rustoleum was applied, it was ready to go. The steel also had some of that B-Quiet, but it seemed much more effective in the door than it was on the floor. I only removed the pieces that came off easily. Oddly, the passenger door stuff came off with little effort and the driver side stuff would not budge. So, the driver door was pretty much left alone (just CLD'd one section) and the passenger door got a full replacement treatment. Thinking about how much material I have on-hand, and how small an area I needed to solve, I used the Noico. While I test-tapped each door, I noticed both doors had a rattle that I traced to loose fasteners on the window mechanisms and door latches. A couple of passes of tighten-loosen-tighten eliminated those rattles.
 
Unlike the floor, I used Mega Zorbe in the doors. This stuff is so easy to work with. It is self-adhesive, so you figure out exactly what size you need, cut it, test fit it and when you're ready, you peel the paper off the back and stick it on. Of course, clean the surface really well first. The self-sticky is super-sticky, so I suggest the first time you play with it you apply it in areas which won't be seen until you get the hang of it. I got the 1/2" thick Zorbe, and it easily fit against the outer door skin without impacting the action of the window. If I have material left at the end of this project, I may apply some to the side of the door card that fits into the door cavity for more sound absorption. 
 
Nose Noise Contain
original Styrofoam
Most of the metal on the inside of the nose is inaccessible or at least very hard to get to. The pedals make getting to that lower section difficult, but not as difficult as the area behind the dash, especially on the driver side. Accordingly, I did not get very complete coverage of the inside of the nose with CLD. Before I could start, the bus originally delivered with some foam stuff glued to the lower section (below the mid-point). This stuff looks like old Styrofoam cooler material, and made a mess similar to a broken cooler with those little white dots everywhere. It was very thin, so I doubt it did much. Once removed, shop-vac'd and surface-cleaned, I used ResoNix, hoping to maximize the vibration deadening from covering such a small percentage of the total surface. I removed the windshield washer bottle and successfully fit a full one-foot-square sheet of ResoNix on the nose in that area. I cut a second square, fitting material up behind the glove box and onto the big metal airbox on the passenger side. On the driver side, access was even more limited. I was unable to fit a full uncut square directly in front of the pedals, but I was able to get a pair of rectangles applied there. I consumed the rest of that sheet plus another, getting coverage above the running light (beside the headlight) as well as onto the airbox. It is hard to know how much those sections will help, but I used the higher quality ResoNix, so maybe it will matter. Because of the foil topper, I figured putting CLD anywhere near the fuse-box would be a bad idea, so the whole upper left side is CLD-free.

I had originally intended to use the Jute inside the nose, but I changed my mind after wrestling CLD in there. First, the Jute needs adhesive to stick. Second, it is stiffer than the Mega-Zorbe. Third, the foil on the Jute is electrically conductive, so, like the CLD, we do not want it near the fuse box or electric controls. So, while we would have probably appreciated the temperature management of the Jute, there is no way I could have constructed a thermal wall in there. This is all about absorbing sound, and inside the nose can't be seen nor felt. So, I used and will continue to harvest for use, trimmings from other applications of the Mega-Zorbe and patch-work my way to sound control on the driver side. On the passenger side, I was able to place a single sheet of Mega Zorbe in pieces. The driver side was very difficult to get to, and handling the super-sticky self-adhere was not working out too well. I was able to get some larger cuts (maybe 4 inches by 8 inches) along the lower section, but that was about it. As I generate trimmings around the rest of the bus, I will return to the nose to add more.

Cab Ceiling
Mega Zorb'd ceiling
After all the efforts in previous postings, from the rough-in electrical to the mounting of the luggage tub and the shelf, I was finally ready to do the cab ceiling. Recall that the drop ceiling has been removed, the old shelf came down, and the original 1972 Westfalia supporting superstructure was removed. I used a combination of ResoNix and Noico for vibration control, thinking that an extra pound was worth minimizing the noise closest to my head. Similar to the doors, I used the Mega Zorbe on the ceiling. I covered the ceiling from lip to lip, front edge to the cross support. Simply sitting in the seat with that single layer of 1/2" foam was incredibly quiet just sitting in the driveway with the engine off. It is quieter inside the bus than outside. If I utter words, they are simply gobbled up by the noise control material in a more pronounced way than a gentle wind takes your words outside. I had originally planned for a second layer, and still may before applying a true headliner, but it will not be because I need more sound taken out of the air. It will depend more by how to contour the ceiling and remaining steel so the transitions are smooth. I will sit with it as-is for a little while, as I do other areas, to see how I feel about it. I may get some basic automotive foam if I need to add something. I don't have the headliner material yet anyway. Seriously, this bus is getting crazy quiet.

Under the Seats
view of the under-seats
Moving on to the seats, I used the Heat Wave and MLV combination again. Consider the little compartments along the inner edge of the seats. These compartments accepted 6-inch wide, 26-inch long Heat Wave on the floor. Against the wheel wells, another 26-inch long 5-inch tall stretch of Jute was set. Then, I got to thinking about the MLV. Consider, the access is very limited and the side of the wheel well is vertical. Simply brushing or spraying on contact adhesive was not viable. I cut 2 sheets of MLV for each compartment, with a combined overall average length of 25 inches each (d-side shorter, p-side longer), but 12 inches wide. Dealing with a half-length, I rolled it up and stuffed it through the access hole, unrolling the 12-inch width in place. So, the bottom edge is against the inner edge where it meets the floor, and the MLV runs up along the side of the wheel well with the top edge roughly against the ceiling. I set the second sheet in similarly, and with an overlap, the compartments are covered.... mostly. The driver-side compartment has the brake reservoir and tubing, so I was not able to get as deep. Hence, the shorter length of MLV. Still, I knew this was not going to be 100% sealed/covered. This is about as good as I could have expected without putting MLV around the outside of the entire seat pedestal, but that would have intruded into the limited walk-through space, for what I think would be little improvement. I accept that the MLV may not stay in place long-term. Since there will be a card on the walk-through side, I can access it and check up on it periodically. Being honest, I probably won't. If I have left over MLV, maybe I will figure out a way to put it inside the walk-thru card. We'll see.

Other than the little compartment, the under-seat space was controlled rather simply. I put one piece of both Heat Wave and MLV under each seat, running from the outer edge of the little compartment (under the seats) to the door's edge. To fit, I cut a channel around the outer seat runner. I thought about lifting the seats, but decided that having an additional 1/2" of squishy lift was not desirable; having some noise travel through the rails was an acceptable tradeoff. After the seat compartment efforts, we are no longer looking at 95% containment anyway. Between the inner seat rail and the inner edge, I set another section of Heat Wave, covering up the remaining bits of steel. This final section was not rectangular since the seat pedestal is not exactly square, but it rests above the little compartment, so MLV was unnecessary. The Heat Wave, however, will allow the carpet to lay flat.

Wrap It Up
Once installed, I taped all of the MLV bits together. Why? Audiophiles suggest that the MLV works best when it hasn't any breaks in it. I know there are breaks under the seat rails and inside the little compartment, so the tape may not be as effective. Still, the metaphor I have read is that the seams are like slightly cracked windows in your house, letting in the noise of your neighbor mowing their lawn. If the window is completely closed the noise is much more contained. So, having lots of open seams is like lots of cracked windows, versus a couple around the seat rails. Since I have not been taking noise measurements along the way, I cannot say whether the patchwork MLV will help meaningfully more than just the CLD and Heat Wave. The sound experts swear by this stuff though.

At this point, I have the floor completely noise contained, from rear hatch to the front nose. We have CLD to contain the vibration, Heat Wave to absorb some of the sound that makes it through and MLV to block most of whatever remains. Since most of the noise comes from the engine, drivetrain and wheels, the work to date should have addressed most of the problem. I am continuing down the noise elimination path, though. I will be applying Mega Zorbe onto the rear ceiling, adding some deadener between the 2 rear ceilings, and solving for the slider and mid-bus driver-side wall. I feel that I have turned an important corner, however.

That's it for today. Thanks, as always, for following along-

Tuesday, April 19, 2022

Noise Control Continues

With Summer tour dates heating up, and our favorite festivals appearing to be taking the Summer off, I was lacking an out-of-town overnight show to really kick this effort into high gear. Well... Phil Lesh and Friends have announced Pacific NorthWest tour dates, hitting 2 of my all-time favorite outdoor venues: the Cuthbert in Eugene, OR and the Marymoor in Redmond, WA. Phil played these 2 venues back-to-back with Further in 2013 (See Tale of 2 Trips), so I conclude that these are his favorite NW outdoor venues too. Anyway, June 11 and 12, Phil will be at the Cuthbert and Marymoor respectively, and so will we. With that, we have some serious motivation to have Hapy buttoned up by the end of May. In that spirit, I finally got after the big sections of the floor, so today's post is all about that. 

Tear Down
starting the Jute
I accept that maybe I have been finding ways to delay the full-blown interior tear down. I messed with electrical (See Ceiling Wiring Rough In), built a replacement shelf (See New Cab Shelf), even messed around with the stereo (I will post on that once it reaches completion). At some point, I was going to have to remove the lot couch and the rock-n-roll bed so I could get after the floor underneath them. The lot couch removes easily enough, but the sliders also needed to come out so I could get the complete floor. Back when I first installed these runners, I mounted the runners with 17mm bolts. I added nuts underneath. I initially just loosened the runners and forced the Jute underneath. I later decided to completely remove the runners so I could get a seamless heavy vinyl sheet down.

My implementation of the rock-n-roll bed is held to the floor by a pair of Phillips screws holding a pair of arms to the rear deck, a 17mm bolt underneath, a pair of small nuts on a metal bracket mounted on the passenger side rear wheel well and a single 13mm bolt through to the fridge cabinet. The electrical bits, however, add to the complexity. I have my luxury fuse box under there, so I had to tear down what was left of that. Plus, the original Westfalia electrical includes the cables routing city power into the rectifier (110 to 12V converter) that's buried inside a wood box and running to the outlet on the front face of the bed. The box is held down with 2 Phillips screws and the outlet box is held by 4 Phillips screws. With the electrical separated from the bed, and the bed detached from the floor, I removed the cushions to manage the unit better. Each of the 2 cushions are held to the bed with 4 long Phillips bolts on each end (so, that's 16 bolts).
cabin Jute mostly complete

I would have completely removed the fridge cabinet, but the mounting of the furnace was so difficult, I did not want to revisit that. Just being disconnected from the rock-n-roll bed loosened it enough for me to fit materials an inch or so underneath it.

Constrained Layered Dampener (CLD)
I have probably posted enough on this material. Still, I applied on the now exposed floor areas. Parts of the floor had already gotten a light treatment in the little valleys, so on top of that I applied larger squares of CLD as well. I still have about a third of the box of ResoNix, with a plan to use some inside the sliding door. I have used some of the Noico around as well. For example, the walk-through partitions behind the front seats each got a large splat of Noico. I do not know if I will be keeping those partitions long term, so I did not want to spend the expensive CLD on those panels. Still, the Noico definitely helped reduce the clatter heard when I tap on the partitions with the roller. Of course, the whole floor and the rock-n-roll bed needed a thorough cleaning, starting with a shop-vac and ending with cleansers. 

Heat Wave Jute
MLV over engine
I was so excited to finally get to the Jute. I has felt like forever since I ordered this stuff and started working on noise containment. I started with a rectangle on top of the engine access hatch, with an extra couple of inches all the way around. I pulled the computer cover, and Jute'd the rest of the rear deck, and then moved forward. I fit a segment under the rear edge of the fridge cabinet, and doubled up over the front side of the rear driver wheel well. I pierced the Jute for the seat belts and a grounding screw, and set another piece of Jute up to the lot-couch rear slider and continued my way forward, covering the entire floor with rectangles. My method was to define as large a section as I could easily manage and then measure that out on the material. I marked the line with a sharpie and then traced the line with a box-cutter to start the cut. I made a second pass with a pair of scissors. I tried first with just the scissors, but the thickness of the material and 2 foil-faces were too much even for my best pair. As I set shapes down, the bus got progressively quieter. Without a radio, and just ambient neighborhood noise, there was not a dramatic change, it just felt more and more quiet. Very neat. One last observation about the Heat Wave: the foil top and bottom are electrically conductive. So, I would discourage use anywhere near open circuitry or be sure to insulate. For example, I took a section of excess MLV produced below and have it resting between the foil and the spare tire well where the engine computer and fuse box live. No sparky.

Lot Couch Rails
I had loosened the rails enough to force-fit some of the Heat Wave jute underneath, but decided that getting the MLV under the rails would be worthwhile. This meant removing the rails entirely. I had forgotten that when I first installed these rails, I ran bolts from above and nutted from below. Three of the 4 nuts were hidden by the radiator, so getting in there to free them was an all-morning exercise. Still, the nuts came free, the bolts pulled out and the rails were set aside. I took this opportunity to clean under the rails as well as install 4 riv-nuts into the old holes, so I would not have to go under the bus and reach around the radiator to deal with the rails again. That riv-nut kit is definitely paying dividends.

Mass Loaded Vinyl (MLV)
MLV continues
MLV is heavy; my goodness, it is heavy (1 pound per square foot). I found that the sound inside the bus actually brightened a little bit as I set it on top of the Jute, though. The Jute, in contrast, was simply amazing in how much quieter the bus seemed as I added it to the floor.  While I can't measure the impact of the MLV independently of the rest of what I am doing, I do wonder if the additional weight will translate into a corresponding reduction in noise. The SecondSkin web site has a noise transfer reduction table for the MLV that defines the reduction as anywhere from 14dB to 37dB, depending on frequency, with higher frequency blocked more than lower. We'll see. The actual absorption by the Heat Wave was noticeable. The table on the SecondSkin page for Heat Wave (in coefficient rather than dB) demonstrates very little in terms of dB drop below 500Hz: below 500Hz < 3dB, 1k: 7db, 2k: 14dB, 4k:19dB. So, the very high end will be controlled well and the low end not so much. I arrived at these numbers courtesy of the formulas on this blog post, converting the coefficients published by SecondSkin.

Anyway, the MLV delivers in a roll 54" wide. The bus is around 60-1/2" wide so rather than solve for a strip along one side, I laid a section 54" long front-to-back, covering the engine compartment and on down the rear wall behind the rock-n-roll bed. After cutting contours for the narrowing of the rear of the bus, I pierced the MLV for the seat belts and installed them. This took a considerable amount of time, mostly because of the challenges of getting the seat belt mounts in place. I continued with the next sheet of MLV, covering the mid-floor past the lot-couch rail mounting points (see picture above, right).

Re-Assembly
bed and rails in
I chose at this point to re-install the rock-n-roll bed. Unlike the seat belt mounts, locating and piercing for the bed mounts was much easier for some reason. With the bed in place, I pieced holes for the lot-couch rails and installed them. To make a more firm mount to the floor, I added a nut between the rail and the floor for the bolt to pass through. These nuts act like a 3/8" riser through the Jute material. I confirmed the width of the rails (12") and then torqued the bolts. Then, I put the lot couch back in. The couch slid in more easily than it used to. I think the rails were slightly below the lip of the sliding door before, creating some friction/resistance. With the little risers, the couch slides right in. The interior is pretty much the way I started the weekend. Yes, from the start to end of this post, it was 2 full-for-me (6+ hours) days of work, and some uncovered sections remain.

On a random mid-week afternoon, I added an additional strip inside the rock-n-roll bed where the 2 larger sections meet as well as a small piece inside the fridge cabinet. Last, the area just in front of the fridge cabinet shown in the picture above was addressed. So, from the seat partition rear-wards is pretty much done. That leaves the cab still to do. All of the seams need to be taped as well, but that should be much easier once the rest of the Heat Wave and MLV have been laid out.

In case you were wondering, that reflective material in the wall behind the fridge is foil-backed "RV insulation" that I had put in there years ago. It actually does reduce the temperature inside the bus a little bit, or it did when I first installed it. Since it does not fill the cavity, I will probably just leave it and put the Mega Zorbe or Jute right on top if it. There is the old Q-Quiet vibration absorber on those panels as well, and I will just leave that be. I am running out of material, and this project has taken quite a bit of time already.

That's it for today. Thanks, as always, for following along-

Tuesday, March 22, 2022

Noise Control Update

I started working on the sound abatement/control/contain effort in fits and starts over the last couple of months. Since I have been making some progress, I figured an update was due. I have only started the Constrained Layered Dampener (CLD). At some point I will be done with the CLD, and ready for the next layer. For more about my plan for noise control, see Hapy Noises Parts 1 and 2.

Sound Deadening
high-cost / high-value CLD
Sound deadening is slow-going stuff, even when you have time. The actual application of the CLD is fast and easy; getting access to the spots where you want to apply it is what takes a while. Some areas are virtually uncovered; like under the carpet in your trunk, the rear under the mattress of the camper bus is open bare steel. The metal gets cleaned with oil/grease remover, the largest square/rectangle of the highest quality deadener you can find is carefully applied and then you roll out any bubbles for a firm bond. In this way, the exposed steel was relatively quick work. I suggest you wear thin protective gloves because the edges of the foil layer can make tiny cuts in your fingers.

Accessing the Ceiling
To get to the largest sections of steel (the ceiling), I needed to remove the wood (Baltic Birch) headliner. The headliner is actually 4 distinct pieces: the rear, the front and 2 sides. Between the sections are channeled aluminum bits to hold the pieces together. Then, around the opening in the middle of the bus, a plastic pinch-surround holds the lip of the wood against the steel. The plastic pinch-surround removes with little effort: just grab and pull. In fact, getting this thing to stay put had been a bit of a challenge over the years. With some channel-lock pliers, tug on the aluminum channels, pulling towards the center of the bus, to remove them. With the channels and pinch thing gone, the rectangular piece over the sliding door fell right off. The one of the opposite side was held on by the '79 Westy interior 2-way light. Two screw removals later and the light and ceiling bit were free.
not quite done, but getting there

On Hapy, the rear section had been falling down for years, and I had resolved it long ago with self-tapping screws, through the metal ceiling. Recall, the westy was built on a "sunroof" bus model, so there are actually 2 ceilings (well, 3, if you count the Baltic Birch) with a gap between them where the sunroof would slide when open. Once I pulled the screws, the wood hung down in a familiar way. I simply helped what gravity had been doing by giving it a wiggle, and it fell onto the rear deck. This left the front section, which was quite snug. The internet instructions indicate that you simply need to remove the dome light and use that opening as a grip to pull the ceiling free. This did not work for Hapy, even after I removed the front shelf (See Sunshade to Shelf) I added, like, 6 years ago. Recall, the shelf was attached by re-using the sun-visor mounting points so it was a simple matter of removing some screws. With the shelf out of the way, I could get to the screws holding the 12V accessory plug, and then there were some very small screws along the front edge of the Baltic Birch which held the front lip snug against the front of the bus. After removing all the fasteners I could find, the ceiling still did not want to come down. I had to force it, and I accidentally split the driver side. I had no intention of reusing the old wood ceiling, but it would have been nice to give it to someone who is restoring theirs. Oh well.

Ceiling CLD
Once the front bit was down, I could see old-style fiberglass insulation had been installed between the drop ceiling and the steel, but only on the driver side. Perhaps the passenger side had been removed long ago. Regardless, I was not intending to keep it, so I pulled it down (wear gloves or you may get tiny fiberglass particles embedded in your skin. Ouch.), and scraped the glue residue off the metal with a putty knife. Similar to the rear floor, I cleaned and scraped and cleaned the metal in preparation for CLD. I used a combination of ResoNix (high cost / high-value) and the leftover Noico (cheap / lower value), hoping to maximize the vibration noise control. I may have overdone it, but I figured an extra pound of CLD might make a difference on the steel closest to my head.

rear half under top bunk
The ceiling in the rear had not been insulated nor had anything glued to it, so it was pristine metal. Still, it got the oil/grease cleaner treatment, and then multiple squares of ResoNix CLD. Recall that the sunroof model has 2 rear ceilings, and I had only addressed the bottom one at this point. The upper ceiling was much harder to get after. From above, it is covered with the floor of the Riviera-sourced upper bunk. From below, it has less than 2 inches of space between it and the lower ceiling. After mentally wrestling with how to deaden it, I decided to remove the plywood floor of the bed so I could apply material. There was simply no way to get good coverage 5 feet deep through a 2-inch tall gap.

The bed is supposed to be nailed down to the side rails with many tiny finish nails. In Hapy's case, I, uh... kinda didn't nail it down much. So, it would have been easy, had I not parked the bus where the pop-top would not open all the way. Instead, I could only get it halfway. So, I lifted the bed, pulled it as far forward as I could and then dealt with the noise suppression in 2 steps (rear half / front half). I took one extra step during the re-install, and added small squares of foam on top of the rails before setting the bed back in place. My thinking was that there would be less vibration and squeaking compared to the stock wood-on-wood. I will be adding sound absorbing material into the 2-inch tall cavity rather than on top, so I am hoping that I will not need to get under there again. Once I have confirmed that, I will send some thin screws through to hold the bed to the frame.

Exposed Metal
some easy-to-access steel
The last area, well, in terms of timing, this was actually my first, I addressed with CLD is the bare exposed steel around the bed along the sides. The keen eye will see that this is the Noico stuff. Yes, I did this area before I took the plunge on the ResoNix. Still, the tone of the tool-tap implies that the end result is less ring-y than without. Would the ResoNix had been more effective? Probably. Anyway, I mentally wrestled with applying material here at all because the rounded metal interior is part of the signature of an old bus. Arguably, so is the incredible racket you hear while driving. In fact, I used to drive by ear, listening for bad sounds from the original engine because the lack of instrumentation kind of forced me to. Anyway, the area below the window will ultimately be covered by a door/interior card. I intend to apply a headliner of some kind down to the tops of the cards, so the CLD you see in this picture will be hidden longer-term. 

Well, this is as far as I have gotten on the noise control stuff. Some of these steps were taken months ago, and others I just completed. That's just how life is these days: take many little steps and eventually you look around to discover that you have made some progress.

Thanks, as always, for following along-

Tuesday, February 1, 2022

Hapy Noises - Part 1

Today, I share my thinking around how to reduce the din when driving Hapy. He's a 50 year old bus. He runs a turbo-diesel engine. How quiet do we want to be? Or should I say how quietly do you want to spend? Or, maybe, how quiet do I really think this can get? I am actually taking this on, slowly, over the course of the winter and spring with hopes of a more comfortable drive experience when camping season really open up. For now, I will just put my think into words because what's a car person to do when s/he can't work on their cars? Thinks about them. Like so many posts, this got really long. So, I split this up. Today's post will cover controlling the resonation effect with constrained layered dampener material.

Before I begin, Hapy Groundhogs Day. Regardless of what the critter in PA does, it will always be 6 more weeks before the Spring Equinox. Here in the Pacific NW, it will rain until then. With expectations set, let's go.

Constrained Layered what?
Other places do a better job of explaining this. For our purposes, a Constrained Layered Dampener (CLD) reduces vibration by transferring that vibration into heat, which then dissipates. These materials have 3 basic components: the adhere layer, the butyl layer and a foil layer. The adhere layer is obvious: it is the super-sticky that gets the CLD to stick to the metal that vibrates. The foil layer is also sort of obvious: this is the top layer that you see when it's done. The butyl layer is the key: this is the science part that accepts the vibration from the adhere side and the vibration-resistance from the foil side. The butyl does the work of trying to get the vibration to stay put by equalizing between the two layers. The better the quality of the butyl layer, the more effective it will be per square inch. Again, there are better explanations out there, but that is a basic high-level summary.

Noico / FatMat / Hushmat / Kilmat
When I did the work on Oliver (1978 MGB), I used the Noico noise deadener stuff sold via Azn. I had read around the web that it was pretty good stuff, but when you are reading about what amateurs did on forums, it quickly becomes an echo chamber. Many forums dedicated to home-wrenching have posts that ask about one or more of the products listed above. Since most folks only ever use one on that one car, and aren't doing it professionally, the general consensus on Noico is "it's good". For the most part, the testing I have seen put all of these (Noico, FatMat, Hushmat, Kilmat, etc) in the same mediocre category. They sorta work, but you need a lot of it for it to get anything out of it.

Slamming Amazon side-bar.... Azn is excellent at hyping a mediocre product; this happened with Noico. We, as consumers, are led to believe that the marketplace will decide, and if people give positive reviews of something, it's probably fairly good. This works for products or services with which we all are somewhat familiar. Want advice on a TV or a phone? The market will weed out the garbage eventually. The issue is created when someone buys an inferior product about which they know little in a product market about which they also know little. Their experience goes from sucky before it arrived to perceived slightly-less-sucky. So, they think the product is fantastic, because they think life got better. What they may not realize is that they really did not make their life that much better, if at all, for the money they spent. They invested a small amount of money (like $2 per square foot for Noico) and a bunch of time, and when the noise in their car seemed reduced, they figured it was the product. Maybe it was. Maybe it was simply from removing the panels, cleaning a bunch and putting them back on. Most likely, the reduction was not as great as it could have been had they used a genuinely good product. The misperception is then influenced by the amplification of the echo chamber and the desire to not be taken advantage of, so a belief that the product was good is formed. And, the feedback loop continues.

In the convertible, I didn't know any better and, frankly, it doesn't really matter. It is a convertible running a carburetor and an aftermarket header; it will be loud when driving around. That's actually part of the fun: put your foot in it and it goes "waaah!". I put the Noico in the doors and now they have a nice "chunk" noise when they close. Same goes for the trunk. I think the overall din from the drive train is lessened because of the full-floor (both cabin and trunk) install I did plus the liquid rubber liner, the insulation and thick carpet. Exactly how much the Noico helped is unclear. For Hapy, I have way more noise control opportunity. It is not a convertible, and there may be 4 times as much steel panel to resonate-control. I had put something on some of the panels years ago (like the old brown bread, delivered in a roll, smelled bad), so it is not completely bare. I don't think that stuff was terribly effective, but it was what was available 15 years ago.

DynaMat, Second Skin and ResoNix
For learning about quality, viable noise control, I hit the car audio forums. I figured that if they were using something that helped them win car stereo competitions, it would probably do a good enough job lowering the noise in Hapy from incredible racket to tolerable. At least, they would know which lower-price options were actually worth using. In my research, I also engaged with Second Skin audio, and will use their stuff above the CLD (constrained layered dampener), which I will detail in another post. For vibration noise control, though, I am using ResoNix CLD. This stuff is super expensive, compared to Noico, but only a few cents per square foot more than the Second Skin stuff. DynaMat usually appears at the bottom of this higher-quality group, by the way. Based on the testing evidence on the ResoNix site and in the audio forums, the ResoNix stuff is really next-level. In the end, I will need to apply far less material than Noico, which means less work and less weight, while enjoying better vibration noise containment.

Install How
Install for any of these products is simple: clean the area to practically food-grade clean, measure and cut to fit with scissors, pull the backing paper and press it in place. Then, with an installation roller, roll around on the foil to get any air bubbles out and to ensure a quality adhere. Don't damage the foil; I can't emphasize that enough. Also, if the surface isn't clean, the product will not adhere as well, defeating the purpose. The amount of CLD you use is directly related to the product you are using, though the larger the uncut piece of CLD you use the better it will work. Meaning, if you use a bunch of small pieces over a section of metal, it will be far less effective as compared to one single piece. The strength of the CLD effectiveness comes from the foil topper preventing the panel from moving. This forces the vibration energy to change shape into heat energy as the Butyl tries to adhere to the metal yet retain it's shape as defined by the foil topper. If the sheets are tiny or if there are tears in it, there is less constraining, so more room for the metal to move, and much less of the vibration is converted to heat energy.

I found 2 different types of rollers on the market. The one in the image below has a completely smooth roller for foil-contact. While it may lose traction on super-smooth foil, it will probably not accidentally tear the foil. I say "may" and "probably" because I bought the other kind that has ridges running across the roller surface. That kind of roller can tear the foil, but it definitely does not slip. Ask me how I know :) Buyer beware, and if you get the same kind I did, mind you don't get too zealous with it or you may apply splits into the foil.

Coverage
Something like Noico will require nearly 100% coverage to get anywhere near the same amount of dampening as 25% of something high end. Under-apply and the vibration noise may just lower in frequency, not the full resonance so the vibration does not actually get resolved. So, you will think it's better, but you just lowered the note. If you watch car shows on Speed/Velocity/MotorTrend, you will see that those guys cover 100% of the interior and trunk (though they never broadcast the application. No sparks = bored producers). If you have the money, and haven't a worry about weight, I imagine doing the entire car, covering every square inch like that, provides maximum vibration reduction. There are diminishing returns though. Some small areas hardly vibrate / amplify car noise at all because they are small or have multiple connection points and can be skipped. The key to maximizing your product application / minimizing cost is to focus on the large flat sections first. Whether material should be multi-layered is a frequent question. The common understanding, demonstrated with some testing, is that layering product is money and cost ineffective without much return. That doesn't stop folks from doing it. Your project, your choice. I would suggest what the high-end manufacturers say: if you are willing to buy multiple layers of less expensive stuff, why not buy the good stuff for the same price and far less work/weight?

When I apply CLD, I can't help but tap on the area with the roller handle before and after I apply it so I can hear the difference. Before, it sounds tinny, after, it has more bass. Is this a reflection of what the vibration effect will be? Oh, heck no; I just can't help doing it. It feels like you're doing something. The only real tell is after you're done and you go for a drive. With Hapy's diesel engine running, we will get a fairly good idea without actually getting out on the road. My hope is that after I have finished, driving Hapy will no longer feel like you're operating a diesel generator inside an old leaky steel shed during a wind storm.... like it does now.

Liquid Deadener
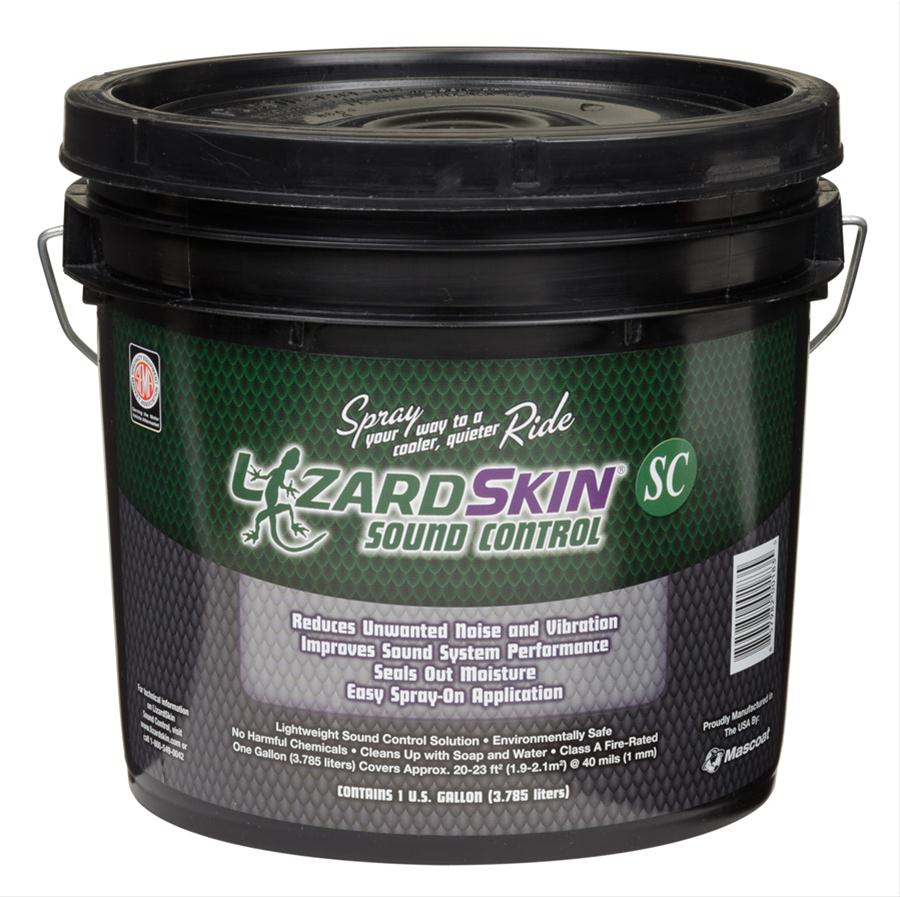
One last thing on deadening: there are liquids that deaden too. These fall under the Liquid Applied Sound Deadener (LASD) umbrella. Second Skin sells "Spectrum" (see here), but there are others, like LizardSkin, dBSkin and QuietCoat. Since these products target the same thing as the CLD does, I thought I would mention it here. Based on the studies and the science of the CLD, I am not convinced the liquid works as well. The product websites don't specifically say how effective they are in decibel reduction terms, but for hard to reach spots where getting a sheet of CLD is not practical -OR- for exterior areas like the under body or wheel wells, this may be better than nothing. Or, this could just be fancy marketing of what amounts to liquid asphalt painted onto your car, reducing noise like a cheaper CLD does simply by being a thick coating. For the coverage, the liquids are much more expensive per square too. Still, I am going to try Lizard Skin in the spots I can't reasonably get to with CLD (wheel wells) because I want to try it out. I may hit between the belly pans and the floor, since I can't get in there with anything other than an undercoating nozzle. If it does little for the noise, but it helps retard the rust, it would still be worth doing, IMHO.

Next time, I get into different materials for subsequent layers, as well as some decibel readings for a "before" image to compare against after I add some of this stuff. Thanks, as always, for following along-