Tuesday, October 16, 2018

MGB Exhaust Re-Do (Part 1)

Earlier this year, I described the slap-together exhaust solution I did to get the car through Oregon Department of Environmental Quality (DEQ) testing. I had a head-to-tail system waiting to get installed since before US Independence Day that had been sitting in the garage walkway, just waiting to get stepped on. Today's post covers the rip-out of the old exhaust and some explanation of the new Bell exhaust.

Mild, Stainless and Coatings
I should probably start by pointing out that I purchased a stainless steel exhaust and then had it high-temp ceramic coated in flat black. I arrived at this combination after listening to various exhaust systems available for the stock MGB through YouTube videos. I knew exhaust paint is temporary, and that it eventually chips and scratches to reveal the metal underneath. I wanted a system that didn't exist anymore: Peco. a mild steel exhaust, but then ceramic coated. Ceramic coating can scratch off too, but it is much harder to do and the finish is much hardier than paint. Especially if the people applying it know what they're doing, and prepare the surface correctly.

Bell system with center "bomb"
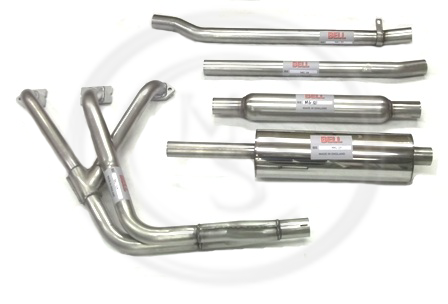
Since the Bell system was built on the same jig as the Peco, but out of stainless steel, I held to my plan. I thought it would cost more, but since the original Peco mild-steel systems are disappearing from inventory, they are really quite expensive now. The image to the right, here, is similar to what I bought. The sole difference is the system I got has a larger center resonator (third pipe down).

I have read that stainless exhausts, while they have an initial higher register note mixed into the lower overall sound, that higher pitch goes away as soot lines the insides of the pipes. So, when I selected my powder-coater, I selected a company that coated the insides of all of the pipes as well as multiple coats on the outside so the exhaust would have that ripened sound from the moment of install. The inner coat also serves an additional purpose of providing a slickery smooth surface so soot will not build up over time. Last, this ceramic coating has some kind of thermal barrier as well so less heat will transfer through the pipe walls, sending it out the tailpipe instead. This should help keep the cabin cooler in the summer.

Old Manifold Off First
The existing (not original) system was welded in from the exhaust manifold through to where I had soup-canned on a muffler. Yes, I used a soup can (See MGB Muffled) to connect a recycled muffler to the rusty pipes to get through DEQ without attracting attention. It worked, but as one would assume, the integrity of a soup can is no match for the stresses of an exhaust system, and it split apart at some point shortly after that. With all the other action this Summer, I didn't really have time to do the full exhaust replacement, or I'd not have the convertible to play with while the weather was nice. Well, the weather turned to cold and rain early this year, so with an uncharacteristically empty autumn Saturday, I grabbed K2 and set to it. First things first: get the front end as high in the air as you can (safely) on jack stands and make sure it does not budge when you shake the car.

old system sans catalytic converter
K2 got the fun job of removing the exhaust manifold from the head while I worked on the other end, figuring we would meet in the middle. I had just replaced the manifold gasket, so I knew that process well enough to give directions from underneath. There are 2 bolts, one on each end, and the other have nuts holding onto 4 studs. All are 1/2" but there is not sufficient room for a socket for most of the nuts, so K2 worked them free with an old-skool combination spanner.

Just as a point of reflection, he was using the Sears Craftsman wrenches that I got for Christmas when I was his age. 30 years later, they have hardly aged. RIP, Sears; it is truly ironic that you, a company rooted in catalog mail-order, met its demise due to Amazon, an internet-order company. You were the one rare store where product quality remained relatively high while prices stayed reasonable. Sears never felt cheap (like Target does), and you offered practically anything a shopper might need other than food. The store closest to me is closing, bringing our 30+ year relationship to an end. Sadness.

Anyway... with the nuts and bolts off, K2 carefully slid the intake and exhaust manifolds off of the head, taking care not to disturb the gasket. The gasket still looked new and the copper sealant between the gasket and the head looked like I had just put it on. Honestly, since I'd only driven the car a couple of miles since I did it, I'm not sure the gasket and sealant ever got all the way up to temperature. So, yeah, that gasket is basically new.

Tail End Removal Next
Meanwhile, I was working on the other end. I noticed the split in the soup can, and figured that the tail-end would just come apart with a good yank once the tail mount was removed. I gave the muffler a hardy tug and it came right off. With a clatter I tossed the muffler into the driveway exclaiming "the first of the exhaust is off". Once K2 had the manifolds clear of the head, we figured out that the pipe needed to be cut to get free. I grabbed the angle grinder (and gloves and a face-shield. Safety First!) and cut the pipe just aft of the collector (and in front of the catalytic converter). With the mid-section now free, it rested on the garage floor. It soon joined the muffler in the sprinkling drizzle on the driveway. K2 was now able to pull the manifold free up through the open bonnet and set it on the rust pile in the driveway.

look at that non-transition
With the old system in pieces, we were able to take a better look at the custom exhaust manifold. The center pipe, which carries 50% of the load was no larger than the other 2 pipes, and had such a horrible flow to it that there was soot collected at the entry point. The soot was so thick, I could barely get my index finger in the hole without touching soot all the way around. The pipe had a 80* or sharper angle at the mate-point with the flange (check the picture to the right). Such bad flow. Just addressing that alone will improve the exhaust flow and behavior of half of the cylinders.

Tossing the rusty bits to the driveway, we chose to take a break. I quickly cut the catalytic converter free from the other debris, and slid it under the 280ZX for later use.

This post got super long once I wrote about the install. So, I'm stopping here and will continue in the next post. Thanks for following along-


Tuesday, October 9, 2018

Drag Link and Tie Rods

At the beginning of the Summer, I had this great idea of getting the alignment done on the bus before festival/camping seasons started. I realized I hadn't posted on that odyssey, so, since I just did the last little bit of fixing, I'll cover the whole thing today.

Mis-Aligning
Like I said, I started with the simple goal of having my alignment set. I had been describing driving the bus as a "full body experience", requiring the dexterity of a kit drummer to keep it on the road and motoring along. The biggest issue has been the degree of play in the steering wheel. I figured maybe the alignment was a good place to start. These old buses have a special way of setting camber requiring a thin 36mm wrench on what is called the "eccentric bushing". This bushing is integrated into the ball joint, but off-center, allowing for the camber to adjust as you move the wrench side to side. These bushings scare off many alignment shops, which I find almost amusing. They have these fancy computers to get things dialed in perfectly, but lack a 36mm wrench. Whatever. I did find a place here locally that would do it: HM Motorsports. They are a spin-off business from the local VW dealer, so they have the VW smart-guys plus the high end computer stuff. They were able to tell me that the camber was good, but one of my tie rods was bent, so they couldn't do a full alignment without replacing it. They asked me for $400US to replace that arm. Uhh... no thanks, but they did charge me the full $90US for the alignment anyway. I guess they tried, but they probably should not have once they saw the bent arm. In fairness, I should have noticed that at some point over the last 15 years myself and not taken it to them before replacing it.

Tie Rods
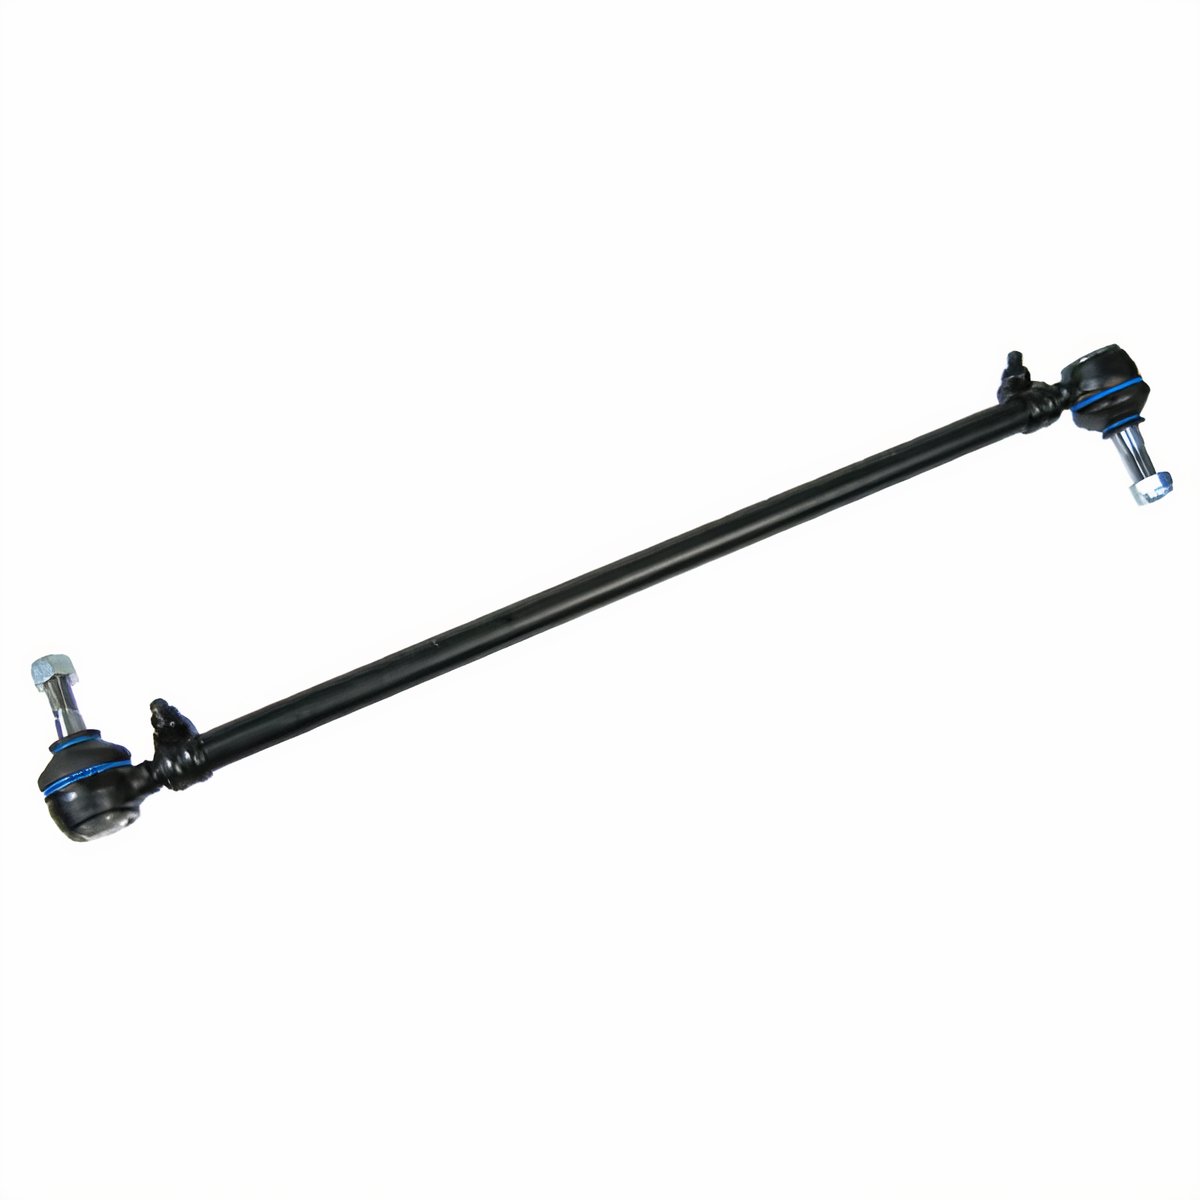
JBugs image of a tie rod
I ordered a pair of tie rods from Discount Import, and had T pick them up for me while he was there getting parts for Nemo (the A4). They charged me $35US each. The replacement was fairly easy. I started with getting the wheels as straight front-to-back as I could, centering the steering. Then, I replaced an entire arm, one at a time. The arm runs from the swing lever to the steering knuckle across the rear of the front beam. Each end of the tie rod has a 90* "end" on it that allows for controlled rotational movement. If the end can move at all any other way, it's bad. Since one of my rods was bent, I replaced the whole assembly, ends and all.

Rods Out
The ends are nutted down with castle nuts which are held in-place with cotter pins. The cotter pins may have rusted into place on yours, requiring more coaxing than mine did. Even as original parts, I was able to bend the pins back and push them out. Then the nut comes off. Last, the end needs to be separated from the knuckle or swing lever. This usually requires a pickle fork and a hammer, which will destroy the rubber boot on the tie rod end, so be sure to plan accordingly. I was able to free the tie rods by hammering away on the pickle fork. The passenger side released from the swing lever with just a couple whacks. In contrast, the driver-side steering knuckle took many many more. I have read of some needing to apply heat with a torch to get these to separate, so be prepared. Once removed, I cleaned up the holes with some WD-40 and a rag. Then, I scrubbed them with some sandpaper to make sure there weren't any sharp edges left around the holes from my removal efforts.

Rods In
Nicked from Interweb,
shows swing-lever end
and steering dampener
Oftentimes, the supplier will sell/send you two adjustable rods. This may be correct for some cars, but for the old bus, one of them is supposed to be fixed length. Discount Import only carries the adjustable rod, so the opportunity to do this wrong goes up. I followed this process for the not-bent side: measure the old rod from end to end on the top side (opposite where the threaded bolt comes out). I then adjusted the replacement arm to that same length, and then tweaked it until it dropped right into the holes. For the bent arm, this process wasn't effective. Measuring a bent arm wasn't going to get the exact length, so instead I matched it to the not-bent arm on the other side. Rather than touch the steering wheel or the tires, I adjusted the arm until it dropped into the holes. With the arms in-place, I could do a ShadeTree front alignment. Replacing the arms took less than an hour, so even at my "my free time is worth $50 an hour" rough math, I saved over $350 doing it myself versus having HM Motorsports do it.

Steering Dampener
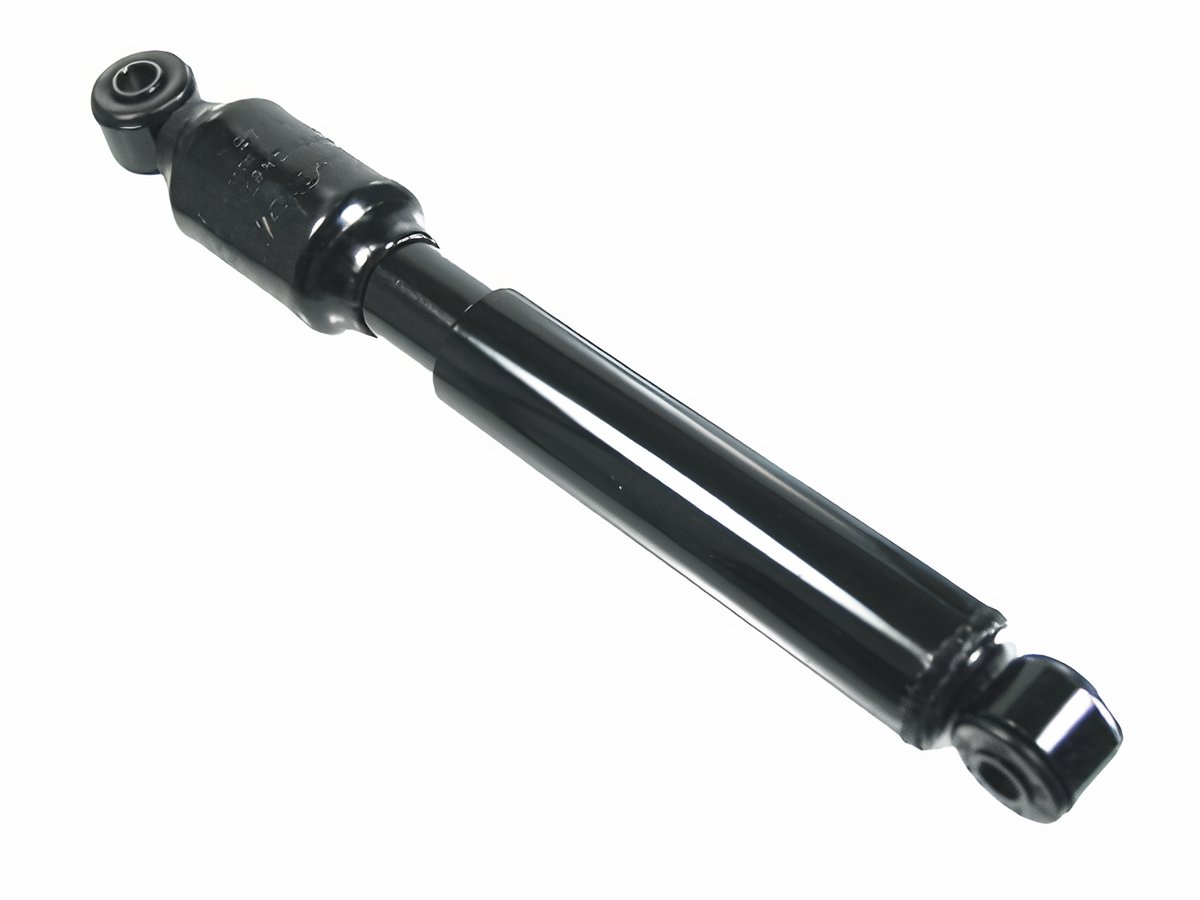
Jbugs again
Before I put in the new rods, I took the opportunity to replace the steering dampener. This is a small shock-absorber that helps cushion the driving experience at the wheel from sudden jarring affects of road hazards. Consider how much the steering wheel hops when you hit a pothole. For a car with a working front-end, it's not too bad. If your steering dampener is shot, the steering wheel gets a mind of it's own for a second. That's dangerous at any speed. In the bus, with the higher center of gravity, it's downright scary. I highly recommend replacing yours if you have no idea how old it is. I got mine when I got the tie rods for $30US. It's held on with 2 bolts (17mm, if I remember right), like a shock absorber, and it is actually pretty easy to get at when the tie rods are off.

ShadeTree Front Alignment
With the steering dampener and tie rods refreshed, I was ready to get the alignment roughed in for a test drive. All cars are a little different, so the measurement below may not work on yours, but it worked on the bus.  Measure the distance between the front-most part of your front tires (looking at the front left tire, at 9 o'clock). Now compare that to the distance between the rear-most part of your front tires. The measurement from the front should be between 0" and 1/4" smaller than the measurement from the rear. The varying length depends on your tire size; I'm running stock diameter, so this works. Ultimately, this effort should be sufficient to get you to the alignment shop. This is not an ideal permanent setting.
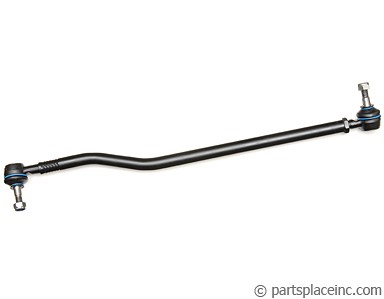
PartsPlace.com image
If you have just one adjustable tie-rod, the adjustment is more straightforward. Since I had two, I adjusted both sides one turn at a time until I hit the 1/4 inch number. Based on how the arms adjusted, I used to have no-toe or a slight toe-out. In my experience, the steering becomes less predictable with toe-out, so I'm good with a slight toe-in. I test drove the bus first slowly in the driveway, then into the dead-end street and finally around the block. The steering held much more firmly over bumps and when the street was level, and there were no bumps, it held a straight line with my hands off the wheel. There was still 3-4 inches of play at the wheel, though, when I did want to change direction.

Drag Linking
To resolve the remaining play at the wheel, I asked Boo to sit in the driver seat and turn the wheel left to right while I laid-hands on various parts of the steering system. I could see the steering coupler turn, and feel the arm move, but the drag link didn't move right away. It had a significant delay, and made a clunk noise when she changed direction from right to left (not left to right, which was weird). I rested my hands on the swing lever to see if it had any up/down movement. I couldn't feel any, so that lever and the pivot pin should be fine, unless my novice hands couldn't feel well. Other than the steering box, the swing lever was all that was left if replacing the drag link didn't fix the steering play. I resolved to replace the drag link, and bought one at Discount Import ($50US). If they had had a swing lever kit, I would have bought one since the 90 minute round trip can eat up a day if you need to do it more than once.

old drag link,
broken pickle fork
The drag link removes just like a tie-rod: pull the cotter pins, remove the castle nut, and apply force with a pickle fork to pop each end free. The drag link removes and installs from the front with the non-adjustable end pointing to the rear. I broke my pickle fork as you can see in the picture to the right. I guess the Harbor Freight fork isn't made very well.

Similar to the tie-rod, you want the replacement to be the exact same length as the old one. In the PartsPlace.com image above, you can see an adjustment lock-nut on the right end. I placed my old and new side by side to get the length correct. Take care as you pass that rear "end" through the hole in the support so you don't damage or tear the rubber boot. I left the plastic shipping cover (visible in the picture) on the end during pass-thru so it wouldn't get damaged. To get the end to fit into the swing lever, I put a socket extension onto the bolt and used that extra torque to position the bolt to easily fit onto the hole. The front end slid right in without any extra fiddling, so I knew I had the length right. If you aren't so fortunate, repeat the measure and fit steps otherwise your steering will not align properly. Last, I threaded and torqued on the nuts, inserted the cotter pins and closed up the belly pan.

Test Drive
This final test drive was quite different. The steering is genuinely responsive, with less than an inch of steering wheel movement before the bus starts changing direction. When combined with the steering dampener, it drives like a completely different vehicle. I know I should take it to have the alignment done, but honestly, I probably won't. It handles so well, holds center during acceleration and braking. Since the caster and camber were within spec before I started replacing parts, and the parts I replaced have no bearing on those settings, I may let it ride as it is.

So, Hapy is fully operational again... just in time for winter. I have plans to address rust this winter, after I complete the interior of the MGB. And, of course, there's the 280ZX that neither C nor I have given much attention to. Clearly, I have lots of content waiting to be generated.

That's it for today. Thanks, as always, for following along-
Tuesday, October 2, 2018

Let's See

Not much car content in this one. This is really more of a diary note for my own sake.

Let's See
When approaching a decision about whether to do something or not, most people come at it in one of two ways: we either start with the question of "why not" or the question of "why". Starting with Why can often immediately create a sense of negativity, like, in a snarky tone "why would you do that"? Immediately, you're defending the position, and you hadn't even decided if you're doing to do it or not. Asking "why not" can avoid that defensive knee-jerk, but it can also drum up all kinds of fears and irrational could-almost-never-happen scenarios that push the idea to the curb. Or, it could create a sense of lack of responsibility where you can go ahead and do whatever without any rationalization applied. Neither of those introductory questions bring me to a place where I would actually try the next step.

Maybe for you, dear reader, one of these questions works well. I know, eventually, I have to get into the "how" questions, but I have found that I need to create the mental or emotional space to let an idea rattle around. Boo has introduced me to the simple door opening phrase "Let's See". This creates a supportive basket to find out what the next steps would be and start weighing pro's, con's, costs and risks without the emotional baggage of a "why" or "why not". This is not the same thing as "We'll See", a classic parent response when the kids have figured out that "maybe" means "no, but I don't want to get into it with you about it now". It was using the "Let's See" approach that found us in a rental house 5 years ago that we thought we had no shot in getting because of how many families were looking at it. It was using the "Let's See" approach that led me to buying the house next door to that rental on a handshake at the kitchen table with the owner. So far, so good.

The Year of T
In June of 2017, T returned from University of Nevada, Reno (UNR) after freshman year. His grades weren't good, his interest and focus on school had left him. He decided that he didn't want to go back in the Fall, and would live with me and Boo full time. While I was concerned about his emotions and possibilities for the future, I embraced "Let's See". We got a room set up, helped him get comfortable with some music production equipment (he bought it all, we just made the space) and got out of the way. By November, he was taking classes at Portland Community College (PCC). By March, he had applied to go to the University of Oregon music program. He didn't know if he was going to get in, but after the campus tour and meeting with the music school staff, it almost seemed like a dream that couldn't come true. "Let's See". He got into the university and the school of music. Then came the questions of housing.

And Then It Happened
We were sitting in the den one night that spring; Boo and I were talking about what potential futures could hold, like we do. One of us, I don't remember who, asked whether we could buy a house in Eugene for T to live in (and one day become a potential retirement location since Eugene is a pretty awesome small city with a fantastic music scene). To anyone else, that sounds a little nutty, but we answered with "Let's See". The first step is see what you qualify for. Okay, can that get you something in that real estate market that is livable? It can? So, how about covering the mortgage and making the housing experience more fun if T has some friends live with him. Turns out, T is a pretty amazing guy and has some deep trusting friendships who are on-the-ball types, working on bachelor degrees in Eugene. Hmm.. this might actually work. So, next you find a real estate agent who can vibe your way, and then you make a bunch of trips to the target town. I think we made 6 trips. After a couple of almost-rights, complete with offers, we found a house that will meet everyone's needs, within the price target we and the students can afford. "Let's See" strikes again.

Left Nest
T wanted to get to Eugene well before school started so he could find employment, set up the house and get used to living before school added additional scheduling and restrictions. We rented the smallest UHaul above the cargo van and moved him down over Labor Day weekend. He drove away from our Beaverton home in the recently repaired A4 (Nemo) to start his new life in Eugene Labor Day afternoon.

Asking "why" or "why not" doesn't get you out of a current place into something completely new. They welcome a cerebral journey at best, leaving you exactly where you were, but fatigued from the mental effort. All pain, no gain. Stating "Let's See" invites you to take the first step, see what you can learn, and evaluate whether the next step will teach you more. You're not planning; you're doing. You're not rationalizing the totality of an idea before you've had a chance to test parts of it. "Let's See" creates a way to live life in an Agile way, forging new ideas and trying them out. Naysayers be damned, this approach works. Just ask T the next time you're in Eugene.

That's it for today. I'll get back to the bus/car content here soon.