Showing posts with label reverse. Show all posts

Tuesday, February 9, 2021

Hapy Daily Driving

Well, that title might be overstating it a little bit. To clarify: Hapy is now capable of driving on a moment's notice. With the CoViD safer-at-home, I haven't been going anywhere. I may not have had an operable car for most of the last couple of months, but the lockdown has meant I haven't really needed one either. Today, I'll cover the little things that needed to be buttoned up after the big re-wire.

Reverse Lights
I mentioned the reverse lights at the end of the Electrical Gremlins saga. I had it wired up to a somewhat mystery switched 12V source before. When I tore the old wiring rats nest apart, it was left out of the new wiring. This resolution was fairly easy. Back when I set the mystery wire-up aside, I left the plastic-snap-shut fused wire in tact. So, there was just a plain bare wire to deal with. I fished it up into the spare tire well / wiring compartment from the engine bay. I spliced the wire into the switched source splice coming from relay 109 so the reverse lights will only come on when the computer thinks we are in "RUN". Since it already had an integrated fuse, this was a simple splice effort.

Headlight Flasher
When I was chasing the cause for my lack of amps during P0121 testing, I tore into the dash. I thought I had bumped something loose, and there are a bunch of things in there that could have shaken apart. Well, I didn't bump anything loose causing that issue, but I did bump something during that exploratory. Haha. During the Summer of 2020, I finally got my high-beam / low-beam flasher relay to work. It was because the replacement relay requires a source of 12V to pin 30. This pin wasn't on the old relay, and there is no wire leading to that pin in the original fuse box. I solved that before, but when I was looking for the buzzing noise during the P0121 effort, I pulled that relay and the wire heading to that pin fell out of the fuse box. I didn't notice that then. During post-testing, I discovered that the flasher no longer flashed. I found the wire, re-oriented it so it would not fall out, and returned things back to their prior cleaned-up state (zip-tied fuse-box). Hi-beam flash/relay works.

Defroster
Also in the Summer of 2020, I installed a defroster. Sort of. The defroster solution was moving the Vanagon rear heater under the belly, routing coolant along the driver side main beam and plumbing into the old air channel from just behind the front crossbeam. The air source was an experiment pulling from the old rear floor vent. The mechanical connection of the hoses to the heater was poor, and the experiment fell apart. This source needed to be remedied. Also, the switch was not operating the fan settings correctly. This was caused by poor quality wire connectors, so once the 3 at the switch and the 2 near the heater were replaced, we have a 3 speed fan again.

I decided that rather than solve for a cabin-source of air for the defroster, I would just remove the experiment for now. I have an idea for a source, but other cars need my focus. So, I removed the air supply hoses and called it good enough for now.

Mop Up
During all of the wiring work, the inside of the bus became considerably disheveled. It was one part shed, one part tool box and no part looking like a vehicle. This was easy to resolve, but made a huge difference in declaring the end of the work. The lot couch is back installed as a middle-row bench seat, for example. The rear speakers are hooked up and placed for sound again. After a quick trip with the shop-vac to get the wire-strippings and other fallout from all the work vacuumed up, he looked nearly ready.

I ran a test of the furnace, confirming that it would run on either the accessory battery or the main. It will, but the current draw for the glow-plug is so significant that I'm not sure I will want to start that heater if I am not running at least a float charger to the sourcing battery. Still, it moved the internal temperature of the bus from 43*F to 68*F (6*C to 20*C) in about 15 minutes. For the fuel-minded, it took about 500ml (or ~0.13US gallons or about 2 cups). As I understand it, maintaining the temperature requires far less fuel, so the consumption at that point dropped way off. I left it running for about an hour and the total consumed ml was about 530ml or 30ml (1/8 cup) for the remaining 45 minutes of keeping the bus warm.

I took one last step: I installed plastic kick panels I ordered like a year ago against the rear of the nose of the bus. Just like that, the cab looks like it is not an active project. It looks fairly clean now, actually. They install and remove easily, and once snapped in they really do not appear to need much more to hold them in place. The guy who makes them suggests poking holes through and screwing them into your bus. I might use Velcro, but I'll withhold decision-making until after we have had a few drives to see if they rattle or not.

Getting Legal
This last thing was actually one of the first things I did for Hapy after I set Zed aside. In fact, I think it was the registration that got me thinking about Hapy in the first place. His registration came due, and because of CoViD-19, I had to do it remotely. Since he is too old for smog and Oregon does not have inspections, I have been renewing his registration online for a few years. Still, this time I did the online steps in October 2020, but did not receive the stickers for his tag until January 2021. This used to take a couple of weeks at most. It sure felt good getting those stickers on his plates, though.

Test Drive
With the tags updated, the wiring fresh, the defroster responding, furnace functioning, etc... Hapy appeared nearly ready to be pressed into service. We just needed a test drive. For that, I did my usual neighborhood lap through a series of side streets out to the main drag, a quick 1-mile straight shot on that major street and then turning back into the side streets for home. As expected, Hapy was fairly peppy and responsive. He sounds great, and did not suffer any P0121 issues. There were a few stutters, but no codes, so I chalked that up to old diesel. That will solve with some snake oil and a fill-up. Considering that Hapy had not left the driveway in over a year, this drive was significant, albeit short.

Alt-Light
The battery light came on when the engine was revving low during the test drive, leading me to think that the unsettling "pop" noise I heard when the wiring was wrong (See Chasing the Hapy Electrical Gremlins - Part 6) was the sound of my alternator frying. This light had been popping on during testing, so the fact that it returned during the road-test honestly just reminded me. Before I jumped into anything, I in-bus tested the alternator: I alligator-clipped a fused wire to the alternator output and ran that wire on the ground up to the cab. There, I electrical-taped the bare wire to the positive probe of my multi-meter to free a hand. I set the negative probe into a small bolt-hole in the driver door frame for a good ground. First, a good base reading: 13.5V. Cool. I started the engine and it dropped down to 12.4V. Solid. With my hand on the go pedal, I revved the engine and watched the voltage climb up and down peaking above 14V. So, the alternator is fine. Since I have been running without an ALT/GEN light for 10 years, I could just ignore that light... Nah, I just can't do that. I figured that the bulb must simply be connected to the wrong wire of the 2 in the ALT plug.

I had spliced into the wire heading to the computer (DFM - or Digital Field Monitoring), and it needs to hit the one that routes to the cluster (L - Lamp). Simple fix: I cut the splice from the donor main harness to the 6-wire cable, and tied it into the other wire from the plug just upstream from the 4-pin plug. While I was back there, I added ring terminals to the sensor wires for the oil pressure and oil idiot light. There remains some wiring tidying I need to do on the driver's side, so I'll cut out the rest of the DFM-sourcing wire when I'm in there. 

As much as I'd like to say that once I completed, I took another test drive... I can't. I did test start and engine-rev in-place, however, just to see that ALT light wink out (which it did). Why did I not drive him? Well, remember Gramps (1996 VW Jetta 2-dot-slow from my folks that we gave to K2)? He re-appeared with a failed throw-out bearing after the first test drive, but before I'd solved the ALT light. So, I will have to juggle the herd to get Hapy free for a drive. And, you can probably guess what I'll be working on next.

That's it for today. While I may not need to go out much due to CoViD restrictions, I now have my beloved turbo-diesel powered microbus available-ish for whenever the need arises. While there are lots of little things I could tweak on Hapy, none of those things would prevent me from taking a drive. Sweet, sweet success. Thanks, as always, for following along.

Tuesday, March 10, 2020

Reverse Lights

Quick post today. After not having operational reverse lights for pretty much the entire time I have owned Hapy, they are now operating.

Bus Reverse Lights - stock
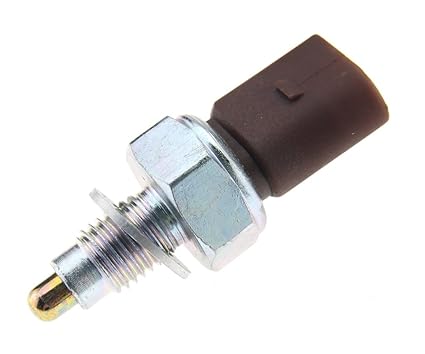
reverse switch
Let's start with how these lights are supposed to work. On the transaxle, there is a small switch threaded into the case. It has a small pick-up inside the transaxle that is depressed when the reverse gear is selected. My original transmission had gummed up the switch, so it didn't work. Or, maybe it was just old and failed. It doesn't matter. While I could have replaced it, I was focused on other stuff... and then that engine swap thing happened... Anyway, that switch receives 12V from the positive side of the coil through a black wire. The wire, obviously, goes to one side of the switch, and the signal is sent from the other, down another black wire, to the driver side reverse light. These 2 wires are bundled together for about half of their travel, separating near the low-point of the spare-tire well. The source wire goes to the coil. The signal wire goes to the light, and a second wire, which is part of the rear wiring bundle, takes the light signal to the passenger side. So simple.

Bus Reverse Lights - after engine swap
Like I mentioned above, the original source of the 12V is the coil. If you are running an engine that had a coil, that works great. The TDI, of course, doesn't, so I have to find an alternative source. Fortunately, since the 12V source wire split off from the bundle at the low-point of the spare tire well, AND all of my electronics are in the spare tire well, this turned out to be quite simple. I located a switched source among the wire bundle and wired an in-line fuse into it. To the other end of the now-fused circuit, I connected the black wire from the reverse switch. I didn't mention before, but I installed a new reverse switch into the rebuilt transaxle when I installed it into Hapy.

Testing
To test, I put Hapy into reverse and turned the ignition to "run". The driver-side reverse light lit up. It was actually pretty bright. Nothing from the passenger side. Now, before immediately assuming something in the wiring was all jacked, I figured I'd look at the bulb first. 3 Phillips screws later, and... the passenger side didn't even have a bulb. Hahaha. I guess when I replaced the light fixtures all those years ago, I ran out of bulbs. Fortunately, I had a single-filament bulb, so with a quick twist, I tested again. This time, I had both bulbs light up.

At this point, I realized how fortunate I was and called it a day. Yes, I could have gotten into all kinds of other things, but it was already 4:PM, dark was approaching and I knew that when you have a win, take it and don't be greedy.

So, that's it for today.

Tuesday, February 5, 2019

Flash fixes continued

I left off my last post about Flash with a summary of fixes stemming from replacing my 3 seasons tires with studded snows. Today, I finish the work by repairing the not-operating wipers and getting the reverse lights to work again.

Wipers No Wiping
The RainX held us for the handful of days while we waited for the new linkage to arrive. I got new wipers and a wiper-arm puller as well. Everything arrived on a Friday night, so the next (Saturday) afternoon I tore into the job.

Before you start, make note of where your wipers are. Similar to getting your engine into TDC (Top Dead Center) firing position for cylinder #1 before you start removing things, move your wipers into the rest position (all the way down) before you start or getting things to line up at the end will take much longer. The arms remove with a 13mm socket, hidden under a small plastic cap. Save that cap and the nuts. Once the nuts are off, the arm puller popped the arms right off. Next, the plastic cowl needs to be pulled away. The rubber seal along the front edge should remove easily, leaving just the 4 snap-on bits along the rear. These pull away by getting your fingers under the plastic along the windscreen and pulling more towards the front than straight up. I have seen others post about using a pry-bar; I found that excessive and introduced more risk to breaking that plastic cowl or scratching the glass. I removed and re-installed this cowl a few times while trying out various parts, so I can say for certain that a pry bar should not be necessary.

nicked from VWVortex
With the cowl out of the way, you should see the unpainted metal linkage connected to the wiper arm bolts. It is held to the car by 3 10mm bolts. Remove the bolts, and the washers underneath and save them. The linkage should now be free, but it can't be removed until you unplug the electrical plug from the motor. It is a flat 6-pin plug with a little catch on the underside. Press the catch and pull it away from the motor. Now you can wiggle the whole operation free from under the windscreen. Note how the motor connects to the linkage. There are 3 10mm bolts holding them together and a central 13mm nut holding the business end of the motor to the operational part of the linkage. Consider the orientation of that "operational part". If the wipers were in their resting position before you started tearing things apart, the short arm is pointing directly to the right (front is front), making it difficult to get the 13mm wrench in there to remove the nut. Remember this when you're putting it all back together.

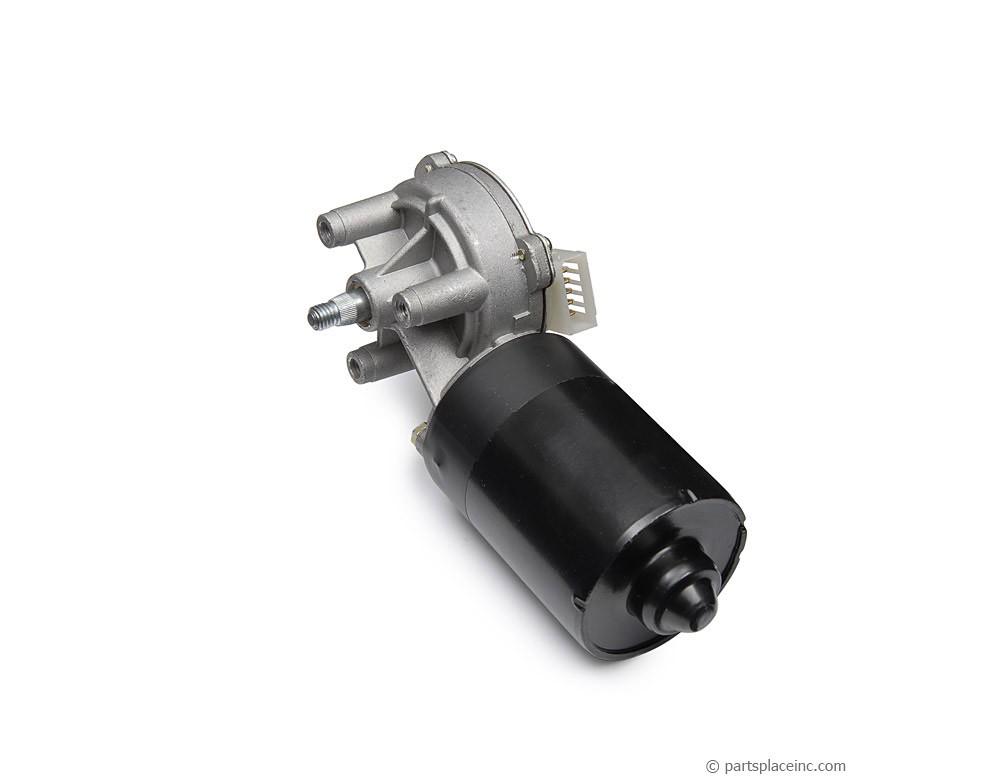
I took the opportunity to clean out the little wiper controls bay at this point. There was all kinds of organic debris in there from years of parking outside. I dug around with a stick and used my shop-vac to get it clear. I also started testing things. First, I compared the new linkage with the original. I noticed that the new and old operated the same. In fact, the old one moved more freely. So, I concluded that the linkage was not the problem. So, I plugged the motor back in, and tested its operation with the wiper switch. The motor made noise, but did not turn the threaded end. So, the motor was the bad item. I needed a new one today or we were going another week, this time a projected-stormy one, without wipers. Eek.
wiper motor

Local Auto Parts
With Discount Import Parts now 1-1/2 hours away round-trip (no, I just can't let that go), I started looking around at the common local places. NAPA reportedly had one just down the street, according to their website, but after ordering one for pickup, I was called by the store and told that they actually didn't have one, but they could have one to me by Tuesday. Hmm.. this is why Amazon is crushing typical retail; I could have one in-hand tomorrow from Amazon. I want one now. Today. Next, I tried O'Reilly's about 30 blocks away, who also claimed to have one. They did. I failed to test it before I left the store, and it failed to work, right out of the box, when I tried to install it. No motor movement; no motor sounds. By the time I got it returned, it was getting into Saturday evening, so I aborted for the day, knowing that the Hillsboro location (20 minutes away) had 2. One of them would probably work.

Sunday morning, I hit the Hillsboro store, swapped a $100US bill for a motor and tested it in the parking lot. Bad the same way as mine: motor hums but the threaded end didn't turn. I've come to the conclusion that this transition part (I refer to as a transmission) is a fail point that is not looked at during rebuilds, or at least not often enough to prevent bad parts going to stores. For reference, it's the silver section of the motor in the picture on the right, here. Anyway, the other motor they had looked much better. The transmission looked new, the paint on the motor was not all over the transmission (like the others were), and best of all, it passed my driveway test of plugging the motor in while it was resting on the hood/windscreen and flipping the wiper switch.

I had brought my old linkage and the fasteners so I re-assembled the wiper motor and linkage, re-installed them and attached it all to the car right there in the O'Reilly's driveway. That's one more plus for them over NAPA: NAPA has a big sign on the side of the building forbidding patrons from doing spot repairs in their parking lot. O'Reilly's guys will come out and help you do it. Anyway, with everything under-cowl put together, I tested the switch and watched the wiper bolts rotate. Regretting that I had not brought at least the driver-side wiper arm and blade with me, I nosed the car east and back home.

Clear Screen
Bosch ICON wipers
The finish-up of the job was very simple. Between the linkage and the cowl resides small rubber boots that I had not mentioned earlier. I think these protect the linkage from rusting, so I re-installed them. Considering how rust-free and genuinely operational the original linkage is, I think this a fair assumption. Then, I wrestled the cowling back under the hood (bonnet for my non-US friends), setting it tight along the front edge before snugging the 4 snaps along the rear edge. I re-set the seal along the front edge, and then put the wiper arms back on, snugging them down with the 13mm socket and finally pressed the plastic caps into the arms. Like all things, test before you call it done. I had been doing all this in a steady Pacific NorthWest rain, so there was plenty of water on the windscreen for a valid test. The new Bosch ICON wipers ran smoothly from park to post and back again.... and completely cleared the glass in one pass. So sweet.

Reverse Lights
The last thing I needed to fix on the old Jetta was the not-operating reverse lights. Start with the simple, obvious things first: the bulbs. While they do not fail at the same time very often, I find coincidences like that happen more often with this car than many others I have owned. Not this time, though. Next, test the switch. The switch sits under the battery tray, behind and to the left of the starter motor. If you unplug it and then jumper across the 2 pin holes in the harness, you simply turn the ignition to "run" and you should see reverse lights. If you do, the switch is bad. If you do not, the issue may lie elsewhere.

Remove and Replace Switch
reverse switch: do not use the washer
I read a few how-to's on the reverse switch, and they all sounded very involved, including removing the battery and tray, removing the air box or both. Yikes. I looked at the location and considered that I could see the hex edges of the switch, so I could probably get a spanner in there. Sure enough, a 7/8" spanner fits the switch perfectly and can thread behind the battery box, but far enough ahead of the transmission to gain purchase on the switch. Unplug the switch first. Then, just pop the spanner on that switch so it can move. I didn't have to move my spanner more than 30*. Facing the engine from the front, reach along the rear of the radiator (under the upper hose) and under the battery box until your fingers reach the switch. I had my elbow brushing the driver-side radiator fan. The switch removes fairly easily (lefty-loosey). The install is the reverse, seriously, and then snug it tight with the 7/8" spanner..

I applied some thread seal on the switch, dropped on the included washer, reached around and under the battery box and threaded it home. I plugged it in and... nothing. Huh? I backed out the switch, and tested the switch by plugging it in, holding it depressed with my new wiper arm puller and saw the reverse light illuminate. Yes, I could have asked someone inside to come out, but it was raining... and raining hard, so why get everyone wet? I concluded that the included washer is NOT for the Jetta TDI engine, but may be used in one of the switch's other applications. Great. So, I pulled the washer, re-installed, plugged it back in and... it worked. Hapy dance.

So, now, the only thing that is still broken on old Flash is the hazard switch. I have bought multiple new ones and they all arrive failed. I think it stems from manufacturing moving away from Germany and Brazil to China, lowering the quality of the soldering along the way. I will just get one from the junkyard the next time I go. I still need to solve for the heated seats one of these days, but I am content to have all of the lights and wipers working for today.

Thanks for following along, and I will be getting back to Oliver's interior now that the daily-driver is safe again.