 |
| world's most dangerous man |
I have been slowly working through a gauge solution for the oil system in the TDI conversion (For reference, see Oil and Temperature 1, 2, 3, 4 and 5). This really has been interesting, and I think those running a stock air-cooled motor might want to do something similar. Since the air-cooled engine runs oil hotter, the broader range gauge may work better, which means less work for you. I unfortunately did not take any pictures of the final steps setting up or installing the Porsche combination gauge. My phone died, so while it sat on the charger I readied the dashpod. Then, assembly inside the bus required 3 hands so I couldn't get a picture without risking dropping something. So, please try to use your imagination as I describe the final assembly.
Final Gauge Prep - Bulbs
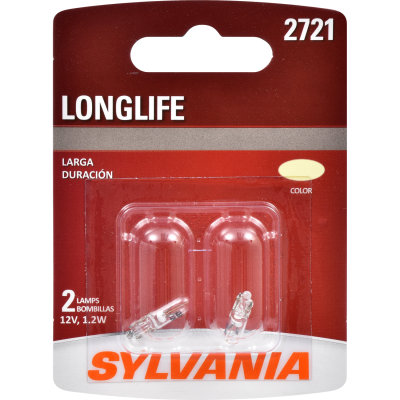
When I left off last, I had the new 250*F limit temperature innards swapped out, and that half of the gauge re-installed into the gauge. We were entering the home stretch. I focused on the bulbs next. There are 4: one each for illuminating the two gauges and one each for the 2 new idiot lights (Alt and Oil). Now, I don't have the light wired at the alternator, but I figured if I could get the gauge-end ready, it would be one fewer thing to fiddle with later. The illumination lights are simple push-and-twist 1.2W bulbs like the others in the bus dash. In fact, they are the exact same bulb. The idiot lights, however, are not like those, nor are they the same size. The alternator bulb is bigger, and the oil pressure light is an odd spade style. As luck would have it, back when I replaced the thermostat panel bulb in Flash, I had to buy a 2-pack of bulbs. That bulb (Sylvania 2721) was a match for the oil pressure bulb socket. Kismet!
Final Gauge Prep - Wiring
With the bulbs set, I shifted to the wiring. There are 4 signal wires (oil temp, oil pressure, oil warning and alt warning). For these, I simply stripped the wire ends. They already have disconnects at the gauge so I could disconnect them later when I pull the dashpod. The other wires (1 ground, 2 illumination and 2 switched 12V) needed a different treatment. In the interest of keeping the dashpod remove-able, I wired the 2 switched 12V source wires into a single male disconnect. I did the same for the 2 illumination wires. To the ground, I attached a female disconnect. Before I moved out to the bus, I fiddled with the gauge to make sure it was straight up/down.
In the Bus
 |
| warming up |
I started by inserting one of those "chair" disconnect splitters into one of the dashpod grounds and then connecting the ground wire from the combo-gauge. I then used my wire color map from my last post, heat-shrink splicing the gauge signal wires to the cable wires. Then, I plugged in the illumination male:female. Last, I sourced switched 12V with a covered female disconnect, and plugged in the male from the gauge. I thought about wiring it into the black switched circuit that powers the fuel gauge and the turn signals, but couldn't get my head around how to do it with one of those chair disconnect splitters without risking an accidental grounding. I wanted to minimize the wire cuts too. Last, I could have just put disconnects on the ends of the colored wires rather than splice into the original gauge wires; I just didn't. I still might.
 |
| thermostat just opening |
Unrelated, the couple of hours I spent in the bus getting the dashpod wired and installed I also test-ran the little heater with the new Afterburner thermostat. Once I had the temperature probe in a spot where it was not up against the outside wall, the thermostat held the interior temperature at a fairly static 70*F. Considering the wind and rain outside, it was really luxurious. Imagine how different the experience is compared to lying in the street gutter trying to get an alternator swapped out in front of that old Lake Oswego house.... in a late fall rainstorm. We've come a long way, Hapy.
Testing
 |
| after thermostat opened |
Because of continued limp-mode issues, I ran my engine-running tests in my driveway. That made the picture-taking possible, though. The gauges respond as I would have expected. The oil pressure starts high when the engine is first started and then settles down once the engine is warm. The oil temp warms faster than the coolant. When I rev the engine up and down, the oil temp climbs and then settles. My last test was to check under the bus for fresh oil spots. There were none. You can see from the pictures what the coolant temperature is (number in lower left corner of UltraGauge).
With that, the oil system gauging is complete. I am not sure what's next. I have a cable for re-wiring the front-to-back stuff, and otherwise I'm just about running out of parts for projects. I do have some coolant hose and a stretch of aluminum pipe, though, so maybe I'll get after some part of the defroster. Of course, some day I'll have to get back to paint-prepping Zed, the 1979 280ZX. I'll figure it out when I get to the garage. Thanks, as always for following along--

No comments:
Post a Comment