Showing posts with label shed. Show all posts

Wednesday, June 3, 2026

More Moving

Today's post follows the last one, sort of. Today I focus on moving stuff basically from one storage location (the attached carriage-house-sized one-car garage) to another (the tool shed or the shop floor). In re-reading it, there is really a lot of history context with some moving stuff mixed in.
 
But First 
most empty since 2022
Before I get into it, I understand that a blog about fixing cars really ought to, you know, talk about fixing cars sometimes. I get it. I really do. I like working on cars, and when I have time, space and a car that needs fixing, that's how I prefer to spend time. Over the past 2 years, I have spent a great deal of time focusing on creating the space for that to happen. In light of that, I think it is worth noting that I understand the economic space many of us are in. Costs for everything seem to climb more every day while our respective salaries and wages are flat. Affordability may be a catch-phrase for politicians, but for the rest of us its a daily life reality.
 
When I look back on the last year of posts talking about getting a shop built, I recognize how tone-deaf much of that must feel to those in real financial difficulty. I totally understand that. Please consider that I started this before the election in November of 2024 and had committed to $22k of steel building before the tariff wars started in 2025 and had the concrete poured, building installed and the doors started before trump attacked Iran this year, sending our fragile economy skidding into the ditch. I had already started down a path which could not be easily changed before things got really bad.
 
Now, Boo and I are in the same financial binds as most of the US: income flat, outflow increasing. Accordingly, I will not be getting any new-to-me cars/projects nor really invest much in fancy new after-market parts to install on any of the ones I have. What does this mean for a blog about fixing cars? Well, it kinda means that I won't be posting as often and when I do it will be more about repairs than about some new thing except for the parts and bits I collected before we bought the farmhouse in 2022. I have boxes of interesting things that I never got to, like a 2-1/2" universal exhaust kit for the bus, a 3rd brake light idea for the bus (from junkyard parts), a trailer wiring package to go with the tow hitch, etc. So, there will be things. And, of course, I still have the locked up engine on Nina ('64/'65 Beetle) to free, a bunch of little things to finish on Oliver ('78 MGB) and a disassembled '79 280zx (Zed) to put together. Most of that work would require very little in terms of parts.
 
Garage
acquisition day 2022
This 1948 farmhouse has what I would call a carriage-house style attached garage. I say that because only the smallest of cars could possibly fit with the door closed. Oliver, the MGB, could fit. Astra and Nina could fit. That's the end of the list. Hapy is too tall and probably too long. The XRunner is definitely too long. I think even Zed is too long. Further complicating the garage is a fixed work bench along the rear wall that protrudes almost a full meter off the wall and the laundry machines near the front, narrowing at least the feel of the width of the space. I think Astra will still fit, but it will need to be mostly empty.
 
Shortly after we bought the house, before we had meaningfully cleaned anything, Boo and I scored a solid wood, full kitchen's worth of era-correct cabinets from the rebuilding center for $420US. The rebuilding center is not a store room; quite the opposite. Everything you buy must leave the store that day or it's theirs again. So, we lasso'd Boo's ex-husband (and his mini van) and some helpers (our local kids) and ran all of the cabinets over to the farmhouse. And slammed them into the garage on top of one another. The fate of that garage had been written the day we bought it: it would be the staging area for building supplies until the house was livable. Those cabinets were the first but far from the last. And then it continued to be the store room for all kinds of things. Until now.
 
farmhouse at winter solstice
With the shop taking all car-related stuff and car-related tools, almost a third of the stuff in the garage was moved. Over the last weekend in May, I moved everything home-repair related out to the now empty and clean tool shed. That represented almost another third of the stuff that used to be in the garage. As I cleared an area of things, I shop-vac'd all the dust bunnies and old cobwebby string-things. What remains in the garage are camping gear, ski gear, holiday decorations and household goods storage. The rafters are still full of lumber. So, I have to clear that to somewhere and then there is a bunch more vacuuming of ick. I have a couple of extra kitchen cabinets which need to move to the shop and I still have the big black rolling cabinet that needs to move too. Once those three big items move, we can park Astra in there. Boo had been gone for the weekend, baby-sitting our little grand-niece (A) while her mama was at a wedding. When she returned and saw the garage space, she immediately started envisioning a project space for herself. I love that, and if we do it right, we can still move things around and park her car in there between projects.
 
Car Stuff
There has been some car stuff, though. Hapy is my "daily driver" again, getting me to and from a show with Brenda on Sunday. Astra, now that her alternator is keeping her all charged and start-able has started complaining about her power steering. It is making a low hum most of the time and actual turning has gotten harder at the extreme edges of the range. I checked fluid (nothing on the stick: that's bad) and topped it off. I expect one of the rubber hoses is failing so I will need to do a deeper diagnosis this weekend. For now, though, the added fluid appeared to quiet the hum a little bit and the steering is better until the last bit. It could resolve as the air works its way out the hoses, but I think there is an active leak so it will only get worse before I find and fix. Work on Saturday! Yeay!
 
Wrap up
Yep, that was an unusual post. There is a considerable amount of economic uncertainty around us. For some, it is the loss of discretionary spending while others are dealing with food or even housing scarcity. We all can feel some foundational insecurity, maybe while filling your tank or grocery cart, paying utility bills or thinking about how to keep your kids safe this summer. I see it in faces. Fewer smiles, more worry-lines. It is a hard time for most of us. So please, let that person pull in front of you, give everyone a little grace. Grace is free. So are hugs and smiles and waves. Everything else seems to be more expensive than it was yesterday and the shorter-term future looks like it will be more of the same.

Thanks, as always, for following along-

Friday, May 29, 2026

Moving Into Shop

It has been a busy couple of weeks spent mostly moving stuff from the tool shed into a big heap at the front of the shop. I did get to wrench on Boo's car, Astra, though. Today's post is mostly about Astra, but the pictures show the move of stuff as I didn't get my phone out to take pictures of Astra's alternator replacement.
 
Weather the Weather
shop heap
One of the best parts about living in the Pacific Northwest are these incredible spring days. When I first moved here decades ago, we would enjoy what I called "the weather donut hole" in April. It was a short, maybe 2 week period, when the rains stopped and we got these just gorgeous sunny days. Then, we would descend into another 2-1/2 months of rain until July 5th. Through the wonder of climate change, our spring weather donut hole has grown. Maybe 10 years ago, it would last most of April. As recently as 2 years ago, the donut hole never closed, and we did not get much more than 2 or 3 days of rain a few times before the summer dry season hit. This year is looking more like 2 years ago did, with mostly clear and dry days with a few passing rains to knock the pollen out of the air. While I worry about summer fire season, we make the most of these below 25*C (80*F) sunny days with daylight lasting until 9PM.
 
So, with that backdrop, I had a meaningful car repair to get after.
 
Astra's Backstory
Boo replacing Dude's starter
Well before I met her, Boo used to drive an Opel Kadett. Always generous, she let some friend use it and never saw it again. Years later, when I met her, she was driving a gold Saturn sedan (named "Dude"). She loved that car, doing everything she could to keep it on the road. Again, a friend of my dad needed a car for a while. This friend was running errands for the less-physically able in my parent's building, so she loaned him Dude. It was stolen, and when it was recovered by the police, the ignition and steering column were destroyed. With considerable sadness, she let the car go to police impound auction. She had owned Dude for 18 years.
 
Fast forward a few years and I'm driving along and find myself behind a 4 door hatchback with a Saturn symbol on it. At the next red light, I snapped a picture of it and sent it to her. We were in the market for a new car after the GoRo disaster and had been talking about a Mazda3 or maybe a small SUV. The Saturn appeared to be an intersection of her appreciation of the looks, lines, mileage and size of the Mazda3 with her love for Saturn. I started investigating and learned that the Astra was built with Stellantis/Vauxhall, owner of Opel and original manufacturer of the Kadett. In fact, the Kadett evolved into the Astra. So, the Astra was really an intersection of her beloved Saturn, her equally beloved Opel Kadett and her appreciation of the Mazda3. Of course, now I had to find one. The Saturn Astra was only available in the states for 2 years (2008 and 2009), and not many were sold. We lucked into one outside Salem for literally $2kUS and after applying another $1k of repairs and tires, it has been a fantastic family member.
 
tool shed "empty"
She is not without her issues, though. Sometimes she does not want to downshift and just groans in a too-high gear. This is reset with a restart, but that's not easy in traffic. Over the last 18 months, though, the battery had been not charging enough on shorter drives to start again. She priced having someone replace the alternator, after having it checked, and the $800 price tag lead us instead to get a jump pack to jump start her when she didn't want to start on her own. This lasted over a year until a couple of weeks ago I took on the task of replacing the alternator. By the time I got to step 3 or 4 in reading the online "how to", I understood why shops were giving her a "go away" price.
 
Alternating Astra
In January, Boo and I planned for a trip to the east coast the week before Memorial Day. We were going to visit my sister and her family and then see our son K2 (currently serving in the US Navy at Quantico). Then the trump administration decided to pick a war with Iran, airline prices spiked and our plan was scrapped. Thanks trump. Nature hates a vacuum, so what would have been a trip to the east coast became an opportunity for me to spend up to a week fixing her car with no drive-to-work pressure.
 
shelving starts
The challenge with removing and re-installing an alternator on the Astra is that the alternator only fits out the left front (passenger-side) tire well. Even then, it doesn't fit easily. So, the process is you get the car up on a jack, remove the wheel and the inner wheel well just so you can approach the serpentine belt and alternator. Disconnect the battery. I put the battery onto a charger while I did the rest of the job. I found removing tension on the belt tensioner especially difficult because of the required body positioning to access it and the steel supports blocking direct access. I used a spanner-on-a-spanner (yes, it's cringe-y) for sufficient leverage. If you reuse the belt, mark the belt direction. With the belt off, you can get at the 2 alternator bolts. With the alternator loose, reach around the rear and unplug the 2-pin socket. It has a latch holding it on. I palmed a small bladed screwdriver around everything and got the latch to release without breaking it. Then, remove the nut holding the main cable to the rear of the alternator. At this point, some folks have posted that they have been able to worm the alternator through the wheelwell. They must have a different engine than we do (2.0L). I needed to remove the air box and then the engine mount bolts underneath it, so the engine on the left side was no longer attached. I did set up the TravisJack under the engine so it didn't lower at all. Then, the engine itself needs to move as far forward as you can manage it. I just grabbed onto it from over the radiator and pulled. The alternator drops down and out behind the engine and out the rearward end of the wheelwell opening. I found that if the alternator is in the same orientation as it was when installed, it does come right out. Any other orientation and it will get stuck. Yes, this happened to me many times until I figured it out.
 
end of day 1
With the old alternator out, the install is mostly the reverse. Alternator enters the wheelwell oriented as it will be installed. I plugged in the socket and nutted on the thick cable before then attaching the alternator to the engine. Next, I put the serpentine belt back on. It has maybe 20k miles on it since it was replaced by the yard we bought the car from. With the belt tension restored, I moved the engine back into place and re-connected the mount. Then, I put the airbox back in and returned under the car to put the inner wheel well back on. I finished up with putting the wheel back on and the battery back in.
 
I had read online that this was a 8+ hour job, so I had set aside 2 days, hoping that I'd be done by Sunday in time to see our friend Maldarine play a show. It took me 6 hours, start to finish, backing her out of the shop and the lane way back into the front well before dark on Saturday. 
 
Moving In
With all the extra time I now had, I decided that I would get as much of our summer project done as I possibly could. I figured that it wasn't raining and every nice summer day I could save by doing things now, would make for a better summer. This year's project is getting everything car-related into the shop and everything home-repair related into the tiny shop (tool shed). Then, the only stuff in the garage is camping and ski gear, leaving plenty of room for Boo to park Astra when the fall rains return.
 
partway day 2
I had started with the garage, moving the red rolling tool cabinet before I even had the doors installed. This renewed effort was about getting anything else car or tool-related from the garage into the shop. This included my jacks and stands, the hypersonic-cleaner and lots of random parts. All that remains is my big black rolling tool cabinet. I hope to move that this week.
 
Next, was the tool shed. I regret not taking a genuine before picture. The shed was so full, the back half was out of reach, blocked by stuff. So, those large items blocking the floor were first, rooting through them a little bit looking for junk before moving the keeper-bits to the front of the shop floor. I noted that there was evidence of rodents, so I spent the next few days wearing a dust mask, shop-vacuuming a lot, and generally moving at a slower-than-hoped pace. I would vacate a shelving unit, dismantle and wash it, move it, and finally re-assemble it inside the rear of the shop. Most of the stuff that were on the shelves ended up in a heap at the front of the shop, or a heap for the dump. The exceptions to this were solvents and cleaners, which went onto freshly cleaned shelving, and everything painting related, which went into an old kitchen upper cabinet the kids used to use for skate and snow gear repairs and parts.
 
Those with a keen eye will see (in the shed heap picture at the top) that I put Zed on furniture dollies so I could move him around a little bit. These dollies are the $30, 1000# max variety found at Harbor Freight. The genuine car dollies I've seen cost up to 10x that much. Are they 10x better? Unlikely, except they work on heavier cars. I was able to move Zed by myself, one end at a time, so I could fit a shelving unit against the wall beside him. I used another pair of those same dollies under the paint cabinet.
 
paint cabinet on wheels
Boo and I agreed that the Tetris I did to get Zed's entire interior onto the high shelf in the tool shed could not be easily repeated (see the upper deck in the tool shed "empty" picture above), so that stuff stayed. Otherwise, the tool shed is clear of car stuff, the shed is cleared of all evidence of rodents and the shop vac has been emptied and washed. Next, I will be moving home-repair stuff from the garage.
 
Wrap Up
This got really long, but a lot gets done on a full week stay-cation. I hope to get after the big black rollie cabinet and the garage-to-tool-shed over the next couple of weeks. Then, our summer project will have been completed before summer even arrives. We all know nature hates a vacuum, so that time will be filled by something. And that something will probably be either home improvement or car-related. Once that happens, I'm sure I'll post about it. Until next time, thanks, as always for following along-

Tuesday, April 4, 2023

We're Out

Similar to a prior post (We're In), this post serves as another major milestone, marking when we got the last of our things out of what we have been calling "existing house" and leaving it for the last time. I posted about moving the garage to the ToolShed (see Shop to ToolShed) and about moving the vehicles (See 4-Wheeled Friends...), so I'll skip that here. Those significant steps completed while the things below were happening. The first 2 pictures dramatically depict the significance of what has been resolved with the current state at the top and those same 2 rooms after we had them 90% empty only to receive a 1-bedroom apartment's worth of belongings.  

Moving Flotsam
living and dining ready
The end of a move can be incredibly elusive. You move the big things, and the boxed things and think you're practically done. Then, there are all the things you had not boxed for various reasons. That stuff ends up taking 80% of the time. At least, that's the way it's always been for me, but that could be because I don't buy, like, 100 boxes and box everything up ahead of time. We box and move the critical, or the rarely used, leaving everything else to be solved in a subsequent pass. In our case, our level of flotsam was increased by the influx of all of my parents' stuff and my siblings taking so little of it (no judging, of course. Is what is). Regardless of how it appears, it takes forever to get it all moved. Of course "moved" does not mean "relocated" in that we have stacks of things that need resolution in NewOldHouse. It doesn't matter. It is no longer at the other (once called existing) house so we are taking the win.

Clutter Peak 
Overall, we donated at least 5 pickup truck loads to GoodWill. 2 truck loads went to family friends and our sectional couch was taken by niece J and significant other C down to LeisureLand in the coast range west of Eugene. We recycled a considerable amount of paper, plastic and glass, leveraging containers at both houses and still occasionally having piles next to the bins on garbage / recycling day. Another 2 or 3 pickup truck loads of larger items were moved to the back of NewOldHouse to eventually route to metal recycling or the waste processing center.

NewOld Attic
One thing this new place has that our old house didn't is a real attic. The old house had small cubby-style attic crawl accesses where small things like banker-boxes could be stored, but they were spread around the upstairs, preventing central organized storage. NewOldHouse has an attic that runs the width of the house. It is not very tall (I have smacked my head multiple times), nor fully floored, however. Still, we can store things up there. In an earlier post, I mentioned that all of the sporting goods, like camping gear and ski/snow stuff went up into the attic. In truth, almost everything which used to line the wall next to Oliver ended up in the attic as well as some of the things from the ShedRoom which hadn't found another home. Even with all that has been moved up there, we have considerable space remaining. We don't intend to fill it, of course, but better to have the space and not use it than the alternative.

Big Pile of Shame
Pile of Shame
In the end, there seems to always be a big pile of stuff that is moved near the end which doesn't have a clear destination. Or, lack of time forces an additional level of chaos leading to the pile. In all of my moves, one or both have happened, and I think in each case the pile has had different stuff but the Pile of Shame has appeared in the same place every time: the garage. "But wait," you say. "Isn't NewOldHouse garage already full of new-to-you kitchen cabinets?" Yes, it is. So, our pile of shame is on top of those cabinets in one of the least attractive, least manageable piles of any of my moves. It includes things like the white metal rack which used to hold laundry supplies, some building materials, some cleansers, yard chemicals, a traffic cone? Yeah, the picture really tells the story, complete with a shelving unit all catawampus. Not my best work.

If this move were like my prior ones, this pile would be among the last things solved for. Since it is the most significant eye-sore that we get to walk past every day, this move is different. In truth, between the time I started writing this post, and it's completion, the mess has been mostly resolved. It needed to be early in the organizing process because it was preventing the kitchen cabinets from being installed, and we cannot live with the camping-kitchen indefinitely. I felt that we could not in-earnest return to the kitchen work until this was solved. I organized some of the pile of shame up into garage shelving, sorting the rest into logical places (garden chemicals to the garden shed, eg).

Repair, Clean and Paint
closet repaired
Once the last of our things were moved, the house had to be readied for whoever lives there next. While I completed the evacuation of our stuff, Boo focused on painting, starting with the first floor baseboards. Then, she re-painted all 3 bathrooms, the master bedroom, another bedroom and the front door. I cut-in one of the rooms and did the super-high work in the entry, but she did everything else. Meanwhile, our friends Lana and John completed the closet repairs in the upstairs hallway closet, started and abandoned by the mess-making handy-person I mentioned in the garage lament in Shop to ToolShed. For background, Boo and I had done the demo to install a stackable washer/drier in the hallway prior to the NewOldHouse saga starting. Walls were gone so we needed to enclose things again. With the painting completed, the closet complete and our stuff out, we set to cleaning the place.

We figured that we could save some house-cleaner money if we did some of the more time-consuming things. This list started with dusting the walls, mopping the hardwood and cleaning windows. Before we knew it, Boo had cleaned the bathrooms (down to disassembly/re-assembly of the shower doors), the kitchen (cupboards, fridge and oven too) and the hot tub. We contracted out shampooing the carpets, but Boo did an incredibly thorough job. Last, there is considerable concrete around that house, from the long driveway (flag lot) to the back patio, the opportunity for moss to grow in western Oregon is significant. So, John, Lana and I power-washed the patio and the worst of the driveway.

Reflections
ShedRoom ready
With the house in the best possible shape we could have made it, we handed the keys over to a rental management company. This has been a very long slog. We were not ready nor really thinking about moving when NewOldHouse came to us. I imagine most folks who consider a move do some elimination of things they are not moving prior to the start of the actual move. We had the inverse happen: a 1 bedroom apartment's worth of stuff arrived maybe a month after we started that "elimination of things" and months after the move was decided.

I don't think the emotional impact of leaving a place we called home for 6 years has really hit us yet. When we started to move in, we had 4 sons and a niece moving with us but our family shape seemed to change every 6 months. By the time our things moved, son K had decided to live with his girlfriend instead, so we were already in flux. By the end of that first Summer, our niece had returned to Montana. Shortly after that, C decided to live with his mom full-time and did so for 2-1/2 years before returning at the end of the 2018 school year and then stayed with us until Fall 2022 when he retuned to his mom's to attend Portland State. In the middle of that, T continued to bounce between homes, staying with us increasingly. Then, he went to University of Nevada, Reno for a year and returned to stay with us full-time for a year before heading to Eugene and then LA. Barely missing an overlap with C, K2 shifted to living with his father full-time at the end of the Summer of 2019. That's a lot of moving pieces, and the amount of overlap between them was very light. After that first summer, we rarely had more than 2 kids with us at any time.

master complete
Boo and I had moved into that house to create a stable home for our 4 boys where they could really become brothers. We didn't achieve that goal; there were too many changes of who was there for large periods, and even at the week-to-week level, we lacked fixed periods together as all of them would do short periods at their other parent's house. Boo's ex-husband was very supportive of our create-brotherhood effort as he also recognized the gift of 2 brothers to his sons. He was quite flexible to accommodate days/nights/weekends/holidays to allow for more overlapping time with all 4 boys. Unfortunately, my ex-wife only saw our brother-building effort as some kind of a threat to her. She had and has an all-too-common misbelief that love, joy, happiness and contentment are all constrained resources to be horded for one's self, and thwarted for others. So, she actively undermined our efforts both in words and in actions. She would purposefully schedule things that would force the kids apart, and was completely unwilling to shift things unless we sacrificed additional days/nights/weekends/holidays for the favor. It is unfortunate she was unable to rise above the petty for the benefit of our children, but that's just who she was. Perhaps she has since grown.

One might think that leaving a place where our boys lived their last years together would be difficult. Honestly, we are leaving a constant reminder that we failed to create that nurturing space for them, but not from a lack of trying. Today, their relationships span from strained to non-existent. So, we have a sadness, but not for what was, rather for what we could not manifest.

As winter tries to turn into spring (we had snow flurries on the morning of 3-April), Boo and I both remain positive that the NewOldHouse is and will be a great place for the 2 of us. Going forward, our attention will be split between (a) getting the random stacks resolved and (b) the demo and construction of the kitchen. Of course, I have some cars which need attention as well, and I expect I will get some time very soon.

Thanks, as always, for following along. This move has been an incredible, and unexpected, journey. I hope to be returning to more typical activities (and blog topics) very soon-

Tuesday, March 21, 2023

Shop to ToolShed

Clearing the old (previously called "existing") house has lots of sub-topics. I think, for this blog, moving tools and parts from a 2-car garage into an 96 square foot shed might be most on-point of what's left for a targeted post. So, I cover that today. 

Garage
our humble beginning
We start with a sub-sized 2-car garage. I say "sub-sized" because a full-sized car could not reasonably park in either spot if you were also using that bay for any storage at all. The former owner had a BMW SUV parked in one bay, where we parked Oliver (1978 MGB). Otherwise that side of the garage was completely empty, including the back wall. The other bay was filled with shelving. The other bay was also where the laundry area, the furnace and the hot water heater were located. We set it up in a more standard way, with shelves along the side-walls, leveraged the laundry space in the same way and added some storage along the back wall nearest the door to the inside. So, basically, wall-to-wall shelving where some major appliance wasn't already located.

Facing the garage from the driveway, the bay on the right was filled with Oliver and shelving. The shelves he was parked up against were used to store recreational equipment (skiis, camping gear, eg) and household spares (light bulbs, batteries, paper products, eg). Oliver barely fit and access to the shelving was accomplished by shimmying sideways along Oliver's passenger side. His rear bumper was less than an inch from the garage door and there was, maybe, a meter and a half (5 feet) from his front bumper to the garage back wall, and the entrance to the house. We had a small storage cabinet there which jutted out, maybe 8 inches from the wall to further constrain passage, but a person carrying a laundry basket could easily pass through without touching anything. An MGB is not exactly a huge car, measuring in at just over 4 meters (13 feet) so a more typical car could prevent door access. A VW bus, for example, is almost 4.5 meters (15 feet), which may have been too long to park there. When you add a spare tire to the nose, like Hapy (1972 VW camperbus) has, you lose another half a foot, so Hapy stayed outside. Anyway, the non-car-ish contents of the shelving next to Oliver are eventually routing to the NewOldHouse garage, once that garage is cleared of the new-to-us kitchen cabinets earmarked for the kitchen rebuild. So, we got creative for temporary storage, putting that stuff into the NewOldHouse attic.

a "before" image
In the other garage bay, I had all of my car/bus/truck parts and my tools. These things were relatively well organized until the furnace was replaced last Summer. Okay, maybe that's being a little generous... it was semi-organized chaos, but I knew where everything was. The furnace installers needed access behind a shelving unit full of parts so they just moved things around, putting things in a heap until they could do what they wanted. This left a huge mess in the middle of the walkway from the rear of the garage to the driveway. On top of that mess, a handyman we hired plopped another mess of scrap wood and drywall. So, before I could move anything, I had to clean up and reorganize a little bit. Remaining Agile, I dealt with just enough for tools and parts to be moved, leaving a larger organizational effort to happen at the ToolShed.

ToolShed
Ah, the ToolShed. In my last post about the ToolShed, I had just dropped all of Zed's interior onto the floor (see "before" image on the right). Those items needed to be sorted and, as much as possible, stored on the mezzanine before anything new arrived. Well, as I was preparing for this, we had a freak snowstorm drop 4+ inches of snow. The snow and rain and melting took out my last remaining canopies, leaving considerable wreckage, and blocking both the doors to the shed and the egress from the driveway to the shed. So, the daisy-chain of mess grew by one more.

Zed parts up, one shelf in
On a Saturday morning, I disassembled the canopies and moved as much of Zed's interior up onto the mezzanine as I could fit. I also took apart the table that I had set inside the doorway for a temporary work table. The table went into the demo-in-process kitchen and the stuff that had sat upon it got piled on the side. Now, I could consider a shelving solution.

The side walls of the shed are just shy of 12 feet long and less than 7 feet high before the ceiling pitch starts. The mezzanine juts out 4 feet from the rear wall. With the mezzanine location, it does not make sense to put shelving all the way to the rear wall. Besides, the standard shelving system is 4 feet wide, and the interior of the shed is just shy of 12 feet so you can't fit 3 shelves side-by-side anyway. So, my plan became setting 2 shelves along the wall width-wide and a third shelving unit turned sideways nearest the rear wall. After measuring it out, I was left with over 3 feet of space behind the turned shelf. Into that space, I set the old Westfalia closet, and used it to protect Zed's window glass between the closet and the rear wall. Ultimately, I will probably share that closet with someone else who will put it to use, but for now, it is helping protect Zed's glass. If you're local, and you will use it, please message me.

Moving Shelves and Parts
end of day 2
That afternoon, I started moving things. My process was fairly obvious, and repeated a few times: empty a shelving unit into large plastic tubs, disassemble the shelving unit, move the shelving and the tubs, assemble the shelves, and reload them with the tub contents. This cycle took a couple of hours per shelving unit and lasted the rest of that Saturday and all of the following day. 

Once the shelves and their contents were moved, I shifted to the heaps of stuff left by the HVAC folks, the handyman, and, honestly, me. I ran out of energy, daylight and give-a-crap before I got all of the remaining stuff out that day. As you can probably see in the images, it was raining (of course, it's Oregon) by the end so I left wet footprints as I went. Still, you can see I had quite a bit of available shelf-space after moving over 80% of the stuff. I returned after work the following few days to move things like the car jacks, ramps, jack-stands, random larger car parts, sound absorption materials, etc so all that remained were my rolling tool cabinets, and their contents. It was this 20% that unraveled the organize-as-we-go model I had been following. These things, unfortunately, ended up where the tool cabinets are intended to go.

Moving Tool Cabinets
rollin'
The documentation for the tool cabinets say to empty the cabinet before rolling it. I don't know how much people actually follow that advice when you're moving it around your garage, but I followed it to move the larger one to NewOldHouse. I do not have a liftgate nor a very low-floor trailer. Even if I did, the mud bog in the backyard of NewOldHouse prevents driving anything back there. We already got ToyoTruck stuck when spreading bark chips, requiring a visit from AAA to pluck him out. A truck hauling a tool cabinet would definitely get stuck. So, I started by emptying the cabinets into a pair of large blue tubs, like you can see in the various pictures. These buggers got so heavy, I needed to use a wheelbarrow to move each tub from the ToyoTruck in the driveway back to the ToolShed.

Once the tools were moved, we considered the remaining space in the ToolShed and how overgrown the assortment of to-be-shelved pile had become. Boo and I considered that the organization would take away from our get-out-that-house velocity. So, we decided that the tool cabinets would temporarily live in the attached garage. We just had to move them. The red-rollie is an older Kennedy upper/lower cabinet. I moved the upper cabinet with the large blue tubs. I use the lower for holding my larger power tools, and electrical stuff. Since that cabinet is so much lighter, I did not empty it, we just pushed it. The larger black cabinet is the one I bought a couple of years ago (see $50 Tool Chest). It's a Harbor Freight / US General 44" that weighs 300 pounds when empty. I had pretty much all of my hand tools usually stored there (wrenches, sockets, body hammer/dollies, tap/die kit, etc) and I still had a couple of empty drawers.

cabinets at NewOldHouse
To get the cabinets to NewOldHouse, we hand-rolled them down the street to the end of the NewOldHouse dirt driveway. That's our friend John pushing red rollie in the picture above-right. We were blessed with 2 dry days, and did this move mid-day on the 2nd dry day. We brought some wood planks with us, strapped to the top of the 44 with a plan to lay them on the driveway for ramps to run the cabinets. We figured we would try simply running without the ramps first... and we made it without incident. I was super-concerned about moving these cabinets, so the fact that they moved so easy and fast was a great surprise.

Once the cabinets were moved, everything tool or car/truck/bus part related had been solved for. The garage still had camping gear and other not-car stuff, I'll touch on that as part of a larger "we're out" post once we're actually all the way out. Of course, the cars themselves remain. Each of them presented their own challenge to move, so I'll tell those adventures in the next post. 

Reflecting
Thanks so much for following along, and staying tuned during this move. I can't really describe how difficult this has been other than list out the challenges: no help from my family; little help from friends and Boo's family; my folks stuff was added increasing the overall amount of stuff we needed to resolve; my father died; we moved my mom into assisted living; both Boo and I are suffering at least one arm with tennis elbow; record-setting cold/wet winter; our only vehicle to move our things is an open 6-foot bedded pickup truck.... and, of course, the NewOldHouse hadn't a bathroom nor kitchen (still hasn't a kitchen). These are not complaints, rather, I am reminding myself that our success in light of these barriers is all the more worth celebrating. We are very close to being done, and then life will start to return to normal.

Again, thanks, as always, for following along-

Tuesday, January 17, 2023

Shed Floored

I took a break from all the interior stuff on NewOldHouse and got after the shed floor this past week. Today's brief post covers that.
Mid-Afternoon Update: my father's memorial is this Saturday (21-January) and the longer obituary was finally posted by the funeral home (here) this morning.

Holey Floor
finished floor
I've mentioned that the NewOldHouse came with a pair of chicken shacks. The one closer to the house was marked for storing tools and car parts until we can build a shop. The other one has been marked for gardening stuff, but it is in far worse shape. The garden shed has been left siting while I prep the tool shed for use. When I shot the interior of the house, I shot in the interior of the shed. While I was preparing for paint and afterwards I realized just how bad the front-most section of flooring was. I figured I could cut out the bad section and jam in some new wood.... I could replace the whole floor... or I could do both. I went with both.

Parts
We had to go to Home Depot for some other home repair stuff, so I got 3 pieces of treated 15/32" plywood (4 foot by 8 foot). These ran for about $60 each. I had the lumber guy trim off 7 inches off the long end, bringing it to 89". This is the distance between the base plates for the side exterior walls. Front-to-back, I needed to shave 7 inches too, but the lumber guy would not cut a couple inches off each board and I failed to get one shortened. So, with 3 pieces of 48" by 89" plywood, and the 48" by 7" cut-off bits we prepared for the floor work by setting the sheets inside the shed on an especially wet and windy winter afternoon.

Patch It Up
fixin a hole
There was an actual hole in the floor close to the door, so with a framing hammer I got whacking around the hole until I couldn't easily knock off dead floor. Then, I measured off 13.5" from the door and then 47.5" across to create a neat hole to patch. I cut the hole with a hand saw and then cleared 1/2" of the rotten wood under the baseplate. I still had to cut a small section out of the section of new material that was against the door, but the bits fit. To support them from below, I pulled a 2x4 from the scrap pile and set it into the hole, centered under what would be the thin gap between the patch boards. I attached it from above, with 1.5" long screws into the base plate and then into the solid flooring at the doorway. I had to section that 2x4 first so it would fit the hole and I used the cut-off along the inner edge to create a lip to set the inner patch board upon. Once solidly attached, I screwed the patch pieces in.

Floored
With the hole patched, I marked and drilled the hole for the off-door floor latch and then shifted to installing the full sheets. First, I swept the floor of the shed. I picked the one that looked nicest and set it closest to the doorway. With more 1.5" screws, I set the new material into place, held it down with my knee and set screws through. I measured off 16" spaces and continued until the first sheet was down. I repeated this process for the middle sheet, again, picking the next-nicest sheet. The last sheet needed to be trimmed 7", down to 41". I did this again with a handsaw. I would have used a powersaw at this point, but I lacked clamps, and did not want to mess it up. Once the panel was shortened, I marked where the center 2x4 in the rear wall was by setting the panel in place and drawing with a pencil. I marked the depth and then cut the rectangle out again with that handsaw. The panel fit pretty perfectly, and after another round with the power drill and 1.5" screws, there is a new floor in the toolshed.

back wall
Start to finish, this took me, maybe 6 hours, and a great deal of that was because I used the handsaw, and it was not terribly good. Still, I am very glad it is done and feel comfortable starting to move car parts and my rolling tool cabinets in there.

Thanks, as always, for following along-

Tuesday, November 8, 2022

Who'll Stop the Rain

Short answer: no one. Today's post is about managing around that unstoppable rain that appears every autumn in the Pacific Northwest.

Before I begin, my parents have been experiencing health issues and appear to be entering their last chapter with us. My musings here have not included them much, but my son T and I moved them here 12 or 15 years ago from the Boston area. They have been a consistent presence in our lives ever since, especially for Boo. Their recent health decline started almost immediately after we signed the paperwork on the NewOldHouse. Accordingly, our time has been split between tending to them and the NewOldHouse projects. Boo and I have also hosted various family members who travel into town for well-wishing and visiting the folks. If you were wondering why we were moving so slowly, these factors are certainly part of it. In truth, the time spent doing something on the house is a welcome respite from the near-constant gravity we feel as we watch their final days approach. We welcome your prayers (in whatever form that takes for you), and encourage you to connect with your elders, or your youngers, if even just for a few minutes.
 
UPDATE.... I wrote this entry on Thursday (3-November), and my dad's health took a nosedive almost immediately afterwards. My family members who are not local rushed to Oregon on Friday, and we said our final goodbye to my dad on Saturday (5-November). A week earlier, Dad and I were sitting around talking to T about his life in LA. Time really can be unpredictable. 
 
On to dodging the rain-

Garage Coveting
one can dream
I have been working on a fleet of cars without a meaningful garage, much less a shop, pretty much since I started this blog. The house we have been in for the last 6 years, much like the house we were in for the 3 years before that, has a basic 2-car garage. Prior to that, we were in a condo with no garage at all. Unlike the last house, this 2-car garage really is too small to fit a car any larger than an English compact (Mini, MG, eg). So, the only car that has been parked in the garage for a meaningful duration has been Oliver, the 1978 MGB. For a short stretch, Zed, the 1979 280ZX sat in the other bay. Zed is wider than Oliver, and that other bay is where all of my shelving of parts and tools was, so actually working on anything became impossible. So, I worked on cars in the driveway, and when it rained, I worked in the rain. When it was 95* with a blasting sun, I set up a small shade, but generally worked in the heat. So, a couple of years ago, we got those canopies for the driveway. These were absolutely heaven-sent, allowing me to clown on cars out of the worst of the weather extremes nearly year-round.

NewOldHouse has an original, attached, single-car garage with the original door. That door alone, is pretty cool in that it has cables and pulleys connecting to a large counter-weight to help you open and close the door. Regardless of the cool factor, only one car can fit, and after asking Boo to park in the rain for 9 years while I took up the indoor spots and the canopied area, that one garage spot needs to be hers for the next 9 years. Or longer.

Sheds and Canopies
the "fourth" canopy
The NewOldHouse came with 2 chicken shacks, that I mentioned last time. One of them will hold my parts and tools. The sheds lock, and at 8 feet wide by 12 feet deep, plus nearly 10 feet tall at the peak, they are large sheds. Some of the tool-shed floor needs repair, but that's a weekend day of work. Otherwise, it's clean enough, and after I shoot the interior with Kilz and then basic white paint, it will feel like an entirely different space.

But, what about the cars? I have too many of them, yes, but I still need to keep them in fairly good shape, and not let them rust out from below nor get rained on all winter. To remedy, I started by moving the 2 canopies around and behind NewOldHouse. Under the one closest to the house, I parked Zed. The one next to it is dedicated to the car I am working on other than Zed. For now, that will be Nemo, I think, to get the passenger window regulator replaced, the power steering working and maybe add a stereo. To compliment these 2 canopies, I bought 2 more ($140US each at Harbor Freight), and assembled them nose-to-rear adjacent to the side of the first 2. The furthest of these canopies is now 40 feet from the house, and will protect Oliver from the rain. For a floor, we got gray tarps, again, from Harbor Freight. These will act like a vapor barrier, keeping the wet ground from encouraging rust from below. Because rain doesn't come straight down, I will need to get out there with a squeegee after rain storms to keep the water from pooling under things.

The fourth canopy (between the old and new canopy) is set up outside the shed, and will be my staging ground for parts from the old garage. I expect to spend a few weekends this winter simply going through parts, sorting them by vehicle and purpose so I can find things more easily. After getting that tool cabinet (See $50 Tool Chest), and sorting my tools, I was stunned by how much faster I was able to work simply because I could find the tool I needed so much faster. I figure if I can do the same for my parts, I could see a similar improvement.

At some point, these canopies will correlate to work bays. Rather than number them, and accidentally create some kind of priority or pecking order, I have named them after my Grateful Dead heroes: Jerry, Phil, Pigpen and Bob, from nearest the house to furthest from.

Downspouts and Diverters
spider legs, right
I mentioned the foundation vents being below grade, and some of my efforts to resolve for water getting into the crawlspace (basically digging out around them) in my Vehicular Paperwork post. Part of the below-grade problem is the location of the downspouts and the fact that they, like so much of the rest of the house, are original to 1948. Back then, houses did not have their downspouts connected to a central sewer system; they simply dumped water on the ground next to your foundation. If the ground is higher than the vent, then that water dumps into your crawlspace or basement. Neat. To remedy, Boo and I got a few box-style diverters (like this) which have a square catch bin that you set under the downspout. Attached to the side of the catch bin is a 8-foot long, 2-inch diameter flexible hose that you route away from your house. We did this for the downspouts which dumped near a vent. For the remaining downspouts, we used old-skool technology: a simple u-channel style diverter (like this) that you set on the ground under the downspout and the water runs down the u-channel to the other end, moving the contact point of water-to-dirt 2 feet or so further away from your foundation.

new canopies
We tried a few other things before landing on these solutions. We tried digging ditches for the water to follow. It wouldn't. Then, we tried flexible hosing attached to the end of the downspouts. Those worked, sort of, but we needed to gang a few together to get the water far enough away from the vents. And, they were white, so from a distance, it looked like the house had grown spider legs.

The day after we installed the linked diverters, we got almost 1/2 an inch of rain. While the rain was its most intense, we were at the house, and looked at how the diverters performed. They handled the volume easily, routing the water well away from the house. The below-grade foundation vents remained completely dry. While I still intend to do something to protect those vents from water entry, I don't feel like that is an emergency any longer.

That's it for today. Thanks, as always, for following along-

Tuesday, November 1, 2022

Zed Moves

I have been doing all kinds of things to get NewOldHouse ready for us to move. The exterior is painted. The interior is almost ready for paint after many more days of caulking and masking. Because we knew the end of the dry days were almost upon us, I took a couple days off work so Boo and I could get after some outside stuff. Today's post covers that.

Back to Back Chicken Shacks
Zed's new home
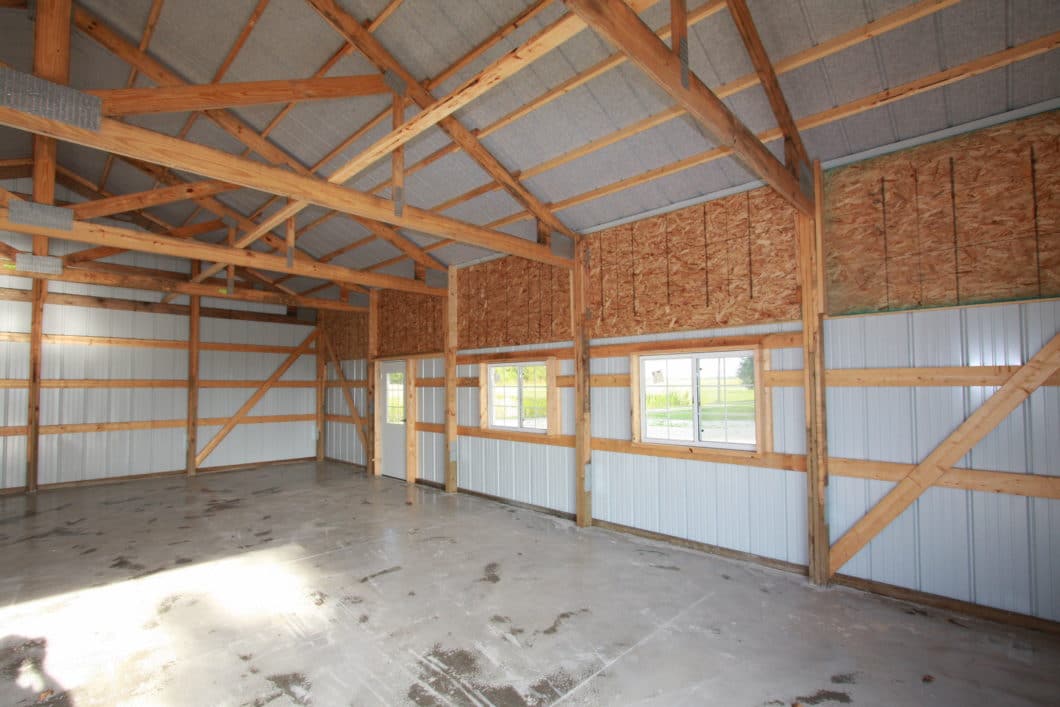
That's right. This property has two 8' x 12' locking sheds right next to each other that the prior owners were using as chicken shacks. The one closer to the house looked to be in better shape, while it's Furthur (see what I did there?) twin has a failing roof. We decided that we would clear them of chicken scat, hay and whatever else we found and then determine what to do with them. After a few minutes of working on the better-shape shed with a respirator and a shovel, it was clear that it was salvage-able, and had not had any rodent activity (no rat scat). I got the nasty out first with a shovel, then with a rake, then a broom and finally with a high-pressure hose. Once cleared, I sprayed it with house-wash and rinsed it down. The front-most section of flooring will need a replacement sheet of plywood/chipboard, but the rest of the shed will work, and serve as my car-parts/tool shed until a more permanent shop can be constructed.

The other shed did not see as much progress. The roof and the entire floor will need to be replaced. Still, that's a couple hundred dollars of plywood (plus some roofing material that we happen to have lying around) to repair a shed that would cost, like, 5K(US$) new. It will hold garden implements and supplies, and can do that even with a rotted floor... until we can get some time to repair it. Eventually, the lawn tractor will even get parked in there. I will return to the scat-removal and clean-up of the FurthurShed after we move. The repairs will probably wait until next year. But, to help protect it for one more year, Boo and I stapled thick, large black garbage bags (flat) over the holes in the roof. Now, that sounds pretty ShadeTree, and it absolutely is. Still, after a couple relatively heavy rains since, the inside of that shack is dry, so the wood that is not rotted will not get worse before we can get out there next year and repair them right.

Zed in Motion
man-hunt on
With the sheds ready to be pressed into service, we cleared the area where the 2 carports were assembled, around the back of the house. The grass was cut down to the dirt, all of the little weedy shrubs were cut down, and then the car ports were set in place: as tight to the house as they could go without bumping into the siding. Last, we laid out a tarp to act as a vapor barrier between the earth and Zed's underside. We were ready to move Zed. Before I started working on how to tow him, I thought I could try to drive him. Sure, he has no interior, no glass, no side mirrors, no tail lights, a 4-year-expired registration, it's raining, it's garbage day and there is an active man-hunt in the neighborhood by Beaverton's finest. Still, it's worth trying; worst case, I have to tow him. Regardless of outcome, it would be a funny story.

Long ago, I had drained Zed of gas by loosening the fuel line in the engine compartment and firing up the fuel pump, pumping the fuel into a gas can that I then used to fill the lawn mower. I had not tried to start Zed again. Knowing this day was coming, I had charged his battery and then disconnected the negative terminal (saving the charge). After confirming the battery was full (12.5V), I poured a fresh gallon of gas into his tank, hooked up the negative cable to the battery, flipped the ignition and fuel pump switches and tuned the key. BahRoom... he fired right up. Now, even though I had pumped the fuel out, there remained some old gas remnants in the lines or the injectors were kinda fouled. Regardless, Zed ran rough, and did not want to idle. I babied him along until he settled down and idled. Cool. So he runs. I took the next step and tried to back him up, but he wouldn't budge. I felt like his brakes were rusted on. I tried to high-rev reverse to break the brakes free, but that didn't work. I suspected the rear brakes were rusted tight from sitting motionless for a couple of years.

the "nicer" shack, before
Undeterred, I chocked his front wheels. I raised the passenger side rear wheel by the axle with my trolley-jack and removed the wheel. I shot rust buster onto the brake shoes (which looked pretty much worn to nothing anyway) and then hit the caliper with a framing hammer, sometimes using a flattened chisel on the pad, to loosen the rust-hold. After a few cycles, I could see that the brake shoe no longer held to the rotor. So, I slapped the wheel back on, lowered the jack. I repeated this on the driver side... all while keeping my head on a swivel for the police escapee (hence, no pictures). Satisfied, I pulled the wheel chocks. I topped off the brake fluid to make sure the front calipers would have the most capability of stopping us, since the rears were now covered in oil.

Feeling confident, I put my red plastic toolbox on the floor for a make-shift seat to try to drive Zed again. I bungie-corded the driver door shut, and fired him up. He started a little rough again, but settled into an idle quickly. I popped him into reverse and Zed started to back up. I navigated around the shrub on the corner of the parking spot and then down my not-quite-straight driveway by looking through the passenger-side tail light hole. It being garbage day, I had to wait for the truck to clear out of the cul-de-sac, but that let the engine idle a little more, working more of that bad gas out and good gas in.

the "nicer" shack, after
The brakes took some pumping to get to a full stop, but I figured it was mid-day during a work-week and I was driving about a block-and-a-half, so the risk was low. I got the rest of the way out of the driveway, put Zed into first, and puttered down the street, stopped at the sign on the corner, and turned onto the more highly-used street to the NewOldHouse. I could see cop cars down the street both behind me and in front of me (picture above shows cops 2 doors down from our new house), but no cops between me and the NewOldHouse. I went for it. I puttered to the house, straight down the drive and around the back. It took a 3-point turn, but Zed now sits on top of a grey tarp, underneath a carport, ready for me to revisit once we're moved (shown in the top picture).

I think that's about it for today. Boo and I are finding that with each potential challenge presented by this house, it always looks worse than it really is. From the chicken shacks to the interior plaster, once things get cleaned, the condition underneath is not nearly as bad as it looked. I continue to get more excited about what this new home, and a potential new shop, could mean.

Thanks, as always, for following along-

Tuesday, November 13, 2018

Z Progress

It's been quite some time since I posted an update on the 280ZX project. Today, I'll catch everyone up. For my US former military readers, Happy belated Veteran's Day and thank you for your service.

Tear Down Blocks
shedroom
In my last post about the Zed in March (See Strip Tea Z), I described the tear down of the donorZ, and even posted the link to the craigslist sale of the picked-over shell. We found a buyer, a guy who rebuilds old 240's, 260's and 280's, and he knew there was some remaining value in what we sold him. To make the sale work, I had stripped lots of good stuff, and stashed them wherever I could find a place in the small garage. Mostly, these parts were set inside the keeperZ (Zed). This had the unfortunate side-effect of reducing the interest in working on the Zed. So, this past weekend, K2 and I emptied the Zed of all of the parts we were storing in there. This created a need to deal with the shedroom.

Shedroom
inspected
When it was conceived, the shedroom was a "couple months" solution (See 280ZX * 2 = Y). Now, over 9 months later, it has persisted. Boo and I decided that we needed to embrace the shedroom, and set it up better than the basic pile of parts on the floor that it had become. Otherwise, the work which has stagnated will never restart. So, similar to the interior of the Zed, we moved all of the parts out... into the hallway. Then, we installed a set of monster shelving and organized the parts onto it. This made the space much larger, and more useful... and allowed for all the other parts from the inside of Zed to fit. So, now we have the Zed empty of spares, and parked in the driveway (under a 10x10 canopy), ready to be worked on.

Auto Shop Class
K2 has started an auto-shop course in high school. This is the only such course available in the state of Oregon, and has a class size of less than 20, so it's kind of a big deal. Gone are the days of every high school having a shop like this. As I said, Oregon only has one. From this class, K2 is learning things that he is now teaching us. Included in this growing list of teachings is the multi-point inspection.

Inspection
stripped
K2 wanted to do some work on the Zed after we emptied it of spares. The auto-shop class is much more focused on mechanical than body or interior stuff, and he felt that doing classwork stuff would help him retain the teachings. So, he set to doing a full inspection of the Zed, recording his findings for us to evaluate. My sole influence was for him to write everything down, and not to filter anything out due to concern that we wouldn't want to do the fix. Similar to having the boys decide if a car was purchase-worthy, I want the boys to drive what is or is not in need of repair, based on diagnostics not cost or convenience. The list was pretty long, including the brake booster and radiator replacements, and a full tune up. That's totally fine. I tell them that money should only guide "when" not "if" something should be done. If it is a safety item and you can't afford to fix it, get a bus pass until you can.

Strip
Sunroof Returns
With weather changing, our window for getting the grinding done before winter arrives is closing. I don't think we're going to get the exterior paint-ready before then, but I think we can get the old paint off before pushing Zed back into the garage for body-fill. How we manage the sanding of that body-fill will be the adventure that follows. With K2's preference for mechanical, I expect he'll get after the tune-up and radiator replacement completely independent of the exterior work. After another weekend day dedicated to the paint, we have stripped the fenders, hood, driver door, rear quarter panels, and roof. All that's left is the rear hatch and the passenger door: both of which can be done on the front porch. So, we are ready for the seasonal rains and the winter that follows. We can figure out body filler along the way.

Sunroof
the grind
The early 280ZX delivered with a sunroof. The donorZ was a late 280ZX, and it shipped with T-tops. Our early model, however, arrived without the sunroof. The prior owner who made such memorable decisions as removing the less-than-one-pound rear speaker panel, gutting the interior for weight and hacking the wiring so the fuel pump and ignition were triggered by switches also decided to remove the glass sunroof and weld on a patch panel. And weld it poorly with gaps and burn-thru. To resolve the leaks, the seam was "sealed" with duct tape. Neat. I had a couple of hours on a Saturday, and the sky, while threatening, wasn't supposed to open up with rain for a couple of hours. So, I backed the Zed into the driveway. The duct tape removed with a razor blade, and within about 15 minutes I was able to knock the patch panel free simply by hammer a wedge into the spotty gap, focusing on the welds. I cleaned up the edge with my angle grinder and then switched over to my wire-brush. I cleaned up all the spots where I'd used the chemical stripper, removing the flash-rust that appeared in the time since. It is interesting how the steel wire brush stripping doesn't leave the surface susceptible to flash rust, but the chemical does. One more factor to include in the mental-math when I look at paint removal in the future.

That's it for today. Thanks, as always, for following along-