Tuesday, August 13, 2019

Making Hapy Sounds (Part 3)

continuing from the Part 2 post about getting music into Hapy the wonderbus. When we left off, we had front speakers installed and rear speakers floating around in their own little speakerboxes. The wiring for all speakers had been routed back behind the dash. For the front speakers, the work was mostly a finished product. The rear speakers, though, were still very much in an experimental phase. Today, we wire up the head unit and complete the work.

Head Unit Physical Mounting
You know how when you swap out a big car stereo (a double-din) for a smaller one (single-din) you usually install one of those plastic boxes in the extra hole? Well, I had one of those box/bin things in my garage, and it had been there for a few years. So, I figured I'd put it to use. Shortly before we left for 4Peaks, I stuffed it into the radio hole in Hapy. On the drive and while at 4Peaks, we loved the extra storage spot. On the drive, it was where we put our phones. While we slept, we put valuables there. So, I didn't want to remove it to put in a stereo. Honestly, it was jammed in there so hard, I'm not sure I could get it out without destroying it anyway. AND, there was nothing in that are to physically attach a stereo to anyway. The old DarkStar stereo was held on from the front. Modern stereos need something to attach a rectangular channel to, and there was nothing there in the bus to bolt it to. So, I popped it into the glovebox instead. It still needs a real mounting, but for version 1, it sits on top of the packing cardboard it shipped in. Will it bounce around? Maybe. Could I break the stereo because I didn't mount it properly? Absolutely. Blindly moving forward, I drilled a 3/4" hole into the driver-side of the box, near the back, to run wires. With the glove box closed, it looks like the bus doesn't have a stereo... like it hasn't for the 15 years I've owned it.

Head Unit Wiring
In retrospect, I could have started here. I am not going to Should on myself (see Don't Should on Yourself), but if I ever have a virgin stereo install to do again, I will. Consider: the 2 most important bits for a stereo install to be successful is for a solid ground and a reliable source of 12V power. One could just solve those 2 wires and confirm the stereo works and your power is good before you do anything else. Wise advice for a future me. Anyway, for a ground, I doubled-up on a o-ring-d ground that was screwed into the air vent box. I verified that ground was good with a continuity test back to the negative post on the battery. For power, I tapped into an always-on circuit but it did not have enough juice to power the stereo. The radio acted like it didn't have any power, though I could read 12V at the plug. So... let me back up and then I'll get back to this.

I wired ground first. Always do ground first. Then, I took the various speaker wires and mated them with their respective colored wires coming out of the stereo plug. I intend to swap these into something more like the plug in Oliver, but this is fine for version one. Last, I tapped into a 12V source, hiding the wire, etc. Then we test fire.... nothing. This is where ideally I would have run ground, and 12V to prove it will power up before doing anything else.
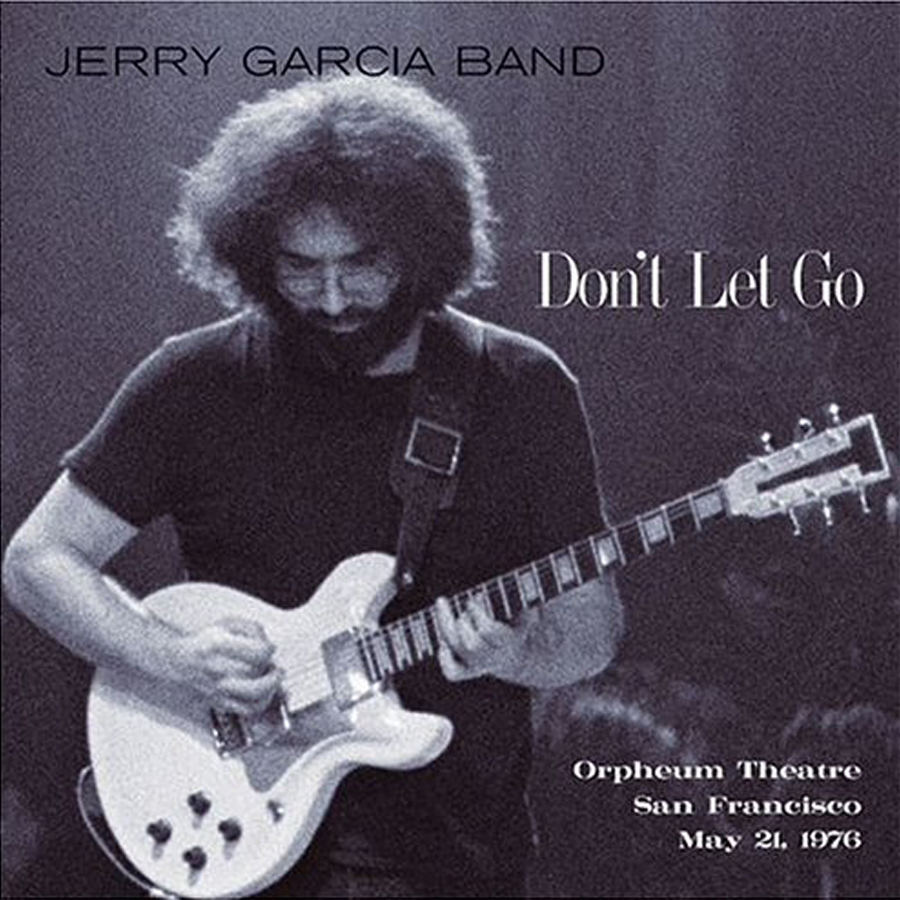
https://jerrygarcia.com/album/dont-let-go/
By now, it was getting late and I was getting tired and hungry. So, I ran a hot-lead from the luxury battery (our name for the deep cycle battery under the rock-n-roll bed that powers the lights and 12V sockets) to the back of the head unit strung across the lot couch, with a big coil bouncing between the front seats. It looked super-janky, but I needed to test whether the stereo would power up, and whether the speakers would respond. I plugged it in and heard the CD whir, so I knew I had power. So, I grabbed Boo and our copy of JGB's Don't Let Go CD for a test-listen before we both called it a day.

The smile produced by a JGB "Sugaree" is virtually a given, especially from the mid-70's era. That smile was compounded by hearing it coming from all around us in Hapy. "How loud does it get," Boo asked. She remembers our struggles to hear on the road as acutely as I do. Turning it louder and louder... it never distorted. Pure Jerry deliciousness pouring out of the speakers, hugging us with music until we were unable to talk over it. Yeah, that'll do.

12V Source Fixed
We shut things down, and I cleaned up my mess for the night. The following morning, I was back out there to run a 12V lead from the luxury fusebox to the stereo. This sounds simple, but it took quite some doing. I started at the glovebox, running a stiff 12ga wire through the hole and down behind the front "floor" vent. It runs below the TDI accelerator pedal (See Pedal on the Right) and under the rubber floor mat to the right edge of the driver seat pedestal. It runs along the right edge of that pedestal and under the old seat mounts for the 1972 Westy rear-facing seat, under slides for the lot-couch / middle-row seat and under the front edge of the rock-n-roll bed cabinet. It appears behind the cabinet near the corner by the refer-storage cabinet. I wired it into "fuse #12", protected with a 16amp fuse. I layered tape on top of the wire where it intersected with the lot couch slides to we don't accidentally catch that wire when putting the couch back in. That would be bad.

Once I had the new 12V supply line set, I re-tested. All good. I took the opportunity to tuck away some other errant wires up front. That's it for today. Version one is ready for some test drives and a festival or camping trip before we make any modifications or harden wiring to the rear. Thanks, as always, for following along-

Tuesday, August 6, 2019

Making Hapy Sounds (Part 2)

Continuing on my post about putting some music into Hapy, today I will go through some if the fun of installing what I'm calling "version 1" of the fuller sound system into the microbus. At this point, I have a pile of components, a spool of speaker wire and a dream.

Front Speakers Physical Mounting
I really wanted to spare my door panels, but I could not figure out where the kick panels were supposed to go. So, I couldn't figure out how much space I had and where. I haven't had kick panels for years, and pictures on the interweb of them installed really didn't show how much backspace there was. Resigned, I went down the tried-and-true path of a door card installation. My cards were made of a thick MDF material rather than the waffle board that most cards are made of. I don't know if that's better or worse, it's just different. I believe the process would be the same regardless.

Since I am installing 5-1/4" speakers, the hole will be smaller than that. A quick look at the manufacturer's spec's tell me that I need a 4-1/2" diameter hole. We take a few measurements and determine that placing the center-point of the hole between 9 and 9-1/2 inches from the bottom of the door and 6 to 6-1/2 inches from the front. That would place the speaker entirely within the upside down trapezoid below the bottom of the window in the door. I picked 9-by-6 since that was easy to remember, and with a carpenters square marked the spot on the driver-side card. Then, I nabbed a compass from the kids school supplies, measured out a radius of 2-1/4" (radius = diameter/2) and marked the cut line on the card. Had I been less daring, I could have cut a piece of cardboard to match the shape of the lower door card and performed test-cuts on that until I had the location where I liked it. If you are using nice cards, I would encourage that.

I took the card, then, out of the bus, and tried to visualize how the hole would align with the trapezoid. It seemed right, so I set the card down, drilled a hole near the line and finished the hole cut-out with a hand drywall saw (it is straight and cuts as you push away rather than as you pull towards). Once cut, I cleaned the edge with a file. I have this knack of undercutting, leaving myself lots of edge cleaning, and this was another one of those. So, I had to file just to get the hole up to the line, and then clean it up. Once I was able to set the speaker in the hole, I test-fit the card. The hole was inside the trapezoid, but is was fairly front-ward as you can see in the picture to the right. I don't think it really matters so long as the hole is wholly inside the upside down trapezoid. I removed the card, set the speaker in and test fit again. Nothing speaker-related was touching anything other than the card. We had a winner. I transferred the hole placement onto the passenger door card, drilled, cut and shaped it until a speaker would fit and test fit the passenger side the same way.

They looked good. So, I checked to get the speaker top level, marked and started the mount holes. I set the speaker grill on and sent the screws through the grill and the speaker mount holes and on through the card until they were snug. I may swap out the screws for bolts with washers and locknuts (on the backside) in a future version. There's just something about depending upon the threads of a screw to hold speakers to a door card that just seems hinky.

Front Speaker Wiring
One of the reasons I didn't want to put speakers in the doors is the question of how to route the speaker wires. I've seen wiring jobs where the wires don't pass through the front edge of the door, rather they pass from between the card and the door, making a small loop of wire when the door shuts. I didn't want that. Fortunately, I had pulled the door light switches out of the A-pillars a few years ago to paint and never returned them (since they didn't do anything anyway). This put a square hole in the A-pillar. I didn't want to drill a hole in the door, and I didn't have to. There are vents along that edge. So, threading wire from the spool back from the front, the wires passed through the door light switch hole, up through a vent high in the front edge of the door, down the front channel in the door and below the support. I left myself about a foot of wire to which I attached the pigtail that came with the speakers. Then, it was a simple matter to plug the clips into the speakers and then re-install the door cards. The other end of the speaker wire was routed up over the air vents and dashboard supports, and routed over to the hole where the head unit usually would go, leaving them dangling.

Rear Speaker Physical Mounting
I loaded the 6x9 speaker boxes with 6x9 speakers, so the physical mounting was fairly routine, in that respect: wire the supplied wires in the box to the pigtails, plug the pigtails into the speakers, place the speakers in the hole, put on the grills, thread the screws through. Since the boxes are going to kind of float around for now, there isn't much else to do mounting-wise, though that may change as we drive around and discover what we need for locating them for sound as well as whether they need to be a-fixed for travel.

Rear Speaker Wiring
Back when I had run a bunch of wires from the rear of the bus, I bore a hole in the wall behind the drivers seat. I ran a pair of speaker wires through that hole back past the old fridge-turned-storage-cabinet (See From Fridge to Storage). From there, they ran along the floor with the other wires, up behind the air vents (and where the kick panels would be), over the dash supports to the general stereo area. I added some plugs to the wires leading to the speakers so they can be unplugged and the speakerbox can be plugged in. I set the speakers on the rock-n-roll bed and shifted to setting up the head unit.

As always seems to be the case, this got long again. To be fair, I was probably 4 or 5 hours into the work at this point, so it's not like I'm just spinning a big tale out of a tiny effort or anything. Anyway, I'll pick this up next week. Thanks as always, for following along-

Monday, August 5, 2019

Missed it by One Digit

Brief out-of-band post today. Normal post will appear tomorrow.

Spin the Wheel
I decided that after Comcast increased my bill again, that it was time to move to something else. When we first got Comcast, our bill was $99 a month for internet and television with some premium channels plus taxes and fees. I thought it was a good deal, and knew the price wouldn't last. It didn't. A year later, the bill was $160 a month. Last month, it bumped again, to $210 a month. Yikes.

I did some research and concluded that I was grossly oversold on my internet bandwidth. So, I did some competitive shopping and decided to go back to Frontier for FIOS (fiber optic). When I called Comcast, the loyalty guy sold me a package change where I got rid of the television part, but kept a smaller internet package. It was still $85 a month, but since there was no contract and it wasn't a promotion, that price wouldn't change.... until they changed their minds about it. The FIOS deal is $50 a month for 2 years.
Guaranteed price won't change for the 2 year period. And they threw in a $75 Visa gift card to offset the installation charge and they threw in one year of Amazon Prime. I'm sure I'll get to pay for all that multiple times over after the 2 years are up.

UnSolution Center
The FIOS installer came today, installed everything and we confirmed connectivity. I switched over my internal wireless to the new system and before the boys were even out of bed, things were now flowing through Frontier instead of Comcast. Awesomeness. So, all that's left is calling Comcast to close-out the internet part. So... hmm... where's that number again? Oh.. right... 1-800-xfinity. So, you translate that into real numbers it is 1-800-934-6489. Be very careful when you dial that. If your finger slips and you dial 1-800-934-6789 you will have the reached the DISH Network "solutions center".

This is a classic boiler-room style hard-sell call center. The person who answered the phone said it was "the solutions center", but did not clarify that it had anything to do with DISH network. She immediately launched into a hard-sell about internet safety, the dark web, identity theft and how my children would be left homeless and starving unless I bought their package of security measures. I started polite, but found that fruitless. I started interrupting her asking simply to help me cancel my Comcast. She pushed harder and I got louder and more forceful, asking her to please stop selling me stuff because I just wanted to cancel my Comcast. Seriously, a recording of this would be internet gold. I said I understood everything she was saying but I didn't want it and then she started to ask me questions like she didn't believe that I was really listening or whatever. I actually asked her if she was going to quiz me. Finally, she asked if she helped me close my Comcast would I be interested in the program. "No". She asked if there was anything she could help with so I would buy the program and I said no, so she put me on no-music-hold for 2-1/2 minutes before someone else picked up.

The new operator said that it was the DISH Network solutions center and since I was not willing to let them help me with anything there was nothing for them to do for me. Unlike his predecessor, he clearly said it was DISH. I asked him why the other lady didn't say that, and he said some bullshit about how she said it was the solutions center.

It was a complete mess. I said it was clear they never were able to help me from the start and they wasted 15 minutes of my day trying to hard sell me some garbage. And then hung up.

The Lessons
First, check and double check the number you dial. If the person on the end doesn't seem right, check the number again while you're on the phone... before you waste time and energy on it. I stayed on the call because I thought this was some crazy hold music up-sell replacement that Comcast had put in place. Had I double-checked the number I would have realized something was up.

Second, don't get DISH Network. This is super-important. Not just for me but for every single person who consumes media. DISH Network is paying those people to act that way. DISH Network wants to scare callers into getting some garbage "protection" which may just as well be another way your data actually gets stolen. DISH Network purposely picked a phone number that is one digit off (and a very close digit on the keypad) to purposely get accidental dialers. DISH Network has obviously instructed their operators to blur the identity of the call center, emphasizing "solutions center" and skipping the "DISH Network" part. DISH Network, you're scumbags. If DISH Network is the ONLY option for media access (which in the US is extremely unlikely since there are multiple national satellite options), read the paper. Or a book. Or your junk mail. Or stare at the stars. Or go to the local coffee shop and use their free WiFi. ANYTHING is better than giving those vultures your hard earned money, underwriting that call center.

The only upside to the time I spent on that call is that some elderly person, or someone who is otherwise afraid of having their identity stolen was not getting hard-sold by that lady for the 10 minutes she worked me over.

Hapy Ending
I am happy with the FIOS, though it has only been a day. When I realized my dialing error and then actually called Comcast, they were very nice. It was not hard to cancel my service at all. Before I got off the phone with them, I alerted them to the fact that the DISH Network hard-sell boiler-room was one digit off of their 1-800-xfinity number (1-800-934-6489) and that someone further up the management chain would probably want to know that. The operator was genuinely appreciative.

Rant over. We'll return to normal posts, as usual, on Tuesday (tomorrow) morning.