Tuesday, November 17, 2020

Zed Prime

No, not like Optimus Prime. Today we celebrate getting Zed primed in 2k hi-build primer. Before I begin, the CoViD numbers are getting flat-out scary, but it doesn't seem like folks are taking this news and processing it into action. I take a walk every afternoon for some exercise around suburban residential streets and there are lots of fellow walkers or runners out there. Please remember that just because you're outside, it doesn't mean you can walk right up to me without a mask. I'm wearing one to protect you; show me the same courtesy, dammit. Now, about that primer.

Layout
panels set up for paint
set up for ease of movement
I started out by backing Nemo out of the other covered spot, and laying a big blue tarp on the driveway where it had been. I then planned my route for moving from panel to panel with a spraygun and air hose. I moved the air compressor out of the garage, but at the edge of it's power cord. I wanted to make sure I could get at different angles without bumping into wet paint, and without dropping the air hose across a panel.

Clean
This is the part that most car shows don't televise: the endless cleaning. Garage Squad is the clear exception, but I think that's because the car owner is usually doing it. Anyway, by now, dust from the Bondo is pretty much everywhere. Your hands and the oils ever-present on them (combined with Bondo dust or not), have run all over all of the panels. Both of these things ruin paint jobs. So, we start with a bottle of degreaser and a roll of paper towels. Since the car has been outside and the weather has been windy and damp, I did not feel it was necessary to shop-vac the interior before I began. I stand by that decision, but I encourage you to vacuum or air-compressor blow-out crevices at least. With bottle and towels in hand, you clean everywhere you intend to put primer. And clean the places nearby so tape will stick. I found the degreaser left a film on plastic so I had to reclean those plastic pieces with window cleaner sprayed onto paper towel so I could get tape to stick. Neat.

Mask
280ZX driver side rear quarter panel
driver side rear quarter
With everything clean, I completed the masking next. I had started a few weeks ago, masking off the engine bay and the windshield. The sides of the dashboard near the doors, the door seals and some of the door hardware all needed to be masked. The fuel inlet did too. Again, it is probably worth stating that the purpose of masking it to keep paint off of stuff you don't want painted. That sounds obvious, but sometimes we get aggressive with tape and overdo it. So, with that perspective, it is better to under mask and have a little bit of rubber or chrome get paint on it than to over-mask, and have a line of unpainted body when you pull tape. Been there; it really sucks. Removing a little paint from rubber or chrome is way better than trying to get paint on that edge after you've messed up the masking. Last, I cut up some kitchen garbage bags and covered the tires. I'm not sure if we are going to keep them or not, but either way overspray would make them worth less. 

Paint Gun Assembly
harbor freight air regulator with gauge
I knew that once I had metal etching material applied, I was all-in on priming. Metal etch is an acid that converts rust, but it also cuts into the steel, making primer adhere better, but also creating a means of rust suddenly appear where it otherwise wasn't. With mid-Fall NorthWestern Oregon weather (read: damp), you do not want to create a rust opportunity. So, I set up my paint gun next.

A while back I got 3 of those purple Harbor Freight paint guns. I figured I would have a different gun for each of the various steps: prime, paint and clear. Well, since then I got a much better gun (ATOM X27) for applying the color and clear. For primer, though, especially this high-build stuff that has some thickness to it, I did not want to put that through the new gun.

The purple Harbor Freight paint gun ships with one tip, a 1.4mm one. That is too small to reasonably throw thick primer. The Eastwood guide for this 2k high-build primer suggests anything from 1.8 to 2.5mm. So, I drilled out the 1.4mm tip with a 5/64" (1.98mm) drill bit to get as close to a 2mm hole as I could. I did this a few weeks ago during paint gun disassembly, cleaning with lacquer thinner and re-assembly. Now, with the gun set up with a nearly 2mm tip, I was about ready. For timing... from end-to-end, gun disassembly, tip-drill, cleaning and re-assembly took a little over an hour. I work slow.

280ZX passenger side rear quarter panel
passenger rear quarter
To the air-inlet, I applied plumbers tape, and then threaded on a regulator with a pressure gauge (like this, also pictured on the right here). On the threaded end went more plumbers tape and then a inline desiccant dryer/filter (like this) and more plumbers tape. To that last bit, I threaded on an air hose quick-release. I set the whole contraption into a spray gun stand (like this) that was held firm to my bench under the weight of a vice. Be advised, these things are not balanced, and need to be fixed to something -or- have the baseplate under something super heavy (like a bench vice that I never attached to the bench) or they will fall.

Etch
With the panels clean, the gun ready and the masking done, I grabbed my small bottle of Eastwood metal etch and a foam brush. Panel by panel, I liberally applied metal etch. Because it was in the upper 50'sF (14*C) and relatively damp, the metal etch stayed wet for quite a while. That's a good thing, as it gives the acid time to cut into the metal and convert any rust without creating flash-rust.

Mix a Batch
280ZX hood in high-build primer
hood looks real flat
Again, not like Letterkenny. The Eastwood hi-build 2k polyester primer requires the addition of liquid hardener: 0.2oz hardener per 10oz of primer. The cup that comes with the purple gun max's out at 20oz. so, I made 15oz batches per spray cycle. 15oz of material needs 0.3oz of hardener. Now, I have an old plastic syringe from when I was playing with biodiesel years ago that holds up to 12ml's, but it is graded in milliliters not oz. Apply some math and we need 8.87ml of hardener for 15oz of primer.

I grabbed a plastic mixing pitcher from the kitchen baking materials (did I mention that my wife loves me? I'm a lucky man.) and with blue tape marked the 15oz. line with the top edge of the tape. I did this so that I could quickly see when I hit 15oz while dumping paint from a 1-gallon pail. I opened the can, and then spent about 15 minutes thoroughly mixing the primer, deep churning the solids off the bottom so it was consistent top to bottom. 

Once mixed, I poured 15oz into the mixing pitcher (to the top of the blue tape) and opened the hardener. The hardener comes in a tube, but is as thin as water, so getting it into a syringe was not really a fruitful exercise. To solve, I removed the plunger, turned it upright (small hole at the bottom) and covered the small hole with my gloved finger. Into the now-open other end of the syringe, I squeezed just shy of 9ml in and then dumped it into the mixing pitcher. I mixed for about a minute and then poured the now-activated primer into the gun paint cup and threaded on the lid. I repeated this process 3 more times during the primer-shoot.

Prime
280ZX passenger side headlight bucket in high-build primer
passenger headlight bucket
With primer in the cup, the lid fastened, the air compressor turned on and my painting overalls on, I was ready to go. I set the air pressure at the compressor to 40 and played with the regulator at the gun to get to 30psi while spraying. I got there, but I think, in retrospect, it would have been better had I run the pressure at the compressor higher so I could get more pressure through the gun. I say that because I found that the fan was not as wide as I would have liked, which forced me to hold the gun closer to the panel (like 4 inches rather than 6-8).

It is recommended that you test your fan on cardboard. I was shooting primer and was going to be shooting multiple coats, so I was fine with getting the fan set on a fender while shooting. My car, my choice. It took me a few passes to get my pass-speed right, but after 3 coats, the coverage looks really good. I found that I was initially moving too quickly, making my first coat quite light. Also, because I have a 21 gallon air compressor, I had to wait for the pressure a few times. Honestly, I expected much more waiting.

Because of the high-build nature of the primer, I made sure that I got a nice build everywhere, and then circled back on the trouble spots (fenders) for some extra. Once it all dried overnight, the panels look very smooth, though after touching them, they will definitely require a bunch of sanding. I haven't decided if another round of primer will be necessary. I guess we'll see after the sanding. At this point, though, I am super-happy with how everything looks.

Clean Up
280ZX passenger door in high build primer
passenger door
Similar to the cleaning of the car prior to painting, the cleanup of tools gets virtually no coverage in MotorTrend / Velocity / Speed television shows. That's really too bad. I know it isn't terribly entertaining television, but ignoring it implies a bad habit of not cleaning things as the way that the professionals do it. We know that is absolutely not the case. I spent over 2 hours spraying primer and another hour cleaning up. I may be slow, but I try to be meticulous. I started by pouring some fresh lacquer thinner into the paint cup and sloshing it around. This didn't free the dried-on primer, but the still wet primer was now suspended in lacquer thinner. I sprayed the material out until the cup was empty, and then removed the air line from the gun. I removed the cup and set it aside while I poured more lacquer thinner into the measuring pitcher. I used the pitcher from this point as the cleaning "sink". I dunked the cup in the "sink" a few times while I cleaned other things so the remaining paint on it wouldn't dry.

I removed the mix nuzzle (on the end that sets the fan-direction vertical or horizontal) off the front spray gun and then pulled the needle from the rear. With a pair of channel-lock pliers, I removed the tip housing, and placed them all into the pitcher. I set the gun in last, upside down. I added more lacquer thinner and then started cleaning things with a brush, getting all primer off of everything, including the outside of the paint gun housing and the paint cup. Once everything was completely clean and wiped down (an hour later), I re-assembled the gun, wiped out the paint cup and put everything away.

Some might argue that these guns are only $15US so why bother cleaning them. To me, treating them as single-use is an environmentally hostile way to operate. Ideally, I would not even have these, and I would have high quality tools (like the ATOM X27) instead. Still, the way we treat our expensive tools is how we should treat our cheap ones, IMHO. I have heard that these start leaking after no more than 10 hours of use, so I may have a couple more jobs before this starts to fail on me. That's still more than once. 

Curing
I let the panels (and the main shell, of course) sit in-place and under the carports overnight. The following morning, it had started to sprinkle so I carefully moved the panels back into the warm garage. I will let them sit until I am ready to sand the primer. I expect I will know if another round of primer will be necessary or not from that. Either way, the window for painting this Fall is effectively closed. Even if I can get sides onto these carports, it will be very hard to warm 400 square feet of space to 70*F (21*C) when it is under 40*F (4*C) outside. Any cooler than 60*F (~15*C), the paint won't behave properly, and it seems like everyone encourages painting at temps closer to 70*F (21*C).

I have read that the polyester primer can protect the metal underneath if the primer is not disturbed (read: sanded). Once you sand it, it is much easier for moisture to get in. I don't know if that's true, but I will be leaving the car un-sanded in primer since I can't get paint on it, so we'll find out. For now, everything except the main shell is in the garage. The shell is sitting under a car port. So, it is semi-outside, but out of direct weather and (extremely limited seasonal) sunshine.

Thanks, as always, for following along. Once the Zed body parts were moved out of the car port, I moved Hapy in, so I expect to be returning to Hapy work in the next few posts. 

Tuesday, November 10, 2020

Decoding Hapy M-codes

I miss my bus. No, I mean, he is still parked out front, but he hasn't really seen much street since the Summer of 2018. Figure, with CoViD-19, all of our Summer plans were thrown out. We tried to plan a quick overnight vagabond, but even that was fraught with CoViD-fear. I routed that frustration energy into all kinds of project last winter / spring / summer, ranging from a parking furnace to a defroster. Now that the weather has turned, and our corral has thinned, he will be getting pressed into service when I need to get somewhere.... until I replace the rear bearings on Nemo, the 1997 Audi A4. So, while I set up projects for the winter, I thought I would post my M-codes, and what they mean. All of this was from my notes from 2004, but I since validated all of it here on type2.com.

Camper Designation
The first code after the VIN is for the poptop. My code is 518 which is for the Westy. I have read that 517 is for a true campmobile and 609 is for the campmobile deluxe.

Color Codes
Below the camper are the color codes. My line starts with "99 26" which indicates L90D or "Pastel White" exterior color. It is followed by "51" for dark beige leatherette interior.

Options
picture of Hapy under autumn trees
Hapy awaits the road
On the same line as the color codes, my option codes start with "A02". That is for a group code or a group of options that were applied as part of a package. This package included mostly basic stuff: 020: Speedometer & odometer in Miles, 026: Activated Charcoal canister, 089: Laminated Windshield, 102: Rear window heating, 206: Anti-glare Rear View Mirror, 506: Dual circuit Brakes, 511: Padded Dashboard, 524: US / Canada spec Sealed beam headlights, Red Tail lights, Side marker lights & Backup lights, 525: US / Canada spec seat belts.

After "A02", I have code "P31" which means Westfalia SO 70/2 interior. Then I have "172" which means radial (steel belted) tires followed by "507" for vent-wing windows in the front doors.

During my research I found that there were "bad weather packages" that included intermittent wipers and front/rear fog lights. Sure would be cool to find one of those.

Manufacture Date
The next line starts with the week number and day-of-week that the bus was assembled. Since it is a 1972 model year, it was constructed either in late 1971 or early 1972. Since the week number is high (36), we can conclude it was a week in 1971. Since the first few days of 1971 are mid-week, so they are shared with 1970, the actual manufacture date gets a little blurry. I have assumed that any day in the year that appears in a week marks that week as week 1. Accepting that assumption, week 36 is Monday 31-August thru Sunday 5-September. That's how the ISO defines a week. I do not know if the Germans used "0" to reflect the first day of the week or "1". Computer geeks start with 0, but I think in 1971, they probably started with 1. So, the 4th day of that week would be September 3rd. The guy who built the type2.com page confirmed that single number was for the day of the week where 1=Monday. I cross-checked by week math against the famous RAtwell, and his week math is the same as mine, so I think Hapy was born on 3-Sep-1971.

If we take the ISO rules for a week then week 1 is the first full week of the year. So, week 36 is the week of September 6-12 of 1971. The 4th day of that week would be September 9th. So confusing. For years, I thought his birthday was September 3rd, and it wasn't until I went to validate that for this post (So I didn't get it wrong) did I consider the blurriness of week 1. I intend to celebrate Hapy's 50th birthday on September 3rd AND September 9th so we definitely get it. September 3rd will be the Friday before Labor Day in the US and September 9th will be the Thursday before ChinookFest (if they hold it). So, either way, there's a ready-made party for his birthday.

Mysteries
After the manufacture week and day, there is a 4-digit code "7628" that I have been unable to identify. Based on some web-wandering it may have to do with production planning. Then, it has "UJ" which should correlate to a shipping destination. The "U" means US, but the "J" is a bit unclear.

Next, I have "2319" which indicates that this is a (2) type2, (3) Kombi, (1) that's left hand drive, with a sliding door on the right and (9) a camper. The last 2 numbers I have translate to engine (4) and transmission (1 - manual). I have not had much luck decoding the engine code of "4", but I'm running a TDI now, so it doesn't apply anyway.

Tuesday, November 3, 2020

Bondo Sand Repeat

Back months ago, I said something like "you're never really ready for paint", and that's because we generally get in our own way. Today's meandering post is about how I am refusing to accept the prep and start shooting primer. Of course, the temperatures running below the recommended by the paint manufacturer isn't helping.

For those of you in the US, today is Election Day. While so many are focused on the Presidential race, there are many races and measures on the ballot that could impact your life more directly. I hope you took the time to vote, and are here reading this as an escape from election coverage. I know I look at my cars as an opportunity for respite, away from the challenges of every day life (or political bs). This blog is absolutely a part of that, and I'll leave it at that.

Bondo Zed
I had a whole post not too long ago about how I thought I was done with the body work on Zed only to do some more. Well, since then, I just can't let it go. I keep finding little things, and I can't let them go. So, I whip up another batch, apply, sand and recheck. I have lost track of how many cycles I have done, but I would like to think that I'm learning along the way. Since I don't know how well the hi-build primer is going to fix things, I may be overdoing things. Regardless, one of my motivators is my color choice for the finished product.

Color Thinking
silver Datsun 280ZX from wikipedia
I spent a few hours looking at pictures of 280ZX's, trying to land on a color. I entered the search with something in mind, but I wanted to see what these cars looked like in a finished state. I also recognized that the darker the paint color, and the higher the gloss, the more imperfections in the paint prep are visible. So, if you go with a dark dark black with a super high gloss so you could, potentially, see a clear reflection from feet away. The prep work needs to be perfect for a color and finish like that. At the other end of that spectrum, if you paint a low-sheen white or off-white, the little misses are not as obvious. I have found a dirty white car looks cleaner than a dirty black car too, but I digress. So, if your vehicle looks good in white or cream or light yellow and it's your first paint job (or you don't have a lot of time), the minor things may not be nearly as visible if you go with one of those colors. So, what do I mean by "minor things"?

Minor Misses
red Datsun 280ZX
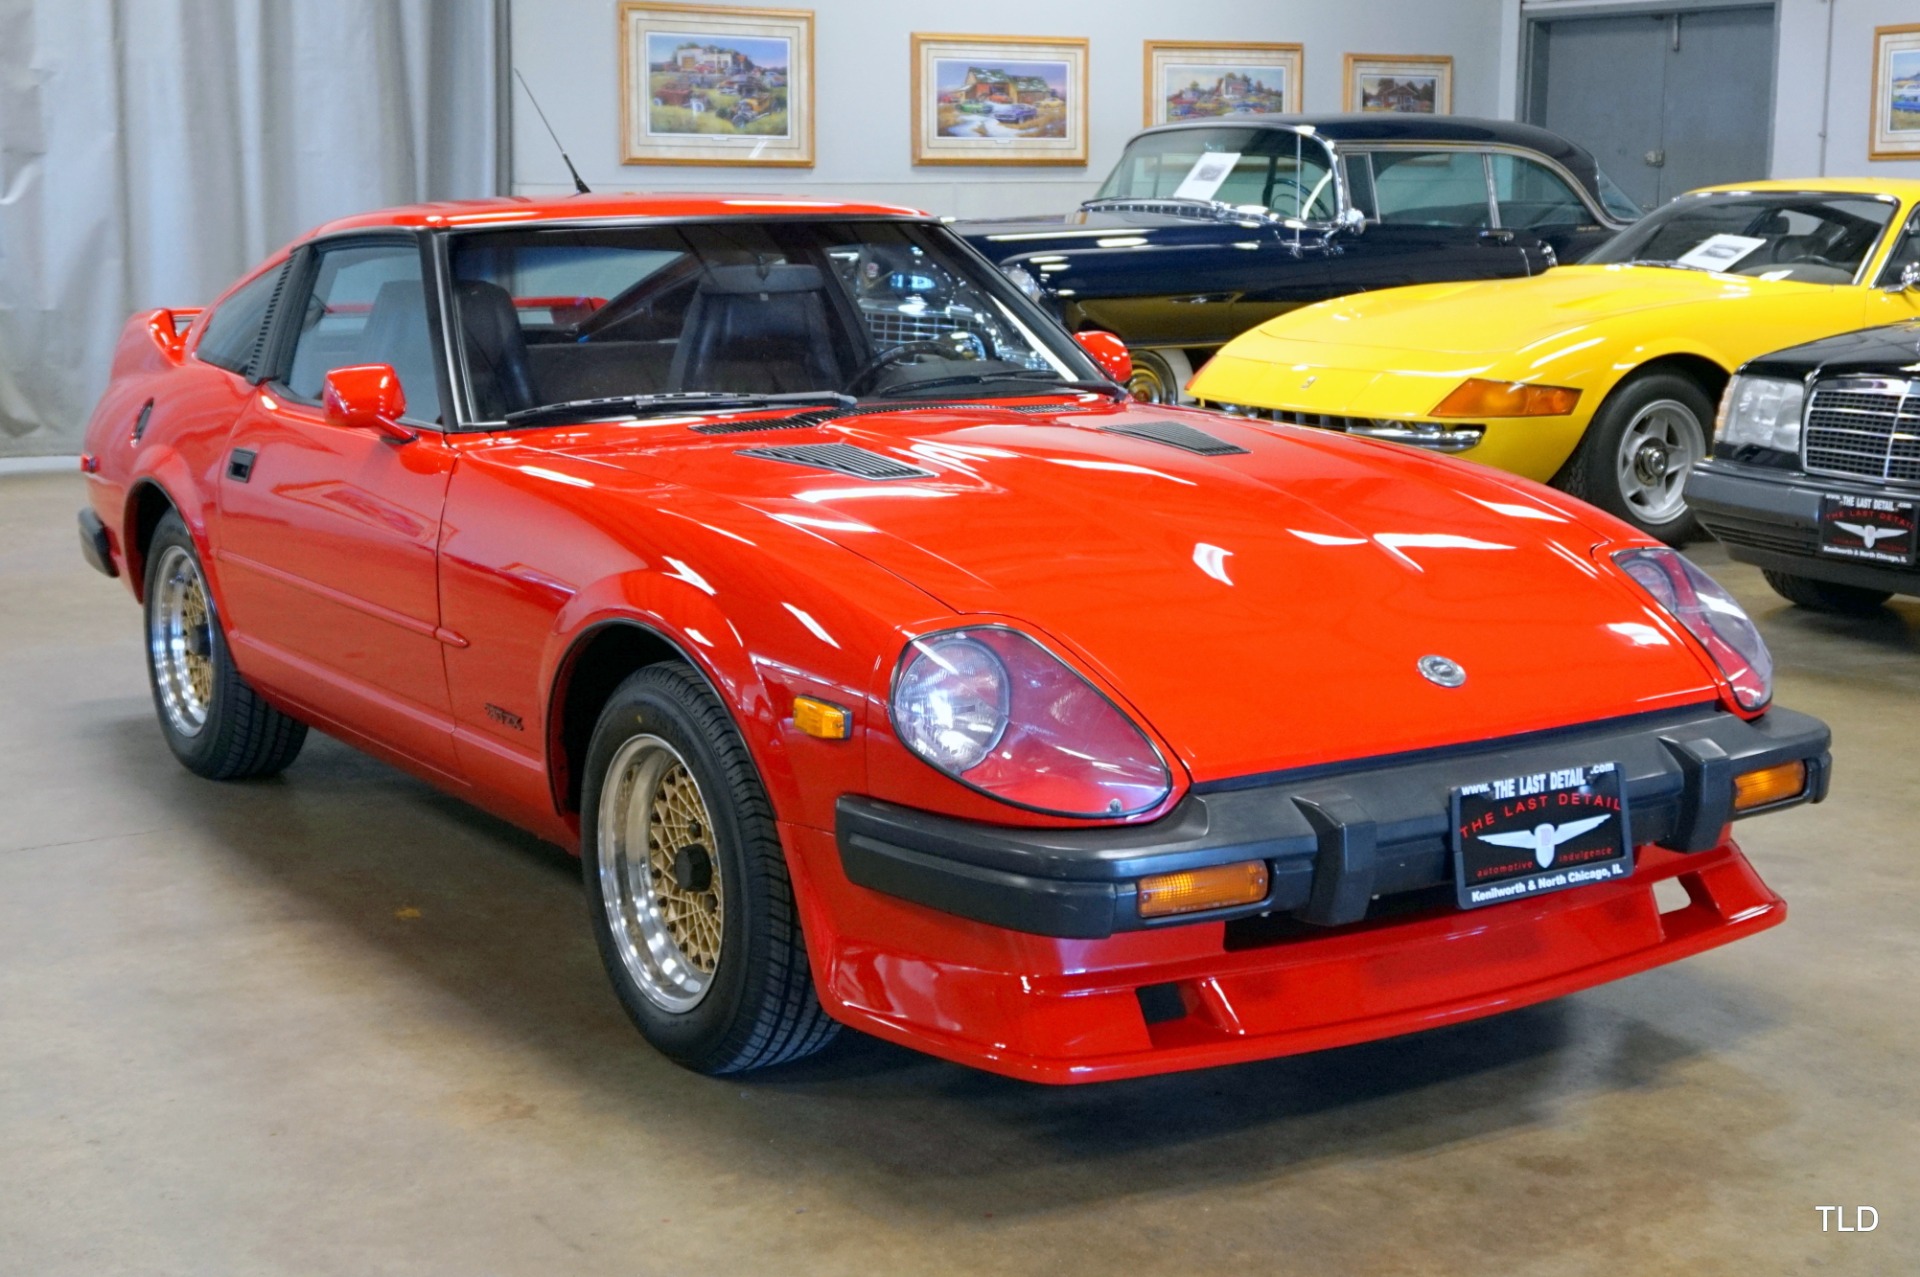
all cars look good in red
The kinds of things I am finding during these last rounds with the Zed are varied. One example is larger, but very shallow indentations in an otherwise straight panel. For example, on the hood, there are multiple little sags in the metal that look almost like they appeared because a child sat on the hood and it depressed a little bit. If the hood was painted flat black, would it show? Probably not too much, but I have done my best to minimize those shallow sags. I have also found very small, but deep chips in the steel. They almost look like someone took a jeweler's screwdriver and stabbed the panel. Multiple times. These could have been filled by the hi-build 2k primer, but I fixed them with bondo instead just to be sure.

Ultimately, panel by panel, I would feel like the panel was done, so I would wipe it down with a towel. Then, I would go over it lightly with 400 grit to get the metal and the patches all the same degree of smooth, at the level pre-described by the paint manufacturer. Last, I would hold it up to the light at various angles, slide my bare hands over the entire panel, both quickly and super slow.. seeking something that felt wrong. Piece by piece I would accept a panel and set it aside. First, it was the 2 doors, then a fender, then the hood and finally that last fender. Ironically, the first area that I accepted was the main shell (rear quarters and tin top).

Zed Color
dark gray color sample
Eastwood intermix gray
All this time, I'm thinking about what color I want to shoot Zed. When C was doing the work, he was thinking flat-black. While I agree that some cars, possibly even a 280ZX, look great in flat black. I'm not sure I want to go that way for the entire car. Like I indicated above, I looked at lots of pictures, and, while there are lots of colors of 280ZX's out there, only a small handful of colors really look good. Of course, this is totally my opinion, and the shortlist is basically the color list that pretty much every car looks good in: Red, Dark Blue, Silver, Dark Gray and Black. Zed was silver when we got him, Flash is silver and KLack is silver, so pretty much silver is out. I intend to paint the lower 2/3 of Hapy a dark blue so that's out. High gloss black would show too many imperfections and it is well documented (though I can't find a link) that red cars are pulled over most often, so that leaves Dark Gray. This is sort of a compromise between Black and Silver, both of which look really good on a 280ZX. 

metallic gray color sample
Eastwood 9mm Gray
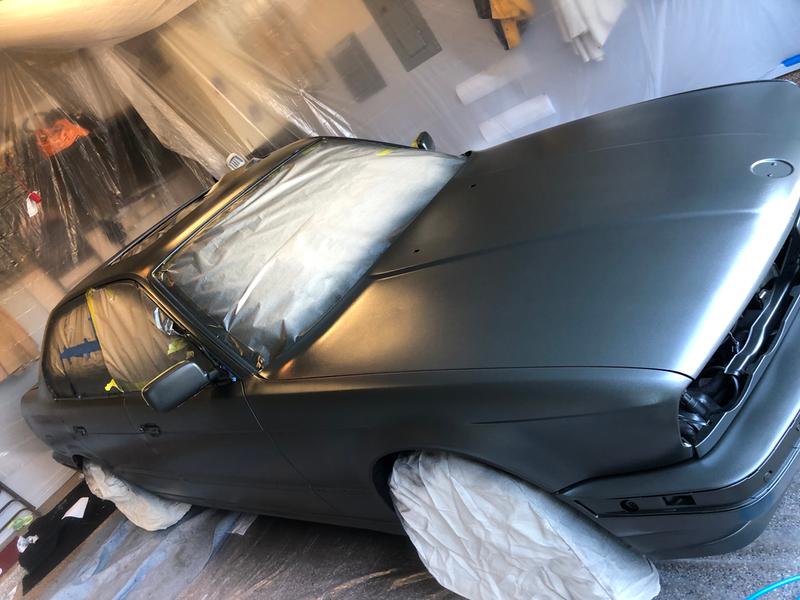
So, I take this idea to my resident style expert (Boo) who suggested that maybe a metallic flake would look better. We are looking at Eastwood's 9mm Gunmetal Gray Metallic -or- their GearHead Gray Intermix. We are going to need 2 gallons anyway, since I will be shooting inside the hood, some interior spots that don't get covered with plastic, etc. So, the cost ends up being about the same. Based on the photos, I tend to agree with her. The metallic flake looks like it creates more depth, and may be a little darker. What is hard to tell is which one will be more forgiving of my prep work. The picture on the right here is of a BMW 5-series shot with the Eastwood 9mm Gray. The owner had not yet color sanded nor clear-coated it, so it is a very honest image of what it looks like fresh from the gun. It looks a lot like the graphite metallic gray color I have seen on a 2019 or 2020 Mercedes.

I guess that's it for today. The primer shipping fiasco has finally come to a conclusion, with it's arrival during the cold snap. We are not expecting weather to be accommodating to spraying paint for much longer. So, while I may be ready for shooting primer, I may not actually have an opportunity to shoot it unless I figure out how to put sides and a non-flame heat source inside the car ports. Before then, I still have to metal etch the bare steel, wipe the whole thing down with degreaser and mineral sprits and, of course, complete the masking. So, there is still plenty to do before I'm ready to actually put primer in a gun and start shooting. Honestly, it could be Spring before priming actually happens.

Thanks, as always, for following along-