Showing posts with label 6x9. Show all posts

Tuesday, August 6, 2019

Making Hapy Sounds (Part 2)

Continuing on my post about putting some music into Hapy, today I will go through some if the fun of installing what I'm calling "version 1" of the fuller sound system into the microbus. At this point, I have a pile of components, a spool of speaker wire and a dream.

Front Speakers Physical Mounting
I really wanted to spare my door panels, but I could not figure out where the kick panels were supposed to go. So, I couldn't figure out how much space I had and where. I haven't had kick panels for years, and pictures on the interweb of them installed really didn't show how much backspace there was. Resigned, I went down the tried-and-true path of a door card installation. My cards were made of a thick MDF material rather than the waffle board that most cards are made of. I don't know if that's better or worse, it's just different. I believe the process would be the same regardless.

Since I am installing 5-1/4" speakers, the hole will be smaller than that. A quick look at the manufacturer's spec's tell me that I need a 4-1/2" diameter hole. We take a few measurements and determine that placing the center-point of the hole between 9 and 9-1/2 inches from the bottom of the door and 6 to 6-1/2 inches from the front. That would place the speaker entirely within the upside down trapezoid below the bottom of the window in the door. I picked 9-by-6 since that was easy to remember, and with a carpenters square marked the spot on the driver-side card. Then, I nabbed a compass from the kids school supplies, measured out a radius of 2-1/4" (radius = diameter/2) and marked the cut line on the card. Had I been less daring, I could have cut a piece of cardboard to match the shape of the lower door card and performed test-cuts on that until I had the location where I liked it. If you are using nice cards, I would encourage that.

I took the card, then, out of the bus, and tried to visualize how the hole would align with the trapezoid. It seemed right, so I set the card down, drilled a hole near the line and finished the hole cut-out with a hand drywall saw (it is straight and cuts as you push away rather than as you pull towards). Once cut, I cleaned the edge with a file. I have this knack of undercutting, leaving myself lots of edge cleaning, and this was another one of those. So, I had to file just to get the hole up to the line, and then clean it up. Once I was able to set the speaker in the hole, I test-fit the card. The hole was inside the trapezoid, but is was fairly front-ward as you can see in the picture to the right. I don't think it really matters so long as the hole is wholly inside the upside down trapezoid. I removed the card, set the speaker in and test fit again. Nothing speaker-related was touching anything other than the card. We had a winner. I transferred the hole placement onto the passenger door card, drilled, cut and shaped it until a speaker would fit and test fit the passenger side the same way.

They looked good. So, I checked to get the speaker top level, marked and started the mount holes. I set the speaker grill on and sent the screws through the grill and the speaker mount holes and on through the card until they were snug. I may swap out the screws for bolts with washers and locknuts (on the backside) in a future version. There's just something about depending upon the threads of a screw to hold speakers to a door card that just seems hinky.

Front Speaker Wiring
One of the reasons I didn't want to put speakers in the doors is the question of how to route the speaker wires. I've seen wiring jobs where the wires don't pass through the front edge of the door, rather they pass from between the card and the door, making a small loop of wire when the door shuts. I didn't want that. Fortunately, I had pulled the door light switches out of the A-pillars a few years ago to paint and never returned them (since they didn't do anything anyway). This put a square hole in the A-pillar. I didn't want to drill a hole in the door, and I didn't have to. There are vents along that edge. So, threading wire from the spool back from the front, the wires passed through the door light switch hole, up through a vent high in the front edge of the door, down the front channel in the door and below the support. I left myself about a foot of wire to which I attached the pigtail that came with the speakers. Then, it was a simple matter to plug the clips into the speakers and then re-install the door cards. The other end of the speaker wire was routed up over the air vents and dashboard supports, and routed over to the hole where the head unit usually would go, leaving them dangling.

Rear Speaker Physical Mounting
I loaded the 6x9 speaker boxes with 6x9 speakers, so the physical mounting was fairly routine, in that respect: wire the supplied wires in the box to the pigtails, plug the pigtails into the speakers, place the speakers in the hole, put on the grills, thread the screws through. Since the boxes are going to kind of float around for now, there isn't much else to do mounting-wise, though that may change as we drive around and discover what we need for locating them for sound as well as whether they need to be a-fixed for travel.

Rear Speaker Wiring
Back when I had run a bunch of wires from the rear of the bus, I bore a hole in the wall behind the drivers seat. I ran a pair of speaker wires through that hole back past the old fridge-turned-storage-cabinet (See From Fridge to Storage). From there, they ran along the floor with the other wires, up behind the air vents (and where the kick panels would be), over the dash supports to the general stereo area. I added some plugs to the wires leading to the speakers so they can be unplugged and the speakerbox can be plugged in. I set the speakers on the rock-n-roll bed and shifted to setting up the head unit.

As always seems to be the case, this got long again. To be fair, I was probably 4 or 5 hours into the work at this point, so it's not like I'm just spinning a big tale out of a tiny effort or anything. Anyway, I'll pick this up next week. Thanks as always, for following along-

Tuesday, January 15, 2019

Speaker Box Finished

After months of sporadic work, the speaker-box is finally finished. Today's post will go over the final few things I did to complete it.

Where Were We
test fit with rear panel in place
When I last posted on this thing, I closed the post with "...after a bunch of hours with the Dremel and hand planer, the wall mate-points are smooth enough where I think it will be hard to see how out-of-alignment they are once covered with carpet. That's what I'll do for next time... as well as get some wiring in, and the 6th side of the box attached... and then the edges planed.... ". I had 5 of the 6 sides attached and planed, baffles installed. I felt ready for the final side, carpet, and wiring.

One Wire
The route from the wire cups on the right side of the box (front-is-front, so the "right side" assumes the 6x9 speakers face forward and the 10-inch sub faces rear) to the left 6x9 speaker needed to go through a baffle. The other wires, for the sub and the right speaker, were not so constrained. So, I left those wires out until after the carpet was on. For the one, left, speaker, though, I drilled a hole through the baffle, threaded speaker wire through, and then routed it along the bottom seams to the wire cup. I glued it into place so it wouldn't flop around, nor create an internal vibration. My concern about a vibration may seem a little without basis, but I thought with a wire that was running the length of the box, it might find it's way against the sub woofer cone. Regardless, a few extra minutes and some wood glue was a very small cost. I filled the speaker wire drill-hole with glue on both sides as well.
papering for pattern

Rear Panel
With that one wire installed, the rear panel could go on. When I set the panel in place, I could see gaps that couldn't be resolved with wood screw force; I needed to plane the edges of the side panels. To get things flush, I started by setting the panel on, and marking the high points on the sides with a pencil, and then planing those areas down. I repeated this process a few times; each time taking less material between checks. I was not aiming for perfection, rather close enough to fit where I could make up the difference with torquing down with wood screws. Otherwise, I would have spent many hours clowning with perfection. As it was, I spend about an hour planing before spreading generous wood glue along the edges and setting the panel in place. I swiftly applied wood screws around the edges, using more screws on this panel than on the others to get it to set flat.

carpet pattern
I tested the seams with a flashlight, shining it from inside the box (hand through the sub-woofer hole) to confirm that the seal was good. To my surprise, it worked quite well. Maybe having a pilot hole every few inches isn't a totally bad idea. Once the glue had dried, I filled the holes with spackle, waited for it to dry, sanded it flush and repeated 2 more times to make sure the holes were smooth enough to not be noticeable through carpet. I probably over-revved on it a little bit, but I'd come this far, and spent so much time on it now, a few extra minutes was not going to make much difference.

At this point, I painted the outside of the box black. I wanted to make sure the box was sealed, though afterwards I was concerned that I might have made it harder to attach the carpet. My thought about painting was that if I jacked the carpet, any open spot would be black instead of raw MDF, so it would not be as obvious.

Carpet
carpet cemented
With all of the panels in place and all of the pilot holes filled, I was ready for carpet. I found some basic black trunk carpet online for about $8US for a 4-foot by 5-foot rectangle. This was about twice what I needed, but I bought extra with a plan to carpet the trunk of the MG with the same stuff eventually. So... how to carpet a box? Off hand, it sounds simple: you have 6 sides, so cut 6 pieces of carpet, glue them on. Yeah.. that creates 12 seams. I wasn't going to carpet the bottom, so it would have been 5 pieces of carpet and 8 seams, but still, that's way too many.

Instead, I mocked up a single piece of carpet that was shaped like a "T" using paper to construct a pattern (see pictures). Imagine the "T" upside down. That long side ran along the bottom edge of the rear and the two sides. The vertical part of the "T" wrapped over the top of the box and down the front. I cut the vertical part of the "T" wider by 1/2 an inch on each side so the edges of the top on the right and left sides would fold down and get covered by the side pieces when they wrapped around. This created 2 seams: one on each side along the top edge and down the front... and each seam was double-thick for a 1/2 an inch Once the box was installed into the trunk of the MG, you couldn't see them, and the seams are facing away from anything else in the trunk so the edges won't catch.

The carpet was attached to the box with DAP contact cement. This is nasty stuff, so I did this on my front porch under the overhang. Wear disposable clothes, and gloves because if the glue gets on, it doesn't come off. I followed the directions, thoroughly covering all 5 sides of the box (no carpet on the bottom, just black paint), as well as the inside of the carpet. Well, I did that best I could on carpet with a paintbrush. Using a glass tabletop as a guide for keeping the bottom edge flat and using my thumbs to mark where the sides were, I started applying the carpet to the rear of the box. Contact cement adheres on contact (hence, the name), so you really have one chance to get it right. I was able to get it lightly attached while checking the angles and had to adjust it once. After that, though, I started pressing it down into place, wrapping from the rear over the top to the front, leaving the sides flapping. Then, I brushed contact cement onto the little 1/2 inch flaps, waited a few minutes and then pressed the sides into place. This part of the assembly was probably the most nerve-wracking, knowing that misalignment during this process would make the whole thing look amateurish. Which, if I hadn't spent so much time on it, I would have been fine with, but now, I wanted it to look good.

Cut In
wire cups and 6x9's in
The contact cement needs at least 24 hours to cure. I waited a day for the stink to dissipate and then moved the box into the garage for a couple of days. Once I was confident that the cement was solid, I took an exacto knife and cut in the holes. I started with the wire cup holes, cutting across the diameter of the hole first and then laying the edge of the knife against the hole in the wood to direct the cut of the carpet. This worked very well, and allowed me to cut all of the holes without any mistakes.

Installs
With the holes exposed in the carpet, I was in the final stretch. I did the final wiring first: Laying out a length of wire for the sub and the right speaker, attaching wire ends and heat-shrinking. To these wires, I attached the wire cups, set the cups in the holes and then screwed them in place. The 6x9 speakers are held on with nuts, so the bolts which protrude from the box needed to be cut free first, but otherwise the wiring was straightforward and the speakers went in without issue. The sub-woofer had barely been out of it's box since I purchased it. It wired up and installed relatively easily, though. I needed to pilot the holes for the bolts through the carpet, and I did that by pushing a roofing nail through from the outside. Once bolted into place, I set the protective grill in place, and the box was done.

The construction could not be complete without installing and test-firing. So, I took the box out to Oliver and set it in place. It fit without difficulty, and the speaker wires easily reached the wire cups on the side. You can see the extra wire on the far side of the box in the picture here. There remains work ahead for wiring up an amp and wires for the sub, so I'll address the extra speaker wire then. In the meantime, I fired up the stereo (local metal station was joyously playing Ronny James Dio), and verified that all 4 speakers were running.

That's it for today. This post contains work effort that spanned a few weeks, completing New Years Day. I intend to paint the bottom of the box with some flex-seal so we can use the box outside, but that will wait a while. In the meantime, I'll be enjoying the sounds, and eventually getting an amplifier installed so I can power the sub.

Thanks, as always, for following along.

Tuesday, December 18, 2018

Even More on that Speaker Box

This speaker box has become quite the project. I swear, if I look back on the number of hours I've spent on this thing, it will rival the hours spent rebuilding the front end of the MGB. Anyway, more progress to update.

Baffling
testing only-angled idea
In my last post about the speaker box, I mentioned adding in some extra support along the edges. I'm sure it was helpful, but when I thought about how much air would be moving around the inside of the box, I got concerned about how the sub-woofer speaker would have air-influence over the 6x9's and vice-versa unless I created some kind of barrier between them. I had initially planned to do that, but this project has lingered on for months now, so I had almost abandoned it. I had some time and some left over materials, so I constructed a couple interior walls to isolate the 3 speakers from each other.

wiring cup
I initially thought about something simple: one wall per side that ran at an angle from the rear wall to the front wall. There's a dark picture to the right that shows what that would have looked like. This would have been easier, but consumed a lot of air space that probably should be available to the sub-woofer. To maximize the air space available to the sub-woofer, I changed to an an angled wall from the front face back parallel to the 6x9 speaker angle until it was clear of the rear of the 6x9 speaker magnet (this was about 3-1/2" long by just over 9-1/2" tall). I connected a wall from that point parallel to the rear/front walls to the side. This left little excess air-space for the 6x9, but the sub needs all the air volume I could bring it in this small box. As it is now, I am at the low-end of the air volume recommended by the manufacturer.

Cutting and Fitting
baffle glue drying
With the walls cut with an old-skool hand saw (I make crap-cuts with power tools), I shifted to test-fitting. The extra supports in the corners required cut-outs in the baffles. You can sort of see the square-ish cut outs in the corners in the picture on the right. The left-side baffle wall fit perfectly though the right side did not. From this, I discovered that some of my early work was not 100% square/perfect. So, some additional trimming was needed on the right side. Still, things looked good so I drilled one hole per baffle to hold the 2 pieces together and glued them.

To support the inner wall baffles, I took a couple small pieces of cut-off left-overs and placed a support along each of the inside of outer walls. I was able to rest the parallel-to-rear-wall baffle against this support to hold it straight as well as for an extra surface for glue.

Shaping
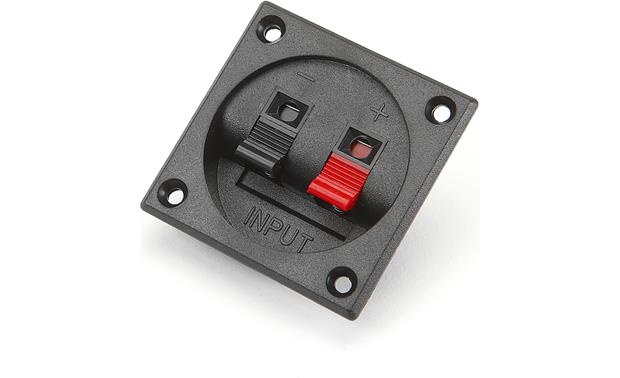
I had planned for 3 wire cups on the right side of the box. I bought these cups from Crutchfield, and used a hole-saw to mount them. The orientation of these cups becomes interesting when we consider the interior baffles I'd just built. I had 2 cups set side-by-side for the left and right 6x9 speakers and one below it for the sub. You can just make out the left-side hole in the picture below. This speaker cup orientation seemed intuitive. Once the baffle was set in place, wiring into the cups will be compromised. So, I had to pull out the Dremel again, and shave down a gentle curve behind 2 of the cups so there would not be any pressure on the wiring once all the various pieces were together.
smoothing the edges

With the baffles shaped, I glued them into the box. Once the glue had dried overnight, I assessed the gaps, and plugged them with wooden kabob skewers... and more glue. Basically, I determined the length of the gap, and cut a thin skewer to length. I then squeezed the skewer with pliers until it was thin enough to fit into the gap. With a thin slotted screwdriver, I pushed the filler material into the seam, and repeated until the gap was completely filled with wood and then slathered it with glue. I then ran a thin bead of glue along every seam to make sure the 5 sides and the baffles were sealed.

At this point, I decided to fix the misaligned outer edges with the Dremel and a hand planer. Ideally, it would have lined up perfectly. If I build another box, I'll take much more care to align just one hole per side for the screw, so the sides fit much better. I did that with the inner baffles, and they aligned far better. Anyway, after a bunch of hours with the Dremel and hand planer, the wall mate-points are smooth enough where I think it will be hard to see how out-of-alignment they are once covered with carpet. That's what I'll do for next time... as well as get some wiring in, and the 6th side of the box attached... and then the edges planed.... yeah, this project got a little out of hand. But it keeps me distracted without pulling a car off the road.

Thanks, as always, for following along.

Tuesday, December 4, 2018

More on that Speaker Box

I've continued to tinker on the box I started over the Summer (see MGB Gets Sound). Today's post covers some of the headway.

Sub Hole
I had about 2 hours of forecasted rain-break on a Saturday that also coincided with a reasonably good game of college football. So, I was torn, but I figured that I could do something on the box on the back patio and sort of keep track of the game through the sliding glass door. Yes, this sounds like a set up that ends with a board sticking out of said glass door, but actually, it all went relatively well. I started with measurements to find the exact center of the rear of the box. Centering on that with a compass, I drew a 9-inch diameter circle to cut. First, I set the panel on the box with the drawing side facing in, so I could check my spacing, and sure enough, that would have been a miss. Because of the bump in the center of the rear frame of the MGB, I have a corresponding bump in the box. To account for that, I need to slide the 9 inch hole towards the top by a half-inch or so. Another quick turn with the pencil, another upside-down check and I'm ready to cut.

way too many pilot holes around the
edge: don't do that
I drilled a pilot hole with a drill bit that was just larger than the saw blade. Then, I made the mistake of thinking that cutting the hole on a bias rather than at 90* was a good idea. Big picture, I may have retained a little more meat of the MDF, but it created a lot more fit challenges. Anyway, I cut the circle and test fit the subwoofer (still in the plastic bag to protect it from the dust). Yeah.. it fit through the top fine, but hung-up on the inner part of the circle because of that bias. To remedy, I attacked the inner lip with various tools: a file, the Dremel, sandpaper.. Eventually, the inner edge widened out and the sub fit. Word to the reader: don't cut on a bias; follow the directions from the sub-woofer manufacturer and trust that when they say the hole needs to be x in diameter, they mean both the top and bottom edges unless otherwise stated. With the sub capable of fitting in the box, I switched back over to the 6x9's.

Re-enforcement
The sub-woofer sites stress re-enforcing the edges of your box because of the force the speaker will exert upon it. I used some of the scrap MDF from the box construction to brace the corners. I've toyed with more bracing in the middle of the box. I may hold off and see how it performs before gluing the rear panel, and sealing my fate.

6x9 Fiddling
I had 2 things I needed to resolve with the 6x9's. First, the box needed threaded studs on the outside so the 6x9 could be attached and replaced from the outside. For this, I found some 1" long bolts that came with some kitchen drawer knobs. These are thin enough to easily fit through the mounting holes on the speakers, but don't protrude too far past the MDF edge to present fitting issues later. Best of all, I have 8 of them. So, I pulled one of the 6x9's from the rear firewall, test fit in the box holes, marking where the mount holes are and set it aside. A few quick runs with the drill, and I was threading the bolts through from the inside. I test mounted the speakers, and they will work great. I will need to be careful about carpeting, though, as the bolts really don't stick out very far. I may need to trim the carpet at the speaker edge rather than wrap through the hole. We'll see.

I then pulled the 6x9's out of the box and started test fitting the box into the trunk of the MGB. Post-assembly, the box is a smidgen taller than space would allow. Enter the Dremel again. I shaved down the front corners to fit under the fuel tank vent lines, and, after a couple hours of fiddling, I was able to get the box flush against the rear firewall. Once I had the box exactly where I liked it (dead center), I reached through with a Sharpie and marked where the 6x9's would need new cut-outs in the rear firewall. Recall that this firewall had been cut up pretty badly by the PO and I slapped together something to make it less crappy. Now, with these new holes, it is PO-level of crappy again. I'll need to do something eventually to make it nicer. Anyway, I cut along the Sharpie lines with my jig-saw. With the speakers back in the box, I set the box into the trunk against the firewall, wired up the speakers with the version 2 wires and tested the system.

We have sounds again. I spent most of a Saturday getting this far. I'll post next time on getting the rest ... or maybe just a little more headway... done. Thanks, as always, for following along-