Tuesday, September 24, 2019

Making Hapy Sounds (part 4-ish)

Well.. it is sort of part 4. In the other 3 parts, I made stereo choices, installed the front speakers and the head unit. The rear speakers were popped into 6x9 boxes and allowed to float around. Today, I harden those wires a little bit.

Why Harden the Rear Speakers First?
That's a great question. The head unit is resting on top of the cardboard that it shipped in. That's the most expensive part of this operation, and it isn't held down at all. Well, I drove to Newberry (La Pine Oregon) and back, as well as a 300 mile round trip from home through Eugene, Florence, Newport and Lincoln City before circling back home again (yes, there are posts on that trip coming). That's over 600 miles all together and the head unit didn't bounce at all. The slap-together wiring of the rear speakers, however, came apart plenty. So, that needs to be first.

Clean Up
I explained that I ran the speaker wires through the same hole in the partition as a bunch of other wire bundles. Well, many of those bundles aren't used anymore. For example, there was a 3-wire cable for the heater fan. I yanked the heater fan circuit to reduce the load up front, to prevent another ignition failure. So, that cable was no longer used. I removed it. To get rid of all of it, I needed to remove the side panel along the outer skin that runs from the driver partition to the fridge/storage cabinet. This opened up a means of burying the speaker wires.

Wire It Up
I took the speaker wires I had flopping around, and routed them behind that side panel. Just past the mid-point of the fridge/storage cabinet, I spliced in a pigtail, and more speaker cable. The pigtail is just like the pigtails I put into Oliver's (the '78 MGB) trunk. I had corresponding pigtails added to short runs of speaker cable that ran into the speaker boxes. I extended speaker cables (for both left and right) behind the rock-n-roll bed to the far passenger side, terminating with another set of pigtails. This created a means of plugging in speakers either at the fridge/storage cabinet or at the slider.

I will create a couple extension cables so we can run speakers out into the camp zone, or at least outside the slider.

While this was a brief post, this took me most of a day to do. Burying wires, and making solid connections isn't exactly fast work. The result, though, is pretty neat. 2 pigtails appear just above the cabinet, the left with a strip of yellow around it; the right with a strip of orange, so I know which channel I am plugging into. Next to the slider, there are now 2 matching pigtails (yellow/orange) and the 12V socket (repaired to work again).

I did not run any speaker wires to support a sub-woofer. I figured that if I get ambitious enough to add that and the amplifier to the mix, it will be a complete effort of it's own.

That's it for today. Thanks as always for following along.

Tuesday, September 17, 2019

Now Water-COOLed

Before I begin, our family lost a brother over the weekend (14 September). Travis was taken from us too soon, but he left doing what he loved most, riding his Harley on a beautiful early autumn afternoon. To meet him was to know him, and to know him was to love him. You will be greatly missed, brother. On to today's post...

The cooling system for Hapy's new engine has been a journey. Looking back on multiple years of efforts to get Hapy to be genuinely water-cooled, today's post covers what may be the last thing I needed to do. I have lots of links referencing pretty much all of the things I've done, but I probably missed a few at the beginning of the project because many of those early posts covered multiple project aspects.

Initial Cooling System
Recall when I started this project, I sourced a radiator off craigslist for $30 (See TDI - Day 2). At the time, I was even offered the air-conditioning condenser, and it had the original fans. I passed on the air-conditioning condenser, which he subsequently sold, and I removed the fans. I added 2 flex-cool fans and wrapped the radiator with an aluminum frame (See bracketing the radiator and rad brackets continue) and put sides on it (See Radiator shrouded) to reduce the amount of air allowed to slip back around from the rad exhaust back into the rad intake. This sort of worked, though I always had my eye on the temperature. Along the way, I removed a bunch of extra wiring from the original harness that was part of the air conditioning circuit, and added a switch to the dash for turning the fans on.

Troubles
Then the leaks started. I spent many hours trying to solve outlet flange leaks (See Reality Strikes, for example). Ultimately, I learned that the plastic parts were designed to fail first, so more expensive parts didn't fail when the engine got too hot and the coolant expanded faster than the expansion tank could handle. Still, replacing that outlet flange and getting the coolant temperature sensor to seat properly are two of the most patience-testing things I've done on this conversion. Having these components by the fuel tank makes the reach and visibility particularly difficult.

Still, with the system seemingly in-tact, the engine temperature would still climb and not come back down easily. As the miles and years passed, the engine would heat up faster and cool down slower. We had a super-long return from 4Peaks in 2017 (See 4Peaks 2017 - Road Report), and had our first vagabonding experience when we were unable to make it to Frog Lake due to an overheat, and big coolant loss (See Almost Frog Lake Part 1 and Part 2). The whole time, Boo was incredibly supportive, and heroically kept my spirits up. My last, most tragic failure was when I added the wrong kind of coolant. That amplified the problems, and ultimately led to the troubled drive to Newberry this Summer (See Newberry 2019 - Getting There).

Resolution Path
I promised Hapy that I would start fixing the cooling system when we were on the side of the US-26 outside Rhododendron, unable to make it to Frog Lake. So, that next Spring, I replaced the old Jetta radiator with a Mishimoto all-aluminum radiator (See Back to the Bus: Rad Swap Part 1 and Part 2). Things were not that much better on the way to 4Peaks in 2018 (See 4Peaks 2018 - Road Report), but with the ignition fire on the way home, it quickly moved to the back burner. I removed the wiring for the heater fan controls when I did the ignition replacement, believing it was causing large load spikes. While that didn't really change the cooling system, its a change worth documenting. By the time the ignition was done, festival season was over. But before I covered Hapy for the winter, I replacing the fans with a real dual-fan shroud (See Cowling the Hapy Radiator). I thought this was the final solve. The drive to 4Peaks seemed fairly good (See 4Peaks 2019 - Road Report), with temperature spiking at 196*, but the drive home was again spent watching the temperature gauge. We peaked at 205*, but the alternate route through the farm country allowed us to keep our speed (and therefore temperatures) down. The drive to Newberry, though, was enough for me to know that I had not solved the problem, and I really needed to fix it right if I was going to truly enjoy driving distances with Hapy.

Last Solve
In my last post, I described the issues with the fuel I bought in Oakridge (See Green Diesel isn't BioDiesel). That bad fuel held my speed so low, I didn't have temperature issues the rest of the way home. I knew they still lurked, so after the fuel system was drained, new filter system installed and new fuel added, I shifted back to my nemesis: the cooling system. I started with a basic drain and water-flush. Then, I removed the thermostat and filled with water, ran the engine, and drained. I did this a couple of times. Then, I went nuclear and did a chemical flush with Thoroflush. The Prestone radiator flush is weak tea compared to this stuff.

The directions are hard to find on the internet, but it's fairly clear:
Remove 1 gallon of coolant from your system
Mix one gallon of water with the right amount of Thoroflush mix for your application
Add mixture to cooling system
Get engine up to temperature (to open thermostat) and run for 10-15 minutes. DO NOT RUN LONGER THAN 15 MINUTES
Drain and flush with water until drainage is clear (no pink from chemicals)

Seems fairly straightforward. But, I pulled my thermostat, so how long do I need to run it? I was unable to find any direction for this case. I concluded that since my engine was fairly warm (upper 160's), if I added the mixture and ran it for less than 15 minutes, I would do no harm, but might not get maximum benefits. So, that's what I did. I used the water from the 2nd rinse-flush and added the mixture to that, ran the engine for just shy of 15 minutes, drained, flushed, and flushed again. After flushing everything out, I re-installed the thermostat with a new housing and O-ring. I determined that the old housing was slightly warped (possibly from the flushing efforts), and found that removing the hose from the thermostat housing makes re-install 100x easier. I filled with G40 and distilled water, clearing the bleeders so there were no air pockets trapped in the system.

Testing and Proving
gmap image of 99W steep
I wanted to demonstrate that 
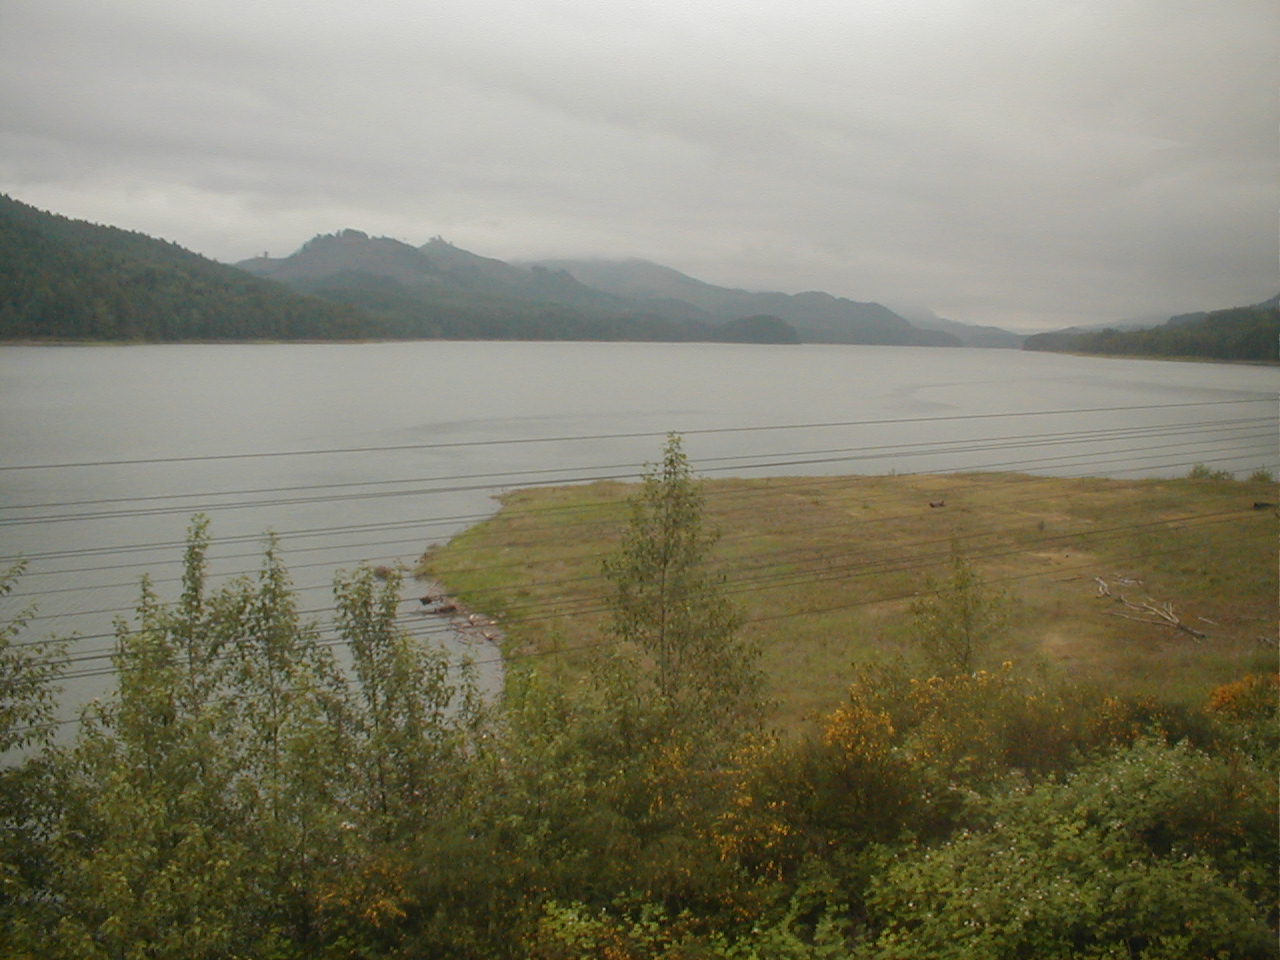
this was the fix. So, I drove around town like a total dick: jack-rabbit starts, rapid accelerations... basically zooming around West Beaverton pushing the bus as hard as I could for a good 15 or 20 minutes. It wasn't until I pulled over onto our quiet street that the temperature raised above 185*F (to 188*F), and even then it was only for a second before it dropped back down to 185*F. The real test came later in the week when we drove to Honeyman State Park, up to Newport, through Lincoln City and home again. I'll post on that trip later, but I'll summarize the coolant test with a simple number: 194. 194*F was the highest the temperature ever got the entire 300+ mile road trip, including climbing the coast range and driving in slow, heavy traffic. At no time did I need to pull over because of the temperature. I did not drive especially gingerly either.

There is a hill climb on 99W between Newberg and Sherwood. Every time we take the back road alternate route, we drive up this hill as our last big pull. Accordingly, it is a consistent gauge for how Hapy is doing. When I drove this hill after Newberry, I barely kept the temperature under 203*F, driving with the flashers on in 2nd gear (25mph* tops). This time, Hapy's temp peaked at 194*F running at the speed of traffic (55mph*) in 4th. In both cases, this was at the end of a multi-hour daytime summer-heat drive. This feels like strong evidence the cooling issues have been solved.

That's it for today's saga. Sorry there weren't any real pictures, there really wasn't much to take a picture of, except, maybe, a picture of the cooling system map. That reminds me, I never did document system-by-system how the conversion was done. Hmm.. maybe I should dust off that documentation effort over the winter. Anyway, thanks, as always, for following along.

Tuesday, September 10, 2019

Green Diesel isn't BioDiesel

In my last post, about getting home from the Newberry Event (See Newberry 2019 - Getting Home), I described my stop for fuel and that Hapy started acting funny within 20 minutes of that fill up. Today's post covers my investigation into the acting funny. I now had 4 codes getting thrown by the computer. I was getting just one code before (P0121), so with the extra codes, I feared I had bigger problems.
Before I start, today is C's 18th birthday.... C, it has been an honor being part of your life, and I greatly look forward to our years together as our relationship shifts, grows and deepens; you truly are an amazing person.

For posterity, the codes were:
p0121 - accelerator pedal position sensor getting funny readings. Causing a version of limp mode where we lock in at 1200 rpms
p1562 - injector pump quantity adjuster. Could be caused by the bad fuel, could be my timing is suddenly off
p1550 - discharge pressure is off. This is usually caused by a leak in the charged air system or in the vacuum lines.
p1403 - EGR malfunction. My vacuum for the EGR is closed off, since I removed the EGR for a straight pipe.
Remember, this is a '72 bus so emission control devices are not required. Before my fellow tree-huggers get all spun up, recognize that I run B20 so mathematically my emissions without the EGR are cleaner now than this bus was with the original gasoline engine. So... back off! Still, could be a loose vacuum hose.

Tank Blockage
I figured I would approach the fuel system from front to back, meaning from the supply hose through to the injection pump. So, my first stop was the supply line coming out of the tank. Remember, back in 2011 on my drive home from Further, I was stopped by a blockage in my fuel tank (See Further - the Return), so I'm fairly familiar with this experience.. First, I put vice grips on the fuel lines to prevent fuel from going everywhere. Then, I disconnected the line from the clear filter and pointed the line at a fuel can. I removed the vice-grip from that line and fuel flowed easily out of the tank into the can. Gravity-feed tank checks out.

Check the Filters
While I was re-connecting things, I took a look at the clear filter. It was still clear-ish. Well, there weren't any cloggy-bits in it. So, with the fuel lines reconnected, I removed the feed line from the injection pump, leading from the "original" fuel filter. With the MityVac, I checked the fuel flow. Again, the fuel came out with very little vacuum applied. So, we have fuel making it to the injector pump easily. Hmm... So if the fuel filters are clear, and everything was running great up until it suddenly wasn't, I had to conclude that the fuel I got in Oakridge was the problem.

Drain the Tank
I raised the rear end of the bus enough to fit a 5 gallon bucket in front of the right rear axle (and under the fuel lines). I disconnected the supply fuel line at the "original" fuel filter, and routed the fuel into the bucket. While the bucket slowly filled, I removed the "original" fuel filter and drained it into the bucket as well. Once full, I clamped off the line, and swapped a second bucket underneath. I filled that bucket as the tank ran dry. I moved the buckets into the sun, and you could see the first bucket had cloudy green fuel in it. The second bucket was much more clear and less green. I interpreted this as the bad fuel settled to the bottom of the tank, leaving the older-to-me fuel floating on top.

So, what's this green fuel? I think it took this fuel those 20 minutes to settle to the bottom of the tank and then feed into the injection pump. I ran on that fuel for the remaining 150+/- miles home. By why green? Well, an underground tank can get water in it, either through condensation or seepage. If this happens for a long enough period of time, algae, fungus or other microbes can form. This usually happens at fuel stations with little traffic. I had ruled this out initially because this was a busy fueling station and there was someone getting diesel right next to me. Clearly, that doesn't matter. Whether this fuel simply had lots of water in it, causing the cloudy, or also had other matter in it, causing the color change, it had to go. The 2 buckets have been securely lid'd and will be taken to the toxic's section at the waste transfer station. I'm sorry I don't have a picture of the green fuel; I put the tamper-proof lids on before I thought to take a picture.

Current ongoing cost: $28 for the full-up. The toxic dump will be another $27. Replacing the fuel will be another $30.

New Filtering
Since the "original" fuel filter is quite literally the original fuel filter that delivered with this engine over 10 years ago, this filter was long overdue for replacement. Yeah, bad owner. I had a pre-filter on there to help it last longer, but still... So, I looked around for a replacement, and noticed that all of the replacements needed one of those plastic thermotatic "tees". These things will re-route unused fuel from the injector pump back into the tank until the fuel reached 85* and then it sends it back to the fuel tank. My "original" always routed it back into the filter. This is to help the engine warm up in cold weather, and since I don't drive Hapy in cold weather, I decided I could look at the thermostatic "tee" style. For the filter plus the tee, it was around $70US. Or, I could upgrade the whole thing.

Upgrade? The standard filter filters down to 10-15 microns. That's great for most applications. If you drive in lots of dust (read: central Oregon where 4Peaks is), that may not keep everything out. For bulldozers and large construction diesels, they have filters that go down to 2 microns. Something that fine would protect the injectors from getting destroyed by particles in the fuel. Particles of, oh I don't know... algae or water or fungus? Anyway, I looked at a combination filter housing and filter, and I was able to upgrade for $75US, so $5US more. And, it's all made in the US. Of course, it's mustard yellow has this big CAT symbol on it, but it's hidden so I don't really care. For those shopping, the extra $5 was for the little barb/nipples that the hose fits onto. They are not included in the $70 kit.

The housing has dual source options, and a feed/return configuration. I went with the most simple: one feed, no return, and routed the injection pump overflow straight back to the tank. If the day comes that we want to drive Hapy in cold enough conditions where having the fuel get warmed up is necessary, I'll deal with that then. We will need to solve for his got-no-cabin-heat challenge before that.

Resolved
While I was in the engine bay, I noticed that the straight pipe which replaced the EGR had an issue. The pipe came with a nipple for attaching a gauge, and the little rubber stopper had split. This was letting out charged air, a potential source of the p1550. I replaced that stopper. After a few hundred miles of driving since, the code has not returned.

I expect the p1403 may reappear. I thought one of the vacuum lines around the "N18" vacuum valve / box came loose, but I didn't notice anything around the vacuum valves. I removed and re-connected the vacuum lines just to be safe. The p1403 code has not returned.

Now, with everything hooked back up, I cleared the codes and started up the engine. After some rough running, it settled down within a couple of minutes and sat idling at 900rpm. After a few minutes I got the check engine flash, but there is only one code (the one I had before): p0121 - the persistent accelerator pedal issue. I think it is a wiring issue where one of my splices is becoming inconsistent. I'll deal with that another time. The p1562 code has not returned.

So, that's it for the fuel system / bad fuel issue. Total cost: $165, but one of those fills should be considered part of just driving, so it's really $135. Since bad diesel can destroy injectors and injector pumps, the $135 is nothing compared to what it could have been. For example, a single injector could cost that much and a new pump could be up to 10 times that much. Of course, if the only damage was the injector nozzles, I could use this as an excuse to upgrade to bigger tips (like these) for around $180US. I'll be watching the engine behavior, regardless. There still could be an issue lurking.

Thanks again for following along-

Tuesday, September 3, 2019

Newberry 2019 - Getting Home

I know. A reasonable response to having 2 separate posts about driving to a single festival means either I have become too wordy, or I'm running out of things to write about or something happened. I don't think it's the second one. Apologies for no personal pictures from the drive home. You'll see why. Before I begin, to my US readers, Hapy belated Labor Day (yesterday). Now begins the "most productive" block of weeks of the year, from Labor Day to ThxGiving. I hope one day our compensation again reflects that production so more of us can afford to spend time doing things like drive to festivals.

Getting Home
Odell Lake from gmap
Every time we leave 4Peaks (except once) we go through Sisters via US-20. And, every time, we have temperature challenges until we hit the pass. This time, knowing I'm barely getting by temperature-wise, I took some advice from Tony and drove south on US-97 and used a cut over to OR-58 out of Crescent. OR-58 is a much easier over-the-pass route heading west. The longest inclines were actually on the cut-over from US-97 to OR-58 past a rock quarry. Once on OR-58, there are still some up's, but they are brief. I welcomed the new views as well. Shortly after getting on OR-58, we passed a large lake (Odell Lake) with dark, almost brown water. It was super big, but I didn't see anyone playing on it. Maybe it's more for fishing, even though the state site says louder watersports (water-skiing, eg) are approved. There were numerous turn-offs for various campgrounds (Princess Creek, and Trapper Creek being right on the water) so it was a fairly popular place to camp, at least. Still thinking about the campgrounds, we reached the summit of "Willamette Pass" and passed the ski resort by the same name. Until this point, I was pulling over every 20 minutes or so to let Hapy cool down from his higher temperatures. At no point did Hapy's temperature get above 202*F, but I usually pulled over as he was hitting 198*F and let him cool down to 190 before resuming. Willamette Pass had a bunch of stuff going on. There was a go-kart track rolling and folks with mountain bikes and hiking gear filling the parking lot. I wondered if there was a larger crowd for summer activities than for skiing in the winter. After the peak, we started the long downhill, picking up the Salt Creek on our left until we reached Oakridge. Similar to the drive out, once we started going downhill, Hapy didn't have temperature issues.

Speed Limiter Engaged
wiki image of Lookout Point Lake
I stopped for diesel at the ExxonMobil station on the western edge of Oakridge, filled my water bottle from the 5-gallon barrel-cooler on the floor in front of the passenger seat, and nosed back onto OR-58. By the time I reached Lookout Point Lake, I started noticing what felt like a speed limiter. We could get up and go from a dead stop okay, but 4th gear was becoming gut-less. The traffic around the lake was kind of heavy so the speed-limitation wasn't much of an issue yet. Lookout Point looked fun; there were boats, swimmers, and ski-doos, everywhere. Tons of teens just getting their summer on, it looked like a great place for Eugene-residents to go when they want some lake fun, and the weather was perfect for it. On we pressed, or tried to press, with Hapy's accelerator becoming less and less responsive as we went. Interestingly, though, since I couldn't go very fast, the high temperature issues subsided as well. I no longer had to keep one eye on the temperature gauge. Which was good because soon, we were merging onto I-5 North. This was borderline scary. Consider, we are just trying to maintain 45mph* as we merge onto an interstate where the average motorist is trying to achieve 75mph. Flashers on, I held my own through Eugene but by Coburg I just couldn't take it any more. Between the cross wind buffeting, and the speed limiter, I needed a rest, and the rest area just north of Coburg was perfectly timed.

Avoid Freeways
Peoria Rd from gmap
I pulled out the Gmap and requested a route home, to see how much longer I was going to have to do this. 2 hours, and it assumes you can drive the 65mph speed limit. So, I flipped the switch to "avoid highways". As it was calculating, the voice-over said there was an accident on I-5 causing a 27 minute delay. I figured that was kismet, but I still needed to get on the freeway long enough to get off. As scary as the OR-58 merge was, getting back on from the rest area was even worse. I could not get up past 35 mph* so, with flashers on, I hobbled to the next exit. No sooner were we off the freeway than Hapy started acting better. It was short-lived, but for a minute, he seemed almost grateful. We made our way to Peoria Road and then through the middle of hay farms, along the Willamette River. It was a little surreal; on one side of the road are large hay farms with big circular bales sitting in the middle of their sandy-colored fields and on the other side of the road are houses surrounded by trees backed up to the river, docks jutting out into the water. Peoria Road took me to OR-34 and then to 99W which ended up being my main road home from there. With the speed limiter in full effect, I followed a pattern similar to my drive east: when the passing lanes are too far between, I used the shoulder to allow the traffic pressure through. With the accident on I-5, there were lots of "i'm in a big ol' hurry" types trying to 'make up time' by taking 99W after getting bottled up on I-5. I guess they had an important meeting.... late afternoon on a Sunday?... Of course, some of 99W is multi-lane, so those who don't understand that the journey is part of the trip had a lane to speed past well above the posted limit. I did get a courtesy wave during one of my use-the-shoulder pressure releases, though. More proof that there be nice folks in rural Oregon.

Roy Rogers
Roy Rogers from gmap
I followed our usual cut-through from Sherwood down Roy Rogers and was surprised to see just how much progress had been made on the massive housing development going on there. It had been almost 2 months since we did this stretch on the way home from JRAD (See JRAD Eugene - Road Report), and I swear there are multiple blocks of occupied housing where they had just foundations the last time through. I know progress can't really be stopped, but I remember that road as the road where the boys and I declared success as we took Hapy on his first journey with his new engine (See One Small Step for Van). Now, that country road is becoming a major road between Beaverton and Sherwood and instead of hay fields and grazing horses, the land on either side are filling with multi-level condos, townhouses and McMansions. It's pretty hard to watch.

Home At Last
3! 3 Round Trips! Ah Ah Ah!
I arrived home just before 7, in time to see Boo's mom and best friend... who were the last to leave the family obligation I mentioned in the "Getting There" post. Tired and hot, both Hapy and I were glad to be home. My next order of business is to solve his heat problem... and the speed limiter problem... before our next trip in 2 weeks. Regardless of how much we may have limped home, this trip was a win: we made it home without the help of a flatbed. That makes 3 complete round trip journeys, each over 3 hours one-way this season for a total of over 1000 miles... so far.

Thanks, as always, for following along. I'll post as I solve things. I'll be starting with a cooling system flush or changing the fuel filters. Whichever one I feel inspired to do first when I get out to the bus.