Showing posts with label C. Show all posts

Tuesday, April 4, 2023

We're Out

Similar to a prior post (We're In), this post serves as another major milestone, marking when we got the last of our things out of what we have been calling "existing house" and leaving it for the last time. I posted about moving the garage to the ToolShed (see Shop to ToolShed) and about moving the vehicles (See 4-Wheeled Friends...), so I'll skip that here. Those significant steps completed while the things below were happening. The first 2 pictures dramatically depict the significance of what has been resolved with the current state at the top and those same 2 rooms after we had them 90% empty only to receive a 1-bedroom apartment's worth of belongings.  

Moving Flotsam
living and dining ready
The end of a move can be incredibly elusive. You move the big things, and the boxed things and think you're practically done. Then, there are all the things you had not boxed for various reasons. That stuff ends up taking 80% of the time. At least, that's the way it's always been for me, but that could be because I don't buy, like, 100 boxes and box everything up ahead of time. We box and move the critical, or the rarely used, leaving everything else to be solved in a subsequent pass. In our case, our level of flotsam was increased by the influx of all of my parents' stuff and my siblings taking so little of it (no judging, of course. Is what is). Regardless of how it appears, it takes forever to get it all moved. Of course "moved" does not mean "relocated" in that we have stacks of things that need resolution in NewOldHouse. It doesn't matter. It is no longer at the other (once called existing) house so we are taking the win.

Clutter Peak 
Overall, we donated at least 5 pickup truck loads to GoodWill. 2 truck loads went to family friends and our sectional couch was taken by niece J and significant other C down to LeisureLand in the coast range west of Eugene. We recycled a considerable amount of paper, plastic and glass, leveraging containers at both houses and still occasionally having piles next to the bins on garbage / recycling day. Another 2 or 3 pickup truck loads of larger items were moved to the back of NewOldHouse to eventually route to metal recycling or the waste processing center.

NewOld Attic
One thing this new place has that our old house didn't is a real attic. The old house had small cubby-style attic crawl accesses where small things like banker-boxes could be stored, but they were spread around the upstairs, preventing central organized storage. NewOldHouse has an attic that runs the width of the house. It is not very tall (I have smacked my head multiple times), nor fully floored, however. Still, we can store things up there. In an earlier post, I mentioned that all of the sporting goods, like camping gear and ski/snow stuff went up into the attic. In truth, almost everything which used to line the wall next to Oliver ended up in the attic as well as some of the things from the ShedRoom which hadn't found another home. Even with all that has been moved up there, we have considerable space remaining. We don't intend to fill it, of course, but better to have the space and not use it than the alternative.

Big Pile of Shame
Pile of Shame
In the end, there seems to always be a big pile of stuff that is moved near the end which doesn't have a clear destination. Or, lack of time forces an additional level of chaos leading to the pile. In all of my moves, one or both have happened, and I think in each case the pile has had different stuff but the Pile of Shame has appeared in the same place every time: the garage. "But wait," you say. "Isn't NewOldHouse garage already full of new-to-you kitchen cabinets?" Yes, it is. So, our pile of shame is on top of those cabinets in one of the least attractive, least manageable piles of any of my moves. It includes things like the white metal rack which used to hold laundry supplies, some building materials, some cleansers, yard chemicals, a traffic cone? Yeah, the picture really tells the story, complete with a shelving unit all catawampus. Not my best work.

If this move were like my prior ones, this pile would be among the last things solved for. Since it is the most significant eye-sore that we get to walk past every day, this move is different. In truth, between the time I started writing this post, and it's completion, the mess has been mostly resolved. It needed to be early in the organizing process because it was preventing the kitchen cabinets from being installed, and we cannot live with the camping-kitchen indefinitely. I felt that we could not in-earnest return to the kitchen work until this was solved. I organized some of the pile of shame up into garage shelving, sorting the rest into logical places (garden chemicals to the garden shed, eg).

Repair, Clean and Paint
closet repaired
Once the last of our things were moved, the house had to be readied for whoever lives there next. While I completed the evacuation of our stuff, Boo focused on painting, starting with the first floor baseboards. Then, she re-painted all 3 bathrooms, the master bedroom, another bedroom and the front door. I cut-in one of the rooms and did the super-high work in the entry, but she did everything else. Meanwhile, our friends Lana and John completed the closet repairs in the upstairs hallway closet, started and abandoned by the mess-making handy-person I mentioned in the garage lament in Shop to ToolShed. For background, Boo and I had done the demo to install a stackable washer/drier in the hallway prior to the NewOldHouse saga starting. Walls were gone so we needed to enclose things again. With the painting completed, the closet complete and our stuff out, we set to cleaning the place.

We figured that we could save some house-cleaner money if we did some of the more time-consuming things. This list started with dusting the walls, mopping the hardwood and cleaning windows. Before we knew it, Boo had cleaned the bathrooms (down to disassembly/re-assembly of the shower doors), the kitchen (cupboards, fridge and oven too) and the hot tub. We contracted out shampooing the carpets, but Boo did an incredibly thorough job. Last, there is considerable concrete around that house, from the long driveway (flag lot) to the back patio, the opportunity for moss to grow in western Oregon is significant. So, John, Lana and I power-washed the patio and the worst of the driveway.

Reflections
ShedRoom ready
With the house in the best possible shape we could have made it, we handed the keys over to a rental management company. This has been a very long slog. We were not ready nor really thinking about moving when NewOldHouse came to us. I imagine most folks who consider a move do some elimination of things they are not moving prior to the start of the actual move. We had the inverse happen: a 1 bedroom apartment's worth of stuff arrived maybe a month after we started that "elimination of things" and months after the move was decided.

I don't think the emotional impact of leaving a place we called home for 6 years has really hit us yet. When we started to move in, we had 4 sons and a niece moving with us but our family shape seemed to change every 6 months. By the time our things moved, son K had decided to live with his girlfriend instead, so we were already in flux. By the end of that first Summer, our niece had returned to Montana. Shortly after that, C decided to live with his mom full-time and did so for 2-1/2 years before returning at the end of the 2018 school year and then stayed with us until Fall 2022 when he retuned to his mom's to attend Portland State. In the middle of that, T continued to bounce between homes, staying with us increasingly. Then, he went to University of Nevada, Reno for a year and returned to stay with us full-time for a year before heading to Eugene and then LA. Barely missing an overlap with C, K2 shifted to living with his father full-time at the end of the Summer of 2019. That's a lot of moving pieces, and the amount of overlap between them was very light. After that first summer, we rarely had more than 2 kids with us at any time.

master complete
Boo and I had moved into that house to create a stable home for our 4 boys where they could really become brothers. We didn't achieve that goal; there were too many changes of who was there for large periods, and even at the week-to-week level, we lacked fixed periods together as all of them would do short periods at their other parent's house. Boo's ex-husband was very supportive of our create-brotherhood effort as he also recognized the gift of 2 brothers to his sons. He was quite flexible to accommodate days/nights/weekends/holidays to allow for more overlapping time with all 4 boys. Unfortunately, my ex-wife only saw our brother-building effort as some kind of a threat to her. She had and has an all-too-common misbelief that love, joy, happiness and contentment are all constrained resources to be horded for one's self, and thwarted for others. So, she actively undermined our efforts both in words and in actions. She would purposefully schedule things that would force the kids apart, and was completely unwilling to shift things unless we sacrificed additional days/nights/weekends/holidays for the favor. It is unfortunate she was unable to rise above the petty for the benefit of our children, but that's just who she was. Perhaps she has since grown.

One might think that leaving a place where our boys lived their last years together would be difficult. Honestly, we are leaving a constant reminder that we failed to create that nurturing space for them, but not from a lack of trying. Today, their relationships span from strained to non-existent. So, we have a sadness, but not for what was, rather for what we could not manifest.

As winter tries to turn into spring (we had snow flurries on the morning of 3-April), Boo and I both remain positive that the NewOldHouse is and will be a great place for the 2 of us. Going forward, our attention will be split between (a) getting the random stacks resolved and (b) the demo and construction of the kitchen. Of course, I have some cars which need attention as well, and I expect I will get some time very soon.

Thanks, as always, for following along. This move has been an incredible, and unexpected, journey. I hope to be returning to more typical activities (and blog topics) very soon-

Tuesday, November 3, 2020

Bondo Sand Repeat

Back months ago, I said something like "you're never really ready for paint", and that's because we generally get in our own way. Today's meandering post is about how I am refusing to accept the prep and start shooting primer. Of course, the temperatures running below the recommended by the paint manufacturer isn't helping.

For those of you in the US, today is Election Day. While so many are focused on the Presidential race, there are many races and measures on the ballot that could impact your life more directly. I hope you took the time to vote, and are here reading this as an escape from election coverage. I know I look at my cars as an opportunity for respite, away from the challenges of every day life (or political bs). This blog is absolutely a part of that, and I'll leave it at that.

Bondo Zed
I had a whole post not too long ago about how I thought I was done with the body work on Zed only to do some more. Well, since then, I just can't let it go. I keep finding little things, and I can't let them go. So, I whip up another batch, apply, sand and recheck. I have lost track of how many cycles I have done, but I would like to think that I'm learning along the way. Since I don't know how well the hi-build primer is going to fix things, I may be overdoing things. Regardless, one of my motivators is my color choice for the finished product.

Color Thinking
silver Datsun 280ZX from wikipedia
I spent a few hours looking at pictures of 280ZX's, trying to land on a color. I entered the search with something in mind, but I wanted to see what these cars looked like in a finished state. I also recognized that the darker the paint color, and the higher the gloss, the more imperfections in the paint prep are visible. So, if you go with a dark dark black with a super high gloss so you could, potentially, see a clear reflection from feet away. The prep work needs to be perfect for a color and finish like that. At the other end of that spectrum, if you paint a low-sheen white or off-white, the little misses are not as obvious. I have found a dirty white car looks cleaner than a dirty black car too, but I digress. So, if your vehicle looks good in white or cream or light yellow and it's your first paint job (or you don't have a lot of time), the minor things may not be nearly as visible if you go with one of those colors. So, what do I mean by "minor things"?

Minor Misses
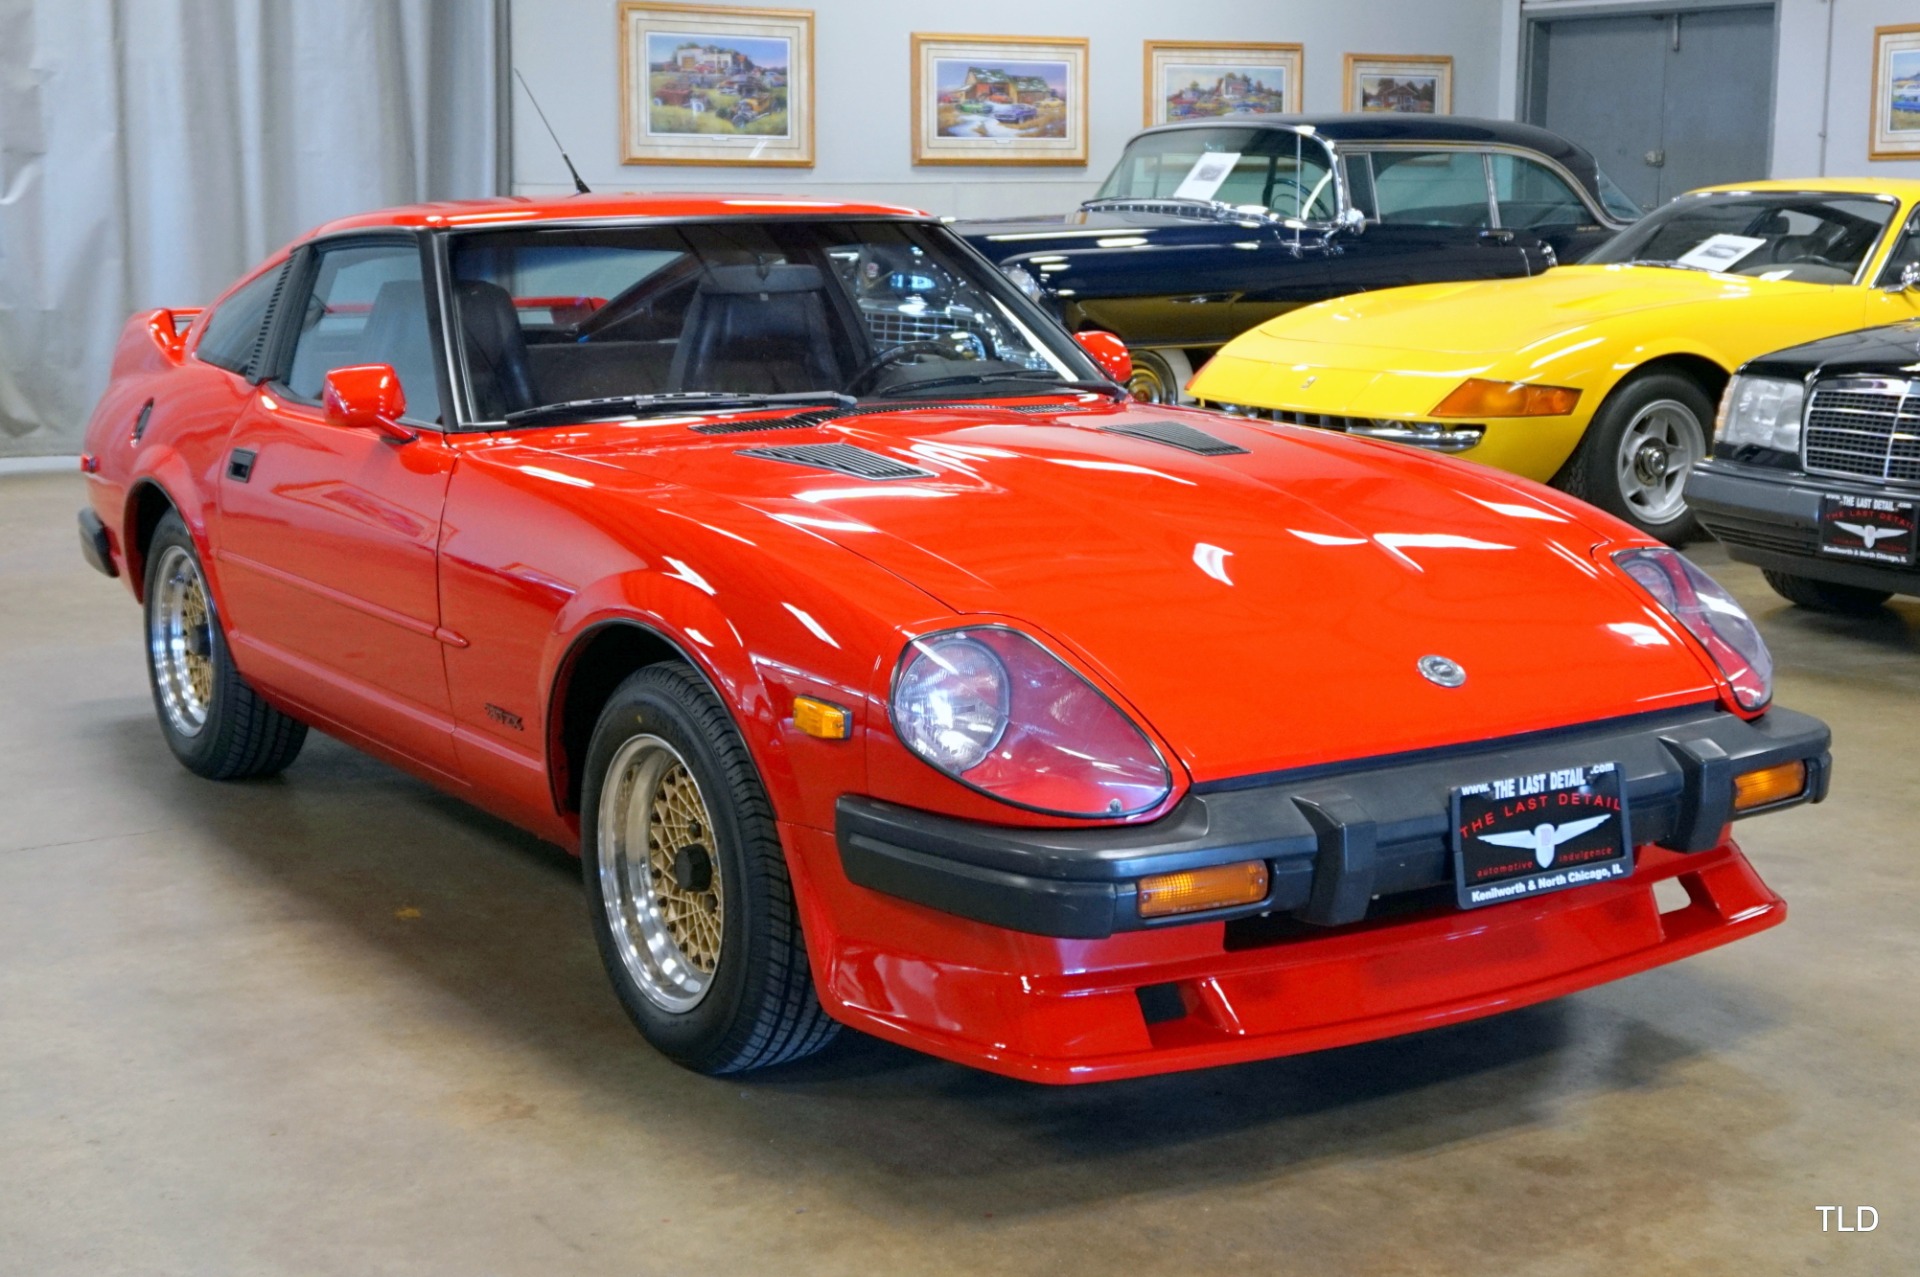
red Datsun 280ZX
all cars look good in red
The kinds of things I am finding during these last rounds with the Zed are varied. One example is larger, but very shallow indentations in an otherwise straight panel. For example, on the hood, there are multiple little sags in the metal that look almost like they appeared because a child sat on the hood and it depressed a little bit. If the hood was painted flat black, would it show? Probably not too much, but I have done my best to minimize those shallow sags. I have also found very small, but deep chips in the steel. They almost look like someone took a jeweler's screwdriver and stabbed the panel. Multiple times. These could have been filled by the hi-build 2k primer, but I fixed them with bondo instead just to be sure.

Ultimately, panel by panel, I would feel like the panel was done, so I would wipe it down with a towel. Then, I would go over it lightly with 400 grit to get the metal and the patches all the same degree of smooth, at the level pre-described by the paint manufacturer. Last, I would hold it up to the light at various angles, slide my bare hands over the entire panel, both quickly and super slow.. seeking something that felt wrong. Piece by piece I would accept a panel and set it aside. First, it was the 2 doors, then a fender, then the hood and finally that last fender. Ironically, the first area that I accepted was the main shell (rear quarters and tin top).

Zed Color
dark gray color sample
Eastwood intermix gray
All this time, I'm thinking about what color I want to shoot Zed. When C was doing the work, he was thinking flat-black. While I agree that some cars, possibly even a 280ZX, look great in flat black. I'm not sure I want to go that way for the entire car. Like I indicated above, I looked at lots of pictures, and, while there are lots of colors of 280ZX's out there, only a small handful of colors really look good. Of course, this is totally my opinion, and the shortlist is basically the color list that pretty much every car looks good in: Red, Dark Blue, Silver, Dark Gray and Black. Zed was silver when we got him, Flash is silver and KLack is silver, so pretty much silver is out. I intend to paint the lower 2/3 of Hapy a dark blue so that's out. High gloss black would show too many imperfections and it is well documented (though I can't find a link) that red cars are pulled over most often, so that leaves Dark Gray. This is sort of a compromise between Black and Silver, both of which look really good on a 280ZX. 

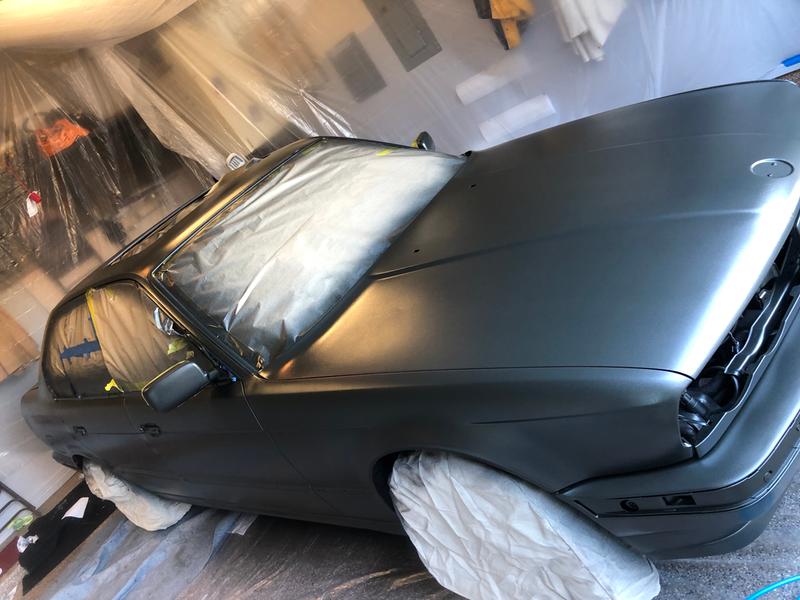
metallic gray color sample
Eastwood 9mm Gray
So, I take this idea to my resident style expert (Boo) who suggested that maybe a metallic flake would look better. We are looking at Eastwood's 9mm Gunmetal Gray Metallic -or- their GearHead Gray Intermix. We are going to need 2 gallons anyway, since I will be shooting inside the hood, some interior spots that don't get covered with plastic, etc. So, the cost ends up being about the same. Based on the photos, I tend to agree with her. The metallic flake looks like it creates more depth, and may be a little darker. What is hard to tell is which one will be more forgiving of my prep work. The picture on the right here is of a BMW 5-series shot with the Eastwood 9mm Gray. The owner had not yet color sanded nor clear-coated it, so it is a very honest image of what it looks like fresh from the gun. It looks a lot like the graphite metallic gray color I have seen on a 2019 or 2020 Mercedes.

I guess that's it for today. The primer shipping fiasco has finally come to a conclusion, with it's arrival during the cold snap. We are not expecting weather to be accommodating to spraying paint for much longer. So, while I may be ready for shooting primer, I may not actually have an opportunity to shoot it unless I figure out how to put sides and a non-flame heat source inside the car ports. Before then, I still have to metal etch the bare steel, wipe the whole thing down with degreaser and mineral sprits and, of course, complete the masking. So, there is still plenty to do before I'm ready to actually put primer in a gun and start shooting. Honestly, it could be Spring before priming actually happens.

Thanks, as always, for following along-

Tuesday, September 29, 2020

Bondo Zed

Today, we return to Zed, the 1979 Datsun 280ZX. Earlier, I completed the paint removal that C started. With the smoke finally gone, and the rain storm that followed passed as well, I could start with the body filler so we can get this car painted. I admit that the 2 weeks of smoke gave me time to consider whether I wanted to have a body shop do this or not. I decided that I wanted to learn, and even if I did it poorly, I would learn. I could always farm it out later.

Seek and Mark
The process of finding imperfections to resolve with body filler (Bondo, bog, putty) reminded me of my old house painting days. With a light in-hand, shining on the subject, look for dings. When painting a house, you do this with some spackle in-hand, and just fix the issue right there. Or, if this is after priming, you do it with putty and, again, fix it right there. In both cases, you fix as you go. With a material like body filler, though, that doesn't work. Bondo is pre-mixed with a hardener so while you are out looking for the next ding, it is drying out. So, instead, you walk the car with a pen or piece of chalk. As you find spots, you mark them, either drawing a circle around it or otherwise drawing on it to attract your attention as you circle with the steadily-drying putty.

Hammer Thoughts
Zed mid-filler
By now, most of the worst spots have been hammered out, leaving some hammer marks or imperfections that you just couldn't get to, or couldn't get perfect. Between this crappy economy and buying T's A4, my resources are gone, so I did not buy a set of body hammers. At some point, if I find that I am enjoying body work, I will get a set of these Covell hammers, but $300US is a bit much for a one-time set of hammers. Big thanks to the HotRod Hippie (check his youtube channel here) for the hammer reviews to help me find a set that is good enough for quality work (not HF hammers) but won't break the bank like SnapOn. 

So, after many weeks of using standard tools, like a framing hammer, a rubber mallet and assorted screwdrivers, a pry bar, etc, I have the fenders and doors as close to straight as I can get them. Most important, the remaining dings are slight, like less than 1/8" off-straight/flat. These areas were easy to find. Even while I was marking spots, I decided to try some more tuning on the passenger door handle area that still looked a little too deep for filler.

Mix a Batch
No, not in the Letterkenny way. I mean make some body-filler. The instructions are on the can, but after messing with the stuff for a few days, I concluded that less hardener is better. This gave me more time to work with the material before it started to set up. For a work area, I grabbed a small steel table that we inherited from the Eugene house. Atop that table, I set a 12" x 20" piece of glass that we also found there. I used the glass sheet as my body filler mix-and-apply-from surface. This saved me the $8 for a steel sheet at Harbor Freight, but it also comes clean easier: Just scrape the surface with a razor blade after the material turns to rubber, and it's ready for another go. Last bit of advice: no matter how you may feel about wearing the blue gloves when you work on your car, I strongly suggest wearing them for mixing and applying body filler. Getting it off your hands afterwards took me 4 rounds with the GoJo. The next round with the filler, I wore gloves. No muss, no fuss.

Apply
more Zed mid-filler
Before I chose tools, I hit the interweb for opinions on the various applicators. There are basically 2 kinds: plastic and metal, and there is, of course, a religion about these. I got the plastic ones because they were cheaper. These don't have a handle, which means your fingers are in the stew, but that also means you are that much closer to the work, allowing you to bend the applicator to contour. I'm sure the steel applicator folks have a solution for this as well. Your car, your choice.

Once I started applying, I went the route of too-little-is-better-than-too-much. I did not want to spend all day sanding a bunch of extra filler. I got my wish, but I failed to recognize just how much the filler shrinks when it dries. This oversight drove me to apply-sand-reapply 4 rounds before I had all of the spots filled well. Of course, many of the small spots were completed in one shot; I had to return to areas which had multiple dings or an inward sag that needed to get built up. Again, none of the areas needed more than 1/8" of material thick, but some areas, like on the fenders, had a lot of little dings that took some effort. Mostly, this was a learn-as-I-go thing. I think I tried to spread the material too thin, or far beyond the edge of where the damage was. As a result, I needed to re-apply because I simply went too thin.. on the same area... multiple times. Learning is fun, but my arms we so sore from sanding all day.

Sand
Yeah, the sanding is the effort part. Most folks recommend using 80-grit sandpaper. I had a limited amount of that, so I used 60-grit. This accelerated the initial cut-down, and by the time the filler area was approaching flat, it had worn down to less than 80-grit. It was probably more like 100 by then. I used a full-size (8") sanding block the entire time. Keep the block even with the contour of the body panel you are working on. So, for example, the fender on Zed is flat running front to back, so I held the sanding block parallel to the ground. Then, sand in a diagonal pattern, mixing it up so you're sanding in an "X" shape. I did a little sanding in a circular motion, as well as top-to-bottom, but the best, flattest, smoothest results came when I did it diagonally. Also, try to keep up to half the sander on the body panel if you are not sure how it contours. This held my sander from over-sanding, once I figured this out. My over-sanding caused some extra batch-work too. More cost of learning.

Wash Rinse Repeat
As you sand, you will eventually arrive at a flat, smooth area adjacent to the undamaged body panel. Congrats. You may find, however, some spots that the sander missed, but was sanded all around it. That's a low-spot that needs more filler, and it probably happened because the filler shrank on you. Or you simply under-applied. No worries; just mix another small batch and fill it in. I suggest you learn from my mistake, and fill it with a little extra on top of it. This is how you properly use spackle too, but it took me many times around to figure out what was going wrong,  and I still did it.

Anyway, put a little convex material where the un-sanded spot was, and have a thin layer on top of what was sanded. If you don't, you run the risk of over-sanding those spots and you won't be flat and level with the surrounding body. Yep, I did that too. There is also the risk of putting too much product on, creating a false body contour, leaving you a bunch of extra sanding to get the panel back to the correct line. What I mean by this is you can over-apply, sand it smooth and leave you thinking that you got it right. Then, you get right on top of it to confirm the panel and realize that the body panel isn't following the original line anymore. You gotta sand all that off and do it again. Yes, I did this as well.

Well, that's it for today. Once I am 100% satisfied that the body is as correct as I can get it, I will be vacuuming and blowing it out, removing all the dust I can. Then, I will start masking for primer. I ordered some high-fill primer from Eastwood so that should fill in the tiny imperfections. But, I'm getting ahead of myself. First, I need to close-inspect Zed, possibly body-fill some more, probably sand the untouched metal with some 400, then clean, then mask.... yep, lots left to do and we are already in the first full week of Fall. Still hoping to have him painted before the rains have fully arrived. Based on the weather this past week, that window may have already closed.

Thanks, as always, for following along. Please accept that CoViD-19 is still a genuine threat (back to 40k+ new cases per week in the US) and that wearing a mask is one small way you can help contain it's spread. It is not a commentary on freedom, it is a commentary on being a responsible citizen.

Tuesday, August 18, 2020

If You Love... Set It Free

Weird post today, but it IS car-related. Before I begin, today is the birthday of my lovely wife of 7.75 years. Boo, you are amazing, an inspiration and the love of my life. So glad we found each other, and we can enjoy this life together, laughing through the good times and leaning into each other through the hard times.

If You Love Someone (or something)
So, In my last post, I mentioned how T is leaving Eugene for music school in LA (well, Burbank, actually). Similar to my barely-escaped-disaster departure from southern Nevada when I was his age, he had to sell his car for money for that new life. So, he had to sell Nemo. But, in another twist for how to make money for music school, he got hired by a forest fire fighting crew.... and got sent into the bush. So, how does someone sell a car when they are nowhere near it? Consider too, that he is effectively homeless, having vacated the house, and crashing on a friend's couch when he's not fighting fires. The answer? Your dad buys it from you. Yeah, I'm a big frickin' softy, and I bought that A4.

Set It Free
The decision to buy it was actually the easy part. Then, we had to figure out how to get it from Eugene back to the corral. I say corral, because now I have an absolute embarrassment of riches in terms of cars. I mean, this is ridiculous. It's a good thing I have a long and somewhat hidden driveway or my neighbors would be rightfully wondering WTF is going on over here. It was almost like Nemo didn't want to be set free. He did everything he could to stymie our efforts. First, he got his passenger window smashed in... twice, and had the stereo and T's new forest-fire fighting boots stolen. Then, he popped the charged air hose off the intercooler, stranding T. Last, he started leaking oil, leaving spots everywhere, but also forcing regular pull-overs on the drive from Eugene to Beaverton to top off the oil. After an Odyssey worthy of epic poetry, T arrived with Nemo, packed with stuff we'll be holding for him until fire season ends. Oh, did I mention that part? Yeah... my once-viable-as-a-shop garage is now full of not-my-stuff.

If They Come Back
At this point, the expectation is that fire season will end or the start of school will arrive and T will come back to Beaverton for his stuff. That won't include Nemo. As for Nemo, I will be fixing the smashed window, and fixing the oil leak. I may have to do other things, but eventually I'll be selling him... I think. I don't know. Now that he's in the driveway, Boo thinks he looks pretty darn good. With the upgraded suspension, turbo and intercooler, it is a super-fun sled. T did the timing belt and the clutch as well as the master/slave clutch hydraulics and replaced the sunroof while he had it. I did the head gasket, and a few random things over the years, so we have gone through a lot of the expensive stuff already. So.... maybe we will jettison a different member of the fleet.

He/She/It is Yours
Which brings us to what am I going to do with all of these cars. While I may not be at "Rust Valley" level, for a suburban cul-de-sac, I kind of am. For posterity, this is what is currently in the corral:
Hapy - 1972 VW camperbus (TDI transplant from '98 Beetle, Riviera top, '79 westy bits)
Oliver - 1978 MGB (Mikoni side-draft carb, stainless header-back exhaust, new interior)
Zed - 1979 Datsun 280ZX (still in pieces, still not ready for paint)
K'Lack - 2004 VW Jetta Wagon TDI (Boo daily-driver car)
Flash - 2001 VW Jetta TDI (my car, tho with CoViD it hasn't seen tarmac since June)
unnamed - 2006 Subaru (C's car)
Nemo - 1997 A4 1.8T Quattro (up-rated suspension, turbo, intercooler)

Yeah, that's 7 cars. All in one suburban driveway. Again, like my complaints about having that house in Eugene, this is just too far into first-world problem for most folks, and I apologize for any who are offended. I'm a little offended. Like smelling myself after a particularly good hot sweat. Yuck. So, what's the shower in this metaphor? I think it is selling off or long-term lending out cars that we don't use, starting with Flash. Then, finish the Zed and sell it. Last, make a decision on Nemo.

If They Don't,
Years ago, I set out to get a $1000 car for each of my boys when they were entering high school. I figured that they could learn about cars and we would have something to work on together. In many ways, that was true. Psychologists believe that one great way to connect with your kids is to do something with them. While their hands are busy with whatever that something is, you talk about stuff. Before you know it. you're maintaining a relationship through the awful puberty high school years and maybe they learned something about cars. In all of those ways, this worked. I was wrong in one significant way, though: I thought that by putting this time into a car, they would love it more, and want to keep it, drive it carefully, etc. Nope. Instead, I just put my $1000 in a 0 percent-interest account for a few years, so I could spend that same $1000 later, to buy the car from them to finish.

They Never Were
Ultimately, they learned that ...having an unreliable car is a major pain in the butt. ...not having a car at all is preferable to breaking down on the side of the road and then having your window smashed in because you didn't get it towed soon enough. ...having a car in pieces in the garage for years at a time is not really the same as actually having a car. ...choosing between food and car parts is not a choice they want to make. So, C saved all his money for a reliable car that will require no more than routine maintenance. And T? He sold me Nemo and has decided that he won't have a car in Burbank.

That's it for today. As to the house in Eugene, Boo and I have finished the work down there. Our road trip got cancelled, so I will be shifting focus back onto cars. It is hard to imagine the rainy season approaching when it is 37*C (100*F) and clear skies, but I know my time is limited. So, even though I could probably thin the herd faster by getting Flash and Nemo ready first, I will probably focus on Zed so he can possibly have paint before the cold wet arrives in mid-October.

Thanks, as always for following along. I guess the break wasn't as long as I thought it would be. That's what happens when your life-partner works harder than you do, and you both are 100% focused on the same goals. More when there's more-

Tuesday, June 30, 2020

You're Never Actually Ready for Paint

It's sort of like when you tell yourself that "maybe we'll take that trip next year". Or "maybe we'll do that bathroom re-model after the taxes are paid". "Maybe I'll go back to school after the kids are gone." Yeah. It's like that. What is? When you say "we're almost ready for paint". No, you're not; we have been saying "we're almost ready for paint" about this 1979 280ZX for almost 3 years. Today's post pulls the Zed out of storage and back into the workplace. First, let's remember some of the history of this thing.

Zed, a History
original CL listing
We bought it 3 years ago (come August) from a couple of guys who were turning it into a drift car. They made many dubious decisions like removing the center console, the little rear partition where the stereo speakers go, the sunroof (tack-welded and duct-taped on a piece of tin to fill the hole), the carpet, etc in the interest of dropping weight. They hacked up the ignition and wiring so the fuel pump, ignition and radiator fans are all controlled by switches. Of course, the switches don't match and they were installed kinda hinky, but they work. They did start with a great shell, though they painted a big purple V on the hood that just had to go. There is very little rust. In fact, there's hardly any anywhere on this thing. They did fold the driver door and fender, though. And, they did a top-end rebuild, so the valves still need to be re-gapped.

We bought a second 280ZX from a guy outside Seattle and had it towed home. This one was rusting apart, but it had a very clean grey interior, the center console and some other goodies, like original alloy rims. Our plan was simple: remove the interior, rims and other bits... then pitch the donor. The keeper would get a decent paint job (probably one that we'd do and learn how along the way), and then we would re-add all of the pieces. A replacement driver door was found during a separate trip T and C took into northwestern Washington. Unfortunately the yard was closing by the time they got there so they couldn't grab the matching fender. Oh, I almost forgot: this was my son's project. So, I was available labor, bur the decisions were his. The body parts were removed and hand-stripped either with chemicals or a grinder by C. Somewhere along the way, he either lost interest or became overwhelmed and the Zed was parked.

Out of Garage Storage
After shimmying along side the Zed, parked in the prime spot in the garage, for the next 2 years, I decided I needed to take more of a lead role. So, Boo and I pushed Zed back into the driveway. We are going to do everything we can to keep the Zed from returning to the garage in less than 1 piece. Zed hasn't been meaningfully looked at in months, so I spent a few minutes just getting re-familiarized with it. The fenders looks decent. The driver side has some small dents from where the fold near the driver door was hammered out. The passenger side looks straight. Both have a little rust along their bottom edges. The tailgate is solid, with some rust along the top edge. The hood is in great shape, showing no rust. A replacement driver door was originally a copper color, the outside skin had been stripped like the rest of the body panels, but the inside and edges were still copper. Overall, it felt like we could be fairly close to paint.

Still Not Ready for Paint
purchase day, passenger side
And yet, we're not. Over an exceptionally rainy weekend, I tucked into the 2 doors. I laid out cardboard, and starting with the passenger door, removed the glass, window controller and door latch mechanisms. Then, I re-sanded the outside with 100 grit and then 150 grit to get the skin smooth enough to an initial coat of primer, or filler if needed. The passenger door had a glaring imperfection at the door handle that I needed to bang out. Not having decent body tools, I made do with what I could pull together. In the end, I was left with a divot about an inch across (25mm) and about 1/4" deep. Because of where it is located, I can't get a good push angle from the inside. Anyway, I'll body fill that divot in stages so the filler dries correctly. I found some additional little pits that I can fill while I have the Bondo mixed.

The replacement driver door was in better shape, but it had a small horizontal outward fold about 6 inches from the bottom near the rear edge (front is front) that I couldn't see nor feel until I has the skin nice and smooth. That will be harder to get flat. I worked it with a rubber mallet, and that actually fixed most of it. There is, of course, more to be done before the doors are ready. These cars are so rare, the door rubber isn't available anymore. So, I am carefully removing the originals for reuse after paint. Once removed, the rest of the silver (passenger door) and copper (driver door) that would be visible after the door cards are returned will be sanded. Then, I'll do the body filler. Only then can I tape them for paint. Of course, the fenders (look at the driver fender in the original CL posting for an idea of the worst of it), the tail gate and the hood need similar attention... as does the remaining shell. So... it's gonna be a while before we're actually laying paint.

Ready is a State of Mind
In some ways, maybe this is like considering having a child: you're never actually ready for that either. Ultimately, you have the kid when you don't think you're ready, but maybe you actually kinda were; you were just scared. I think the same will be true of the paint prep. I painted houses for years, and if you are methodical and meticulous, you eventually get to the end. In both cases, it's about trusting yourself, and accepting that you're never ready and it's never perfect. At least not for your first few paint jobs... or your first few kids.

I can tell you that this effort will be consuming the next several weeks, and I have stopped all work on Hapy to make room to get this thing moving forward. I probably won't post much. But, then again, I have said that before and always managed to post anyway, so who knows? Regardless, thanks as always for following along.

Tuesday, February 26, 2019

Hapy B-Day to Me

So.. no real post this week since I'm celebrating my birthday with a once-in-a-lifetime / first-time-ever trip to Hawaii. I may post on what happened or not. Not really sure. As of right now, though, I'm in HI, enjoying the not-freezing (82*F daily high temps versus ~45*F daily high temps). Being thousands of miles from my projects, all I can really do is watch the waves.

I need to call out how grateful I am that Boo encouraged the idea, underwrote a large portion of it and really helped drive this, uh, home. It started with one of those internet /InstaFace things where you indicate the states you have visited. I realized that I had visited all but 3: Hawaii, Alaska and Louisiana. We decided the next big birthday (one that ends in either a 5 or a 0) we would knock one off the list. Hawaii in February sounds like a better idea than Alaska, so that was picked. I don't know which will be next. I guess it depends on how much it costs, and whether it is hurricane season (Boo b-day is in August) or winter again when we get to thinking about it.

When I consider how much money this trip is costing, it gives me pause. Normal people just can not afford to do this so it is no wonder that this is my first and probably only time. We have been saving since Summer (just saying we're normal people and that is how we managed to make this happen). For posterity, the cost breakdown is pretty severe, with an almost perfect balance of around $1200US each for flights, a condo rental and a rental car for a week for 2 people. The true math is more like $3500, and then I added my 2 boys (T and C) for another $1200 in flights. Costs for things like food and gas are much higher on the island too, so once I do the full accounting of just the grocery store and the gas station this will easily top $5k for a week in Hawaii. That is some serious scratch and that number just goes up when we think of places we went, lunches we grabbed, etc. This topic is way too heavy for this view so I am going to think about something else.... like drinks at sunset this evening... on the beach... in my flip-flops.

The money will solve and while it does we will dine at home. But that's for when we get back. I'll get back to the regular stuff next week. Enjoy this picture of the beach in the meantime...


Tuesday, November 7, 2017

Oh Gee, How bout a Z?

Today's brief post is about finding and acquiring a project car for my 16 year old son. To our former service men and women, happy Veteran's Day and thank you for your service.

Back-story
Not our Z: rust in usual spots
Long before my divorce, and re-marriage, I had made a commitment to my sons. I promised that when they were ready to commit to a car, the project that it represented, the time it would require, etc, that I would invest $1000US on something. When T was 17, we drove up near Seattle and got him a late 90's A4 (See Gotta Keep Moving). Well, his brother C has just turned 16, and while he doesn't yet have a license, he is now ready to commit. To be fair, $1000US bought more car 10 years ago when I made the commitment, but we've had pretty good luck, and good finds are out there. You just need to work that much harder.

Looking
C has been keenly aware of this money-for-car arrangement. Last Summer, I drove to Vancouver WA to look at a project 280Z, but the rust had affected too much of it. The body had large nasty rust holes in the rear quarters, rust pinholes in the rear lid and a couple of flat tires. The interior was kind of sad too, but it was complete. After a few minutes of looking, I knew it wasn't passing muster, so I walked on it. C was disappointed, but that didn't dissuade him from looking harder. He likes sports cars. So, he was looking at BMW's, Camaro/Firebirds and, always, Datsun 240/260/280's. We talked to lots of people, emailed more and drove by a few, and after a year we thought we may have finally found one worth looking at.
not our Z: more rust

Found
C found a 1979 280ZX project that had hit a hard patch. He had rebuilt the engine, fixed up the transmission and replaced the clutch. He had stripped the interior of everything but the seats and door-cards and slapped on fancy rims and tires with a plan to turn the car into a drifter. Unfortunately, while driving to the brake shop to get the brakes done, he was hit, damaging the driver door and front driver fender. The owner was working multiple projects and needed cash for the Mustang he was almost done with. Meanwhile, the 280ZX wasn't getting much focus and the accident had pushed away some of the love for the project. Listed at $1200, we figured the engine / transmission was probably worth the money. Add in the rims and tires and we could probably get our money back and more just by parting it out. BUT, if the frame wasn't bent or damaged in the accident, we could pop new body panels on there and make a car out of it. So, C made an appointment to go look at it on one of the final nice days of the fall.

That'll Work
C's Z
Since C didn't have a license yet, we brought his brother T with us. I decided to make this a learning opportunity for both of them by having them lead the conversation, inspection and test driving. We walked the car, searching for rust and weird frame issues first. The rust we found was surface stuff. The floors were perfect: no rust, and well protected. I thought they might have been replaced, perhaps by the person this owner bought the car from. We did our other look-sees as well, using all of our senses as best we could and then T took it out for a test drive with the owner while C and I stayed with the owner's friend and asked a ton of questions. T came back grinning from ear to ear. Clearly, he enjoyed driving it. Rather than get too deep into that, though, he jumped into giving us feedback: the brakes were good, same with the steering. Neither one impacted the other. Hard stops were good. Held firm over bumps. All the switches and dials work, lights, turn & brake signals too. I made the decision to let them make the decision. They had asked all the right questions, and got good answers. They wanted to do the build, so I shelled out $1100US cash, C signed the title, and the deal was struck.

Homing
not our Z: interior trashed, but complete
The appointment was in Newburg, which is around 30 minutes from my place. Since the boys made the decisions, they got to drive the new project home, while I followed in the chase car. That little car has some get-up-and-go. They turned the corner from the side-street onto the 99W and simply took off. They didn't speed; they just arrived at the speed limit much faster than I did. We stayed together, though, and they pulled all the way into the driveway and under the awaiting canopy. The smiles on their faces remained for quite some time after the engine was turned off. I think this is going to be a fun build.

Since we got it home, C has been over a few times and has made some headway. I'll post on that soon. Thanks, as always, for following along-

Friday, September 19, 2014

Bearing Bang On

As the leaves start to change color, and the sunsets arrive sooner each day, the pressure to beat the rains increases.  Accordingly, I have spent the last 2 evenings trying to get the bus back together.  A quick update today, recognizing there will be great progress over the weekend.

Clutch-less
note the band on the
inside-left making it thicker
than original bus bearing
Wednesday, I had about 45 minutes between the time I got home and the time I needed to pickup C from soccer practice down by his mom's house.  I figured that wasn't enough time to get the pilot bearing in, but I'd just see how far I could go.  I was pretty fortunate, actually.  The 13mm bolts loosened pretty easily.  I held the clutch in place with a thick bolt slid through the pressure place and clutch center hole, and removed the 2 as a single unit, noting the position of the pressure plate on the flywheel.  The flywheel looked and felt abrasion-free.  a wipe with a paper towel brought it to a scuff-less shine.  Since it has been less than a thousand miles since I swapped tranny's and less than 2 thousand since I put on the clutch, I expected nothing less.  I looked at the clutch face next.  It still looked new, so I switched to installing the bearing.

Bearing Bang On
About this time, T was messing around on his skateboard, so I asked him to hand me the pilot bearing I'd picked up earlier ('98-'02 Jetta/Golf/Beetle 1.8T bearing).  Unlike the original bus bearing, this one delivers pre-packed with a yellow-ish grease.  For the first few millimeters, it slid in, and then required some setting after that.  I used a ratchet extension against the bearing and a lightly-tapping framing hammer, (following a figure-8 patterns) to slowly set the bearing flush with the flywheel.  I did a quick time-check and had about 15 minutes left.

Clutched
I grabbed the extra input-shaft I have lying around for my clutch alignment effort.  I aligned the clutch/pressure plate such as they were when I removed them and loosely fingered in the bolts.  Unlike the first time I did this 2 years ago, the input shaft slid in tightly.  There was very little wiggle for the clutch, helping me understand how much wiggle there used to be without the pilot bearing.  Everything held firm, and I finger-tightened the bolts.  Following the jump-the-center torquing model, I first tightened with the socket in my fingers, then a short ratchet and finally my torque wrench (set to 18ppi).

After a quick tool put-away, wash-up and change, I headed south to collect C from soccer practice.  I arrived as practice was ending.  Perfect timing, and now we're one small step closer to having the bus in one piece again.  That's it for today.

Wednesday, September 10, 2014

Removing an Input Shaft Seal

I have a bigger post in the works for the engine drop, transaxle input shaft seal replacement, etc.  For now, I have the engine lowered onto an ATV jack, and the transaxle in pieces on my garage floor.  I removed the old input shaft seal in a unique way.  Everywhere I looked, the advice was to get a seal removal tool, hammer it into the rubber seal and pry away.  I did something else, and that's what I cover in today's post.

Identify the Seal as the Problem
After separating the engine from the transaxle, and before moving the transaxle into a clean location, look at the inside of your bellhousing.  Does it have a bunch of oil residue lining it?  Maybe a small pool of oil?  Dip your finger in it and sniff it.  Does it smell like your engine oil?  Does it look like engine oil?  Lighter color?  Maybe slightly different smell too?  Yep, you have a leaking input shaft seal.  Now, remove the throw-out bearing like everyone says.  If you have the sleeve behind it, remove that too, exposing the input shaft seal.  Look at the seal.  Wiggle the input shaft a little bit.  Does the seal cling to the shaft or do gaps appear?  Is the seal smooth or does it have a pinch in it?  Mine had 2 small pinches along the outer edge and the shaft did not cling to the seal.

Removing an Input Shaft Seal
This is the point where everyone else says to remove the seal the brute-force way.  For some transaxles (those without a seal housing), it may be the right method.  I took a different tack.  Remove the bellhousing.  Its held on with 13mm bolts.  3 on each side inside the bellhousing and 2 on the bottom.  With a rubber mallet, lightly smack the bellhousing to free it from the transaxle body.  Mine had been silicone sealed but the seal didn't hold up much.  Place the bellhousing engine-side down on top of a shop towel.  Pointing up, you will see the seal housing.  Smack it with the rubber mallet and out pops the input shaft seal.  Easy peasey.  EDIT: Through further research, I believe the housing should not separate from the bell housing.  If you were able to get your seal out this way, by lightly tapping on the housing (like I did), you have a new problem: how to get the "housing" (some call it an oil-slinger) re-attached to the bell housing so that it doesn't re-free itself.  I'll post a picture of what my driveshaft looks like after less than 2 thousand miles like this.  I am assuming it wasn't like this when I got the transaxle from AA. End EDIT.

New Seal, Torn Seal
I have been unable to successfully get a seal back into the transaxle, to the point where I tore the only replacement I had.  All of the advice on the interweb seems to exclude transaxles with a seal housing, making their "slip it over the input shaft and drive it in by alternating sides" unusable.  I have tried setting the housing first, but that hasn't worked.  I got close, though, using a 13mm socket to press the seal.  I made the mistake of trying a larger socket and tore the seal.  I need to hit Discount Import Parts (DIP) for another one.  Once I get the seal onto the housing and into the transaxle, I'll close the loop on how I did it.

That's it for today.  I picked up a pilot bearing and a replacement mounting stud for transaxle re-install at the local FLAPS during lunch today.  They didn't have a suitable input shaft seal.  Off to DIP when the next opportunity presents itself.  Thanks for following along, and Hapy Birthday, C!

Monday, July 21, 2014

Dead Head Meet-up at the Movies 2014

There have been happenings in the car/bus space, but in the interest of space and a single focused post, today's post will just focus on going to the movies last Thursday.  

Dead Head Night at the Movies
Thursday, July 17th was the annual Dead-head night at the movies.  In previous years, these events have aired full-length concerts.  For example, last year (or the year before that) we saw the Sunshine Dairy benefit concert from Veneeta OR from 1972 called "Sunshine Daydream".  Having been too young to have been there at the time, it was great to see what the scene was like and watch them play a great show.  This year, the producers found the raw footage from the Europe '72 tour when they played in a tv studio for about 80 minutes.  A portion was later aired on UK's Beat Club tv show.

Beat Club
As a movie, it wasn't that great, but as a music fan it was really interesting to watch them as if they were working in a studio.  For example, they stopped "Sugaree" after the first verse because Phil missed a change and played "Playin' in the Band" a second time because Donna howled too loudly on the first take.  In both cases, the second run was better, so it was the right call.  I base my theory on the second "Playin" on a background conversation you can see between Jerry and Donna about standing further away from the mic.  Seeing Pigpen in such a diminished role was curious too.  Considering his health at the time, I wondered how he contributed in his last year while his "replacement" (Keith) took over and established himself.  Keith was almost inaudible through most of the film, only really peeking out sparingly on the later songs.

Beat Club Sound
The sound was very good and well balanced.  The film started with them checking the mic's and having side conversations.  Then, without much prompting, Bob shouts out a band introduction and they're off.  Like a show, it didn't seem as though they had a plan for what they were going to play.  In fact, they called Donna out to the 'stage' to sing on "Playin' in the Band" with a vague "how bout you come on up and sing on this" kind of vibe.  At the very end of the film, the band is playing a holding pattern coming out of a "the Other One" while Bob replaces a broken string.  Just as he gets it tuned in and the band starts to turn into a jam that's moving into a clear direction, the film suddenly ends.  Like a brutal cut in an old bootleg, the credits roll and you're left with that wondering of what came next.


Beat Club Filming
Staged in front of a green-screen showing tie-dyed sheets, the band was set up much like they would for a live performance (see picture).  Based on the staging, though, it seemed like they didn't know what to do with Donna.  When she was singing, she stood in front of Jerry, using his mic but forcing him back to his Wah pedal but out of direct line-of-sight with Bob and Phil.  When she wasn't singing, she stood in front of Pigpen's organ, blocking him from the cameras.  Still, considering it was 1972 and capturing live music on camera was still in its Woodstock-ish early years, it captured the band well.  Kieth didn't get much camera time, but Billy and Phil did, even though they didn't sing much (or at all in Billy's case).  Jerry and Bob were, of course, the focal point of most of the camera work, but that makes sense considering their lead vocals and guitar work.  It didn't appear that the band knew the cameras were rolling the entire time.  Prior to a few song starts, you could hear one or more of the members say "we're rolling" before they started counting into the song.

Full Bus
Unlike previous years, Boo and I piled all of the boys into the bus (Hapy drove great again) and shared Dead-head movie night with them.  Unexpectedly, they all took something positive from it.  T, for example, gained an appreciation for how Garcia approached and played the instrument.  He's heard their music before (obviously), but hadn't gained that understanding until he saw him play.  Interesting.  C appreciated what Billy could do on such a simple kit.

I was disappointed in the size of the crowd.  It was much smaller than the "Sunshine Daydream" year, but maybe there was a different local showing deeper into Portland which attracted some of that crowd.  If not, I'm afraid the numbers may not warrant airing something next year.  That would be a shame.  With all of the simulcast concerts from the 80's and 90's, there are many years worth of material left.

That's it for today.  I'll try to get another post in before the weekend.  Thanks for following along!!

Tuesday, July 8, 2014

Nye Beach Road Report

We took a road trip to the Nye Beach district in Newport Oregon over the July4 holiday.  This and the next post are dedicated to that trip. This one is just the travel report.

just North of Newport on US101
Getting Out of Dodge
Boo has a saying that goes something like "people will do what they want to do".  If you have a house of 6 people, all 6 need to want to get their collective stuff together and out of the house relatively early in order for you to get out early.  I had high hopes for being on the road by 11, but it was closer to 2 before we shoved off.  Ultimately, this worked out for the better, since that meant we could carabus with K driving his new-to-him Subaru named Kirby.  This split up the passengers and the payload too.  Still, Hapy was loaded down with 2 coolers full of food, all of the clothes, pillows, blankets, and most of the dry food... and 4 of the 6 travelers.

Wind-Blown Journey is the Destination
Since we were leaving town before rush hour, and it was mid-week (Wednesday), the traffic was trivial.  The drive out of town was trouble- and worry-free.  We followed the same route I took with T and C on our first camping trip with the new engine (see: One Small Step for Van...) down Roy Rogers and again as we entered the farmland of outer Beaverton, we expressed thanks to all of those who helped us along the way.  It's a tradition now.  We waved at the NAPA in Sherwood who helped us on that trip and again told the tale of how they helped us solve a hose-coupling design flaw.

Yamhill county grape region
Once we were outside of Sherwood, the towns are spread further apart.  First Newburg and Dundee, then Dayton, McMinnville.  By McMinnville, the increasing cross/headwind started to make steering an adventure.  If you haven't driven a bus or other tall flat-sided vehicle, you don't know the true terror of having the wind suddenly shift you 8 or 10 feet to the side.  It wasn't that bad, but with those kinds of memories in mind, I could feel the stress creeping in.  So, we stopped at the Dairy Queen near Sheridan for cheap eats and a couple Blizzards.  Shortly after leaving Sheridan, the flat farmlands give way to the Coast Range foothills, and corresponding forests.  The winds slowed as we passed the Spirit Mountain Casino and our adventure shifted from holding the wheel against the winds to climbing steep inclines.

For the most part, we were able to maintain the speed of traffic (55 MPH) through the foothills, the Coast Mountains and even along the 101 to Newport.  Of course, there are always those who want to go faster and will express themselves as they pass.  How sad for them that they are unable to enjoy the beauty around them and can only focus on the endpoint of their drive, spreading negative energy as they go.  There were a few longer inclines which were especially challenging.  There is one run south of Lincoln City that I had to run up at 35 MPH in third gear.  Even with the new engine, pushing over 4500 pounds is hard.  At no point along the entire run did Hapy's engine temperature go above 194*F, and every time it rose above 185*F it was during a long hill climb after which it immediately dropped back to 185*F again.  All told, he ran extremely well, pulling us into our destination around 6.
Devil's Lake

At Nye Beach
Hapy was warmly welcomed by the family when we arrived.  Little cousins who hadn't met him before climbed around inside, clearly amazed at seeing something so old.  We realized that Hapy is one month older than my younger brother and brother-in-law.  Funny stuff.  While at Nye Beach, we didn't drive almost at all.  We carabus'd with K, and sent him and brother T to the store for forgotten foodstuffs in Kirby.  We took one drive up to Lincoln City on Saturday to visit Devil's Lake.  The drive into Lincoln City from the south was a slow plod because of some road construction, but otherwise, it was just another mellow smiley drive in a 40+ year old microbus.  We put his pop-top up at the lake, creating a private changing area for us.  The nieces especially liked that.

I have discovered that Hapy is leaking some form of oil, but I can't determine the source.  When I check his engine oil level, it checks out virtually unchanged, but he continues to leave little puddles.  The drip also gets caught in the passing air and is creating a spotty film on the rear of the bus.  Me no likey.  I intend to dig deeper into this leak this weekend.  I think it's transaxle gear oil.  We'll see...

Home-bound
Happy in Hapy along hwy101
We had "check-out" at 11 on Sunday morning.  I quote check-out because there wasn't anyone to hand a key to, and no one was waiting for us to get out so they could get in.  Honor system, though, had us out of the condo by 11:30.  We didn't really have an agenda, so we pointed ourselves north on the 101 seeking coffee.  We couldn't find an easy-to-get-to coffee shop anywhere on the 101 through Newport, Depot Bay and most of Lincoln City until almost the end of town, there's a Starbux on the north-bound side.  To be fair, we could have tried to turn left across 2 lanes of southbound traffic and then try to turn left back afterwards, but this was end-of-holiday weekend traffic.  No chance.  With coffee's in-hand, we set off into the bumper-to-bumper traffic.  I could create an entire post about the ridiculous driver behavior we saw.  Maybe I will, so I'll leave it out of this report.  Needless to say, there were unexplainable traffic slowdowns and delays.  We stopped at the Dairy Queen in Sheridan again for a late lunch, and tried the trucker scales on OR18.  We scaled out at 4550 pounds.  While the outside temperature rose up into the mid 90's, inside the bus wasn't uncomfortable.  In fact, we didn't really notice the heat until it was time to unpack the bus.  After 2 prior attempts to have a coast trip without an issue, this, our 3rd try, was successful and issue-free.

Statistics
270 - total miles traveled
26.2 - miles per gallon

That's it for today.  More next time on Nye Beach, the family visit, the condo's, the Hatfield Marine Science Center, fireworks, Devil's Lake, etc.

Sunset at Nye Beach

Monday, April 7, 2014

Film at Eleven

With the start of April comes the Pacific NorthWest's faux-Summer.  We're really experiencing that now, with mid 70's temperatures, clear blue skies and bright smiles on everyone's face.  In an ironic contrast, I spent Sunday afternoon in my sun-blasted garage solving the water-block problem both under the belly-pan and in the passenger door.  I'll hit that today.

Plastic Fantastic
from vw-resource.com
First, I need to give credit where due.  I stumbled upon this website while trying to figure out a viable way of keeping the water that makes it past the window seals from damaging the new inner door panels / cards.  The old plastic was pulled out, and the cards were destroyed.  The guys at the vw-resource web site had a great suggestion for using BlueTak on their page dedicated to the doors.  In my last post, I mentioned that I bought some of the 3M stuff that was basically the same.  I borrowed their picture on the right here.  The 3M stuff is white, so it doesn't show up as well in pictures.  I posted one here anyway.

trash-liner door-liner
Note how much less I used (I relatively uniformly used around 1/4" thickness).  That became an issue when I tried to hang visqueen.  The plastic sheeting that you get in most home remodeling shops is too slickery, and won't stick easily.  Instead, I considered what was originally in there: a very thin film.  I grabbed a kitchen garbage bag, and hung it on there instead, aligning the bag bottom with the door top and one edge against the front edge of the door .  Because of the static electricity built up in the bag, it immediately clung to the steel, making the pressing into the 3M stuff much easier.  I cut the bag in half along the front / leading edge of the door, and folded it back against the rest of the door.  Some simple trimming later, and the door is sealed.  Like the vw-resource guys, I poked holes where the rubber bits will be going and made sure to run loops of sticky-stuff around those holes.  Be sure to run loops of the sticky-stuff around the holes for the window winder, door pull and the latch.  One other thing to note, I didn't run the plastic to the very bottom of the door; only to the very bottom of the hole in the door and then put multiple runs of sticky stuff along the bottom.  Remember, the whole idea is to keep inside the water that's inside the door, so it runs out the bottom.

Bag in the Pan
exposed electricals. 3M sticky
After such a simple success with the door, I slid under the front of the bus and pulled the belly pan off. My drive-by-wire electronics are under there.  This has been a source of concern any time I go for a drive when the pavement isn't dry.  While it is really just a simple resistor attached at one end to the pedal and the other to a wiring pigtail, its still an expensive replacement.  If it got wet, it would fry, and I'd need to replace it.  As I write this, I realize that there aren't any fuses in the wires either, so if something shorted out, there could be ECU troubles.  Anyway,  in looking at the exposed electronics, I noted so many openings where water could get through: from the rear where all the controls go through, over either side of the main frame members, etc.  Yikes.

same view, but bagged now
I had thought of plastic-sheeting the entire area, but that would have been nearly impossible.  Instead, I figured I could just "bag" the electronics by running a circle of sticky along the bottom of the floor and sticking another kitchen trash-liner against it.  It totally worked.  It has a small hole for the pigtail, but otherwise, its protected from water.  Once the rainy season returns for May and June (like it always does), the bus will be road-capable.

That's it for today.  I spent Saturday watching C play in 3 lacrosse games, starting the Spring sports season.  We hoped to hit Mt. Hood on Sunday, but it was raining up there, trashing those hopes.  I'm starting to believe that the Ski Bowl season is about over, between that rain and today's warm temperatures.  I've heard it will hit the mid 70's through next weekend.  So, after an unimpressive snow season, our Spring conditions appear to be disappearing.  Time to plan camping season instead!  Thanks for following along-

Saturday, August 17, 2013

Rack 'em, Snow Bum

Sure, I know its August.  Yep, most folks are taking vacations or at the least thinking about the sweltering heat.  Even here in usually-temperate Oregon, the humidity has been over 65% (which is downright humid for these parts in August).  Sweaty.  It reminds me of my old lawn-mowing days in upstate New York with 80%+ humidity, 80*+ temps.  To combat the weight of the dog-day heat, I think cool thoughts.  T and I will talk about the drop into the bowl on the Thunder run at Timberline or Ski Bowl's Lower Surprise trail.  It's funny how talking about losing an edge and cartwheeling downhill in deep powder can cool you off.  I spent yesterday afternoon in my 90* garage building a ski/board rack for the bus.  I'll detail that today.  Stay cool my friends.  2013-2014 Fusion season passes go on sale in less than 3 weeks (Sept 3rd!).

Starting with What?
thinking about it
The bus was a 1972 Westy when I first bought it.  It ran a 1700CC air-cooled non-original engine with a Weber 32/36 Progressive carb, 009 dizzy and a worthless heat-exchanger exhaust (65HP, 18mpg @best).  It had the original 1972 Westvalia interior and canvas bellowed pop-top.  Today, it runs a 1.9L TDI from a 1998 New Beetle (90+HP, 30mpg).  Inside, it has the rock-n-roll bed, rear closet and refer cabinet from a '79 Westy plus a middle row seat from a Vanagon.  Up top, it has a 1972 Riviera (straight up) poptop and bed.  That may sound crowded inside, and it can be.  Since I've been working on the engine, I have had the rear closet (left side with a front-facing door and cubicles at the rear) out of the bus and sitting in the garage.  This leaves the engine electronics, which sit in the spare wheel well, exposed.  I have a solution for that, but that's for another day.  Anyway, I started looking at the 14" gap between the left side wall and the middle row / rear seat, thinking.... "couldn't we put our ski stuff there?"....

Think, Measure, Think
aligning the rails
I started simply by setting a shoe box on top of the refer cabinet and putting my snowboard on top.  Surely I could make something work there.  I grabbed a set of skis and held them above.  "Yep, I should be able to make 3 racks, each holding either 2 boards or 2 sets of ski's," I thought.  The racks need to be far enough apart so snowboard bindings fit between them, but close enough together so our youngest ski's fit.  That last part proved too much, but he needs new planks anyway, so it should all work out.  Holding the ski's in the air, I made pencil marks on the wall to give me a sense as to where the rails should sit.
I wanted the rack to have some give, so I chose to connect the rails to the side supports with hinges rather than angle braces.  On the other end, I thumb-screwed eye-hooks so we could pull one-to-all of the racks upwards, suspended from another eye-hook in the ceiling by a length of chain.  I haven't completed that part yet.  Last, the equipment needs to stay put.  To address that, I replaced one hinge wood-screw on each rail with a eye-hook bolt run through to the bottom.  On each rail, a 12" bungee is attached from hinge eye-hook to rail-end eye-hook.  I am waiting for the arrival of some bath-tub tread material that I will apply to the rails to make it complete.
parts list

Material List
2 6' lengths of 1x3 cedar for the side supports and rails.
3 packs of 2" utility hinges (2 in each pack)
3 packs of #8-32 x 1-5/8" eye-bolts (2 in each pack)
3 packs of #208 Screw Eyes (2 in each pack) - for rail ends
1 pack of #206 Screw Eyes (2 in pack) - for ceiling
1 8-pack of mini bungee's
some #10 washers

Cuts and Drills
I started with a clean-up cuts on the ends of the cedar.  Lumber yards don't make perfect square cuts, so this is always a good idea.  I cut 2 24" long pieces for the supports and 6 12" long pieces for the rails.  I set one of the supports against the sidewall to consider rail placement.  To make it simple, I pressed the support against the headliner support.  I transferred the pencil marks on the wall to the support. Recognizing that we need 9" between each rail (our tallest binding was 4-1/2"), I lined up the rails 9" apart, adjusting the pencil marks.  Once I had a plan, I set the support back against the wall, held the rails up to see how it would feel.  Then, I pre-drilled the holes for the hinges (making one on each rail large enough for the eye-bolt) and assembled.  I also pre-drilled holes at the top and bottom for wall-mounting.

Installation
testing installation
Once the rack was put together, I wanted to see it in-place.  I discovered that the bottom rail was so low that I had to remove the eye-bolt so the hinge would open enough for me to access the mounting holes.  Hmm.. opportunity for model improvement.. I pre-drilled one hole in the wall and mounted the rack with a 1" sheet metal screw.  This held the rack in place so I could pre-drill the remaining holes without the rack slipping.
A test installation wouldn't be complete without filling it with snow equipment.  I put 2 boards (mine and T's) on the bottom rack, 2 sets of ski's (K's and C's) and Boo's set on the top rack.  K2 gets new-to-us ski's this year, so I left his off.  With the bungee's, the equipment sits well.  I will apply bathtub treads to help hold things in place, but it looks like the passengers will be comfortable and safe, and the equipment a-fixed.

That's it for today.  I still have some clean-up to do, but in just 4 hours this went from concept to installed.  We may use the racks as garage wall-mounts too.  Each one attaches with 4 screws.  Neat.  More next time, and thanks for following along-