With the help of a couple of friends, and my 2 boys, the new Riviera pop top moved from my garage floor to the top of the bus. We made some discoveries along the way. Today, I'll back-document what happened. It was hot and long, so I'm very grateful to both Ed and Toby for sacrificing a nice Saturday afternoon with their families to be with mine.
Preparations and Discoveries
 |
| initial placement. Toby eyeing things |
After the test run last Thursday, I felt comfortable moving the bus out into the driveway of the complex. So, as Ed was arriving, I got the bus into position just outside my garage. While still exchanging pleasantries, Toby arrived, and we were ready to go. I'd spent a couple of hours before they arrived digging through Toby's photo album dedicated to the Riviera pop top removal he performed. Through examining his pictures, and my interior, I made some important discoveries. These were confirmed, as you'll see.
 |
| showing cut-out "X" |
First and foremost, the Westy was based on the sunroof style transporter while the Riviera was based on a standard transporter. This drove a few differences which are important. The sunroof bus has 2 roof panels with a 2" gap between them running from the rear of the opening back to the rear of the bus. This is where the sunroof slider would hide when the roof was open. The front of the sunroof opening is not straight, either. There's a kick-out off-center on the driver's side where the sunroof crank would appear. Contrast these 2 conditions with the hole cut at the Riviera factory in Beaverton Oregon (where Riviera's were made), and things get interesting. The transporter has only the one roof section, for starters. The front of the hole is straight.... and about 3 inches closer to the front. Also the sides were closer to the drip-rails in the Riviera bus than the Westy hole. When we looked at how the interior foamy bits all tied together, its clear there will be some customization needed. More importantly, though, the Riviera facto
 |
| after cutting p-side |
ry firmed-up the hole by applying wood strips around the underside of the hole and mounting wood strips (which are a-fixed to the bellows) through the steel from above into the wood strips below. Since these lower wood strips roughly aligned with the support steel Volkswagen installed in the sunroof transporter, the lower strips can be ignored for our install.
Top On
 |
| extra 6mm screws. frame sits in the rail |
It is with those differences in mind that I chose to not do anything to prepare for the top install prior to the guys arriving. This meant that the first step was actually the step I needed them for: muscling the top onto the bus. They kindly recognized that I'd just painted the roof, but there wasn't a way we were going to get that top installed without scratching it, so I said as much and we jumped in. I took the back, Ed took the passenger front corner and Toby took the driver front corner. This put Toby in the spot of having to climb into the bus during the install. We approached the bus from the rear passenger corner, lifting vertically while moving towards the front. The 3 of us were better able to get it on the bus than we'd expected. The quick-part ended there, though.
 |
| thanks Toby. |
The lower bellows frame for the Riviera top is not flat. There is a portion of the wood frame that hangs down into the hole. The Riviera-shaped hole. I have a sunroof-shaped hole. They aren't the same. Enter saws. To make the frame fit, 3 inches of lower frame needs to be notched out. The notch needs to be 1" high (up to the bottom edge of the bellows). With the notch cut out of both the driver and passenger side fronts, the lower frame started to fit. We spent the next couple of hours measuring and remeasuring, shoving the lower bellows wood frame around to get it into the right spot. Once we got the spot set, we started chewing through drill bits trying to get a pilot hole bored. Fun times. There are 3 hex-topped (6mm) screws on each side holding the lower bellows frame to the bus-roof. Since we omitted the lower wood strips, we put 2 more 6mm hex screws through the lower bellows frame into the sides of the sunroof hole. To make sure we were square, we brought the bed plywood sheet (under the bellow frame) and set everything. Re-measuring. Re-setting. Then, we marked the holes, moved the lower frame out of the way, bored the holes and screwed it down. We're square, and the bellows are fixed to the bus-roof.
 |
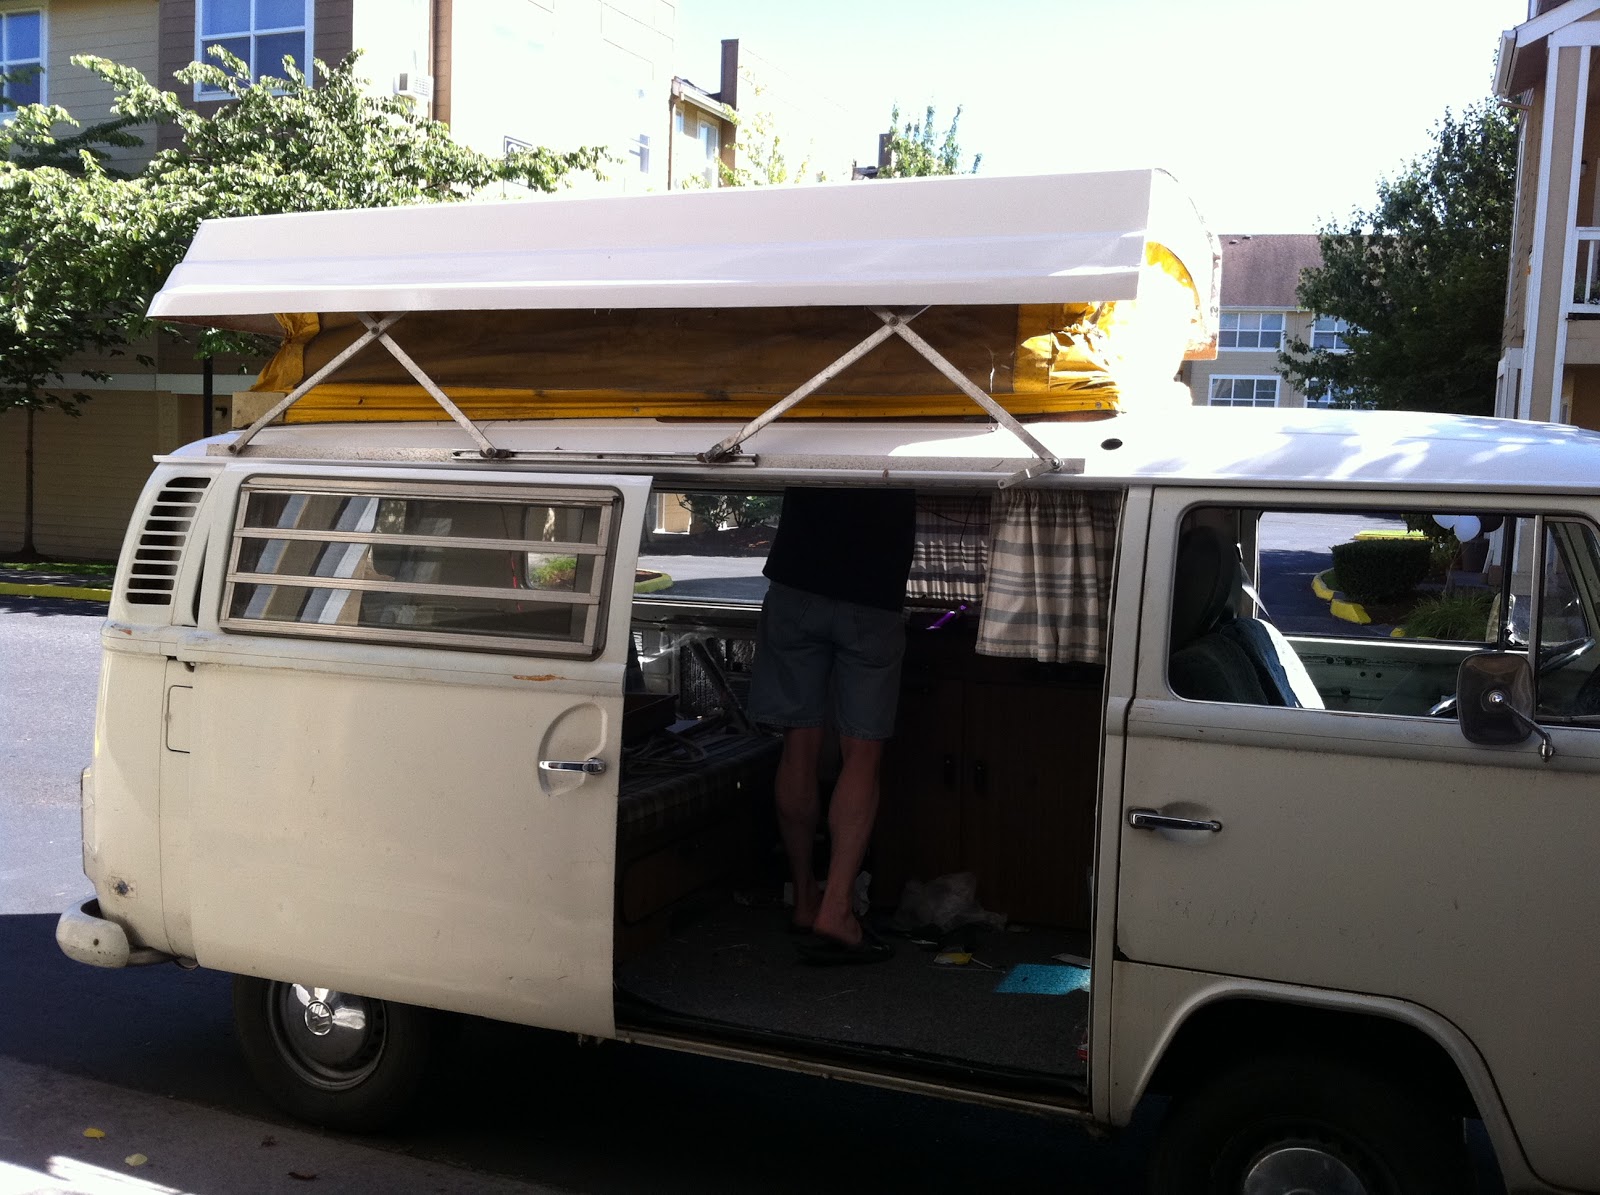
| back home w/top on |
Next, I need to resolve the water barrier at the bottom of the bellows and get the scissors-supports mounted. Then, I'll clean-up the top interior and the foamy customization I mentioned earlier in this post. Should be a productive weekend. Oh, I almost forgot: he fits in the garage.... once I disconnect the auto-door opening, push the door as open as I can make it, and hold the door open with a vice-grip! Love it! As always, thanks for following along,


No comments:
Post a Comment