Showing posts with label Tuukka. Show all posts

Tuesday, August 15, 2023

LeisureFest 2023 - Music Report

I wasn't going to do a special post for the bands, but each performance capsule got so long, the original overall post got way too big. So... here's the music review.

Before I begin, last weekend was my father's birthday. After not seeing him nearly as often in his final years as I had before his health started to slip, I find that I miss him at the strangest times. For example, my mother-in-law shared some fresh-from-her-garden tomatoes with me and I was immediately transported to a childhood memory of walking the tomato vines with my father after he arrived home from work, salt shaker in his shirt pocket. Few things as good as a tomato directly from the vine, with a little salt. Miss you, Dad.

Music In-Brief
We did not see all of the bands, and because of how far away we were, we could not hear all of them either. It was an interesting mix of genres, challenging Randy, the sound guy, but he flippin killed it. Randy was the star of the music, independent of every artist, he made everyone, and I do mean everyone, sound very good. The bands below I actually heard, but there were some I missed. Similar to my prior post about this festival, I did not take any pictures, enjoying the space IRL, absent a technological veil between me and my surroundings.

Steel Wool - (Eugene-based) fronted by the prior owners of the property, they had an early Airplane sound. Steel Wool played on Friday night while we were setting up, so we could not hear them as well as some others. What we heard was really good, setting a fairly high bar for the next day.

Jam - some of the artists scheduled to play the next day tossed in for a jam that ran until midnight. I was asked to throw in, but between the road fatigue and lingering anxiety about the variables I mentioned above, I was a bit of a wreck and abstained, hitting the bed instead. Besides, I was part of the opening the next morning.

Sunkicks - (Hillsboro-based) it's not fair to judge Sunkicks, because I play bass for them. The feedback we heard was very positive. Katie's vocals are always amazing, and even though we started playing at 11AM, she nailed it. We were given, and played 2 sets, setting a mellow wake-up tone for over 2 hours. I had to eat afterwards, so I missed Corona (singer/guitar with a clarinet player). Randy said we were the perfect hangover set, gently pulling people from their tents down to the music bowl for a day of fun.

Eve and the Bad Apples - (Eugene-based) solid band with some cool vocals. This was only their second gig, so there will be much growth to see, for sure. I felt the songs where there were many words or syllables close together lent best to Eve's vocal style. There were some songs that were almost rap-like in how the words were pressed together, but you could clearly make out every word, following the story she was sharing. Instrumentally solid with interesting bass twists and slide guitar work mixed into more straight supporting stuff. The drummer was like a clock, keeping time and keeping it simple.

Joe and the Wheel Monkeys - (Hillsboro-based) I play with Joe on Wednesday nights at Pizzario, and because their regular bass player misses shows sometimes, there was a risk that I would have to jump in. Dave arrived during the Eve set, so that was avoided. Joe plays an approachable country / bluegrass / rockabilly blend. Depending on who is joining him onstage (it seems different almost every time), he may have a lead electric guitar, a fiddle, a dobro or a mandolin for solos. This weekend, he had Rose (Boo's sister) on fiddle and Spencer (Sunkicks' guitarist). They were predictably solid.

Sunwell - (Salem, OR-based) These guys were amazing, and the loudest of the weekend. Boo described them as a blend of Perfect Circle and Tool. I would add some Primus just because of how talented the bass player is. The drummer and bass are about as locked a pair as I have had the chance to see; every single hit was together. Very impressive; Boo and I are big fans, so take these next few sentences through that lens. The vocals and lead guitar work was all handled by one player. There were spots where he was trying to do something fairly complex on the guitar while hitting a moving vocal line. I'm not sure a brain can actually to that level of context switching. Of all of the successes Randy had with the sound, the clarity on the lyrics was not there. I don't think it was Randy's to solve and perhaps splitting focus that was negatively impacted vocal clarity. He hit the notes, we just couldn't pick out the words. His solo work, complete with hammer-ons, was fun to watch. Great band.

Boo and I went back to Hapy for some dinner and missed the next band, arriving late for the Raventones.

Raventones - (Eugene?-based) the former landowners took the stage for their other band: just the two of them. TK is an accomplished bassist, but in this new configuration she plays a baritone instead. Her partner, Randy the sound guy, plays drums (and quite well). The baritone allows her to play more guitar-like stuff, with some chords while still focusing on the low-end. TK leads the mood mixing stories and song into a tapestry where you can't really be sure when a song has ended or started.

Alder Street - (Eugene-based) During our sound-check in the morning, Randy mentioned Alder Street as the band to make time for. Mentally noted, Boo and I made sure we were well established on the festival blanket, dog fed and settled, etc. when they started. OMG, these guys are incredible. If you look at their calendar, they are not playing many venues, which is absolutely puzzling. These guys are an absolute MUST SEE. Starting with the mandolin player, his voice is phenomenal, ranging all over the place, and performing with absolutely no filter. His solos are soaring, and when playing against his fiddle player (who was also next-level) some magic happens. They share the stage with an acoustic guitarist who also lead-vocals on songs (and lead guitar's in spots), a stand-up bass player who does not approach it like a blue-grasser (that's a good thing, once you hear him) and a female drummer with a clear sweet voice. We were treated to 2 sets, but crowd fatigue had caught up with me and Boo, it was getting dark and Tuukka needed to be moved away from the crowds as well. So, we headed back to camp. Can't stress enough how much these guys are a must see.

We missed a progressive rock band and the DJ. We were unable to hear either from Hapy, which I found odd since we were able to hear Steel Wool so well the night before. On Sunday morning, there was supposed to be a hangover set, but I think the artists (TK and Randy) overslept. Since they had played twice already, perhaps it was just as well they got the morning off. In the vacuum, some of Joe's Wheel Monkeys played around the bonfire pit.

In summary, Sunkicks were good, Sunwise rock and Alder Street is amazing. IMHO, all 3 are worth finding. Eve and the Rotten Apples are finding their footing, but give it 6 months and they are going to be tearing it up too.

That's it for this time. Thanks, as always, for following along-

Tuesday, August 8, 2023

LeisureFest 2023 - Road Report

It has been a long time since Boo and I took a road trip for a music festival. Thanks CoViD. Since LeisureFest is a private invite-only event at a private communal-living-space, I will not post on the event itself, save for some comments about some of the bands in another post. I will say, we had a great time, met some wonderful people we now call friends, and look forward to being invited again. I took no pictures, living in the moment instead of through a cell phone. So, there are no pictures to accompany this. Before I start, today is my mom's birthday. Although I know she doesn't surf the internet anymore... Hapy Birthday, Mom. 

Getting Out
LeisureFest is held in the coast mountains west of Eugene. So the drive is very similar to a drive to the Cuthbert Ampitheater until we hit the beltway (route 569) which wends west around the city of Eugene. Prior to leaving our home area, we needed to be in East Portland for an appointment. So, departure day was atypical. First, we hadn't been camping since we moved into NewOldHouse, so we had to find everything. We had never camped with the dog before, so there was additional logistics around packing his crate, his stuff and managing his needs. The band I recently started playing in (Sunkicks) was given the opening slot, so I had bass gear to haul too. Because of unknowns around facilities at the communal-living space, we brought a full 5-gallon water cooler (needed) and a prepared travel-potty (not needed), adding to Hapy's overall haul-weight. Then, because of the appointment, we had to pack the night before, and finish prior to heading to that appointment, for which we ended up late. Once concluded, we headed for the I-205 pretty much when we originally expected. We brought the trailer-hitch platform carrier (we call "the trunk") to help make room for with all the extra things we were bringing; Hapy felt heavy at the throttle.

Getting There
We were pleasantly surprised at how swift the traffic moved on I-205, until it wasn't. Shortly after the Lake Oswego exit, traffic came to a near-stop and crawled through the interchange onto I-5 South and continued until we were past a multi-car wreck just north of Wilsonville. We lost about an hour to that crawl. Once we passed the wreck (no one appeared hurt, the cars were on the shoulder), traffic quickly picked up speed. We took advantage of the Charbonneau rest area to walk the dog and stretch ourselves before returning to the interstate. The rest of the drive was relatively typical. Hapy took the hills more slowly than usual, but his temperature barely registered above 190*F when we did. Once we were south of Albany, and the hills flatten to farmland, the crosswinds presented as they usually do. With the rear antisway bar and the shock-stiffening I did before Hapy's birthday (See Handling the Handling), the winds did not affect us nearly as much as they used to. Of course, blustery winds forced me to be animated behind the wheel, but it was still much improved compared to years earlier. With the extra weight, I found I drove to regulate his temperature again, rather than to meet a particular speed. Basically, I went as fast as I could while keeping the temperature around 190*F.

We arrived at the festival entrance with a little over an hour of workable daylight, and were directed into a spot pretty much the furthest from the stage under a canopy of trees. We were grateful for the killer spot and Hapy remained in the shade all weekend, but close enough to sunny patches to allow for the solar collector for the luxury battery. We did a very modest set up, laying out the recycled plastic mat and the carpets underfoot, placing the lot couch and camping chairs/table and calling it good enough. So, no canopy, nor kitchen, the outdoor lighting was hung on the side of the Riviera poptop to create some visibility, but we did not set-up for hanging out. We intended to be in the music bowl most of our awake time, and ultimately were.

Getting Home
Because our set-up was somewhat sparse and put together less than 40 hours earlier, the tear-down was fast. After letting the dog get a final hour long wrestle with his new best friend Banjo, we climbed in the bus and headed out. It seems like every time we drive north from Eugene on a Sunday the traffic is flat awful. Too many are in a hurry, following each other too closely and generally putting out an agro "I'm late for a meeting" vibe. The drive from the coast range into Eugene was lovely, in contrast. Sure, there were plenty of toy-haulers returning from the beach wanting to get into the valley and on to the interstate, but there was very little pressure. Hapy drives as he does, and the speedsters took advantage of the passing lanes as we reached them. From OR-126 to OR-569 and then on to I-5, we trucked along, with little concern. Again, Hapy's temperatures were staying below 193* even on the hills, and returning to 185* (thermostat opening temp) quickly thereafter.

After our first dramatic traffic slowdown starting well south of and then extending through Albany, we found a detour west of the interstate that ran along the Willamette River, then onto OR 219 into Newburg where we picked up OR 99. This put us on a course for what I have referenced as the temperature test hill where we test Hapy's run-ability. Hapy had a harder time retaining 55mph than he had since I fixed his heat issues, but he did. He did not get too hot, it was just hard to keep pace with all the extra weight. Most of the way up the hill, I realized that I was not really pushing him all that hard either. I chalked that up to personal fatigue. When I pushed it a little he responded, but the temp did not climb much and it returned to normal as soon as we crested the incline. It was not a very good test, but he held pace and didn't get too hot, so I call that a pass.

We got home after about 5-1/2 hours on the road, which is fairly long for a drive from an hour west of Eugene to West Beaverton. It was traffic-related though, and we got home without incident. Tuukka, the dog, slept the entire drive home after spending the weekend making dog-friends with Banjo and Svi. I didn't touch on how having a dog at a music festival changes things, but this has gotten long so I won't go into much detail. There were more than the 2 other dogs and owners, but not all of us were camped at the far end. Down there, where Tuukka, Banjo and Svi were camping, they could off-leash play.  And they did every chance they got for as long as we would let them. There was at least one other dog who was openly hostile and others who were not near us so we really didn't see them.

We had a great time, and hope to be invited again. We understand that the party may be no-dogs-allowed next year. There is a possibility of a neighbor creating a dog-safe space, but it's fairly remote. We may have to weigh the importance of being with our dog against the significance of this party. Not an easy choice. Unless the band is asked to play, I suspect that if the dog can't be there, we may not be either. We'll see.

Thanks, as always, for following along. More next time-

Tuesday, June 27, 2023

Small Fence, Big Difference (Part 1)

As they say on Letterkenny, "back to chorin'". Today's post covers our building a 7 meter (20 foot) fence between our new neighbor's fence and NewOldHouse. We did this entirely ourselves with all salvaged wood. The only new materials were the gate supports, hinges and latches. Since there are only 2 of us working on this, around jobs and such, it is taking a while, so this is split into multiple parts.

before image
Before I get into it, you are probably wondering why we did this when the kitchen is non-existent. Great question. It starts with the dog, Tuukka. He is very curious and wants to be in everything. We knick-named him "pedibus" because of how much he wants to be underfoot. So, if we need to get after some serious demo, or something, we need to contain him. The backyard is big and wild.. and almost completely enclosed with fence. The space between the neighbor's fence and our house is open, so when we put him in the backyard, we find him in the front shortly thereafter.

Get Material
Backing up a couple of months, Boo was out walking Tuukka when she saw a fencing company tearing down a neighbors fence. In her usual way, she asked what they were up to and what they were doing with the remains. It turned out some of the fence was bad, some of it was good, but the neighbor wanted the whole thing replaced. So, the fencing guys put the really bad stuff in their trailer and left the mediocre to good fencing in a pile on the curb. In 2 loads with ToyoTruck, we collected enough material to build more than what we needed. The main posts were not too great, so we will probably not re-use many of them. The cross-pieces are a mix also, but mostly in decent shape; many were recent replacement boards. Last, we look at the actual pickets. This fence was at least 5 feet high, and we are building a 4-foot fence. So, any board which has limited rot on the bottom is fair game. Some boards were in good shape, but most have some rot at the bottom and the top is worn.  Again, if we can get 4 feet out of a board, it fits our purpose. Since the fence we are building will be more traditional-picket, with air space between the pickets, and the fence we salvaged was solid, we have twice as many to think about as we need for the same distance.

Plan
diggin holes
Boo and I spent a Saturday morning, wandering around with coffee, measuring tape and a level to decide where to put our fence. We have a power meter on the house, so that needs to be available to the power company. That defined the furthest towards the street it could go. Less than a foot further back, is the downspout. We preferred having that in the backyard, so the fence is going into that spot in between. There is a small flower garden there, and then open space to the neighbor's fence. We intend to put a garage in the back one day, and we would like to be able to pass through without having to open a big ol' gate to do so. To remedy, we decided to have a short section of fixed fence from the house to the edge of the flower garden. There, we would put a 1 meter person gate. The rest of the line from that gate to the neighbor's fence would be a 4 meter opening, with 2 2-meter gates so a car could pass between. The weight of the person gate should be relatively small, and with the hinge on the flower garden side, there will be sufficient ballast. The car-gates, however, cannot be free-swinging gates. I figure that no matter how deep I set the post between the person gate and the adjacent car gate, that car gate will pull on it and eventually loosen it. So, the car gates will get wheels.

Prep Material
this took a long time
Free wood is not as "free" as it sounds. Each picket needs to be removed from the cross-pieces, the screws and nails removed and then cut to length. I started simply by removing pickets and the fasteners from the pickets and cross-pieces, leaving them in corresponding piles. I spent spare cycles around work days and other commitments to collect a pile of pickets nearly 3 feet high and twice as wide. This took a lot longer than I expected. We borrowed a table saw to rip the boards down from their existing 5 inches wide down to 3 inches wide. Again, this creates an opportunity to cut off splits or bad edges. But each board takes multiple cuts (up to 4, right?) to get right. We delayed the shaping of the pickets until after we got some of the fence supports up.

For posts, we had a couple of long pressure-treated 4x4 posts already on the property. For the 3rd post, we took the best-looking, longest from the salvaged fence. It was also pressure treated and look less than a couple of years old.

Dig Holes, Place Poles
holes dug
With a rough plan in place, we got into details, marking exactly where each post would go. Once satisfied, I marked the spot with spray paint. To collect the dirt, I laid out a tarp. We had an old post-hole digger, but it would not make much of a dent in the clay soil. Instead, I started with a traditional shovel, removing the top layer, tossing the dirt under the grass-plug onto the tarp. Once I got down to the top of the shovel (6 inches?) I switched to a pry-bar to loosen the clay and then a small plastic tub from the recycling to remove the loosened soil. In this manner, I dug 3 holes 24 inches deep, each taking about an hour. While I was digging, Boo went out and got us 10 gallons (2 5-gallon buckets full) of 3/4-minus gravel.

One post at a time, we put a few inches of gravel in the bottom of the hole, tamped it with the fence post and then set the post in place. Boo confirmed vertical with a level on 2 sides while I added gravel and tamped over and over again until the post was secure. After the first post was set, we also checked that the placement within the hole was in a straight line and then followed the same vertical / gravel / tamp cycle. Once all 3 posts were in, we watered the holes to press out the air, and then added more gravel and tamped again. We topped the last 1/2 inch of the hole with soil and then made sure there was a mound around the post, again tamping. In theory, this should dissuade rain from running down along the post, weakening the foundation. We will see.

I took a few weeks of work around work to get this far. We have steel brackets for building the gates so they will not only be held together with wood 2x4's and wood screws. I will get after that assembly and more material prep in the next post.

Thanks, as always, for following along-

Tuesday, April 18, 2023

Tear This Old Kitchen Down

If I had my way. Yeah, if I had my way. If I had my way, I would tear this old kitchen down. Boo and I have been singing that little tune (a take on Samson and Delilah) since we bought this old farmhouse last August. Well, we took a huge leap forward. So, today's post covers it, starting with where it all began.

How We Found It
"One day while Sampson was walking along, looked down on the ground, saw an old jawbone". In many ways, the NewOldHouse kitchen was a skeleton when we purchased the house. The guy we bought the house from had started the demo when Boo worked out the purchase arrangement. The doors and drawers were gone, the stove and fridge were gone and some of the uppers had been smashed. Oh, and it was filthy. It was the most disgusting kitchen I had ever seen.

First Round
during first round
Before I picked up the sledgehammer, Boo removed the remaining garbage that could be seen and then rough-cleaned the floors, walls and ceiling. By rough-cleaned I mean with a floor mop she would wash until the water turned gray and then repeat until she was so sore she couldn't anymore. That got rid of most of it to the point where we could go in there and not feel like we were in a bacteria-laden petri dish. Regardless, we continued to wear rubber gloves and dust masks.

I started with the garbage disposal, simply disconnecting the sewer line, the electrical and then from the bottom of the sink. The disposal looked hardly used, so thinking we will probably re-use it, I stashed it in the garage. Next, Boo and I removed the dishwasher. I was surprised by how little in terms of fasteners are used to hold a dishwasher in place: 2 screws along the front, holding the leading edge to the underside of the counter. Once we started pulling it out, however, we encountered more garbage. We threw our respirators back on and completed the yank into the middle of the kitchen floor. The insulation around the dishwasher smelled like human urine and there was more rat evidence behind it. So yuck. The dishwasher went into the to-the-dump heap, and the garbage went into the weekly street bin.

oh my gross
Feeling fully grossed, I shifted to the upper cabinets. We lacked a power driver that could remove the 3" long mounting screws driven into the studs. So, my method was a little more smashy: crush the cabinets with a sledge until they fell off the wall in pieces. Then, I would chisel around the screws in the rear wall until the real panel fell off. I removed the screws by loosening them with a framing hammer and then hand turning them out. Unfortunately, this gave me tennis elbow in my left arm that 5 months later I am still recovering from and I still didn't get all the screws out of the walls. Still, the uppers came out, went to the landfill pile and then on to the landfill about a month ago.

Sledgehammer Triumphant Return
Once the old house was fully vacated and repairs completed, we were ready to refocus on the kitchen at NewOldHouse. Since both Boo and I are suffering from tennis elbow, we splurged on a DeWalt power driver for removing the screws, and I tried it out on the screws remaining from round 1. Then, we teamed up on removing the iron sink into the garage (will probably reuse with a new fixture) and then removing the counter tops. The counter tops were glue-board with a thin Formica veneer that were attached to the base cabinets with construction adhesive, so they removed once I convinced them to... with the long-handled sledgehammer. It surprised us both how much smell this glue-board stuff retains. Clearly, once the rats get in, there is no escaping the smell they create without considerable effort.

The power driver made the removal of the base cabinets much easier than the uppers were: remove the screws and then pry the cabinets apart with a wrecking bar - the base cabinets had construction adhesive between them. Boo and I removed them from the wall and then out to the landfill pile one at a time. Of course, just like we had a discovery under the dishwasher, we had guh-nasty discoveries under the cabinets along that wall (see picture on the right). Again, once the gross was discovered, respirators went on and the mess was cleaned up.

UnFlooring
flooring coming up
With the cabinets gone, we swept the floor, washed up and grabbed a late-afternoon sandwich. Boo noticed that the linoleum that had been under the cabinets was curling up along the wall. So, with safety equipment back in-place, she started pulling up the linoleum flooring, but her arms (tennis elbow) stopped her after a few minutes. Curious about what lay beneath, we lifted some of the plywood underneath to reveal the original wood flooring. We had been concerned that perhaps there was old tiling (and possible asbestos), but were delighted with original, but damaged, wood floor. So, with a 1-meter wrecking bar, I set to lifting the plywood and linoleum together. As the wood split into pieces Boo collected the debris out to the landfill pile. In a couple of hours, the linoleum and plywood were gone. We swept up and called it "good enough" for the day. Many nails remain stuck into the old flooring, so we will be pulling nails before we can wet-mop the gross-dust on the floor. Between then and now, Boo intends to run our "for nasty things" vacuum on the floor to lift out as much of the dust as she can. For now, we have laid down old carpet on top of the floor so we don't track that dust into the main living space.

done for today
We were fortunate to have a dry relatively-warm weekend day to do this work. We had the windows open, the music playing and got more of the job completed than I think either of us expected. We are thrilled to see that the original floors are there. From this last picture, you can see that the flooring under the sink had probably become damaged as the flooring was replaced with what look like old cabinet doors and drawer faces. Since this will again reside under cabinets, it would not be necessary to finish that area with hardwood. I expect we will replace the hack-job with real water/rot resistant sub-flooring instead. Tuukka was our Safety Agent, making sure we stopped frequently for water and petting breaks. At the point of this picture, he was telling us the workday was over, and now it was time for his dinner. We agreed.

Thanks, as always, for following along. This was not technically difficult, and it wasn't really all that physically challenging until we got to the flooring. For that, I was sweating like it was summer and breathing hard. I cannot wait to get the nails out and see what this flooring looks like after a good mop. Knowing that we will be expanding the doorway into the main living space, we may find that the flooring needs some replacement, but we'll deal with that if/when it happens.

Tuesday, March 7, 2023

We're In

We are now sleeping at NewOldHouse, so this post will effectively serve as a mile-marker, if you will. From the pictures, you can see boxes in the backgrounds and the walls do not have decorations yet. That will come.

Push Becomes Pull
living/den
In my last post, I described our effort to move as working from the edges in towards the center. For us, life in our home has 2 centers: the main living space (kitchen / eating nook / den) and the master bedroom suite (bed and bath). So, we were focused on solving for all the other spaces: the ShedRoom, my work-from-home office, the extra bedroom, the garage, etc. That was working, but we didn't feel like we were making sufficient progress towards actually living at NewOldHouse. We are paying to heat and illuminate 2 houses on top of 2 mortgages. In the Pacific NorthWest, there is a great deal of dark to offset and this winter has been relatively typical but with more cold stretches mixed with wet ones than usual. We felt that if we could significantly reduce the more expensive (read: larger) house quickly, we could save some pennies while we get moved faster. We decided that continuing to push things from our existing home to NewOldHouse had reached its useful end and we needed to change it up.

We started by relocating my daily work-from-home into the NewOldHouse. Most of my things were already there, I just had been working with a laptop on my lap at the existing house, but that had been contributing to the inertia problem. So, I started a morning walking-commute to NewOldHouse to work.

office evolving
Rather than continue with the edges, we encircled our second center (master bedroom), moved it and all of our clothes over to NewOldHouse. Just like that, we are sleeping there... or here. This shift now allows us to spend those small hours before bedtime doing tweaks around NewOldHouse rather than at the existing house, and the shift is showing dividends. After work, we can collect a bunch of things and haul them to NewOldHouse to be distributed before we turn in or the following morning while shuffling around with coffee. While the overall acts really are not that different, changing from pushing things out of existing house to pulling things into NewOldHouse has kick-started our efforts. There is just something about doing the push in the cold, wet and dark that made it much more difficult than the pull. I just can't explain it, but I am seeing the difference play out.

Bathroom Improves
Yeay bathroom!
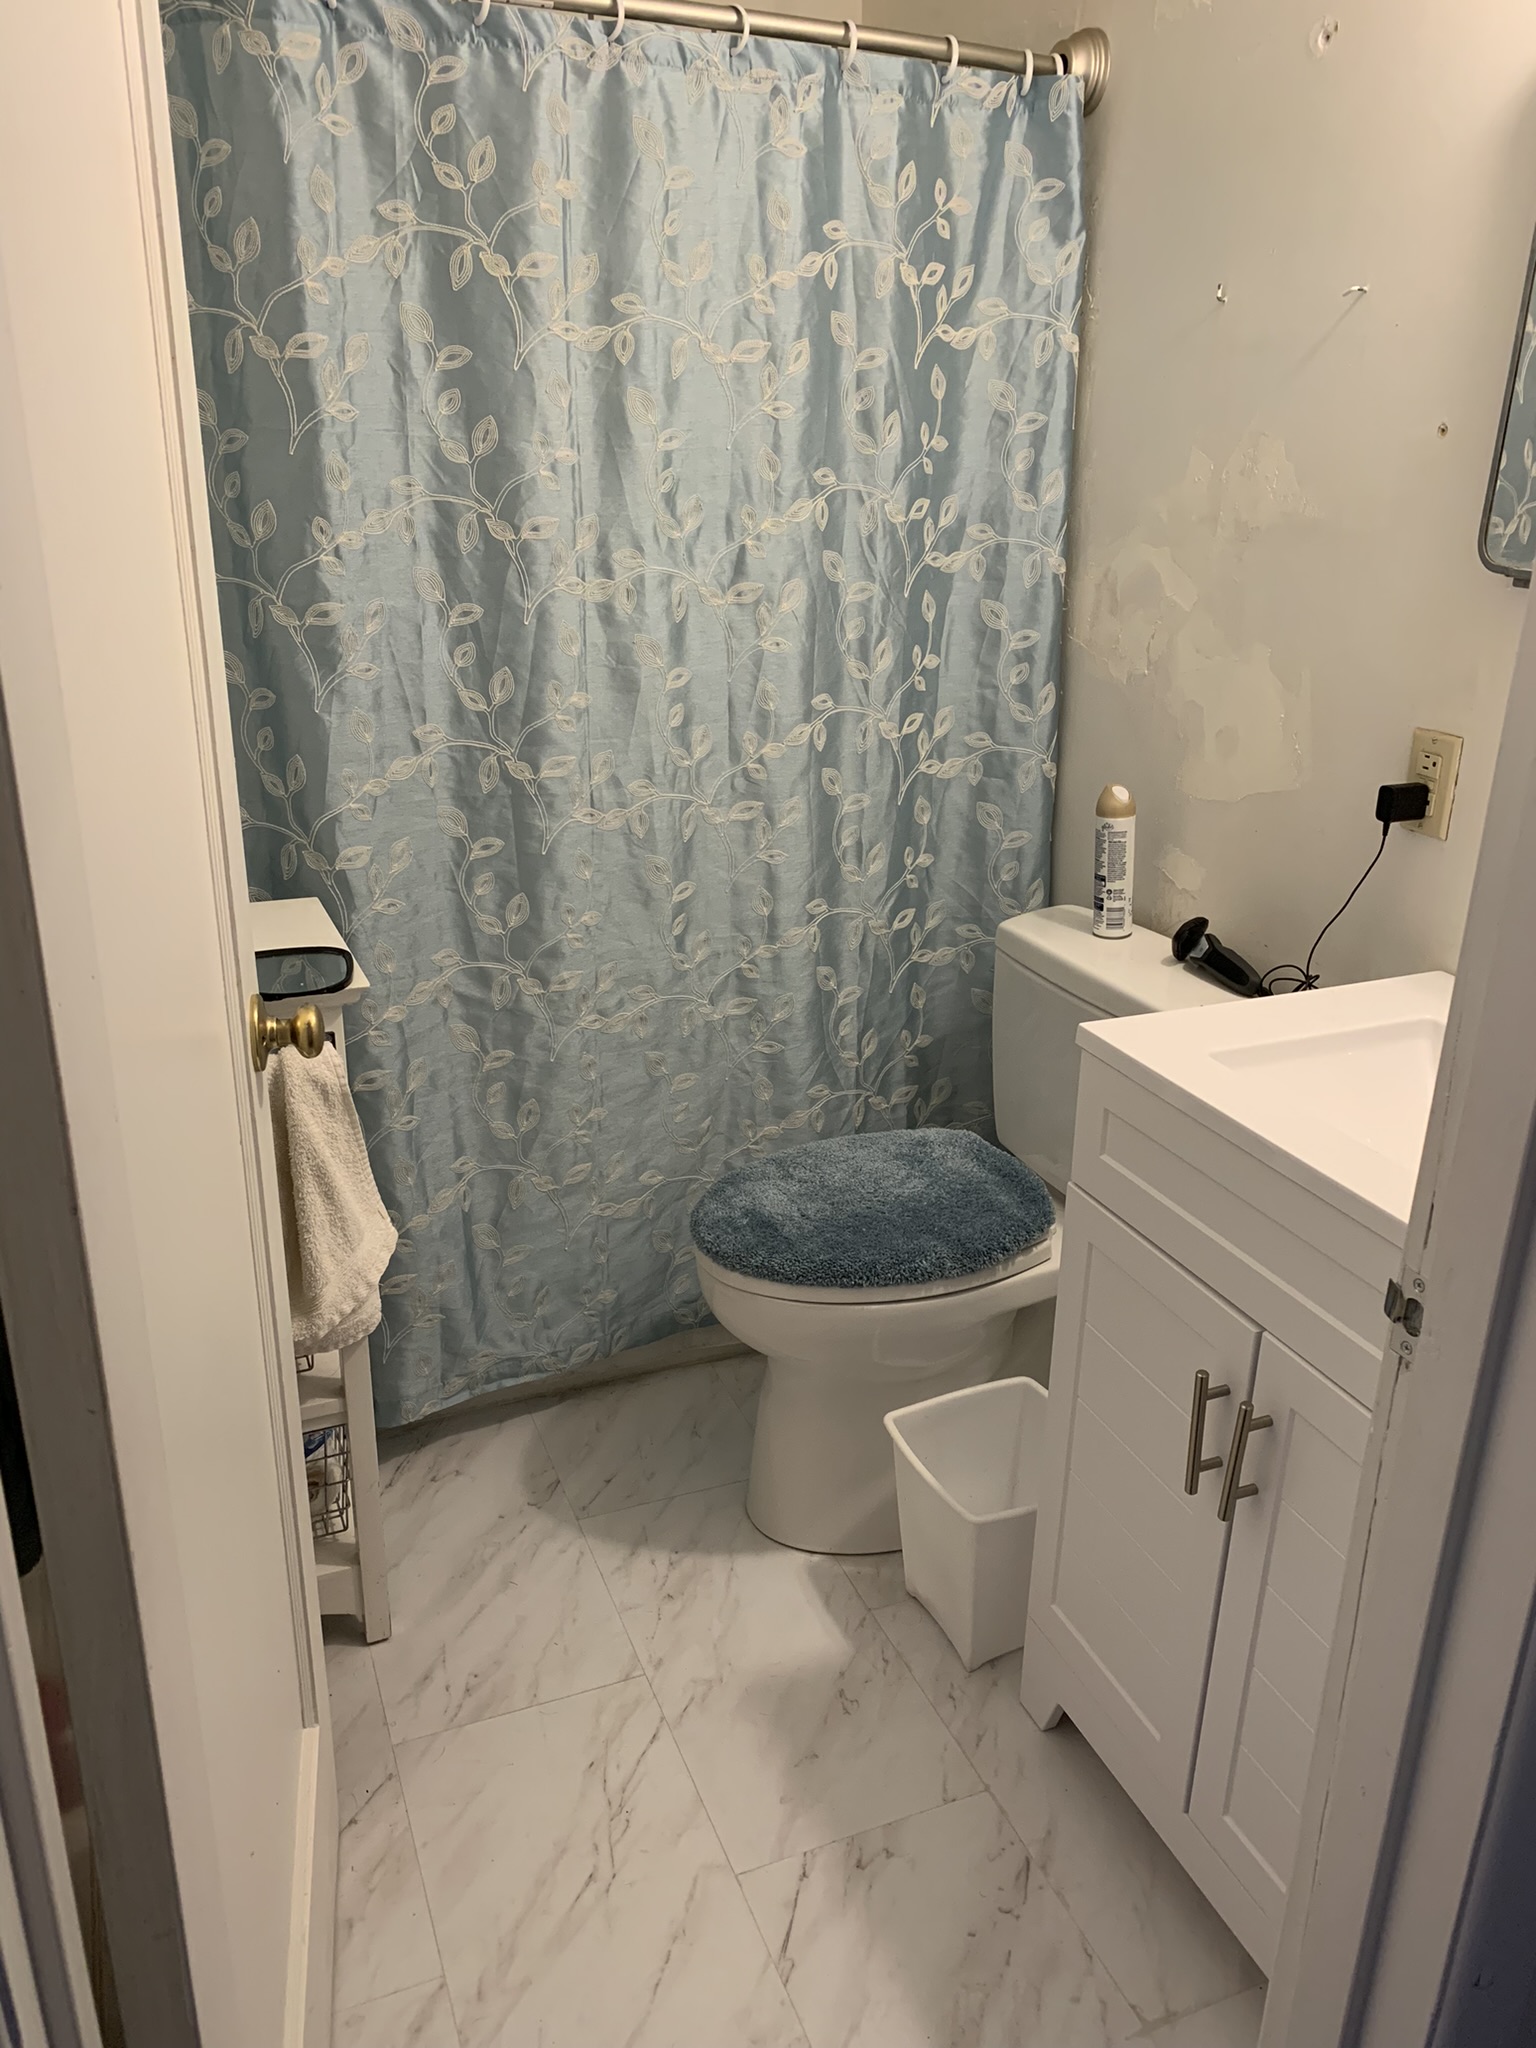
The bathroom had taken major steps forward (toilet and sink functional) only to sit in a partially completed state (shower not functional) for a couple of weeks. That time wasn't wasted, of course. It was just spent on boxing things or sorting belongings (both ours and my folks) at the existing house. With the push-pull shift, the bathroom game is back on. Boo deep-cleaned that old tub and the walls, as well as fixed a bunch of the plaster. Once the plaster was set, I caulked everything (tub to surround, tub to floor, fixtures, etc). To get us operational, Boo installed one of those spring-loaded shower curtain-rods that hold to the walls by outward force rather than with screws. We know we have more plaster finishing, painting and maybe some tile-work before the bathroom is complete, but in our Agile way, this gets us to a minimum viable space. So, until we temporarily suspend bathing for tile or paint, we moved bathing to NewOldHouse. My current thinking is to wait until it's warm out before we restart. When I consider how far this bathroom has already evolved, this image is a major milestone.

Camp Kitchen
To support daily living at NewOldHouse, or anyplace for that matter, you need a way to store and prepare food. Even the smallest economy apartments have something. NewOldHouse has nothing. When we bought this place the kitchen was in mid-demo, and it was so horrible there was no way anyone could reuse any of it without jeopardizing their health. So, we continued the demo and cleaned as much as we could of what remained. Once the upper cabinets were down, the remaining appliances removed and the surfaces cleaned, we stopped the demo. Other priorities had arisen, so the "kitchen" was left in a semi-demolished state. Fast forward a few months, and we want to shift our daily lives into NewOldHouse... so we need a temporary kitchen.

temporary kitchen
We started with the most basic of the basic: a means to make hot water, a pour-over coffee contraption and instant oatmeal. With this, we had morning meal addressed. To this, we added granola bars and other individually wrapped foods to bridge the middle of the day. For dinners, we got go-food for the first couple of days, but that is expensive when done regularly. So, we quickly added more storage capacity by reusing one bookcase for dry-goods and another for dishes. Within a kitchen cart, we are storing a variety of pans, a hot plate, a slow cooker, a rice cooker and an electric skillet. A slow cooker and a rice cooker can support many meals for super cheap.

TheWell
With food storage and preparation mostly solved, we are left with one last challenge: a sink. The old kitchen sink was disconnected during the demo. It had a rather unpleasant garbage disposal so it had to go with the rest of the unusables. The sink itself is fine and we may find a purpose for it in the future, but for today, there is no sink. Our solution for sourcing water is to fill and store pitchers of water from the sink in the connected garage. We call it "TheWell". The other need for a sink is to clean dishes. We could wash them in TheWell, but the garage is unheated, and this winter has been particularly cold and unpleasant. So, leaning over a concrete sink in a 35*F garage doing dishes sounded a bit to much. So, until the weather warms up into the 40's (mid single -digit *C), we will be doing the dishes in the tub with plastic washtubs.

Schmidty and Tuukka
Tuukka watches the new street
At some point in your move, you have to consider the timing of moving your pets. In our case it's our cat, Schmidty, named after a Vet who we love dearly and our dog, Tuukka, named after the Boston Bruins goalie. Like all animals, they did not understand what was going on, and they grew nervous as they watched belongings moving around, and disappearing from home. We brought Tuukka with us over to NewOldHouse starting very early in the process, like, once it was clean enough that we would not be concerned about him stepping on something that he would then lick off his paws. He did not like it for the first few weeks, and it wasn't until we started bringing soft things for him to sit on that we realized it was sitting/lying on the hard floors that bothered him. He adjusted fairly quickly once some of the softer chairs and a couch we added.

Schmidty hides
Schmidty was a completely different matter. He would follow us as we walked to NewOldHouse, and would walk the perimeter, but would absolutely NOT accept being brought inside. This persisted for months. Finally, after we had moved pretty much all of the furniture that was going to NewOldHouse, we put him into a carrier, collected his belongings and hauled him (howling) to NewOldHouse. He hid under our bed and then under my nightstand (picture on the right) for a couple of days. Boo and I had both read that it is best to keep your indoor/outdoor cats inside for at least a few days for them to acclimate to the new space. They need to have their home/center redefined before they go back outside or they will become disoriented and could get lost. After a couple of weeks, Schmidty still had not gone outside. I think part of that is the cold wet weather, which he doesn't like. This past weekend he finally explored outside for the first time. After a couple of short trips out and back in, he is settling into a pattern of going outside. Of course, yesterday, we found him howling to get let in... at "existing house". So, some learning remains. Once inside, it seems both of the animals like NewOldHouse at least as much as the old one, based on their behaviors.

---

The funny thing about living Agile is that you do not often get the satisfaction of a big bang or finish line. Things evolve and evolve and eventually you are in a better space, closer to your goal. Every once in a while, there are moments when a significant threshold is crossed. The first night we slept at NewOldHouse with our pets was one of them. I clearly remember the feeling of turning the thermostat at existing house down to 60*F (to protect your house, don't let the temperature fall below the dewpoint) as we exited to live at NewOldHouse. We have passed an important line, but there remains significant work to do.

As I said at the top, this post serves as a milepost of sorts for us. Of course, the kitchen is still in mid-demo. We still have many belongings at the other house, including Hapy, Oliver and a garage full of stuff. There are lots of things which still need to be done on both ends, but we will be doing those things from NewOldHouse from here-on, and that is a significant difference.

That's it for now. Thanks, as always, for following along- 

Tuesday, March 1, 2022

Enter ToyoTruck

Super long post today, and I still didn't get the project all the way done in one post. I did get most of the way, though, and I'll wrap it up next time. For today, I'll hit some background first, and then get into the adventure with this new-to-us truck. Since this started on Christmas 2021 and today is the first of March 2022, clearly this has been quite a saga. At the rate this is progressing, it will be competed mid-Summer.

Background - the setup
example image
When C returned for winter break from University, he left his car ('09 Subie) on campus. He needed a car while he was home so he could get to work, but we have a significantly reduced the operable fleet (sold Flash, sold K'Lack). So, we borrowed-as-a-prelude-to-buy Boo's sister Rose's Toyota Tacoma X-Runner. I am referring it ToyoTruck for now, though the interweb folks often call these "taco's". I suspect it will get a better name when it presents iteself. Rose has an older Ford truck that is getting a new engine swapped in, so this Toyota was kind of extra anyway. Clearly, having extra cars around is a family thing for us, and with the rehab we plan on doing on this house, having a pickup readily available for supply runs will be valuable. Anyway, C arrived home a few days before Christmas, just in time for some radical winter weather. We got snow, and ice, and more snow, some sleet, and melting followed by freezing. It was a full-blown winter stew. We let C use Boo's '09 Audi A4 (all wheel drive, newer M&S tires, etc) while Boo drove ToyoTruck. ToyoTruck is rear-wheel drive with mostly-worn-down summer highway tires. That would have been fine if it weren't for the winter weather. With Boo's new schedule, she has to report by 7:AM, which means leaving well before dawn, and right about at the overnight low temperature. This lead to a Christmas morning (yes, she worked Christmas morning) sliding-on-the-ice scenario which ended with the truck smacking a pole. The passenger fender, the bumper cover, passenger headlight, passenger fog light, the leading corner of the hood and some assorted little bits all were affected by the very low speed impact. The damage seemed minimal enough that Boo continued on to work. It wasn't until the next day that we got to access the damage in the daylight.

How Does that Insurance Commercial Go Again?
after post-smack
In the daylight, it looked pretty twisted, but it is mostly surface damage. I took a bunch of pictures and we tried to get a claim going with our insurance company. Turns out that insurance goes with the car, not the driver, so we needed to use Rose's insurance. We learned this while we were getting bids (~$5k) on the work. This is where insurance got interesting: even though Rose told Allstate she wanted "full coverage" the agent pulled a massive boner and failed to include collision (pays for damage to your car). How that meets the definition of "full coverage", I don't know, but I swear this feels like one of their ads... where they say the competitor will leave you hanging with a tagline like "if you don't have Allstate...". It appears that the Allstate ad is actually self-describing. Maybe their ad should be more like "if you let our agents do it, you're gonna get screwed". So, to sum this up: we borrowed a truck, slid into a pole causing ~$5k worth of damage and there's no insurance to fix it. Happy Christmas.

Paulie: Bodyman
Fast Times Camaro
To resolve, I tried my best Spicoli imitation: "Relax, all right? My old man is a television repairman, he's got this ultimate set of tools. I can fix it." Of course, the next scene in that movie (Fast Times at Ridgemont High) has that car, unrepaired, but tagged with Ridgemont sucks / Lincoln rules spray-paint. Instead of that, I'm actually going to repair it. I took the itemized bid and ordered all of the parts the body shop said needed to be replaced from CarParts.com. This cost about $1300US delivered. The bid had the parts for around $2k, so we are already ahead in the game. I will simply remove and install the parts I received, and hope I discover nothing else is wrong. The labor for the body panel removal/replacement was $900US. So, if I can get the truck back into one piece, I will have saved over half the bid. At $900US, using my usual price for my labor ($50/hr for simple math), I break even at 18 hours. On its surface, I think I can get way under that. I had a great experience with CarParts.com, by the way. The bumper cover was wrapped in thick plastic wrap inside a huge box and the fender was made-in-Taiwan steel double-wrapped in custom cardboard protecting it plus packing material between the wrapped fender and the box sides. The packaging of the headlights was equally protective. Some of the shipping, however, was spotty. We can credit GLS for losing and then claiming delivery of almost half the order. Ultimately, they got the parts to me, 2 weeks after they said they were delivered. That final delivery was curious in that the box appeared without a text nor email update, though I had been set up for both. Sneakily done, GLS.
 
Finally, with all the parts I had ordered in my garage, I was ready to get started. I had finally gotten the 2016 Sprinter seats installed into Hapy (See Hapy Seating Part 2), so I could shuffle vehicles around. Hapy went back into the driveway and ToyoTruck moved under the canopy so I can work out of the rain.

Body Panel Removals
2 replacement bits in
I started by removing the front grill, fog lights and bumper cover. Then, I pulled the headlights and removed the fender, leaving the hood for last. The grill is held to the top of the radiator support with 3 Phillips screws across the top. Down below, the electrical plugs for the fog lights are simple tab-lock plugs. Since I am replacing the fog-lights with the bumper, I left the old lights in the old bumper. For reference, just press the tabs and they wiggle out. With the plugs out, the fog lights can push through the bumper (after pressing inwards on the plastic retaining tabs). The bumper cover is held on with plastic push-on tabs across the top as well as a few from underneath. These pop free with a slotted screwdriver. Since they are 15+ years old, they will often fail on removal. There are also a few 10mm screws as well, all from below. The ends of the bumper cover tie into the inner wheel well plastic, but eventually, once the last fastener is free, the bumper just wiggles free.

I next removed the under-headlight trim bits. There is a small plastic push-on thing, like the ones that held the bumper cover, on the inside that attaches the trim bit to the headlight, but the rest of it just clicks into place... or out of place. The headlights are held in place with long Phillips-head bolts from the top, and 2 more on the sides (one connects to the lower radiator support, the other through the side of the fender). The lights unplug, but if they are stubborn, the bulbs which are not the main beam twist out with a 90* twist. Then, the plug can be wrestled free. The last big thing to remove is the fender itself. There are obvious bolts from above, but there is one hidden in the door jam near the top and one from the outside just rear of the wheel well. Of course, before final removal, the inner wheel well needs to be removed, and the antenna needs to be dealt with.
 
super-glued tabs on the flare 


The Inevitable Annoying Bits
The antenna and the inner wheel well skin are the worst part of this parts exchange. The antenna had become heavily oxidized and corroded, completely freezing the top nut. I ultimately broke-off the lower antenna mast so I could continue and ordered a top-to-bottom replacement, adding another $140US to the parts costs. Even on my garage floor, I was unable to separate the antenna bit from the bent fender.

The plastic inner wheel well is held in place by ribbed plastic clips along the inner edge and in a couple spots in the middle. Along the outer edge of the fender, the fender, the inner wheel well and the outer faring (flare) are held together with Phillips/10mm screws. When the truck hit the pole, the 3 top mount points along the outer faring / flare all broke. I did not realize that until I was removing things. Rather than order a replacement ($130US plus delivery), I collected the mounting ears and super-glued them back onto the flare as shown in the picture. Once the superglue had set up, the tabs did not wiggle. Since they broke off so cleanly, I could see their original pitch. So, I simply matched that and held the tabs for a 15 count as the glue set.

With the big parts out of the way, we can see where the little bits that Beaverton Auto Body suggested replacing. There is a small plastic bit that looks like a tiny fist with the hole in it that is Phillips-screwed to the fender. This holds the edge of the bumper in the right spot relative to the fender. There are 2 long thin brackets which support the top and bottom of the bumper cover (and lower leading edge of the fender) which were definitely tweaked. The small triangular bit that attaches to the passenger-side front (front is front) of the radiator support, extends forward to the other end of the long thin bracket, had a subtle twist to it. All of these attach with 10mm bolts, and you can see them installed in the picture above captioned "2 replacement bits in". They are the ones with big white labels.

Start Re-Assembly
windshield washer lines pre-removal
I started with the small bits: the triangular bracket first, and then the support bracket on the passenger side. I decided that the driver side bracket was untouched by the accident, so replacement was unnecessary. I swapped out the driver-side headlight next, re-using the original under-headlight trim bit since it was undamaged. Then, I tackled the fender. It is surprising how much faster install can be when you know where the fasteners go. I started with the 2 most difficult: the one on the bottom, heading straight in from the outside, and the one from inside the door. The bottom bolt is really only difficult because of all the extra lower body trim that appears on the XRunner needs to be loosened and held out of the way. I fear that I will need to completely remove all of the panels on that side because of all the dirt and sand I found in there when I took it apart. That dirt/sand may prevent a clean, tight install. Anyway, with the hard bolts in, I ran the bolts in along the top edge and then the front pair into the new bracket. I am not thrilled with the gap along the hood, but I will concern myself with that once the new hood goes on. It is possible that the hood got tweaked beyond just the small dent in the front corner.

After the fender, I installed the passenger-side headlight and the replacement under-trim. Other than cannibalize plastic fasteners from the bent and broken old body panels, this was as far as I could get at this point. I ordered a set of plastic snap-fasteners, but they had not arrived yet. Also, I had not planned for the antenna, so I could not completely button-up the fender and wheel well anyway. Yes, I could have stopped the post here...

The Hood
only disconnect needed
I was able to source everything, except the hood, from CarParts.com. For the hood, I turned to eBay, and got burned with a hood that arrived with a dent. My cursory inspection upon delivery did not detect that the passenger side had a couple of bashes in it under the cardboard wrap. I had checked the other 3 sides, so lesson learned here: completely unwrap the entire thing before you sign. I didn't know the pair of dents were there until I went to install it after installing the inner wheel skin down below, sadly. So, if I want a clean hood, I will order, pay, wait for and move-bits onto a second hood. FFS. Of course, with the supply chain issues around the world, there is a very small set of these hoods in the western US. In fact, according to the local Toyota dealer, there aren't any.
 
Obviously, the hood is held to the truck by 2 large hinges. Additionally, the windshield washer nozzles are in the hood. There are a few other things to transfer to the new hood, so I simply disconnected the washer hose and removed the bolts to free the hood. Then, I set the old hood next to the new hood in my garage. Piece by piece, with the puppy (Tuukka) watching, I moved the washer nozzles, bits of hose, the sealing rubber bits and the front rubber feet. Those feet are pretty interesting: they are solid rubber and thread in. You set the height of the closed hood by turning them clock or anti-clock wise. Very clever design.
 
There is a sealing strip that runs along the rear edge of the hood, held on by little plastic fasteners. I was able to free them without damaging them by using a door panel removal tool. I expected the washer nozzles and hose to the the hard part, with the scoop insert to be a breeze. It was the opposite, with the hose retainer plastic bits and the washer nozzles popping off with only a little difficulty, but remaining intact for reuse. These bits are held in place by little plastic barbs that need to be pinched in for removal. I used a slotted screwdriver, working one side and then the other until each one was free.

Hood Scoop Insert
The hood scoop insert, however, has seen better days. The mounting studs all backed out of the scoop, rather than allow the nuts to back off the stud. The 2 front studs would not separate from the old hood at all, and last, during install into the new hood, it cracked. This plastic is over 15 years old, and based on the damaged paint on the top of the vehicle and the sand I found in the wheel liner, I think we can conclude that this truck lived at the beach for a while, getting salt water on it while driving on the wet sand. I suspect it was parked outside mostly, as well, further accelerating the aging of the exterior. I will accordingly reset expectations for any other exterior bits I touch going forward.

I ordered a replacement hood scoop insert (another $140US for parts), and started considering doing a complete respray of this thing once the damage has been resolved. Of course, with the way I have to keep buying parts, that respray may need to wait a while. Meanwhile, I was in a holding pattern waiting for parts... and I was looking for a hood, again. Yes, I could have stopped the post here as well.

The Bumper
dry-fitting the bumper
The bumper cover / assembly is actually 6 distinct plastic bits: the main bumper cover, of course, a decorative center piece below the grill, 2 end pieces and 2 lower valences (split in the middle). Of these parts, we damaged 3: the main cover, the passenger-side valence and passenger-side end. All of these parts are held together with these blue wedge-like plastic clips. I was able to salvage all but one (which disappeared), which tells us just how slow moving the crash was. While I waited for parts, I re-assembled the bumper bits, excluding the decorative center. I had thought that I could paint the bumper as an assembly, but, I realized that I would need to take it all apart to install the decorative bit anyway, so I will be taking this all apart to shoot it. Of course, I put all this together mentally after I had put the bumper together physically. LOLs.

Still, by having the bumper bits together, I could dry-fit the front end together. Also, this reduced a big pile of parts in my small garage, and it helped me understand what bits I could sell-off, and which I still needed. For example, I discovered that there are little rubber strips between the main bumper cover and both the lower valences and the end bits. In the upper dry-fit picture, you can see the old valences on the ground below. A keen eye could see the rubber seals on top. I will be re-claiming those rubber bits before I dispose of the broken plastic parts. As you can also see. I have not removed the protective film from the lights yet; no need to tempt fate.

More Parts Arrive...
dry-fitting with the grille
After another week of waiting, things I ordered during the tear-down / re-assembly started to appear on my doorstep. So, I got back to it, starting with the antenna.
 
The antenna arrives with a stretch of cable that's about 1/2 a meter long with a pair of mounting clips already attached. This cable passes through the side wall and the fire wall up behind the glove box, and then runs up into the A pillar where it plugs into another cable. This seems like a strange design, but it's how it is. To access everything, the glove box needs to come out and the passenger grab handle needs to come out. There are a couple of plastic retaining clips that need to be popped (the OEM replacement antenna arrives with new clips) and then it is ready for removal. I attached a string to the end of the antenna cable and pulled it out through the side wall. I moved the string from the old cable to the new and pulled the string, bringing the cable along the original path.
 
The plastic tabs were in the right spots, and they popped in. The one in the rear of the picture below was a little difficult, but only because it is in a hard-to-get-to spot. I found by getting the front edge of the clip (front is front) first, allowed me to put pressure on the rear edge with a slotted screwdriver, snapping it home. Once the cable was in, the panels were installed in the order I removed them. The leading edge of the A-pillar trim inserts into a slot on the edge of the dash (seen in picture below) while the upper end has a tab that also fits into a slot: idiot-proof. The grab handle only fits into the A-pillar trim one way, and, because of the tabs, the mounting bolts align without effort. Inside the fender, the cable has a rubber grommet to seal the pass-thru hole. The top of the lower mast is then passed up into the hole in the fender and the lower end is bolted to a mounting tab with a 10mm bolt. After all the wrestling with German over-engineering, I really like this Japanese design. I feel like the Tacoma was built with owner maintenance in mind. I finished up the antenna on top of the fender with the outer rubber bit and nut and then threaded on the upper mast.

The Inner Wheel Well
installing antenna
All I had left was the inner wheel well, but I didn't explain the assembly of the rest of the bumper. As I mentioned earlier, I assembled the bumper, but I needed the bits to mount it. This was a straight-forward matter of using the plastic snap-clips where they belonged, and using the 10mm screws where they belonged. Since I failed to take quality pictures during tear-down, this was not as smooth as it could have been. Still, it all went together, leaving the passenger side wheel well. I purchased a replacement inner skin because I saw that the original had been damaged in the accident. The new liner was an exact match, and fitting it was not as terrible as installing on the old Jettas, but it was pretty close. These plastic liner things are the absolute worst. I did the outer edge last, simply because this edge also held the flare in place and I felt trying to juggle 3 things which were not in any way attached was at least one too many. The inner edge was straightforward: set the plastic skin where it is supposed to be and slam the plastic bit through the holes. The challenge for me was getting the square holes in the skin to consistently align with the square holes in the under-body.

With the skin now held in place by a handful of plastic bits, the outer edge was easier. I started at rear bottom and worked my way up. Again, having pictures would have been helpful so I could confidently set the skin / fender / flare stack correctly. Absent that, I just considered where water would go. So, I put the inner skin "outside" the fender along the rear edge for the first 3 fasteners (block water kick-up from the tires from getting inside fender) and at a cut-out transitioned it "inside" (so water drips from above don't run under the inner skin). At this point, I attempted to mount the fender flare. The super glue repair I described above failed almost immediately, so I shifted to the hood.... at which point I discovered the dents and my progress halted again.
 
I am going to halt this post here, and pick it up in another one. This has gotten very long, matching the saga, and the truck is still not in one piece. And, again, I'm waiting for parts.

Thanks for following along and more next time-